The book is laid out for the paper chosen above, and the print dialog will follow it,
so pick the paper here rather than there. Turn background graphics on
so the cover photograph prints, and leave margins at their default. The page numbers
and the chapter running heads are drawn by the browser into the page margins, so they
exist only on paper: check the print preview rather than this screen for them, and turn
Headers and footers off there so Chrome's own furniture does not crowd
them out. Chrome and Edge print them, Safari and Firefox print the same book without
them.
new build
Grey Seal
Grey Seal
Andrew Donald · 2012 to 2026
A build log
Grey Seal
Grey Seal
kept by Andrew Donald
2012 to 2026
The boat
Grey Seal
Designer
Iain Oughtred
Length overall
22′ 2″ (6.76 m)
Beam
7′ 10″ (2.38 m)
Hull
plywood
Construction
glued lapstrake plywood
Started
12 September 2012
Built by
Andrew Donald
Third build
What it took
By the numbers
89.7 months
From first day to last
25
Days written up
130
Photographs
4,412
Words written
The work
Contents
01Hull Panels
Mar 2019
02Deck & Coamings
Mar 2019
03Trailer & Gear
Jul 2019
04Glassing & Epoxy
Oct 2019
05Hardware & Fit-Out
Feb 2020
06Interior & Cockpit
Feb 2020
07Fairing & Sanding
May 2020
08Paint & Finish
Sep 2026
Chapter 01
Hull Panels
Scarfing plywood, cutting panels, milling strips or planking stock.
4 daysfrom March 2019
24 Mar 2019Hull Panels
This project was started in about 2012.
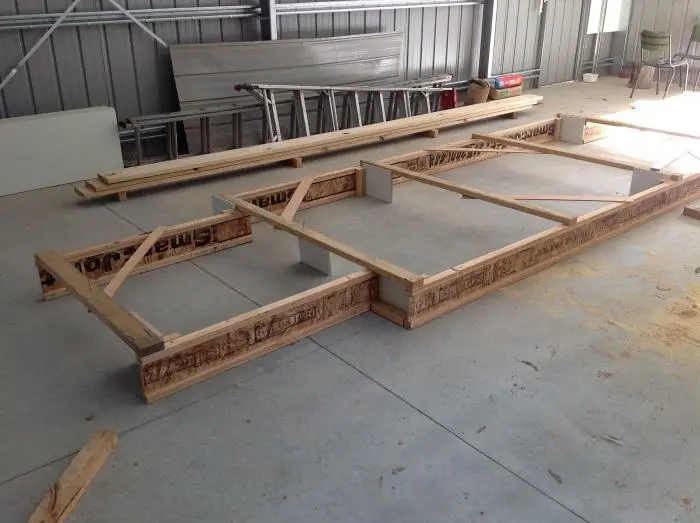
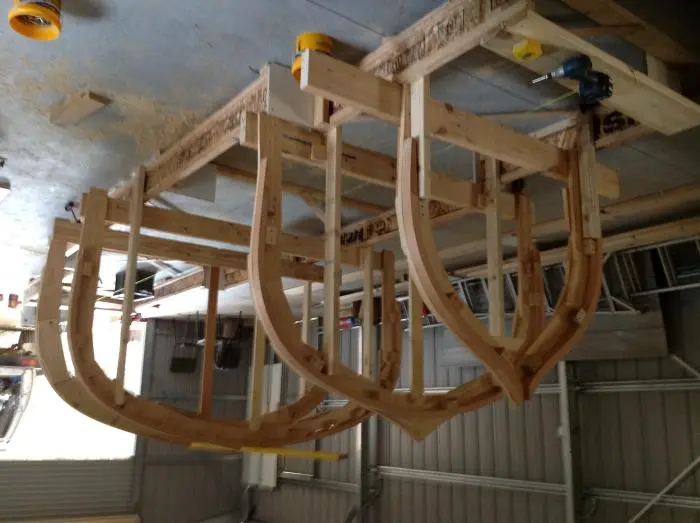
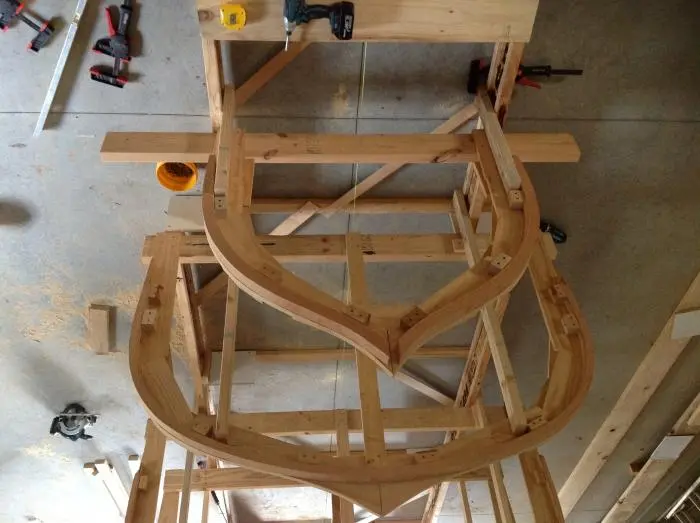
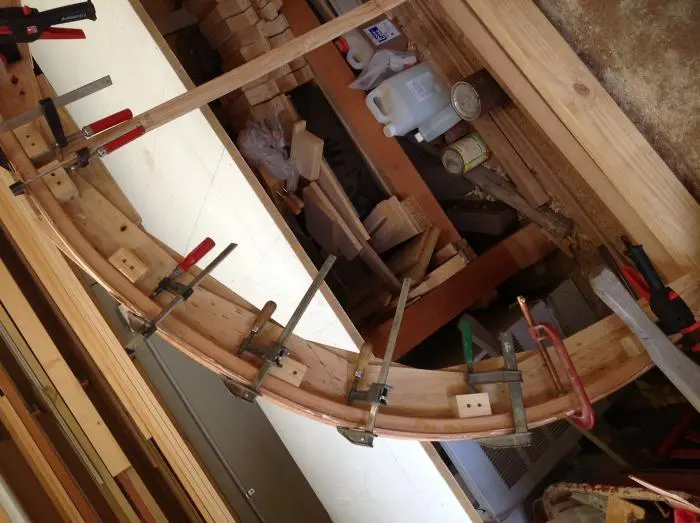
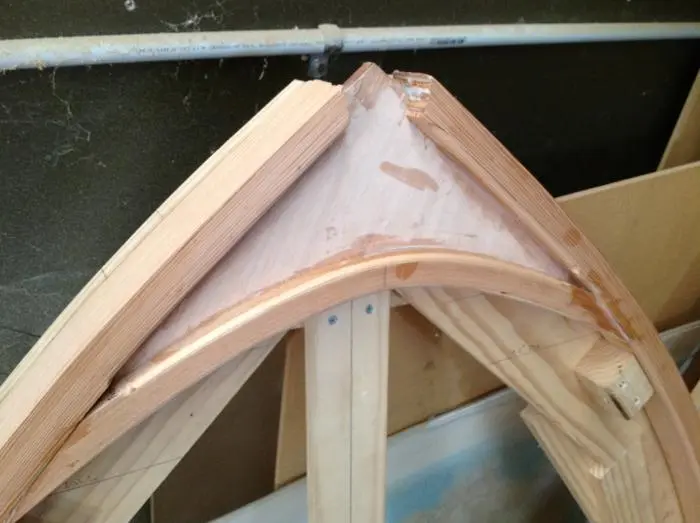
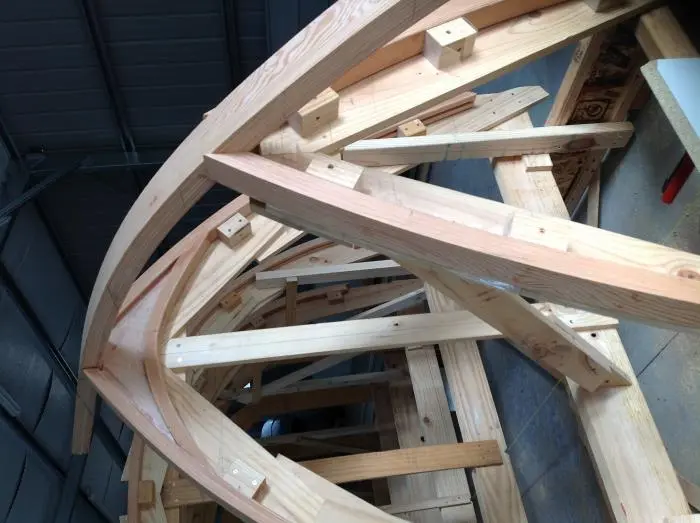
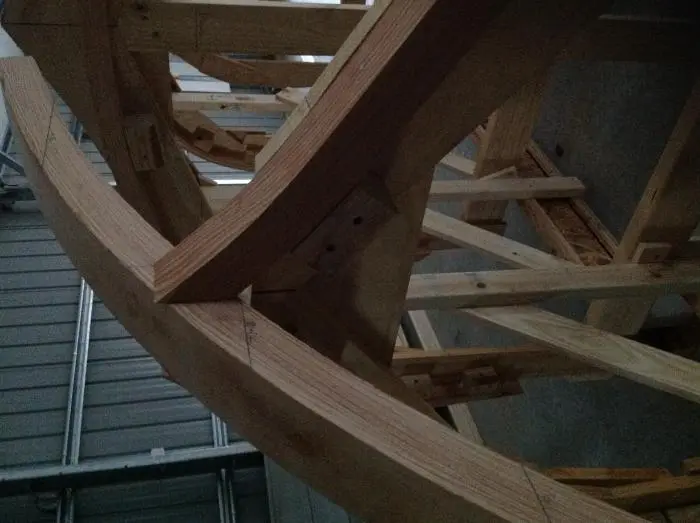
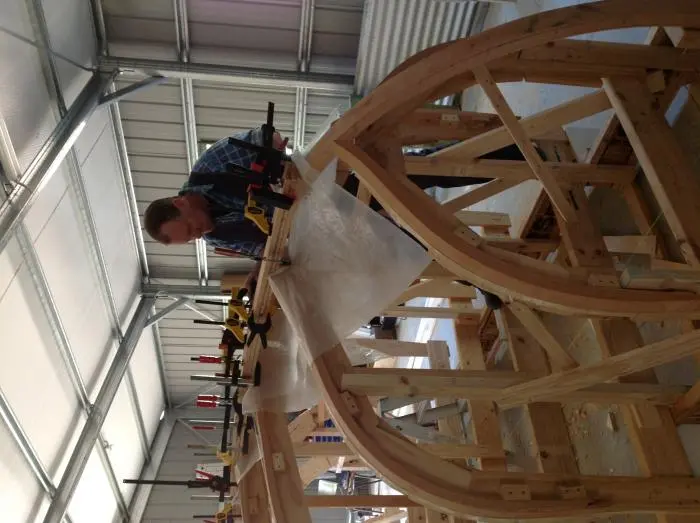
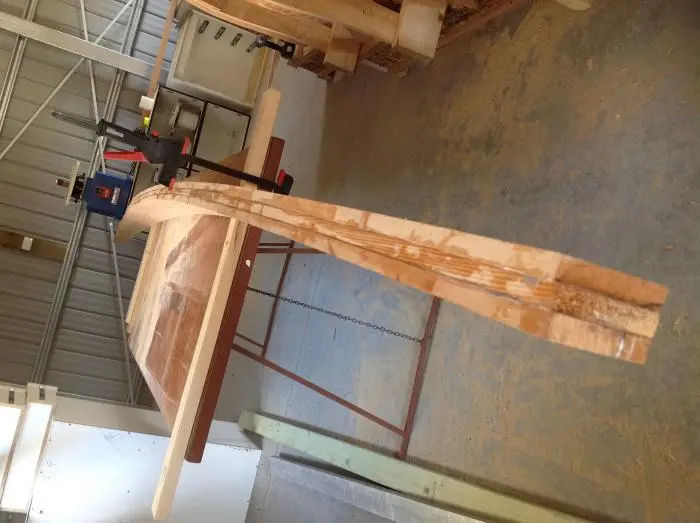
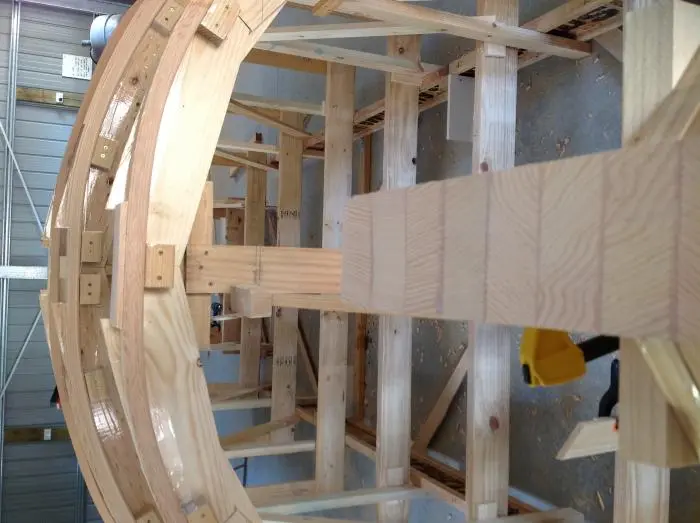
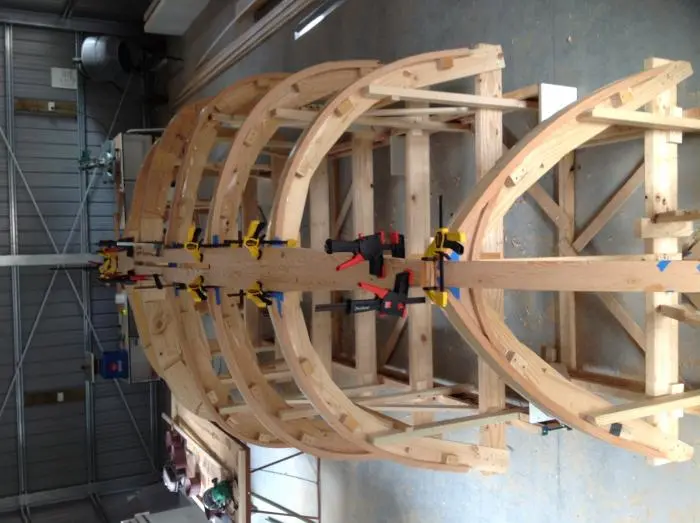
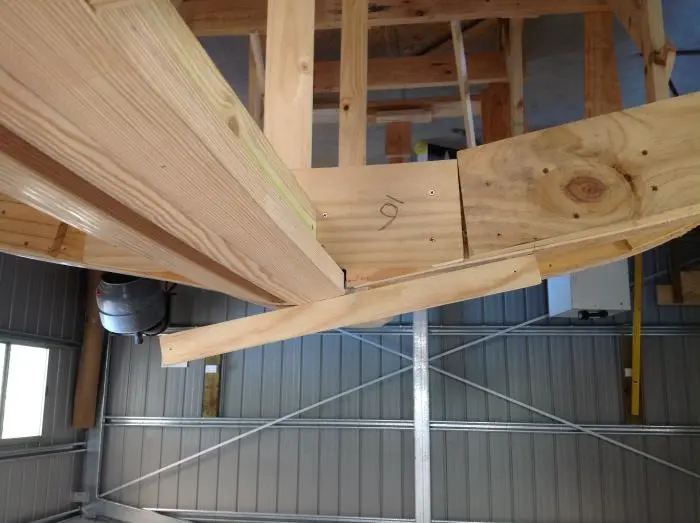
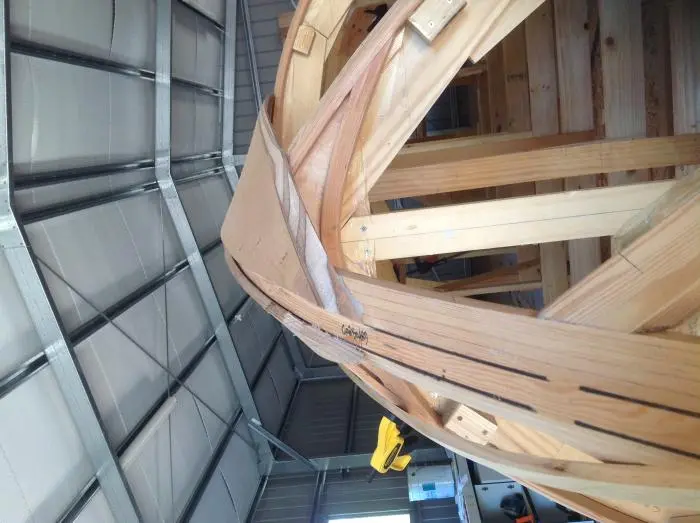
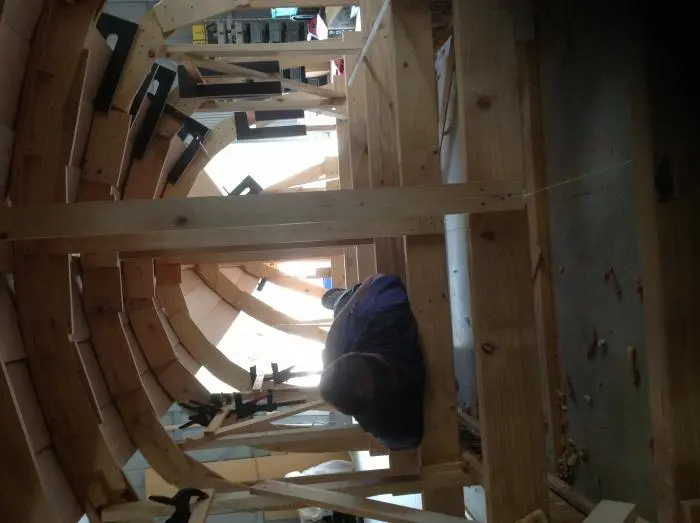
this project was started in about 2012. I'll post as many original photos as I can find, hopefully in chronological order.For commentary please provide your own 'cos Ive forgotten it. Once i catch up then talking will be attached again. Please forgive any pics not up the correct way.Stock made up of ply web beams from builders supply, available in really long straight lengths.Laminated frames held onto moulds with small blocks
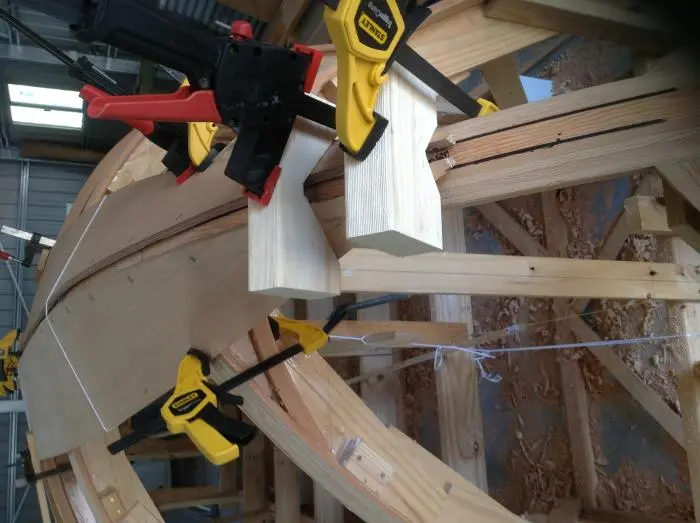
For and Aft stems in position
Glue up of keelson, in position hence plastic. Later finished on bench and centre-board slot cut in.
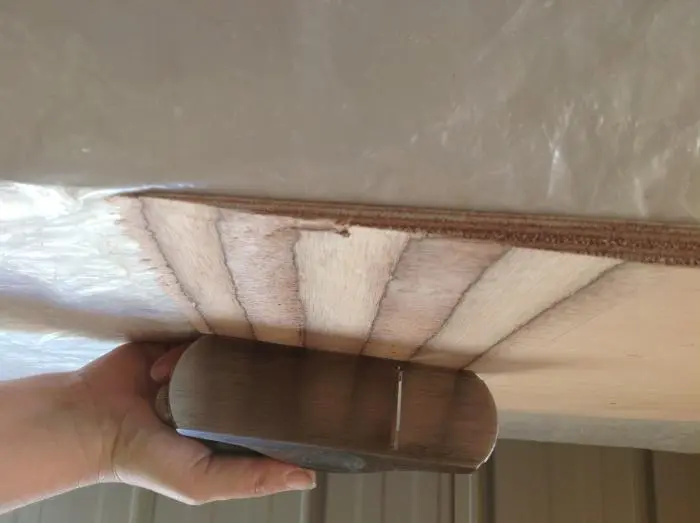
Glue in of keelson. Planing of bevel to same, showing centreboard slot.
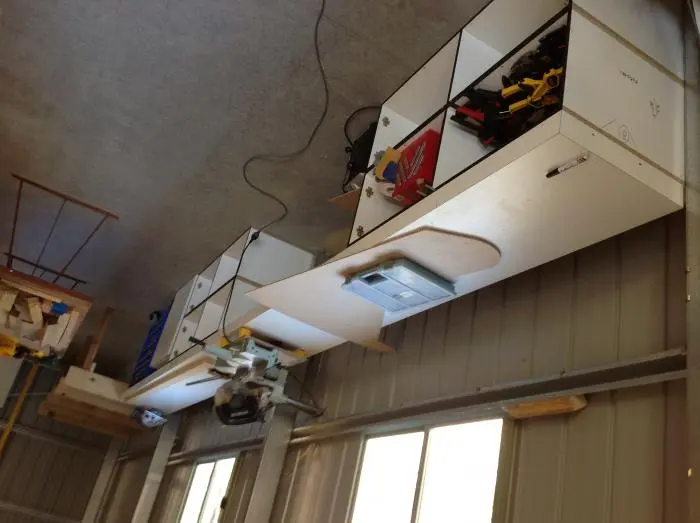
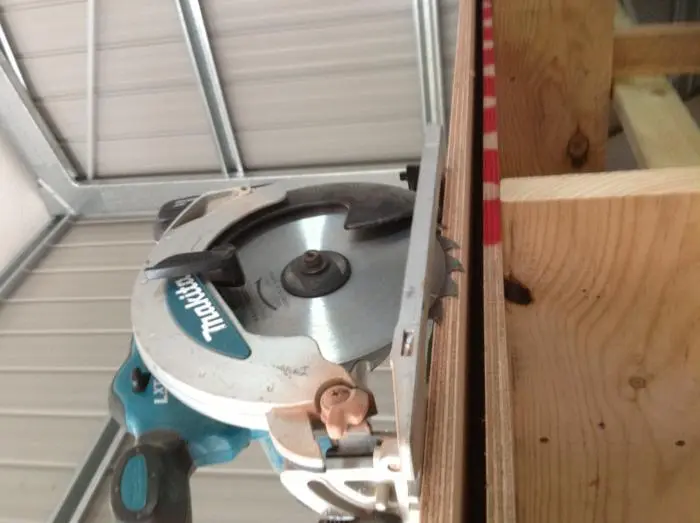
Planking b each made up from old kitchen cabinets and a platform in the dark background to cut ply sheets on. Small cordless circ saw was the best for cutting ply, note depth of blade and diameter was great for getting close to cut line and allowed cutting a curve, within reason.
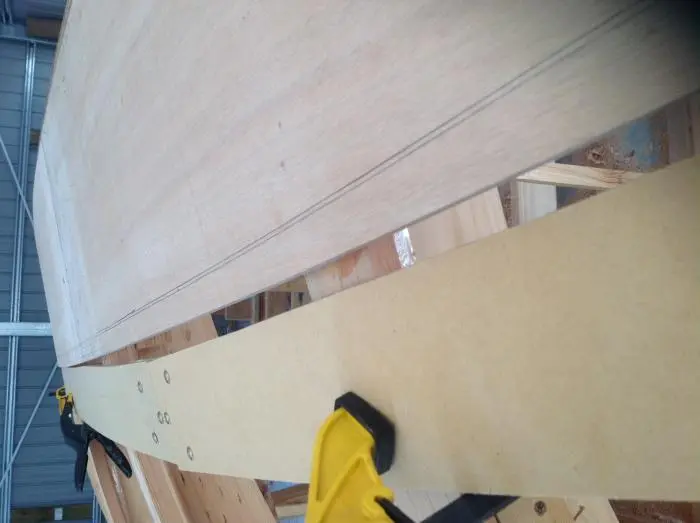
Next pic shows my spiling plank made with “hinges” out of MDF strips.
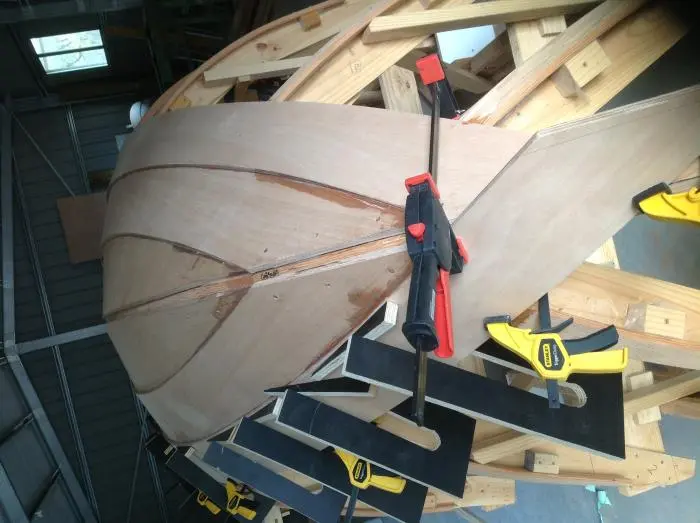
Next pic shows my spiling plank made with “hinges” out of MDF strips. REason for two lines along bevel was to show when i was getting close to final width by “disappearing” first line. I never was very successful at getting out a plank straight from spiled, so i just roughed in the lower edge of plank from Spiling then held it in position, transferred bevel line across, marked underside for upper edge of planks. Iain Oughtred supplies planking layout lines on his plans.
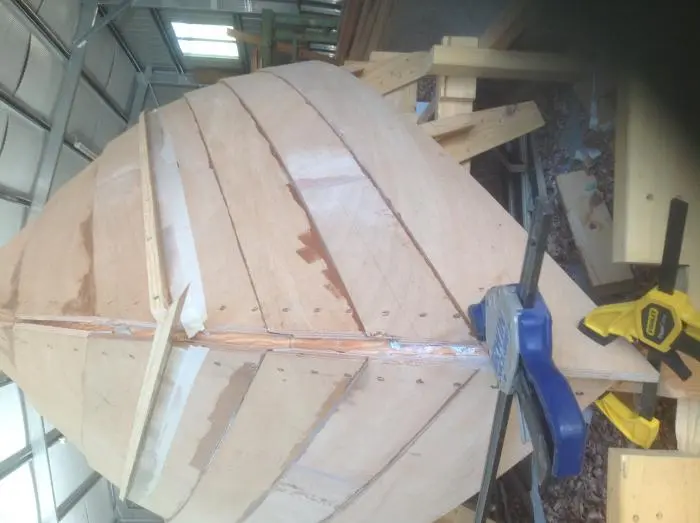
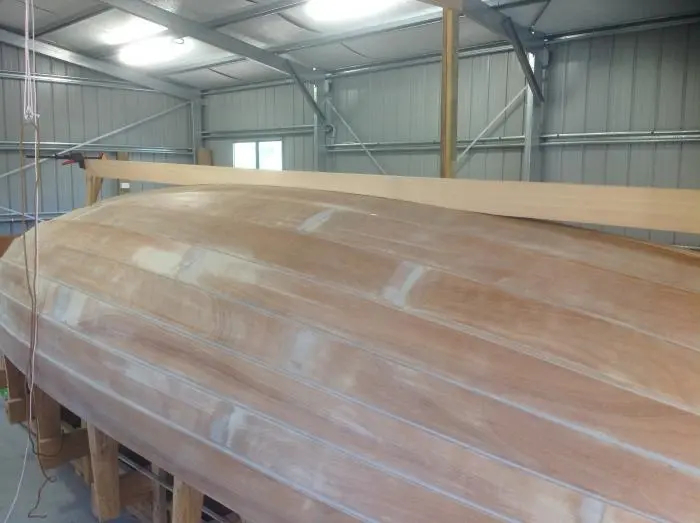
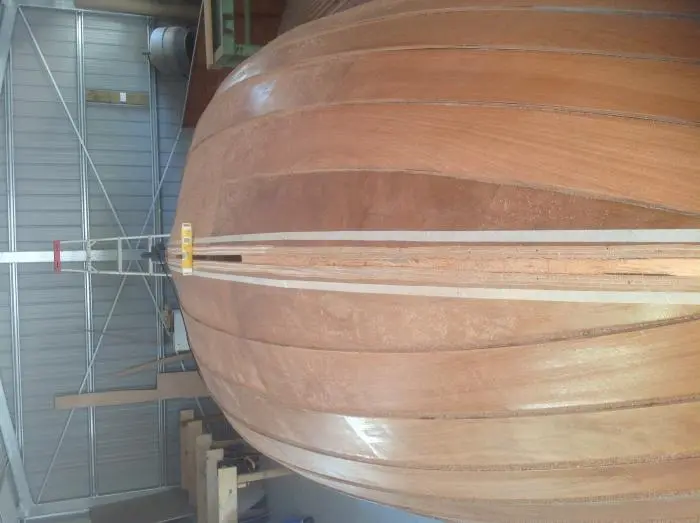
This first photo shows where i applied some new edges to these planks to bring the edge into line and fair. Screwed-on Battens clamped temporarily. Making up 5” wide outer keel (this first member was two 5”x1 1/4” glassed inside for centreboard section then a 1” spacer at each end, this got around the task of cutting the slot and glassing it in convenient manner) and the flat planed on planks for it.
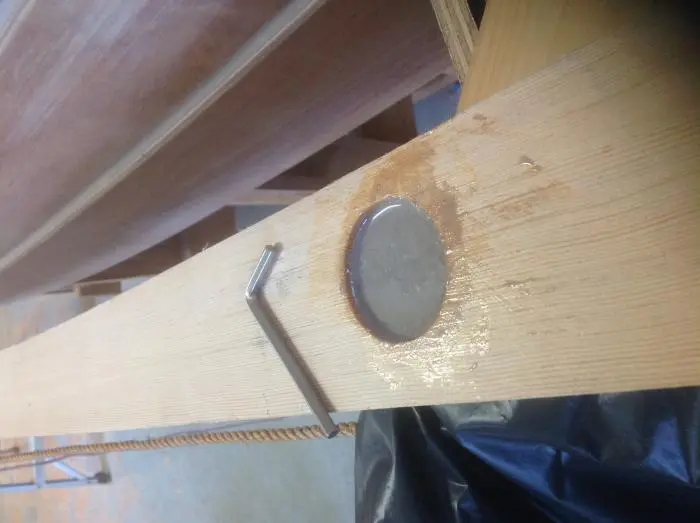
2” diameter epoxy plug for centreboard pivot in outer keel. Below waterline so a bronze screw in plate is let in to restrain pivot on both sides.
Hole for 20mm(3/4”) pin yet to be bored.
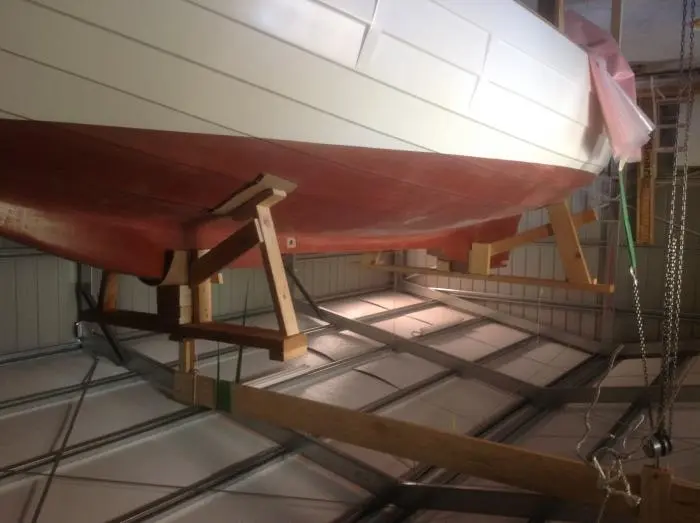
The red stuff is Cop-R-Bote anti fouling which is sprayed on and afterwards lightly sanded to “activate” copper particles so they are on surface ready to do their job. I’ll let you know in a few years if it works or not. Supposed to be good for TRailable boats because it doesn’t mind being out of water for a length of time.
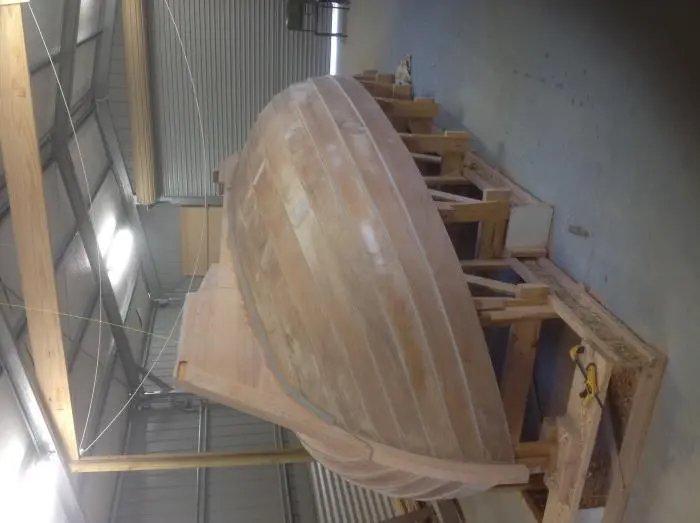
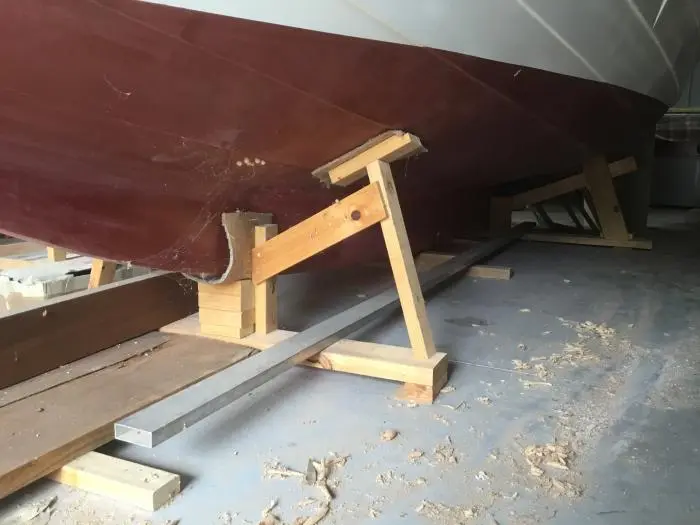
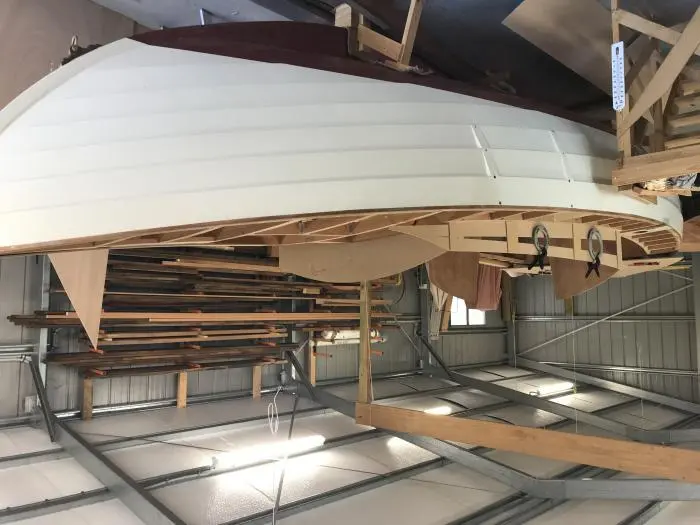
These are the legs I made to support hull right side up and you can see the timber Gantry beam in roof which originally was used to lift outer keel into place but had many uses.
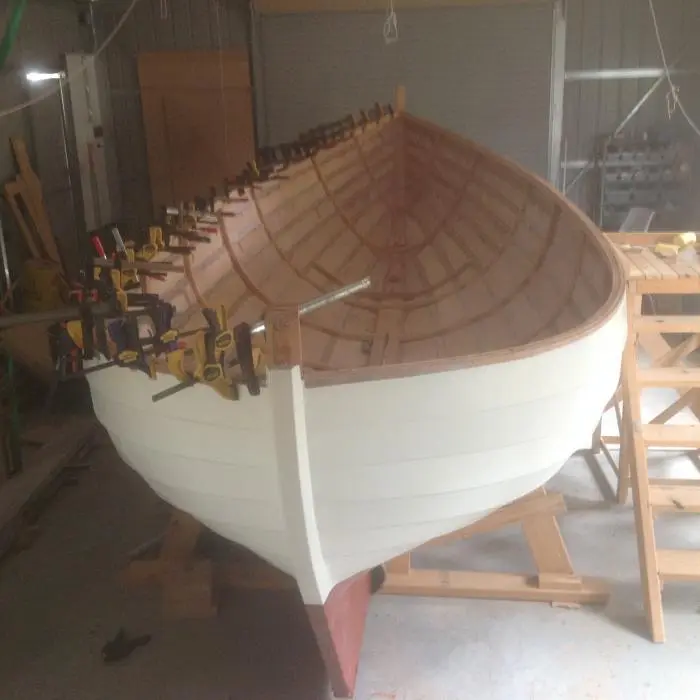
Gluing in inner gunwhale, didnt have enough clamps to do both sides at once!!!
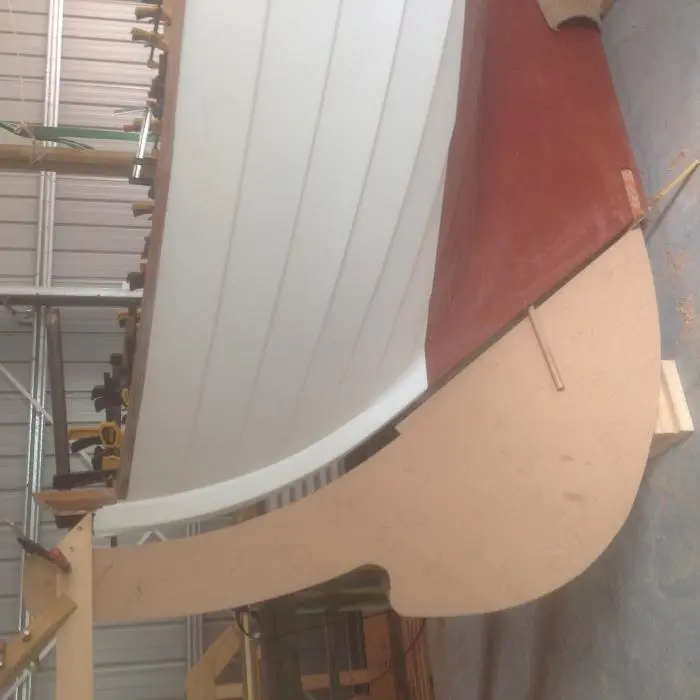
Template and rudder being made with pattern following bit. Round dowel is prop shaft
Lazerette deck framing and painted. Blocking for cleats and mainsheet horse and knees to reinforce beams.
This shot shows extra half frames and frames3 and 4 in new positions because I had I.O. Draw up a new Gaff rig for me so this entailed moving the mast etc. its made a bit of a mess of framing in the fore part of the boat because some frames had to be left where they were so that ballast bolts could be let into them. Ballast wasn’t altered. Also here you can see the centreboard template in the raised position and the case (shown earlier encapsulates this part of it only, which is just inside companionway. Sorry pics are a bit out of order.
Here you can see what i mean about frames. Red log is mast step, 1/2of it goes on top of keelson as in next photo. To gain some much needed headroom in this boat i have let the sole rest down as low as possible between frames so stepping over the frames will have to be become habit, along with stubbed toes!!
Another shot of centrecase because this a complicated part of boat fitting case, centreboard, head-logs and bulkhead six (cabin aft bulkhead) in. In the end I have fitted aft end end of case through bulkhead to get it all in. This is not shown on plans at all well.
While we’re on the centrecase I found a couple more photos which show my interpretation of how things fit in.
The main problem is that the centreboard is so long that it only fits between frames 4 and 6 with a small amount of space in which has to fit the fore/aft headlogs and some room for swinging the board up and down. I cant remember much I left but its only perhaps a quarter inch (could be 1/2”??? ) at after end because fore end is governed by pivot position. The headlogs are only about 1/2” thick and as wide as slot. All is glassed as per earlier photos. That small piece at bottom of photos is the fore head Ledger!!
Here you you see how the sole fits between floors. The case cappinghas been fitted here and you can see the board pennant (dyneema) coming out, it will drop over the front of that cap onto winch which fits onto those screw holes on upright piece of capping. Small hole in front of pennant exit block is the board shove-down emergency!!!
Final centrecase shot of how it fits into bulkhead 6. This is just the template but you get the idea, photo taken from aft.
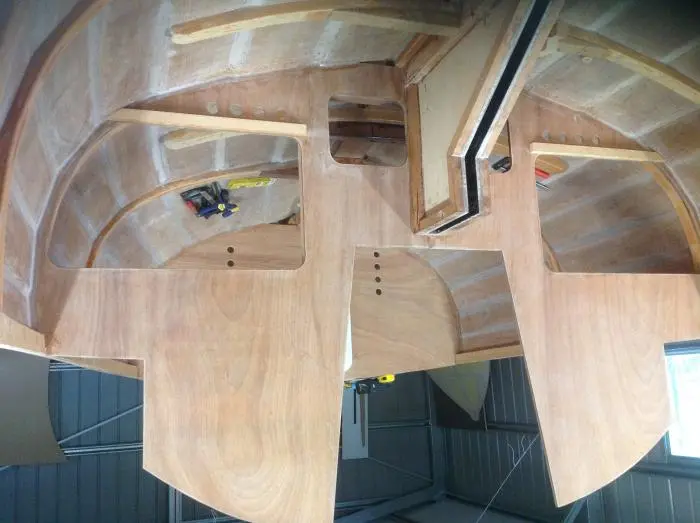
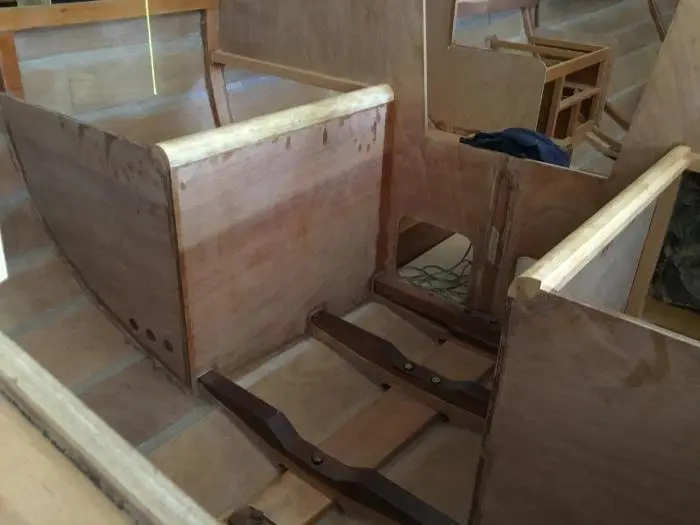
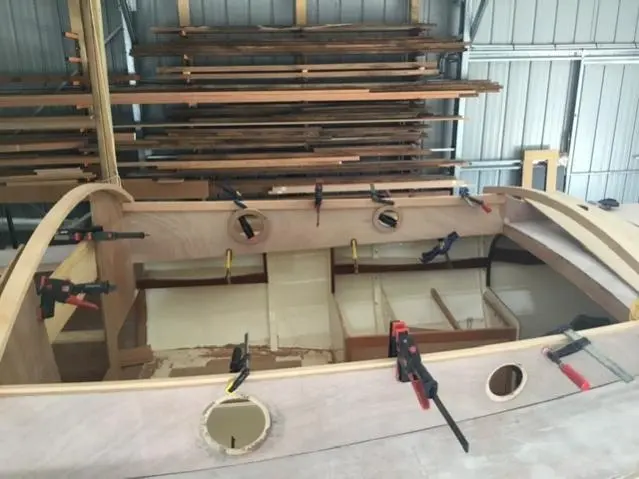
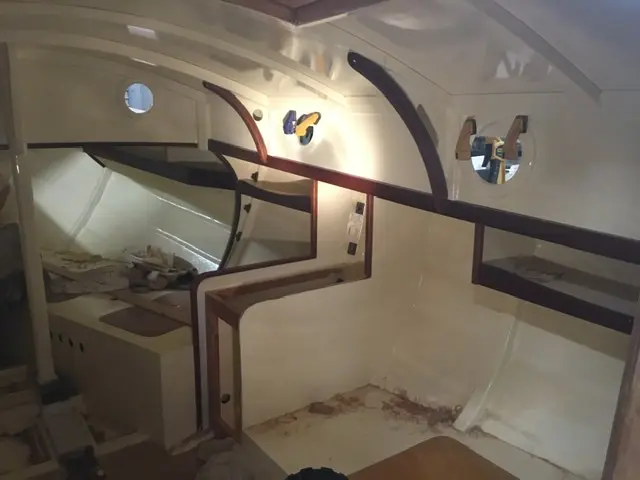
Bulkhead 6 which is the cabin aft bulkhead, This boat will have quarter berths so that...
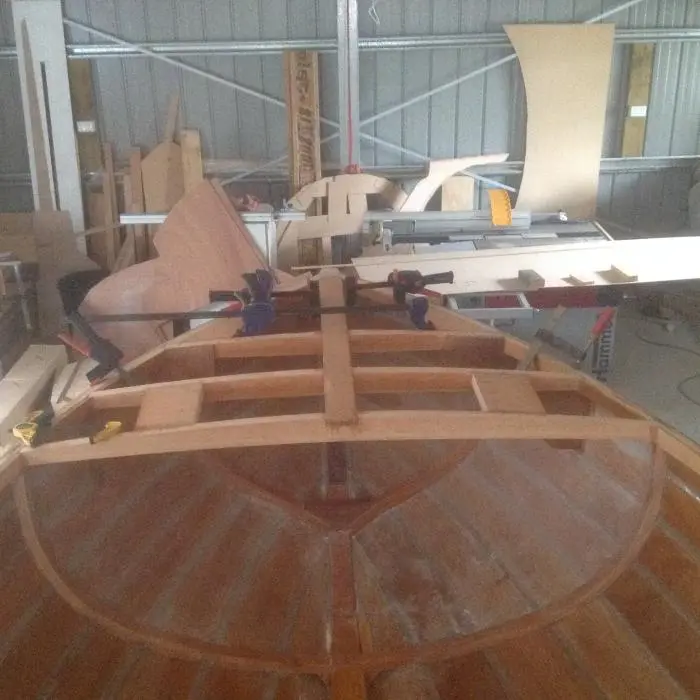
Bulkhead 6 which is the cabin aft bulkhead, This boat will have quarter berths so that explains the big holes through to under cockpit seats. Foredeck framing underway in next shot with a hatch included
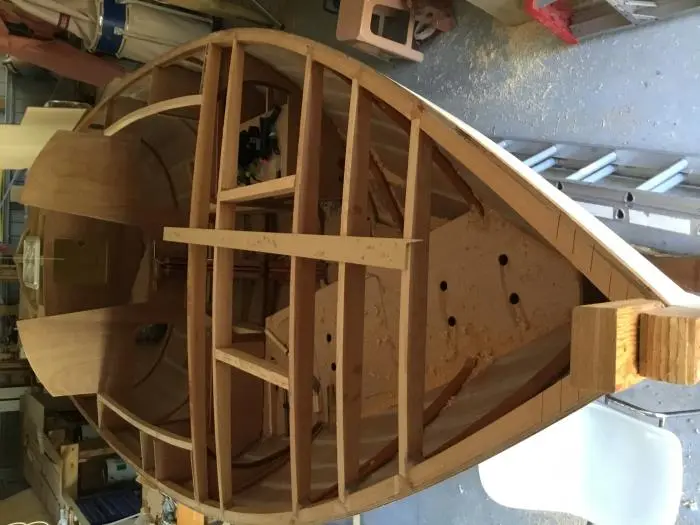
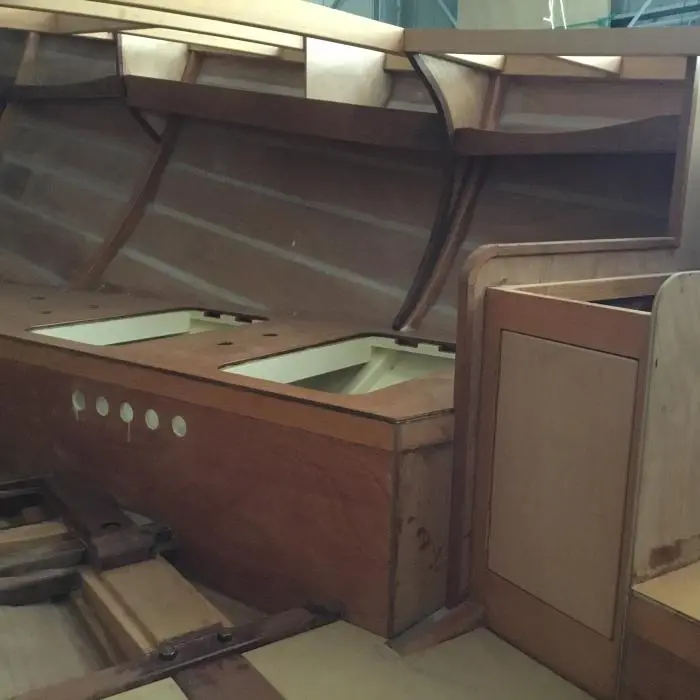
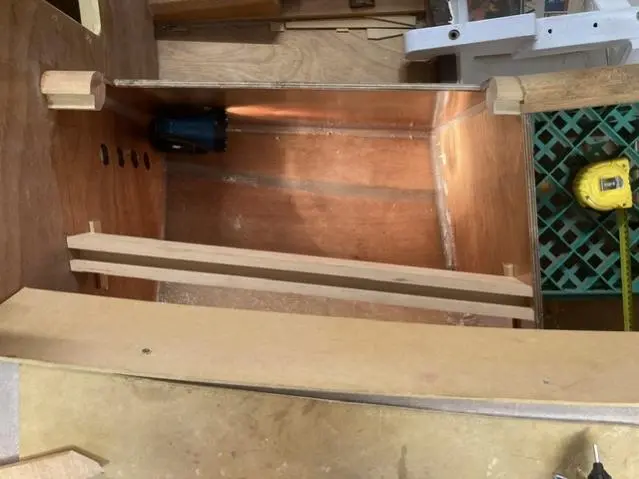
This the cockpit seating being started where the quarter berths hide. Some cabinetry and the forward berth with ventilation holes. You can also see the shelving up under deck.
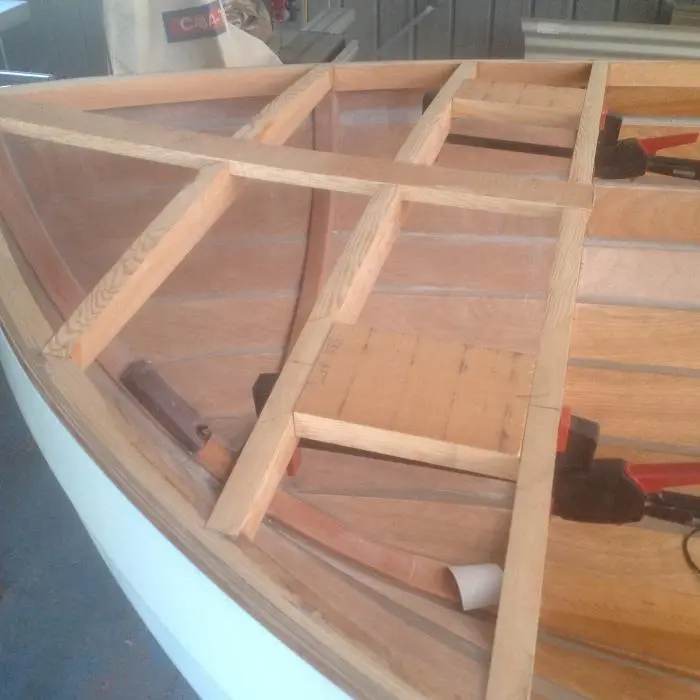
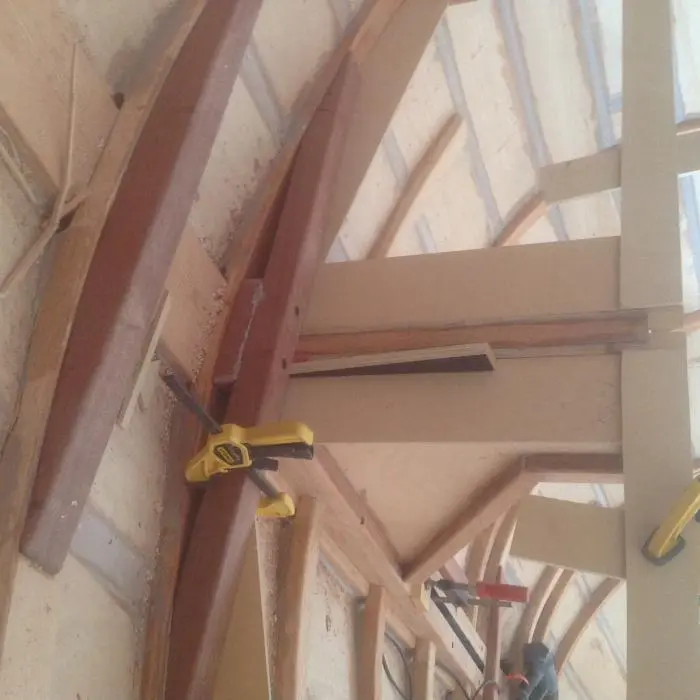
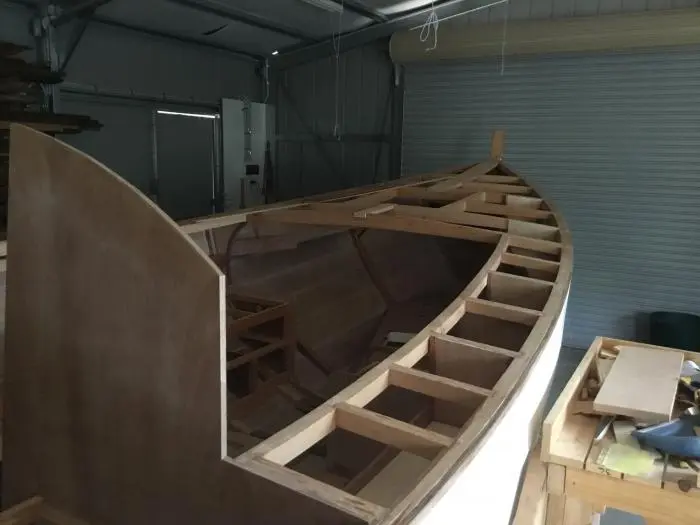
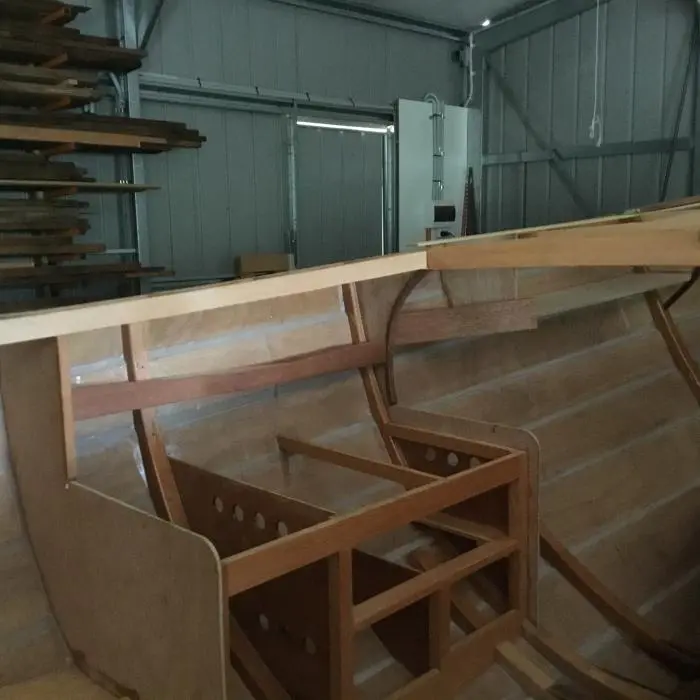
Side deck framing extending forward. The cabin carlins were formed by laminating a beam on hull side to get the curve. This lamination was also made about 4” deep so that I could cut the sheer curve in it . Beam finished about 1 1/4 square .
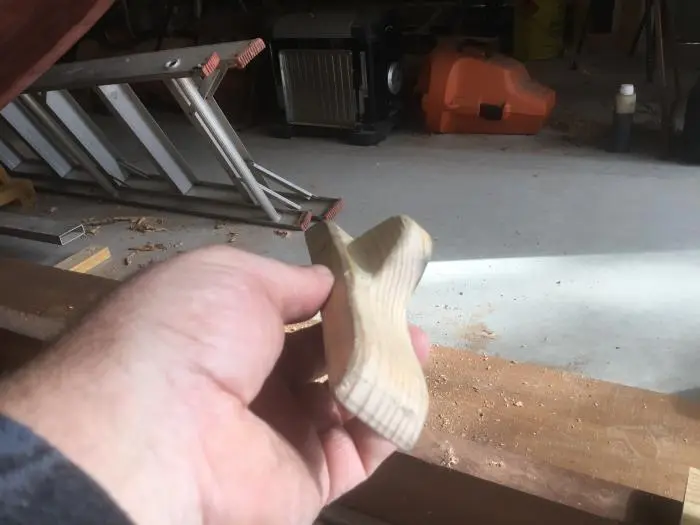
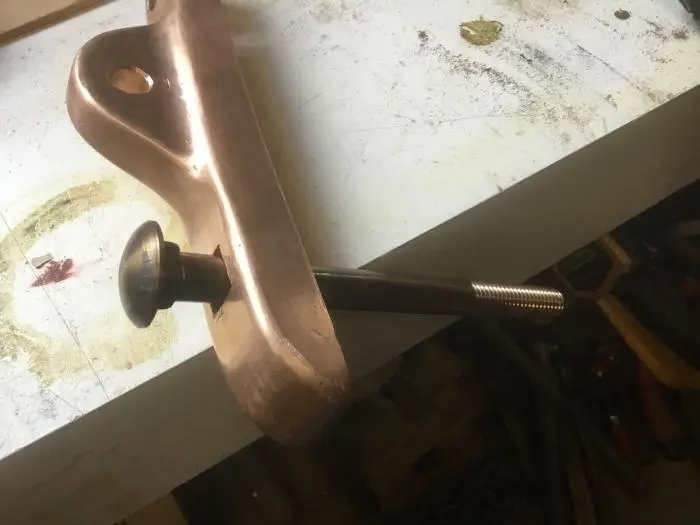
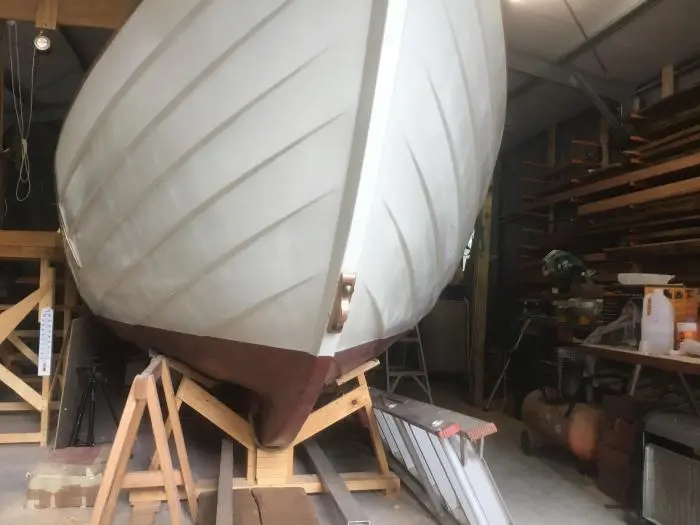
Portt cabinets or galley. The next few pictures show a wooden bow fitting I had cast in Silicon Bronze, many thanks to Peter Sibley for the idea.
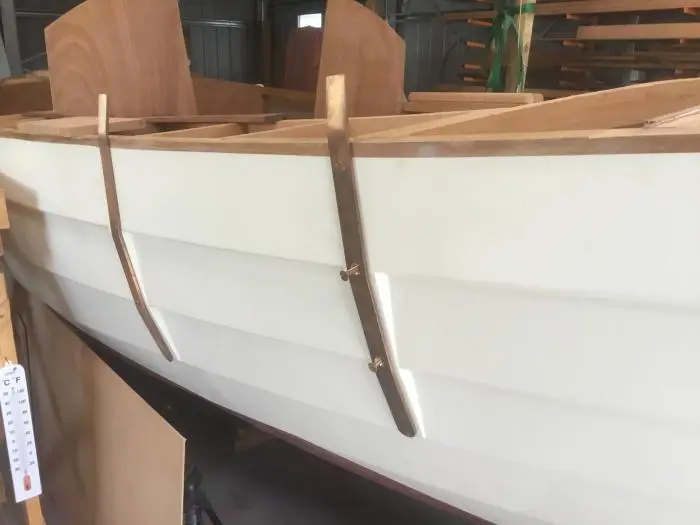
1 1/4 x 1/4 serious chainplates.
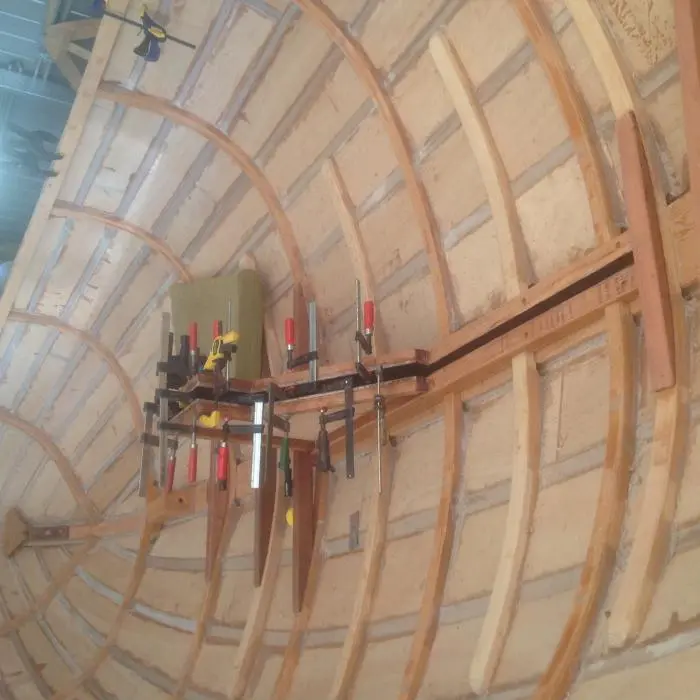
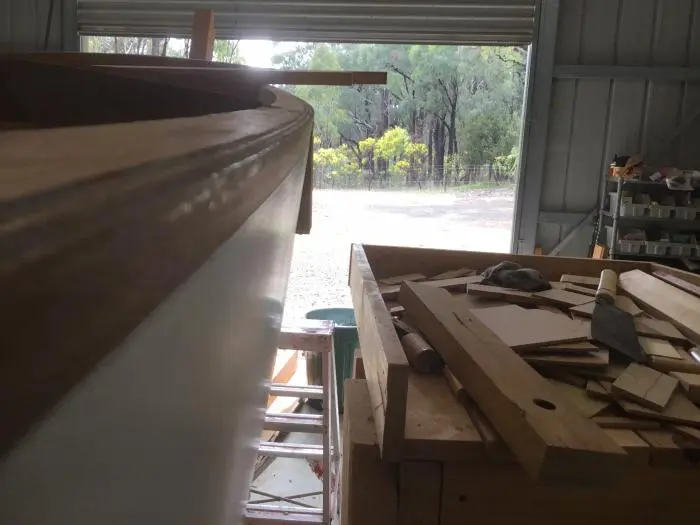
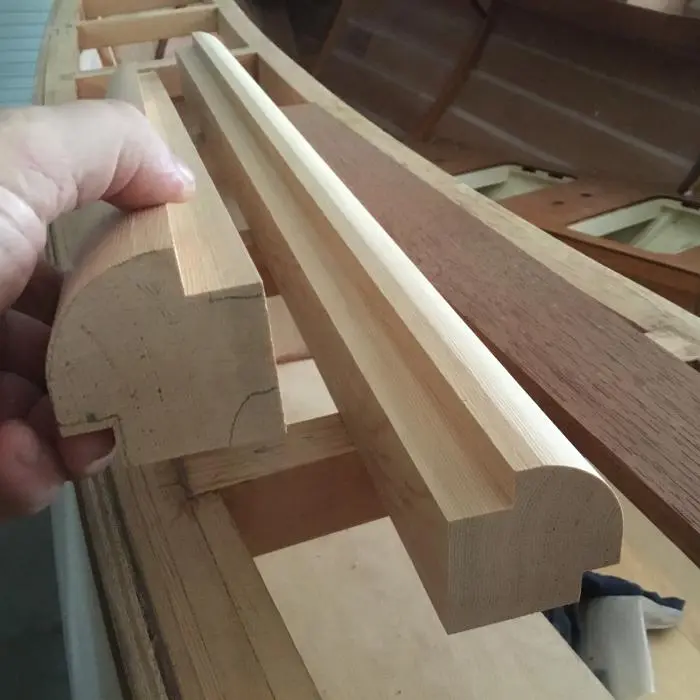
Earlier in post 12 I spoke of laminating the cabin carlins against the hull and this picture shows one of the wedges I hot-melt glued to sheerstrake to form the surface against which i clamped. The planking angle changes as it goes along hull so wedges have differing angles. In next pic are some timber mouldings I made from DF to form edges of cockpit seats and locker lids, the 12mm ply sits in rebates to form tops and fronts of seats.
This is the forward support I made to sit under keel and take the most weight with outriggers to stop it falling over. Theres another order under the aft end.
thats me pretty well up to date now except for some painting of the interior but we all know what paint looks like so Ill be off to look after some other of life’s duties and be back when i have some more photos
Trailer build or rework, cradles, covers, launching gear.
2 daysfrom July 2019
27 Jul 2019Trailer & Gear
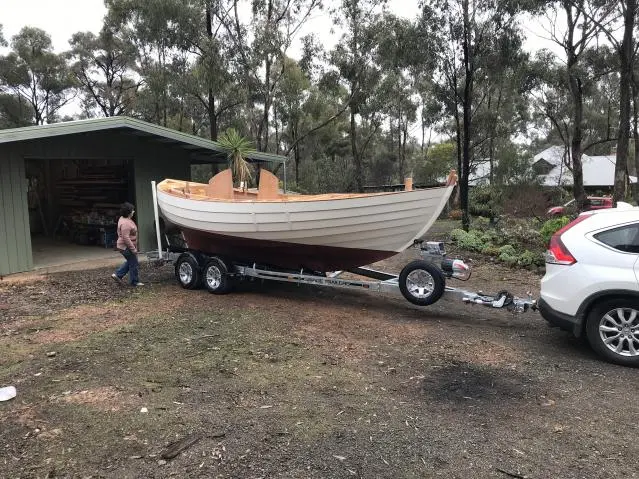
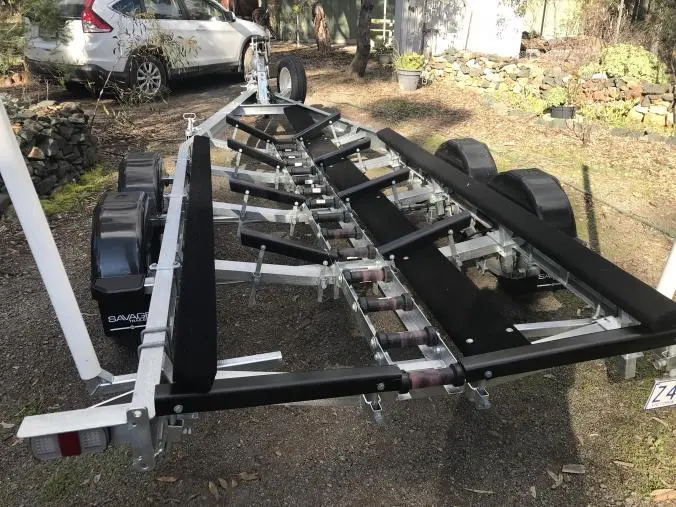
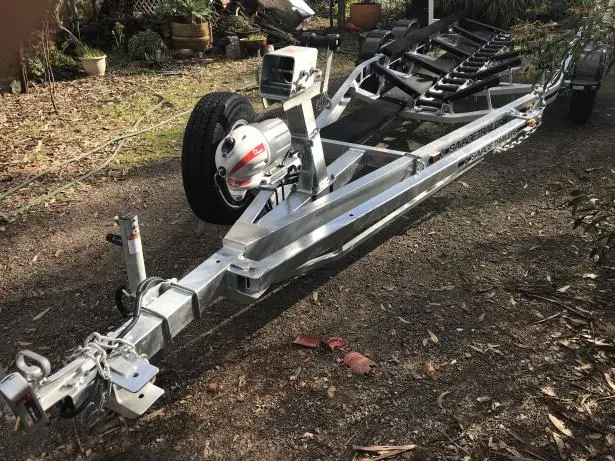
Received my new trailer this week and tried the boat on it.
Received my new trailer this week and tried the boat on it. I’ll have to take it ack for some minor adjustments but overall I’m pretty happy. First time my boat has been out of the shed. Next time will be for launching but don’t ask me when that’ll be.
Photo 1 Photo 2
1 Aug 2019Trailer & Gear
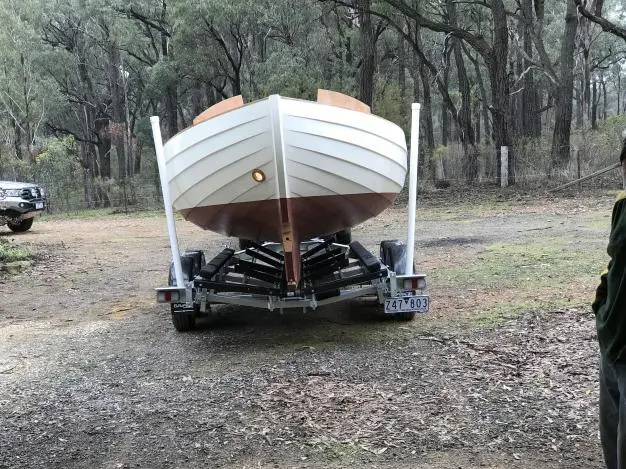
Here’s a couple more pics of trailer.
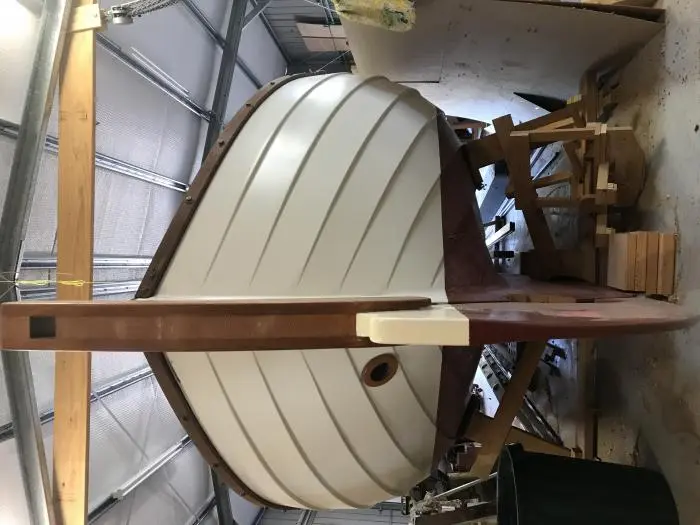
Here’s a couple more pics of trailer. The people who built the trailer put the angled sliders on which although I haven’t tested them for recovery in a crosswind seem a great idea, they are very slippery and would feed keel onto rollers pretty well. You can also see the foldaway extension drawbar which adds about 1.6 metres so I can avoid filling the car boot. As you can see I’m going to need a fair depth to get boat on/off. That football shaped thing is the breakaway brake booster which law says I need cos I’m over 2 tonnes. It activates brakes if trailer becomes detached from car ��
Photo 1 Photo 2
3 Aug 2019Deck & Coamings
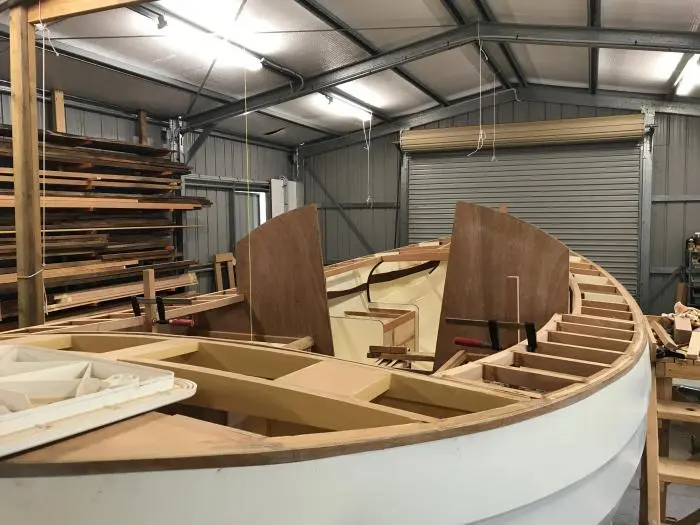
Meanwhile I’ve done a bit of woodwork on the boat.
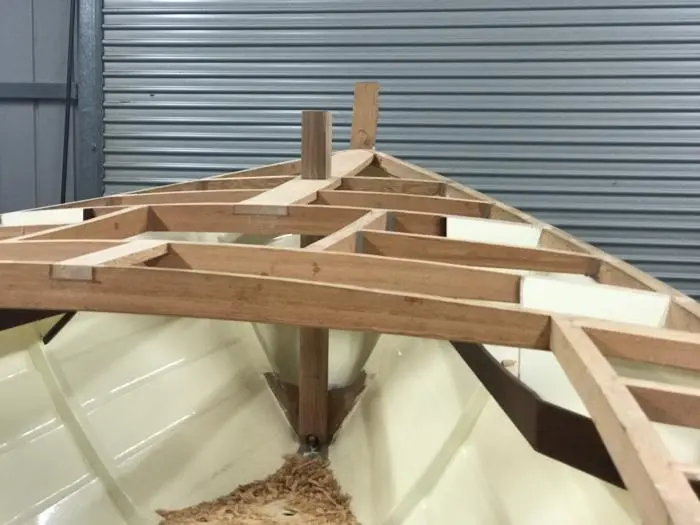
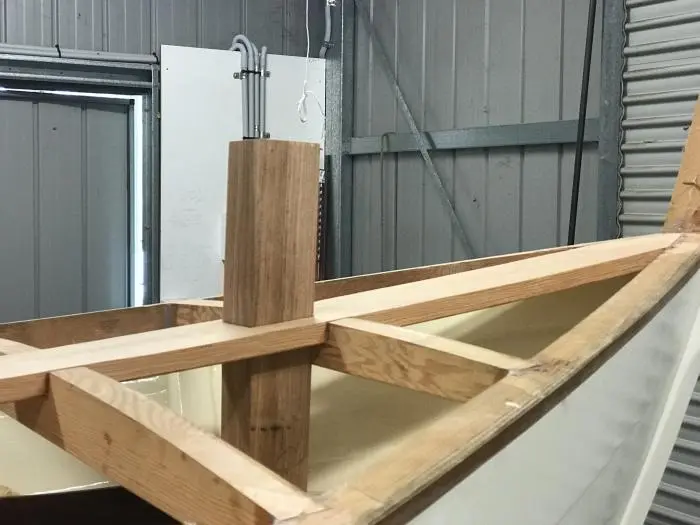
Meanwhile I’ve done a bit of woodwork on the boat. A rough out of the Samson post
Which have a bolt and a block under kingplank also the bronze crossbar is around here somewhere! There’s still a bit to do on post which at its bottom end is notched around one of stem fitting bolts. Can’t fit it until I have the deck on which will be major.
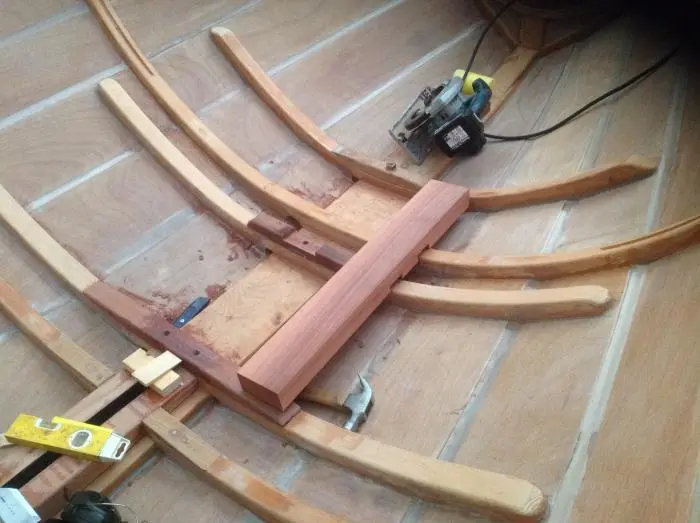
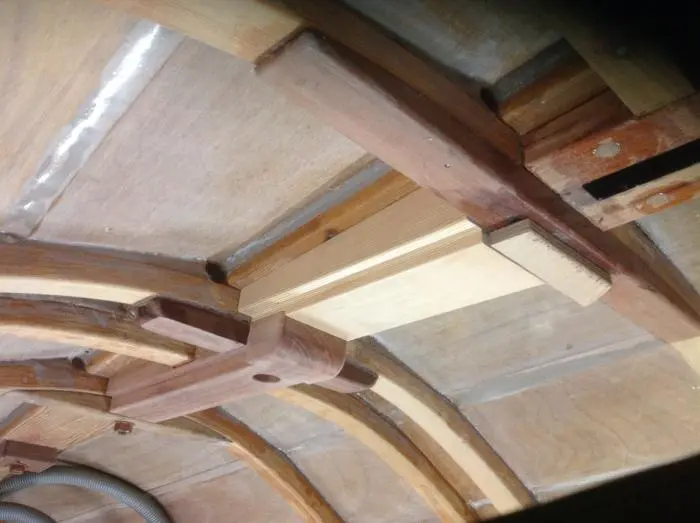
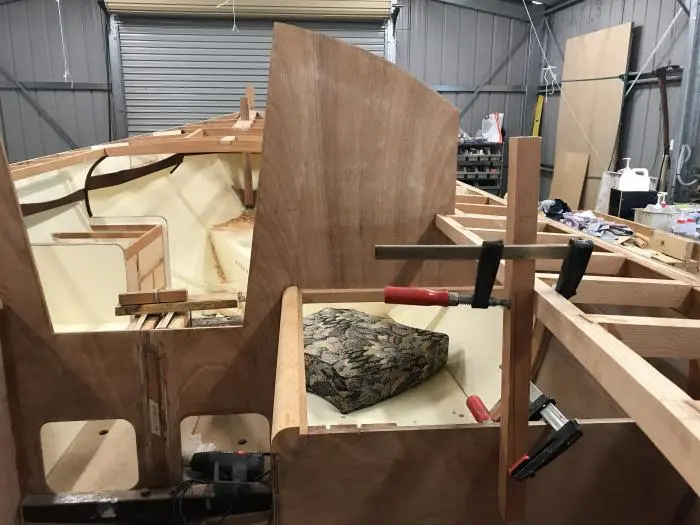
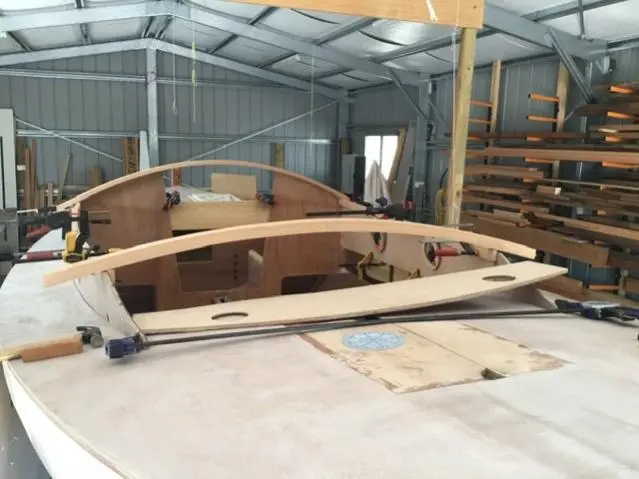
in the cockpit I’ve fitted the Carlin’s and sidedeck beams which completes the deck framing. Now ALL I’ve gotta do is fair it all in. The Carlin’s were laminated to the curve of the sheer but of course it’s not the same curve is it. After I had the lamination in hand I rough cut it to length and positioned it in its place but about 50 mm high because I have bulkheads for/aft. I used a level and pencil riding on sheer to plot the side curve of sheer then cut the deck angle of 6 degrees onto the top of beam. It actually sits vertically so next job will be to cut a wedge/shim with seat backrest angle (12 degrees) and glue it inside Carlin.
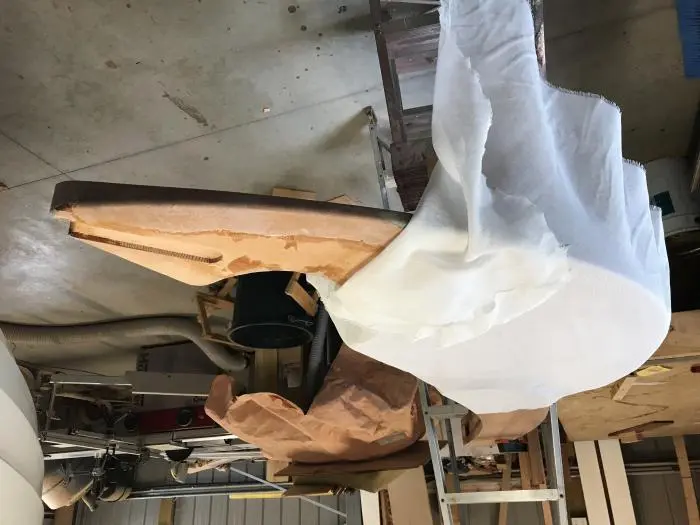
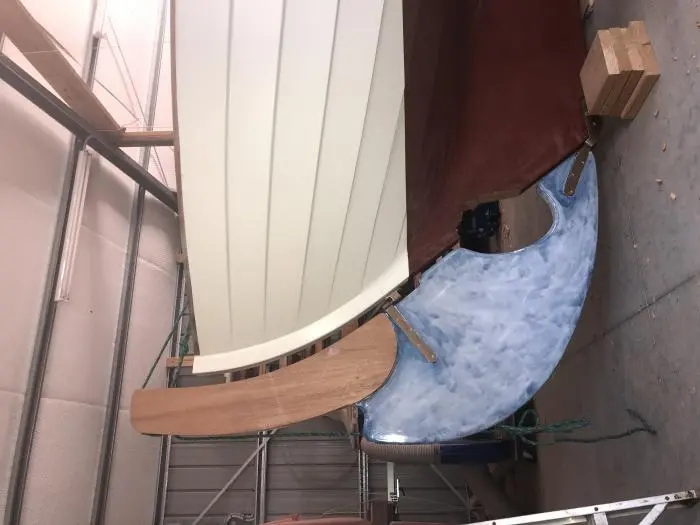
The rudder is receiving some love too in the form of some dynel sheathing. One piece each side wrapped around and peel-plied.
Photo 1 Photo 2 Photo 3 Photo 4 Photo 5
Chapter 04
Glassing & Epoxy
Sheathing in cloth, wetting out, fill coats.
2 daysfrom October 2019
3 Oct 2019Glassing & Epoxy
Now that weather has warmed a little it’s easier to get my lazy bones out in the shed...
Now that weather has warmed a little it’s easier to get my lazy bones out in the shed again. The rudder is about 3/4 done and in this photo it’s mounted to sternpost and blade has been dyneled and 3 coats of neat epoxy. I tinted the coats that’s why it looks a little 70’s. Still deciding how to to treat the cheeks and gotta make the tiller too.
Currently working on fairing deck beams (gentle application of belt sander!) then the grind of epoxy coating and painting them.
Just for a major injection of enthusiasm I made up the templates for cabin ply out of mdf and some wallpaper ones for decking pieces. I don’t have a lot of ply left so I’m trying to work out how much more I’ll need to order before Xmas shutdown here. Whole bloody country seems to start shutting down in November and goes til February so you have to get in with your orders beforehand.
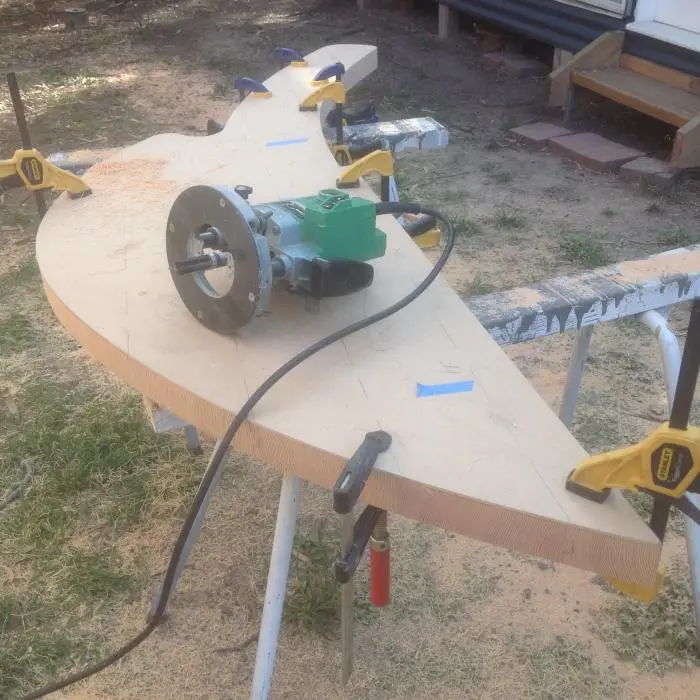
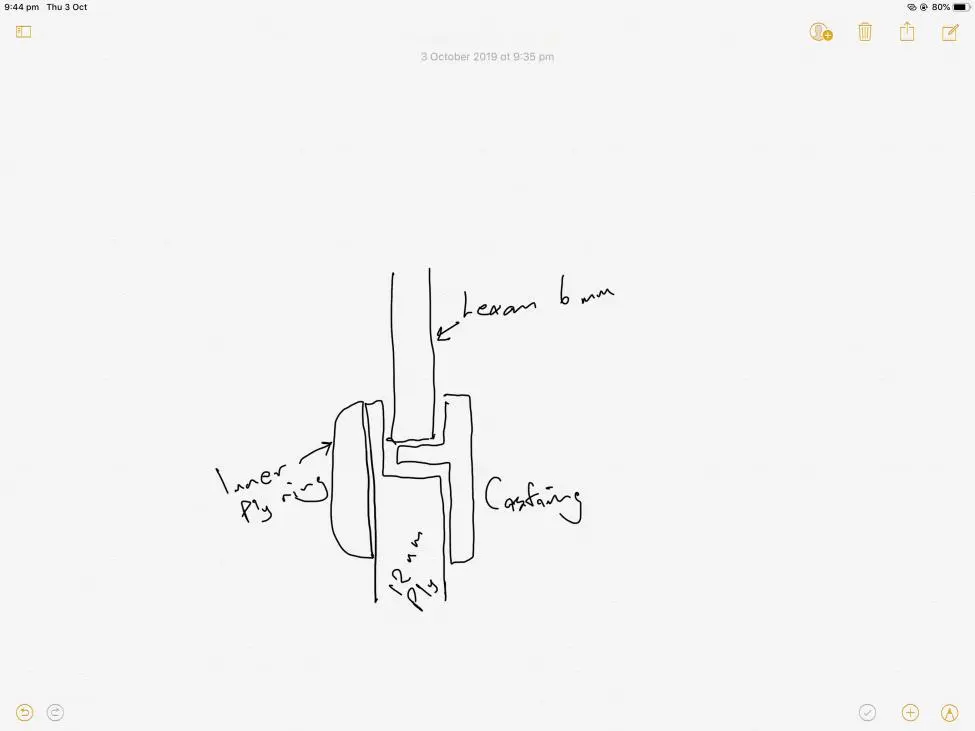
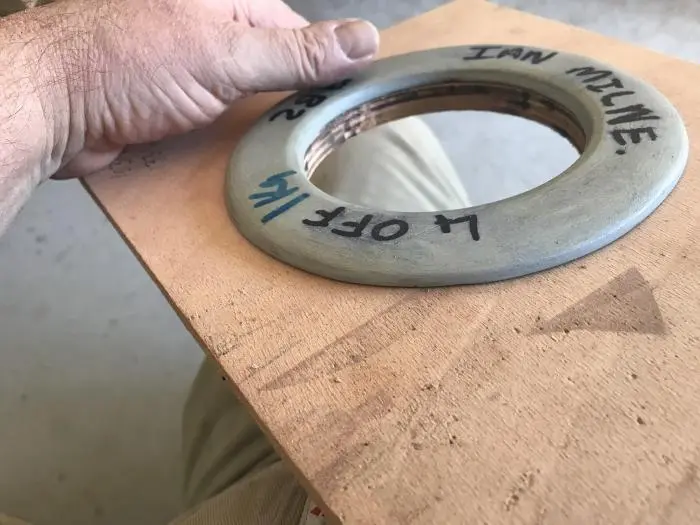
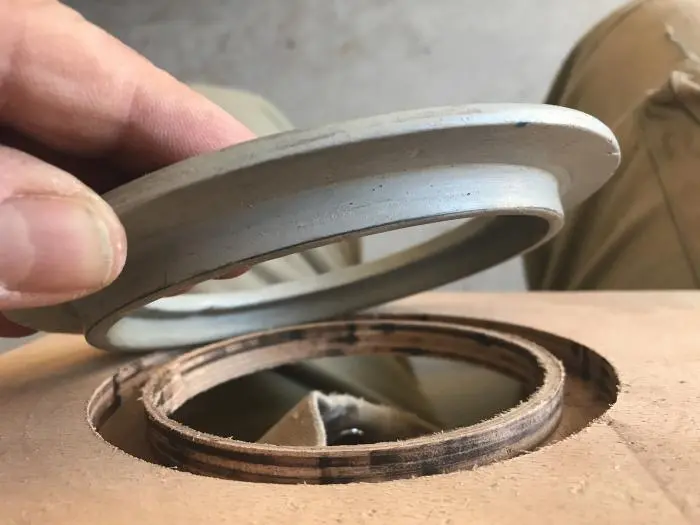
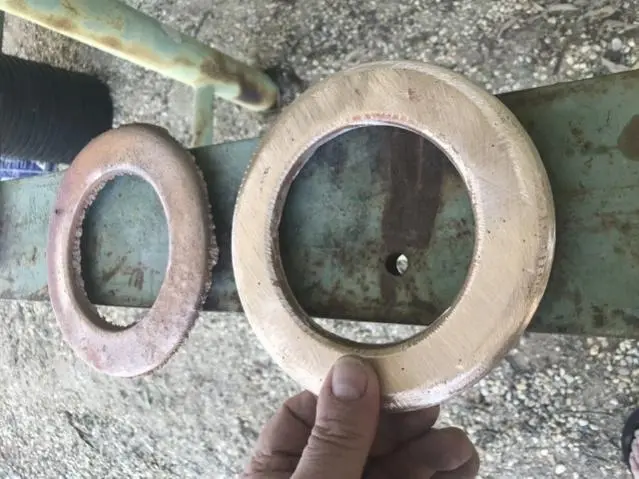
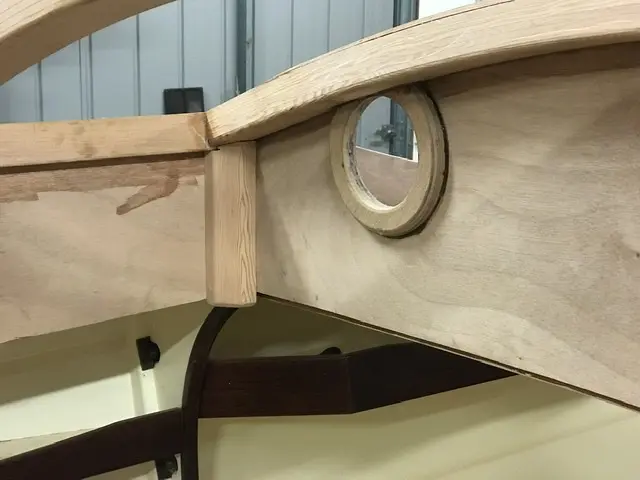
I had the fortune to receive some templates for portlight rings from Ian Milne (thanks Ian dunno how many days you saved me making those) and had a bit of fun working out how to mount them on a dummy piece of ply. Still needs work. I used a sub-base on my trim router with a nail pivot.
Thanks for the pictures Ian. In a way I’m lucky that my ply is 12mm so all I need is a rebate for the casting back-lip and to take lexan. I’m planning on an inner ply “ring”to takes screws similar to yours , inside cabin
Photo 1 Photo 2 Photo 3 Photo 4 Photo 5
8 Oct 2019Hull Panels
Well I’ve decided on cut layout for remaining sheets of ply and it looks like I might...
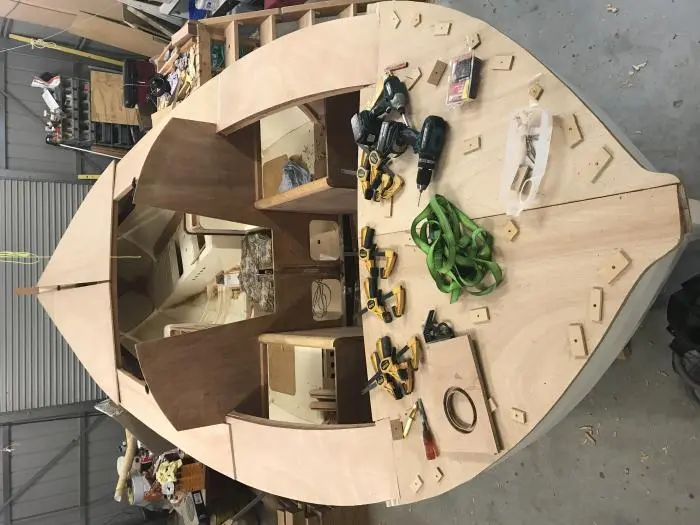
Well I’ve decided on cut layout for remaining sheets of ply and it looks like I might make it, barring any whoopsies. So all up I’ve used 20 sheets of 1/2” , 3 or 4 sheets of 3/8”(interior cabinets and bunks) , 4 sheets of 1/4” ( cabin roof).
Above are are all deck pieces layed out with scarf allowance, just for OCD satisfaction I’ve lapped the scarfs from bow to stern. In the end it doesn’t take much to cut each scarf just some noise and dust. At one stage I was considering butt joins but Ian Milne talked me out of it thankfully.
Photo 1 Photo 2
22 Nov 2019Glassing & Epoxy
Dynel and peel ply isn’t as easy as it seems at first sight.
Dynel and peel ply isn’t as easy as it seems at first sight. I’ve done a little fibfreglassing in past with 6oz cloth but wetting out Dynel is a bit more difficult. After a first failed attempt I stripped it all off and filled three bins. For the next go I had my epoxy coated and sanded ply all ready so outgassing hopefully wouldn’t be as much of a problem this time round. What I failed to realise first time was that the days peak temperatures were not til 5 pm! So this time I started then and finished about 9.30. So after a rough, levelling sand this is what it’s come up like.
also had some bronze ports cast for me, which need polishing now( thanks for the patterns Ian)
Photo 1 Photo 2
3 Jan 2020Deck & Coamings
We’re into the summer hot weather here, days can get up to 43+Celsius but Ive made a...
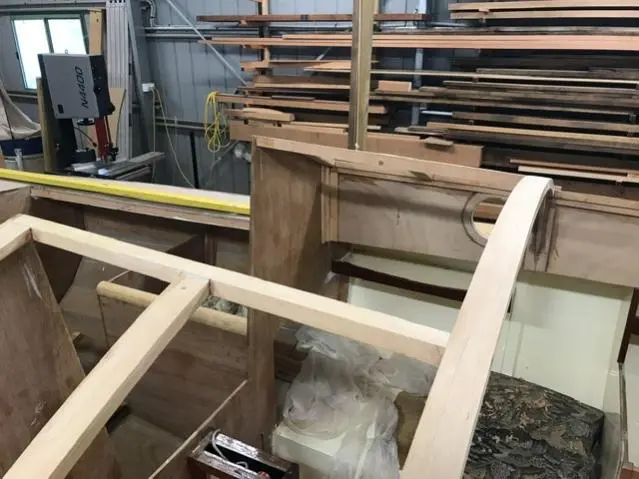
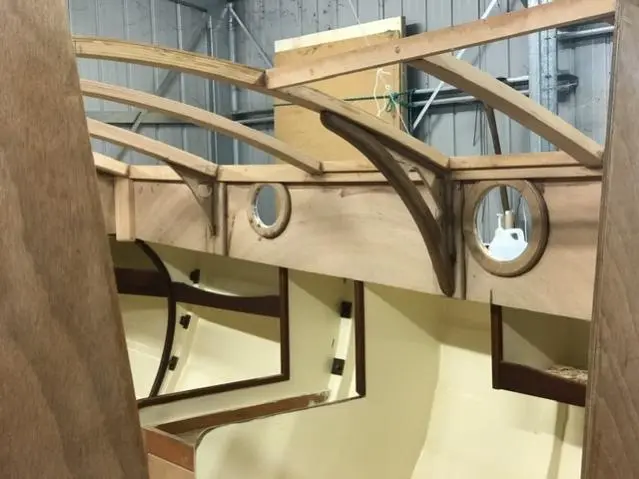
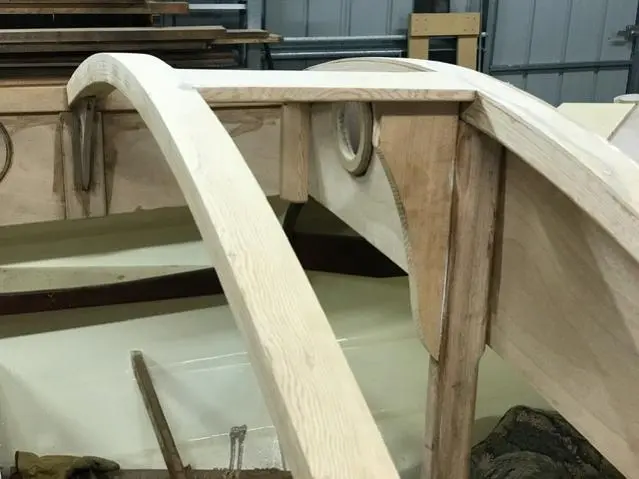
We’re into the summer hot weather here, days can get up to 43+Celsius but Ive made a rule that no work over 30. Started work on cabin where I’ve got the sides and front cutout and dyneled. Beams are in production and so far its been pretty easy working out curves. Front and back beams just follow bulkheads but in between each beam has its own curve so I need to set up everything and measure each beam’s arc to laminate it. In the photo you can also see the porthole doublers (for screws) which will need cutting down to fit under the Carlin.
Photo 1 Photo 2
Chapter 05
Hardware & Fit-Out
Cleats, rudder and centerboard, tiller, oarlocks, deck gear.
1 dayfrom February 2020
5 Feb 2020Hardware & Fit-Out
Rubbing strakes fitted
thanks KNG , looks fantastic but a different boat? Mine is centreboard and gaff rig
rubbing strakes fitted and plugged
17 Feb 2020Hull Panels
Hi there, well thankfully the fires didn’t come this way ......
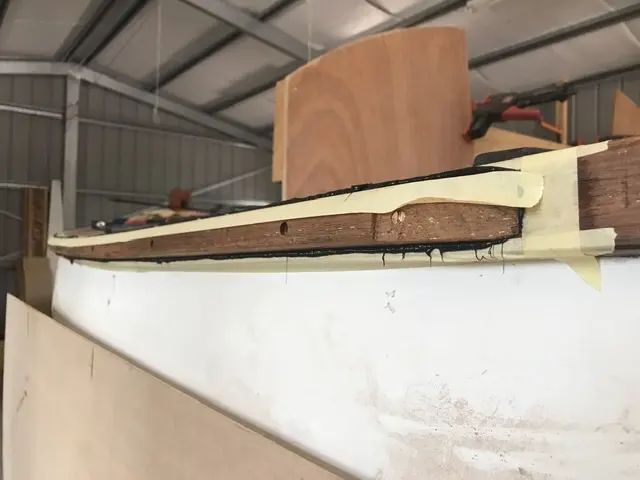
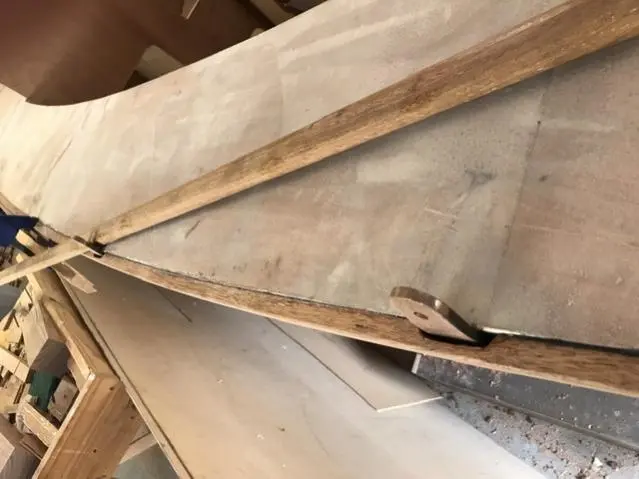
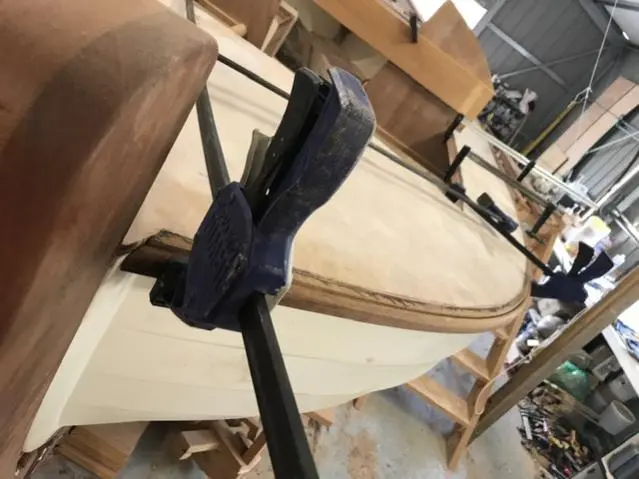
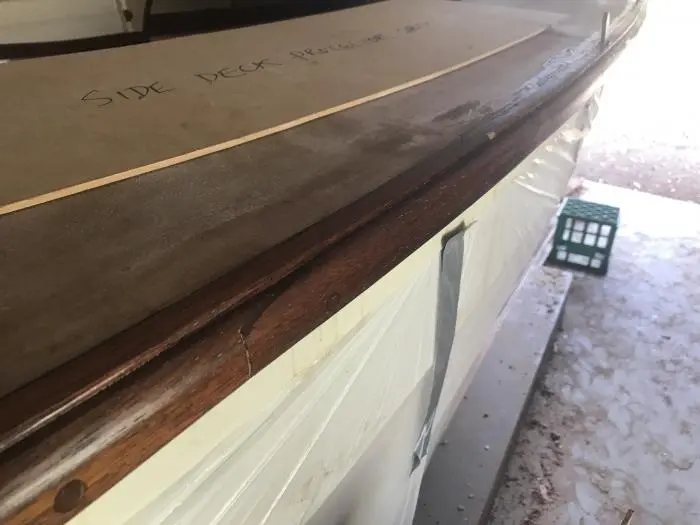
Hi there, well thankfully the fires didn’t come this way ...... yet anyway. In the heat things area bit slower than usual. But over the last week I’ve managed to get the rubbing strokes on. First layer is 45x16 tapering to 35x16 at the last 2 meters. Used Merbau decking which has turned out really well (halfway sensible price too) Steamed the last 3.5 meters to get it around the stern. I epoxied the flying surfaces and then stuck it on with Sika291 and screws. The second layer I used 35x14 tapered again at the ends with a bit of a round over. Once again epoxied the flying bits and used 291 again with screws. Nibbled scarfs facing aft at amidships for the joins. Finished off with Dekes Olje 1 which is a really easy to apply finish even if it takes a little time, each coat goes on quick, I think I put on five coats in about 1 1/2 hrs.
Got the chainplates permanently fixed too using some more of John Aquinan’s butyl tape.
Now it’s onto the next project, which I think I will make the sole because I’ve painted those in between time.
Cont....
Cont........
Got one of these on the way too..
Photo 1 Photo 2 Photo 3 Photo 4 Photo 5 Photo 6
Chapter 06
Interior & Cockpit
Bulkheads, seats, buoyancy, sole, storage.
3 daysfrom February 2020
18 Feb 2020Interior & Cockpit
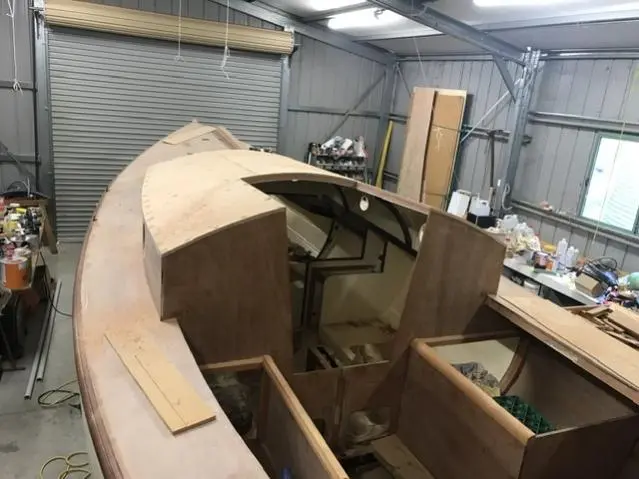
Today a minor milestone , glued the cabin sides and front in.
Today a minor milestone , glued the cabin sides and front in. Means I have to find another way aboard !
Photo 1 Photo 2 Photo 3
22 Feb 2020
A token picture, complete with junk
A token picture that I like ,complete with junk!
9 Mar 2020Deck & Coamings
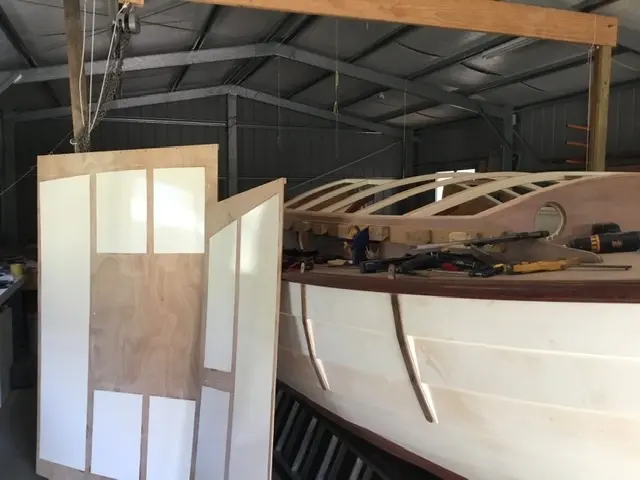
Cabin beams in, although some of them needed further buildup to attain a straight...
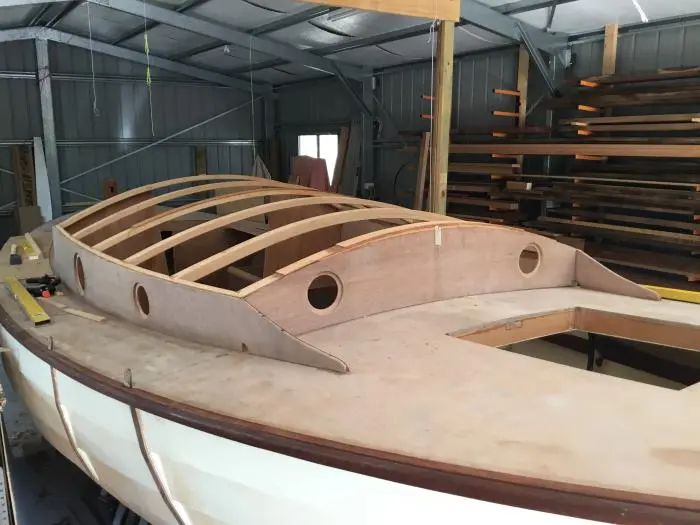
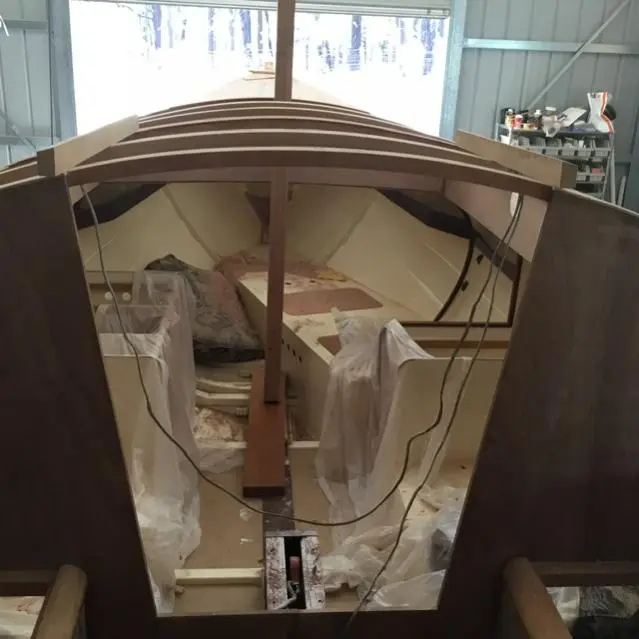
Cabin beams in, although some of them needed further buildup to attain a straight centreline!!! Once I’ve done sanding and fairing them in and painted ( I was Hoping to varnish them inside cabin but it brings another benefit in that paint will make them less noticeable overhead)
todays job is to cut in the companionway carlins seen here propped in position. And also I’m hoping to have the compression post in, seen here with its lump of wood that makes up a capturing location-block for base. There’ll be a king-plank type thingy on top also between first two beams, with a knee to post.
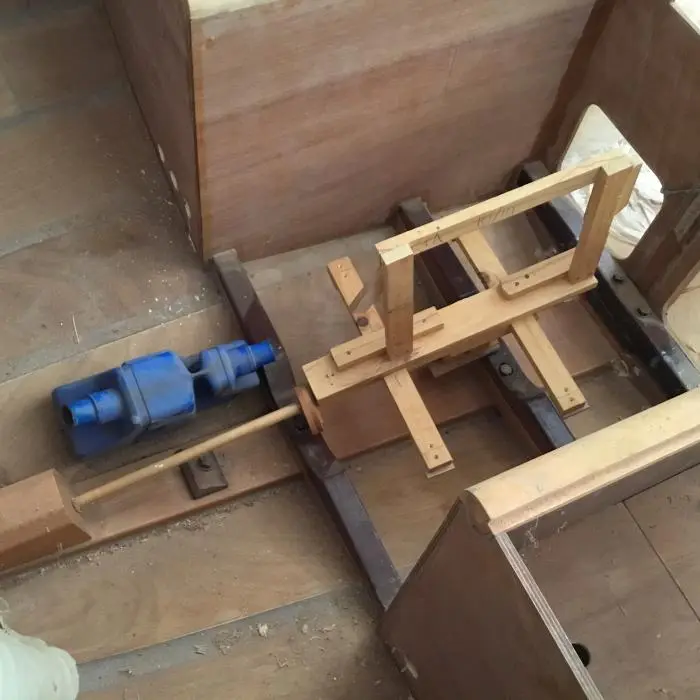
And just for fun I made a wooden model of engine to figure out spacing etc. That’s your muffler Rick
Photo 1 Photo 2 Photo 3
19 Apr 2020Deck & Coamings
Ok I’ve done a bit more work so here’s the evidence/pictures
Ok I’ve done a bit more work so here’s the evidence/pictures
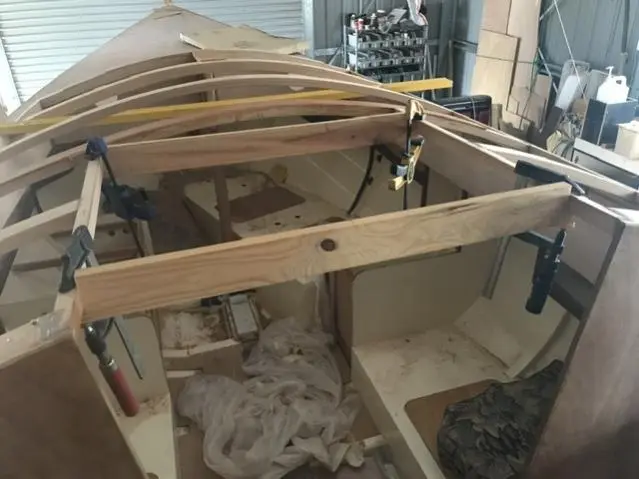
Cut out companion beams and fitted carlins. I drilled into ends of joins and glued in dowels to add a bit reinforcement, on the tee joins of short beams etc. used a couple of spacer sticks to get carlins parrelel.
glued in the doublers for portholes so that screws have some meat. Also did some corner posts at junction of sides and bulkheads of cabin. You can also see the knees here that will have painted webs and varnished fat bits. Used the fat bit to position web while gluing then removed fat bit so that it’s easier to paint. The rear most big knees also double as hand holds.
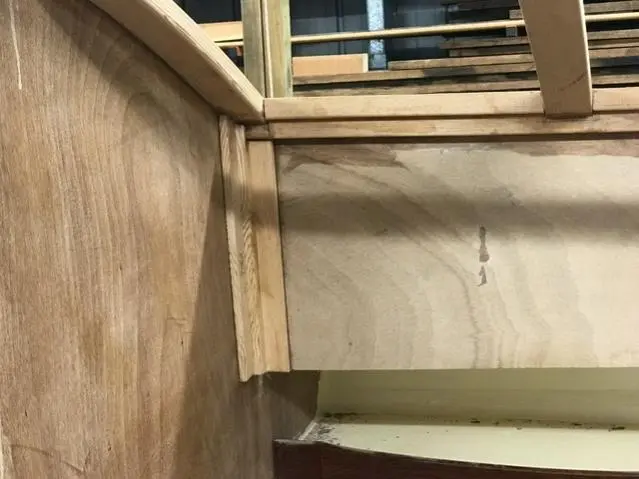
at the rear of cabin I made some corner posts in two sections so that first the corner gets braced then a cover will go over that so that the wiring has a channel from shelves below to underside of cabin roof.
cont....
Here’s a rear corner with cover on.
while inside cabin I’m doing as much as I can before roof top goes on. Next up was the compression post with a brace and sorta short king plank.
that’s me pretty well up to date unless you want some pictures of drying paint? Oh I’ve also been working on Samson post too but that’s just a bit of wood laying on deck now.
My patience is running low so I’m painting the upper interior and then the cabin top goes on! Woohoo, that will be exciting!
Photo 1 Photo 2 Photo 3 Photo 4 Photo 5 Photo 6
15 May 2020Interior & Cockpit
Last few days have been a boat building adventure.
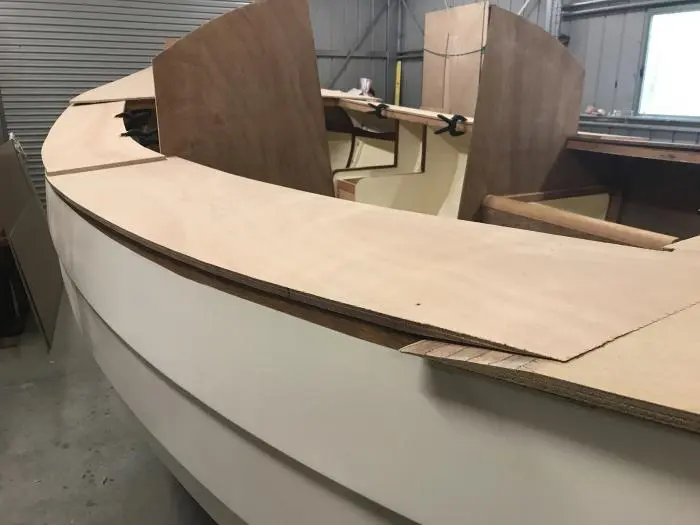
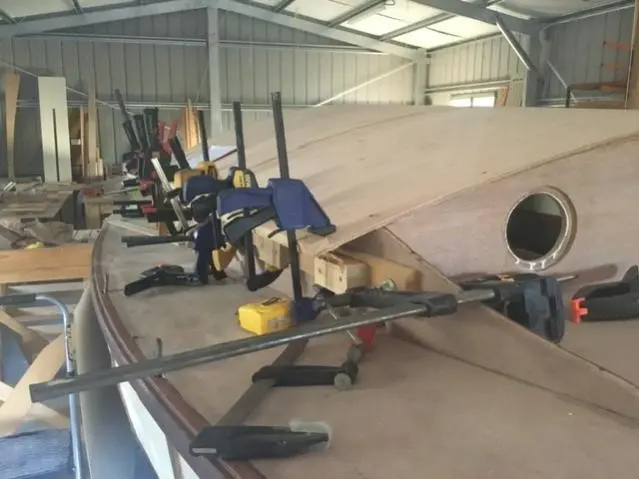
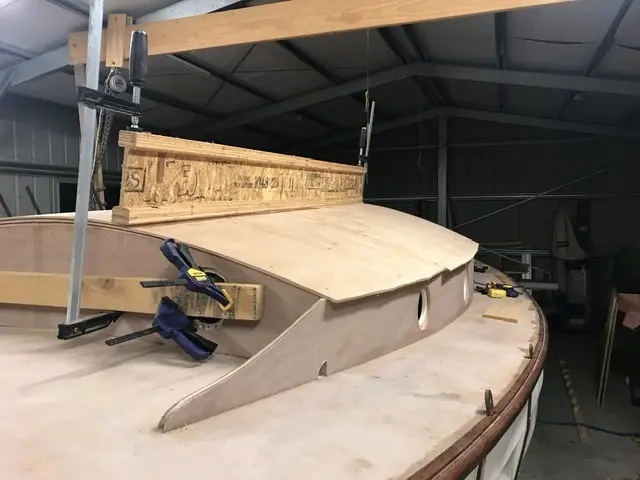
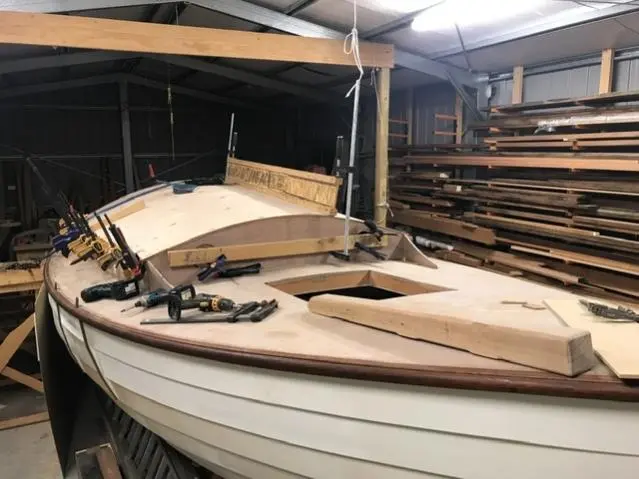
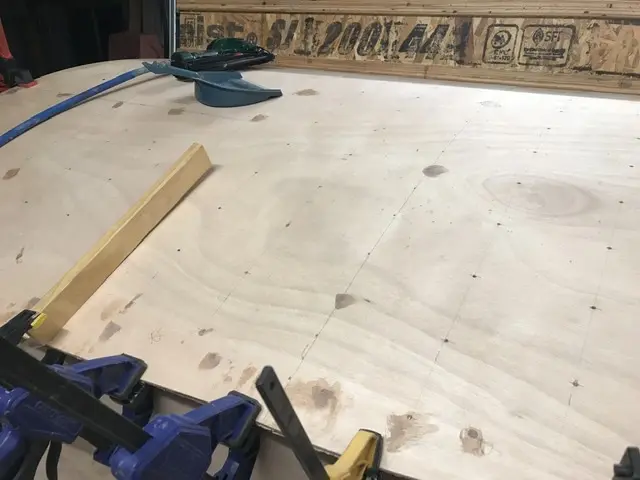
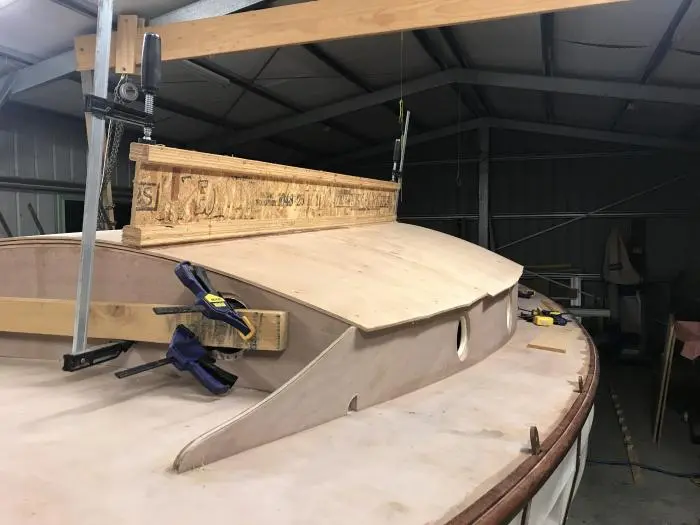
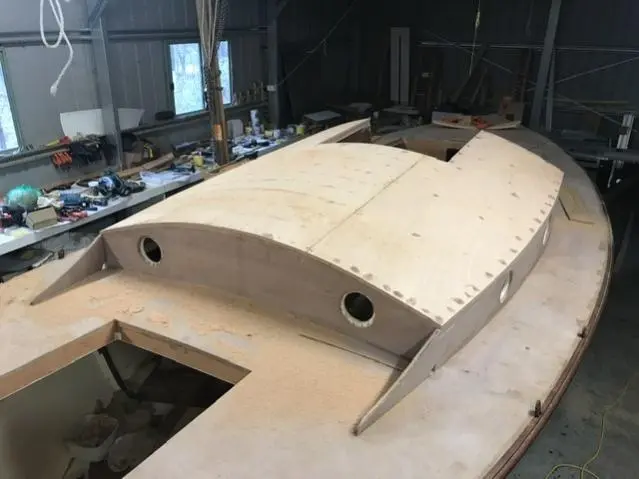
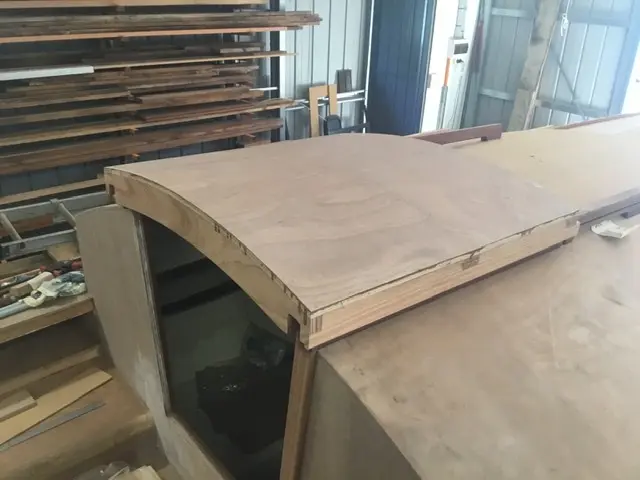
Last few days have been a boat building adventure. I got the lid on! Well half of it anyway, gives a really different feel to cabin. Next photos show two 1/4” sheets laid athwartships, glued and screwed down also about 100 plastic nails. Happily it looks like only about three have missed the mark and come through inside so there’s a bit of patching coming up along with the final finish inside cabin.
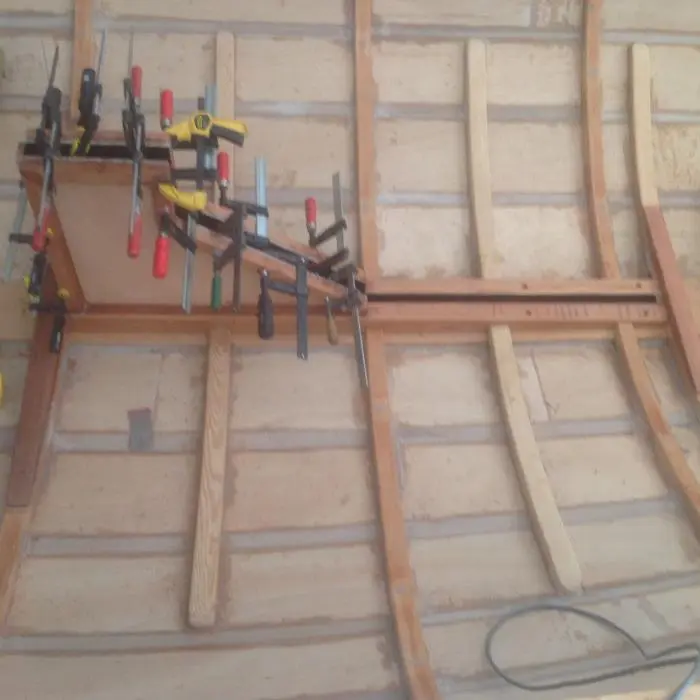
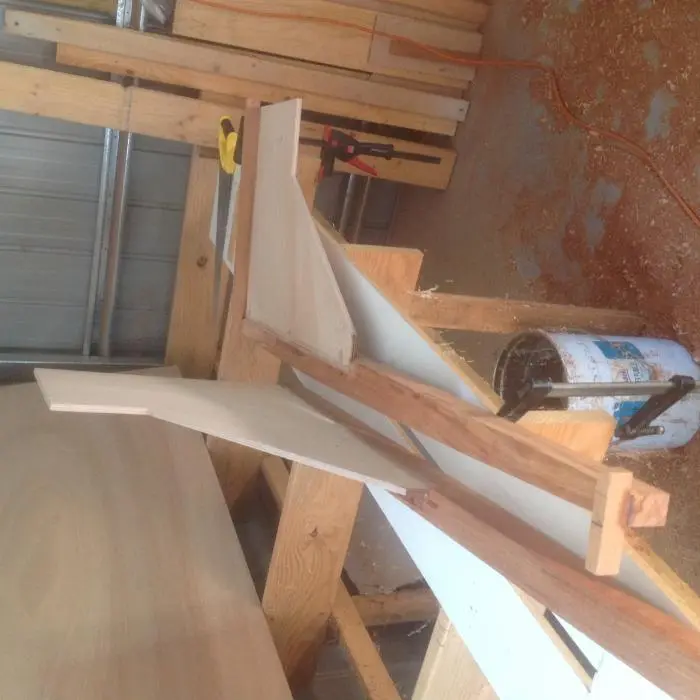
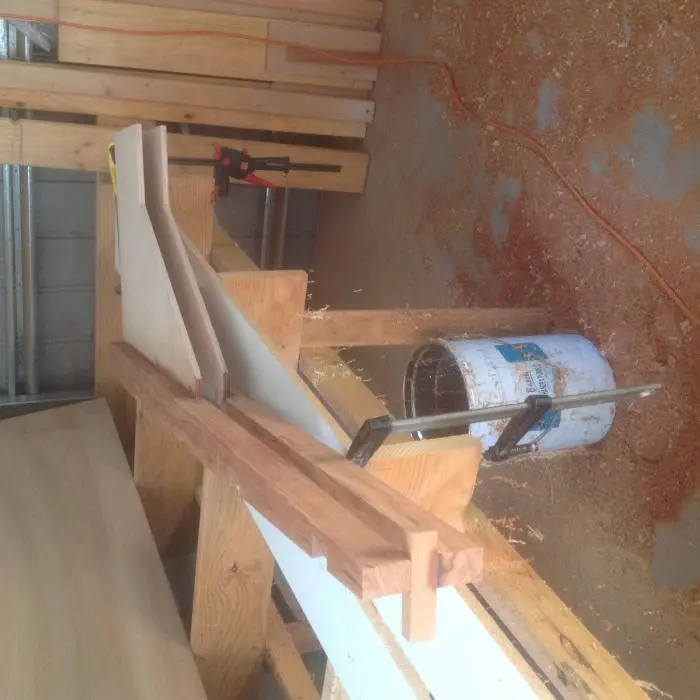
To hold down edges of roof sheets while I screwed them I setup some clamp blocks that are in turn clamped to side of cabin through portholes.
Ive also had the varnish brush busy too putting some trim in the cabin, knees and Carlin trim pieces etc
before putting on these inner sheets I coated 2 epoxy, 2 undercoat & 2 topcoats. I drew lines around all the framing and over coated them by about 2mm so I wouldn’t get bare bits once the roof was on. After a cleanup with the chisel stick and wipe with acetone the only prob Len I have is the few plastic nails that came through that I gotta repair.
more after I’ve done putting next sheets on.
Photo 1 Photo 2 Photo 3 Photo 4 Photo 5
21 May 2020Deck & Coamings
So today was the addition of the second layer of two 1/4” ply’s.
So today was the addition of the second layer of two 1/4” ply’s. Turns out it was easier than the first layer, mind you I still have the dynel to put on.
I drill some ooze holes in this layer on instruction from building guide. Had a little come through. I set up some locator blocks on join lines to make it easier to put sheet on. I also pumped a few batches of resin out in readiness. Turns out I used way more than I expected. Too bad experience is only gained when you’re finished!!
was really good it was a cool day too so the goops didn’t go off too quick.
now for main course - photos
oh, the I-joist is being used to hold Down edge of sheet in between where itS screwed to beams.
I offset join in second layer cos there’s screws in first layer. And it means I’ll gain enough from other piece to hopefully make some hatches.
!
going to start on next adventure in this boat when this ply is done, you’ll have to wait
Photo 1 Photo 2 Photo 3 Photo 4
Chapter 07
Fairing & Sanding
The long one. Fairing compound, longboards, and the sanding nobody photographs enough.
1 dayfrom May 2020
27 May 2020Fairing & Sanding
Ticked off another job that gave me a few 3am’s.
Ticked off another job that gave me a few 3am’s. Big tick and a gold star.
just some final edge sanding and hole filling .
two layers of 1/4” ply laid alternative directions.
Photo 1 Photo 2
18 Dec 2020Interior & Cockpit
Time for an update I think cos engine stuff is slowed waiting for bits.
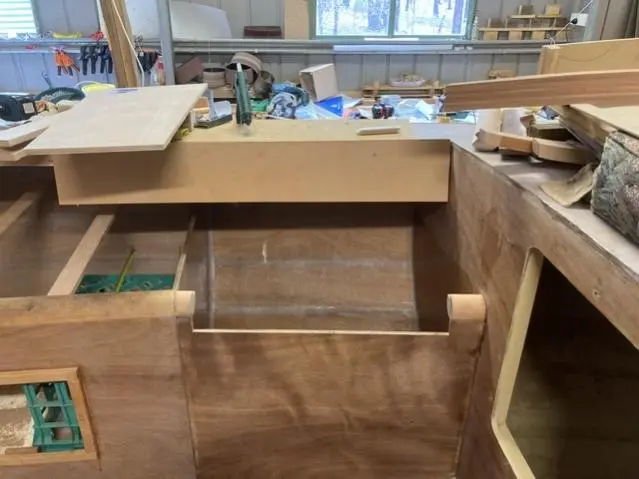
Time for an update I think cos engine stuff is slowed waiting for bits. I’ve started constructing the cockpit lockers so that the fuel tank has a home and the engine control lever gets fitted into the opposite locker on port side.
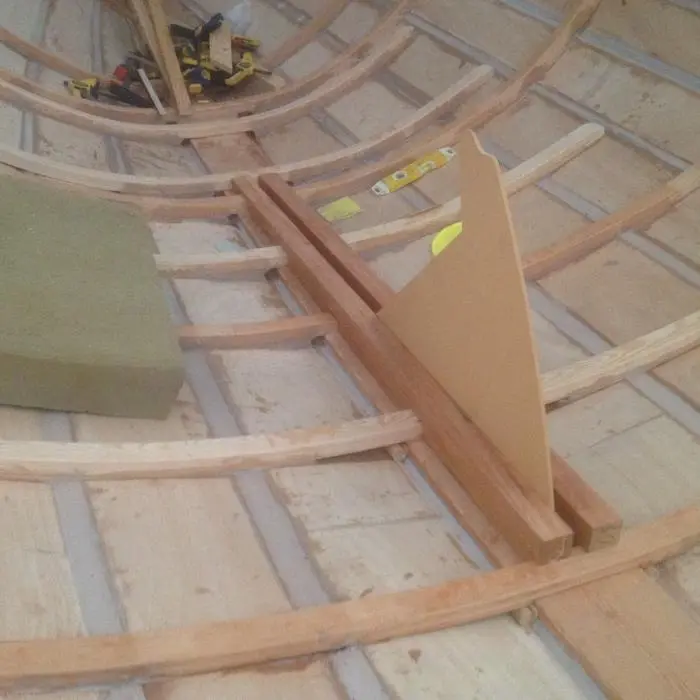
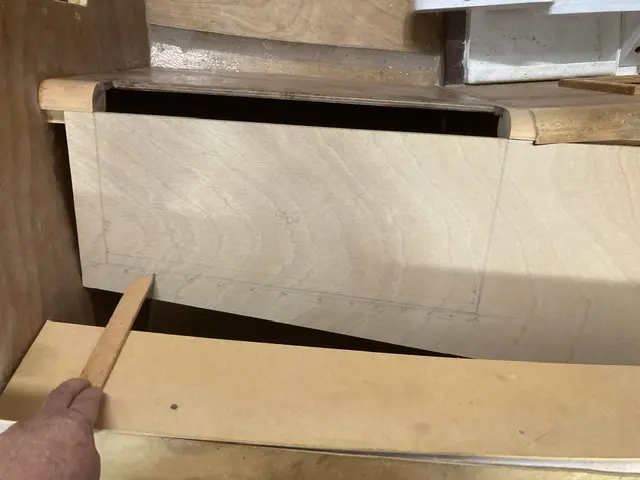
this is the starboard locker with a piece of MDF screwed onto side deck Carlin at the angle of seat back which also curves in planview. I had to project the angle of the future 12mm sea back down to seat level so I cut a pointer stick of a thickness which gave the line of front surface so that I could plan where the rear hinged lip of locker lid goes.
I think on the above pic you may be able to see the lines of lid.
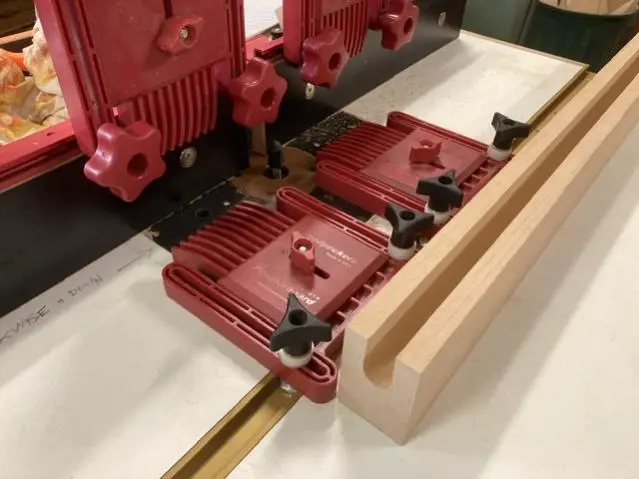
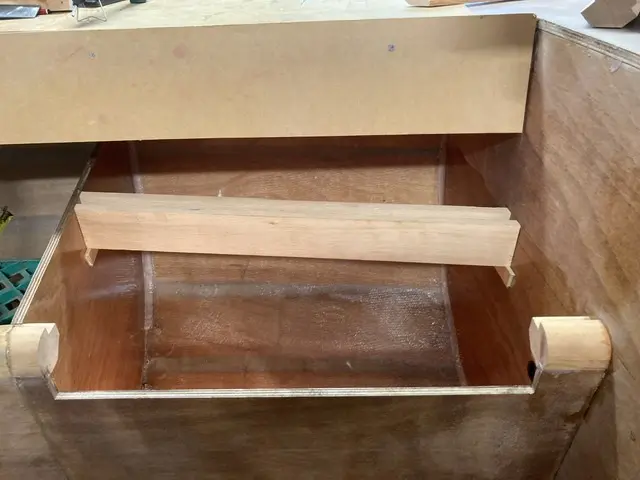
Now onto making the drainage channel for rear outboard of lid. Done as you see with use of router table. This piece is to be fitted between two bulkheads and will glued in with support blocks as well.
Photo 1 Photo 2 Photo 3 Photo 4 Photo 5
10 Jun 2021Deck & Coamings
I think 6 months is time to put up some more pictures.
I think 6 months is time to put up some more pictures.
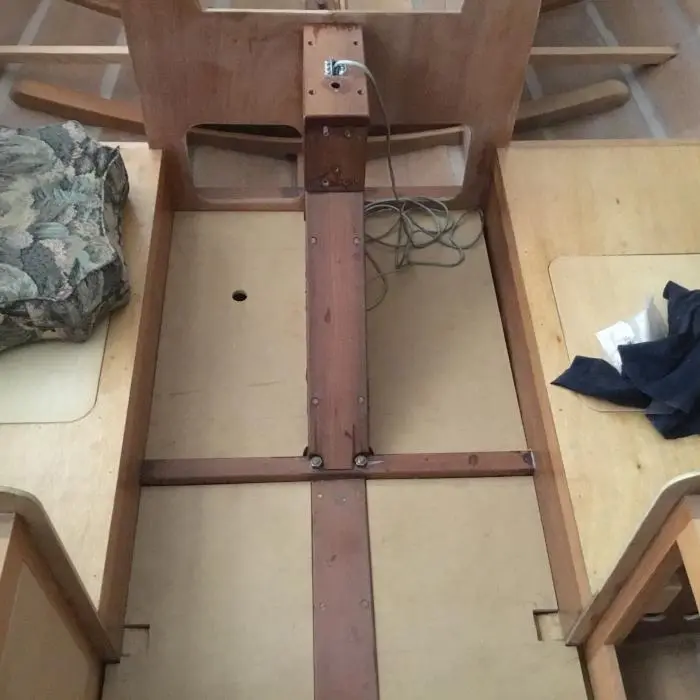
an overhead of cockpit today. I’ve drilled for cockpit drains and epoxied in two Tru Design outlets (at left of pic) Just to the right of centre is a riser from the aft portion to bridgedeck (on right). I’m not far off putting engine in for good, just doing as much of the beams as poss so I don’t fill the engine with sawdust!
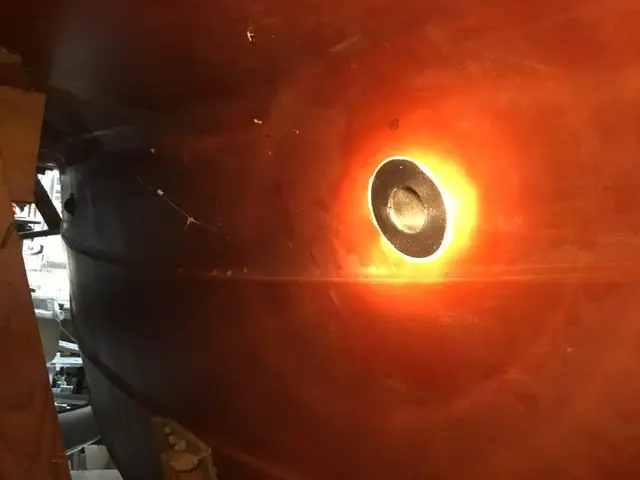
This is under hull showing through-hull that has a counterbored hole through ply and fitting glued in with epoxy and nut tightened inside. I’ll be fitting hosetails inside and I’ve decided to go with crossed drain hoses.
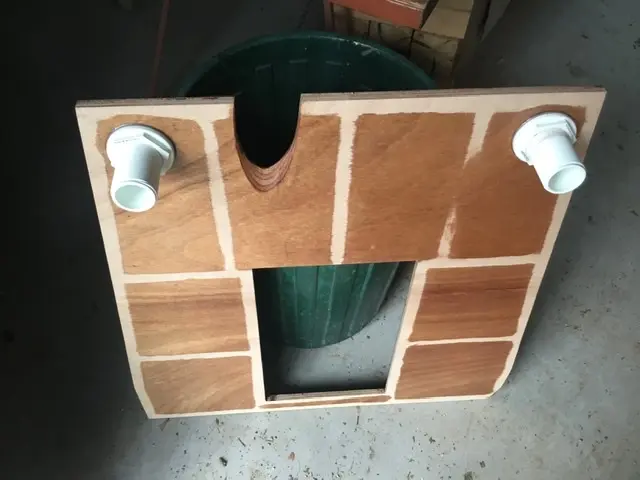
This is the cockpit sole showing drains . Ready for painting and also a gearbox control cable to be fitted first before install. That scallop is for exhaust hose where it rises high enough to go through bulkhead/sole on its journey.
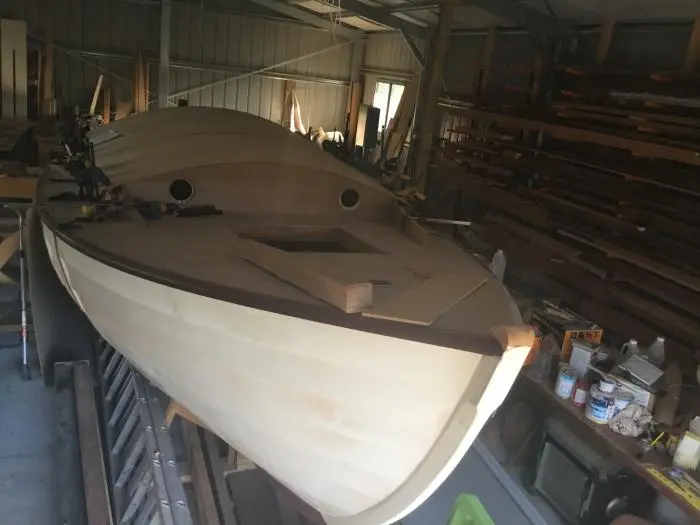
A couple shots showing forehatch. I used a drawer-lock mitre bit on router table to do the hatch and it’s coaming through deck. All covered in dynel and filleted ready for a slathering of filler to smooth it. Laying to right of hatch is the Sampson post almost in its position, I just have to find the piece of bronze rod so I can drill it.
I’m currently working on handrails for cabin top. Seems I have about a dozen jobs on the go at once but I spose that’s boat building once you have a hull.
See y’all next time………
Photo 1 Photo 2 Photo 3 Photo 4 Photo 5
22 Apr 2022Deck & Coamings
I thought it’s perhaps time I put up some photos so youse don’t think I gone and croaked.
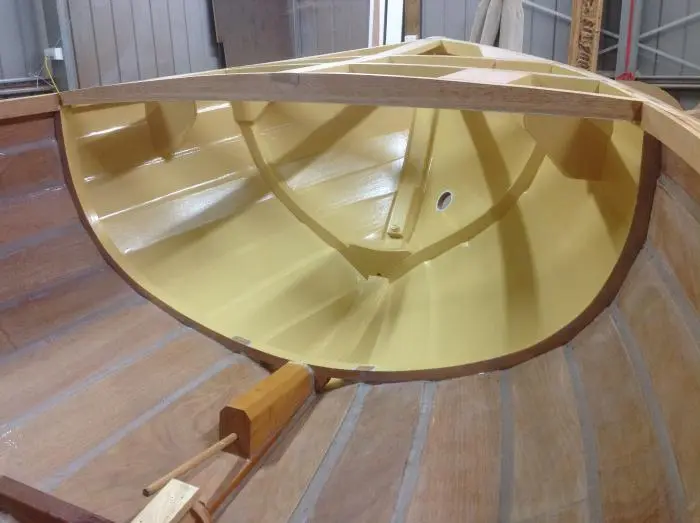
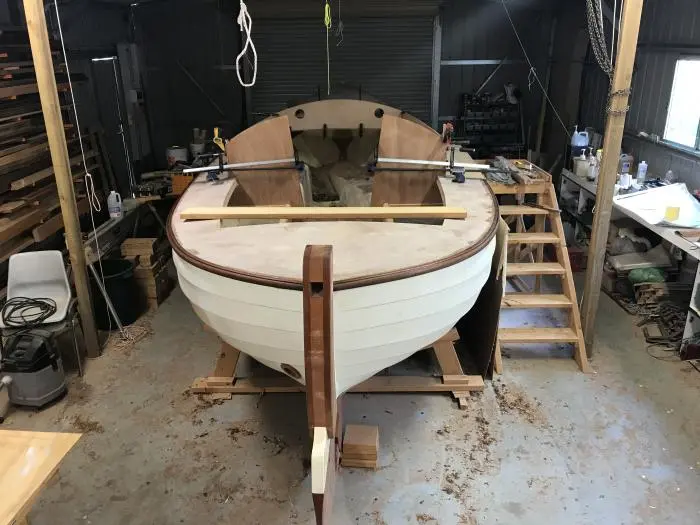
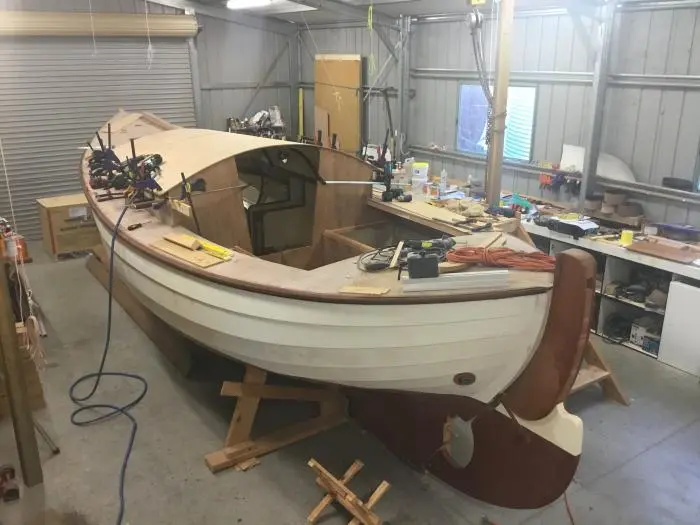
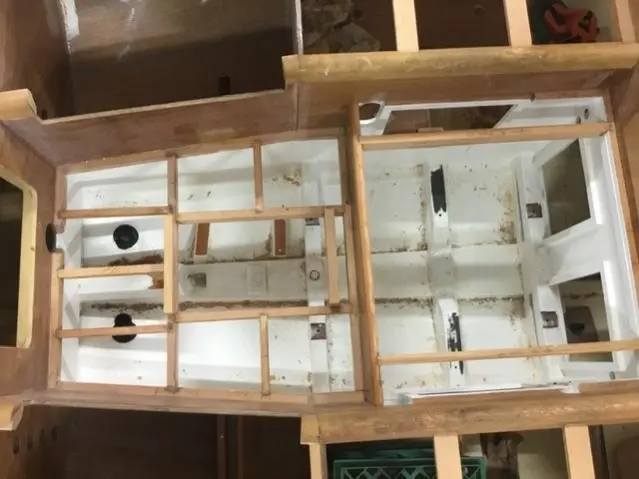
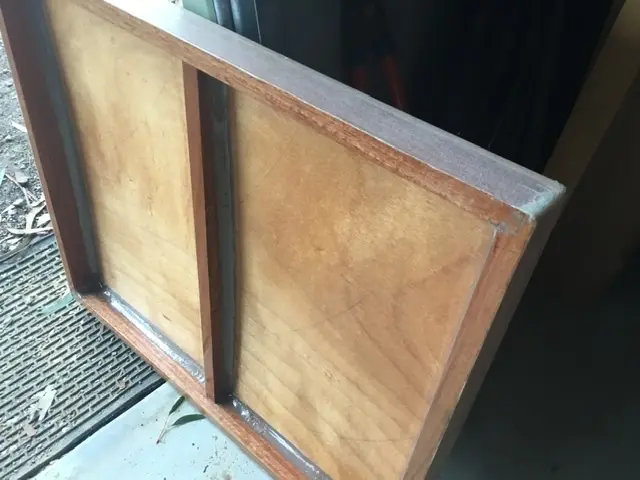
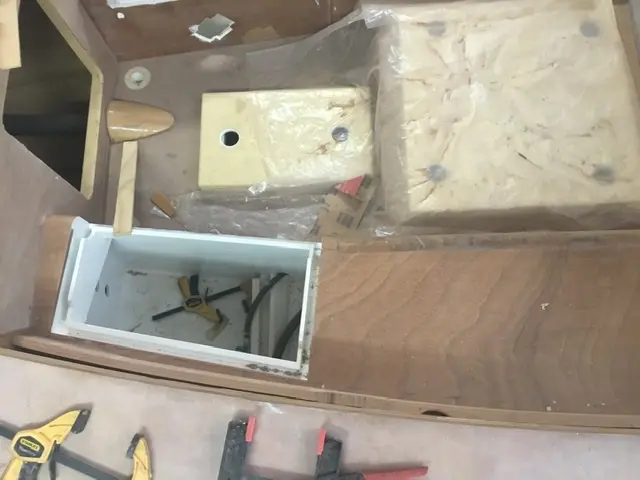
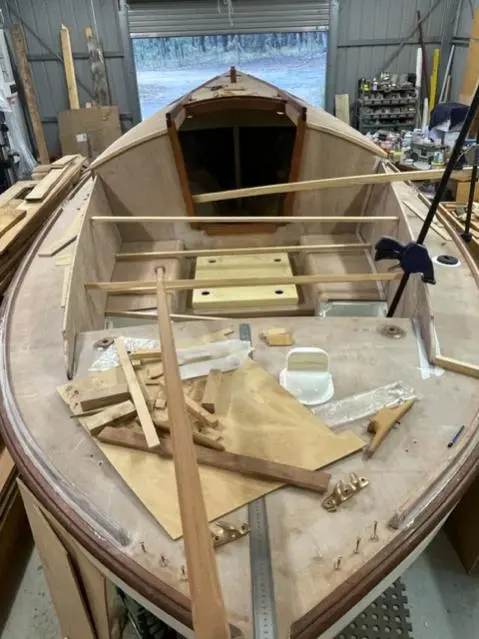
i thought it’s perhaps time I put up some photos so youse don’t think I gone and croaked. This shot above is looking down into cockpit, white cavity bottom left is cockpit locker, two cream coloured hatches are for engine and stern gear. Opening on left is the lazarette hatchway.
Next is the aft deck and sun lounge area with tiller in place and toe rails dry fitted with mooring fairleads. You’ll have to excuse the mess, it’s how I work, I only clean up when I get sick of trying to find things.
this is the main companionway sliding hatch about half done waiting for trim bits. Companionway is also under construction, like just about everything else.
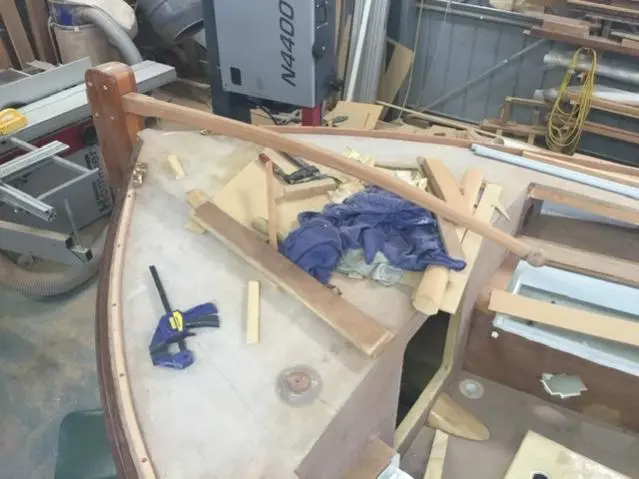
Here is the front porch where there’s a post sticking up in the middle of the floor and a hatch to the cellar. Also these toe rails are actually glued on but now waiting for plugs.
that’s about it so I’ll be back when I’ve done some more bits and bobs, actually any one who’s built a boat prob knows how it is , about a hundred small processes going no-where quick, at least that’s how it is in my shed.
Im off to Italy for 2 1/2 months so the pace will be even slower.
see ya all.
Photo 1 Photo 2 Photo 3 Photo 4
10 Apr 2023Deck & Coamings
Thought I’d better post some pictures of my miserly progress ( getting better recently)
Thought I’d better post some pictures of my miserly progress ( getting better recently)
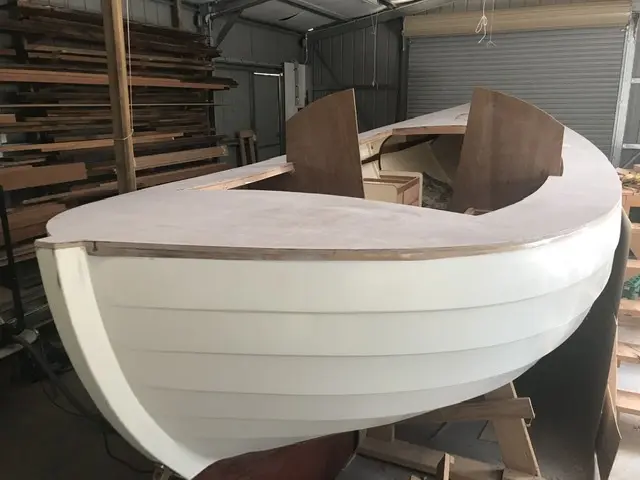
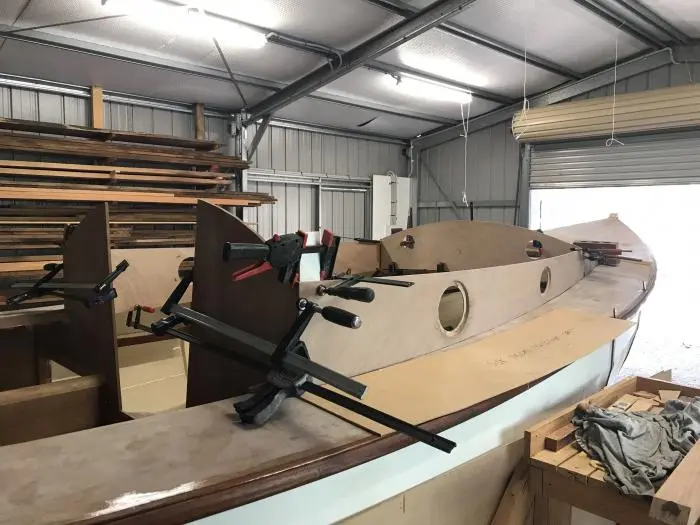
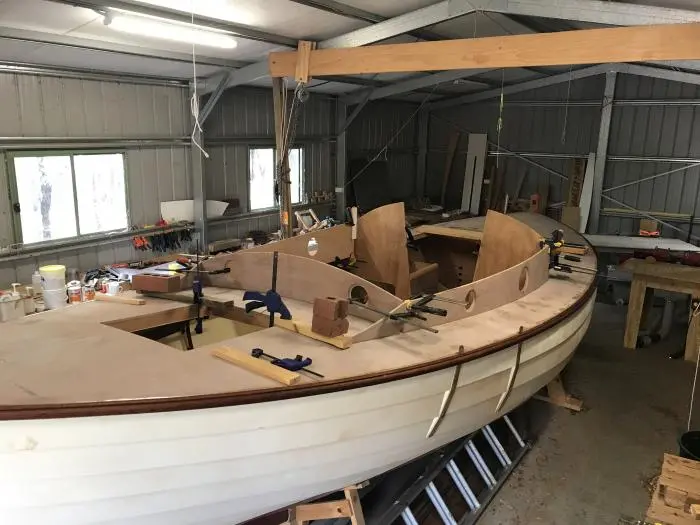
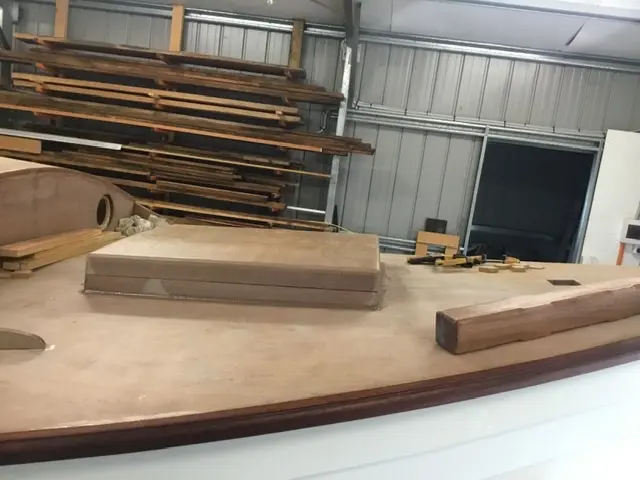
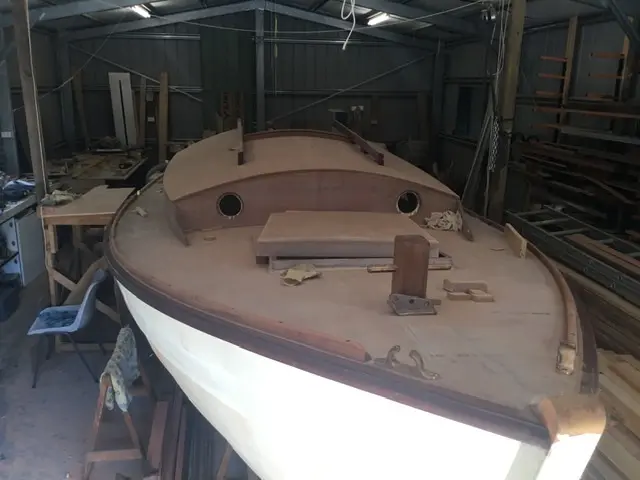
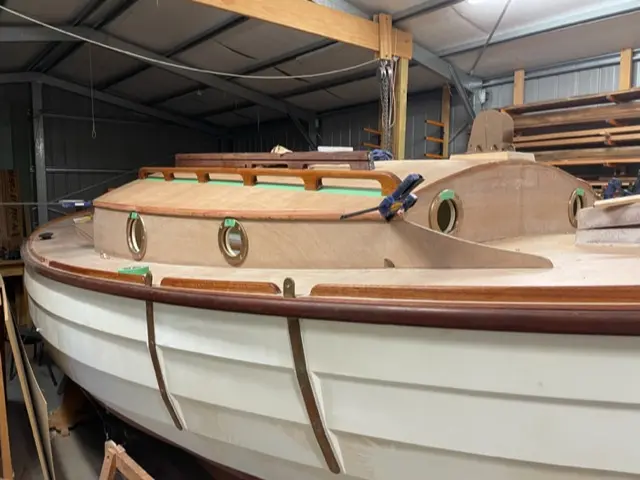
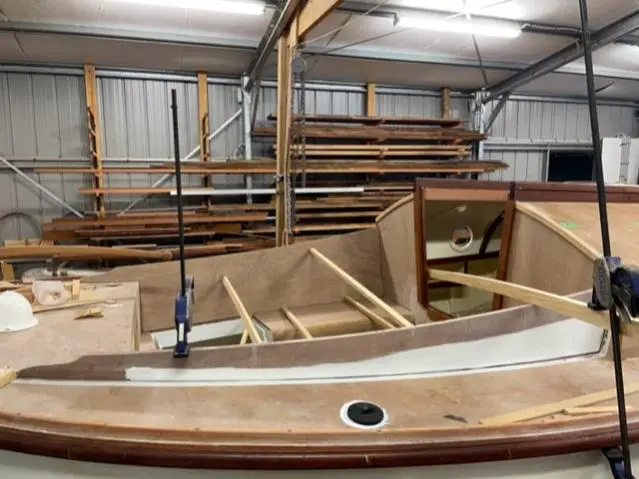
Above picture shows cabin getting towards done, top dynel’d, hand rails and portholes (recognise those Ian) dry fitted.
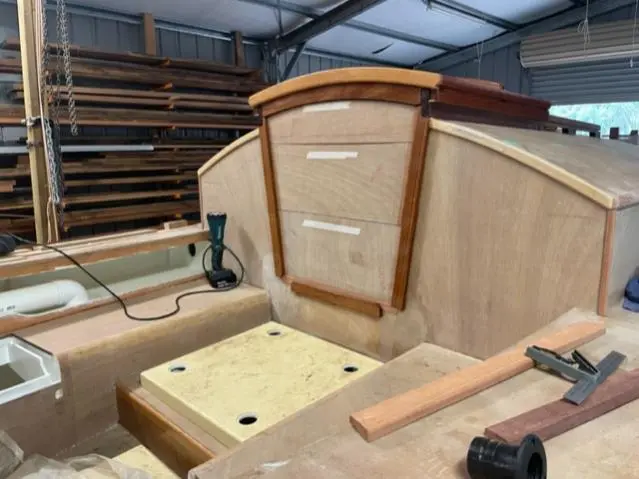
around the back side I’ve made the companionway drop-boards and main hatch
in the cockpit I’ve, today, fitted and glued in the last major piece of plywood for the build, namely the sbd seatback.
Does that qualify for a whiskey?
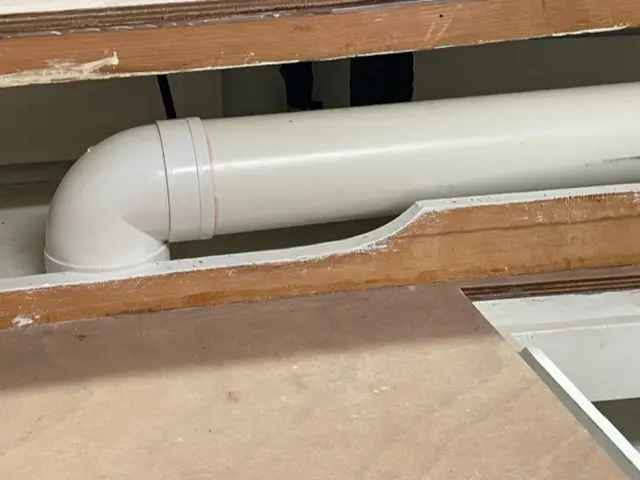
the black circular thing in foreground is deisel fill. I’ve got to finish the rails that go along top of coamings that’s why they’re only half painted. I extended the paint from below where I’ve enclosed the breathing aparutus for engine. That’s the pipe in this next picture, which connects a duct from engine bay to the lazarette so that hot air can be expelled, at least that’s the idea! In the cabin I have two panels with vents to draw in cool air from bilges., in front of engine either side of centre case.
Photo 1 Photo 2 Photo 3 Photo 4 Photo 5
29 Jun 2026Deck & Coamings
Time to get going again on this build.
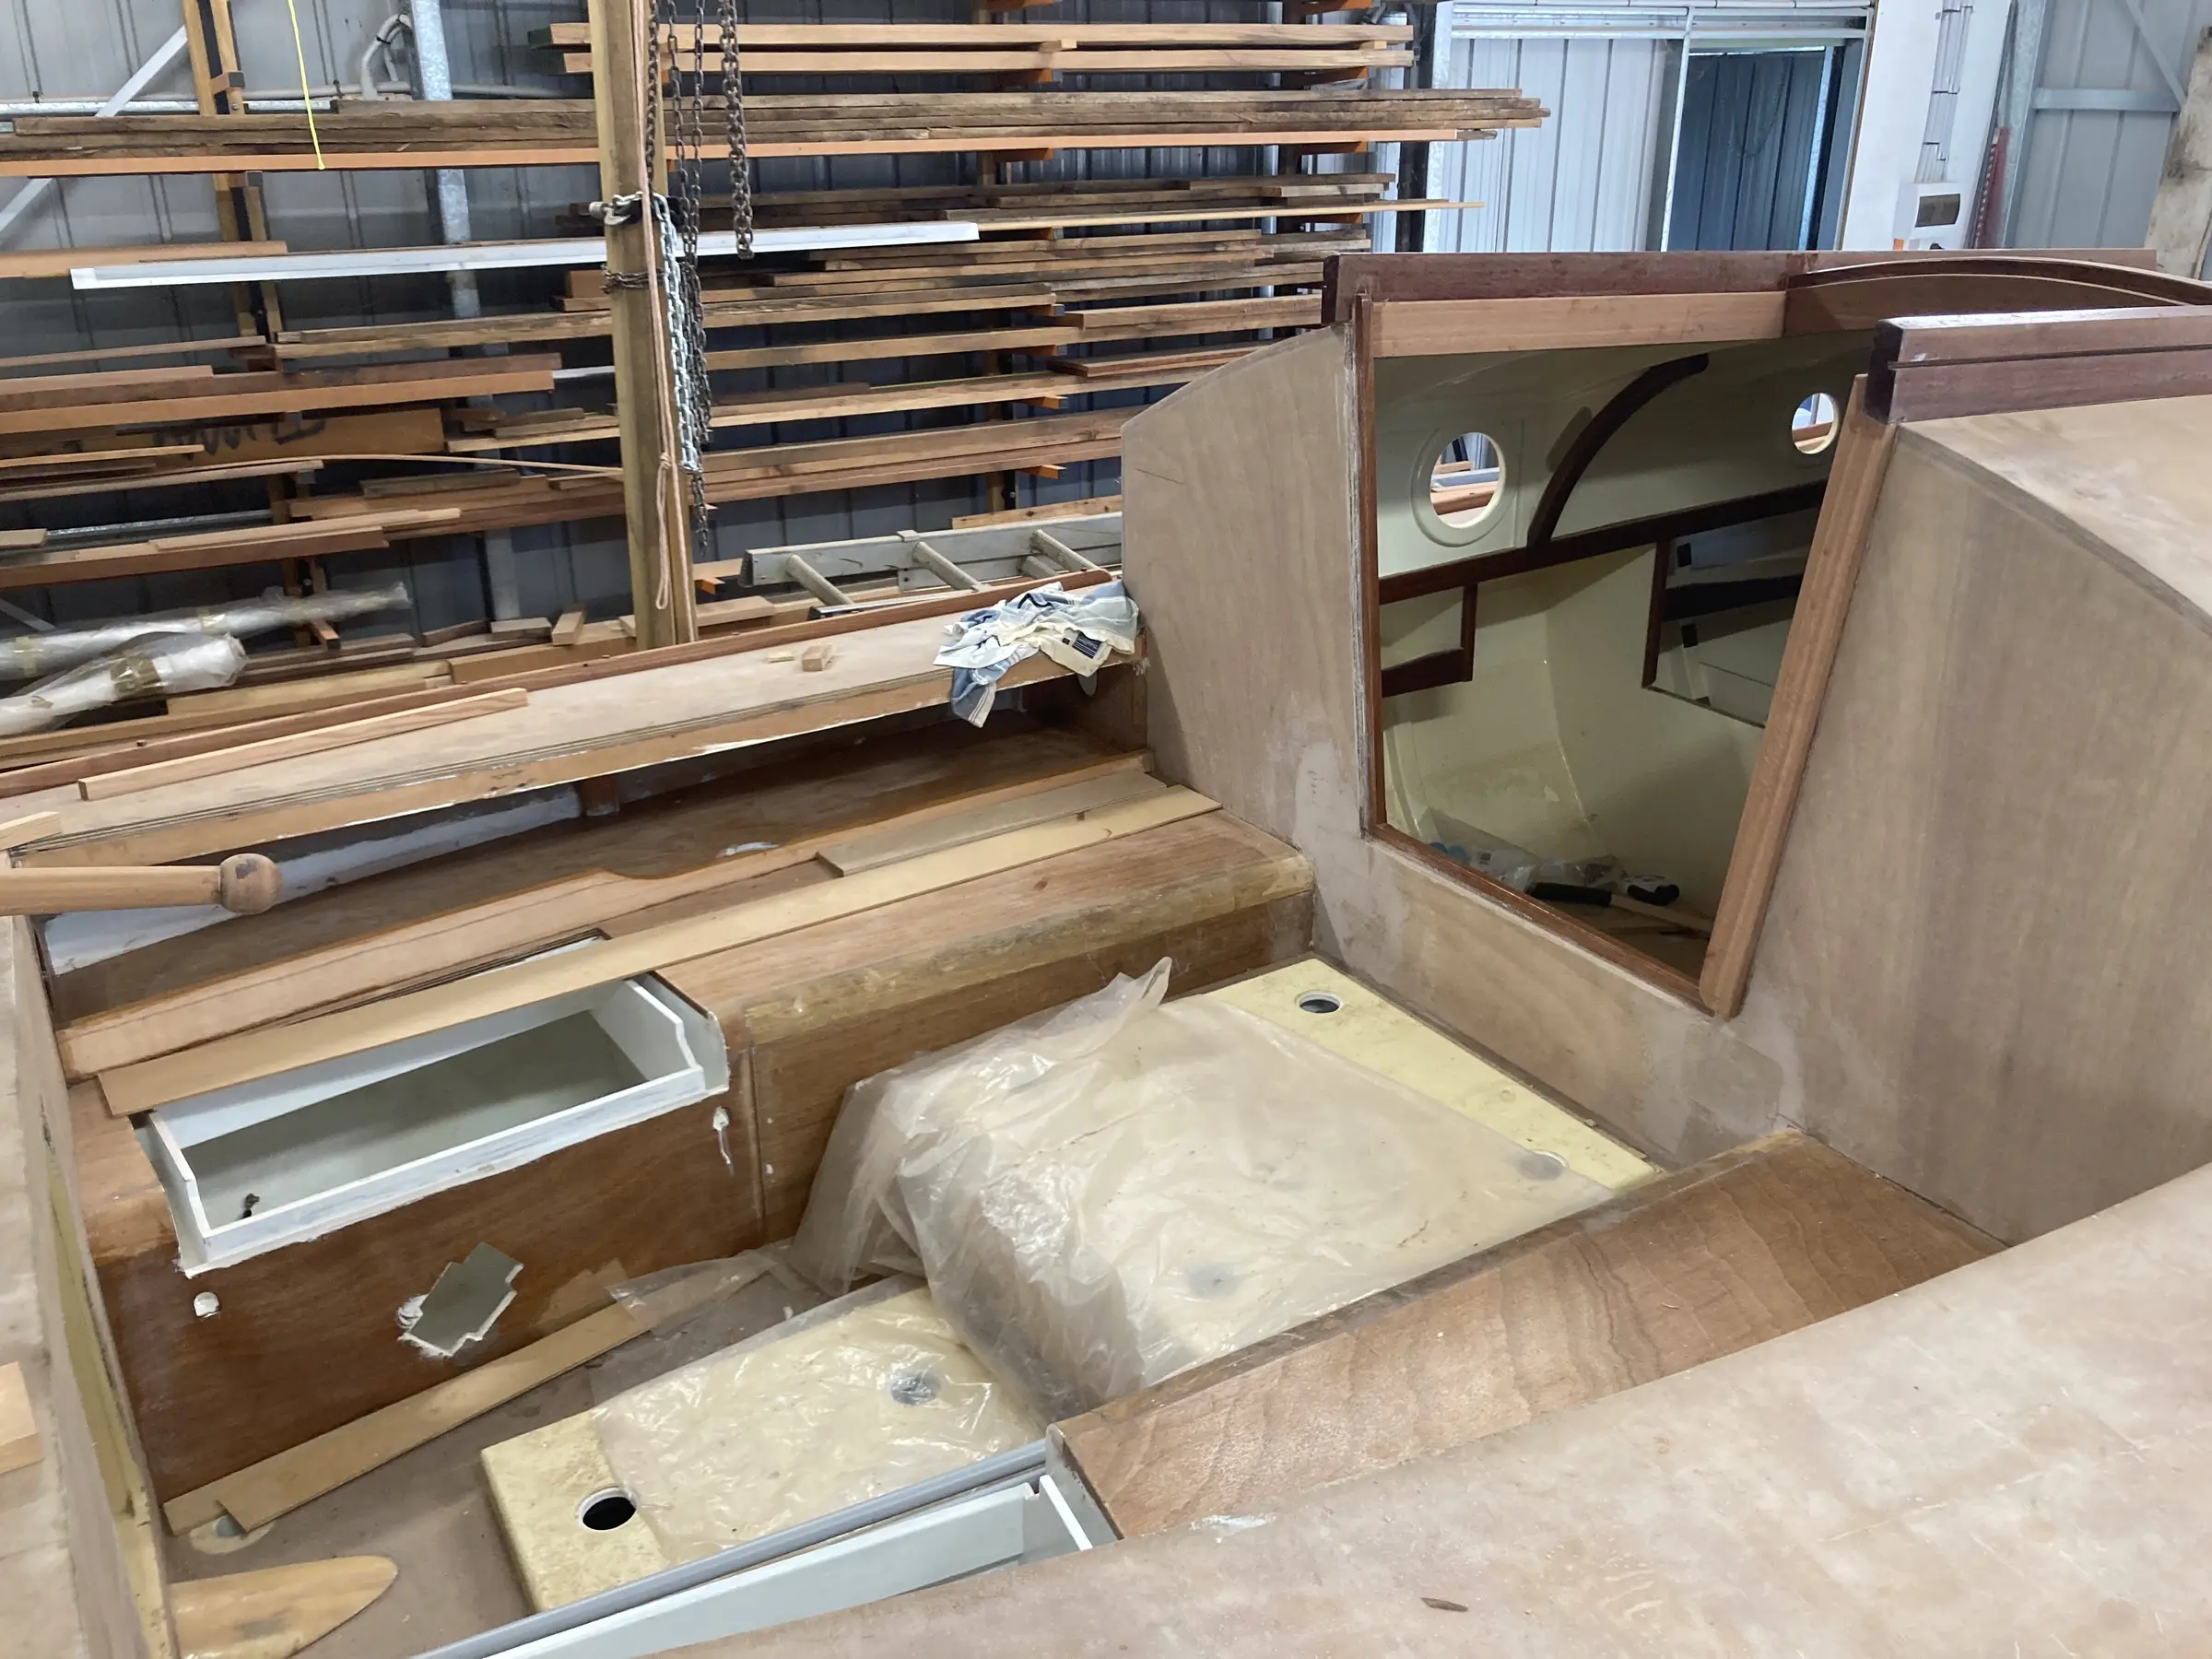
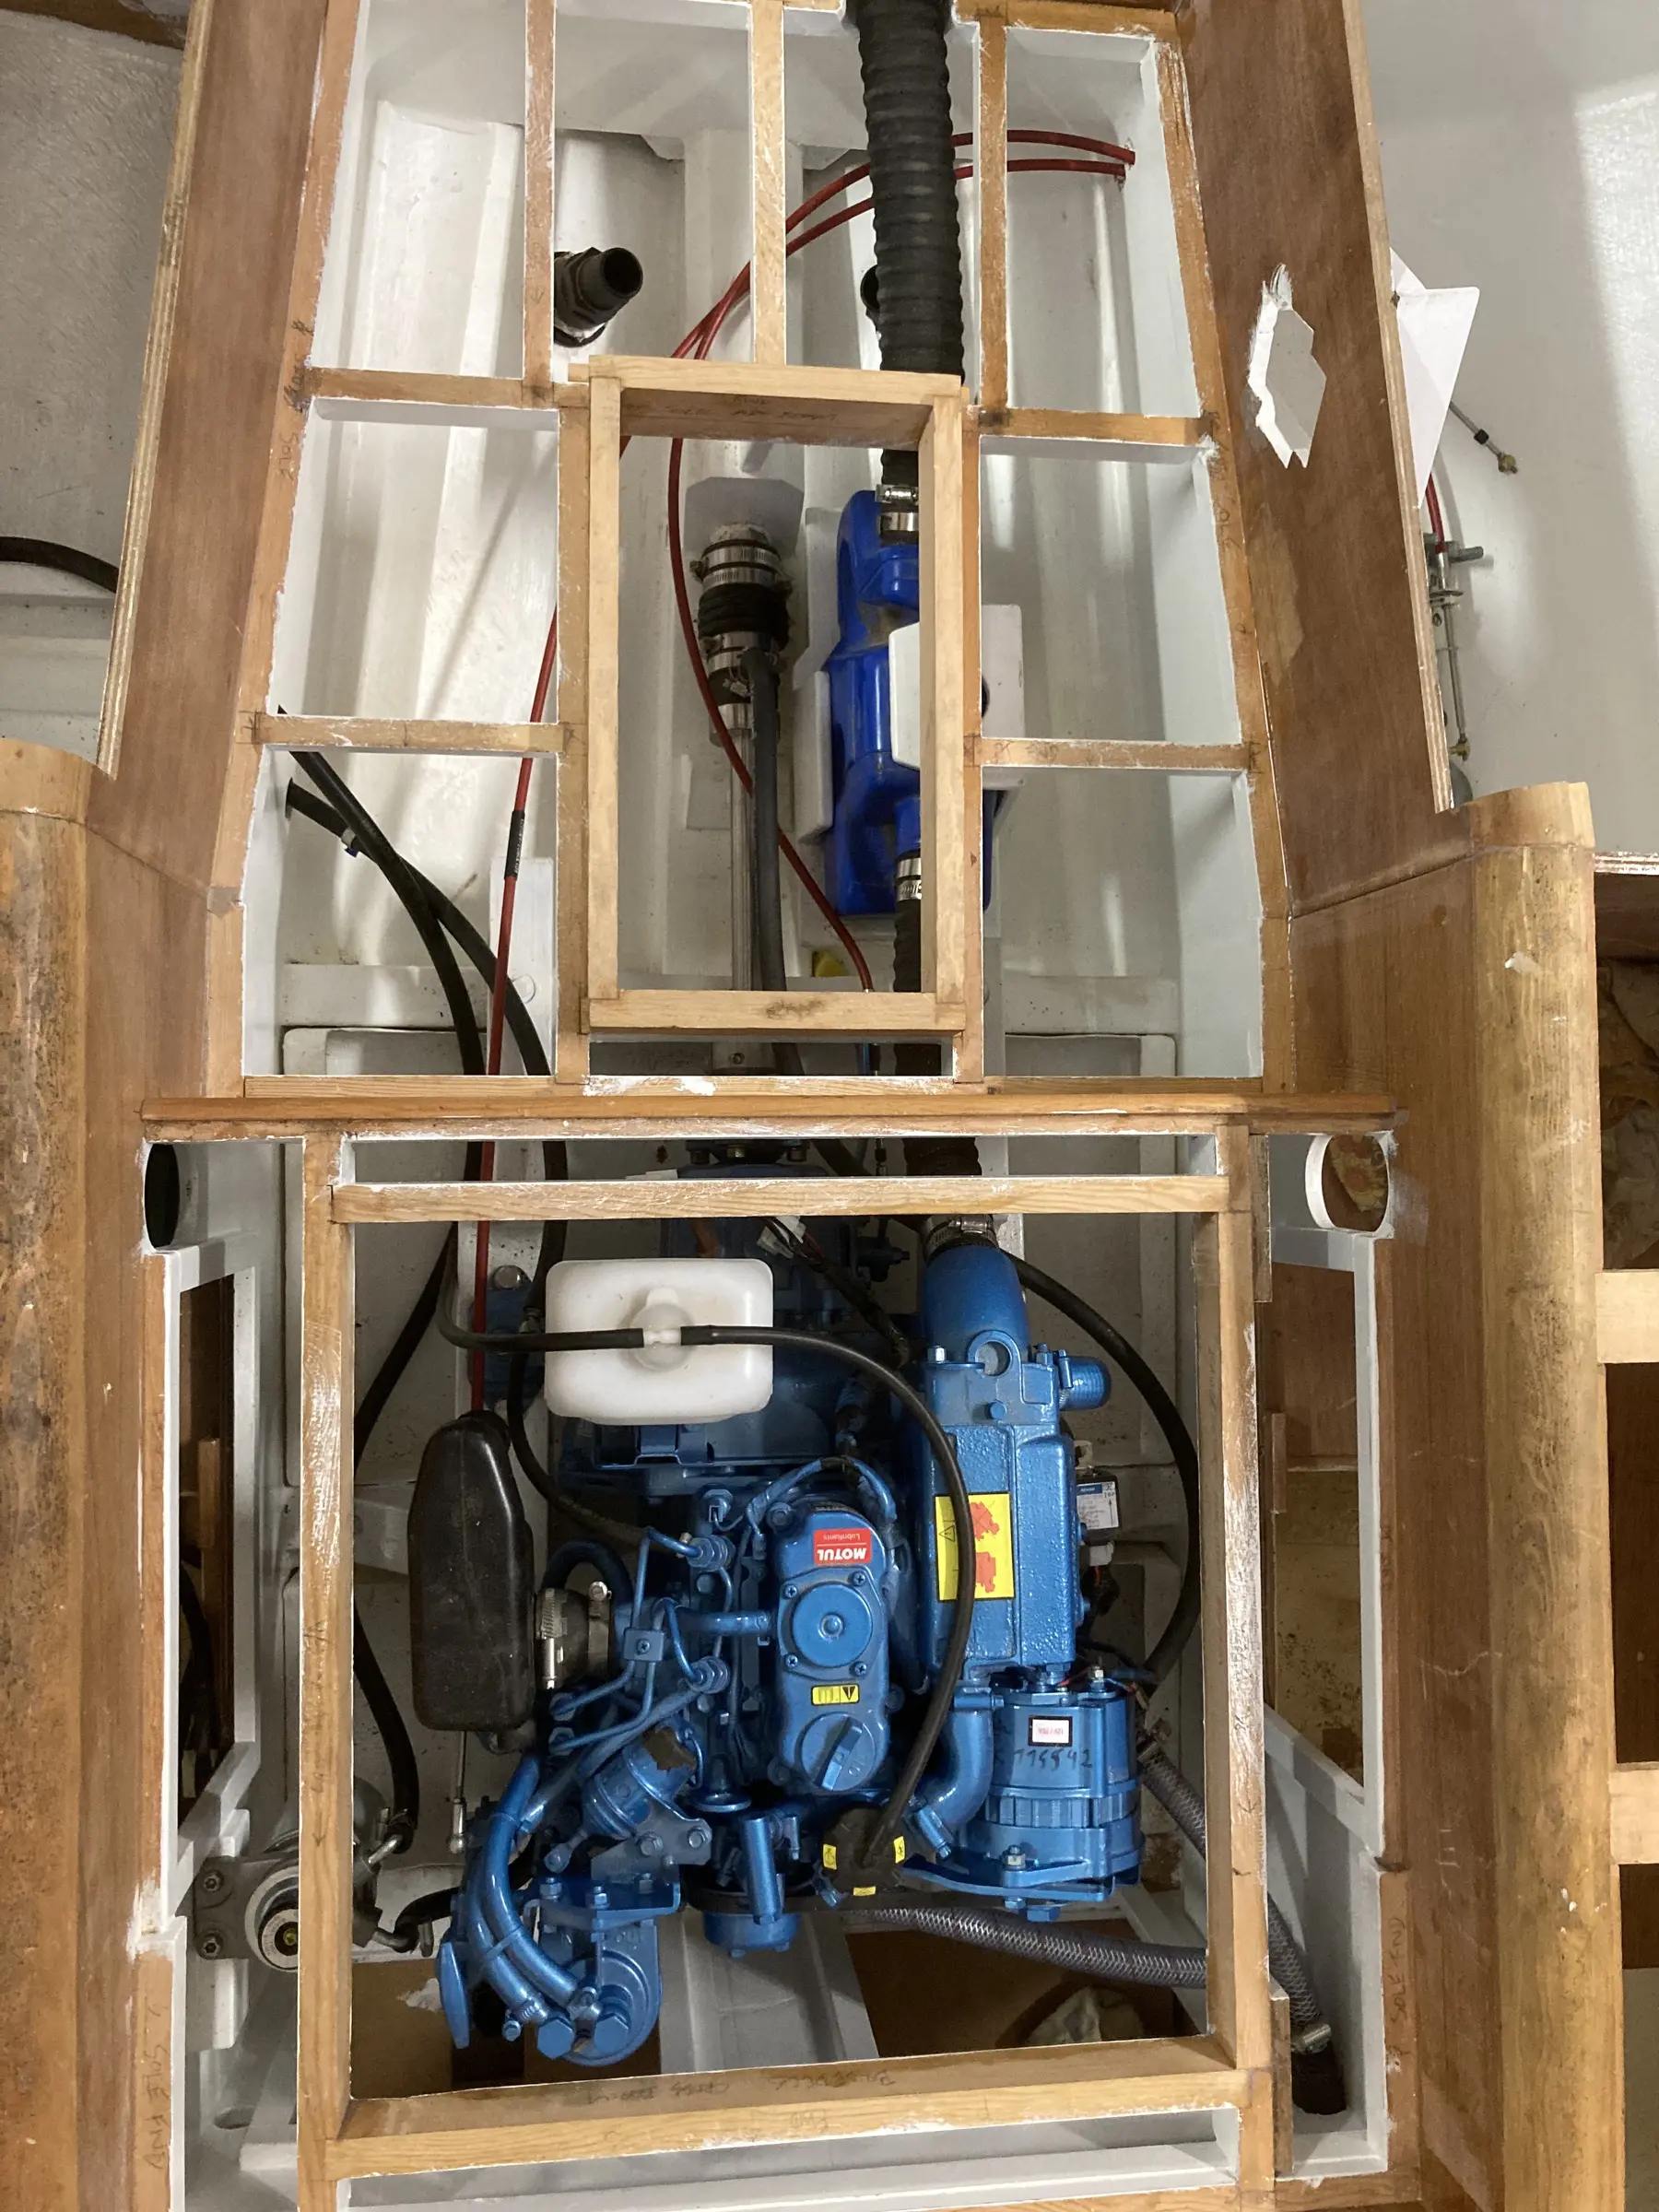
Time to get going again on this build. But first I have some rebuilding to do. I mistakenly thought “she’ll be right” with regard to cockpit drains and omitted ball valves on thru-hulls but now I’ve thought better of it. Prob is I’ve built in the cockpit sole wth a small (about 10” x 15”) hatch in it. So working on the innards takes some doing with only one of my arms or an eye to gain access. First order of business is to make the hatch bigger. the larger hatch covers the engine
this is a picture of framing showing the thruhulls, exhaust muffler, and shaft seal etc.
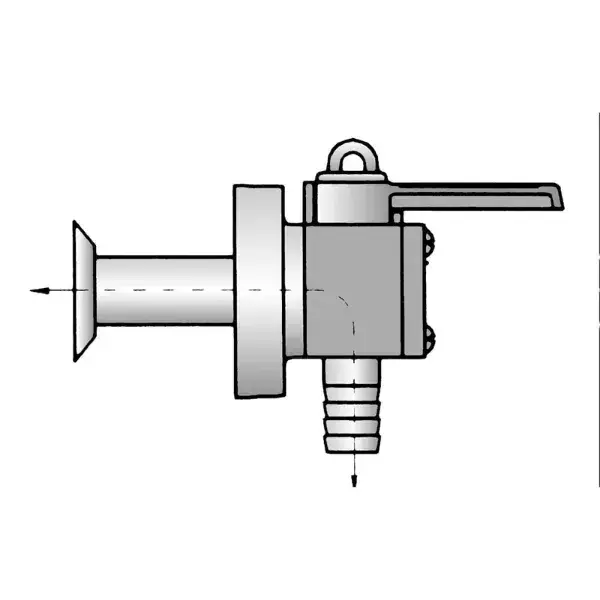
plan is, after making hatch bigger, to get that muffler out which I made a bracket for that allows muffler to slide for/aft but it hits the thruhulls and so I can’t get it out, who’s a clever bunny! Then I’ll cut the throughhulls out (different thread than new ball valves). Here’s the new valve that I’m going to fit, hopefully. They are made by Forespar Marelon and have the inlet very low to the hull. The through hulls on new ball valves are a different thread and smaller diameter than Tru-design through hulls of same 1 1/2” diameter, go figure? So I have to holesaw out old epoxied in through hulls to install Marelon ones. That should be fun just on its own. By this stage I’m really tired just thinking about this f’ up
then new hoses to cockpit drains and put everything back together.
Stand back - I’m going in…..
l
Photo 1 Photo 2 Photo 3
Chapter 08
Paint & Finish
Primer, topcoat, bottom paint, boot stripe, lettering.
1 dayfrom September 2026
12 Sep 2026Paint & Finish
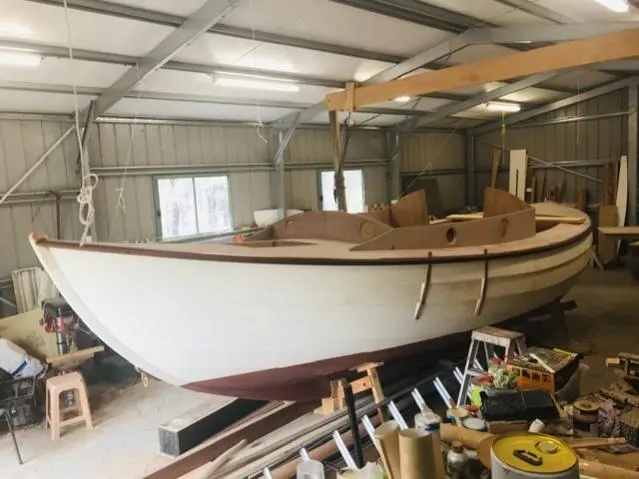
I started this build in 2012 and had a few stop/starts. Main things I have left to do are paint all decks/cabin/cockpit and build a mast. Then finish about a thousand small jobs. Meantime I’ve started another build, see Eland 36.
Photo 1 Photo 2 Photo 3
Matt
looking forward to seeing the finished boat!
boatbuildlog.com
Grey Seal
25 entries,
130 photographs,
written down as the work was done.
The words and photographs in this log belong to Andrew Donald.




looking forward to seeing the finished boat!