The book is laid out for the paper chosen above, and the print dialog will follow it,
so pick the paper here rather than there. Turn background graphics on
so the cover photograph prints, and leave margins at their default. The page numbers
and the chapter running heads are drawn by the browser into the page margins, so they
exist only on paper: check the print preview rather than this screen for them, and turn
Headers and footers off there so Chrome's own furniture does not crowd
them out. Chrome and Edge print them, Safari and Firefox print the same book without
them.
new build
Jersey Girl
Jersey Girl
Jim Norman · 2015 to 2025
A build log
Jersey Girl
Jersey Girl
kept by Jim Norman
2015 to 2025
The boat
Jersey Girl
Designer
Jim Norman
Length overall
20′ 0″ (6.1 m)
Beam
8′ 0″ (2.44 m)
Hull
plywood
Construction
plywood on frame
Started
6 June 2015
Built by
Jim Norman
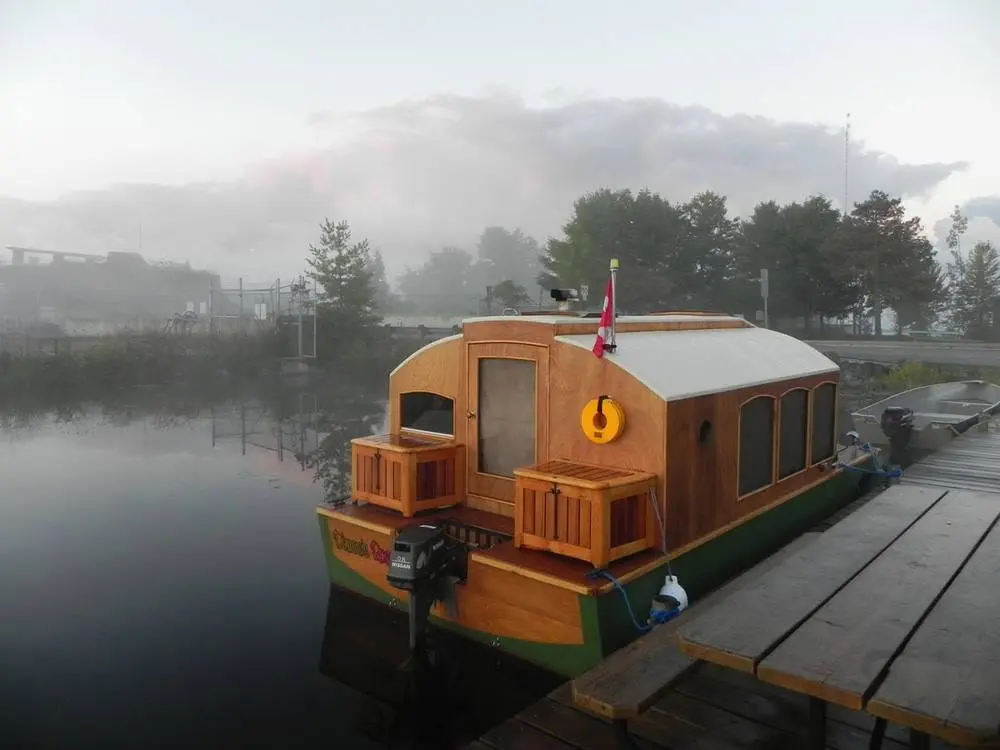
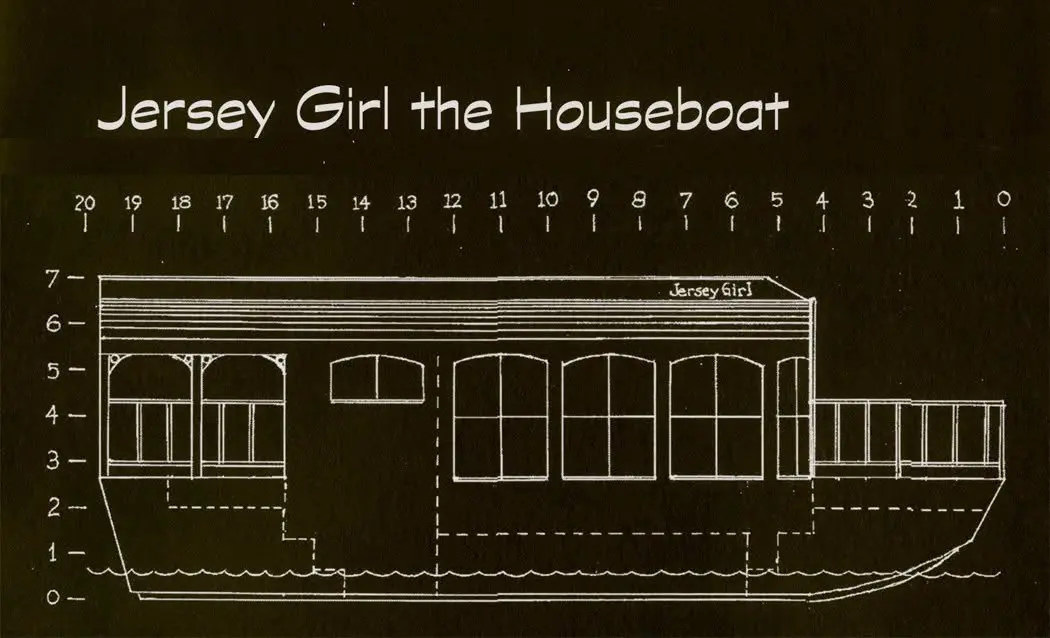
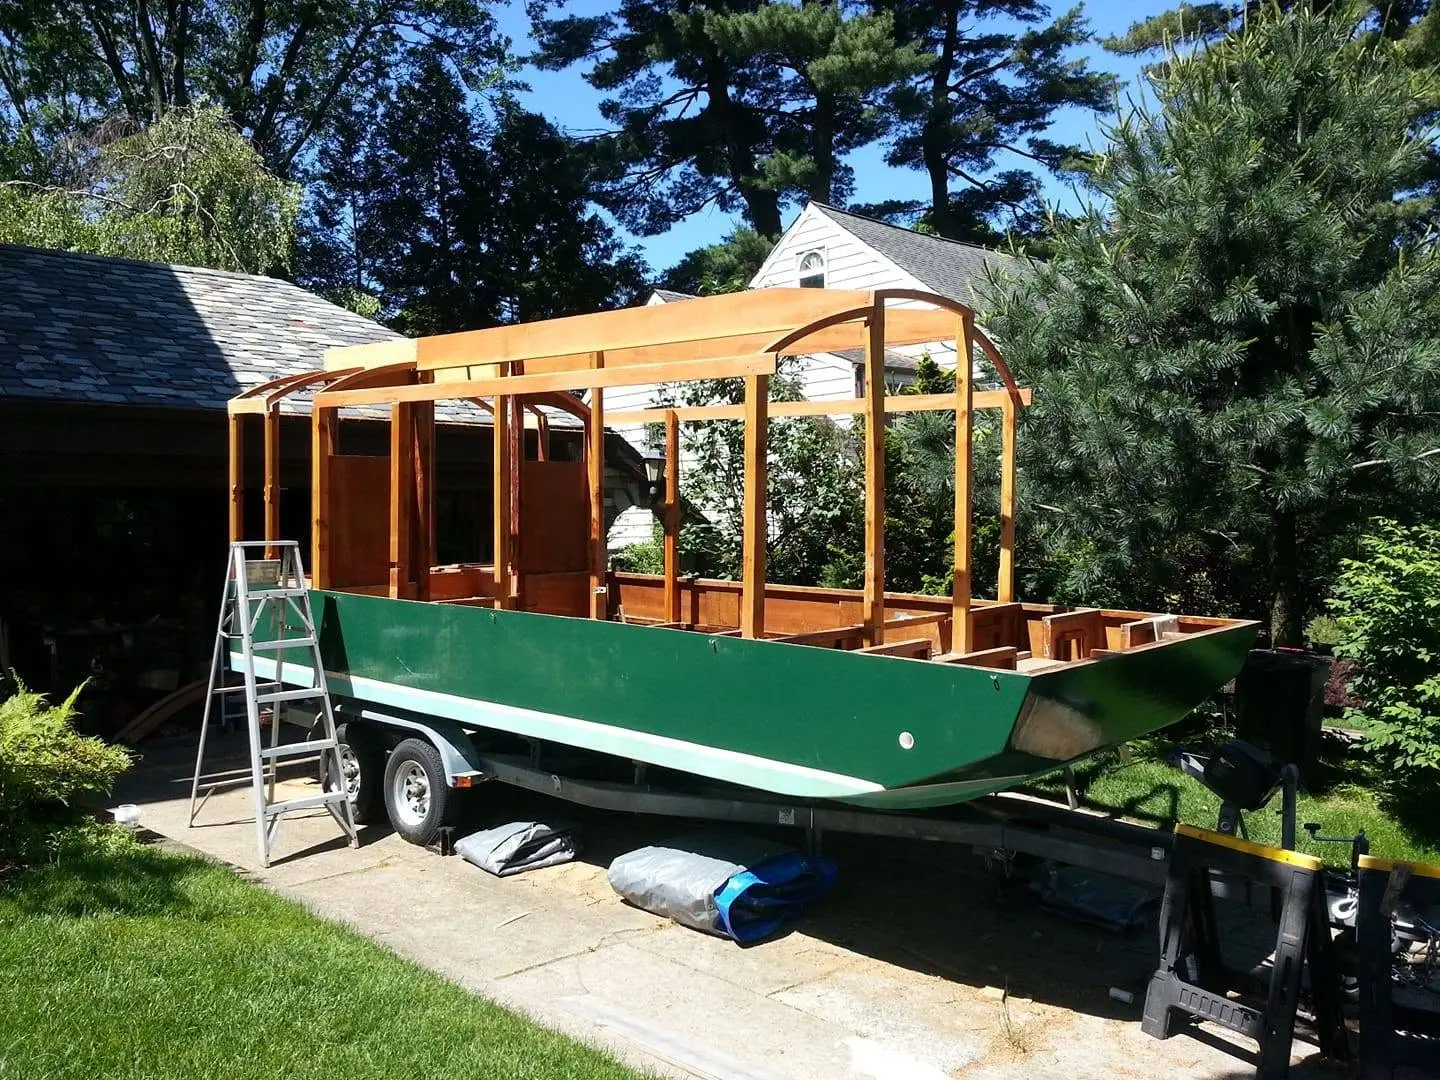
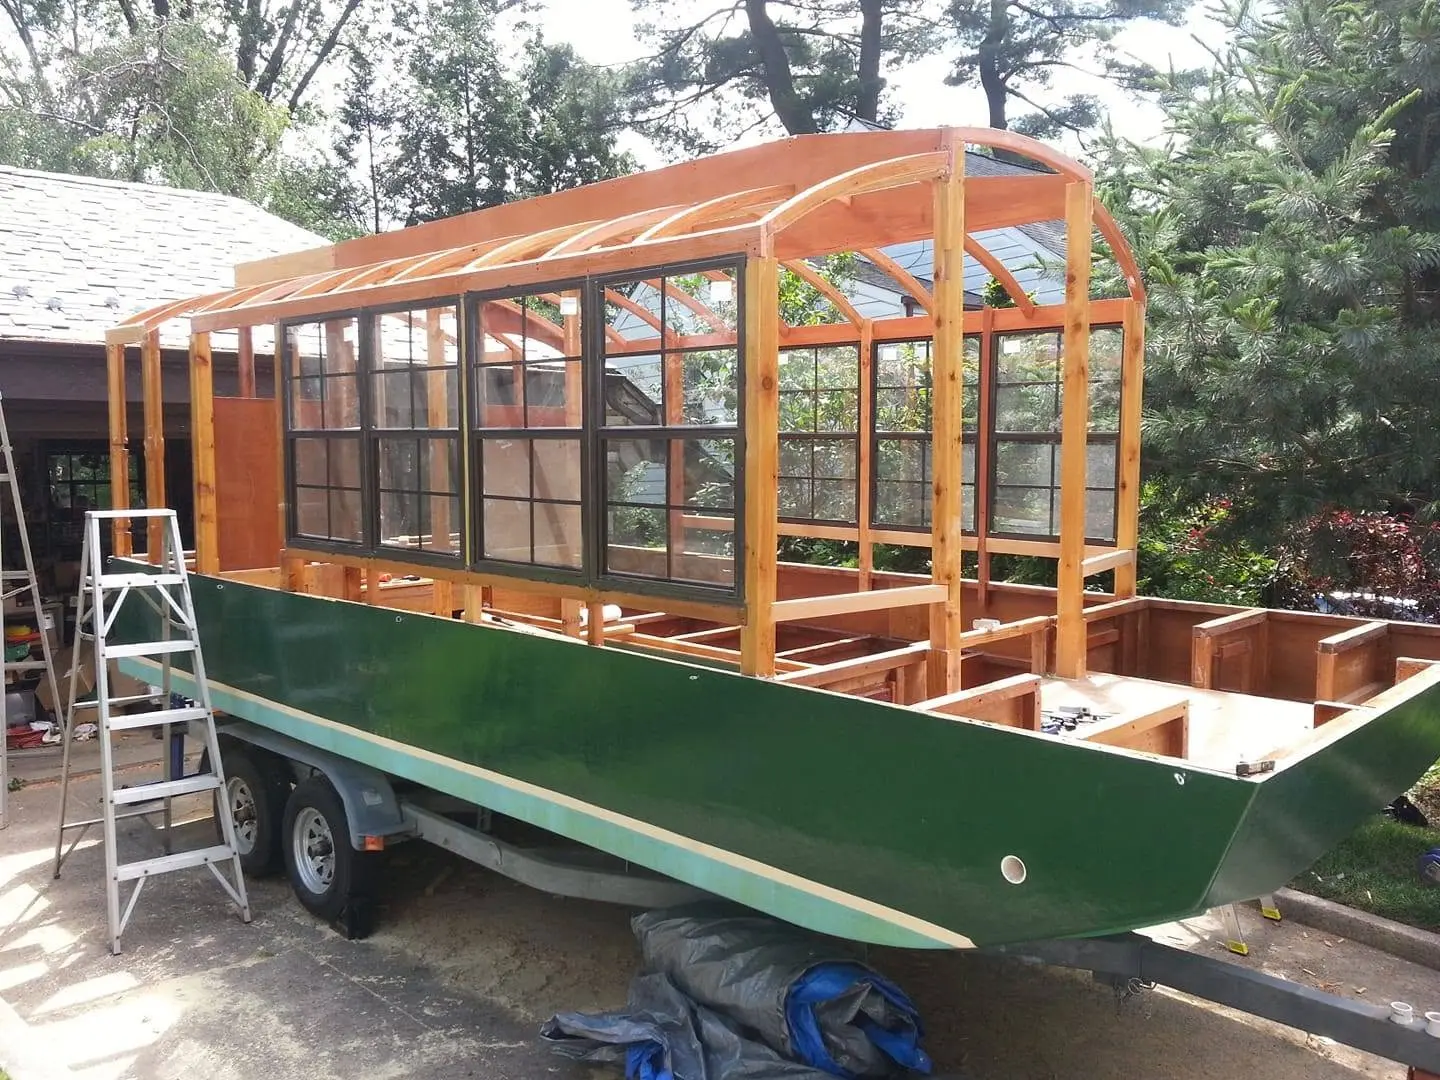
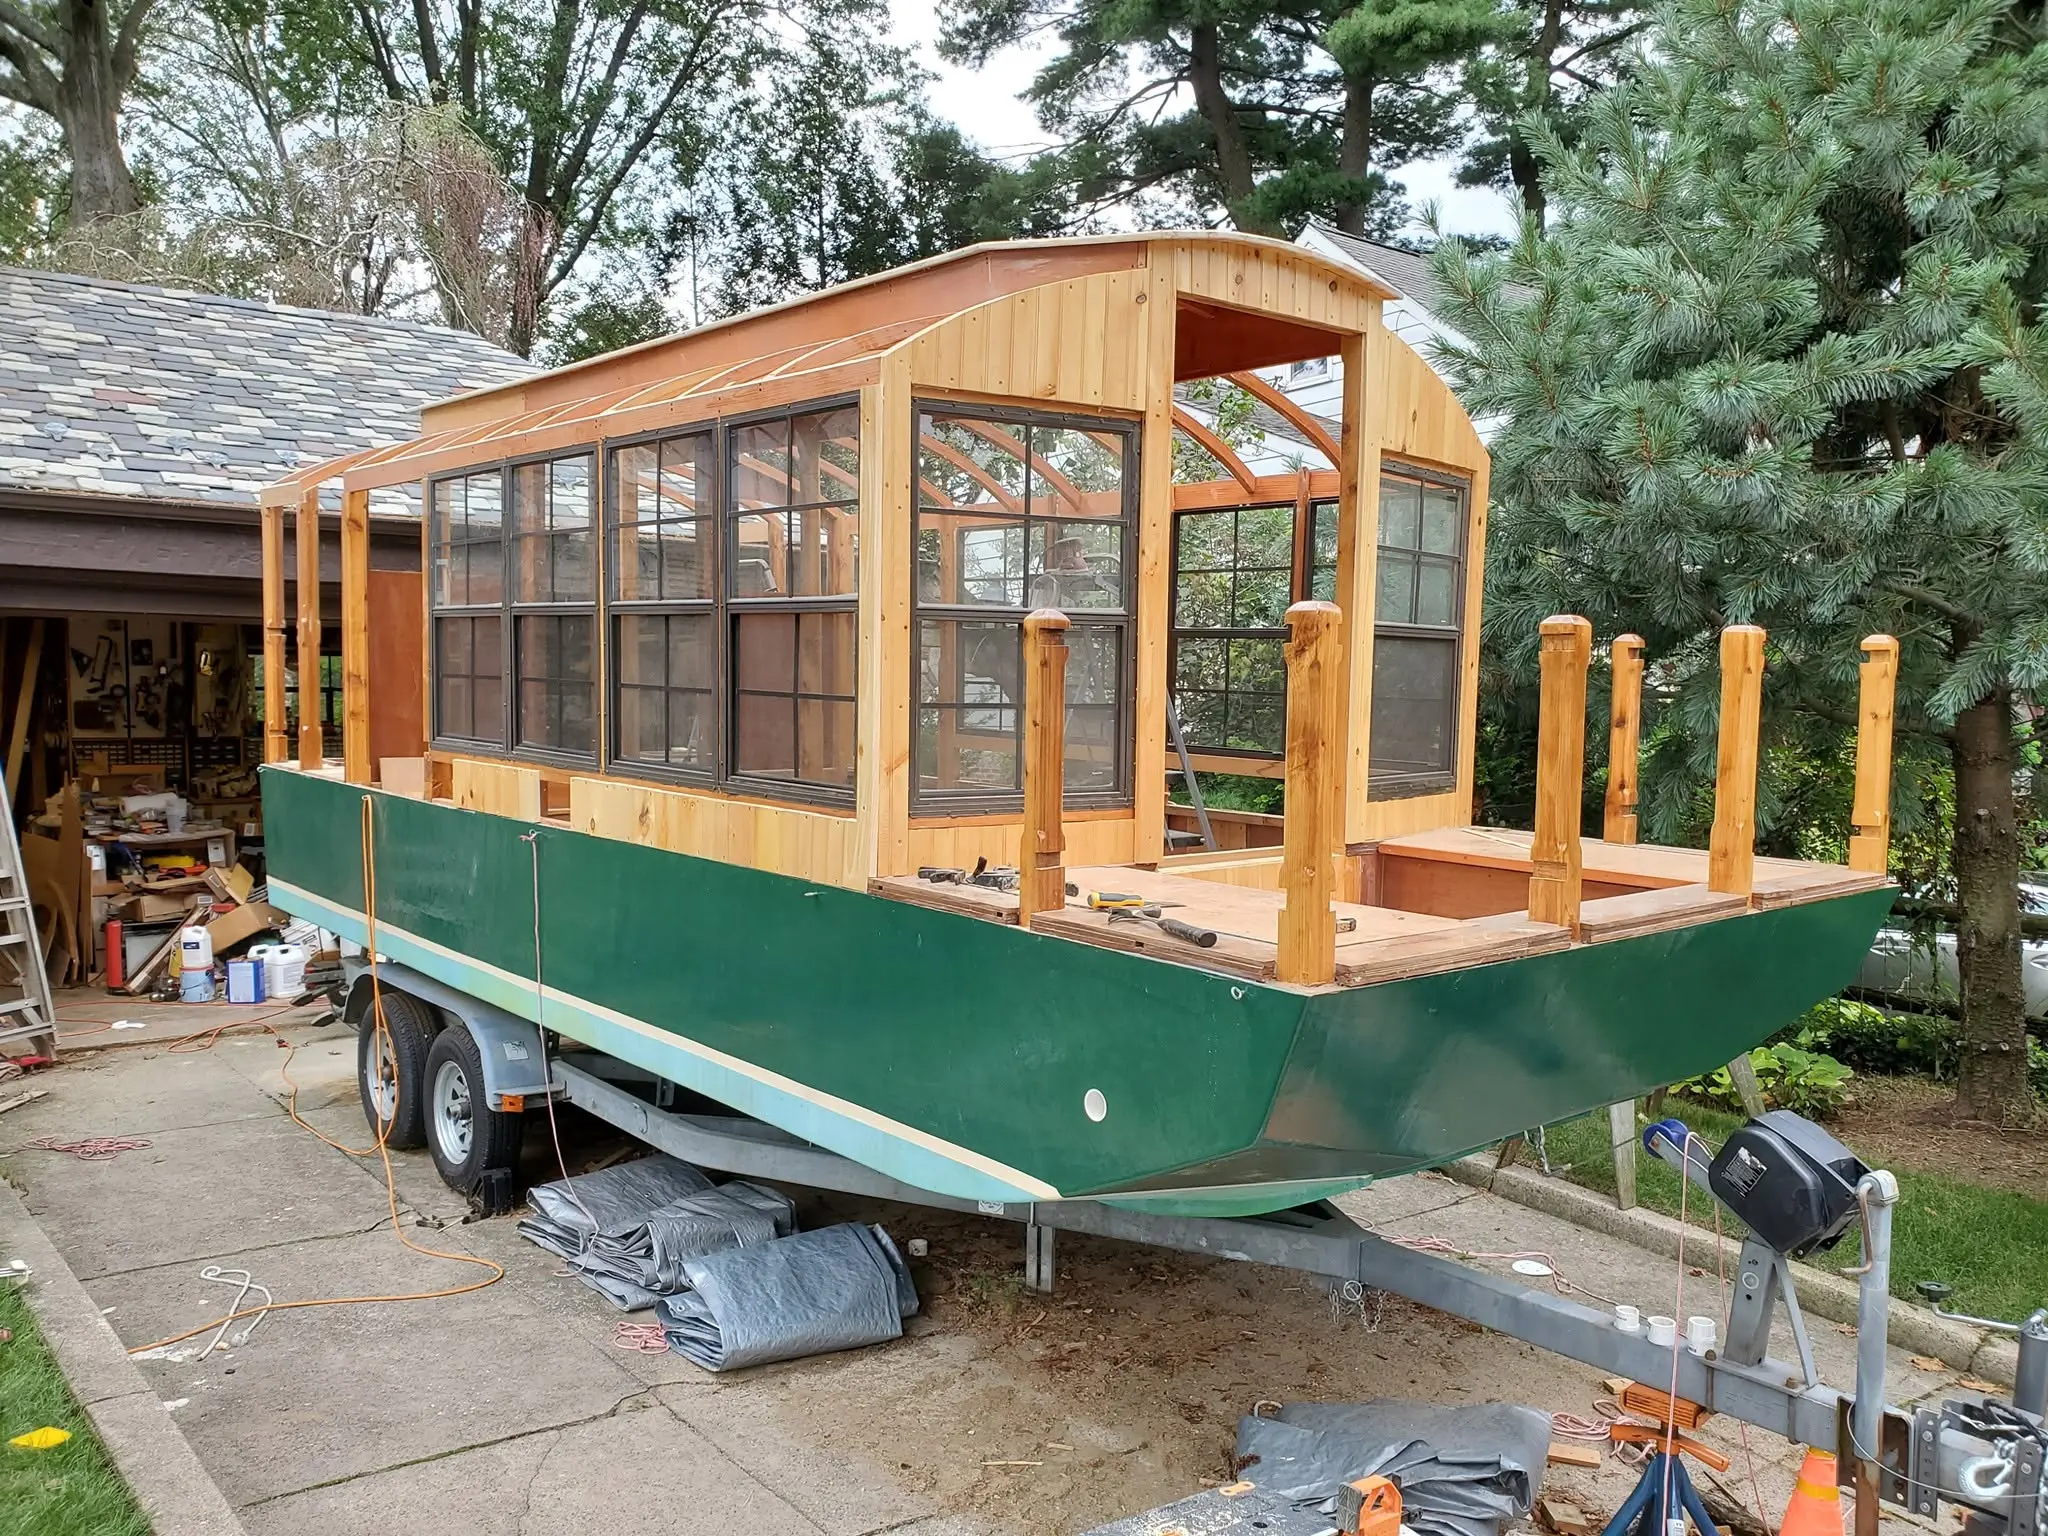
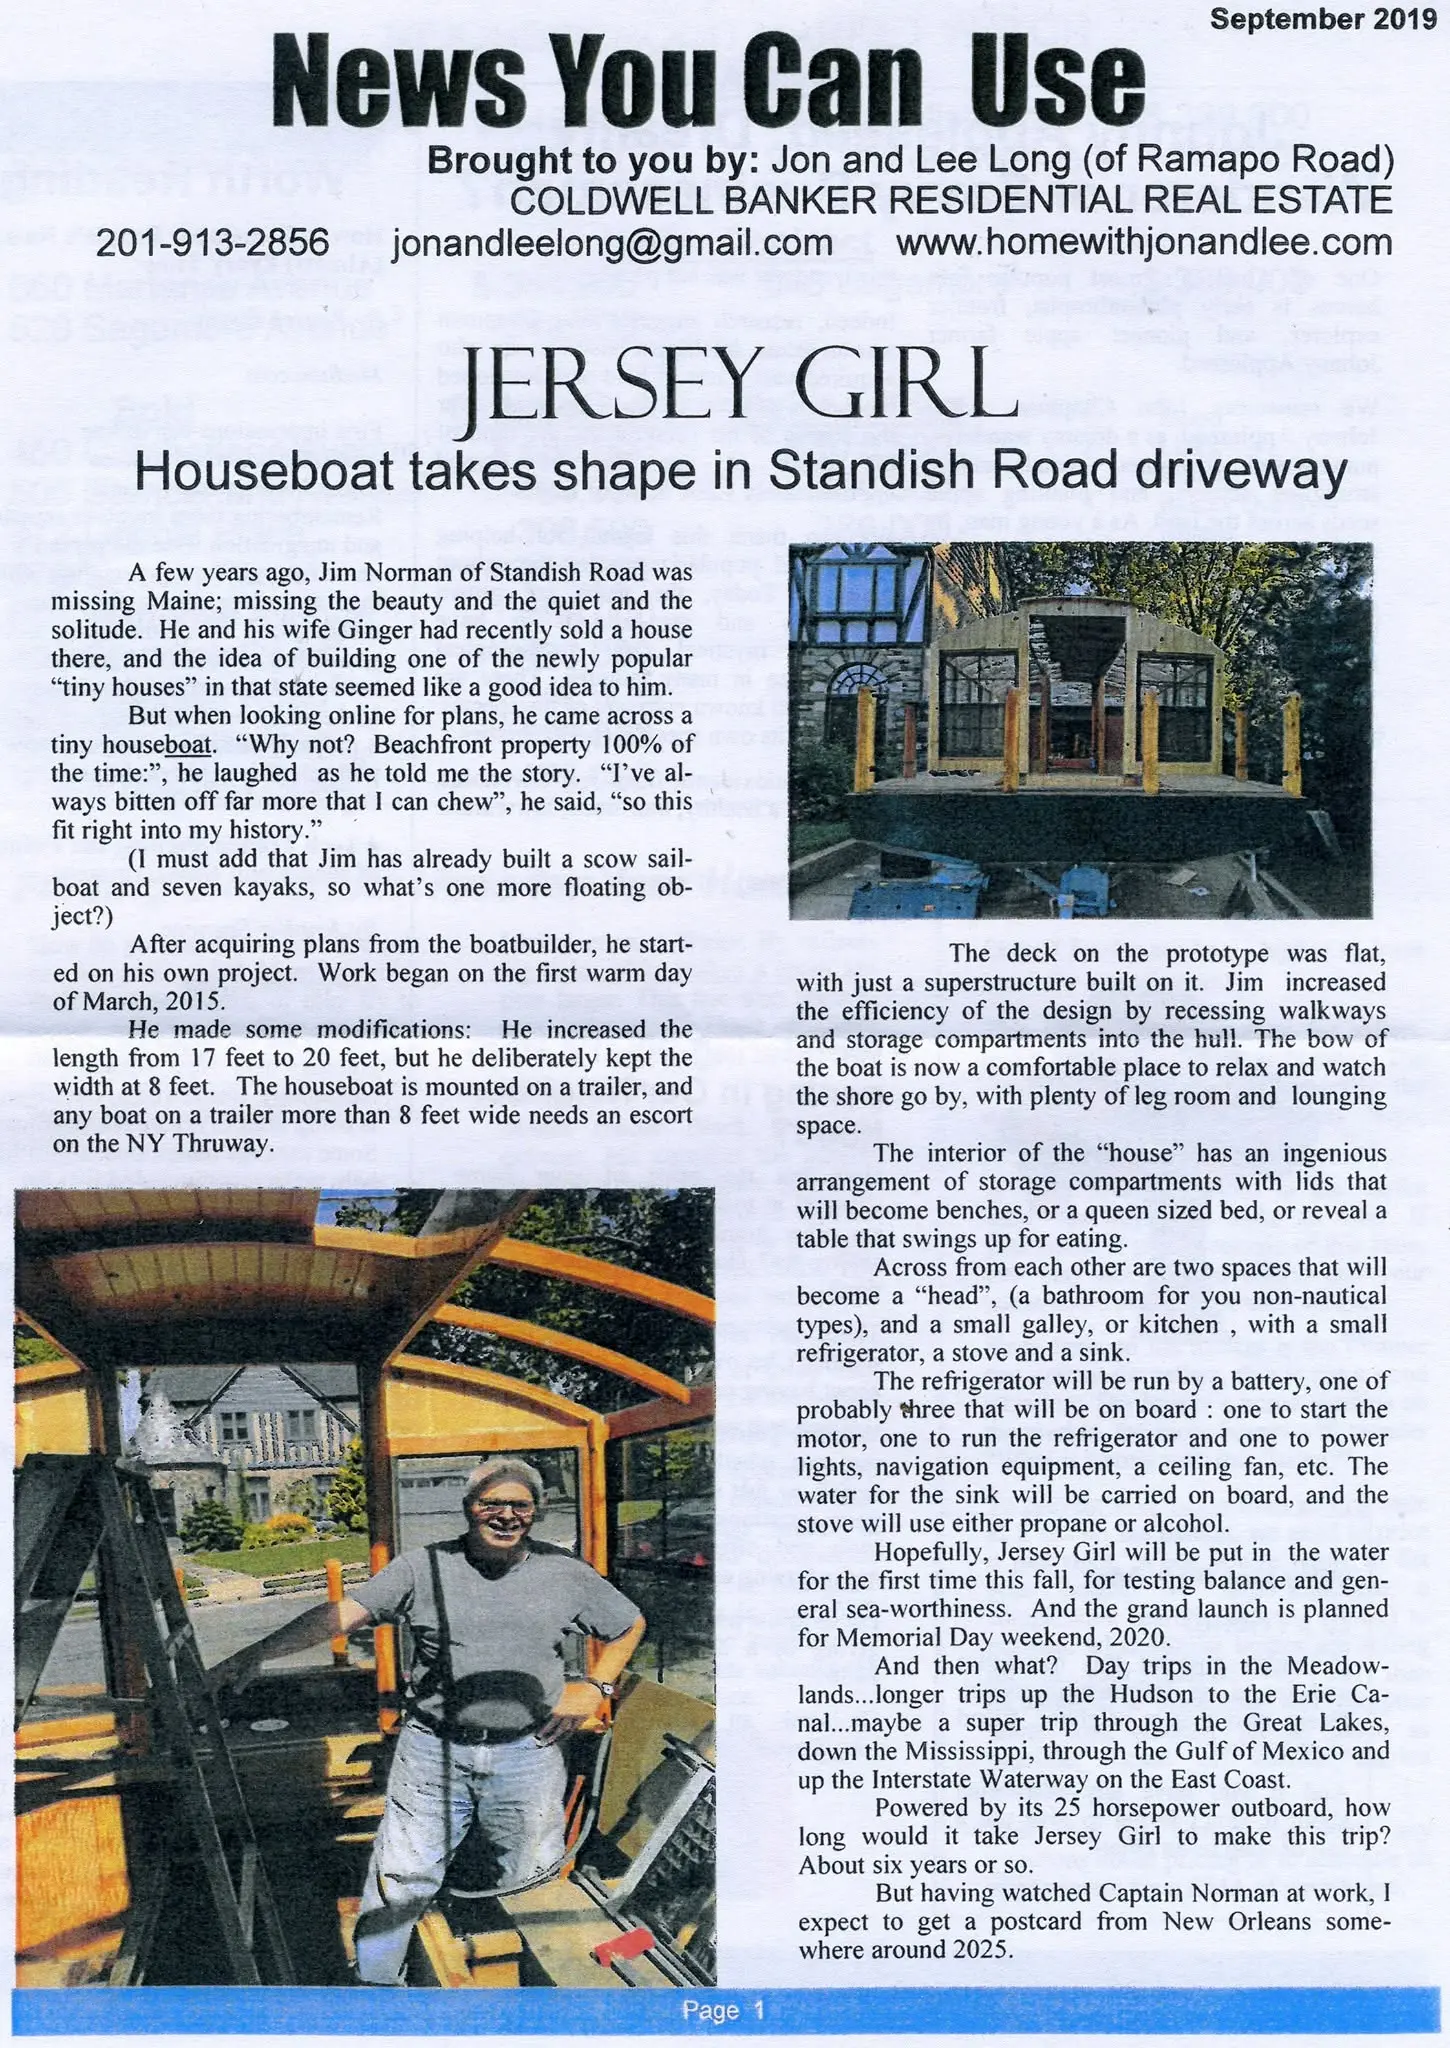
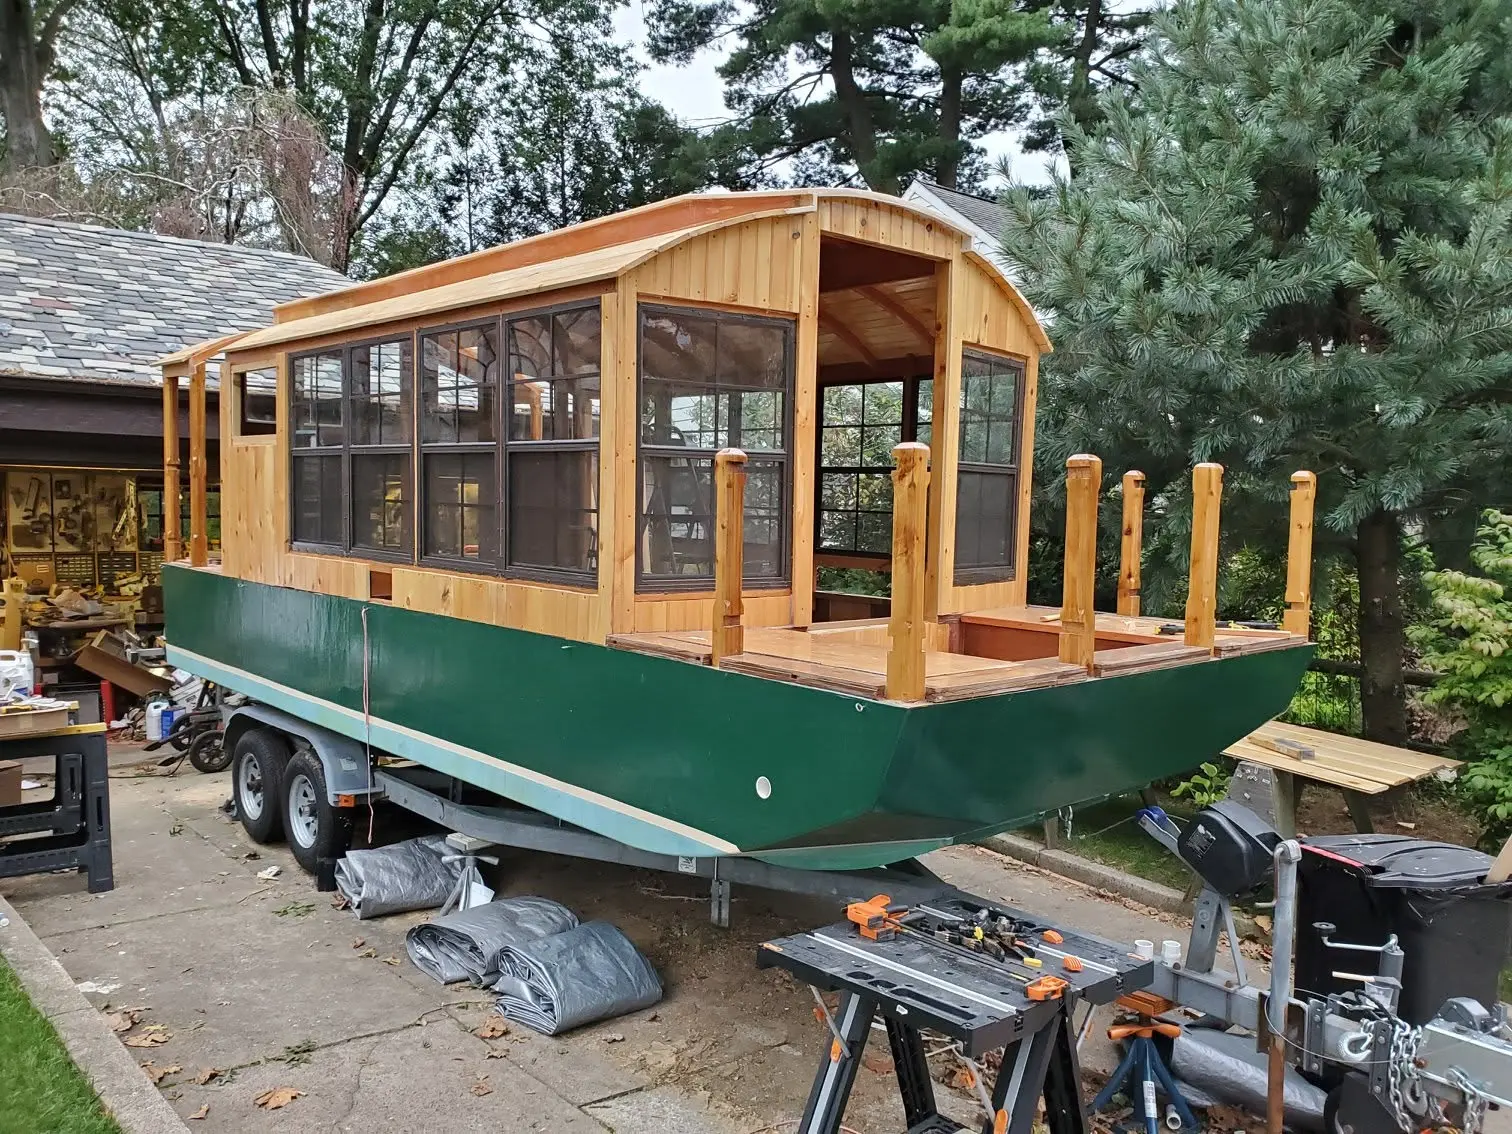
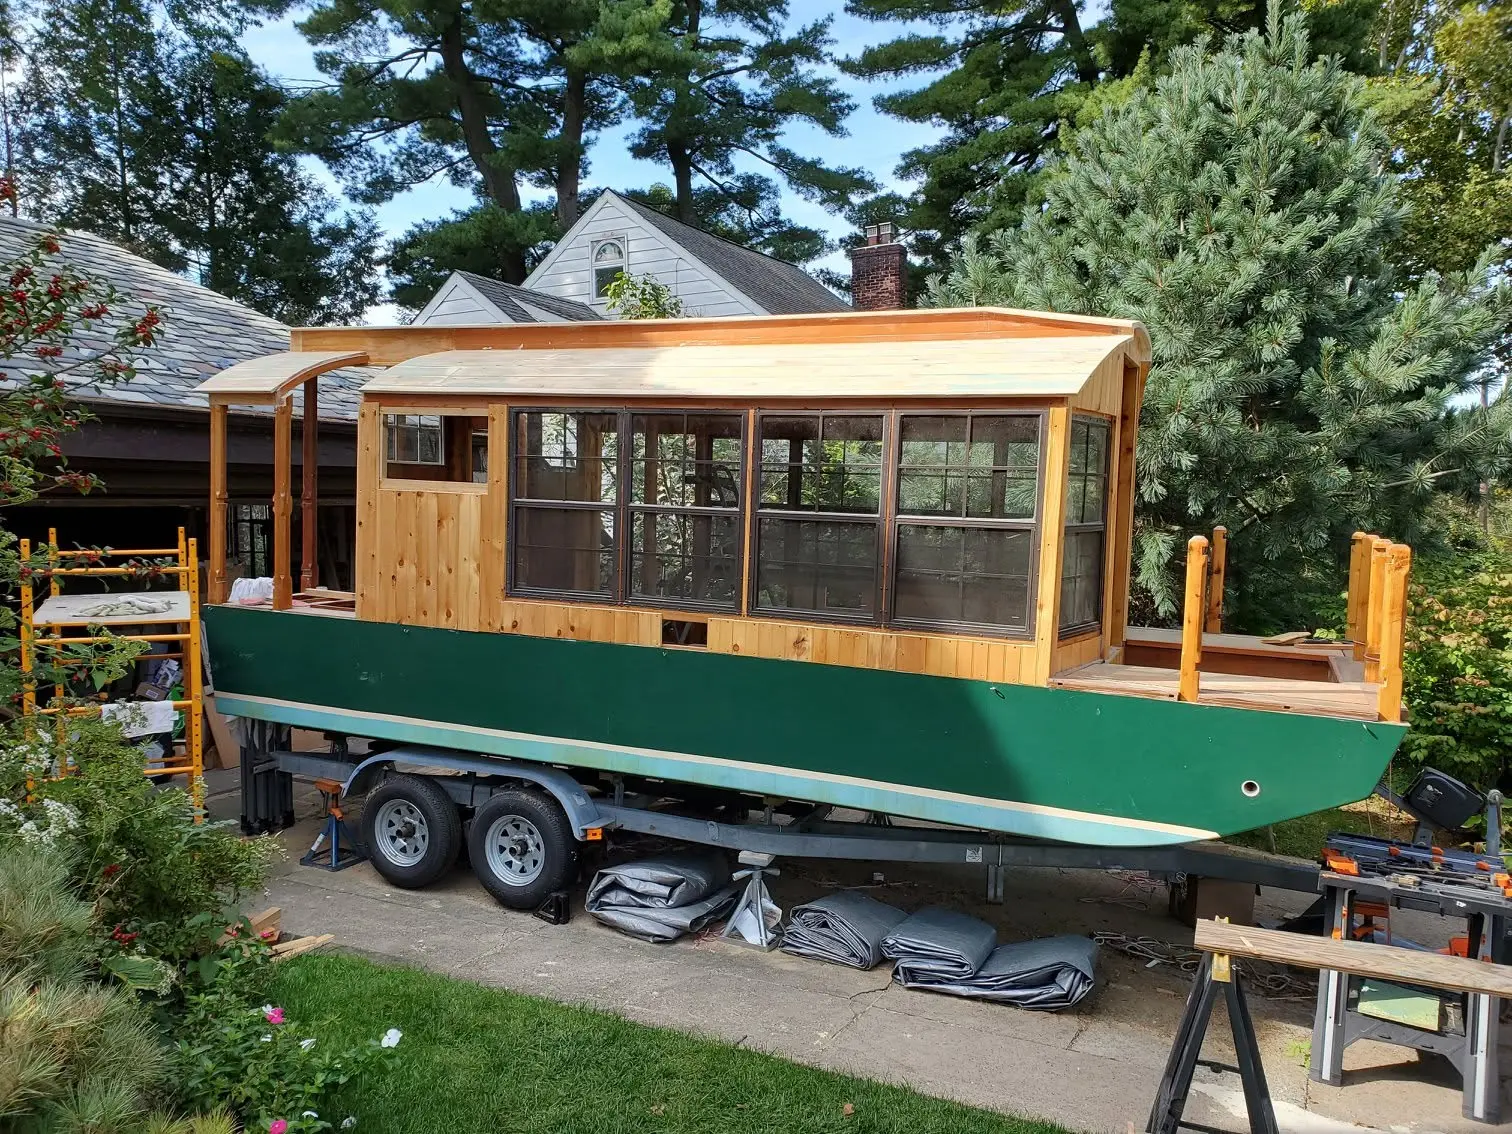
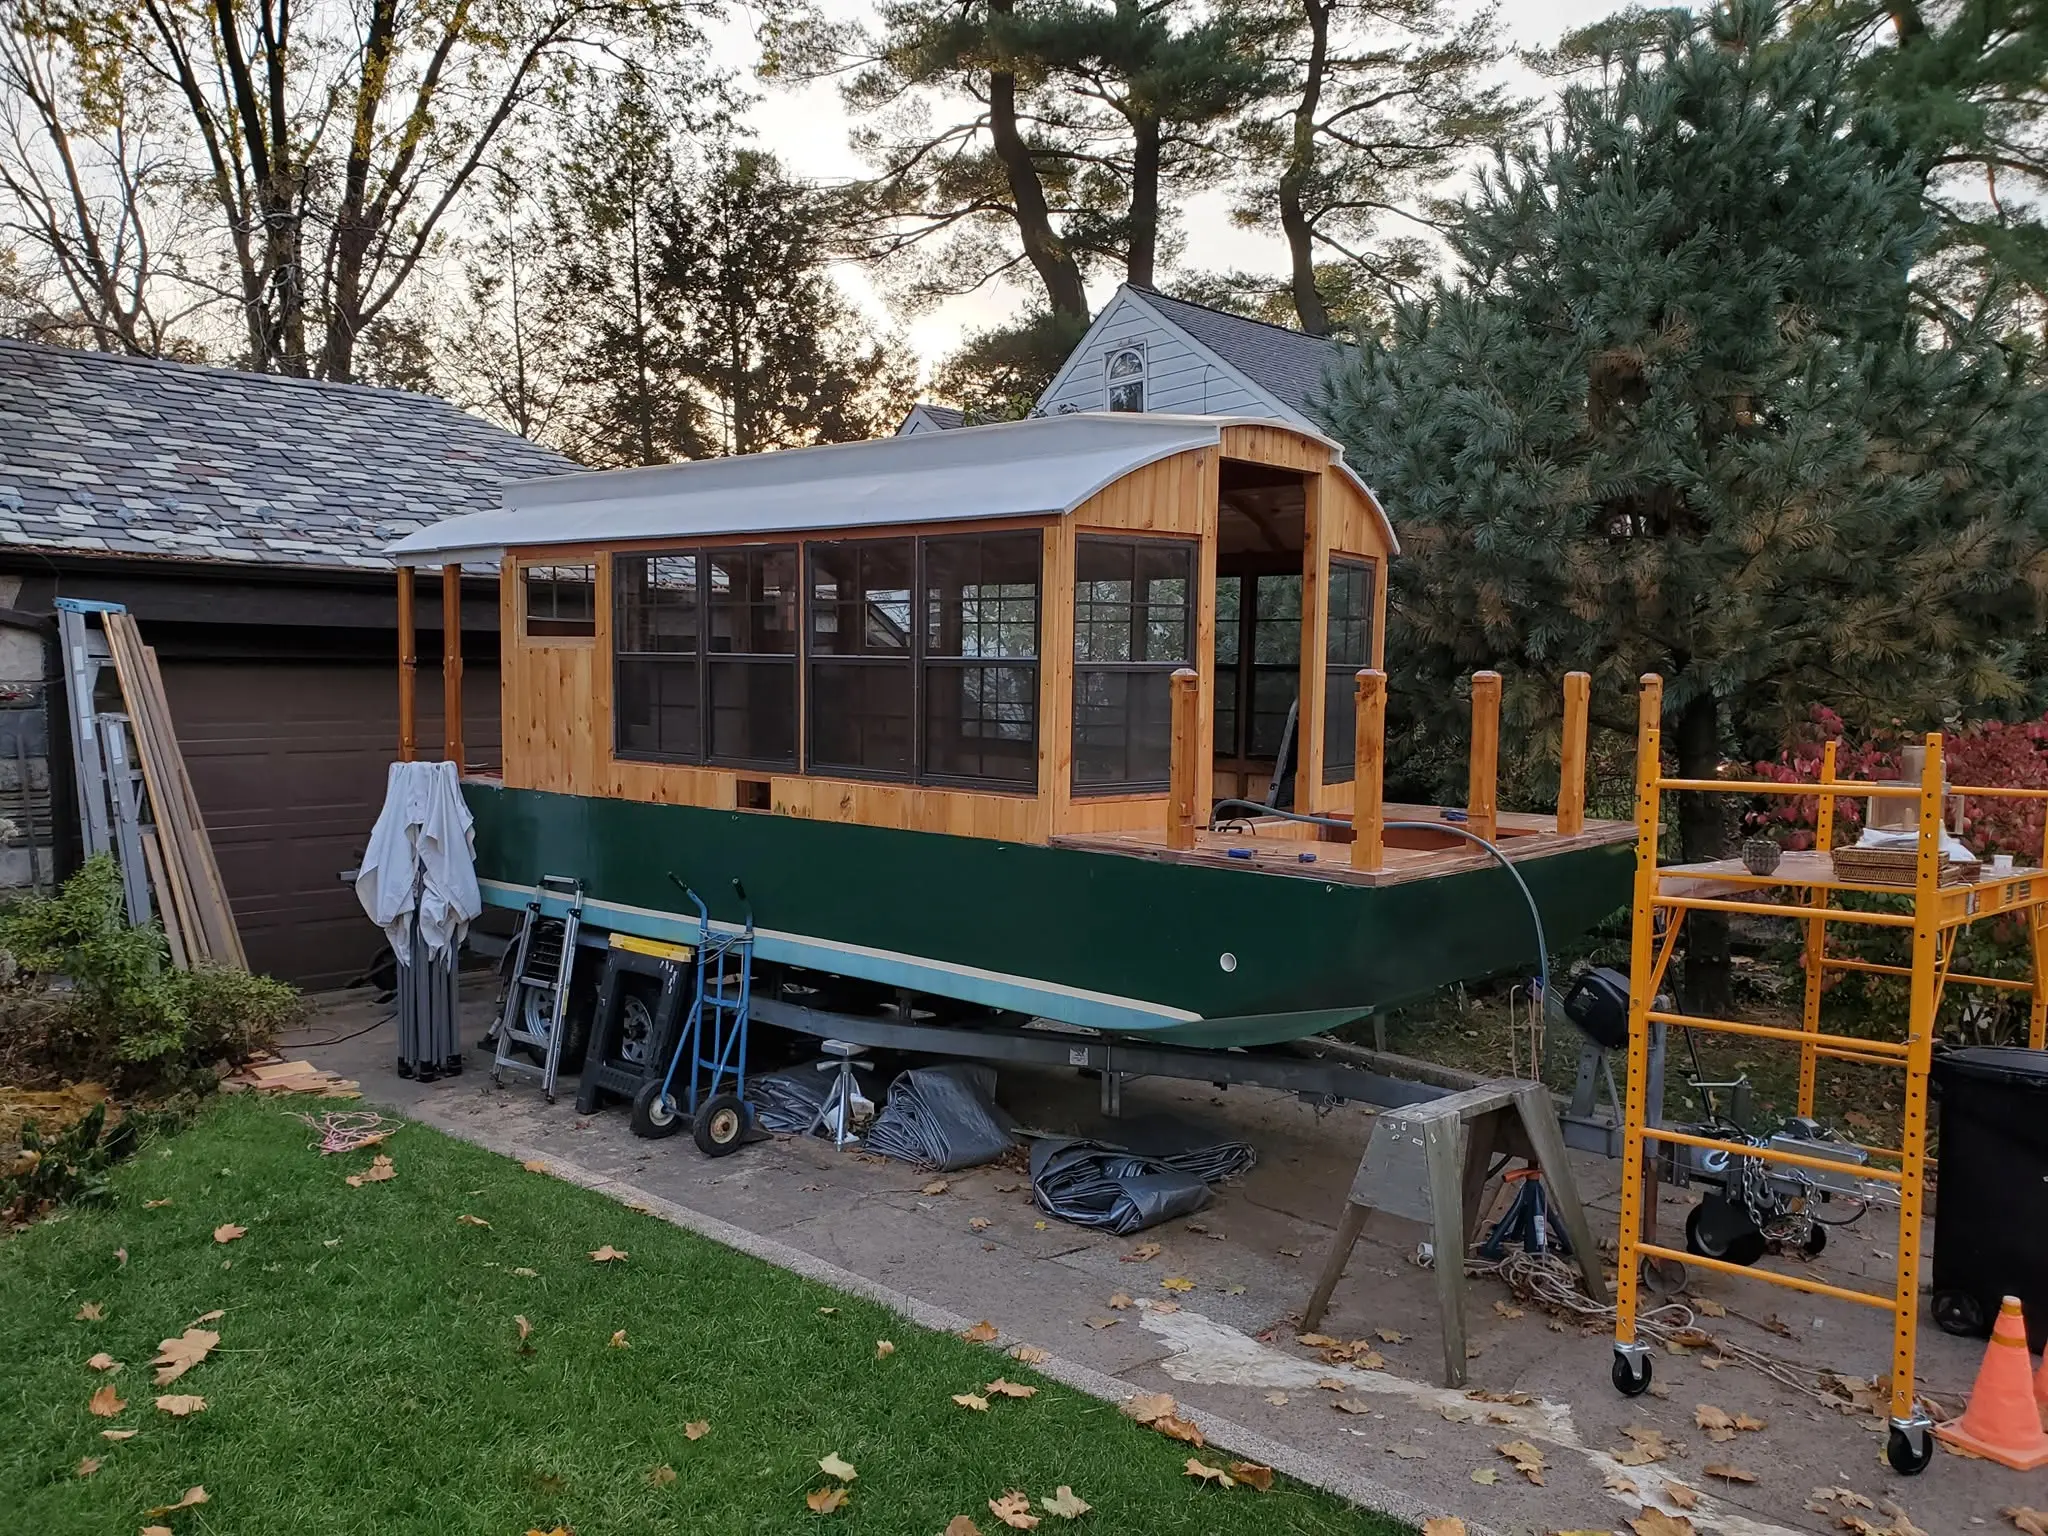
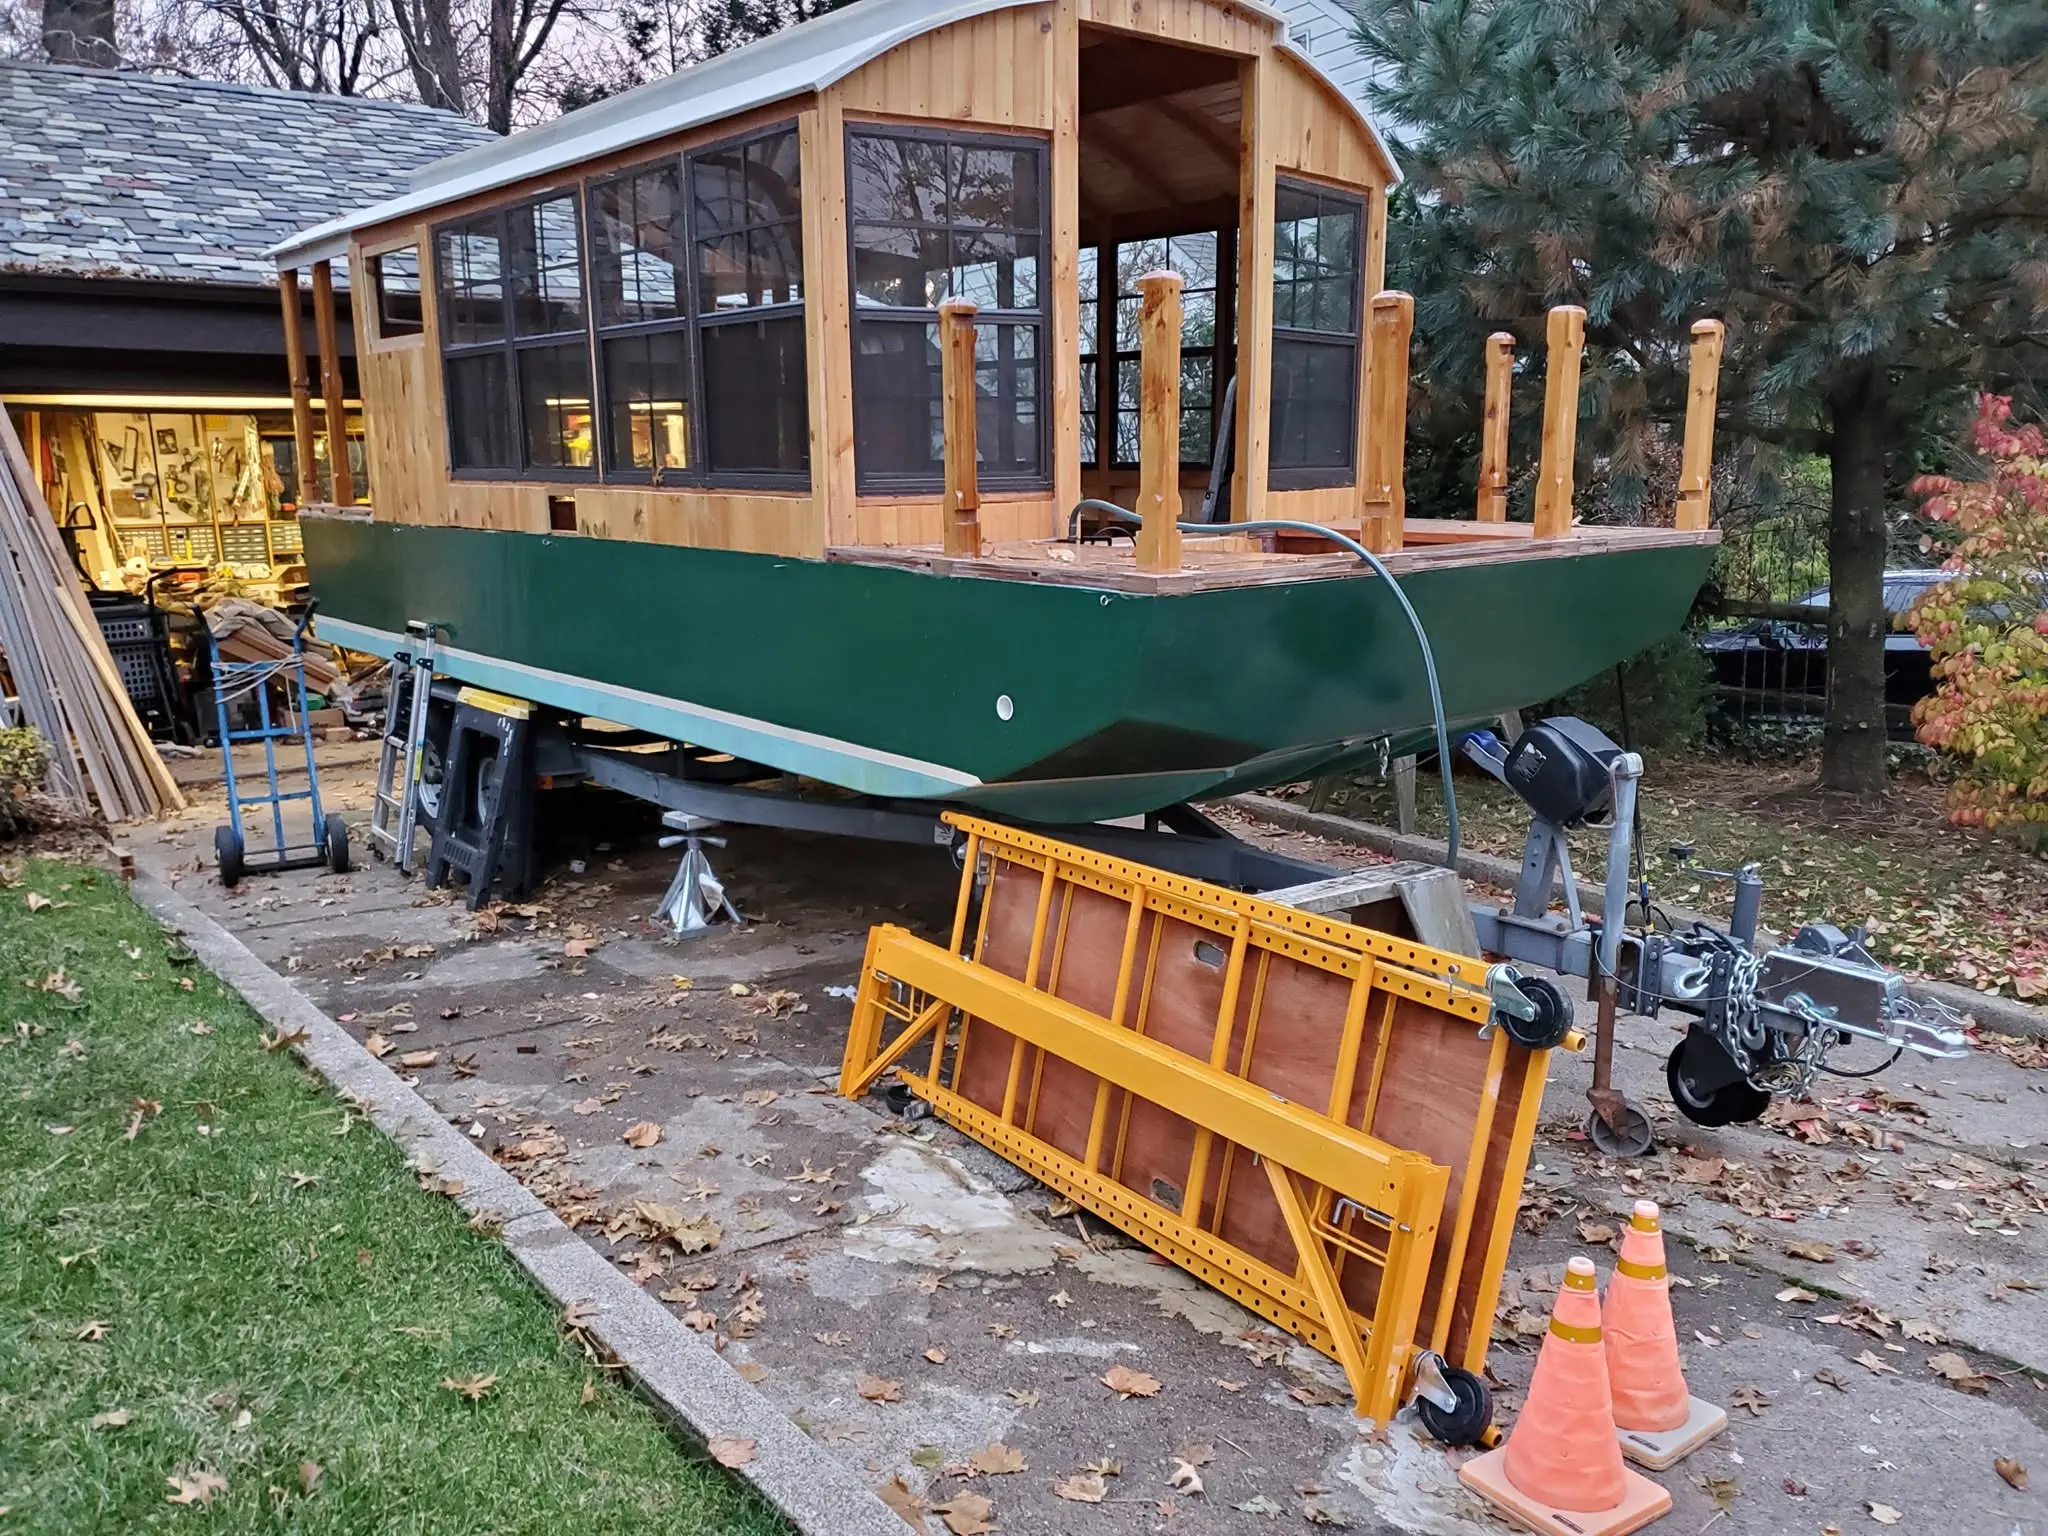
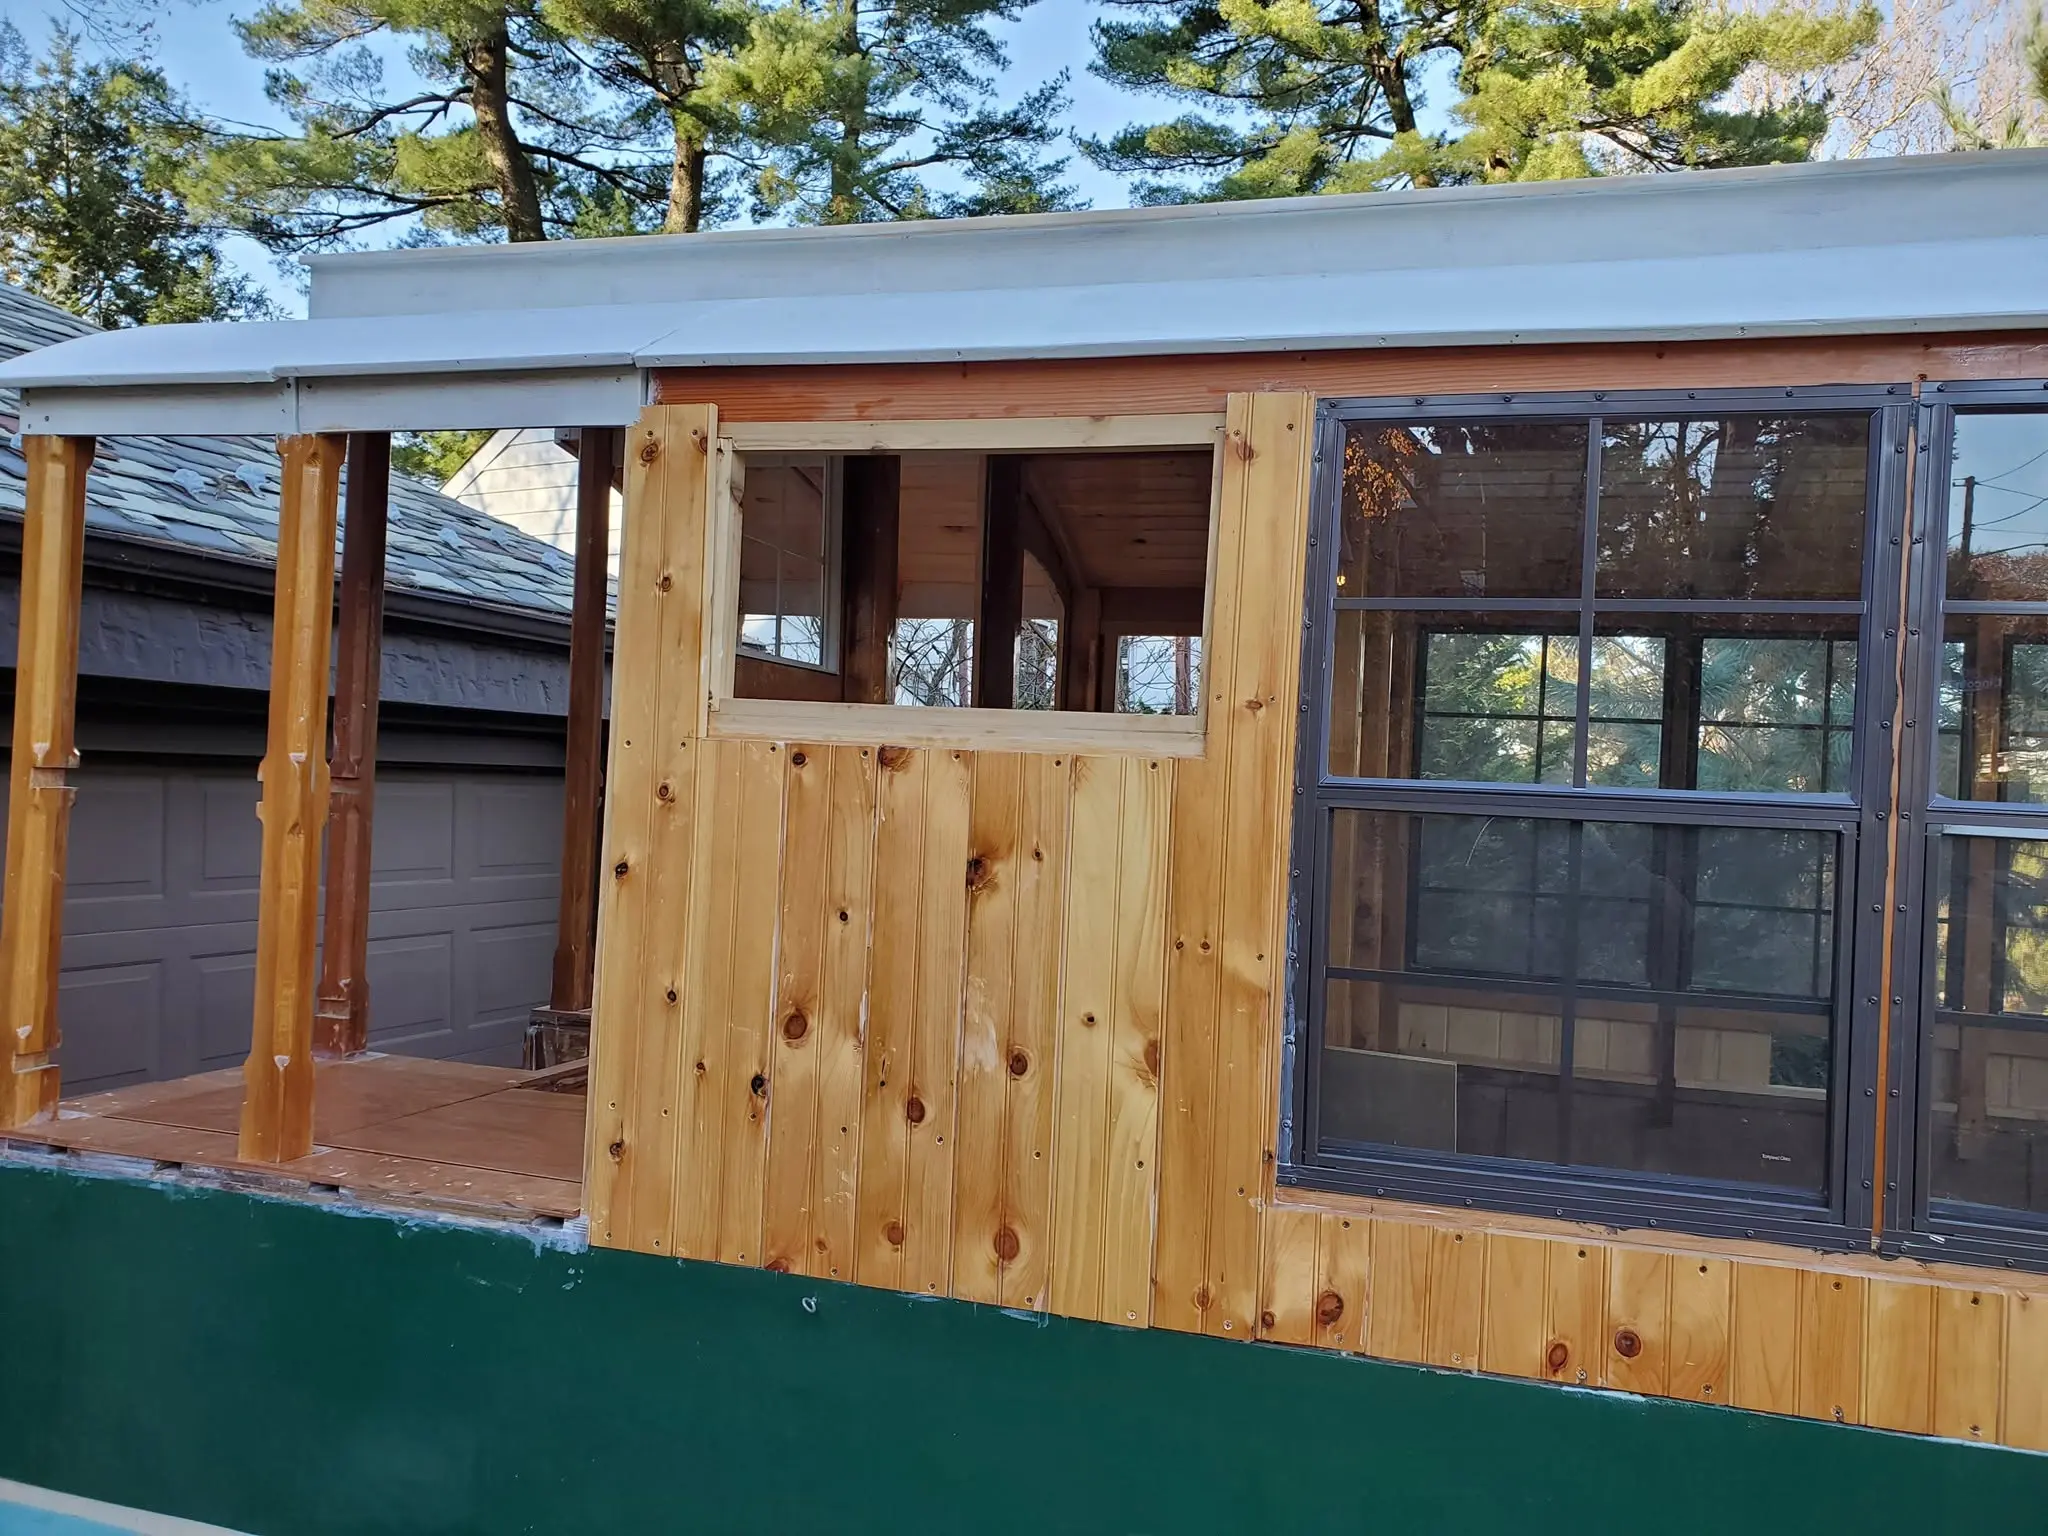
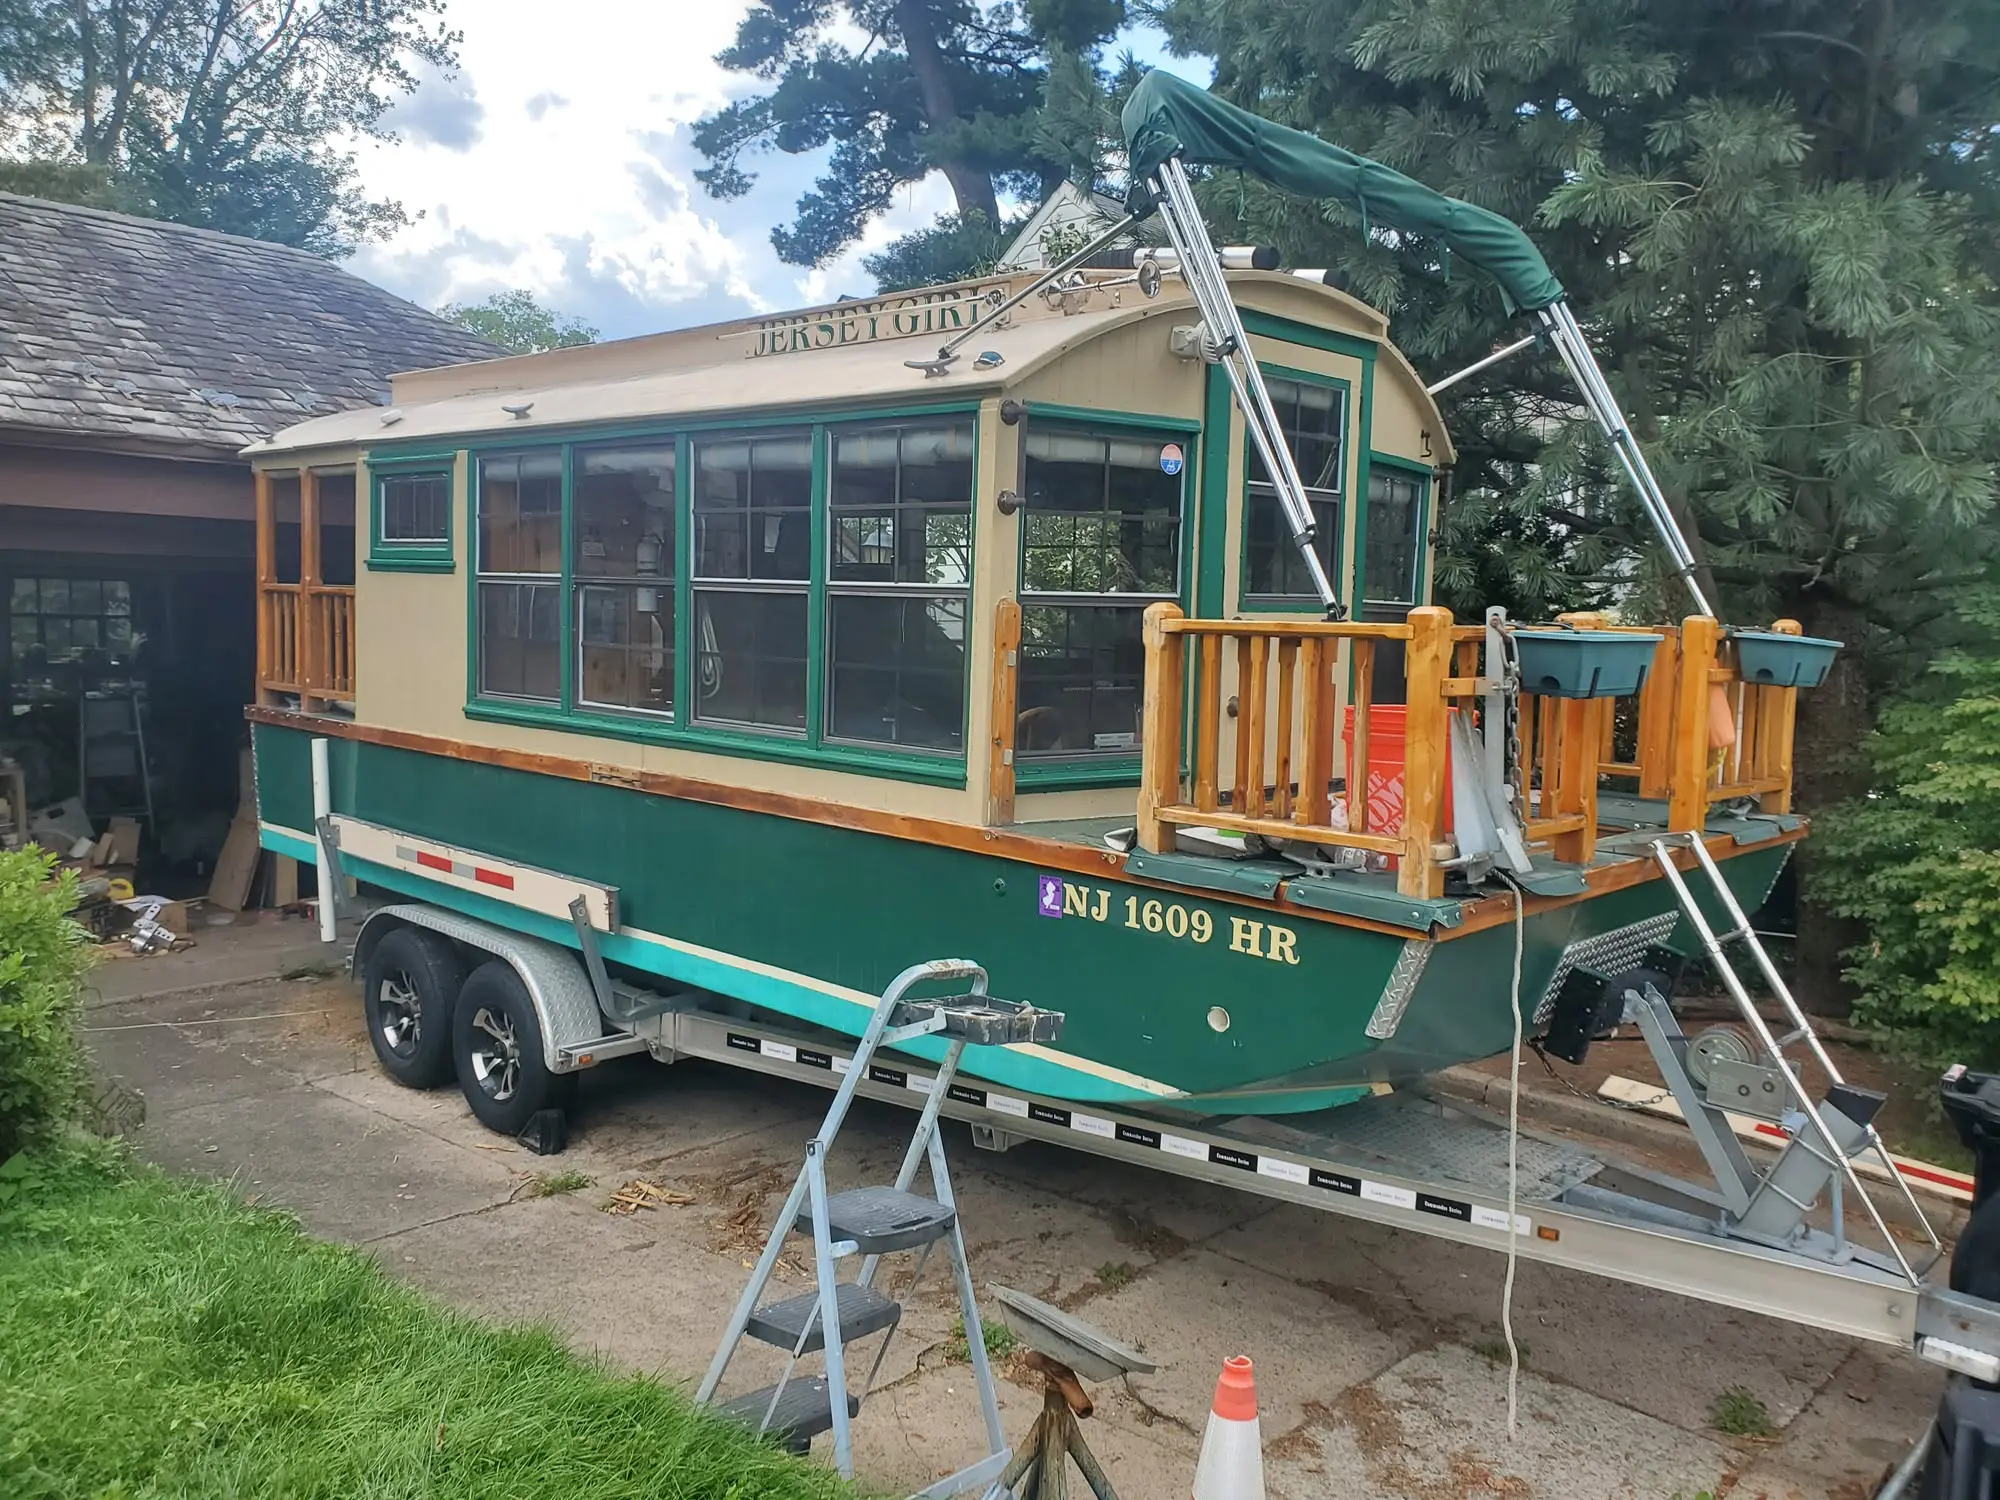
Jim Norman's 20 foot houseboat, built in his northern New Jersey driveway from 2015 to 2021. The design started from Roy Schreyer's Dianne's Rose, stretched three feet and reworked into his own. Okoume plywood hull over sawn frames and bulkheads, a cabin of cedar posts and laminated roof beams sheathed in pine beadboard, and a fiberglassed arched roof with gull wing panels over the aft deck. Launched on the Hackensack River in May 2021, she now cruises Lake Hopatcong, where she took the Ladies' Choice award at the 2024 antique and classic boat show.
What it took
By the numbers
191
Days written up
568
Photographs
31,562
Words written
The work
Contents
01Planning & Research
Mar 2015
02Strongback & Molds
May 2015
03Deck & Coamings
Jul 2015
04Hull Panels
Jun 2017
05Glassing & Epoxy
Jul 2017
06Systems
Sep 2017
07Interior & Cockpit
Sep 2018
08Fillets & Taping
Oct 2018
09Trailer & Gear
Nov 2018
10Fairing & Sanding
Jan 2019
11Paint & Finish
Jan 2019
12Maintenance & Changes
Dec 2023
Chapter 01
Planning & Research
Choosing the design, sourcing plans or a kit, budgeting, lining up materials.
9 daysfrom March 2015
5 Mar 2015Planning & Research
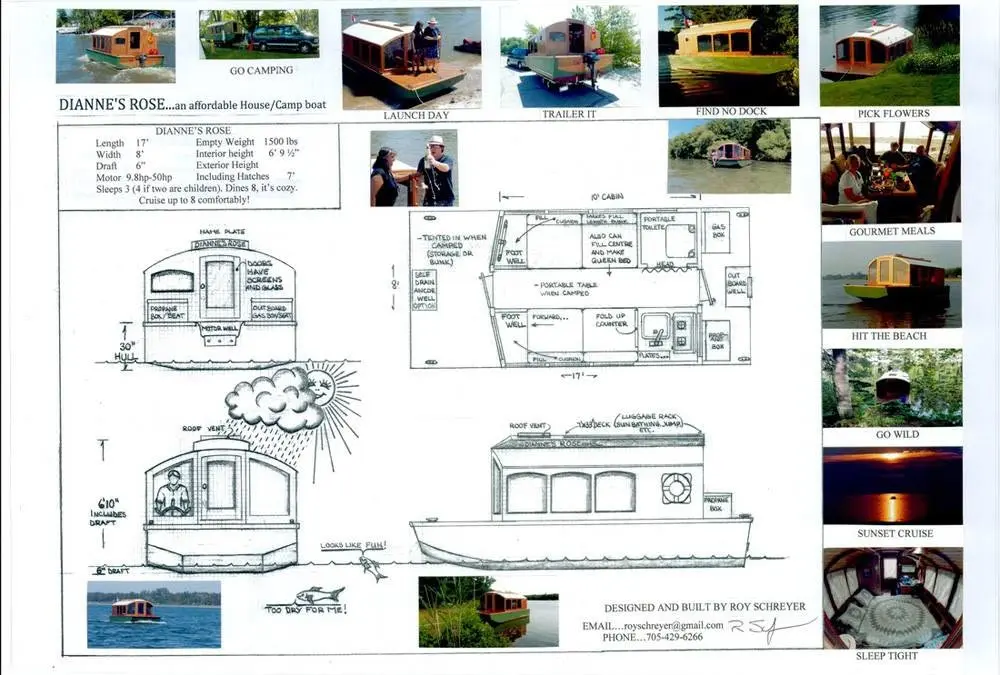
Intrigued by the "tiny house" phenomenon, I stumble across this plan for a tiny houseboat.
March 5, 2015. Intrigued by the "tiny house" phenomenon, I stumble across this plan for a tiny houseboat. It's 17 feet long overall, with a beam of just under eight feet (so it can be towed on a trailer anywhere) and a draft of just six inches. A few years earlier, I found it necessary to sell a beloved home in coastal Downeast Maine, and I've yearned for something to replace it ever since. Could this be the answer? Hmmm...
30 Mar 2015Planning & Research
I'm still thinking about Dianne's Rose.
March 30, 2015. I'm still thinking about Dianne's Rose. I have not bought the plans yet, but the pull is getting stronger. I'm no stranger to boat construction, having built a family fleet of seven kayaks and a sailing dinghy so far, and they all turned out great. For instance, here's a shot of Noah, Taylor and Julio, my three grandsons, in the kayaks I built for them -- during a family vacation at Squam Lake in New Hampshire, in August of 2013.
1 Apr 2015Planning & Research
This houseboat would be a project of far greater magnitude than anything I've ever done.
April 1, 2015. This houseboat would be a project of far greater magnitude than anything I've ever done. Each of those earlier boats took about three months of somewhat obsessive spare time. This would take years -- how many, I am not exactly sure. I keep going back to Roy Schreyer's web site to tease myself with some of the photos he has posted.
Chapter 02
Strongback & Molds
Building the strongback or ladder frame and setting up station molds.
16 daysfrom May 2015
5 May 2015Strongback & Molds
I buy enough okoume marine plywood to get started.
May 5, 2015. I buy enough okoume marine plywood to get started. This stuff is expensive, about $100 for a 4 x 8 sheet of 3/8-inch ply and $125 for the half-inch. But you can't expect to do a project like this with the kind of material you can get at the big-box home centers. The material I am buying has many more plies for a given thickness, and they are bonded with glues that are certified to be waterproof and boilproof. It is made of selected hardwood throughout, and it contains no inner voids or outer patches, which I have learned are called "dutchmen." I'll be learning a lot of new vocabulary as I go along. Within a few days, I have cut out many of the full and partial bulkheads, the transversal components that make up much of the egg-crate style frame and define the ultimate shape of the hull.
6 Jun 2015Strongback & Molds
It's time to get to work on the longitudinal frames.
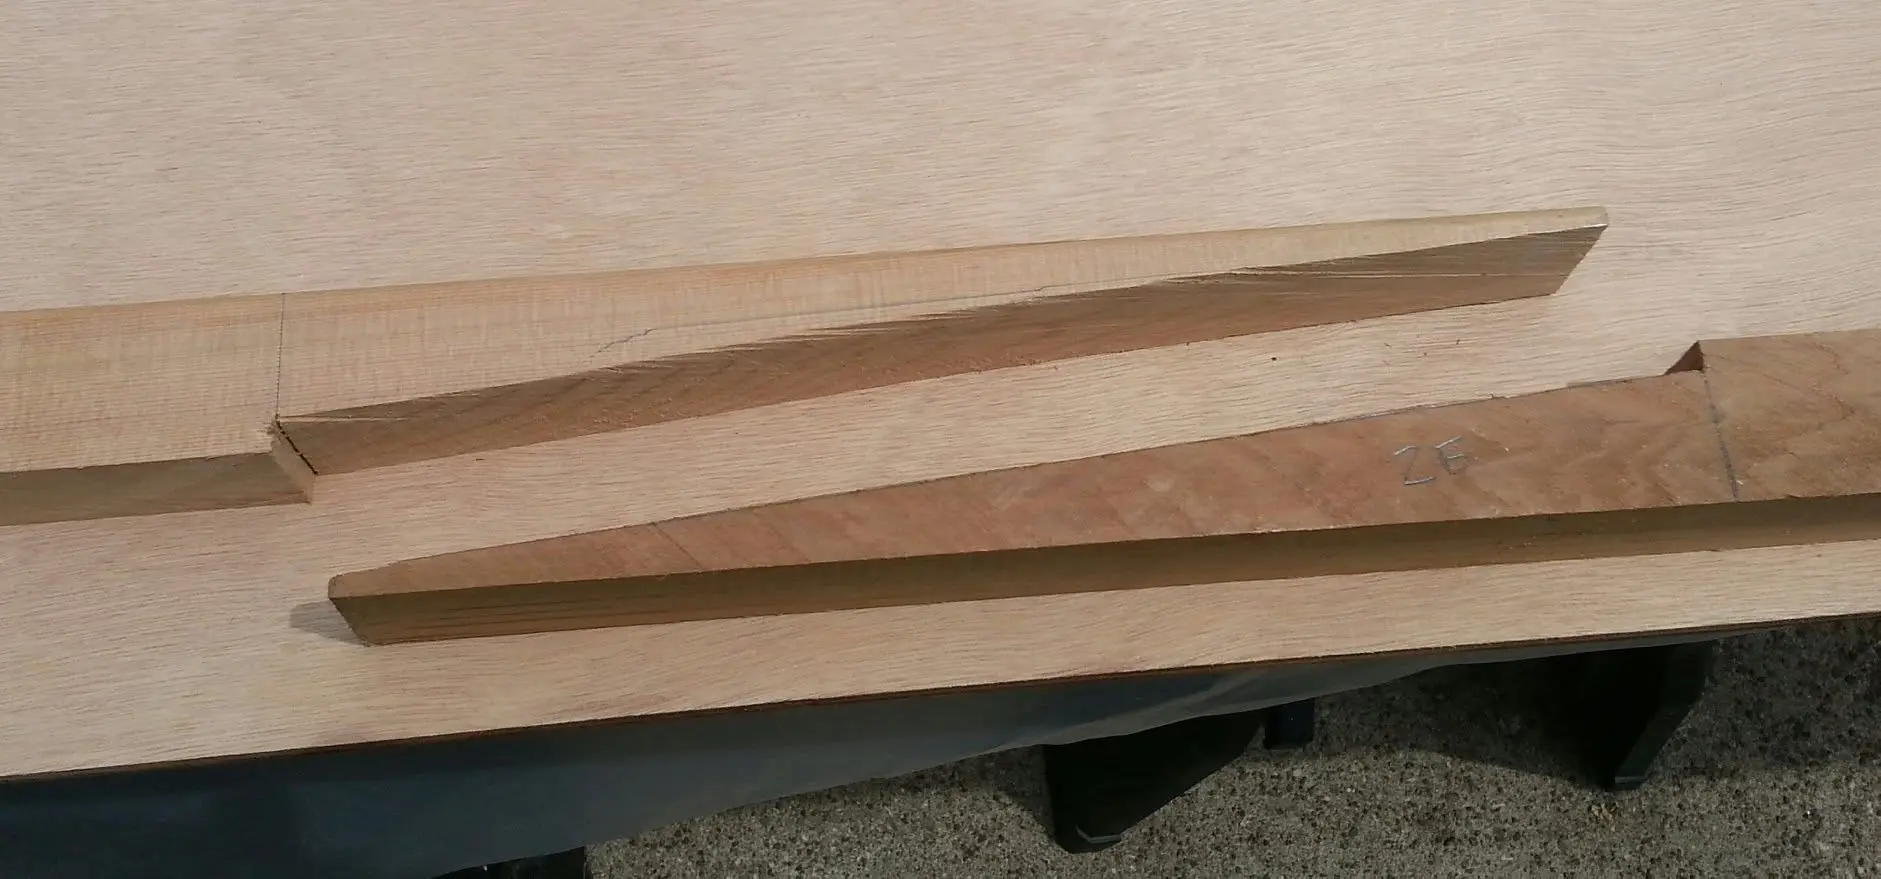
June 6, 2015. It's time to get to work on the longitudinal frames. These are the pieces that will interlock in slotted joints with the full-width bulkheads to create the basic backbone of the hull. The longitudinal frames will also support the partial bulkheads off to the port and starboard (left and right) sides. Reflecting the design length of the boat, they are 17 feet long. Because they are so long, each one has to be made of several smaller pieces of plywood, and they are supported at the joints by 2 x 2-inch timbers of clear red cedar. Red cedar is an exceptionally light-weight wood, and virtually rot resistant. It's a good choice for a boat. Since the full length required of these timbers is longer than I can reasonably obtain, I use a shouldered scarf joint to glue them together. The shoulders prevent the glued joint from slipping out position under clamping pressure before the glue dries.
29 Jun 2015Strongback & Molds
The joints in the longitudinal frame are reinforced on the side that will be seen from...
June 29, 2015. The joints in the longitudinal frame are reinforced on the side that will be seen from inside the boat by a decorative wainscoting system, made of pine. Once it's glued and screwed into place, I'll ease the edges in the decorative way and paint it to make it look good.
2 Jul 2015Planning & Research
I start to think about tweaks to the design.
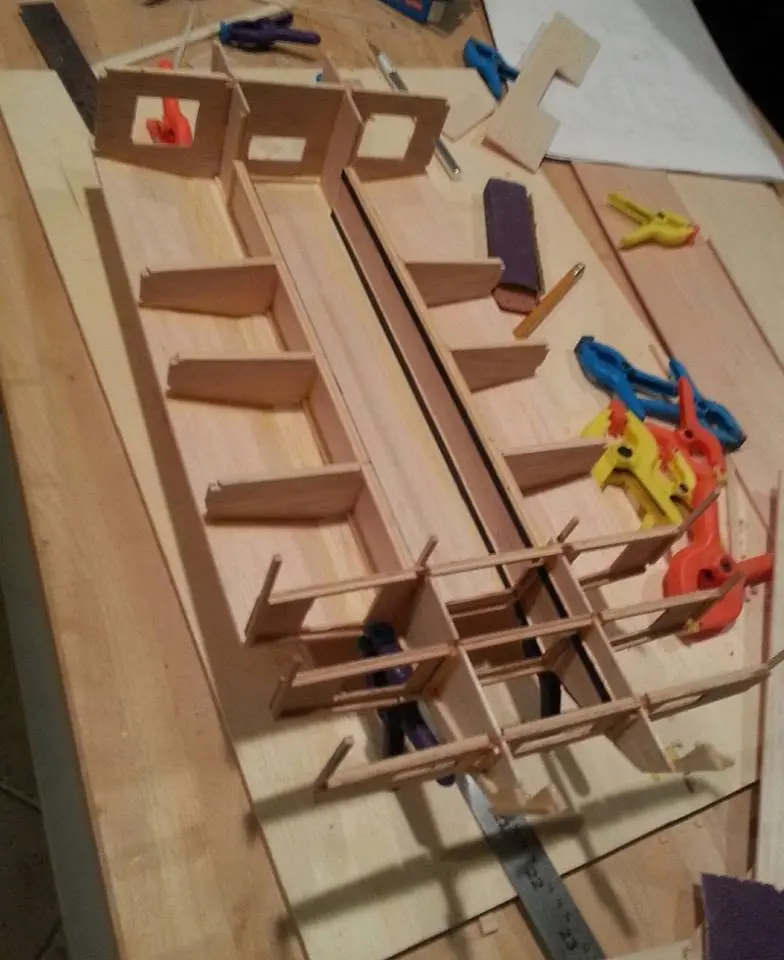
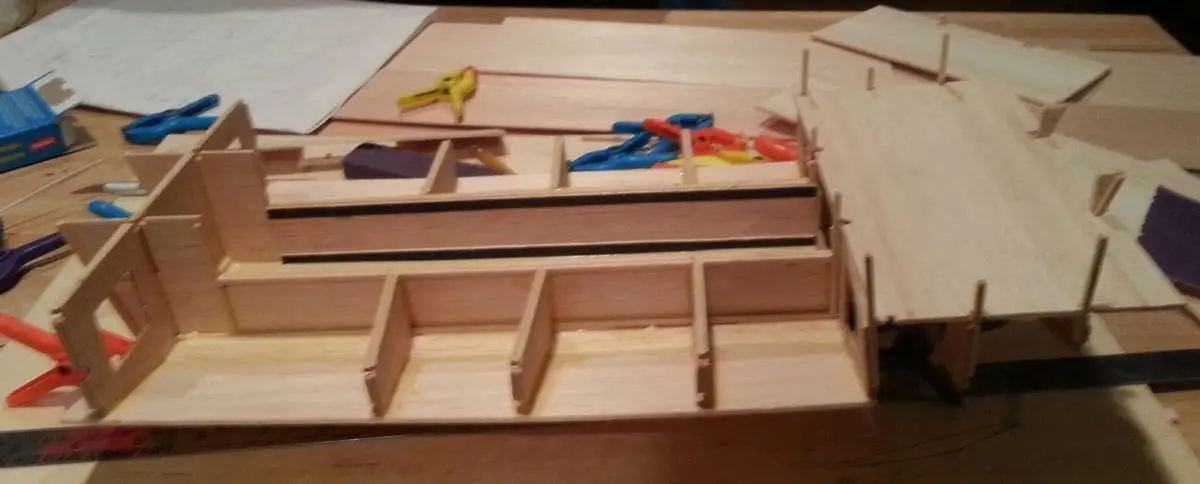
July 2, 2015. I start to think about tweaks to the design. What if I made the outboard motor well a little more commodious -- could I install a larger engine than the 9.8 hp unit recommended by the designer? And provide a little more stern outside deck space? and maybe a little more cabin space for room for a shower in the area reserved for the head? (Head is toilet in boat-speak.) So I called a temporary halt to building, drew a few ideas on paper and started making a scale model to test my ideas out. When I saw what was happening with the model, I resolved to commit to adding three feet to the length, turning a 17-foot boat into a 20-footer.
5 Jul 2015Planning & Research
Continuing to think of modifications to make this still-unnamed houseboat more of a...
July 5, 2015. Continuing to think of modifications to make this still-unnamed houseboat more of a challenge to build (as if it's not already a handful), and more of a pleasure to use when it's done. As I work on the scale model, I notice that flat, 4 x 8-foot deck out front, in the bow. It looks like a perfect place to cover with a retractable fabric shelter to turn it into sleeping space for grandchildren. But what if they roll off into the water? Not good. A nice wooden railing and balusters might be a good idea. But does it really need to be that high up off the water? If it were lower down, it would provide easier access to the main cabin. Then, I think of keeping the sides where they are, but lowering a central aisle, for people to walk through and places for people to sit securely with their feet comfortably down in the central foot well. Looking at the structure that keeps this boat rigid, I conclude that the bottom of the foot well can't be all the way down at the bottom of the boat, because i'll need at least eight inches under the deck for structural timbers and plumbing for rain water drainage. That doesn't seem like it would provide terribly comfortable seating. So I start think now of elevating the side benches by eight inches, to provide a more standard 16-inch seating height. Of course, all this does away with the possibility of sleeping space for those grandchildren (who may be married and have children and grandchildren of their own by the time I get around to actually finishing this thing). Well, what if I elevated the side seating by installing eight-inch-high boxes, hinged along the inside edges so they could be flopped over into the foot well and fill the entire space with a temporary perfectly flat deck that would look just like the designer's original plan. That, together with a railing, would make for an elegant solution. Enough navel gazing, time to get back to work!
Chapter 03
Deck & Coamings
Decking, hatches, coamings, cockpit rim.
64 daysfrom July 2015
7 Jul 2015Deck & Coamings
Off the drawing board and back to the sawdust.
July 7, 2015. Off the drawing board and back to the sawdust. The first thing I have to do is cut the stern section off each of the longitudinal frames and splice 36 inches of new length into them. I've decided to put this spliced section in toward the aft part of the boat, between the outside portion of the rear deck area where the motor well will be and aft part of the enclosed cabin. By doing that, I can distribute the extra length between the aft deck and the head area, where I want to install an inside shower. Then, I have to cut away eight inches from the height of the deck supports forward. I'm actually quite nervous about making these fairly radical design changes, and I hope I'm not dooming this project by doing it. I've sent messages to Roy Schreyer, the woodworker who drew the plans (RoyDesignedThat.com), and he was quite encouraging. He told me that he's thinking of a second-generation houseboat with exactly the changes I'm proposing. It was he who recommended lowering the deck by no more than eight inches to allow for additional structural support to make up for the amount of girder effect that I will lose by cutting down the long frames in the area of the forward deck.It makes me feel well supported to know that Roy has my back on things like this and that he is available for consultation.
10 Jul 2015Strongback & Molds
I've reduced the height of the forward deck support in the long frames, and installed...
July 10, 2015. I've reduced the height of the forward deck support in the long frames, and installed additional bracing to make up for the loss of girder effect. I've also beefed up the the bow, anticipating the shape of the forward deck structure. By now, there's enough wood in each of these long frame components that they are heavy and require quite an effort to move. At the same time, each of them is quite floppy without the support of surrounding framework. If I'm not careful, a misstep now will easily snap one of them in two. That would not be a good thing. Another problem: by now, these components are far too long to fit into the garage. I'm going to have to wrap them in plastic and store them on the rear deck of the house to keep them out of the weather while I work on other things, like at least two additional full-width bulkheads to support that slimmed-down bow area, and four more partial bulkheads to accommodate the extra length in the stern.
8 Aug 2015
Other things, like home maintenance, have moved front and center, pushing the...
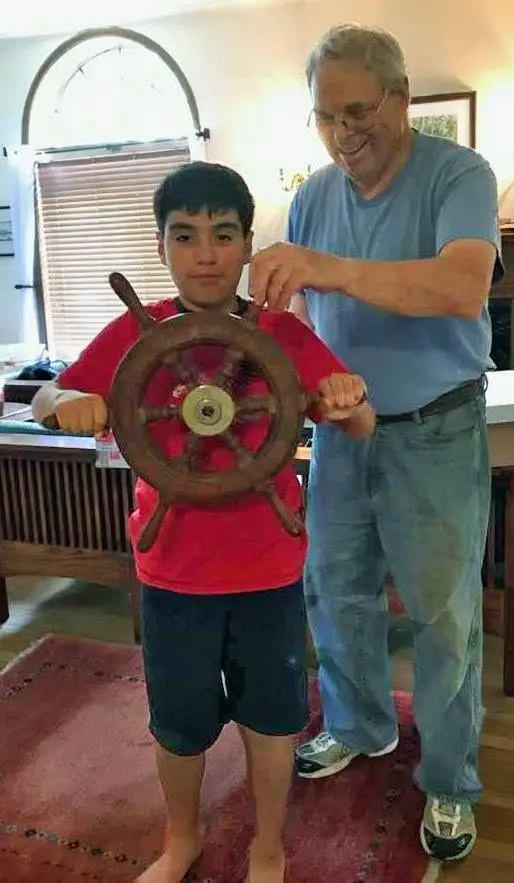
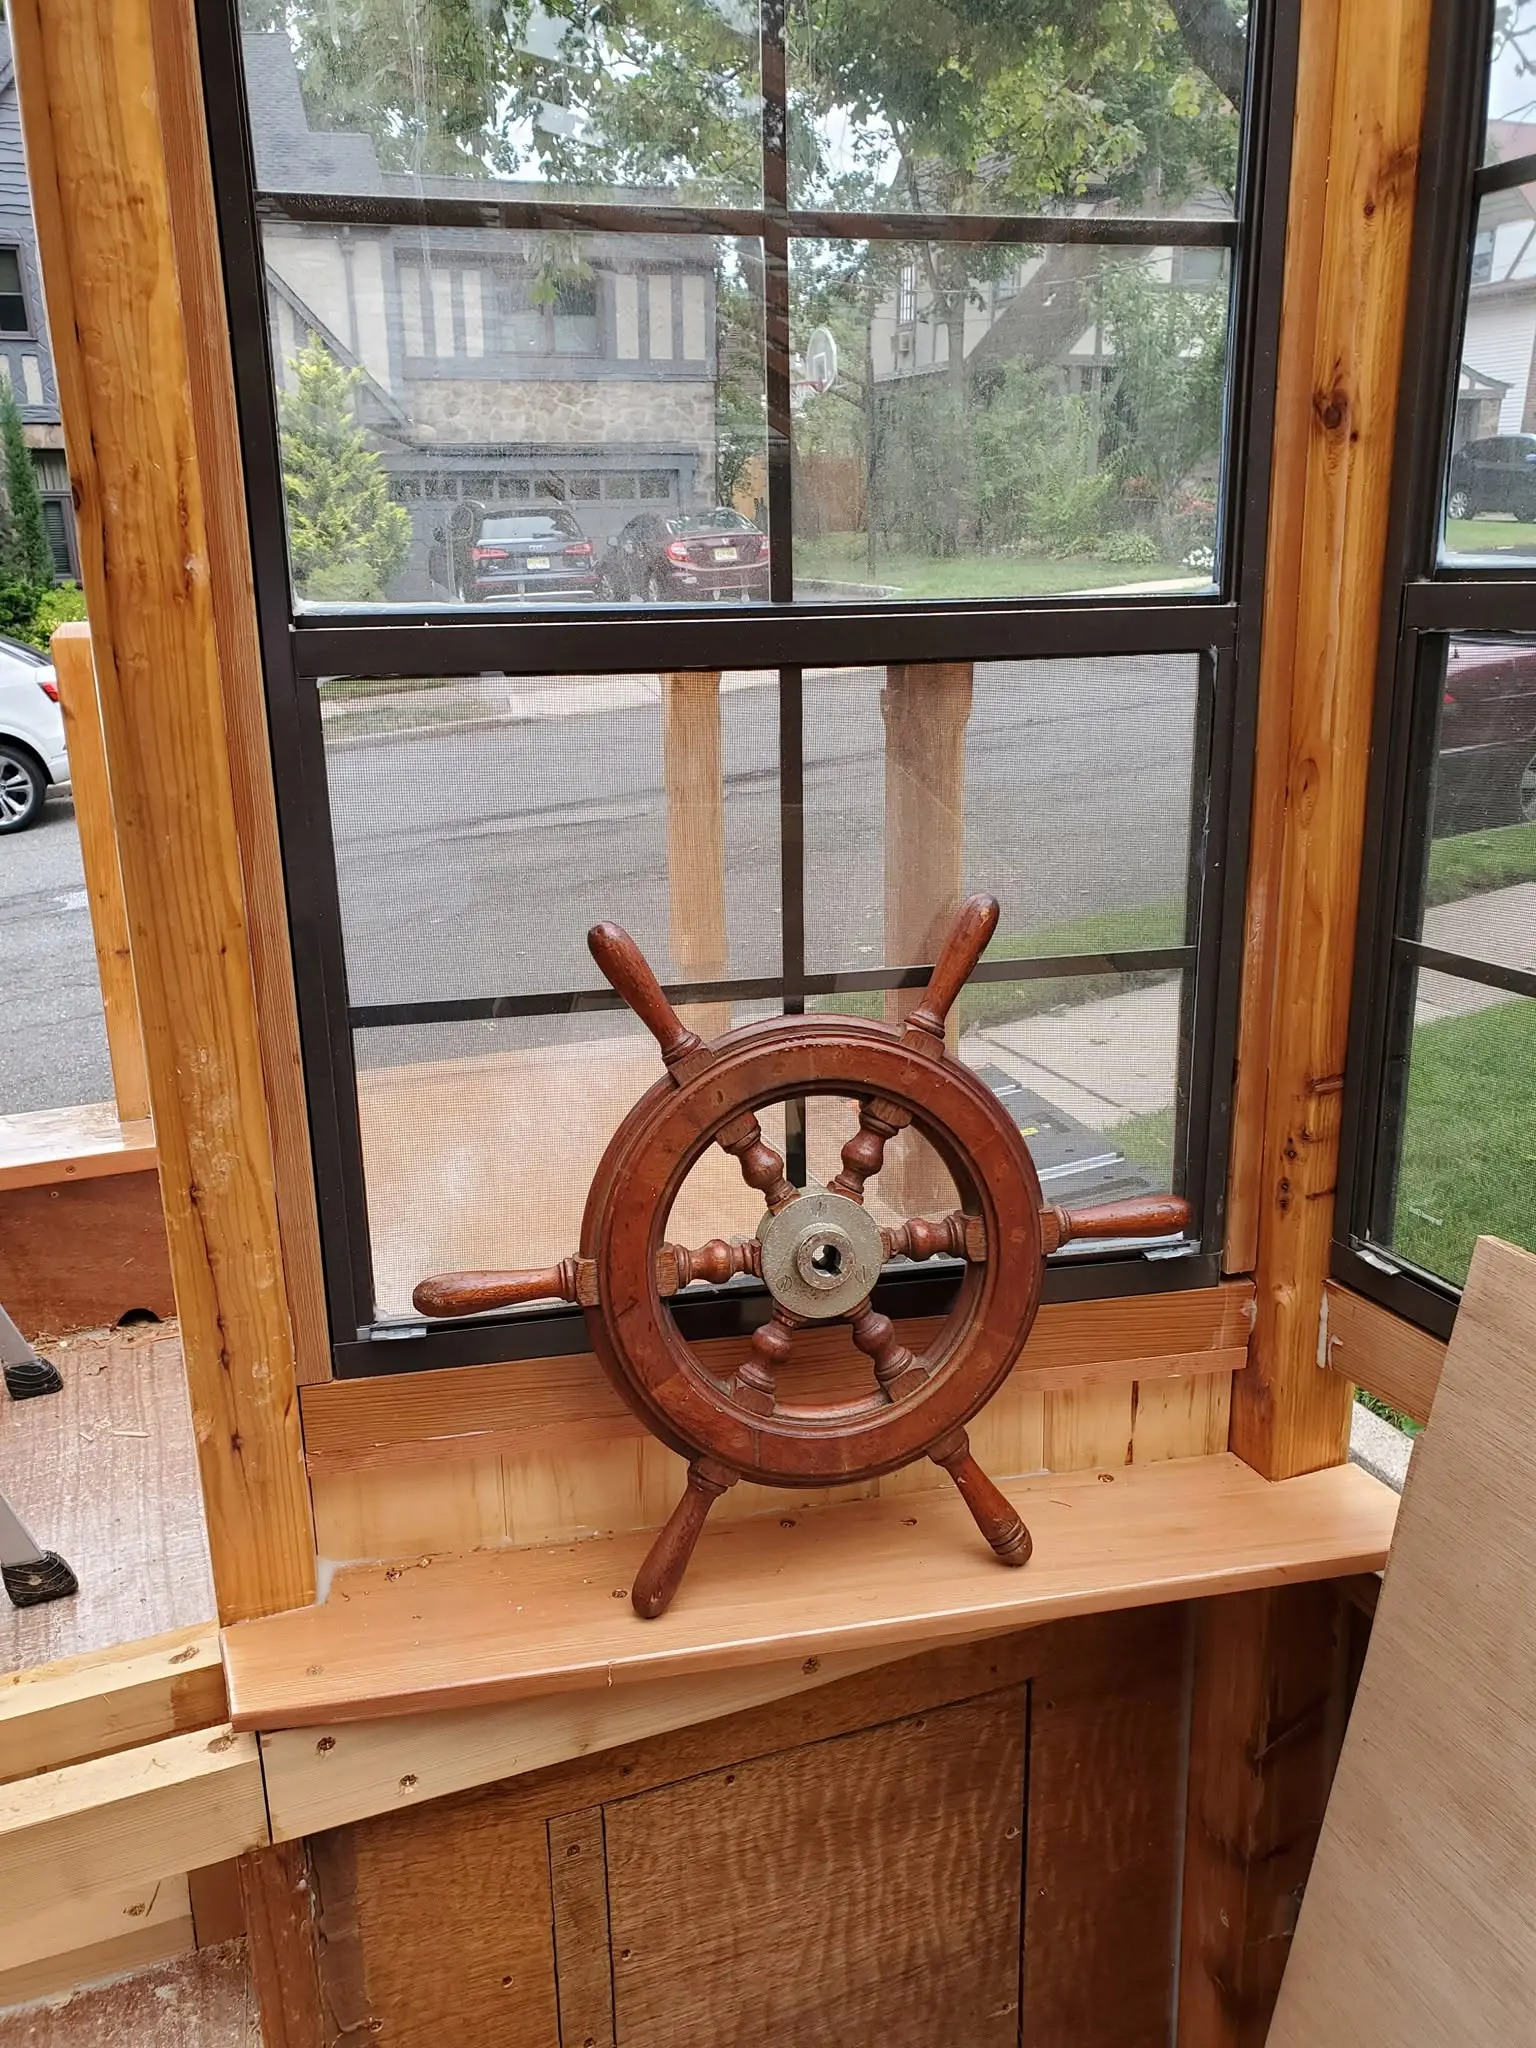
August 8, 2015. Other things, like home maintenance, have moved front and center, pushing the houseboat project aside. Temporarily, I hope! But I have not stopped thinking about it. Perhaps to keep the forward momentum going, I find myself searching Ebay and other online sites for things that I might incorporate into the construction. That's how I discovered a real old wooden ship's wheel stripped from the helm of a long dismantled craft, probably a fishing boat, on a Web site called Russian Antiquities. After all, if you are building a somewhat traditional-looking wooden boat, it hardly makes sense to go out and purchase a modern chrome-plated steering wheel for it, right? So, $80 later, my grandson Julio and I pilot the imaginary boat around the living room.
31 Dec 2016Strongback & Molds
Here it is, the very last day of 2016, and I still have not completed the "short-term"...
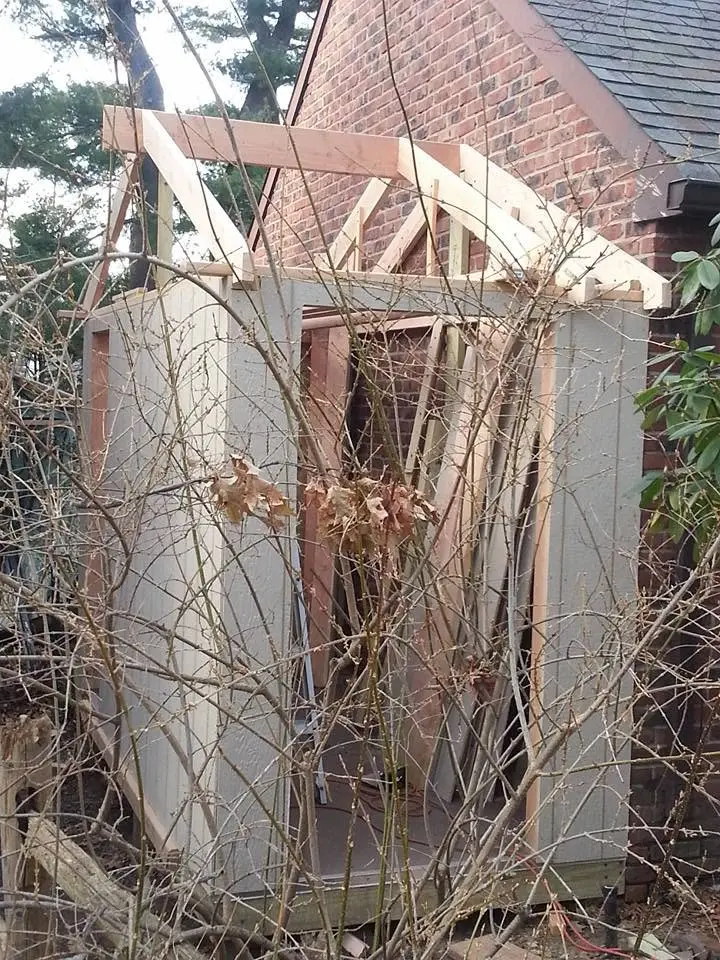
December 31, 2016. Here it is, the very last day of 2016, and I still have not completed the "short-term" construction of a shed that was supposed to help me clear out the garage and get back to boat-building. The long frames, wrapped in plastic on the deck, have gone through more than a year and a half, serving no purpose other than to reprimand me every time I look at them, for abandoning ship. It is perfectly clear that I will still be building the shed well into 2017, when the weather is warm enough that I should be building the boat instead.
2 May 2017
Finally, the shed is done.
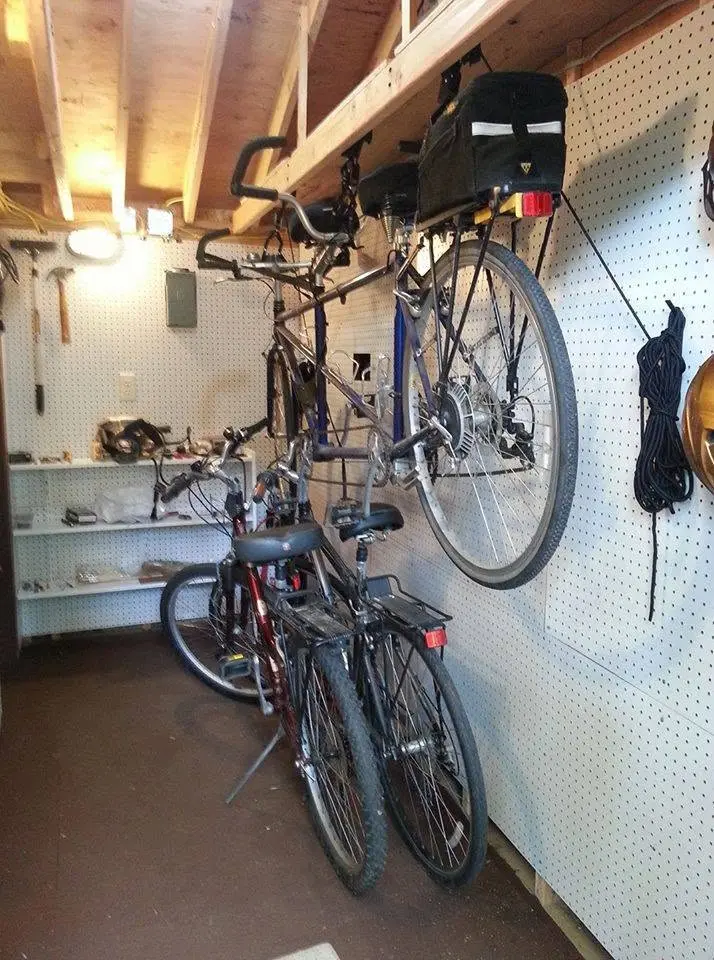
May 2, 2017. Finally, the shed is done. The bikes are out of the garage, and I can move around and find my tools to get back to work on the houseboat. The question is, can I avoid getting myself sidetracked again? We'll see.
Chapter 04
Hull Panels
Scarfing plywood, cutting panels, milling strips or planking stock.
17 daysfrom June 2017
17 Jun 2017Hull Panels
At long last, more than a year after I put the houseboat parts into storage, I have...
June 17, 2017. At long last, more than a year after I put the houseboat parts into storage, I have resumed work. Here, I am rough-cutting the transverse bulkheads. There will six of them. The original plan calls for two, but that's for a 17-foot boat. I'm stretching it out to 20 feet, so I feel I need extra stiffening in the stern and bow. My Facebook friend, Penny Barr, an artist who lives and works on a houseboat in Toronto, noted: "We ALL need extra stiffening now and then. .." Another friend from my Journalism days at the New York Post, who calls himself Thomas Wolfe, observed: Thomas Wolfe "Expensive looking plywood. Measure three times.
"
A discussion is in order here about the merits of different kinds of plywood. When I started this project, very expensive marine okoume plywood was available from a supplier within driving distance in White Plains, N.Y. But the supplier stopped carrying the product and recommended lauan plywood instead. I thought I knew what lauan was -- the cheap junk sold at big box home centers for use as underlayment for hardwood flooring. But it turns out the same wood is used in a very high-quality marine plywood that sells for about $60 a sheet, compared with $100 for a similarly sized sheet of okoume. It has a beautifully figured grain, finishes very nicely, and contains seven plies in the 3/8-inch version, waterproof and boil-proof glue between the plies, and absolutely no internal voids or external dutchmans. So it looks like I'm going to be using a lot more lauan.
28 Jun 2017Strongback & Molds
One day closer to the big splash!
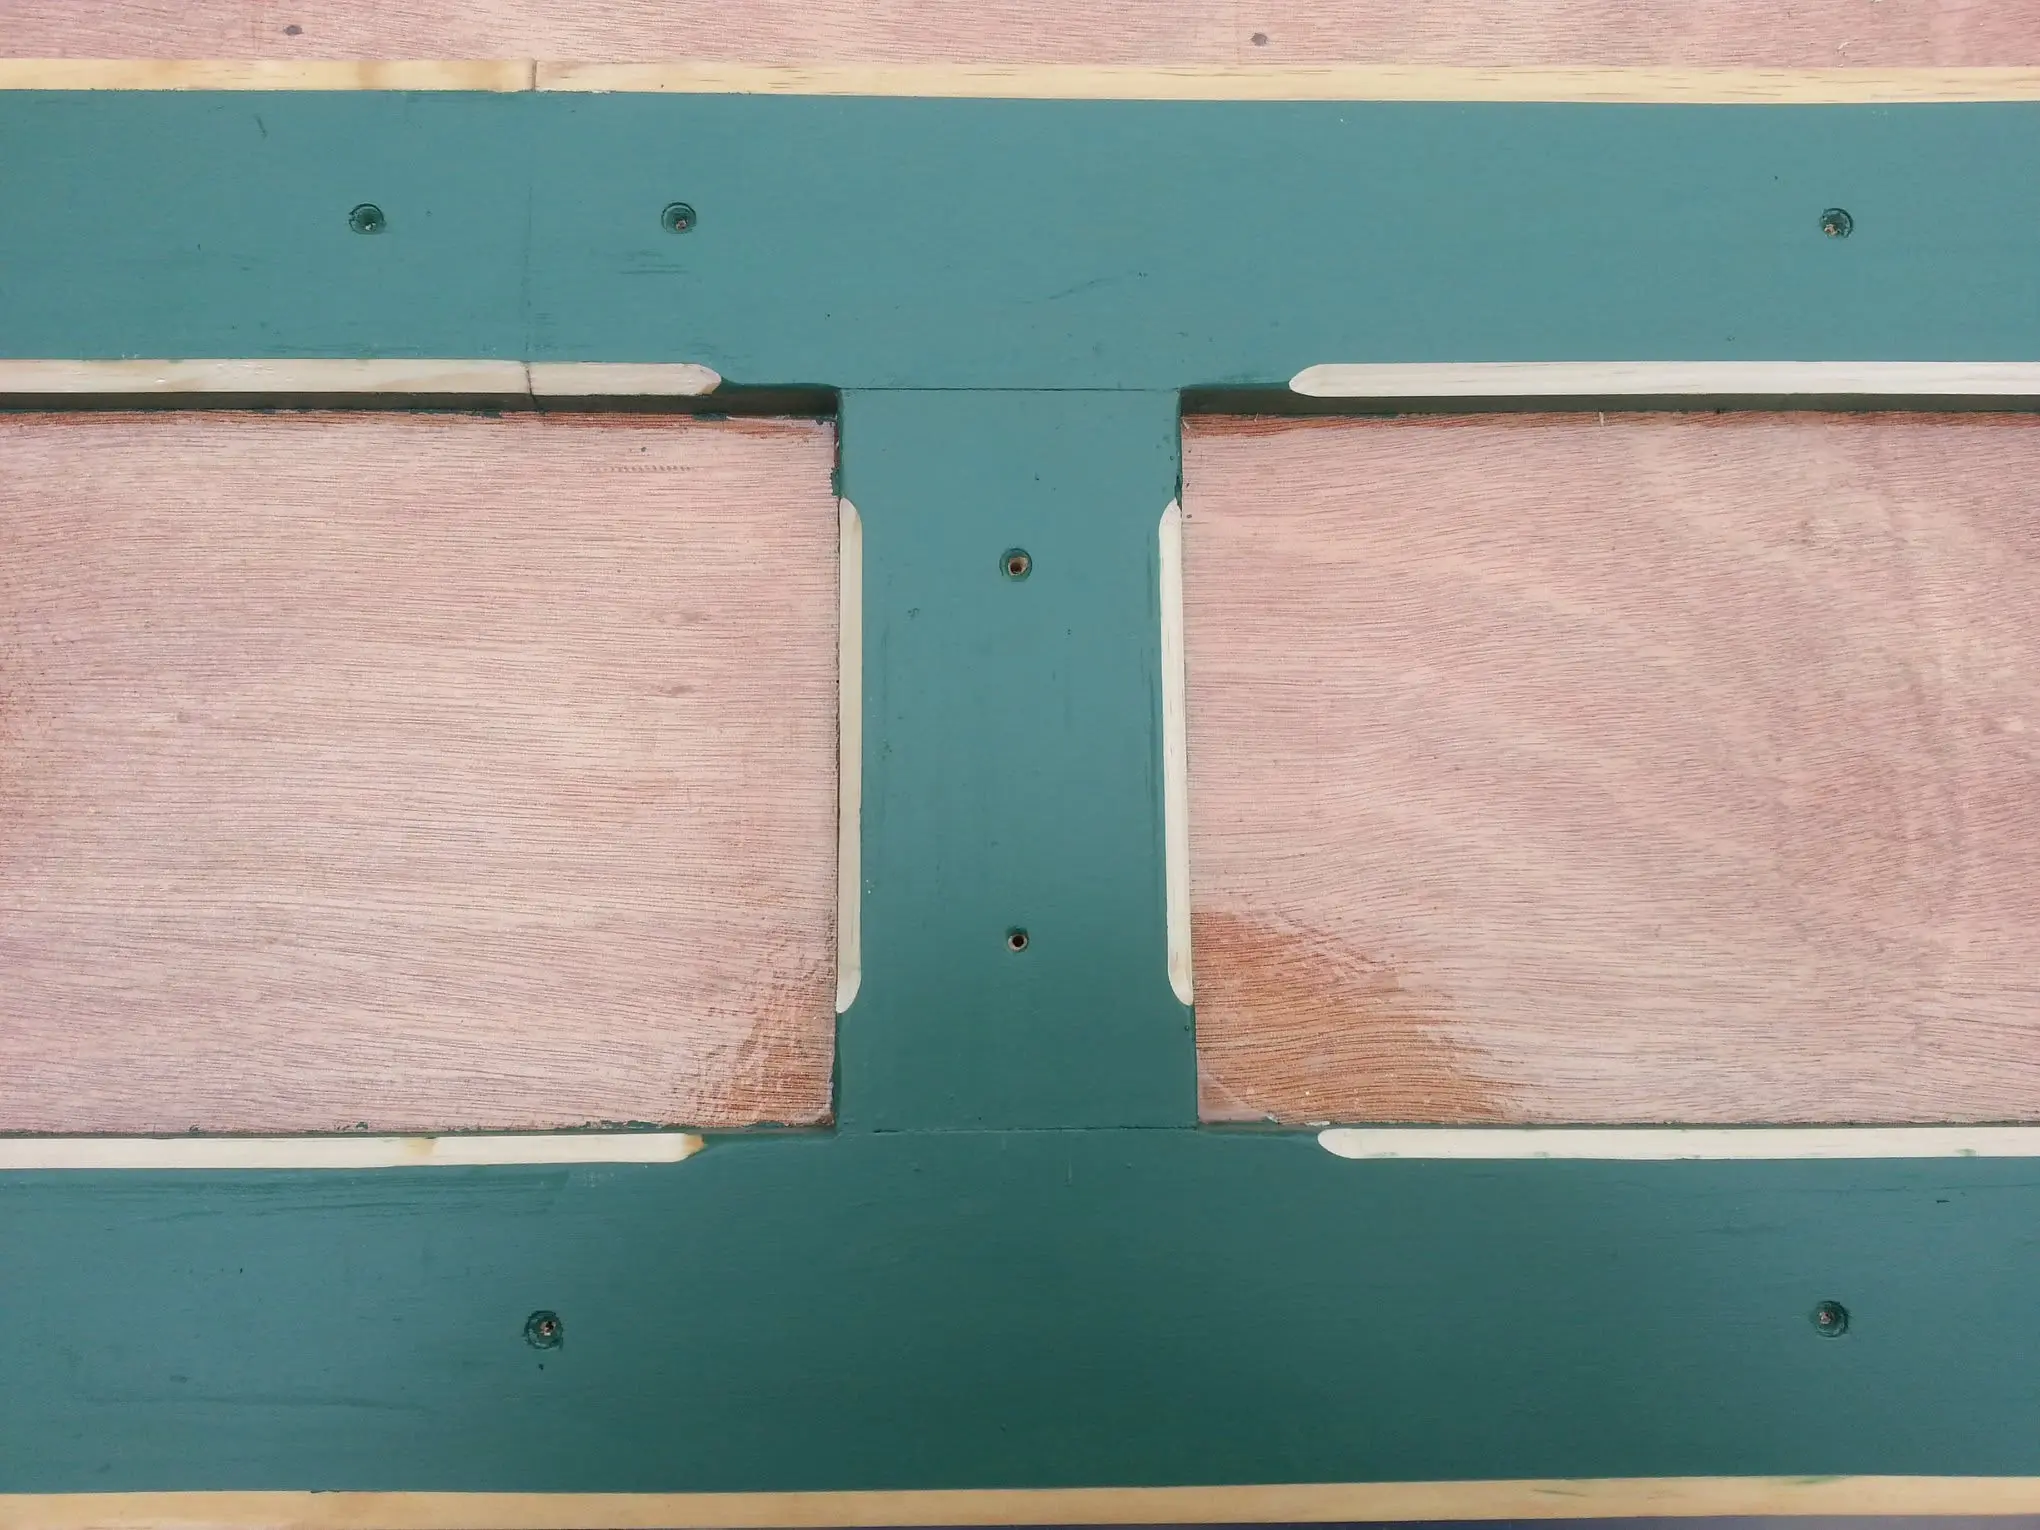
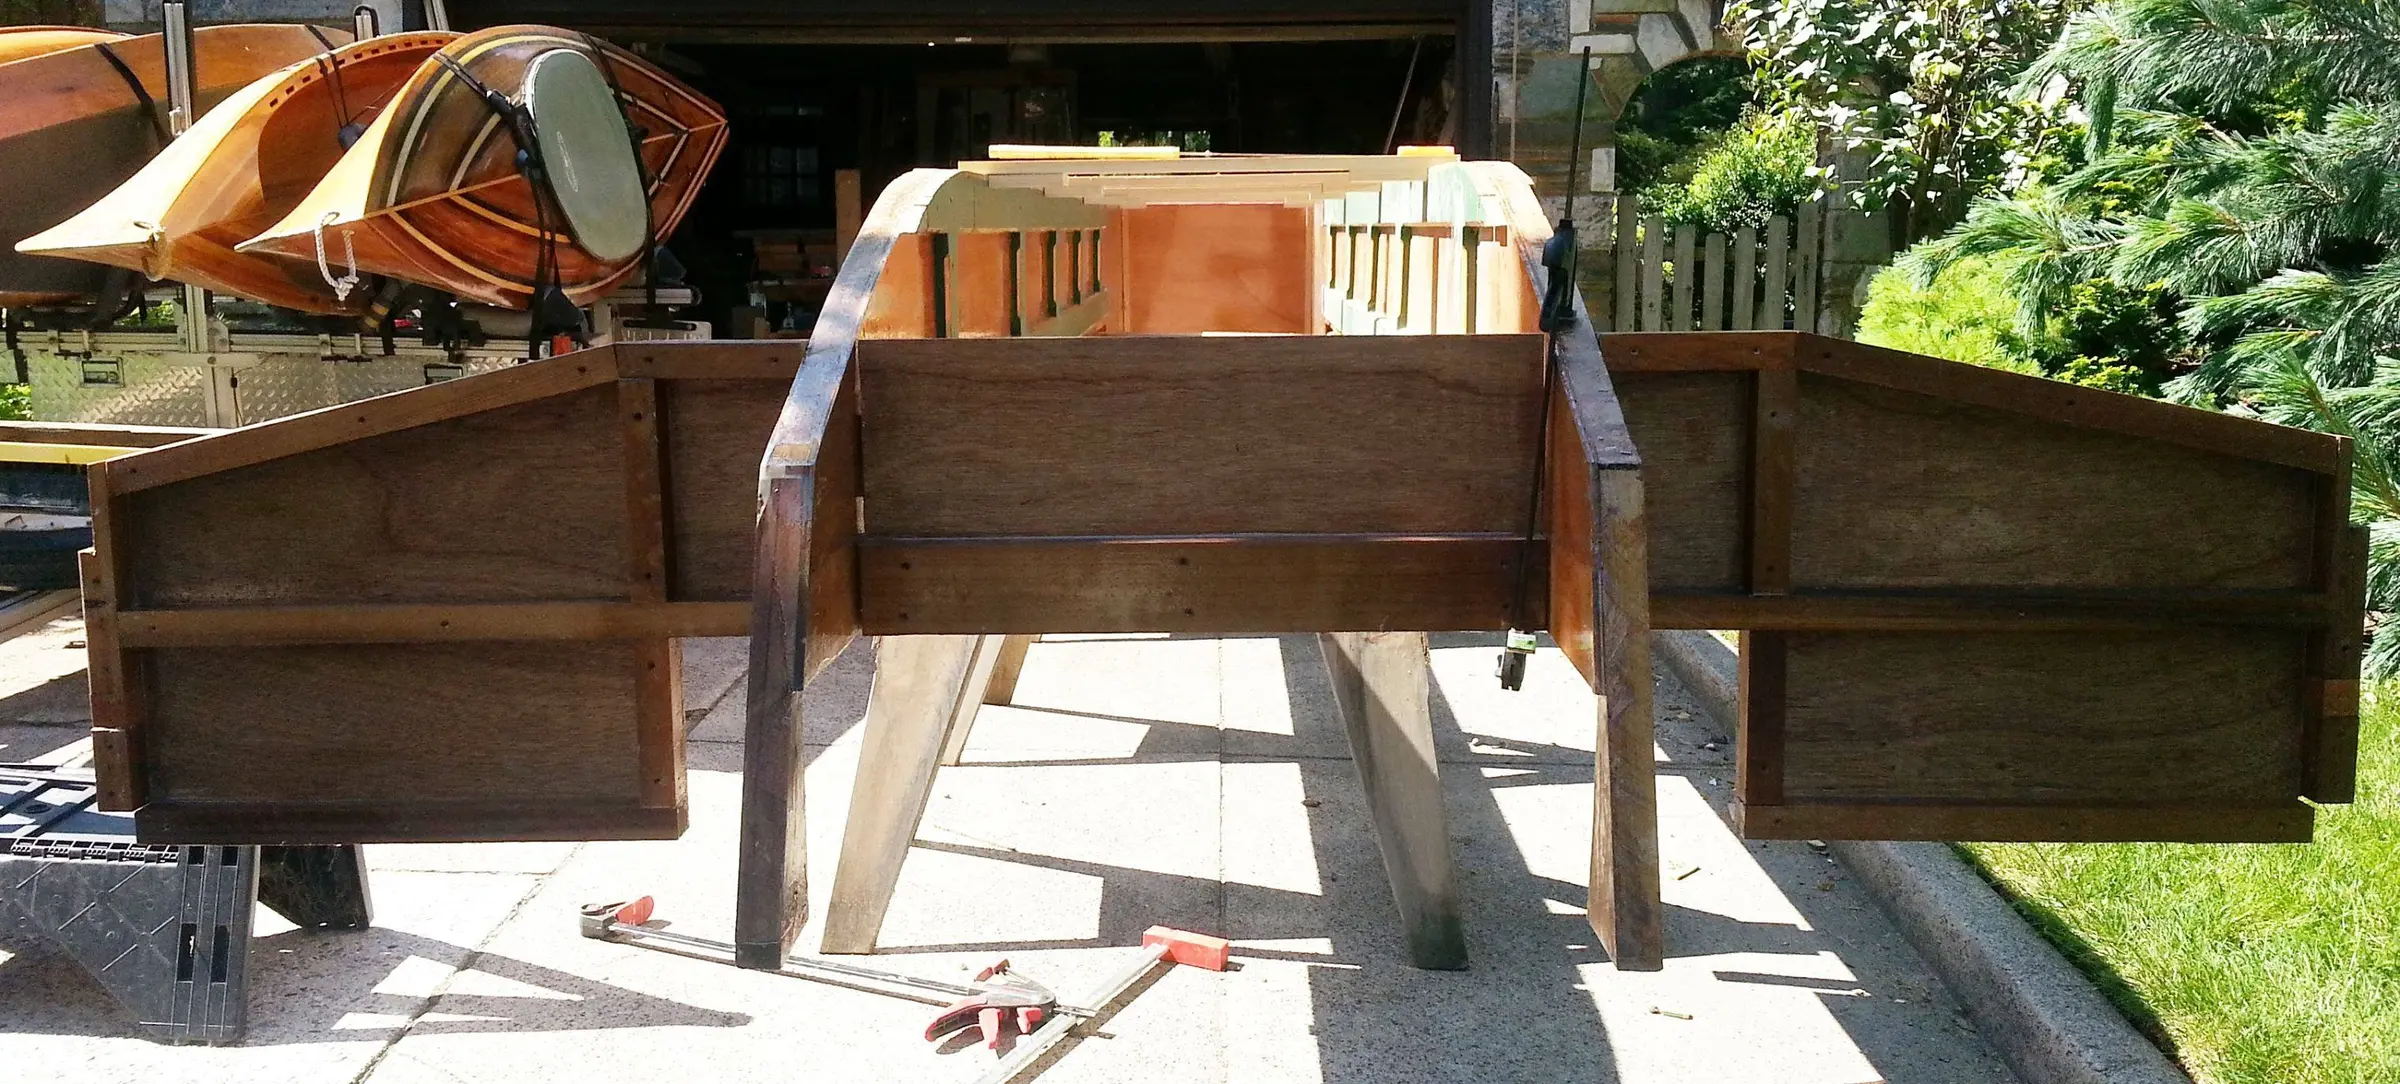
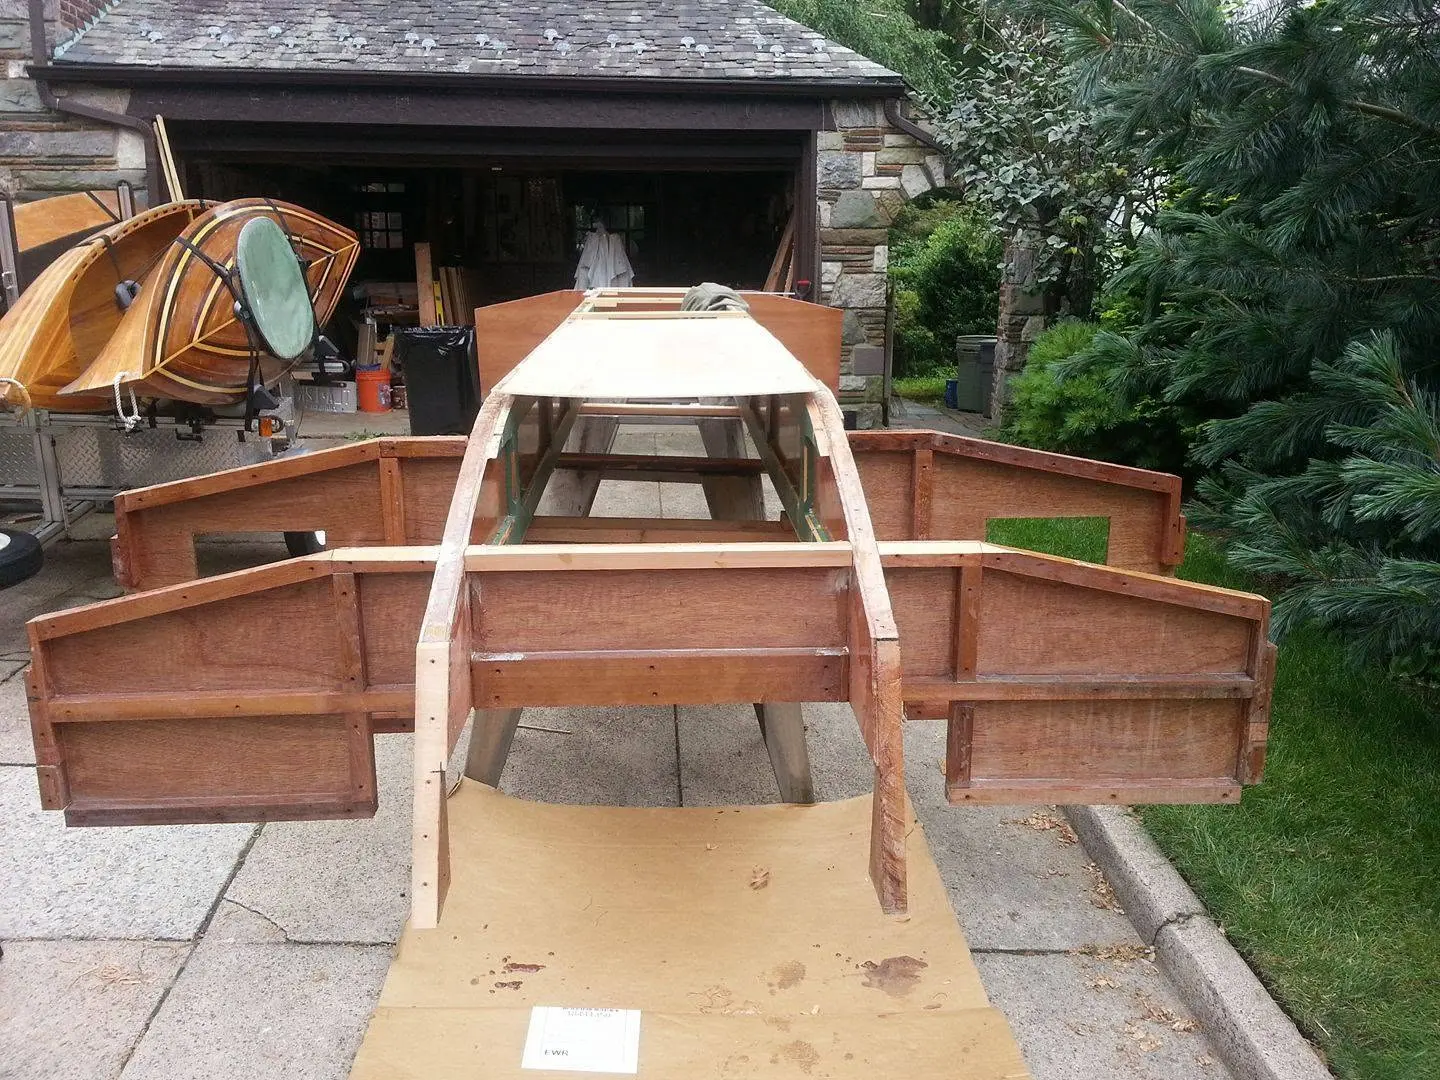
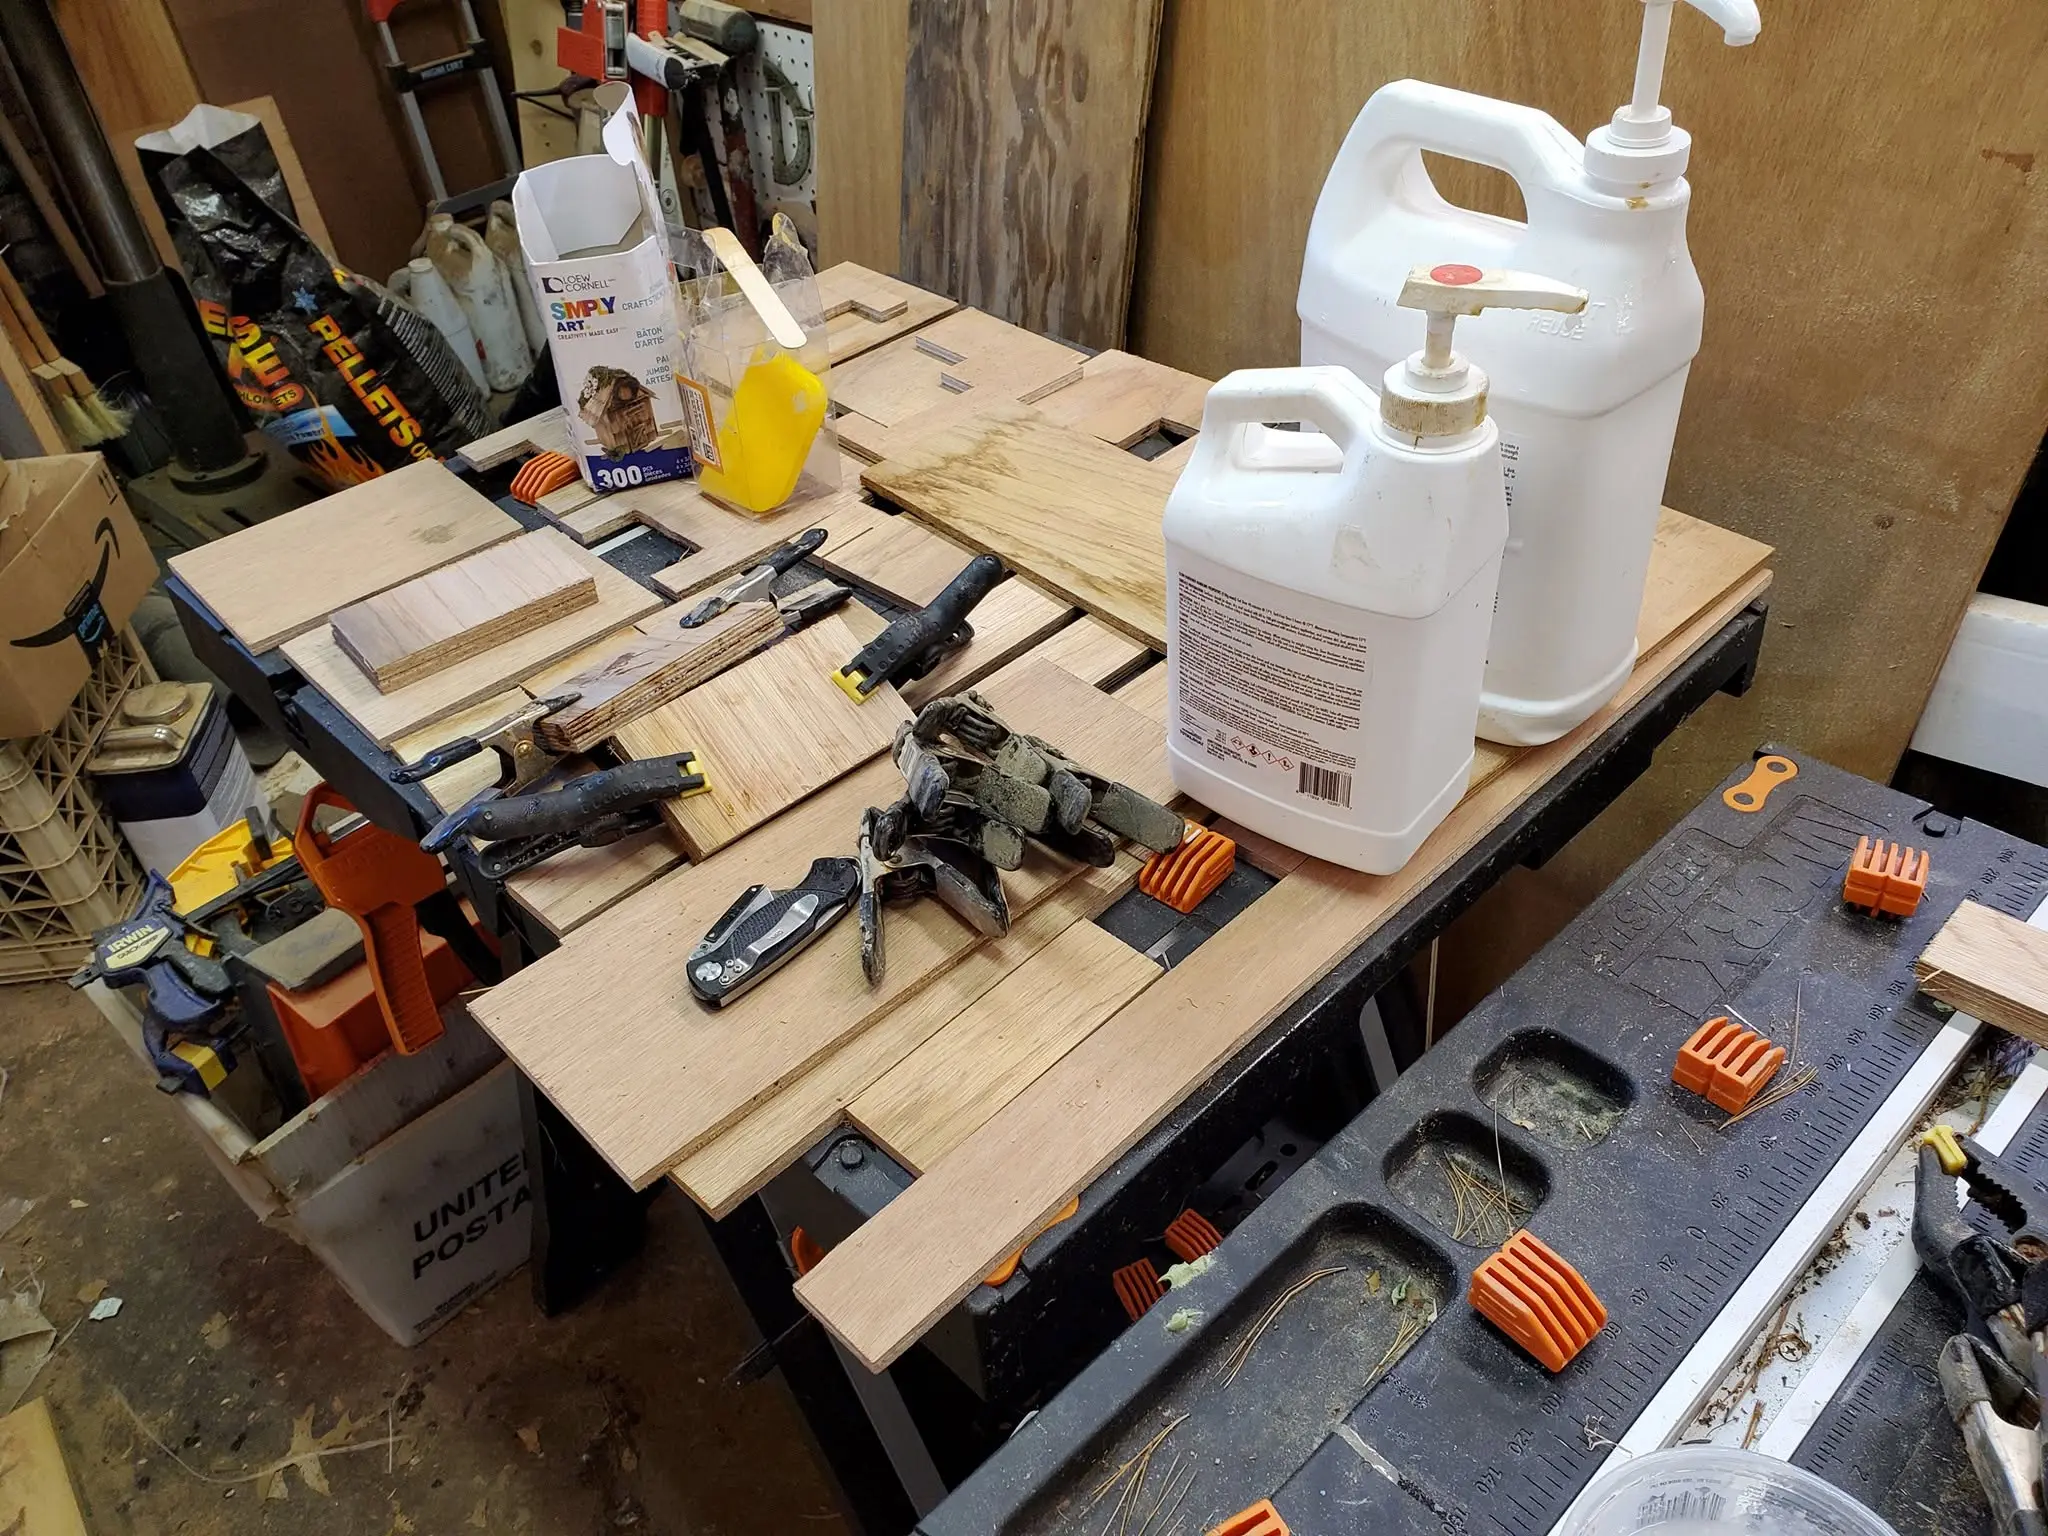
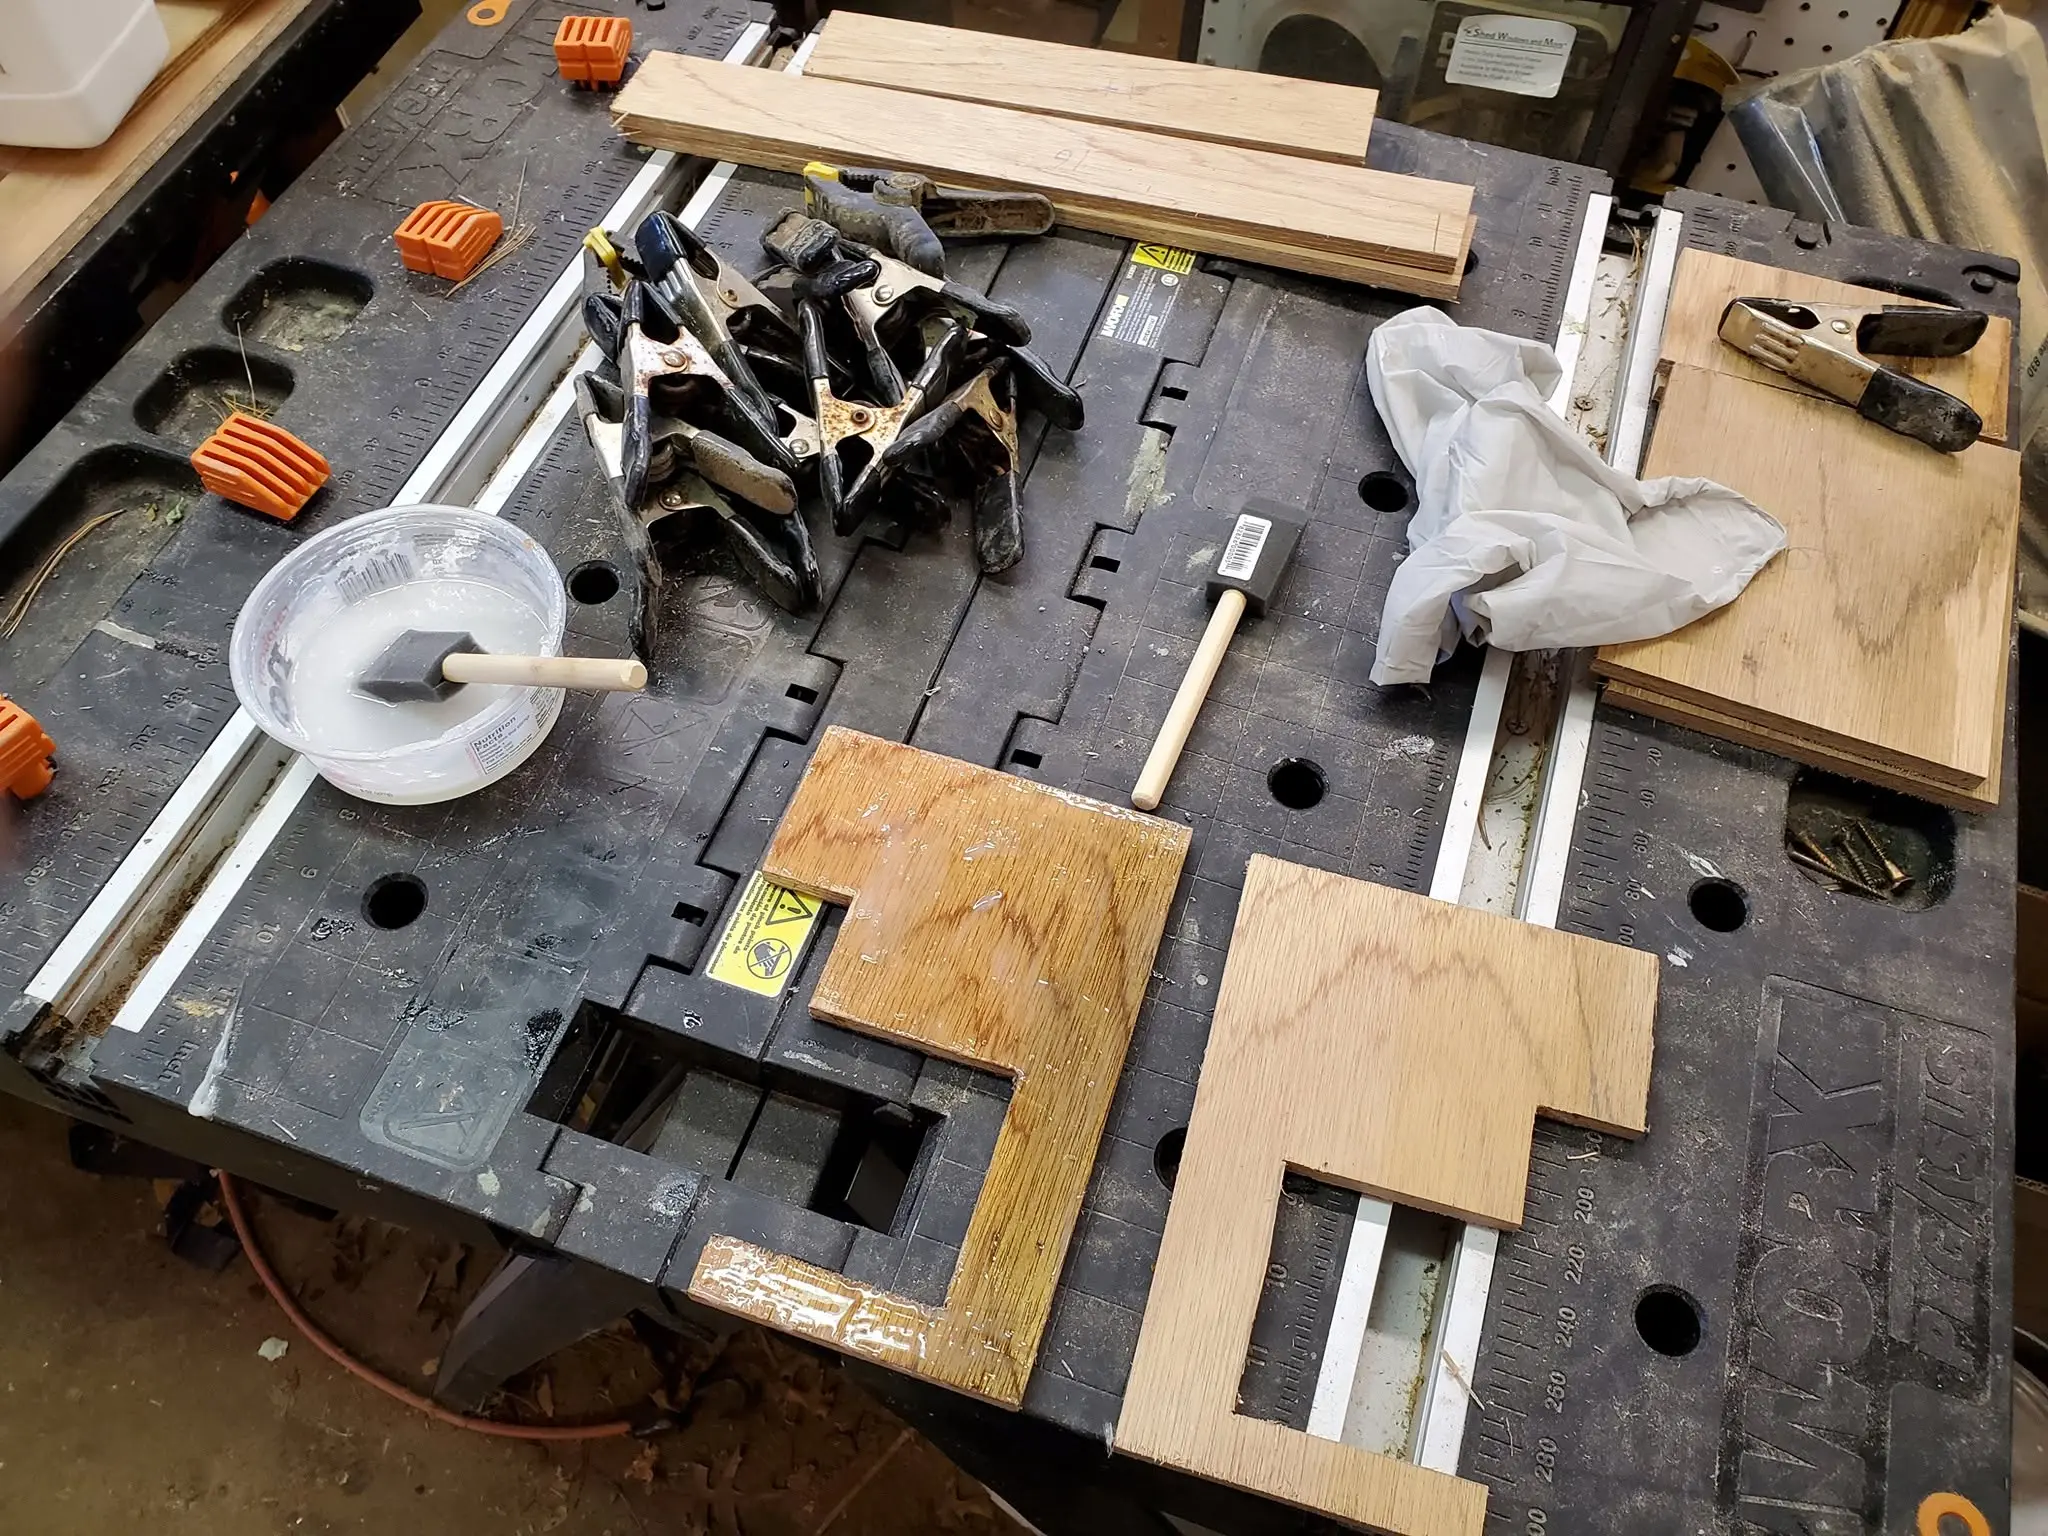
June 28, 2017. One day closer to the big splash! Today's progress on the houseboat project -- the layout and dry fit of the parts that go into the bulkhead closest to the bow. I screw everything together temporarily with sheetrock screws, drilling pilot holes as I go. (Try screwing into cedar without pilot holes and you wind up with expensive kindling.) This bulkhead is representative of the cross section of the outside deck areas of the boat. The recessed area in the center at the right of the picture will support the deck; hence all the extra cedar bits. The two "ears" at the ends show the height of the deck as originally designed. I left them as wide as they are to serve as comfortable seating. Tomorrow, I'll unscrew everything, slather on a gooey epoxy mixture and refasten it all. Then, when the glue hardens, I'll remove all the sheetrock screws, and replace them with non-corroding silicon-bronze screws. After that, I will seal it all with two coats of unthickened epoxy. There are six of these bulkheads, four more than the original design called for. (Plus eight partial bulkheads, four on each side.)
29 Jun 2017Deck & Coamings
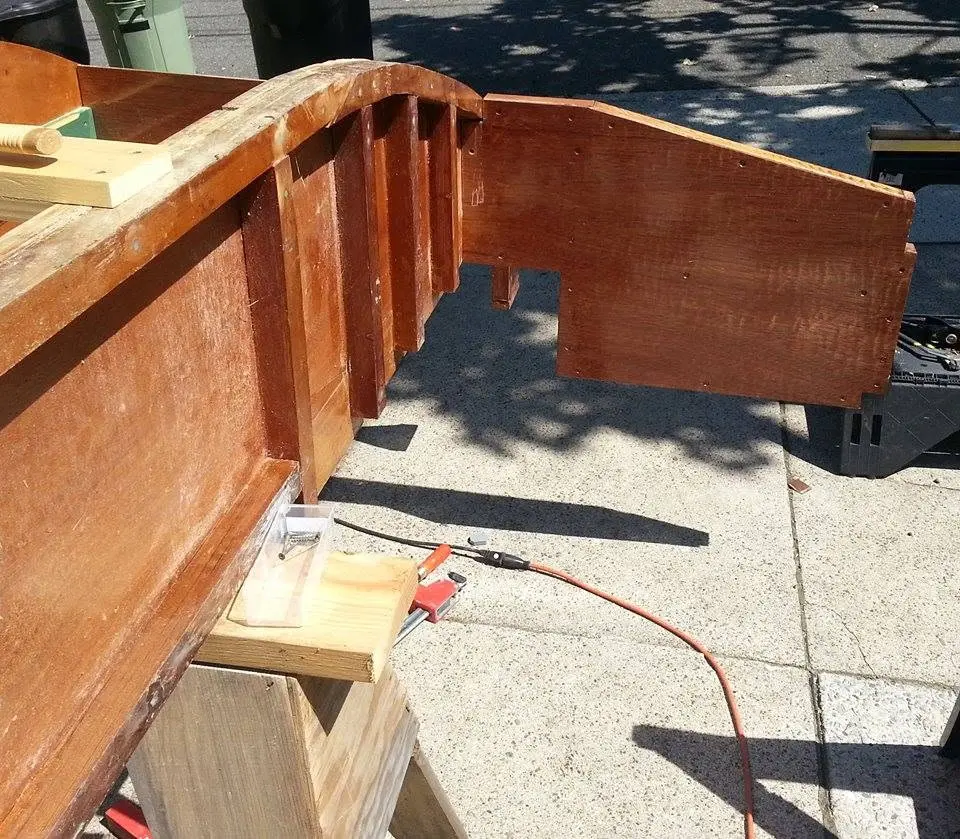
Here's the aft bulkhead, the structural wall that will separate the motor well from...
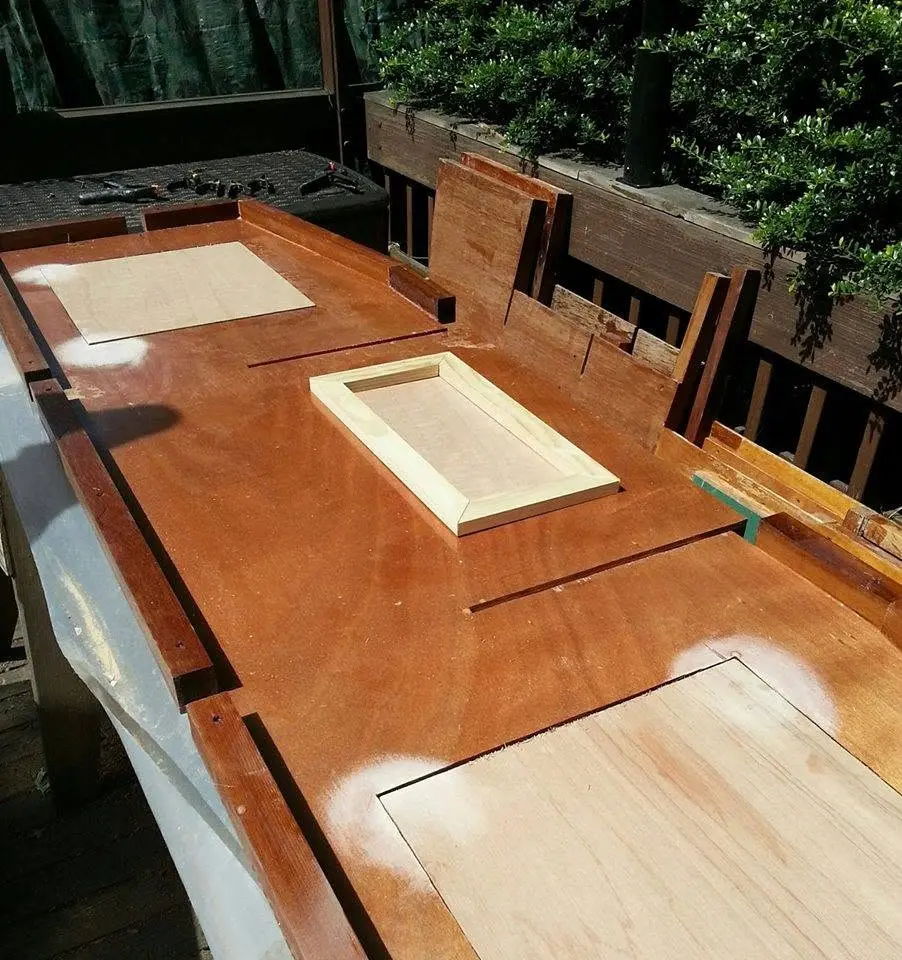
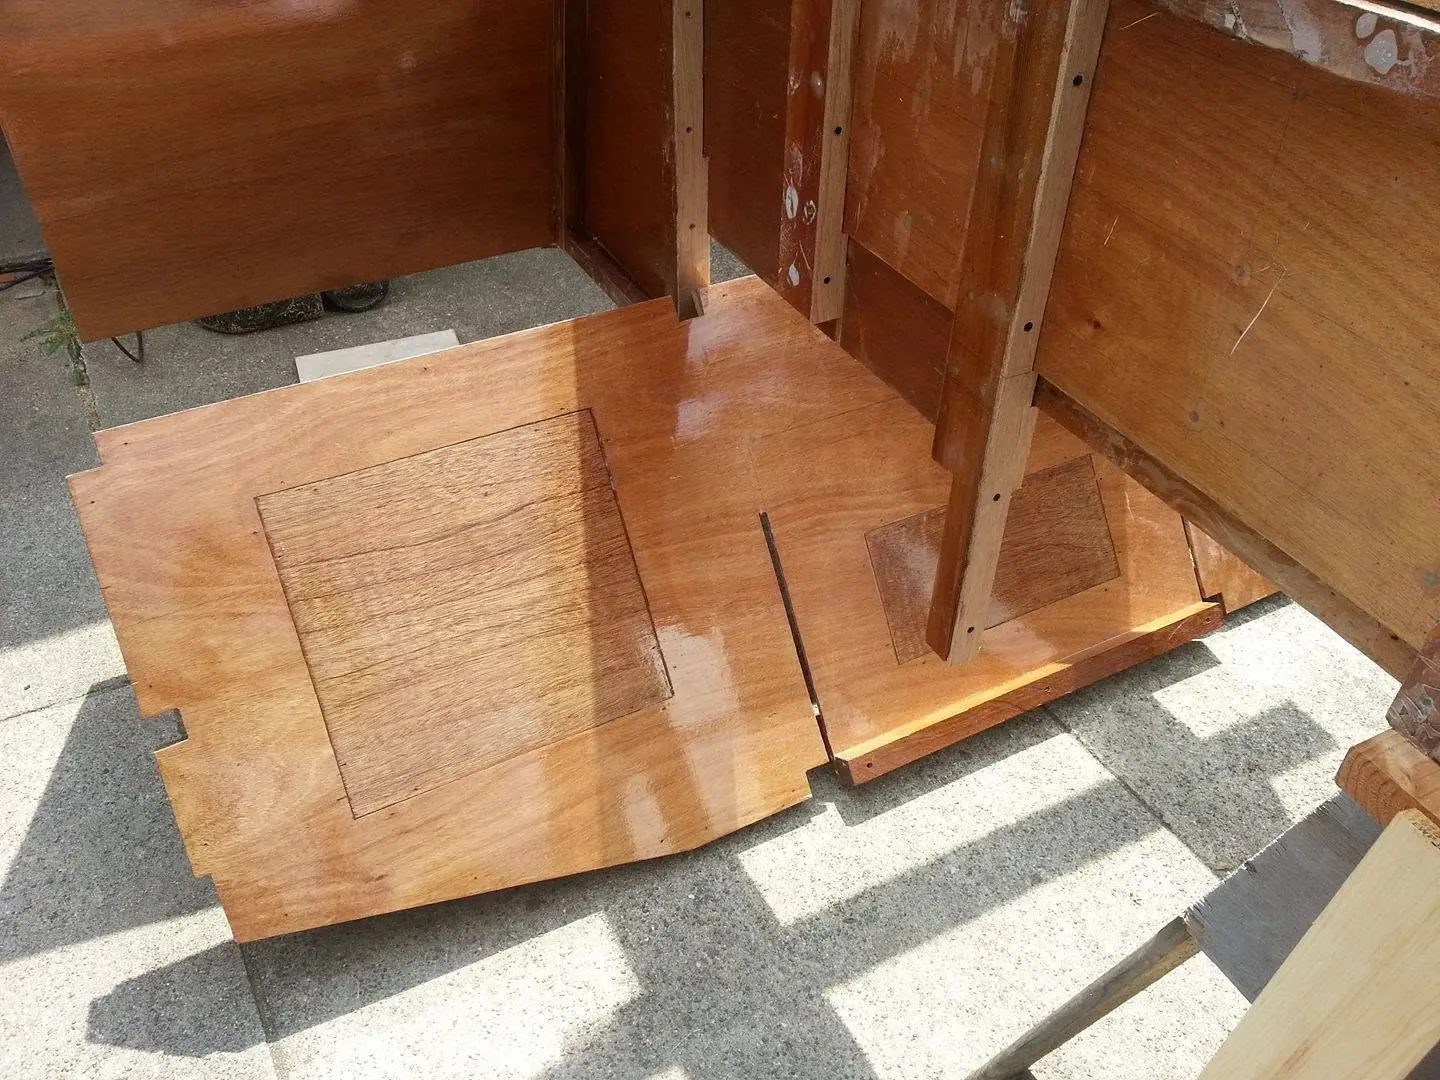
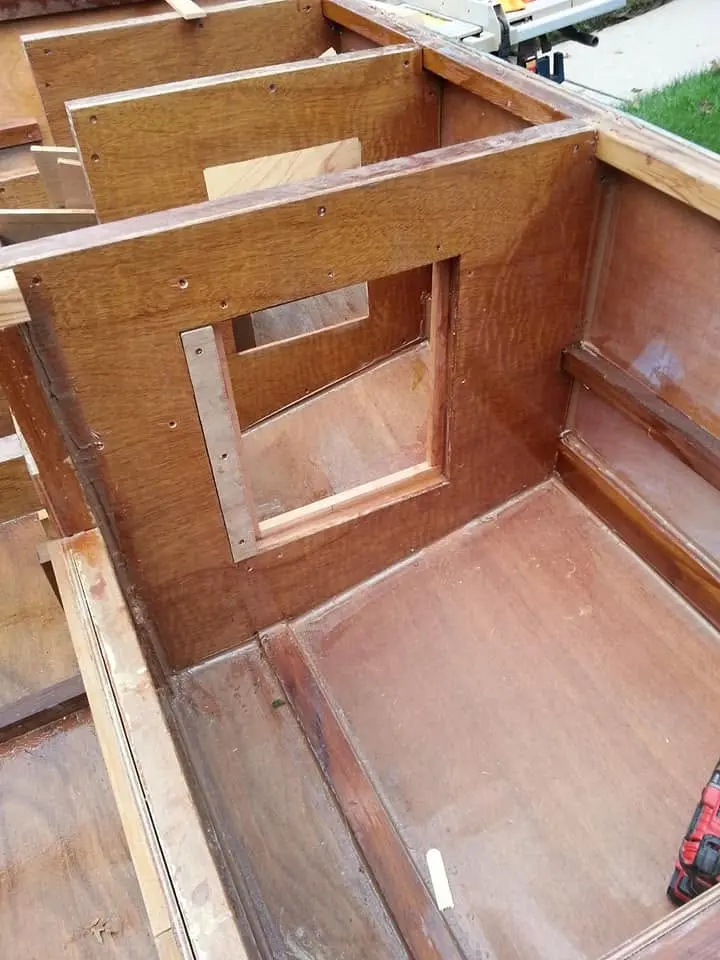
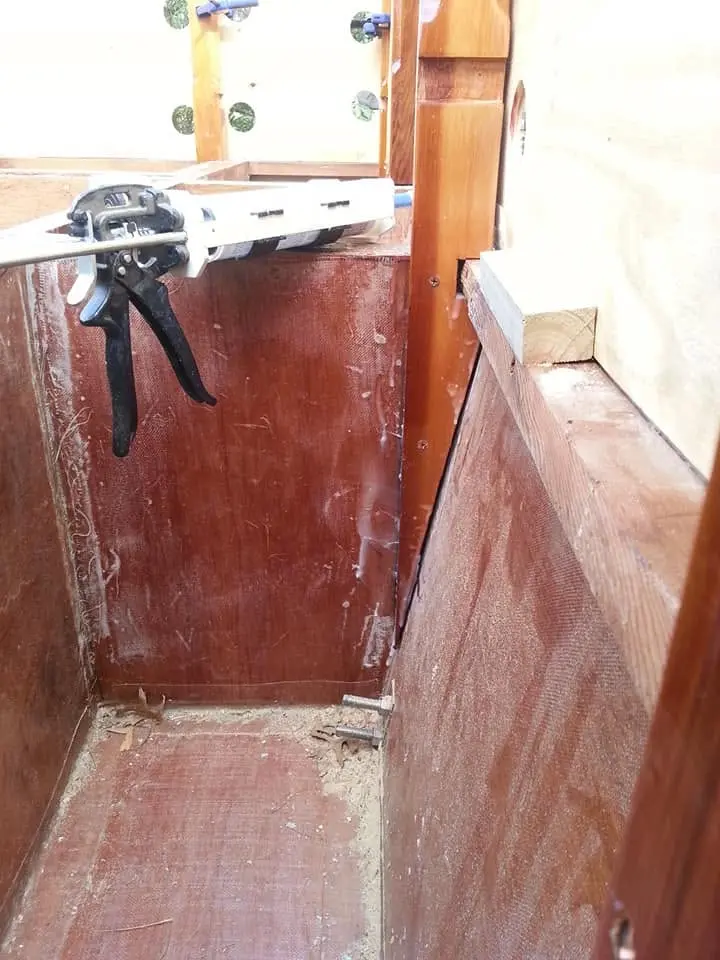
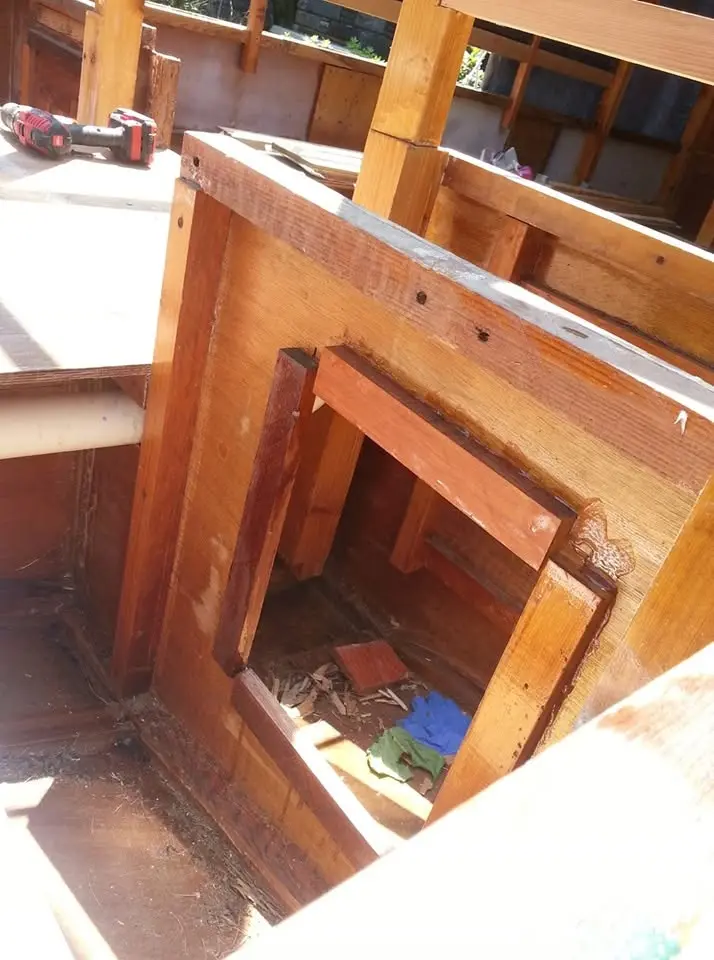
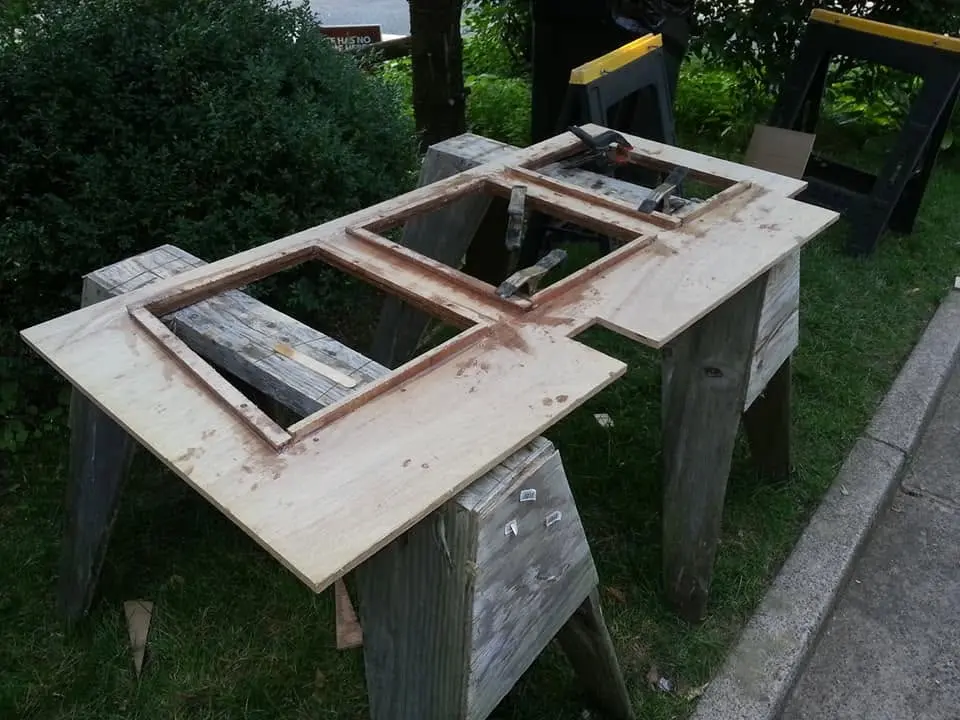
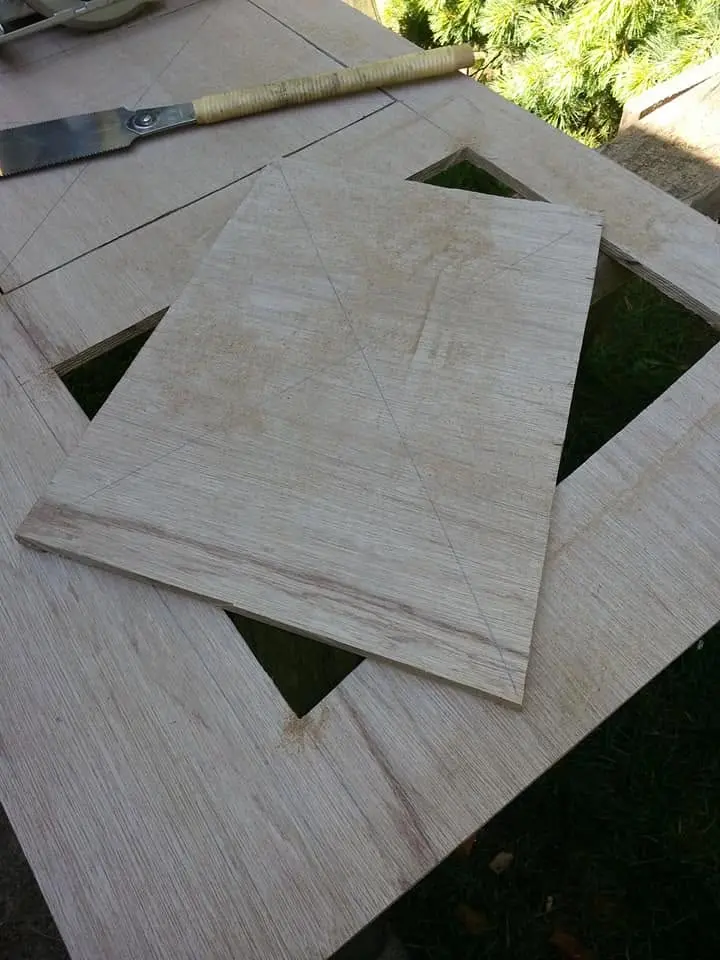
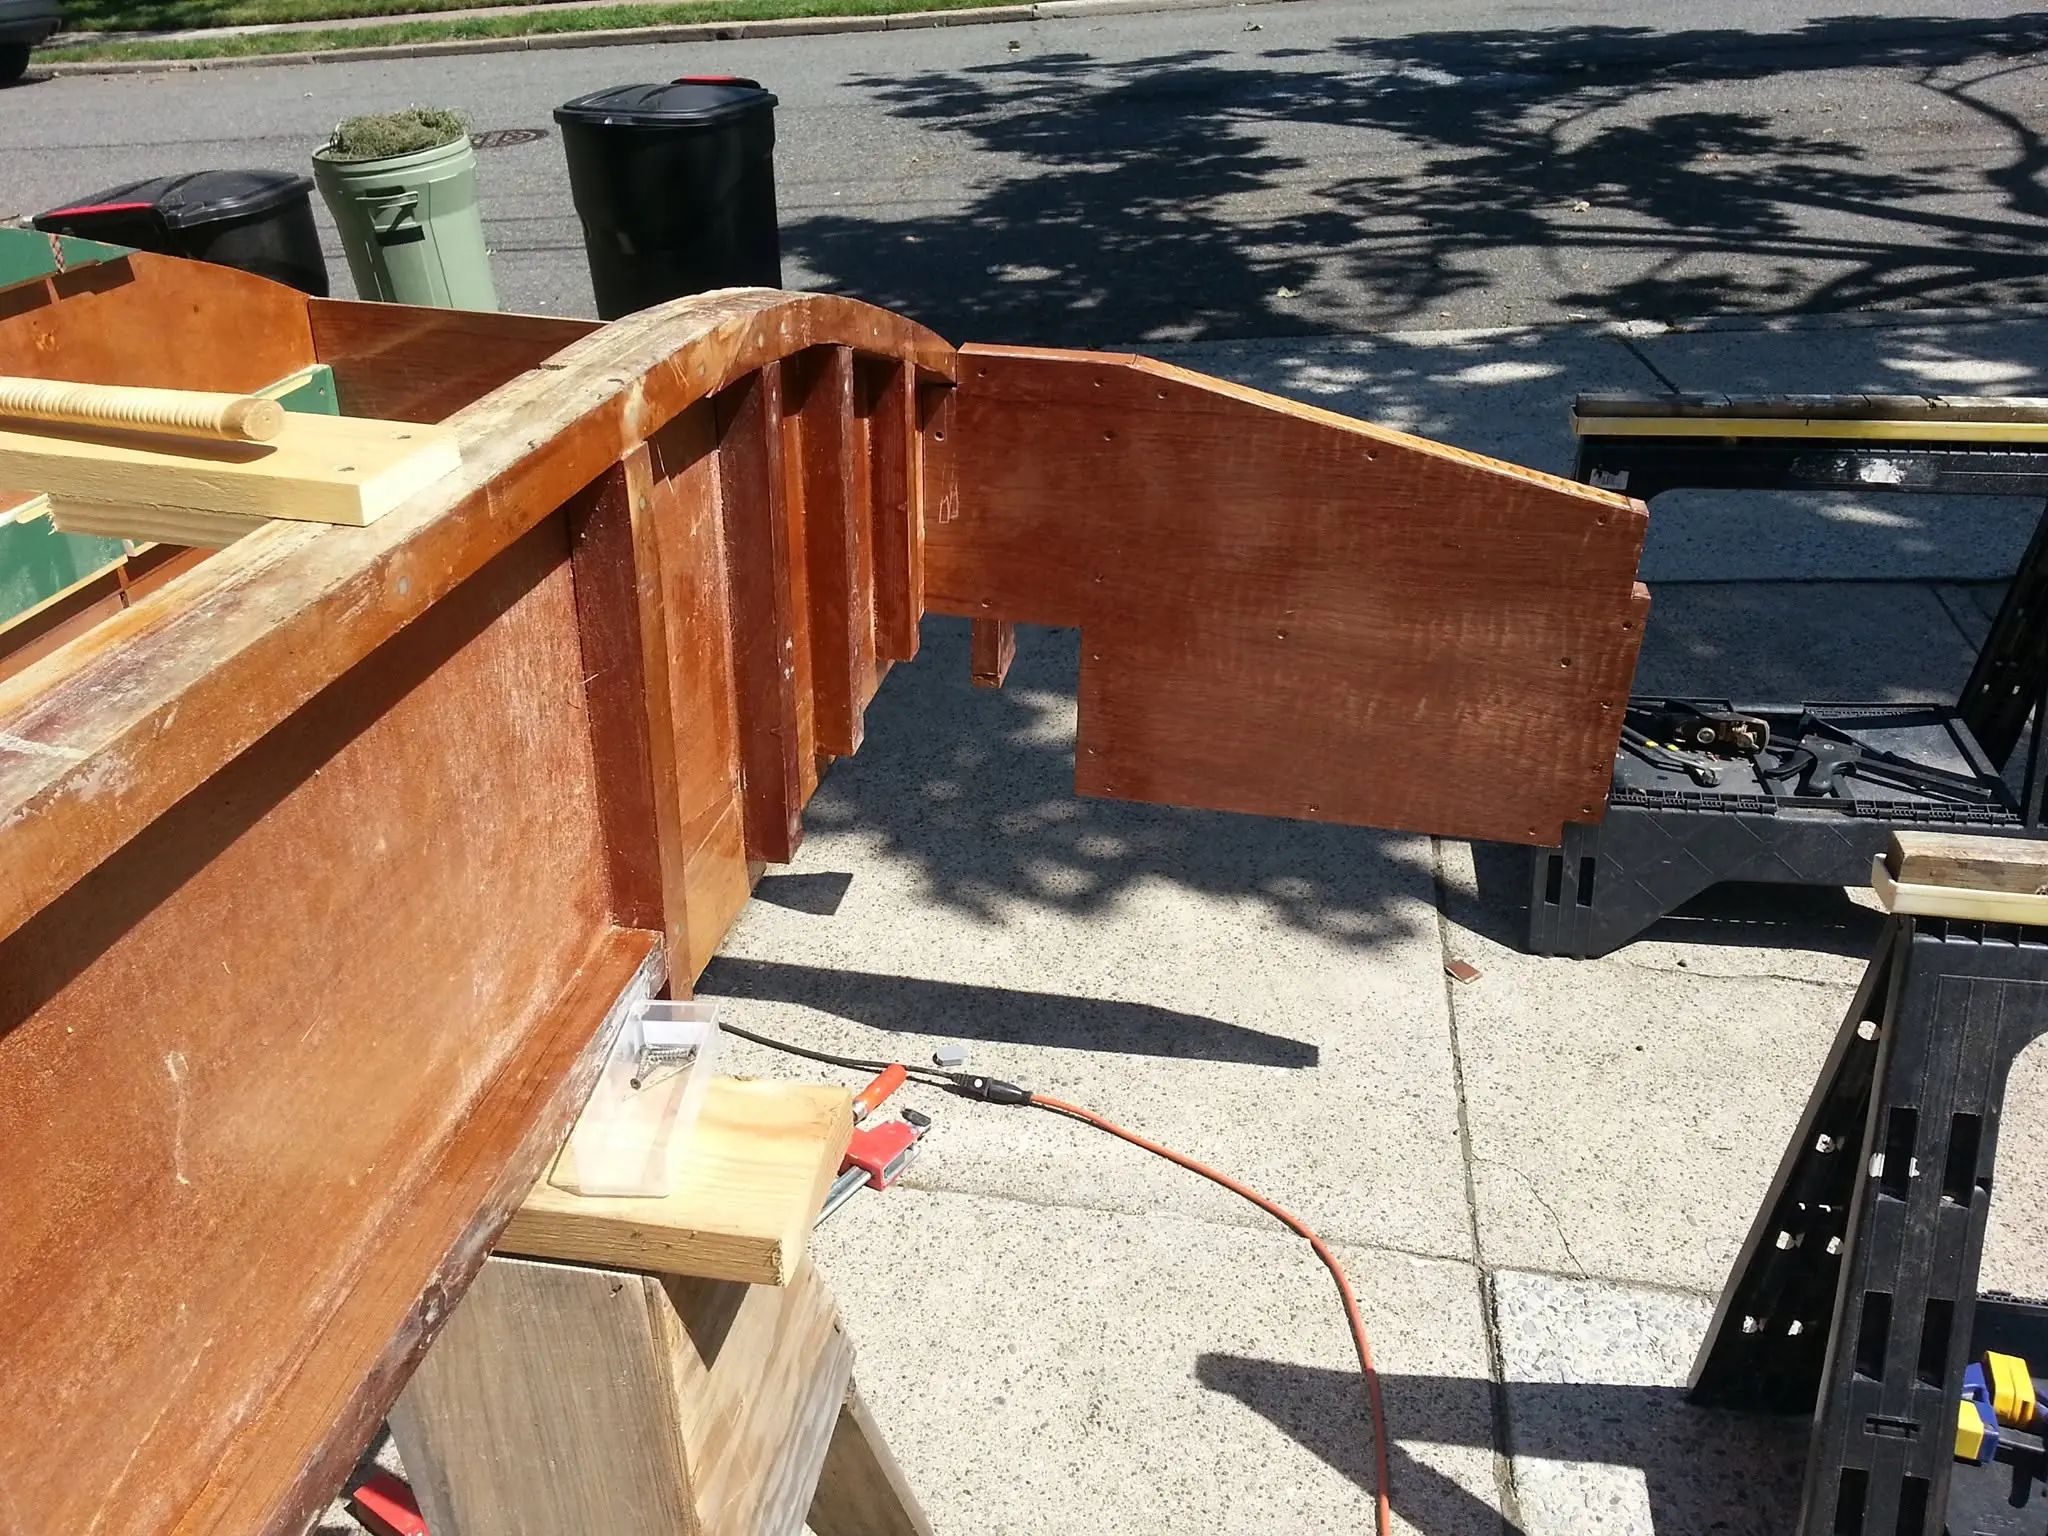
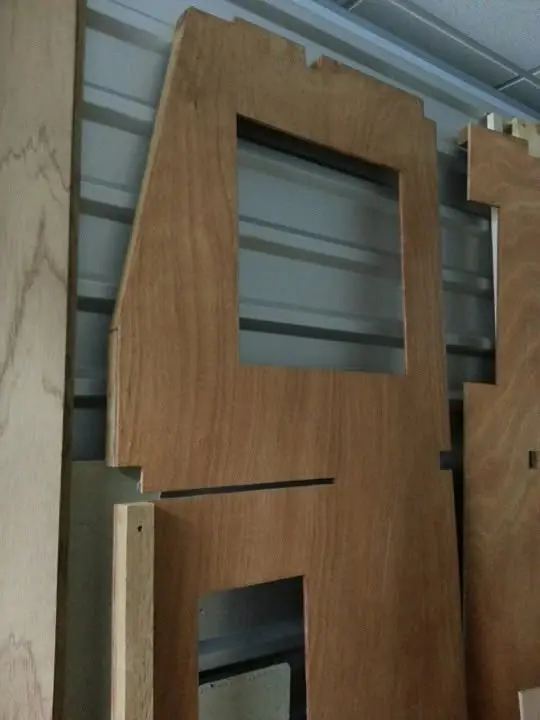
June 29, 2017. Here's the aft bulkhead, the structural wall that will separate the motor well from the rest of the aft outside deck area. The original design had below-deck access ports, which I cut in accordance with the plans. But I have since modified the design to lower the deck and lengthen the outside aft area by 18 inches, so the below deck ports will be quite difficult to get to if I have to for any reason. Instead, I will provide access to the motor well via hinged covers from the topside. So I am filling in the holes with patches cut to size, and covering the seams with a mitered frame to make the patches look like decorative panels. I think it will look like an elegant custom touch rather than the fix-up that it is. Gotta roll with the waves! By the way, in the background you can see the two longitudinal frames, stripped of their plastic cocoons, leaning up against the deck railing. All that time being snowed on and rained on didn't seem to cause much damage, I happy to report.
Chapter 05
Glassing & Epoxy
Sheathing in cloth, wetting out, fill coats.
27 daysfrom July 2017
8 Jul 2017Glassing & Epoxy
A setback! I took a chance with the weather and finished the faces of two of the bulkheads
July 8, 2017. A setback! I took a chance with the weather and finished the faces of two of the bulkheads with a coating of epoxy. The epoxy cured hard despite the rainstorm that inevitably came, but the rain caused it to be lumpy, ugly and clouded. I'll have to sand it down to the bare wood and start over again. Ugh.
10 Jul 2017Deck & Coamings
The last two of the six full-beam bulkheads, all sealed up with epoxy.
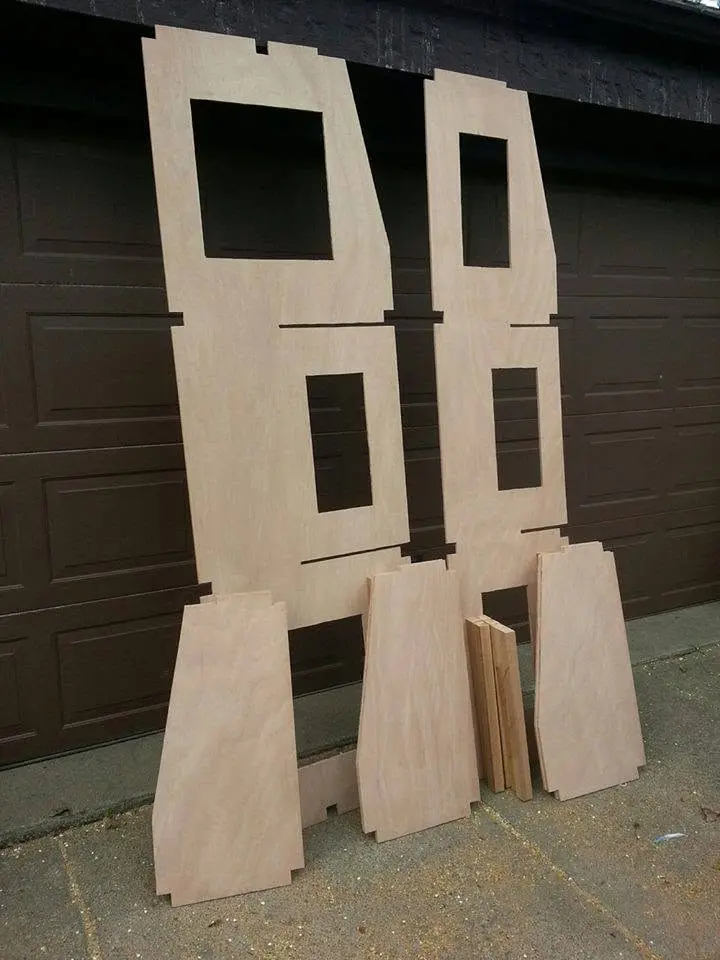
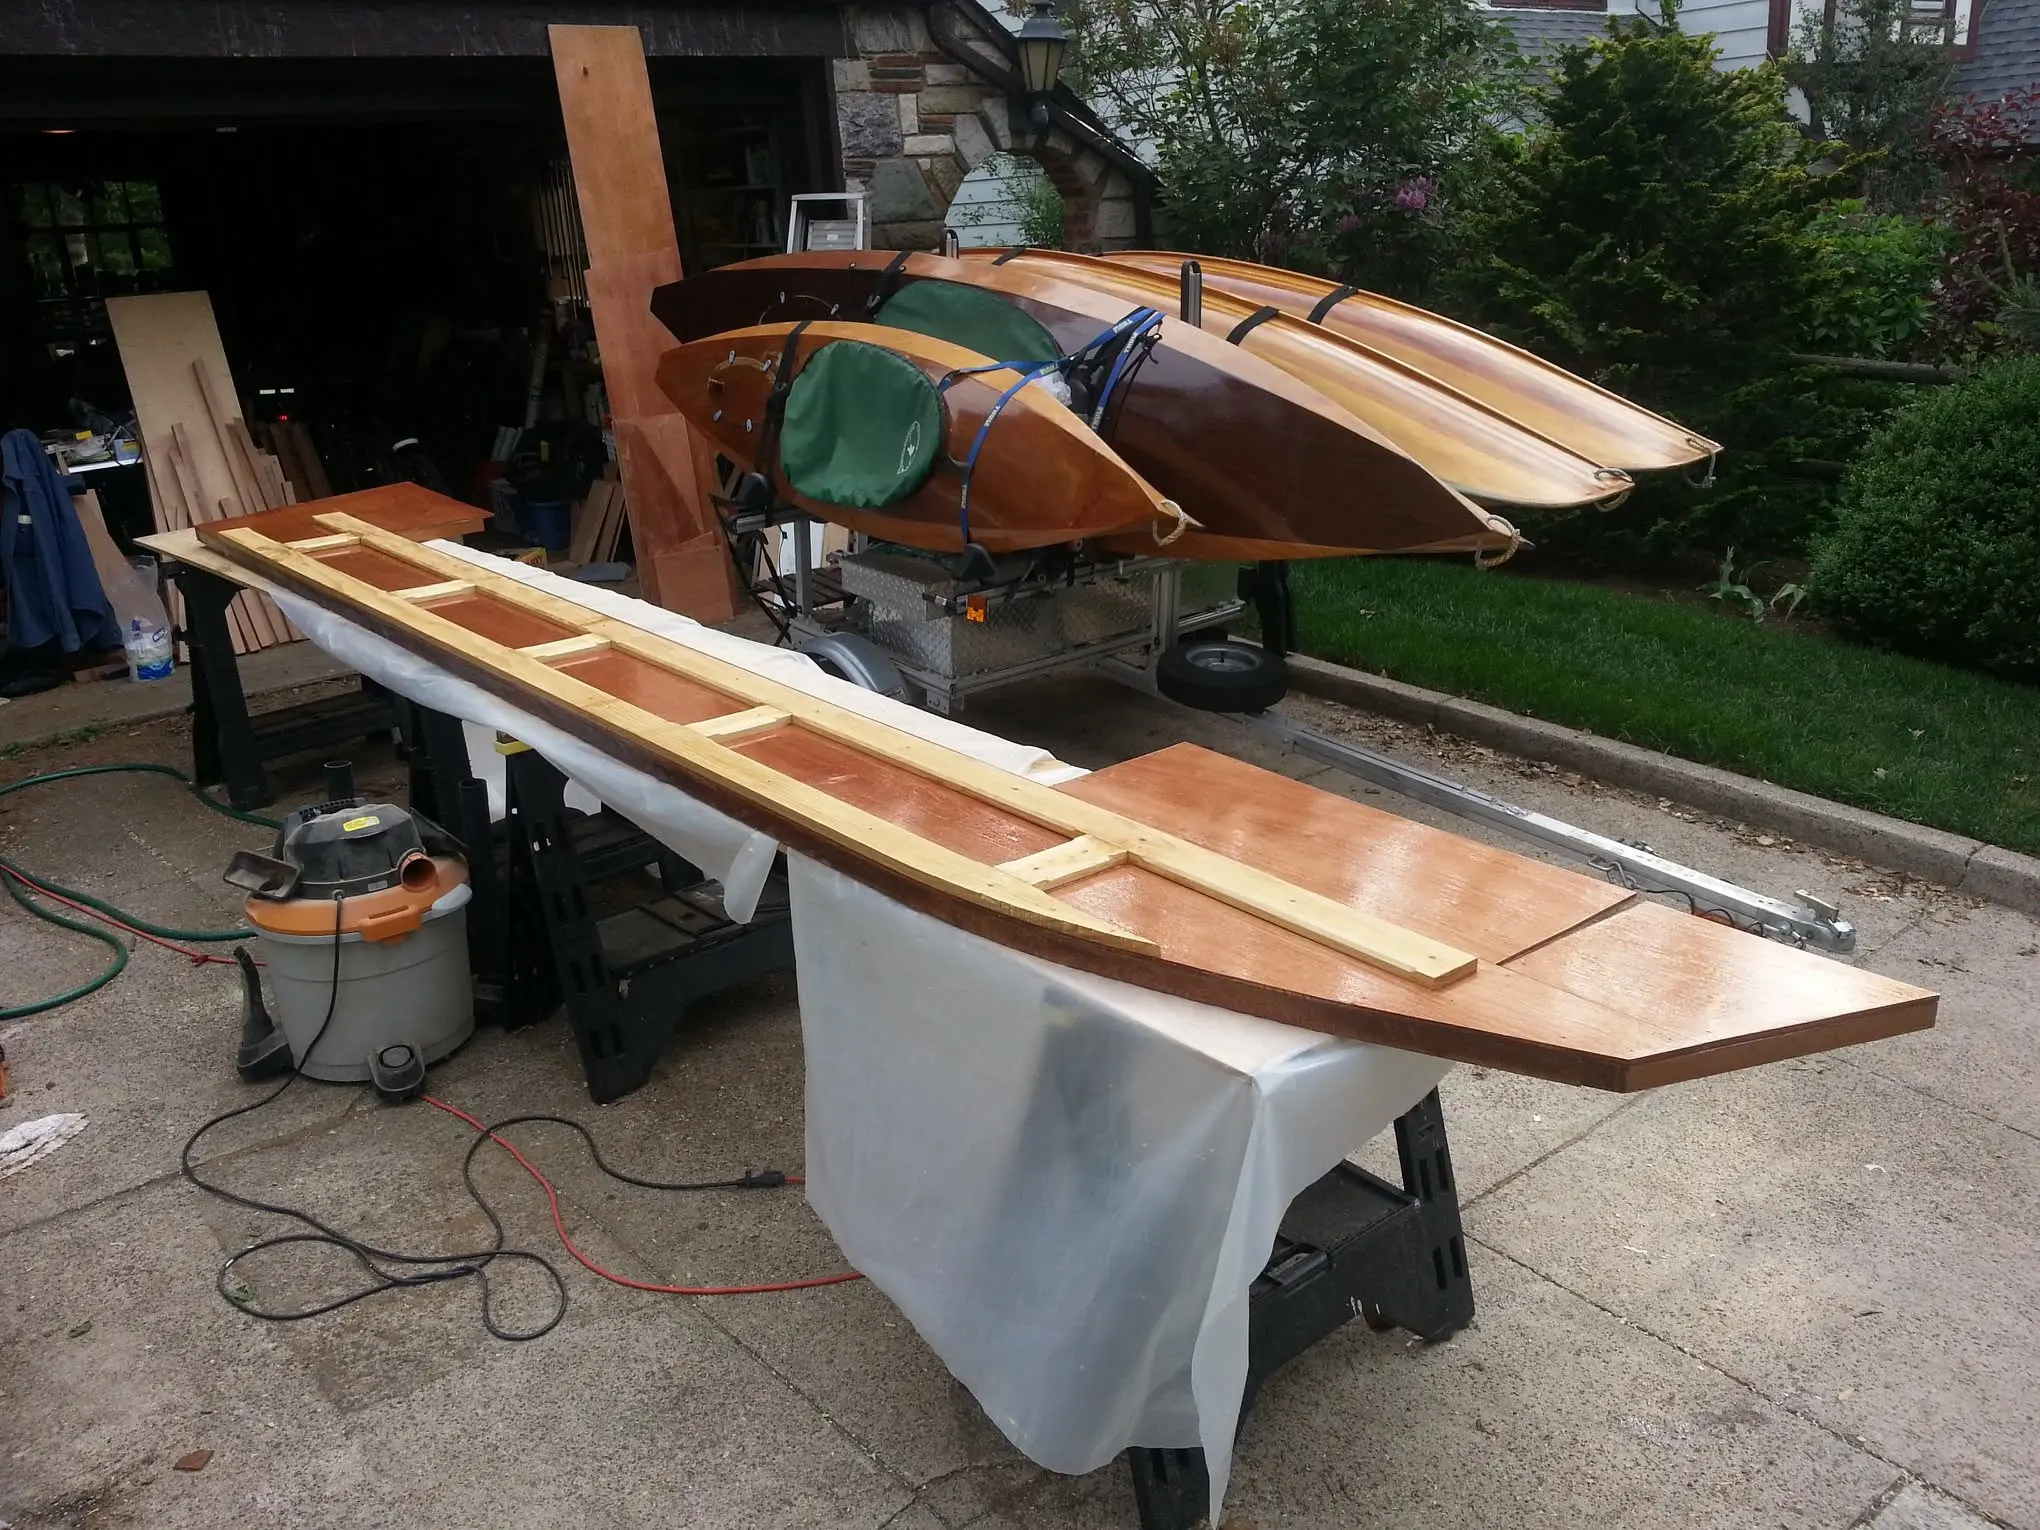
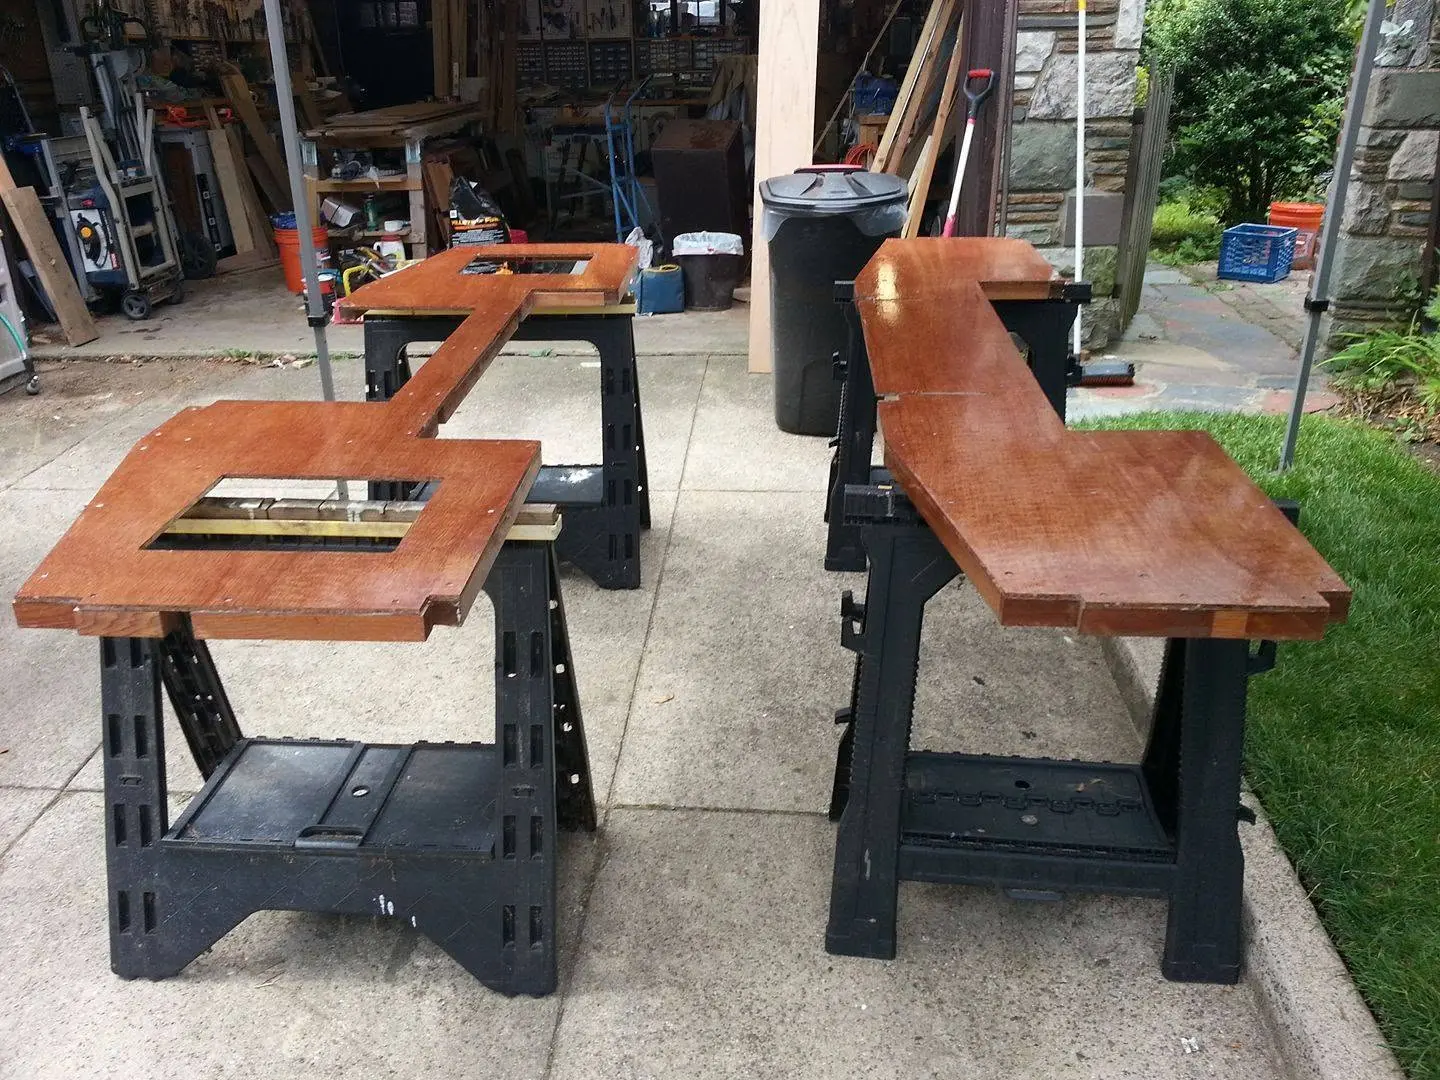
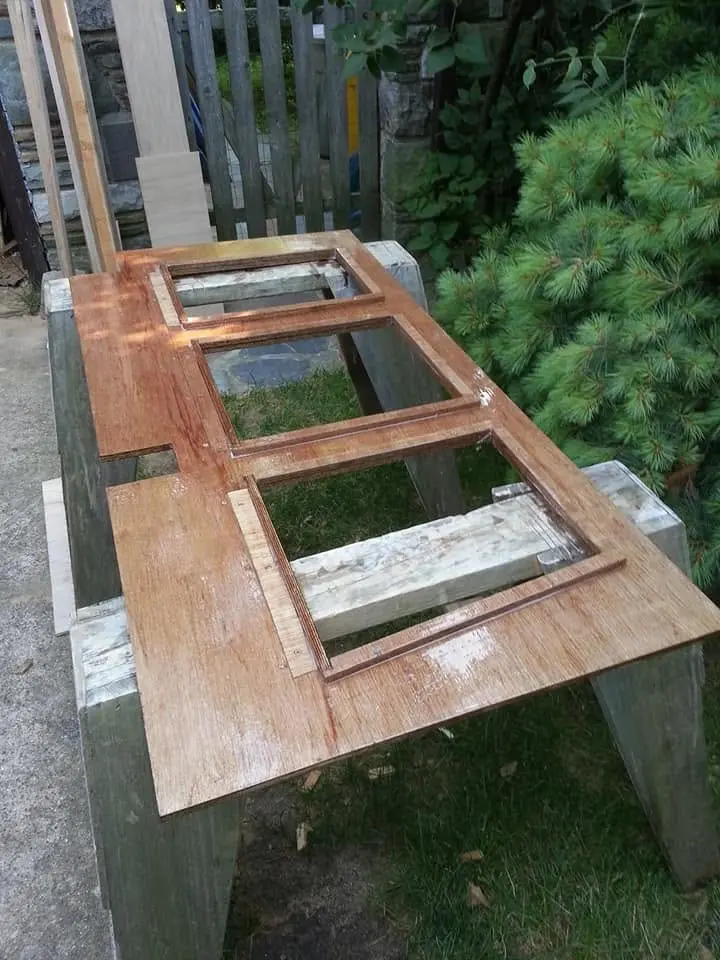
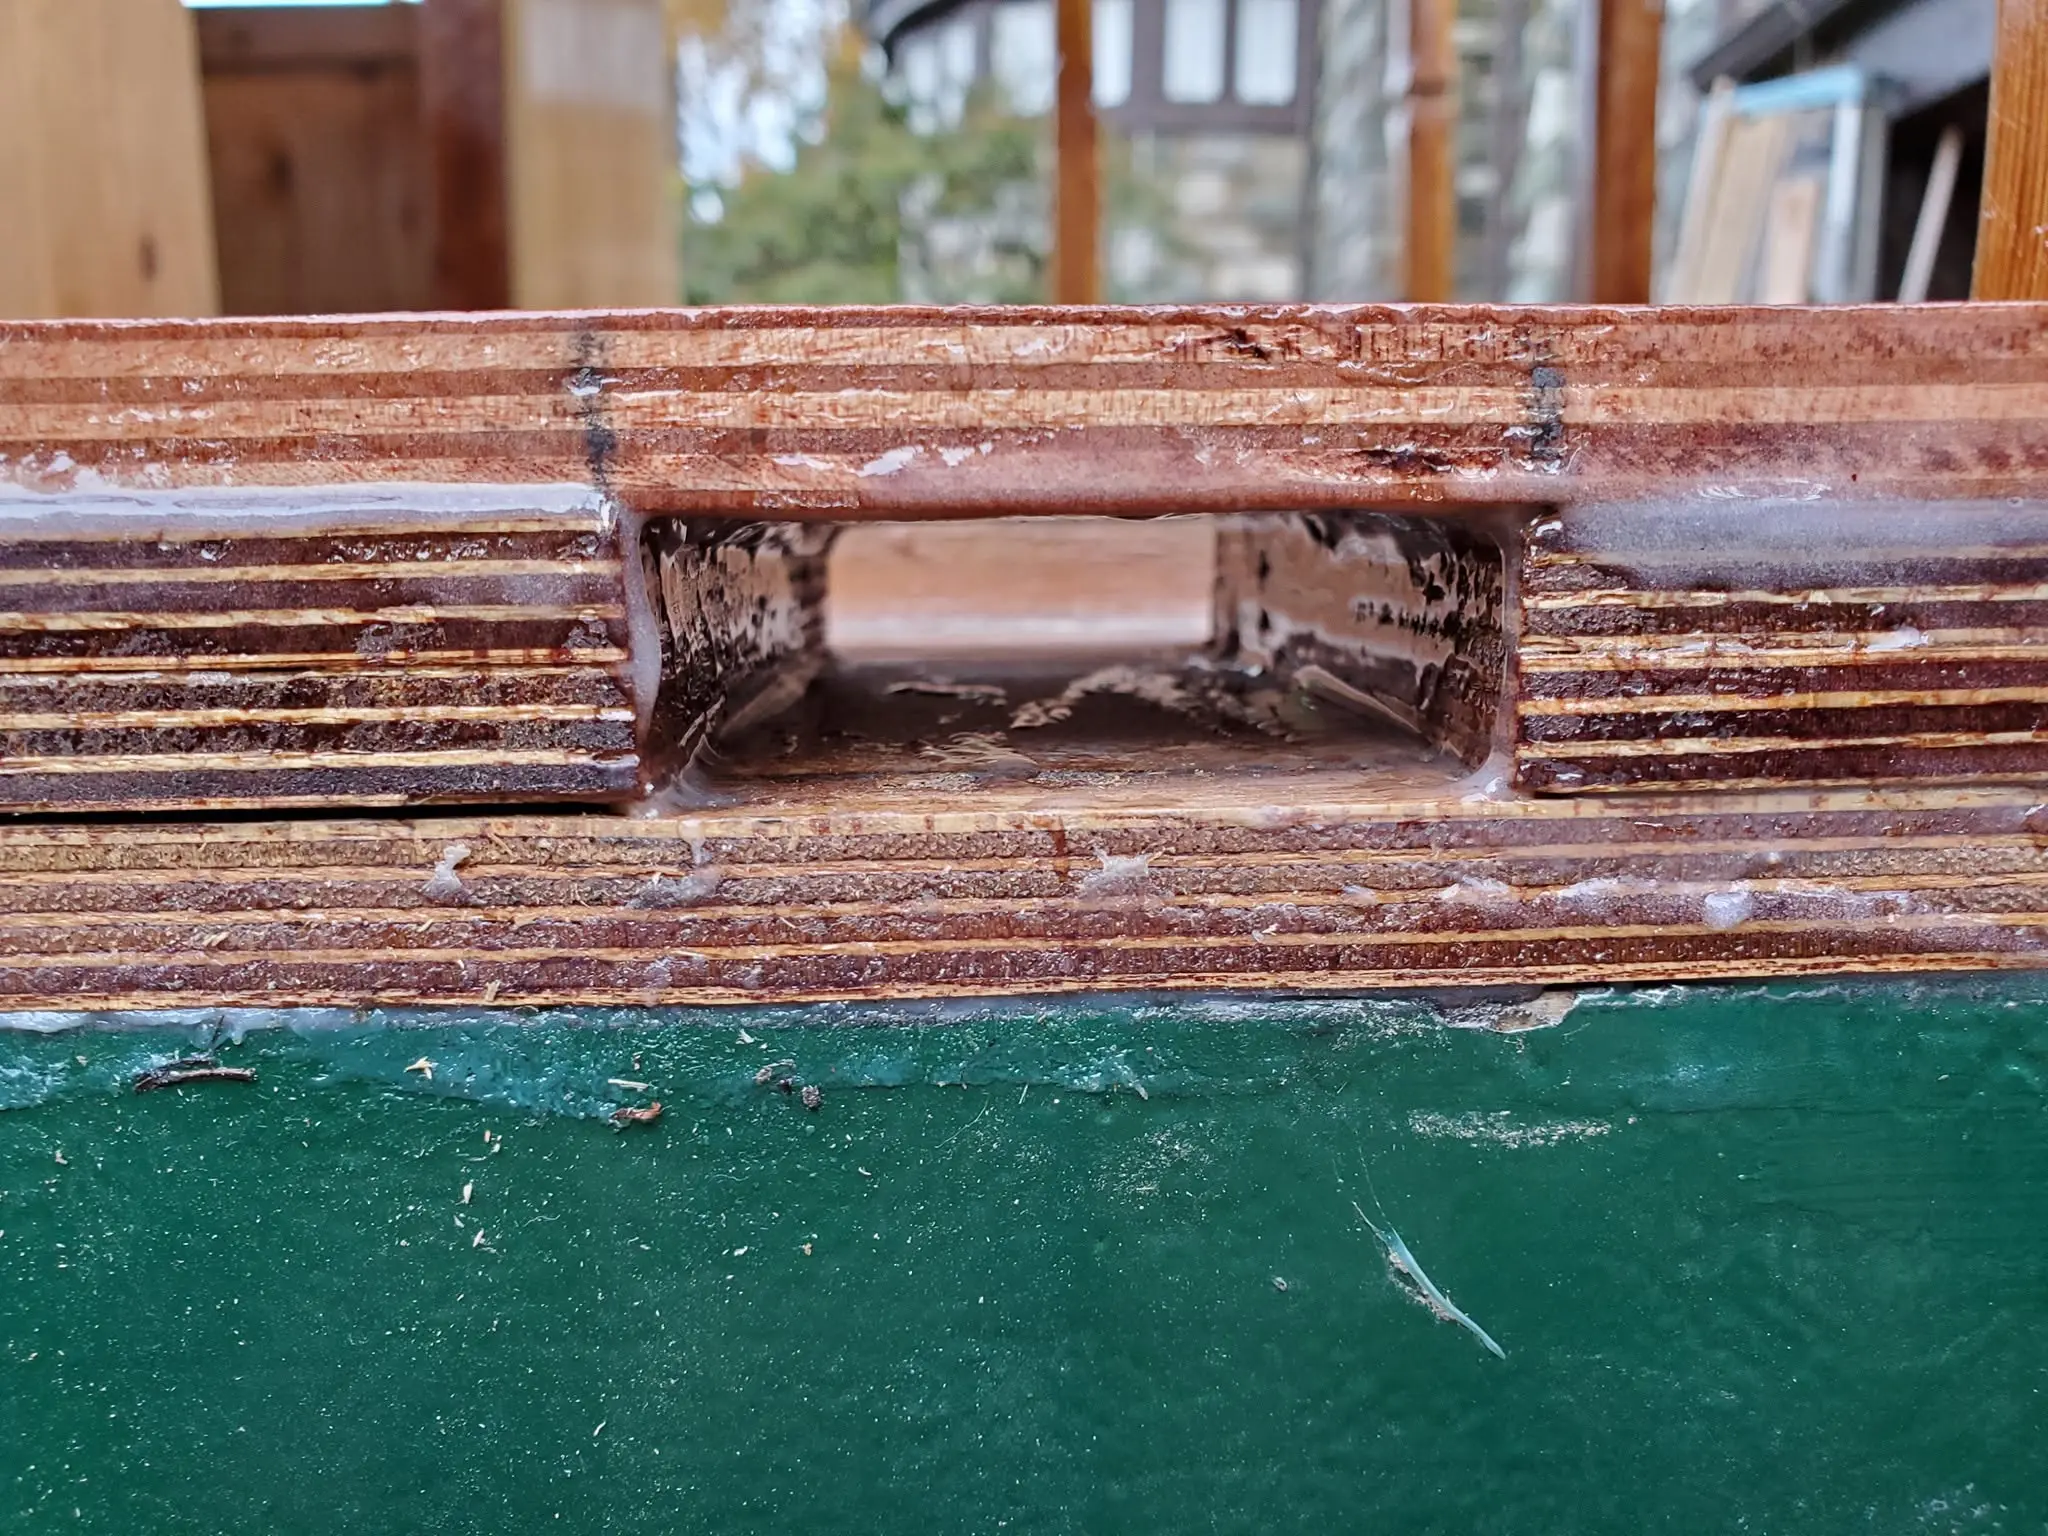
July 10, 2017. The last two of the six full-beam bulkheads, all sealed up with epoxy. No rain expected, but under shelter just the same. The one on the right will be closest to the bow; the one on the left will be the next one in, under the fore deck. The long, skinny cutouts are to accommodate the recessed deck; the others are for below-deck access and storage. I'm expecting a big delivery of more marine plywood tomorrow, then I will make the bow and stern outer panels before starting hull assembly. By the way, for those who shared my distress over the rain-pocked bulkheads a few days ago, not to worry -- I sanded them down and refinished them, and they came out great!
11 Jul 2017
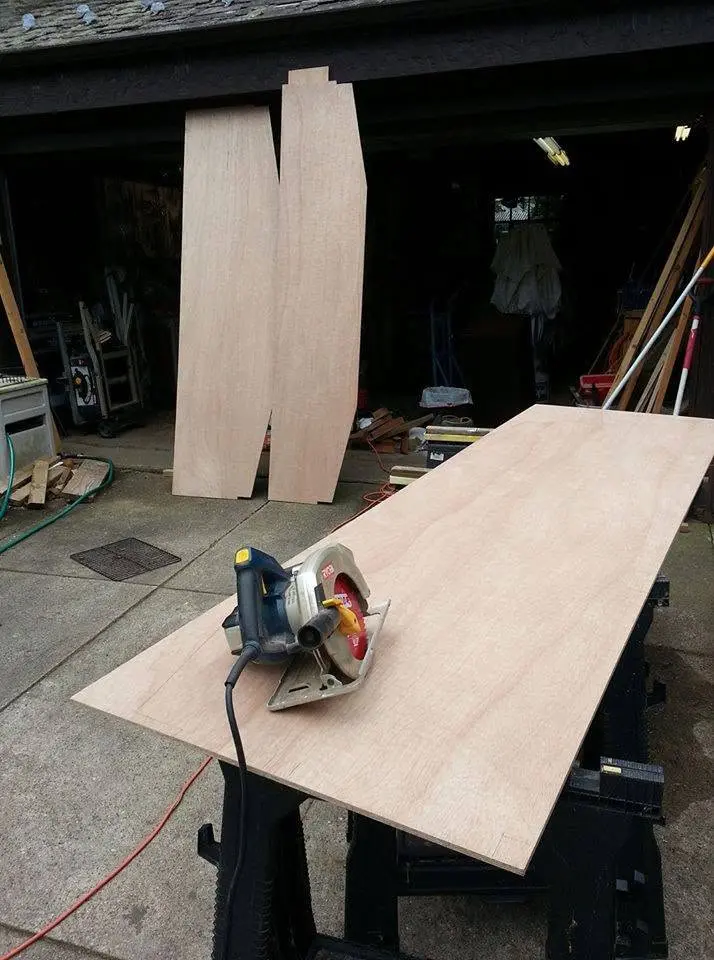
Whew! Almost an expensive screw-up! I was just about to take the circular saw to the line
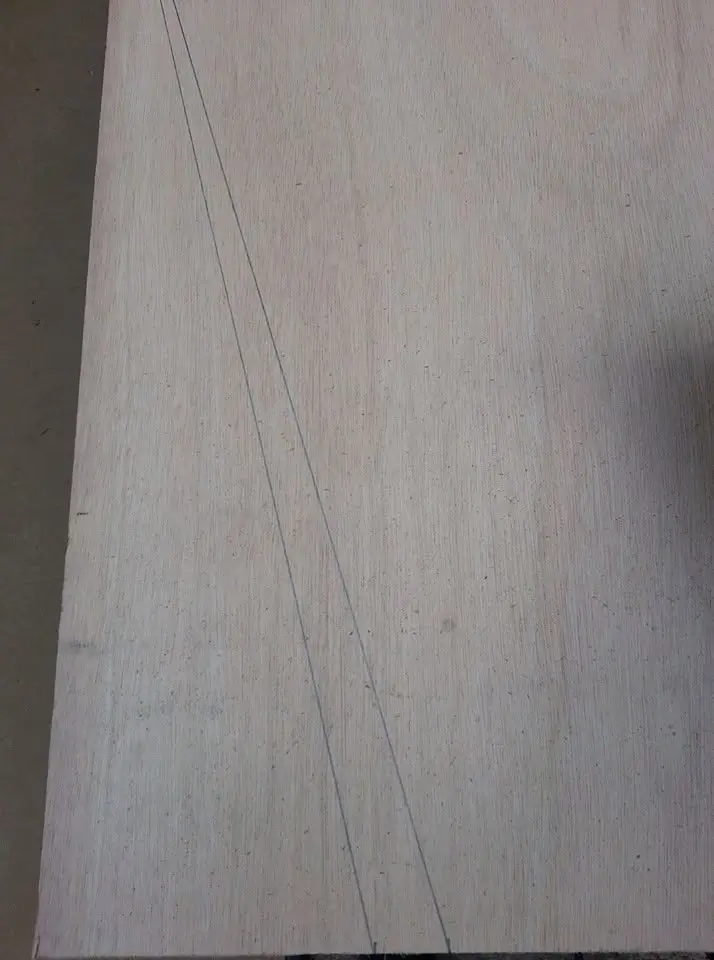
July 11, 2017. Whew! Almost an expensive screw-up! I was just about to take the circular saw to the line on the right, when a little voice whispered, "doesn't look like it should." So I measured again, sure enough, I was one inch off! At $125 a sheet for this half-inch material, the rule is "measure twice, cut once."
18 Jul 2017Strongback & Molds
The hull frame setup begins, with the long frames being taken out of storage...
July 18, 2017. The hull frame setup begins, with the long frames being taken out of storage (finally), and placed on sawhorses that will be the temporary support of the entire hull as it grows, piece by piece. One temporary spacer is screwed into place on one side. Next, I will do a second, then raise both sides into approximate position and make adjustments for equal length.
19 Jul 2017Hull Panels
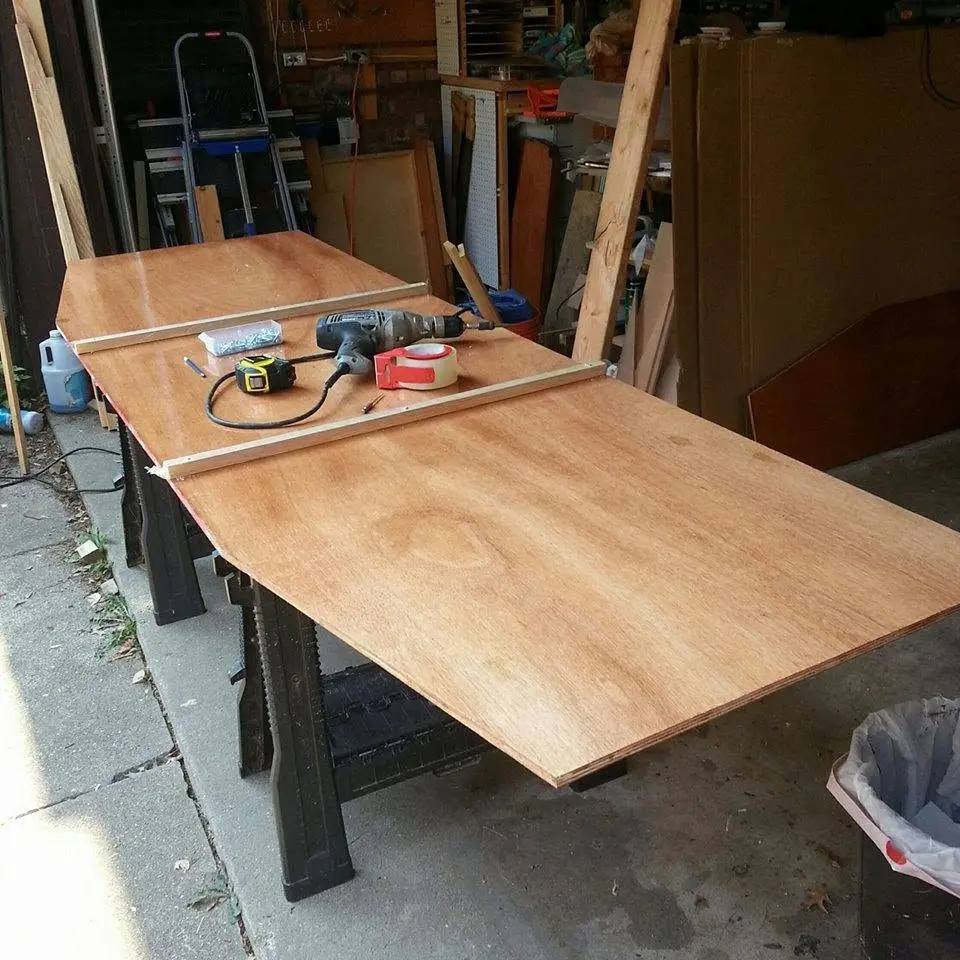
I'm preparing the transom to be installed on the stern.
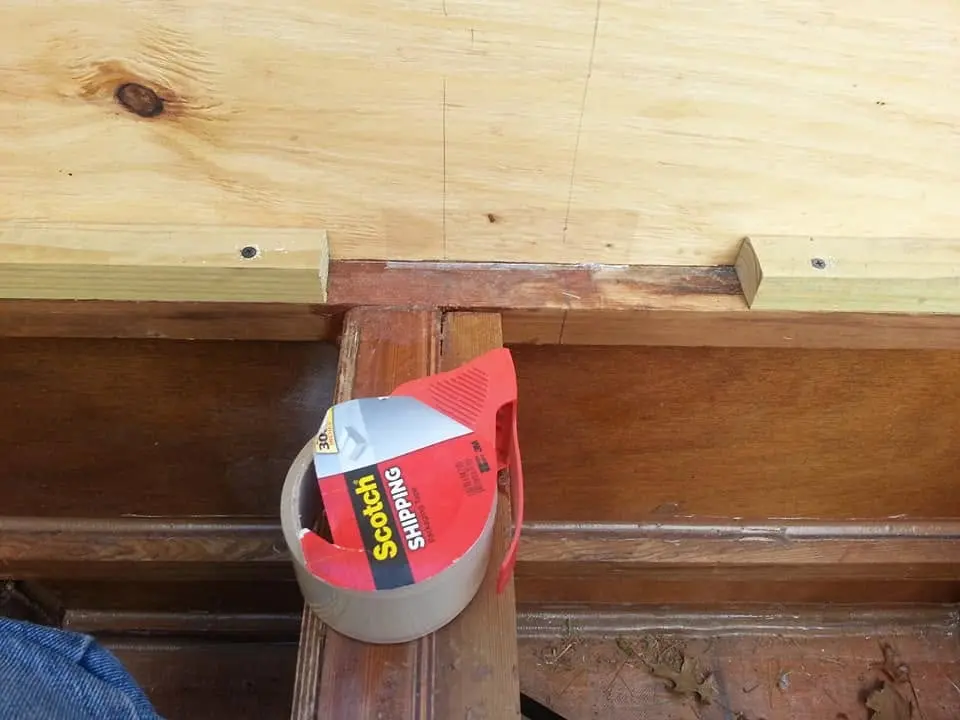
July 19, 2017. I'm preparing the transom to be installed on the stern. I've screwed down two temporary spacer strips making sure to use screws long enough to hold the half-inch plywood securely but short enough not to break the surface on the opposite side, which will show. Also, I've wrapped the strips in package-sealing tape, so any squeeze-out of epoxy will not stick to them and I will be able to remove them easily. Yes, I measured three times, three different ways. Outside edge to outside edge of the spacing strips, 28 1/2 inches. Centerline of the transom to outside edge of each strip, 14 1/4 inches. Outside edge of each strip to outside edges of transom, 32 1/4 inches. Total, 93 inches, equaling width of transom. Check. I sure don't want to screw up now!
21 Jul 2017Strongback & Molds
Now, moving forward to the bow, I'm fitting foremost full width bulkhead.
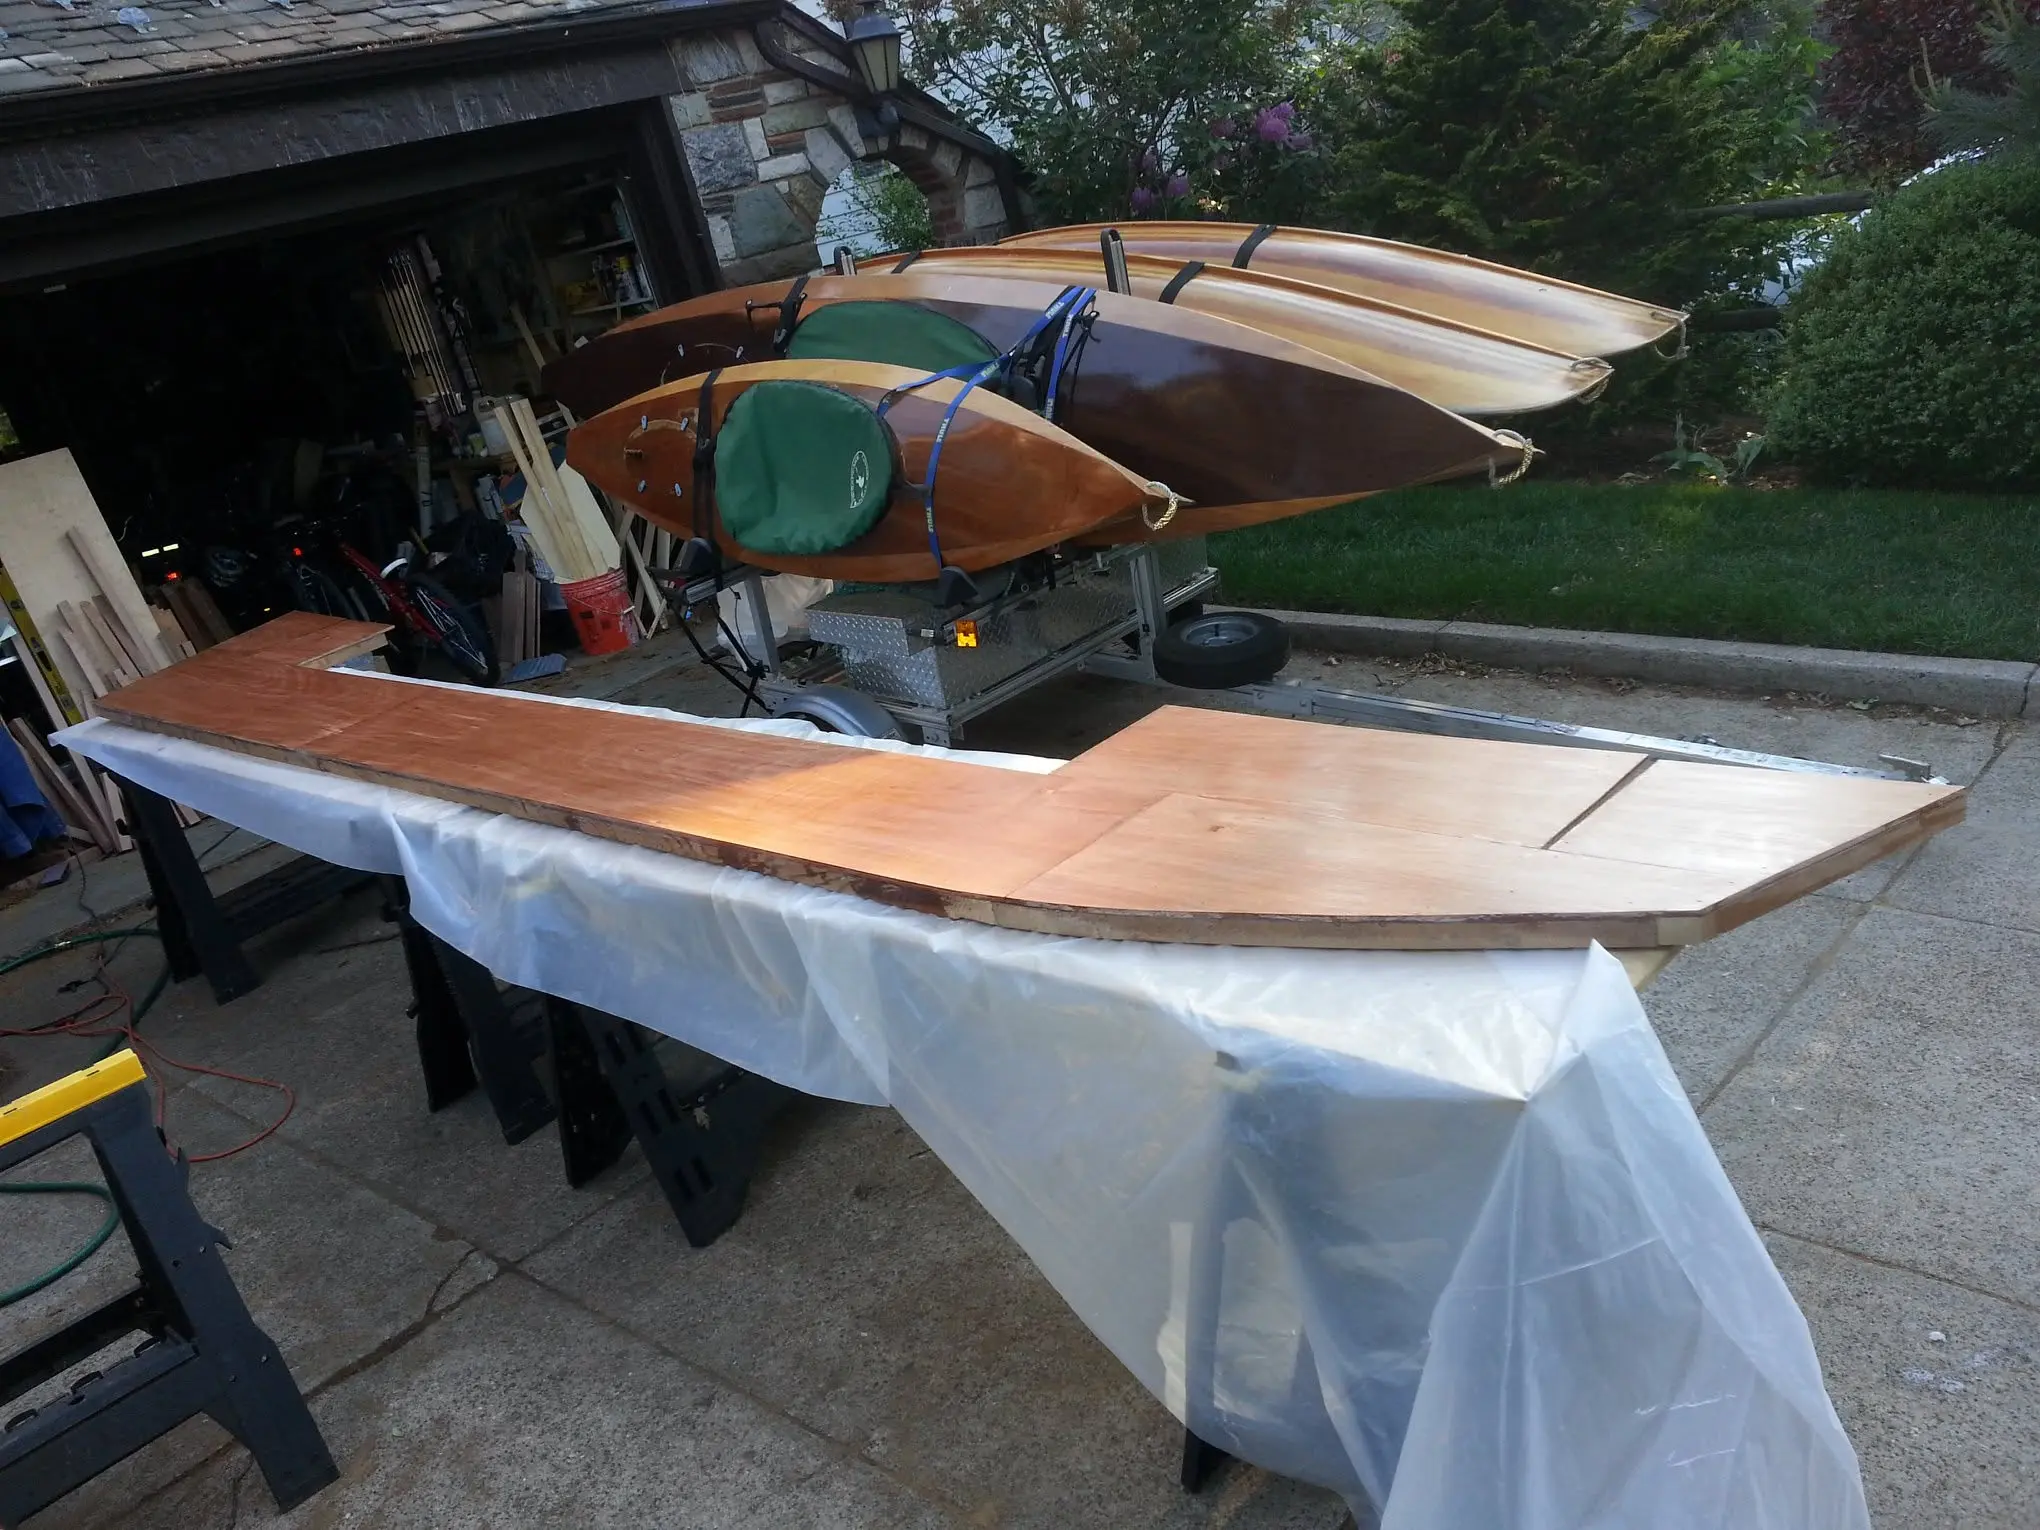
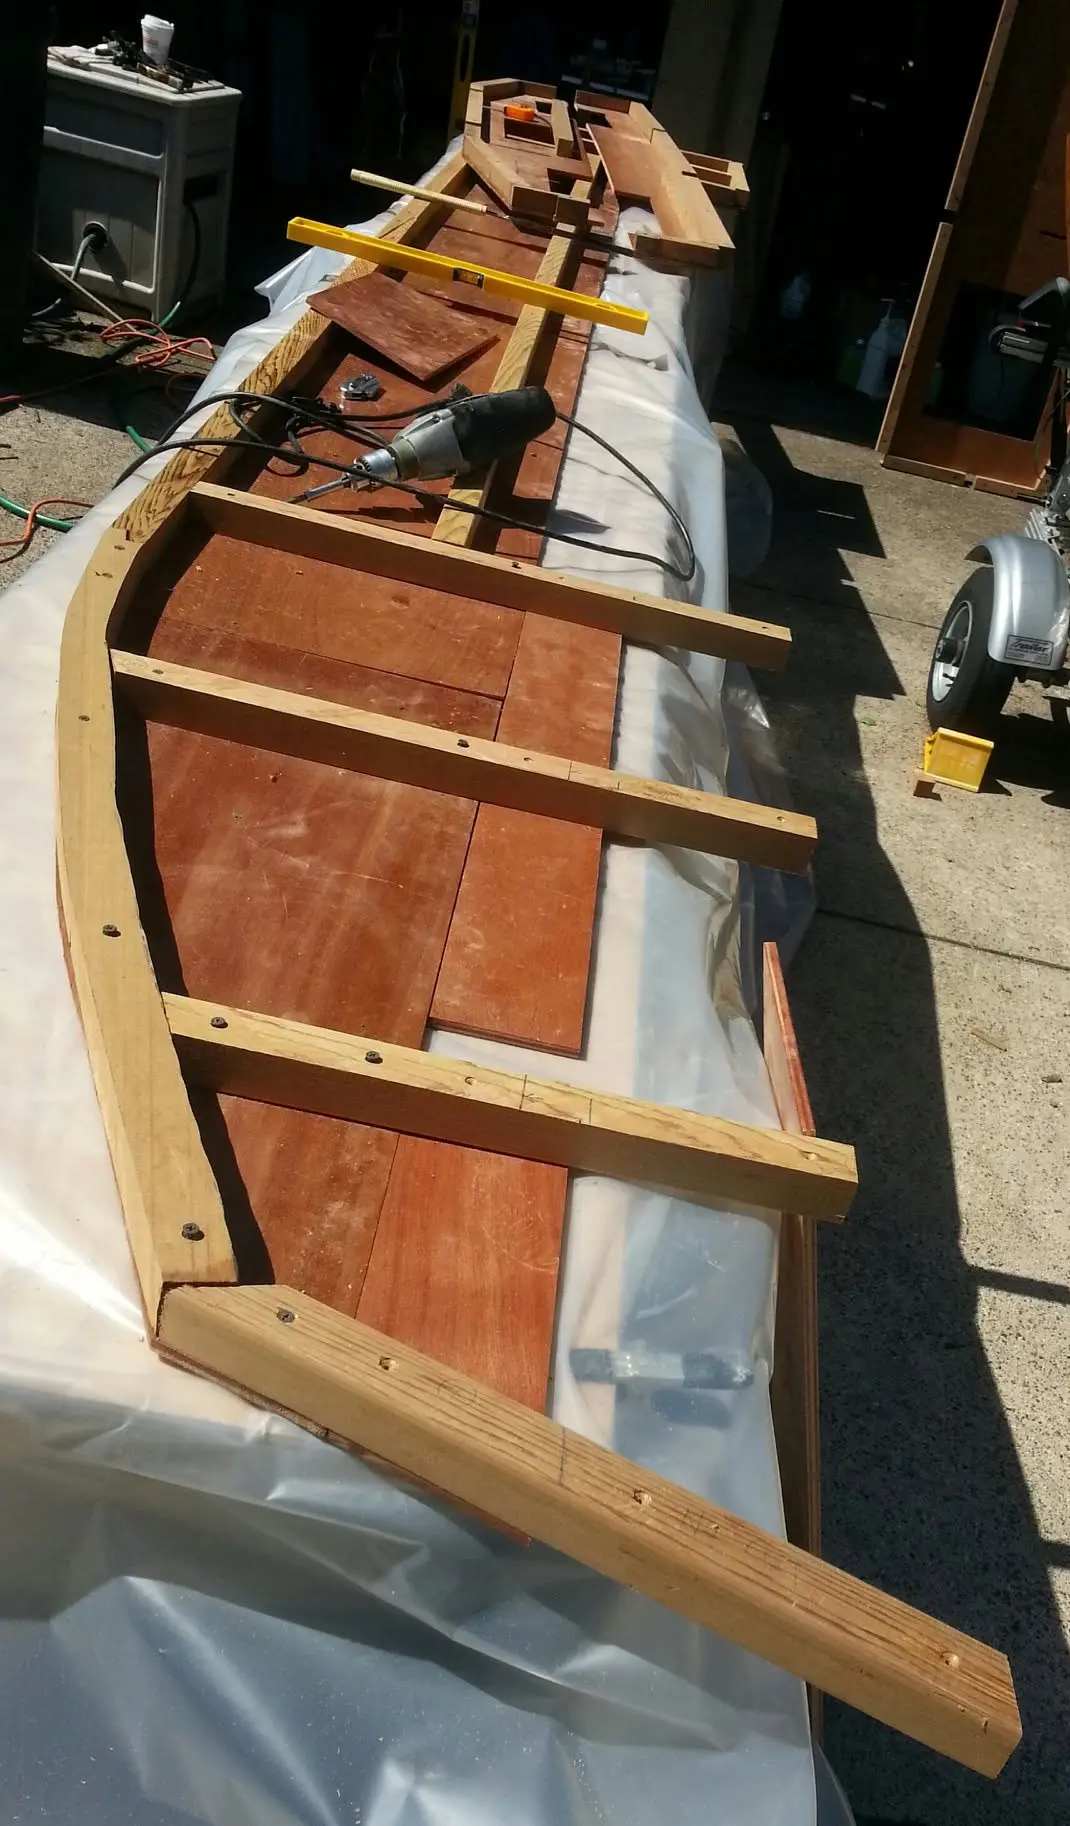
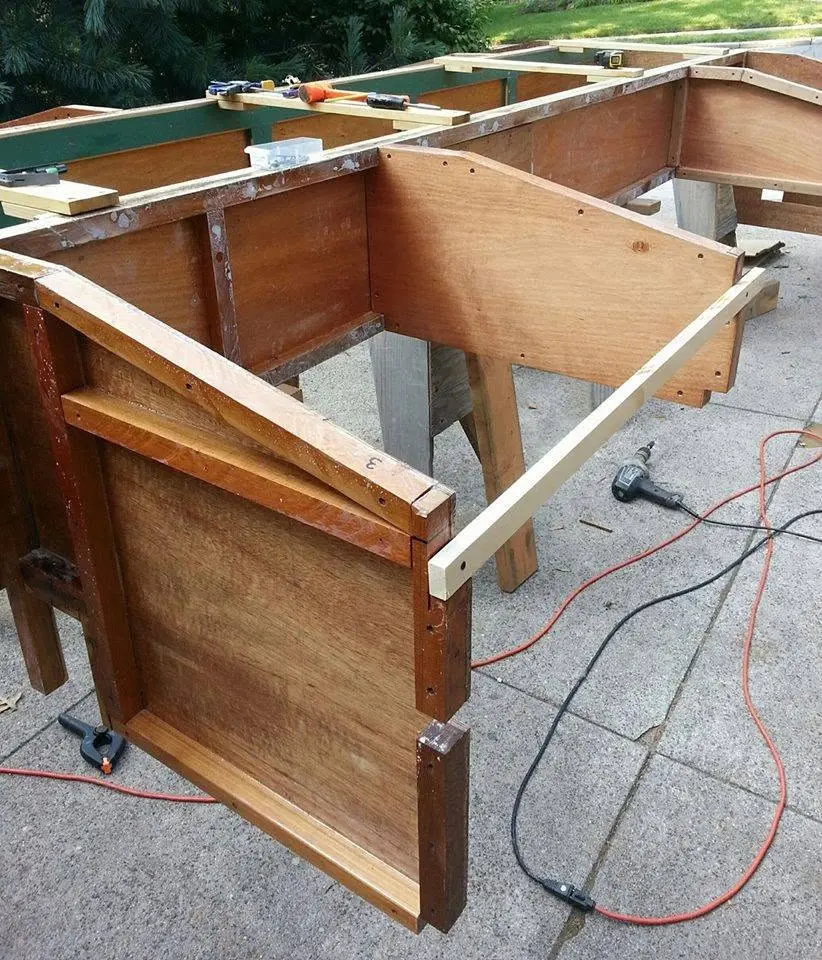
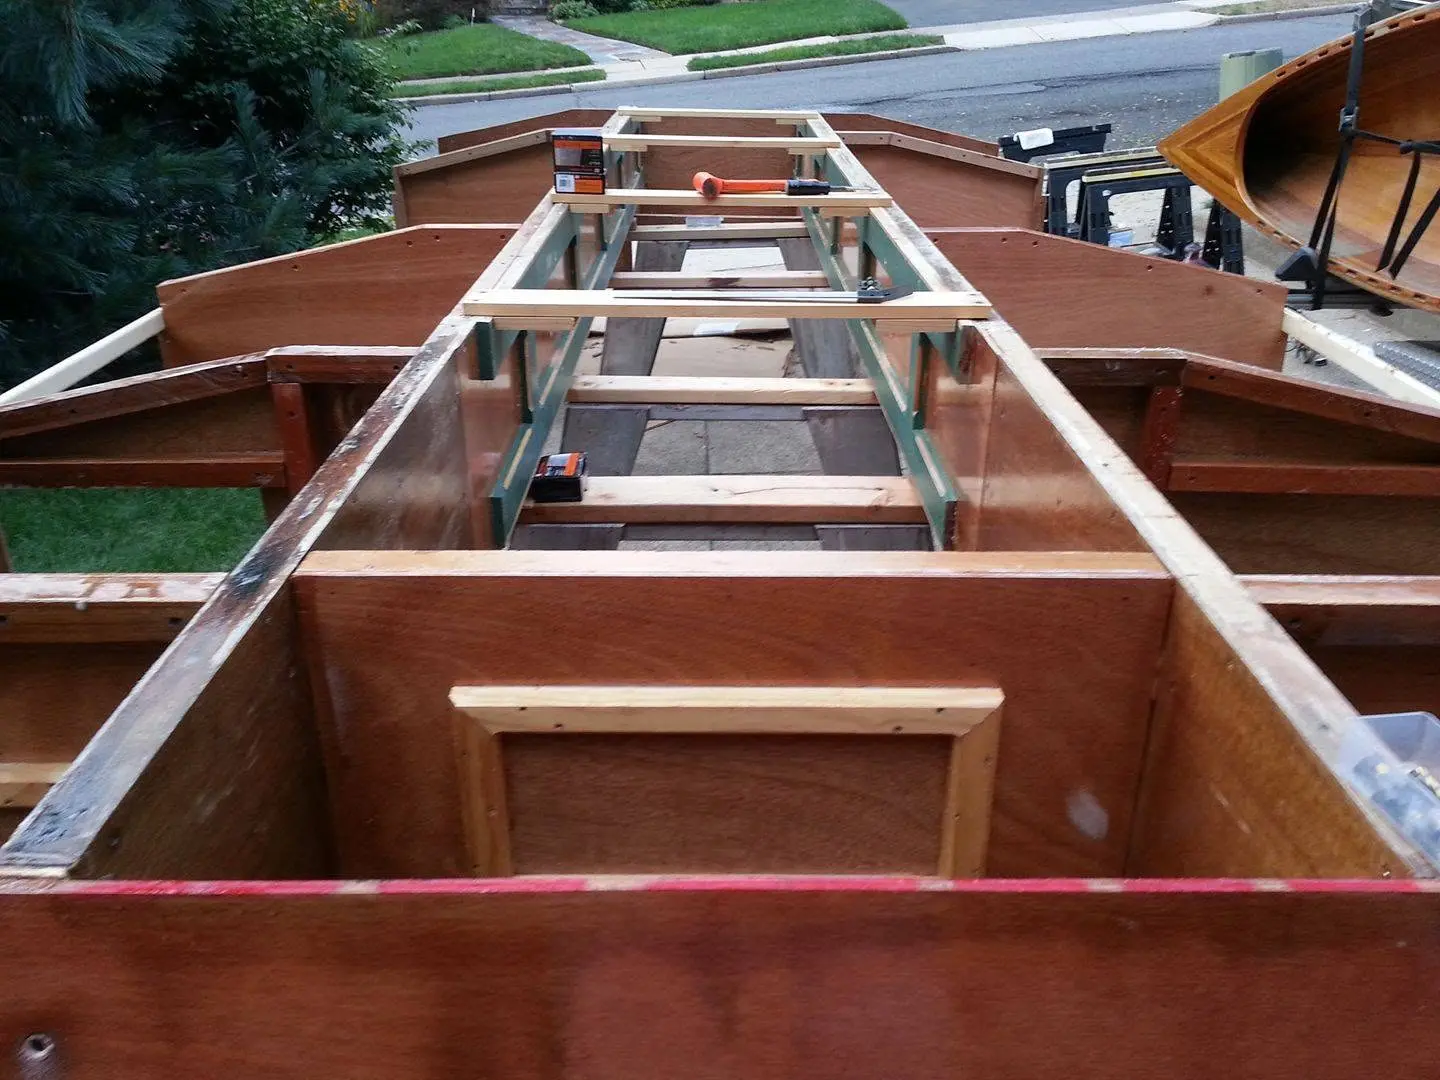
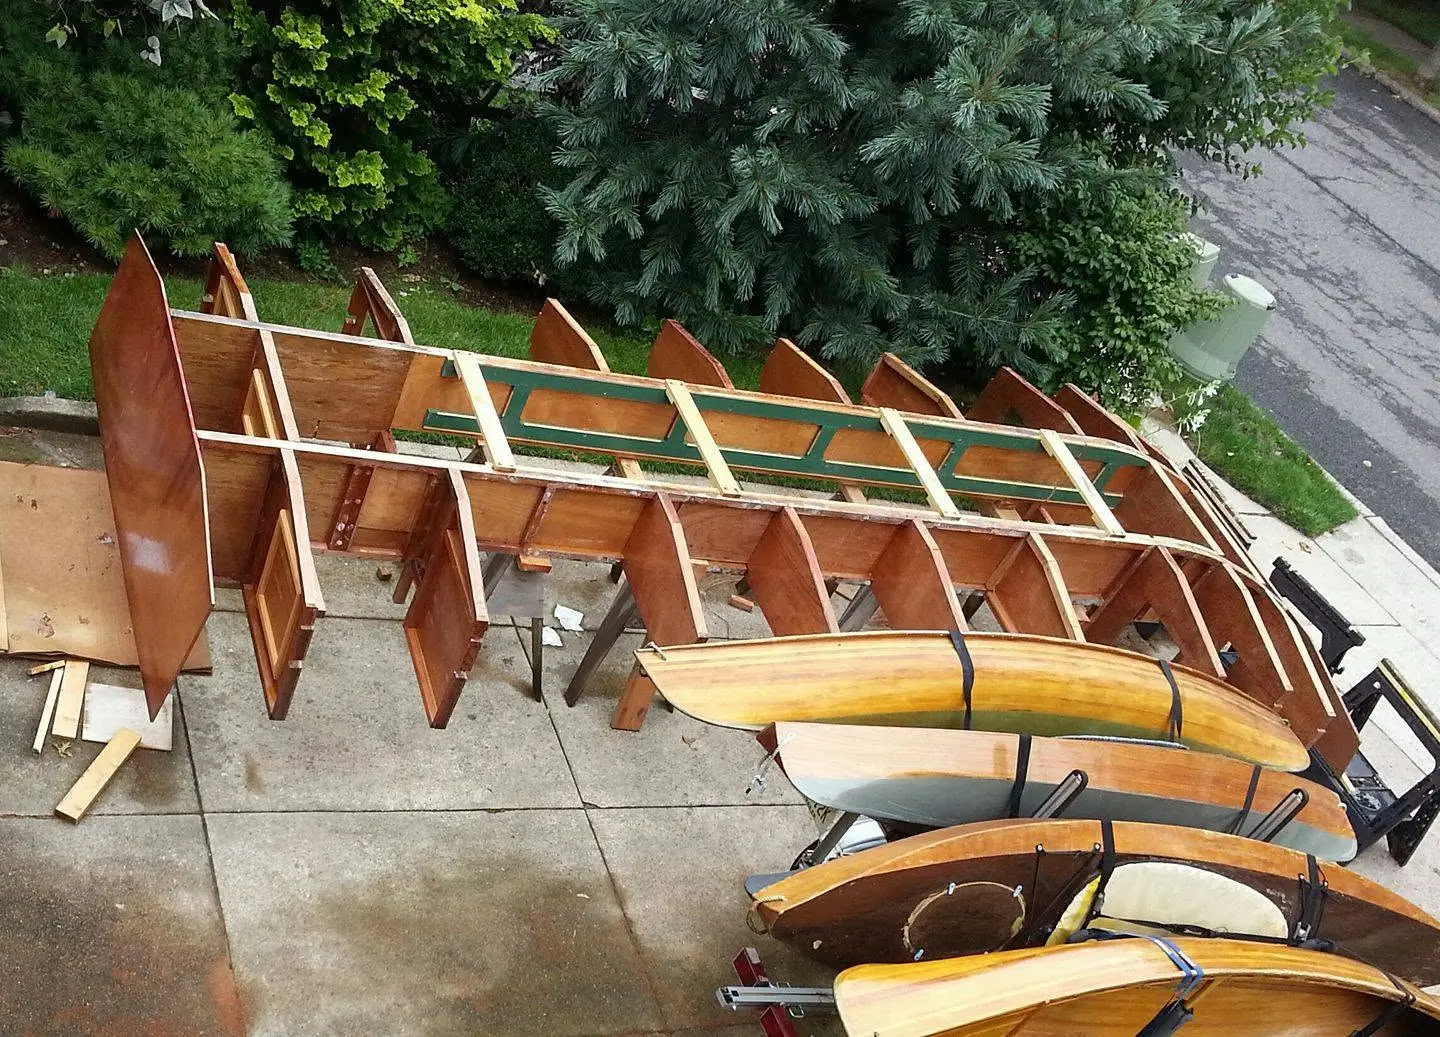
July 21, 2017. Now, moving forward to the bow, I'm fitting foremost full width bulkhead. This begins the creation of the slotted "egg crate" construction method used for this boat.You can see that when the bulkhead is in place along the curve of the bow, it will need some planing to make its bottom timber conform so that the plywood bottom panel can be bent to the proper shape, when it's time to do that. The third picture shows what it looks like after I have planed an angle matching the curve of the bow. And the fourth picture gives you and idea of the placement of the bulkhead joining the two long frames. (In the background, you can see a trailer loaded with some of the family kayaks that I've built.)
25 Jul 2017Strongback & Molds
The mid-bow bulkhead went in today.
July 25, 2017. The mid-bow bulkhead went in today. Tomorrow, I will make some adjustments and put in the forward cabin bulkhead. I find I have to keep checking for square as I go along, and I have devised a great way to do that reliably and easily. The sheet of cheap quarter-inch plywood sitting on top of the work (actually, the bottom, but it's upside-down) is my squaring tool. I just line it up parallel with both of the longitudinal side frames and put the short edge where I want to install a lateral bulkhead. I mark on both sides and enjoy the confidence that it will be square.
26 Jul 2017Strongback & Molds
I am preparing for the dry fit of the stern bulkhead, the one just forward of the transom.
July 26, 2017. I am preparing for the dry fit of the stern bulkhead, the one just forward of the transom. Actually, it's the second dry fit for this component. The first time around I found I had to trim a bit here and there to make it fit. I think I cut and ground and chiseled away all the offending bits, but am I certain? No, it doesn't fit until I see it fits. Can you imagine spreading epoxy with a working life of about a half-hour, and then discovering the piece doesn't fit? What a mess. So, I have to dry fit every piece, screw it together, and if any adjustments are necessary dry fit it again. Essentially, I am building this boat twice. In some places, three times!
9 Aug 2017Hull Panels
Houseboat footnote.
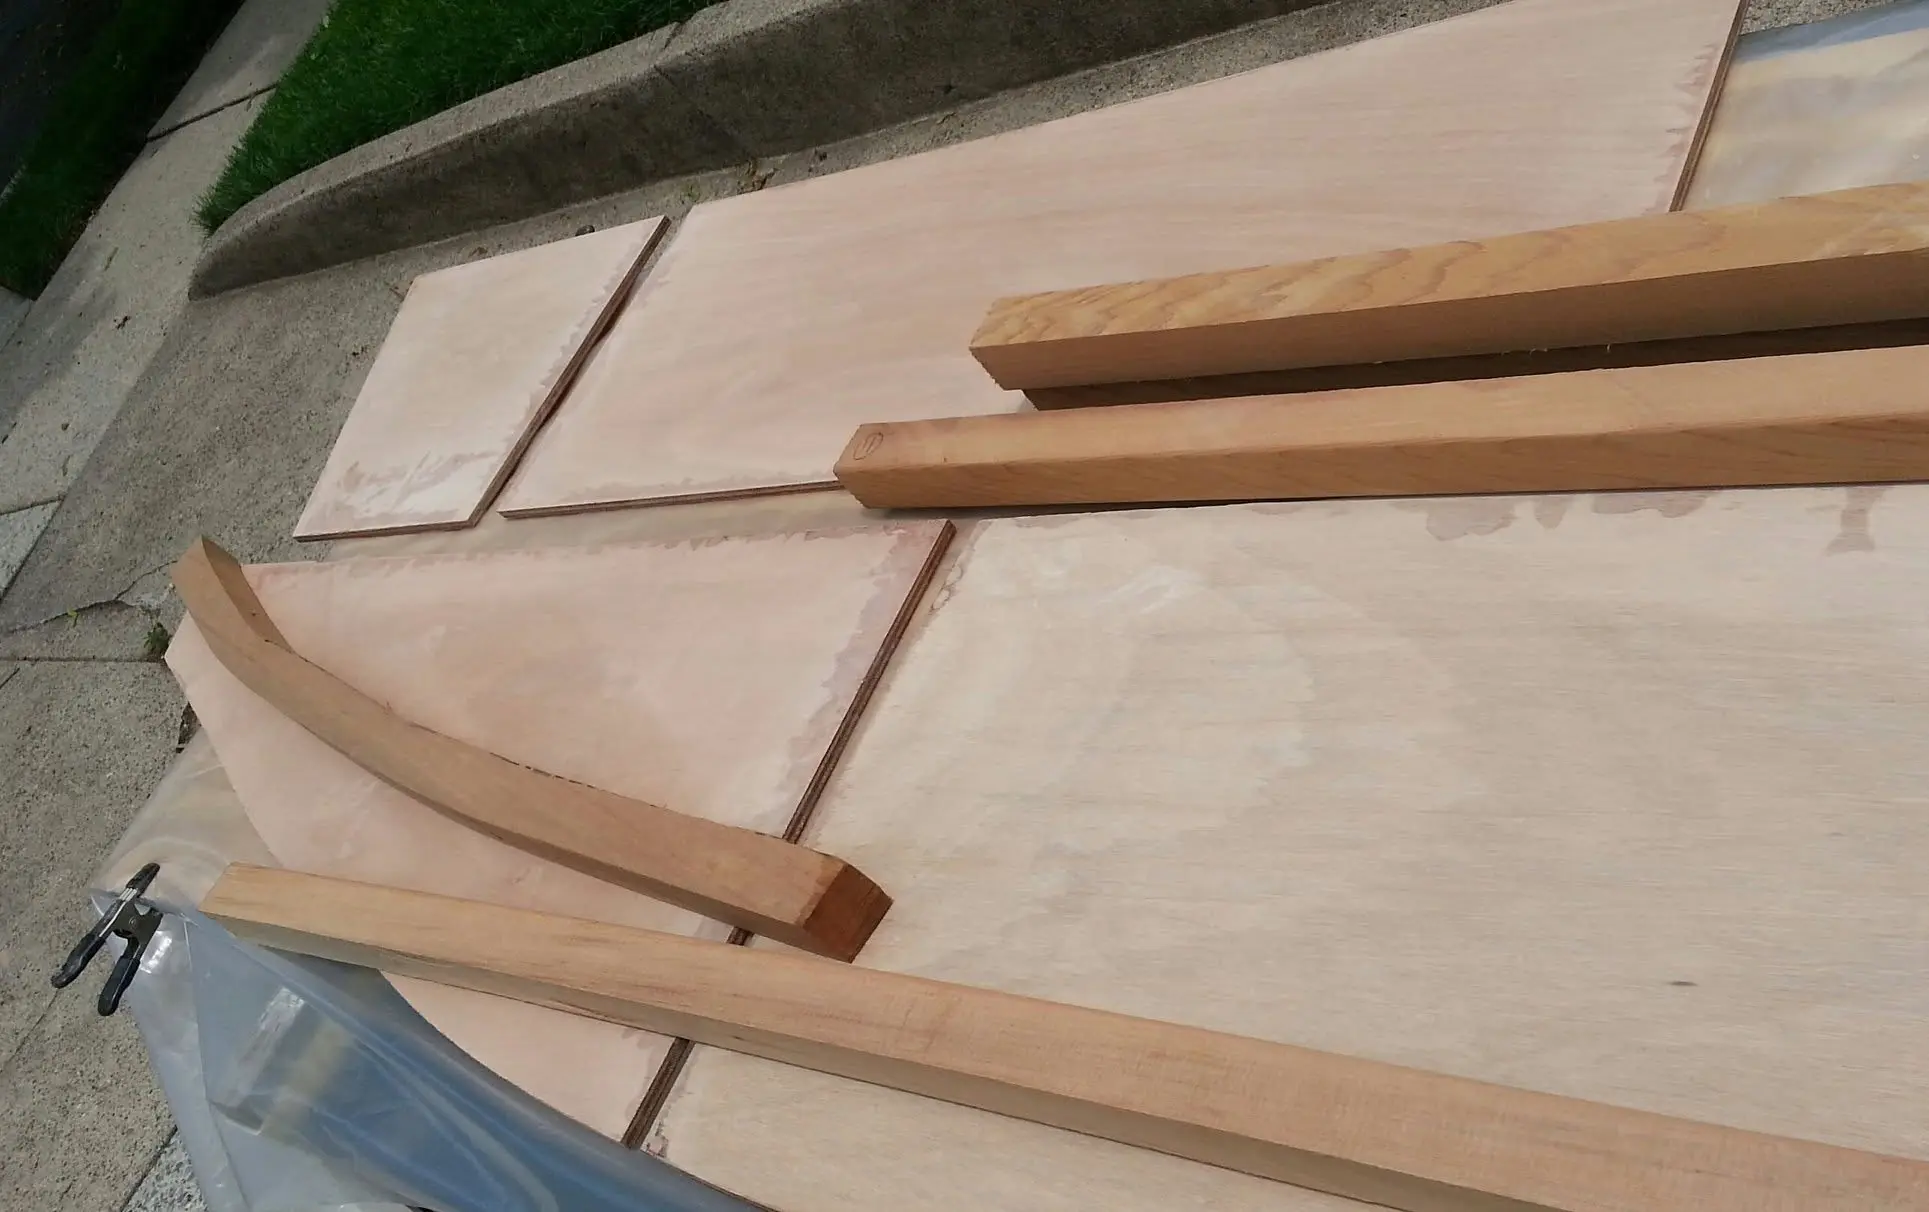
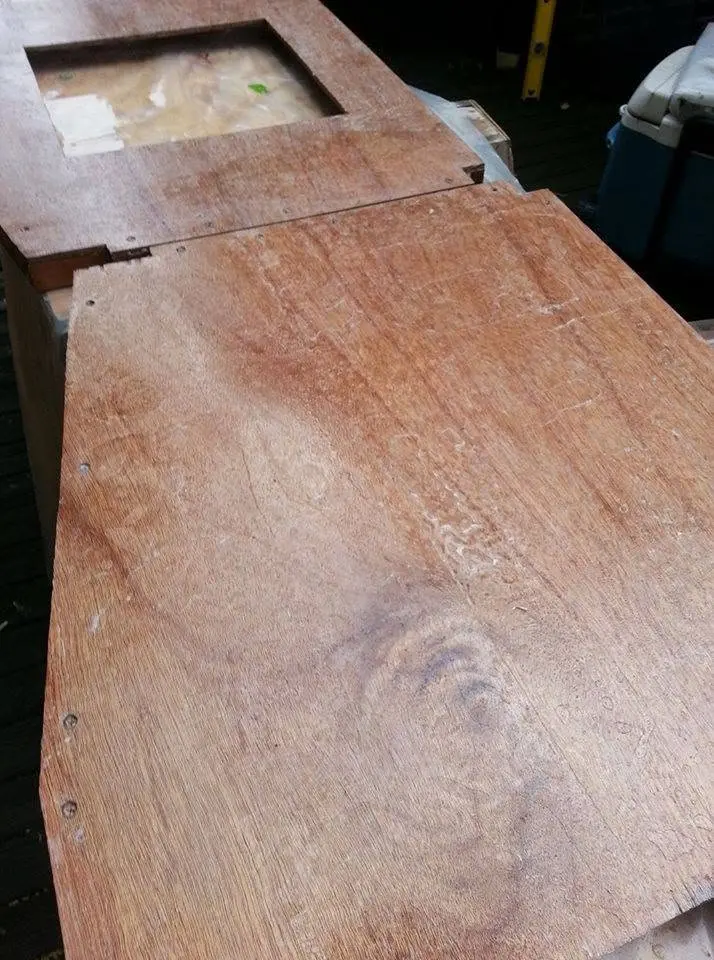
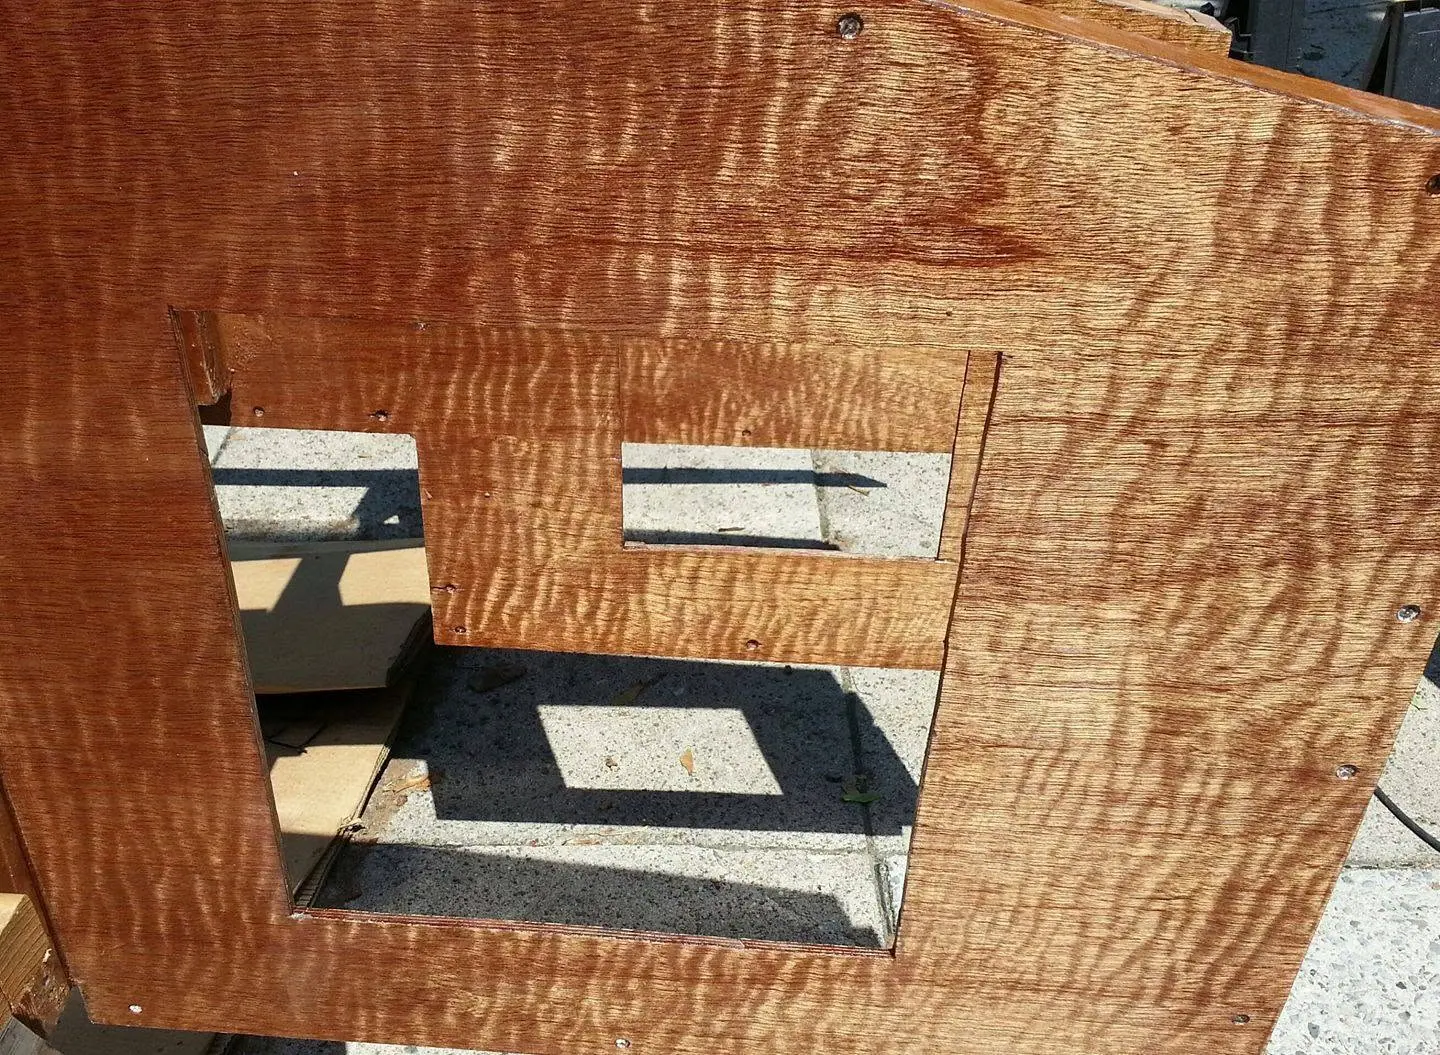
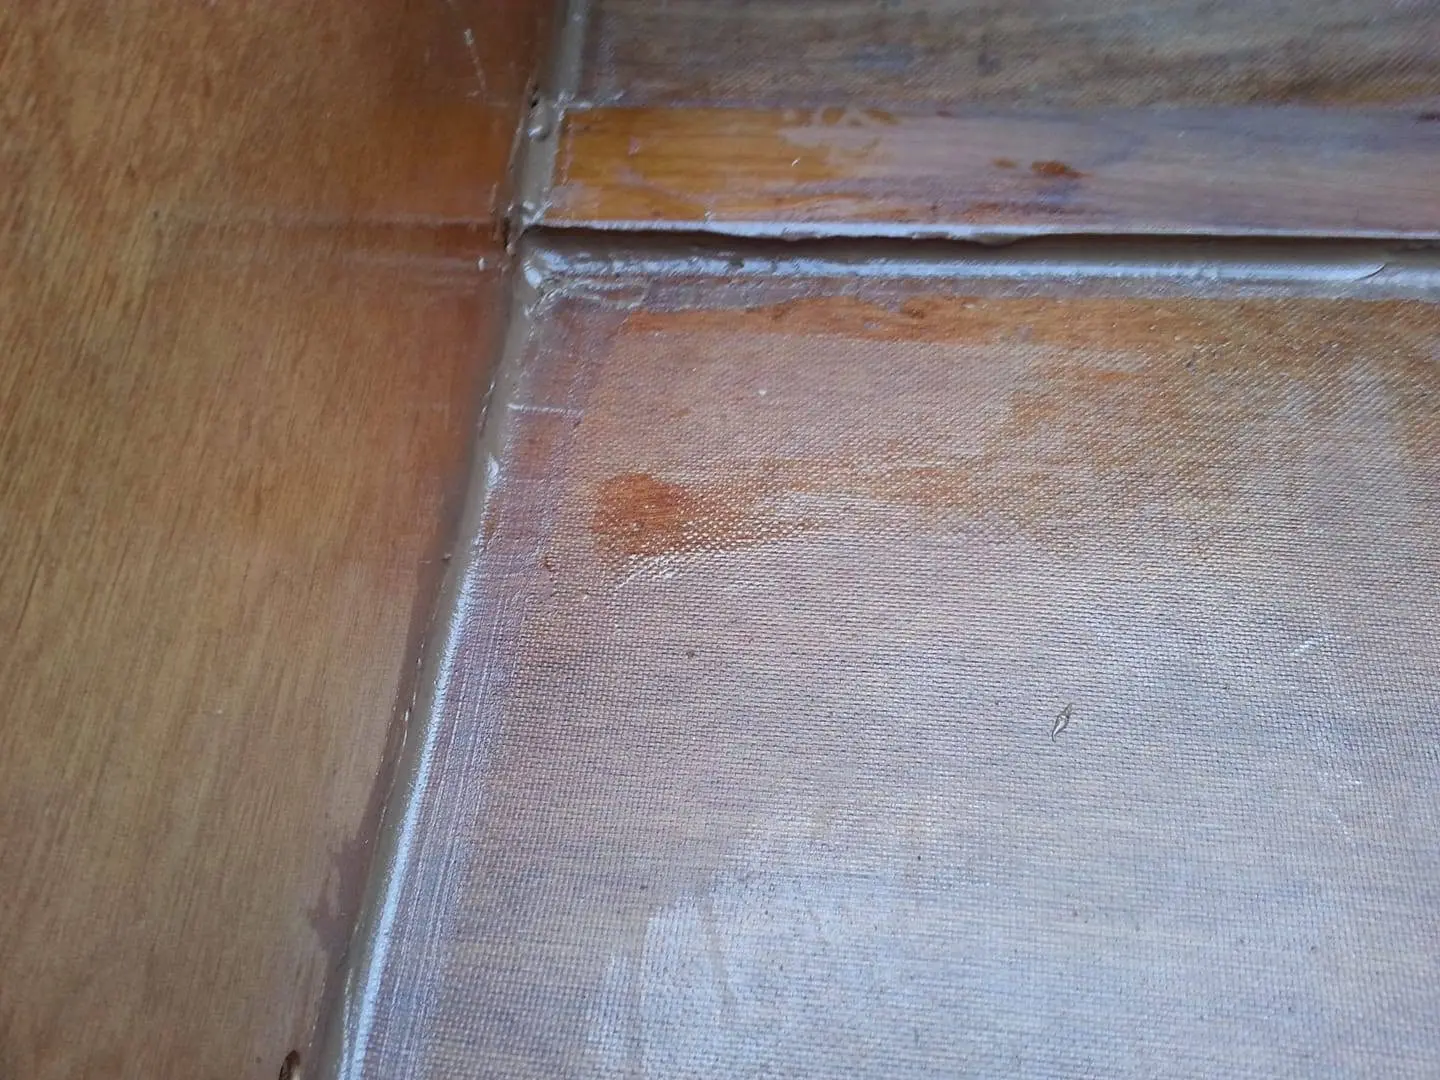
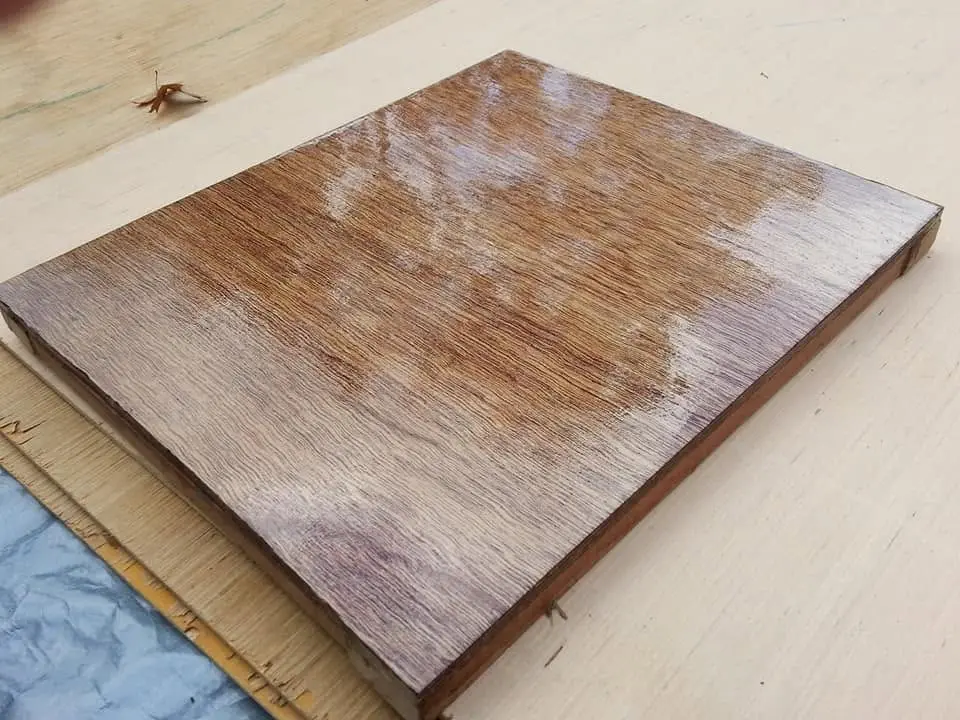
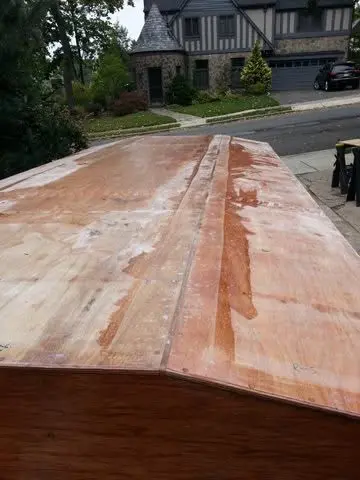
August 9, 2017. Houseboat footnote. Take a gander at the figure of this grain! So here's a brief peregrination on the relative merits of okoume and lauan marine plywood for boatbuilding. "You don't build boats with lauan," more than one boat-building professional has sniffed at me. "You use okoume. Only if you want the boat to stay on top of the water." So of course I started out with okoume, made in Holland from an African hardwood that -- as I understand it, and I could be wrong -- is related to mahogany. And it carries a certification from Lloyd's of London saying it is waterproof even if the water is boiling. (Which is good to know in a time of climate change, I guess.) At $150 a sheet, this is expensive stuff. I went for it. But lately, I have had trouble sourcing okoume locally. "We are selling rotary-cut instead of okoume now," the folks at the yard said. Rotary-cut what? I asked. Long pause, then a sotto voce response: "Lauan. But it's certified." Which it is, although only the adhesive between the plies and not the material itself. At $75 a sheet, it's a bargain, I hope. So i bought it. So far, it's a pleasure to work with. It has more plies of more uniform thickness than okoume. The grain figure and color are what you see here. As for water intrusion after epoxy sealing, there is none. That has been a problem with okoume. So far, I like it much better. The second picture shows Okoume, with its long, rather boring grain. See those vertical striations? That's water intrusion. It's dried out now, but the stain is permanent.
10 Aug 2017Strongback & Molds
It's time to start adding the partial bulkheads, four on each side.
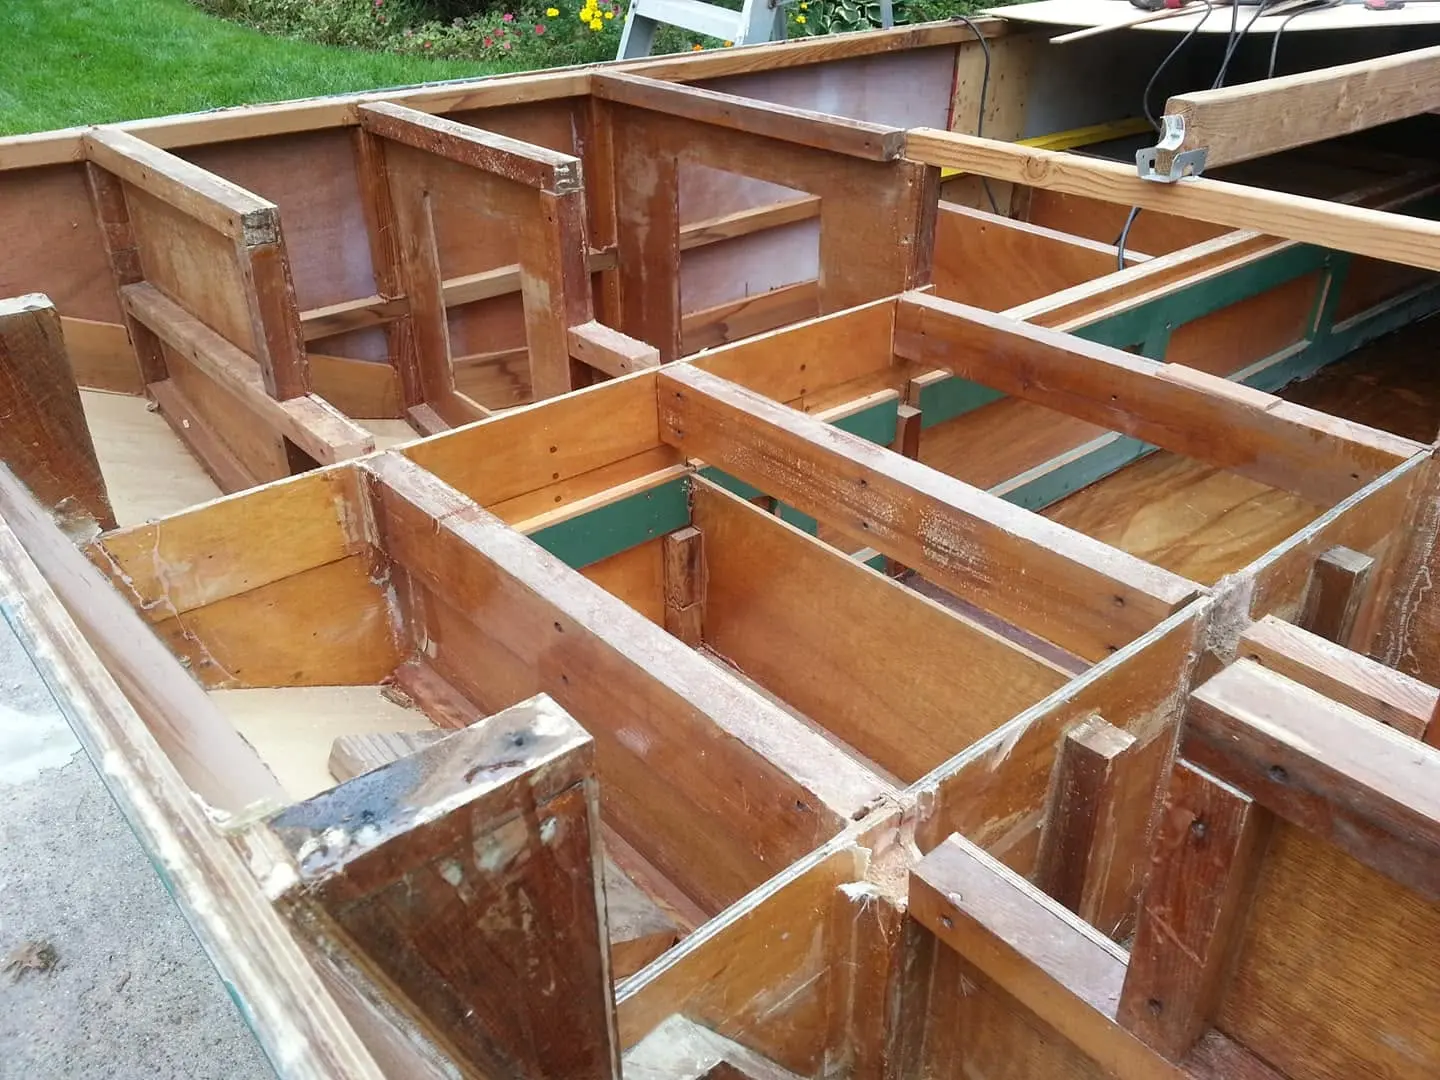
Aug. 10, 2017. It's time to start adding the partial bulkheads, four on each side. Unlike the full-beam (beam is the nautical term for width) bulkheads installed earlier, these shorties do not transect the central space between the two longitudinal frames in the area where the cabin will be. That's because we are keeping that space unobstructed to serve as an aisle so we can move about inside. But before I glue and screw these partial bulkheads in place I have to make sure they are square. In this case, I have decided to make the first partial bulkhead toward the aft end of the cabin 35 inches forward of the previously installed aft cabin full bulkhead. It's pretty easy to screw it into place at the inboard end, but it flops around, back and forth. How do I make sure that when the epoxy cures the assembly will be square to the frame? I put two pencil marks 35 inches apart on a scrap stick of wood (by now I have plenty of those) and temporarily screw it to the aft cabin bulk head and the new partial bulkhead. If the previously glued bulkhead is square (and it is), this partial bulkhead will be square when the glue sets. Boatbuilding, if nothing else, is an exercise in problem solving.
10 Aug 2017Strongback & Molds
Quitting time, Aug. 10, 2017 -- That's it for today.
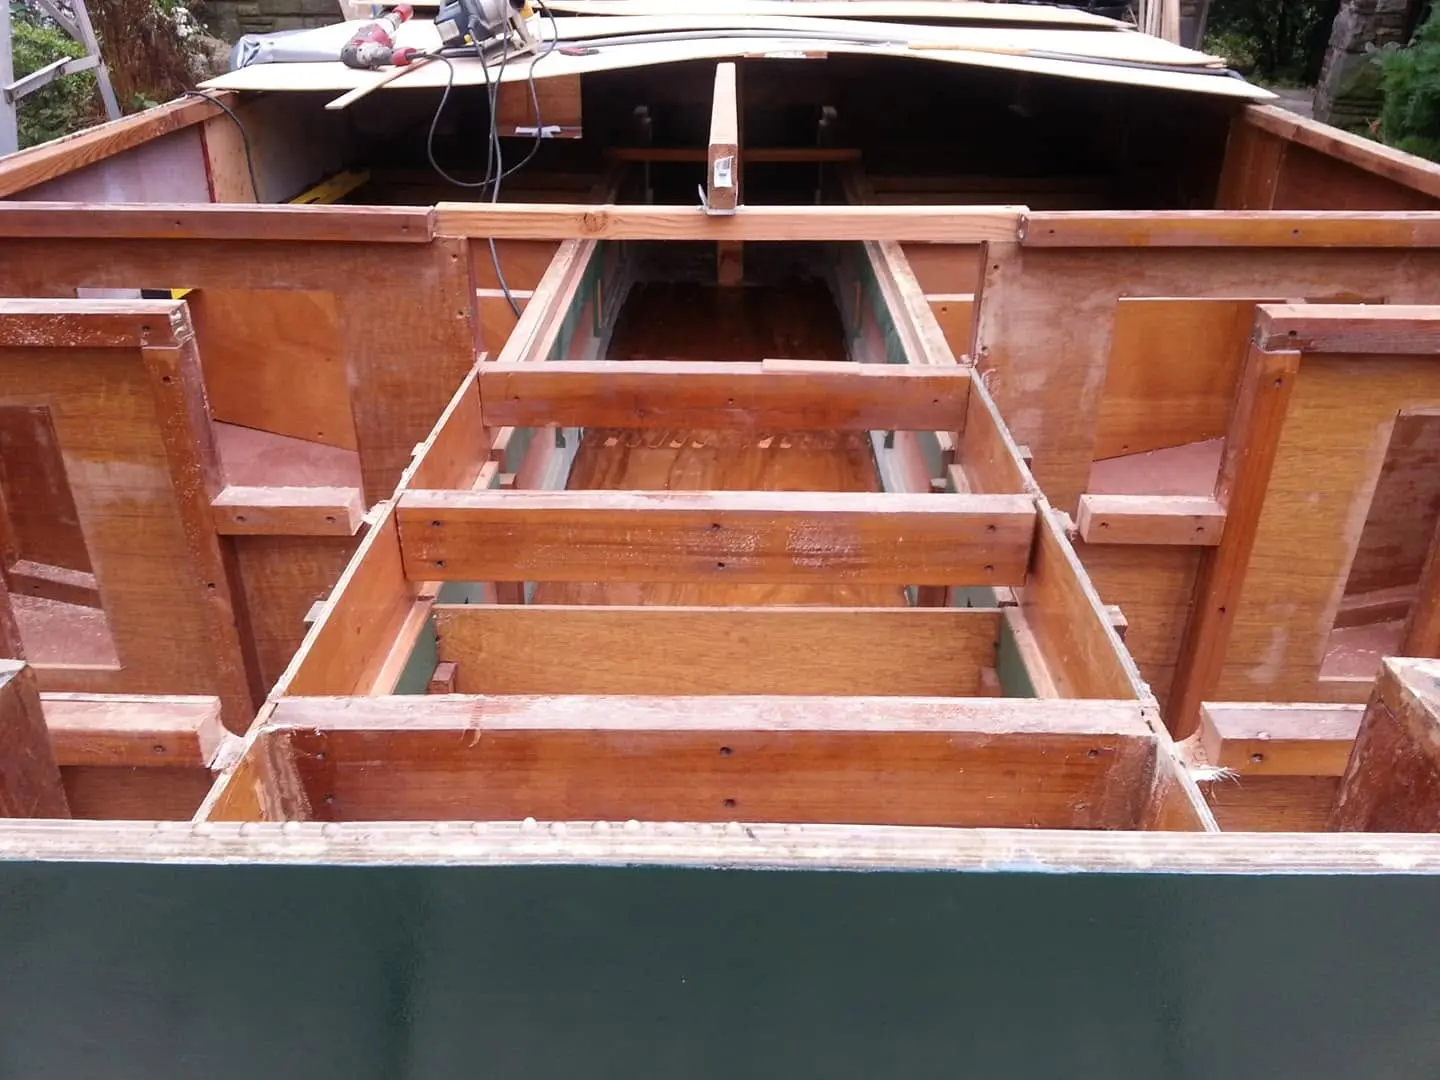
Quitting time, Aug. 10, 2017 -- That's it for today. The mosquitoes are having a feast, and I'm about due for a transfusion. I am four partial bulkheads away from a complete frame for the hull. I'll have to do a little planing to bevel around the bow and stern. At the joints where the pieces of wood intersect, I will have to lay in a "fillet" of thickened epoxy, and reinforce each joint with a strip of fiberglass tape. I hope to be ready to start sheathing the hull next week.
15 Aug 2017Glassing & Epoxy
A view from the bridge.
Aug. 15, 2017: A view from the bridge. Actually, from an upstairs window. All the framing is in place. Before I can start sheathing the hull with marine plywood, I will reinforce all the frame joints with fiberglass tape and epoxy, and plane down any high spots and shim any low spots. I will also go over all my work carefully to make sure I have not left behind any steel sheet rock screws that I used as temporary clamps. They all need to be replaced with non-rusting silicon bronze screws. Each will be dipped in epoxy before being driven home, to make sure they stay in place over the life of the boat, and to block any possible path for water intrusion and eventual rot.
7 Sep 2017Hull Panels
I have decided to solve a few problems at one time.
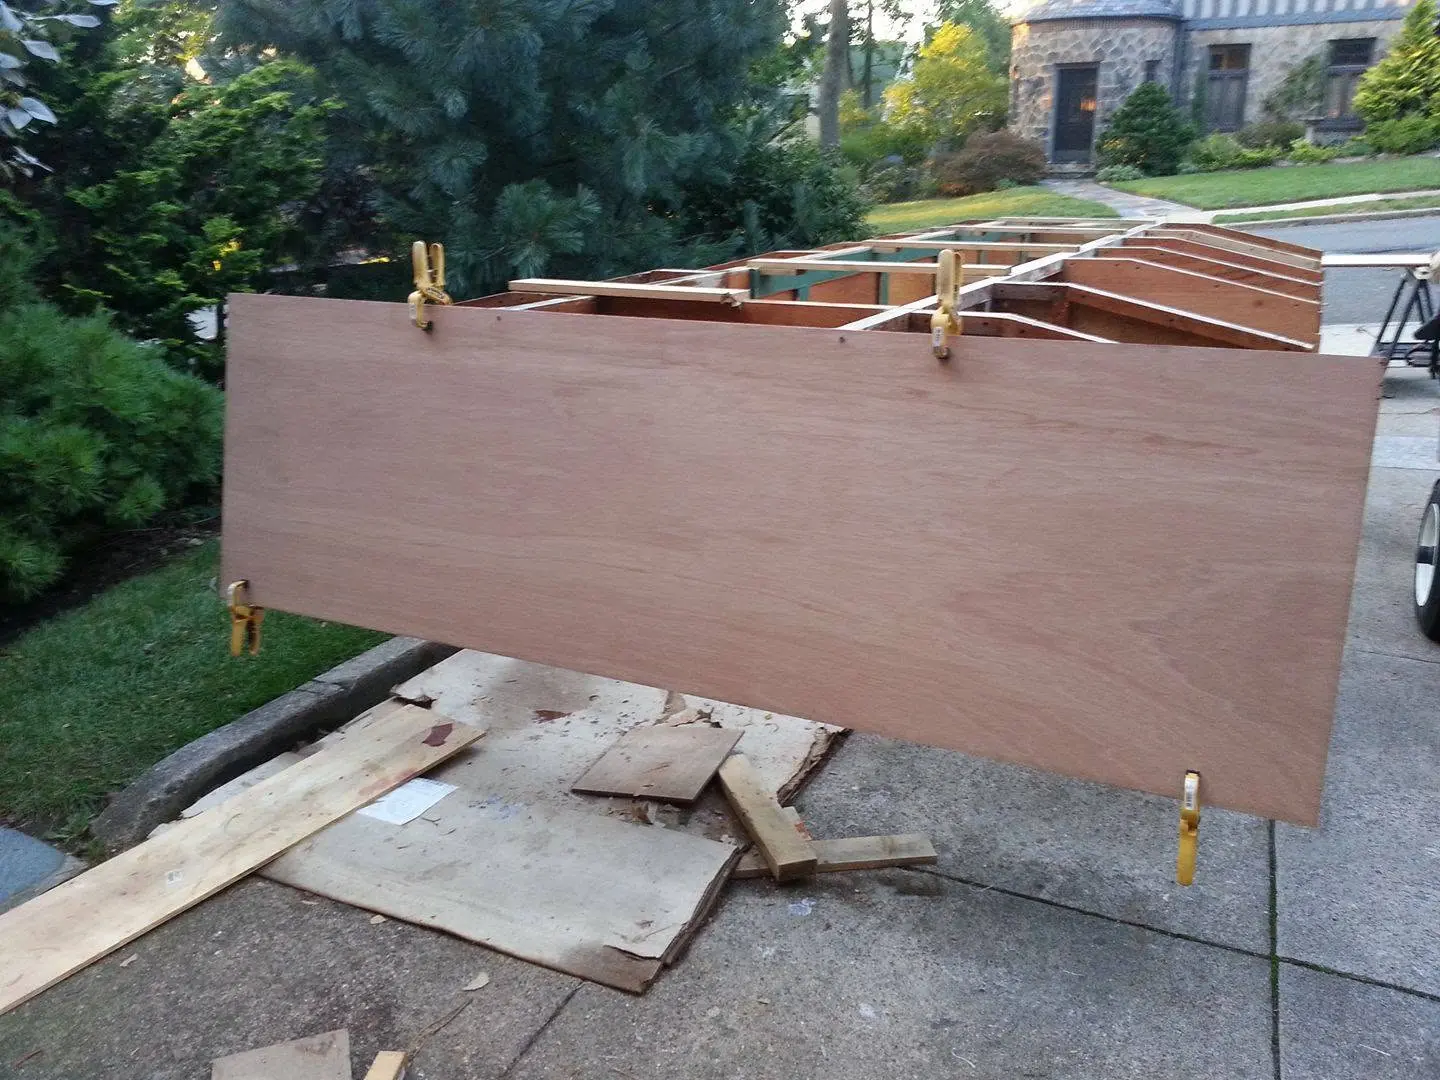
Sept. 7, 2017: I have decided to solve a few problems at one time. The problems: my dissatisfaction over the ugly dark stains from water intrusion under the epoxy finish in the transom, together with the expensive okoume's totally boring grain pattern, and my feeling that I wanted to thicken and stiffen the transom to be able to support a much larger motor than the design calls for. Solution: face the transom with half-inch laminates, inside and out, of much less expensive lauan marine plywood. I believe it's better quality plywood, it has a much more interesting grain, and when I finish, the transom will be an inch and a half thick. Here, I've hung a piece of lauan, fixed temporarily with two screws and four clamps, so I can accurately trace the shape to match the existing transom. I'll cut it tomorrow, then apply an epoxy finish before gluing it down permanently. I am pretty sure it will be a vast improvement. We shall see.
Chapter 06
Systems
Electrical, plumbing, fuel, steering, pumps, nav lights.
2 daysfrom September 2017
8 Sep 2017Systems
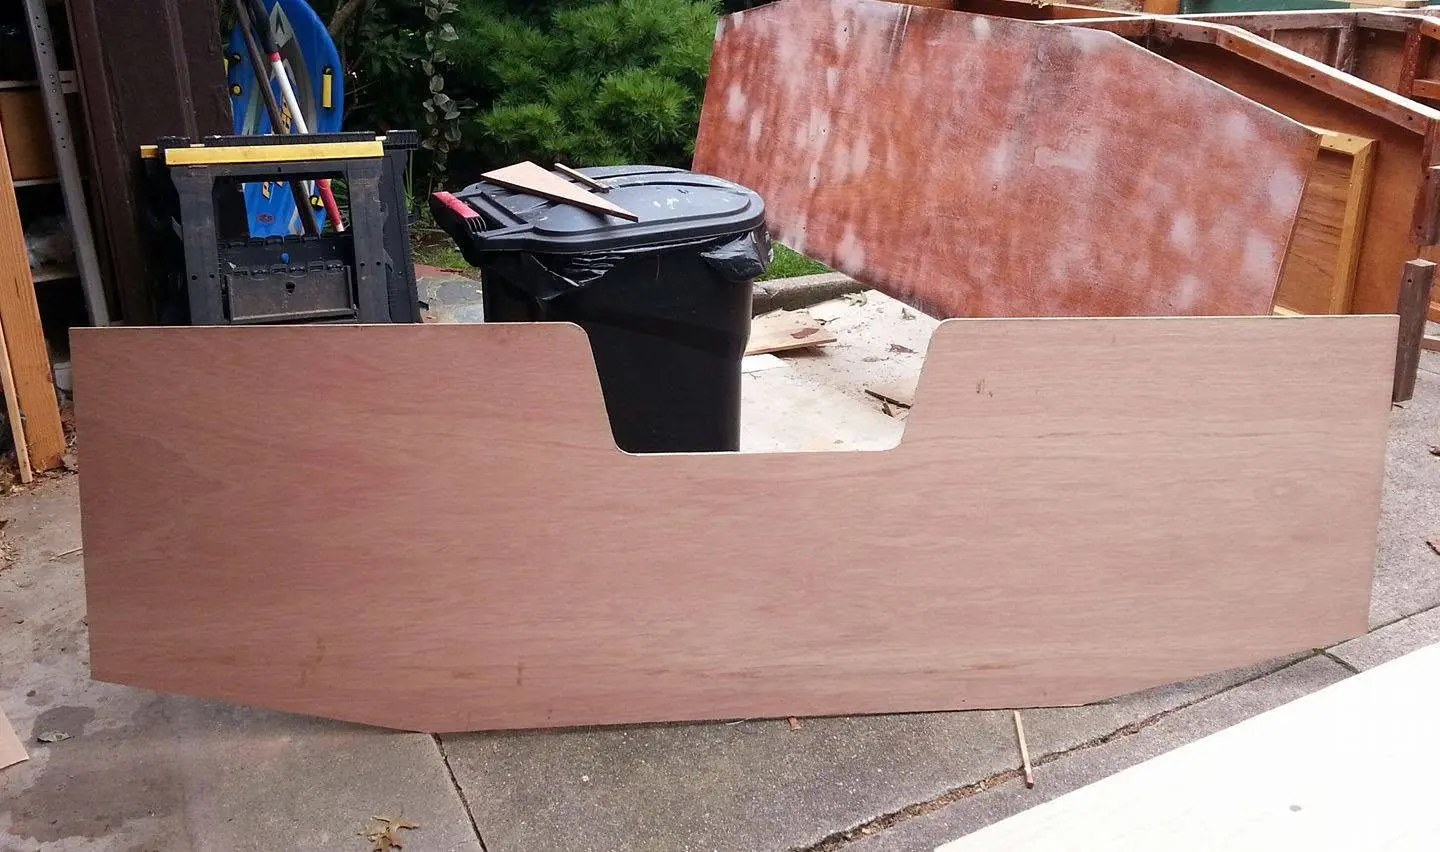
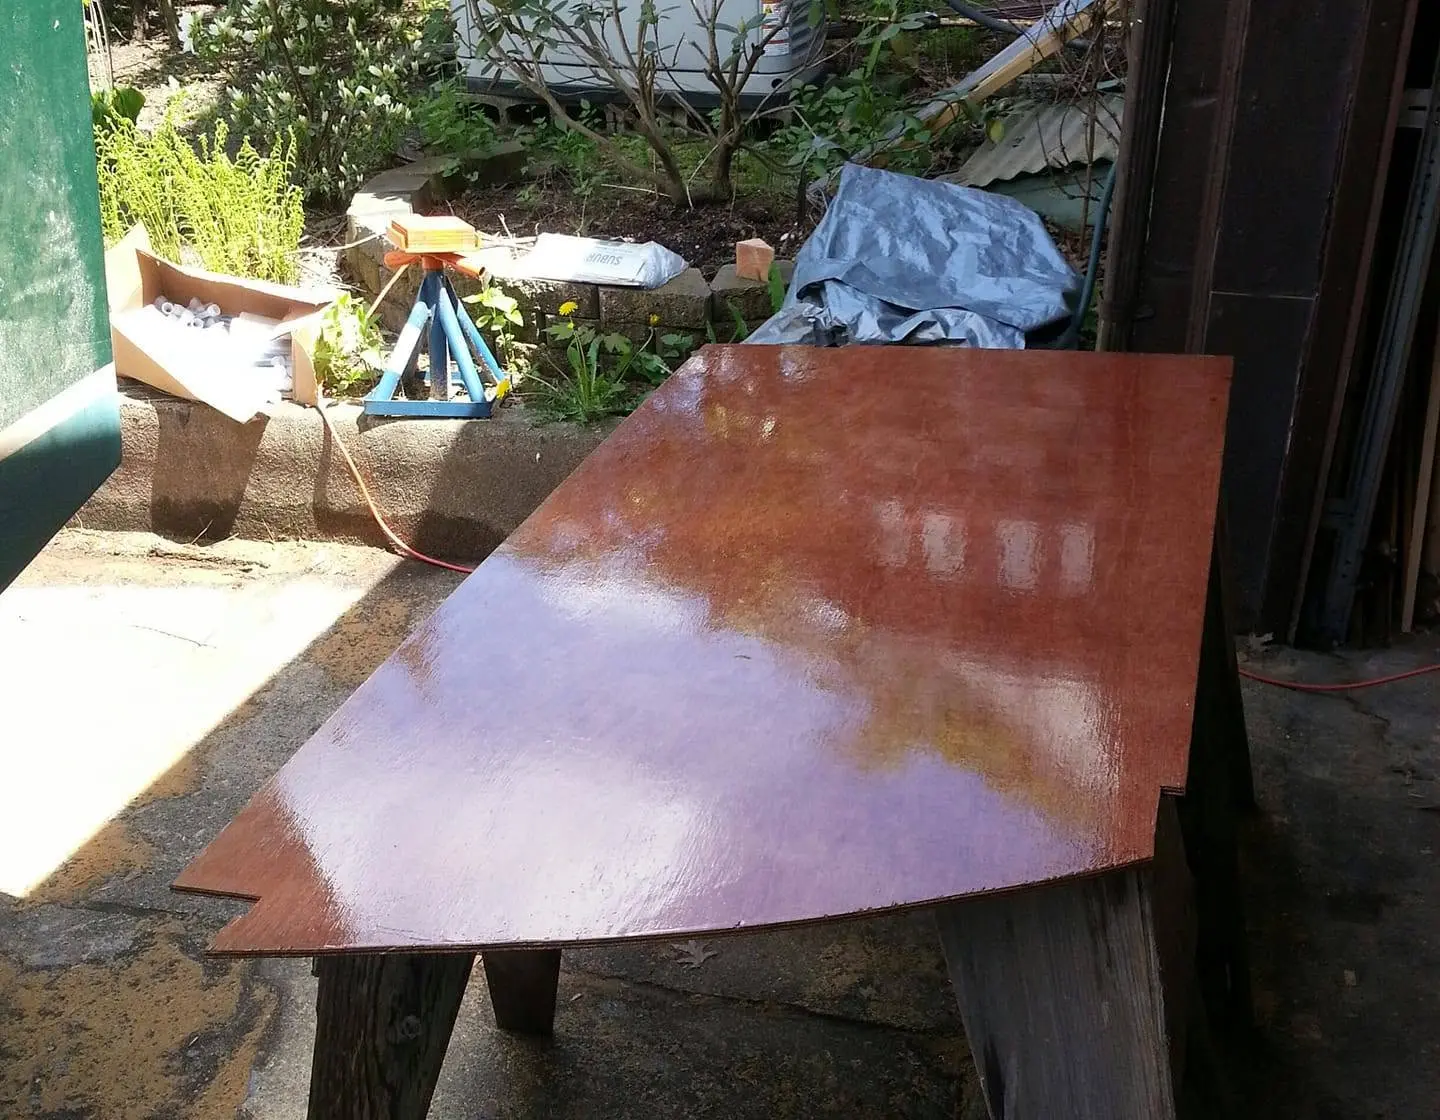
This will be the new outer face of the transom.
Sept. 8, 2017: This will be the new outer face of the transom. The center cut-out is to accommodate the outboard motor, which will be either a 20 or 25 H.P. long-shaft. I'm open to brand recommendations from anyone with experience. I'm also beginning to explore the possibility of an electric outboard motor, powered by batteries to be charged conventionally at dockside or by roof-mounted solar panels. It looks like this will be a much more expensive installation, and the weight of the batteries may be a problem. But a decision is a long way off, and it's just possible that by the time I am ready the price will come down and technology will deliver lighter batteries. But it's nice to think about.
11 Sep 2017Hull Panels
On all days, but especially on this day, I feel fortunate to be alive and doing things...
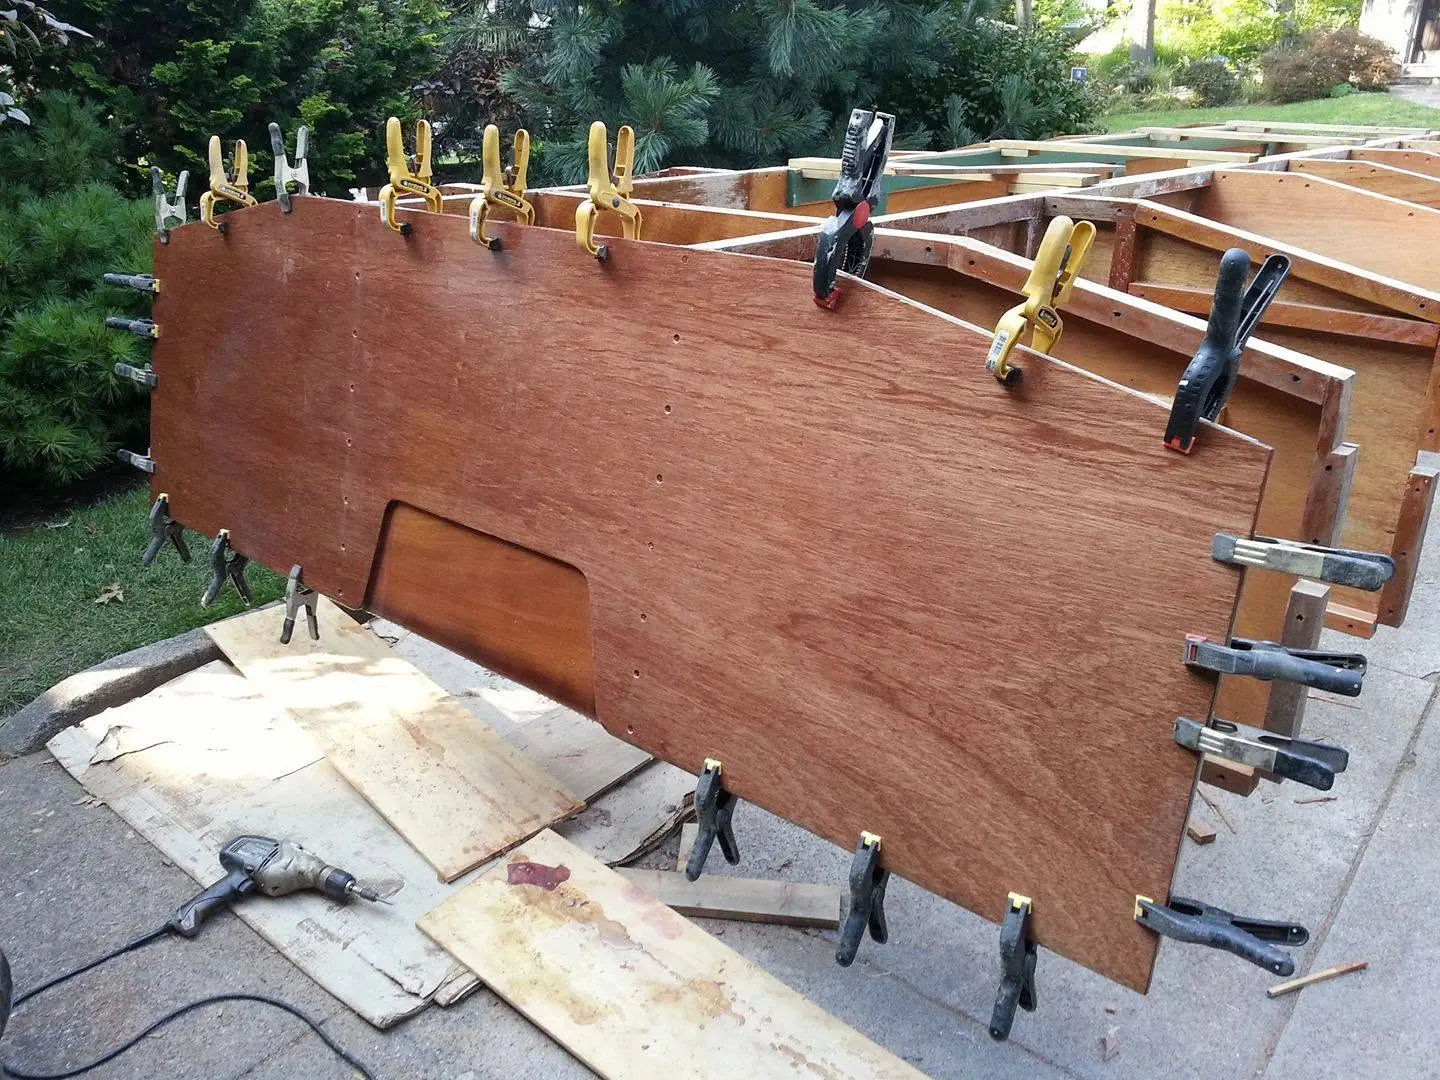
Sept. 11, 2017: On all days, but especially on this day, I feel fortunate to be alive and doing things I love to do. I do not take that lightly or for granted. Here's the the new face of the transom, laminated over the old one. Much better, in my opinion. You can see a bit of the old one where I have not yet cut it away for the motor mount.
18 Sep 2017Systems
I've decided to experiment with sound-deadening materials in the area of the outboard...
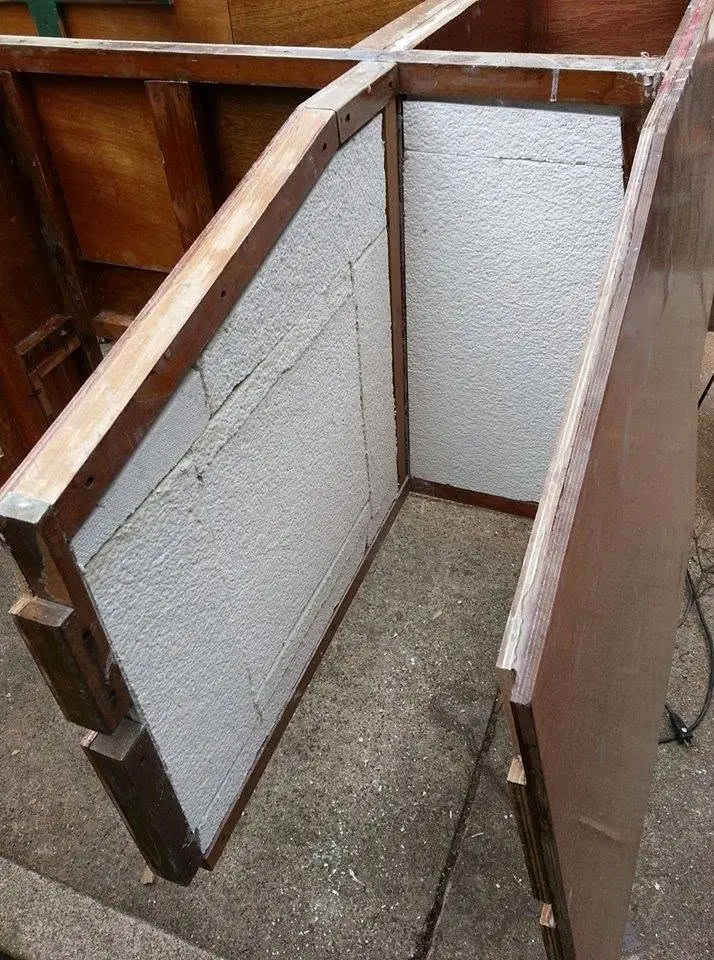
Sept. 18, 2017 -- I've decided to experiment with sound-deadening materials in the area of the outboard motor, although noise will not be a problem if I decide to go with electric power. A high school friend from (yikes!) 60 years ago, Rich Venza, suggested using acoustic ceiling tiles. Here are two thicknesses of tiles, for a total of 1-1/2 inches of sound attenuation. I have not yet covered them up with plywood, but when I knock on the other side, all I hear is a muffled thud instead of a sharply ringing rap. I have confidence that this will work quite well. Thanks, Rich!
24 Sep 2017Hull Panels
It's time to close in the hull, starting with bottom panels.
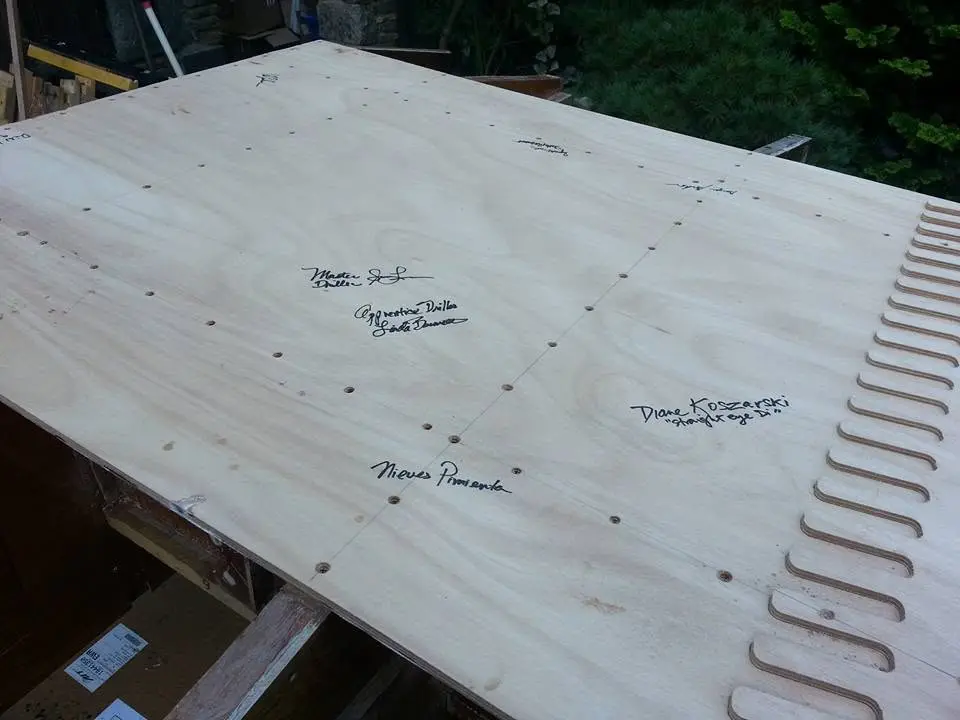
September 24, 2017. It's time to close in the hull, starting with bottom panels. I've decided to use the services of Chesapeake Light Craft, in Annapolis, Md., to deliver plywood panels that are pre-cut with finger joints, formed on their huge computer numerically controlled routing table. Traditionally, multiple sheets of plywood were joined to increase length by using "scarf" joints -- gradual tapers planed into the the edges of the plywood with an 8-to-1 ratio of length to thickness, then glued and clamped. But I think using CLC's finger joints will save me a lot of time and give me a more positive connection. You may notice those signatures on the piece of plywood near the stern. I celebrated the installation of the first hull panel by inviting friends to come over and participate in the drilling screwing and gluing. When we finished, they all signed their names to the work. Of course, they'll all eventually be covered over with paint, but we all know they're there.
25 Sep 2017Hull Panels
Here's the inside surface of the second bottom panel, prepared for installation.
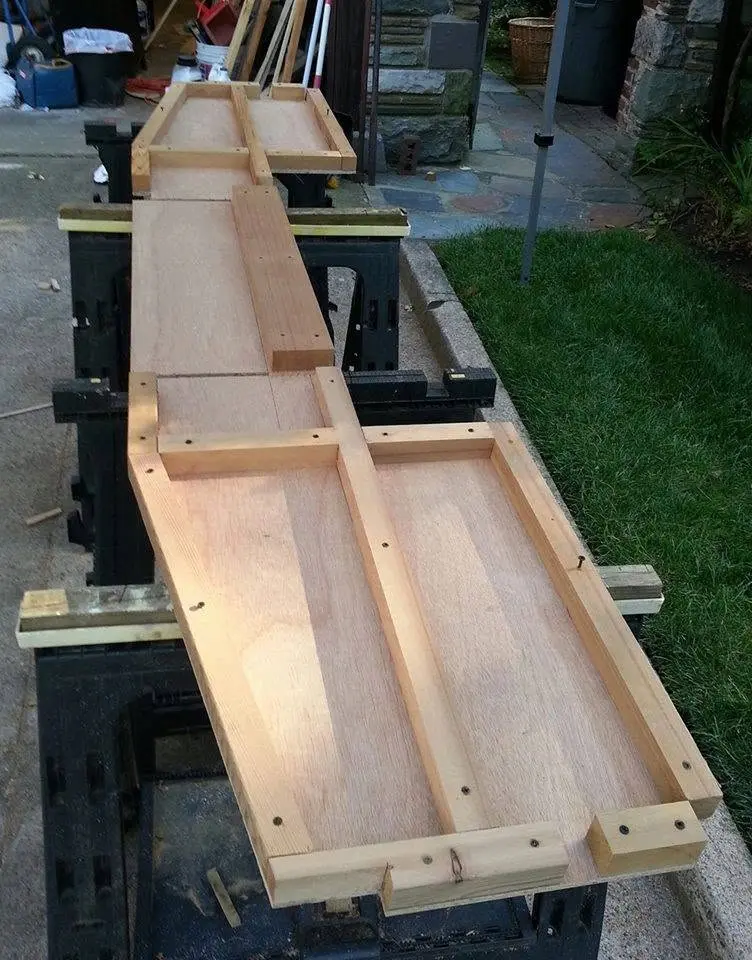
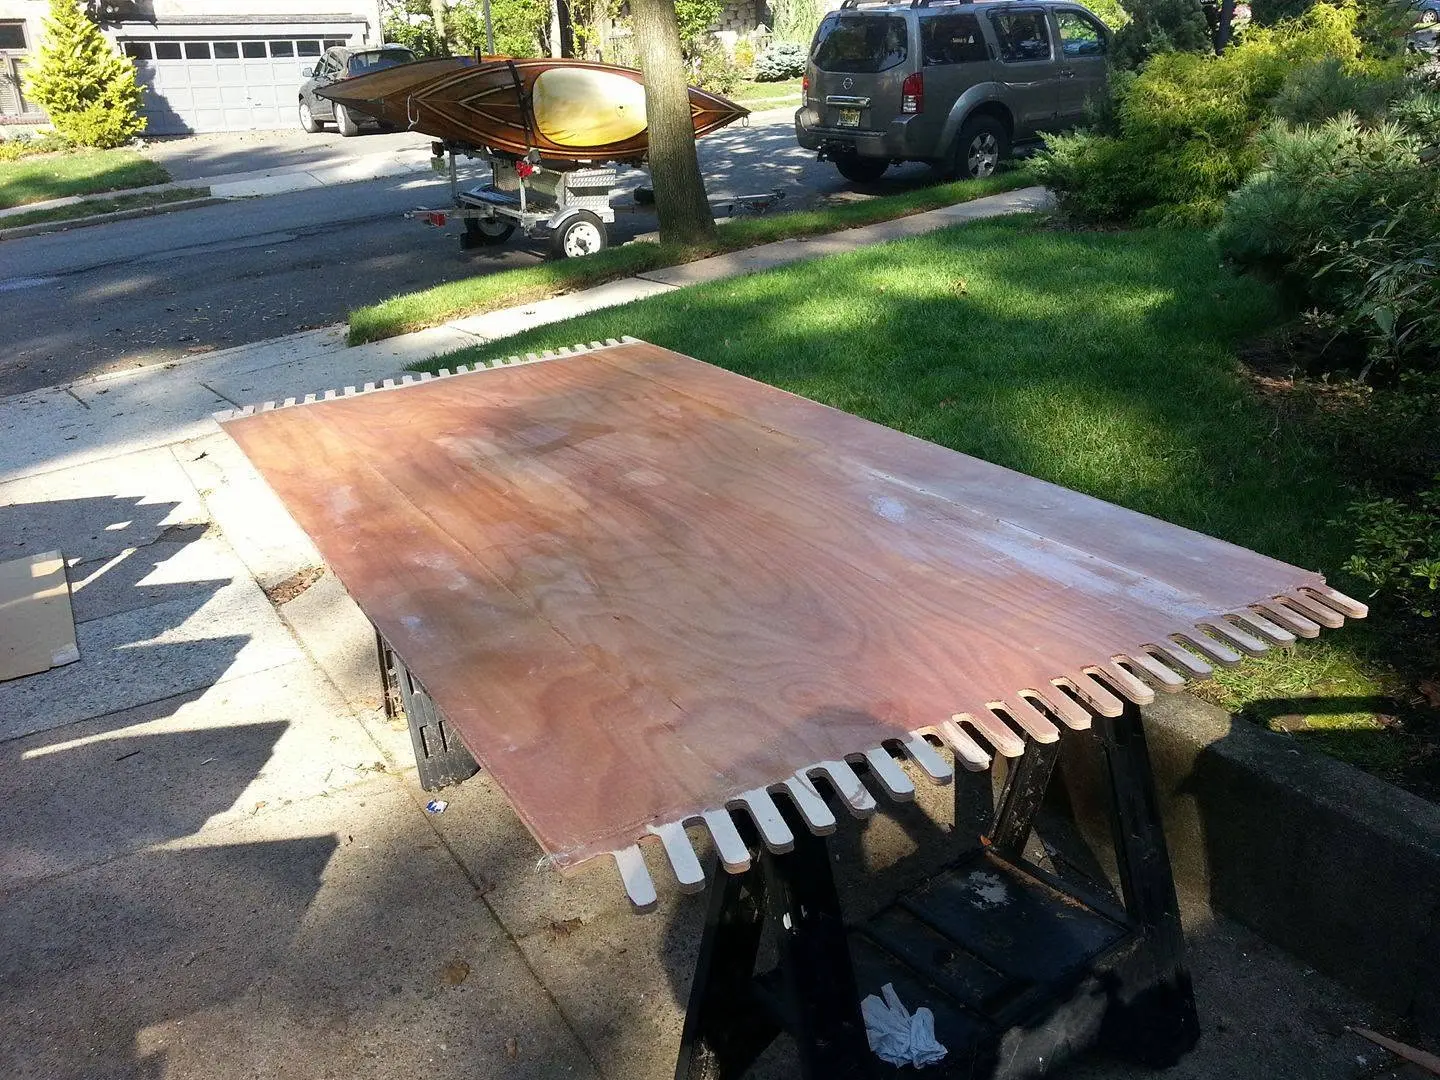
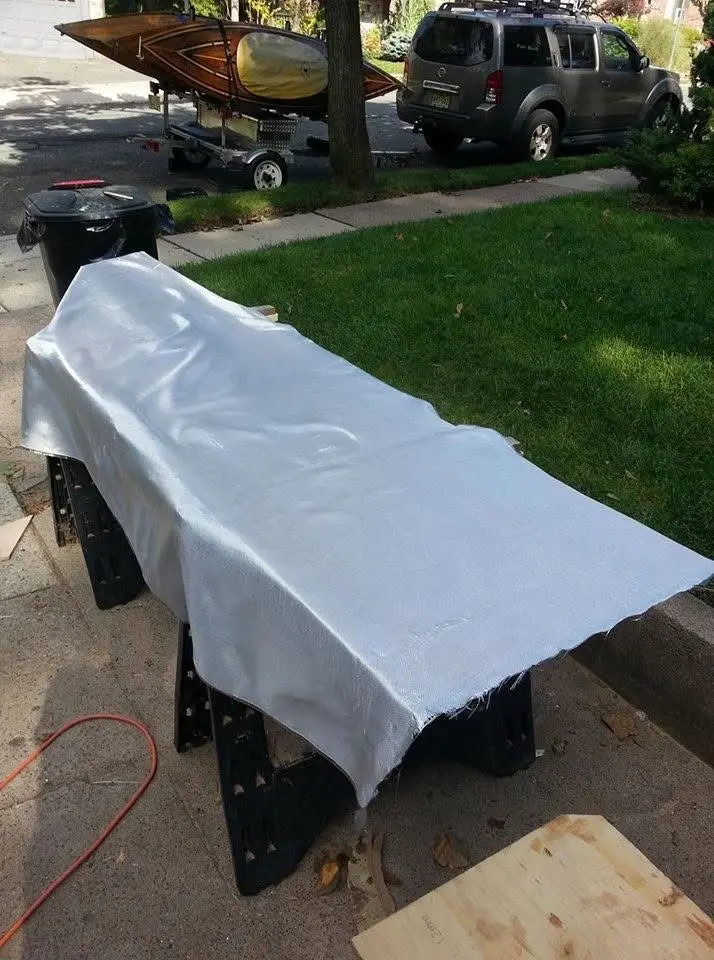
Sept. 25, 2017: Here's the inside surface of the second bottom panel, prepared for installation. Each of these hull panels will be sealed with epoxy and fiberglass fabric before being installed, because it's easier to do it on saw horses than working upside-down while lying on my back under the growing hull. It's still a little tacky so I'll wait until tomorrow to install that and then I'll get back to other fiberglassing jobs in the stern compartments. So that's it for today. Tomorrow is another day.
28 Sep 2017Hull Panels
Some say that with a long enough lever and a well placed fulcrum, you can move the world.
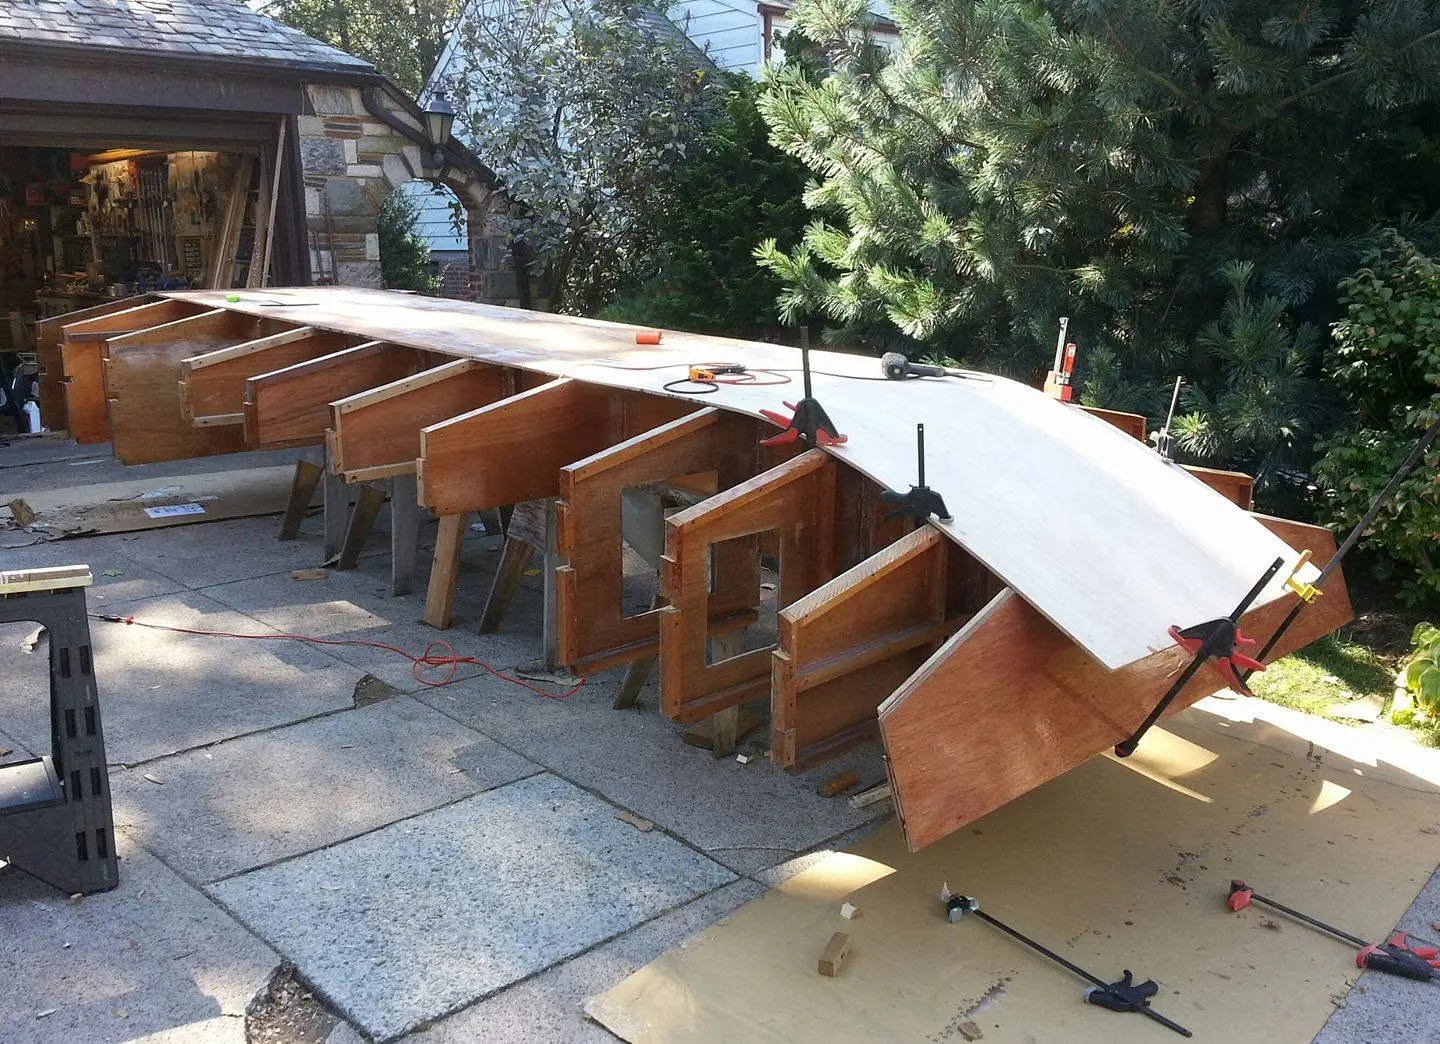
Sept. 28, 2017. Some say that with a long enough lever and a well placed fulcrum, you can move the world. That may be on my bucket list, but for now, I am satisfied with bending half-inch marine plywood around the curve of the bow of the hull of the houseboat-to-be. It might be easier with run-of-mill construction-grade plywood from the big box home center, but with this high quality seven-layer cake that's certified by Lloyd's of London to have no internal voids, bending seems not to be in its nature. "How can you possibly bend it?" asked an architect friend. "I'll bend it with my mind," I said. And so I did, with the help of six long bar clamps. By the way, I deliberately used an over-long sheet of plywood, knowing that I could use the extra length as a lever to help muscle it into position. Today the houseboat; tomorrow the world!
29 Sep 2017Glassing & Epoxy
Happiness is an unclamped bottom.
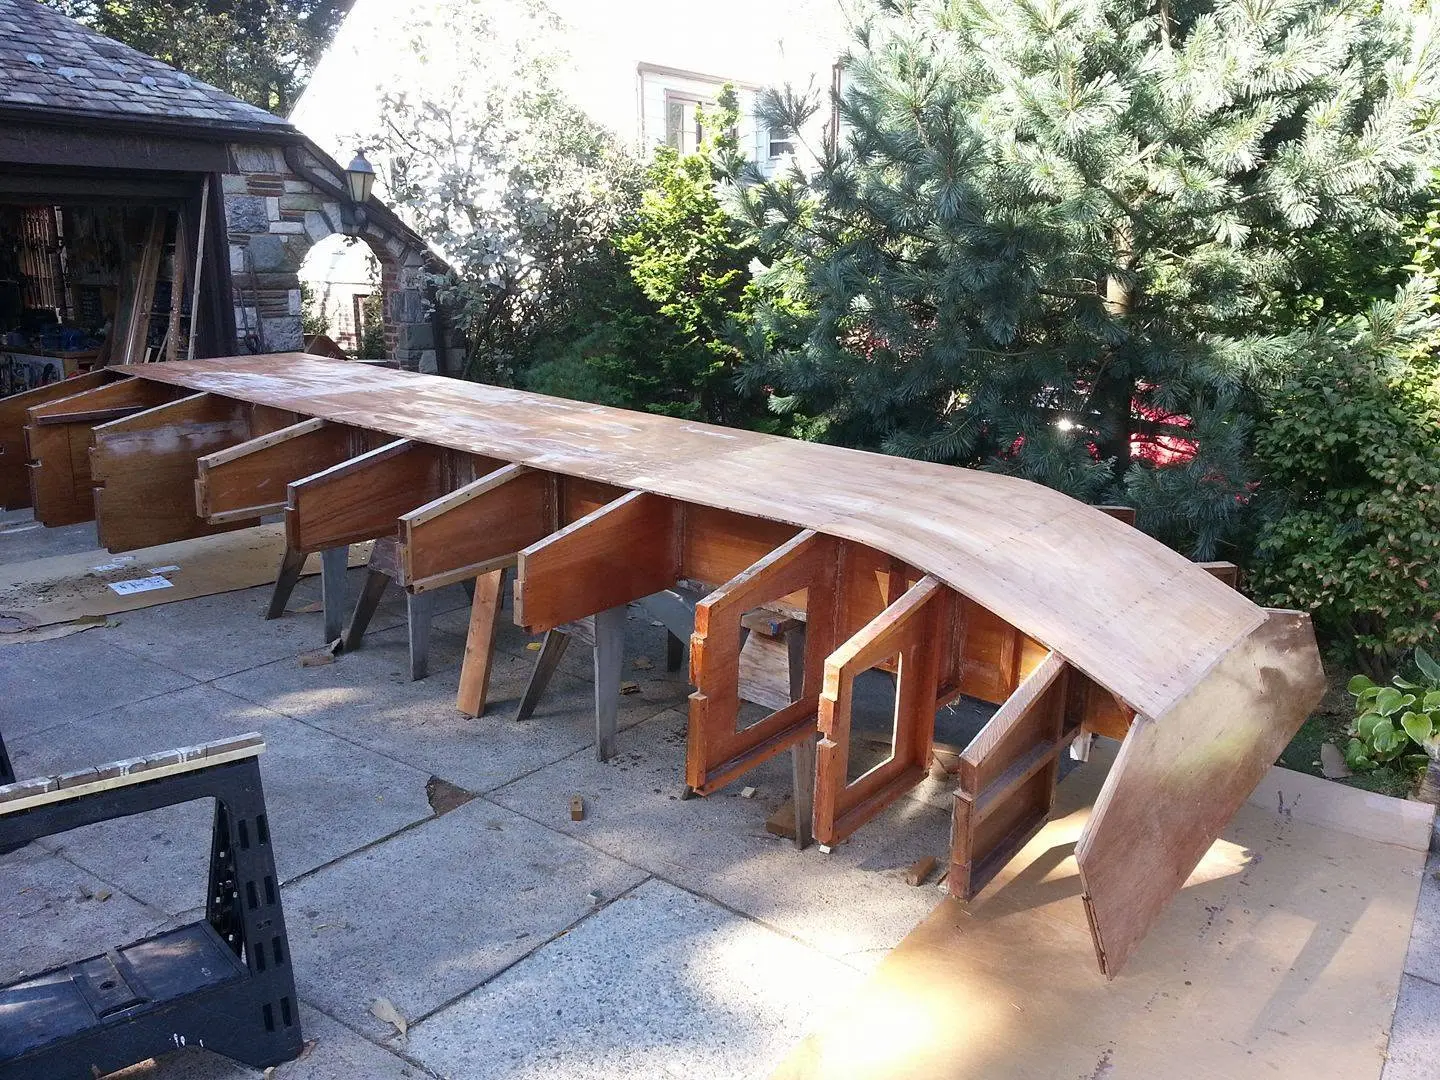
Sept. 29, 2017: Happiness is an unclamped bottom. Its all glued and screwed, and nothing has sprung loose. I've cut away most of the overhang at the bow and will plane and sand what remains until it's flush. I've sealed the entire bottom with a coat of epoxy, so it's protected from the rain that's forecast for tomorrow. She's starting to look a little more like a boat, and less like the fossilized skeleton of a prehistoric creature.
1 Oct 2017Hull Panels
I have started work on the side panels of the hull.
Oct. 1, 2017: I have started work on the side panels of the hull. The thin batten tacked temporarily to the curve of the bow is to tell me how to cut the panel and its supporting framework in that area. I will fasten a cedar plank to the bulkhead ends and trace the curve of the batten onto the plank. Then, I will cut the plank on the traced line, and use it as a template for the side panel at the bow.
1 Oct 2017Hull Panels
The curve of the side panel frame is pretty good for a first pass.
Oct. 1, 2017 (part 2): The curve of the side panel frame is pretty good for a first pass. Now, I have to plane it into a sweet curve with no lumps and bumps, and work in the bevel to make sure all the panels in this area lie down as they are intended. Then, when I'm sure I have it just right, I will unscrew the parts and check them for approximate fit on the other side, even though I know the bevel will be reversed. Then, I'll use the parts as templates for the other side. My goal for tomorrow is to get at least one full-length side panel glued up and installed. We'll see....
2 Oct 2017Hull Panels
Hanging the side panels temporarily, to check for fit.
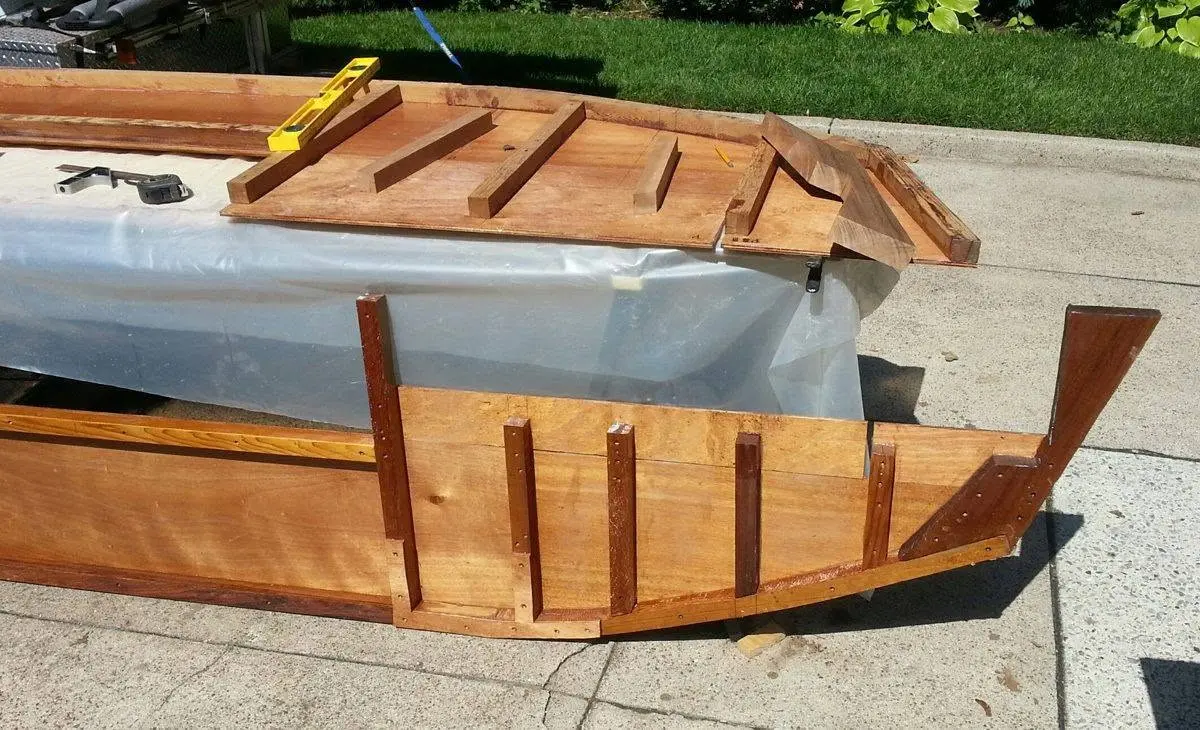
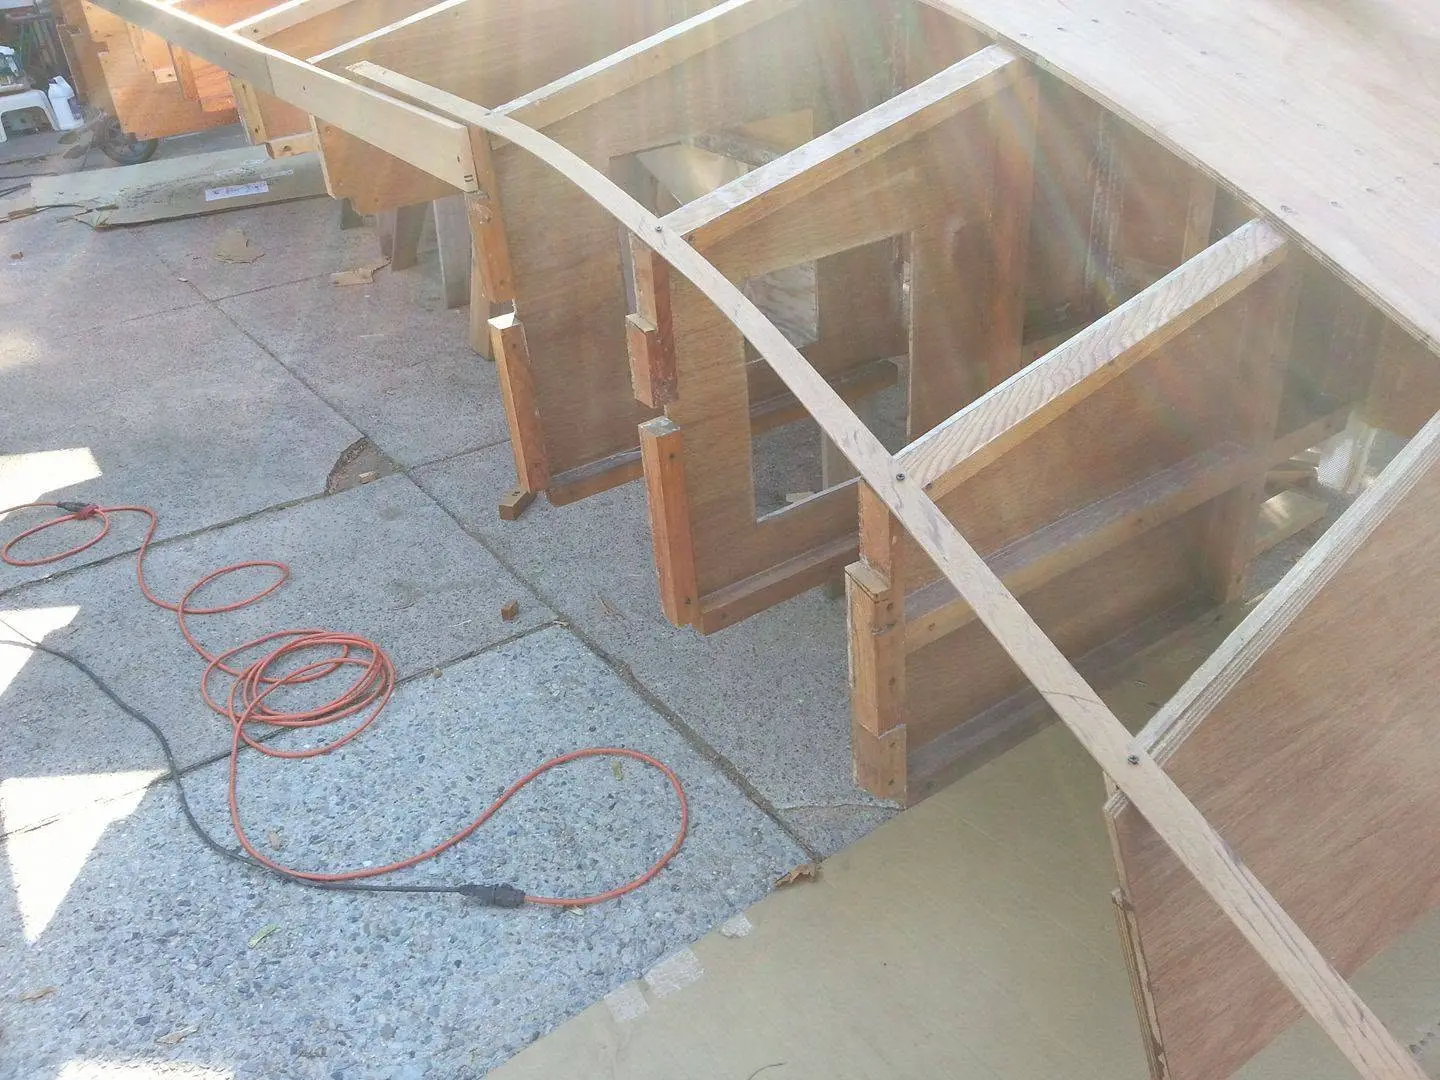
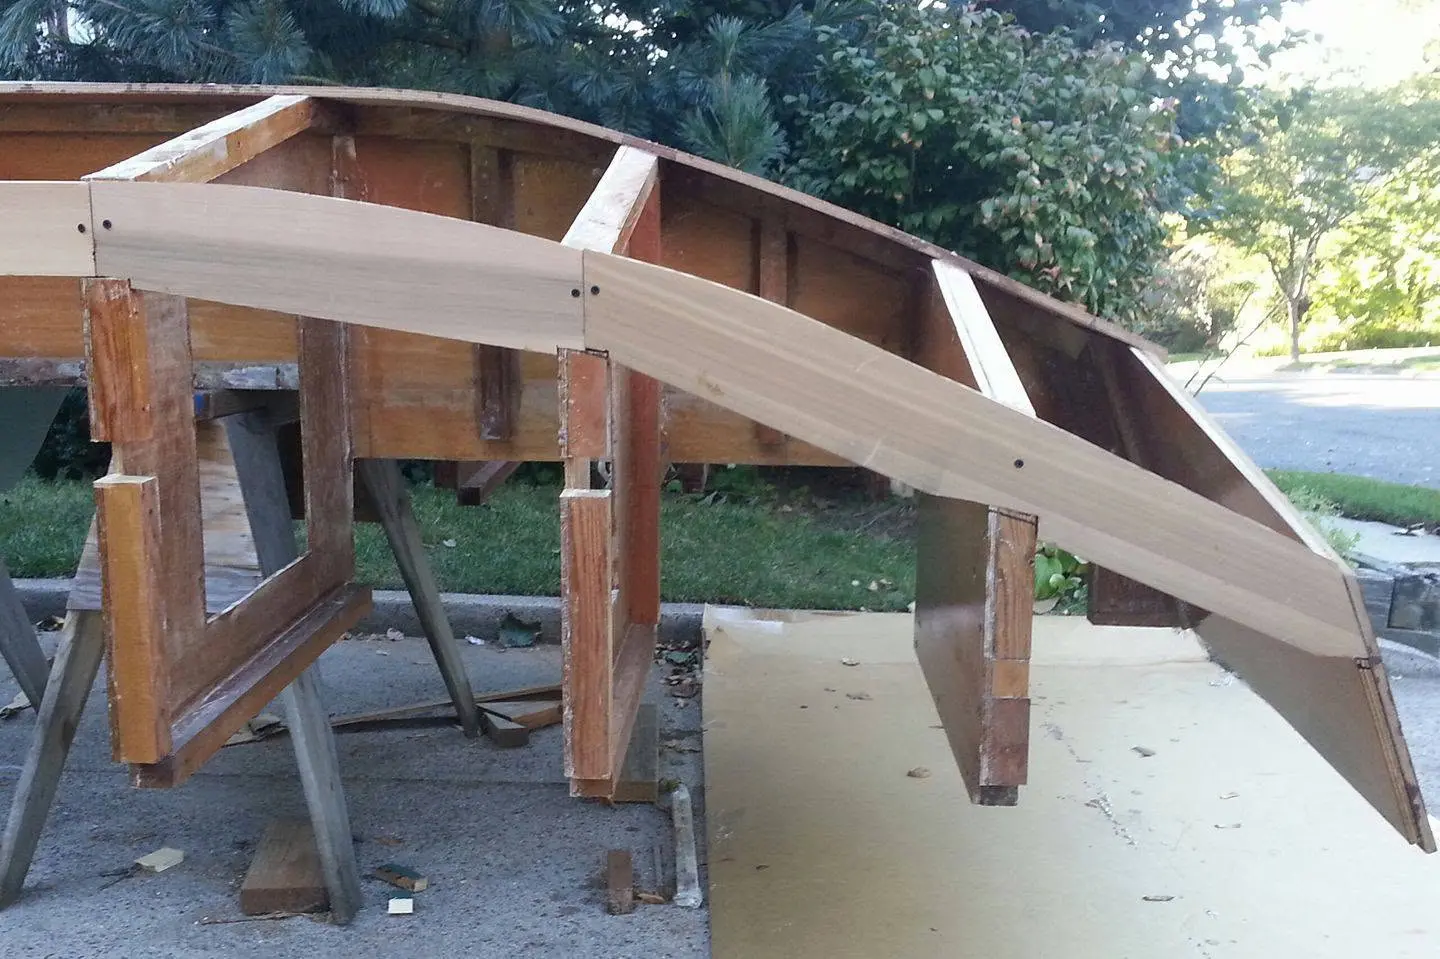
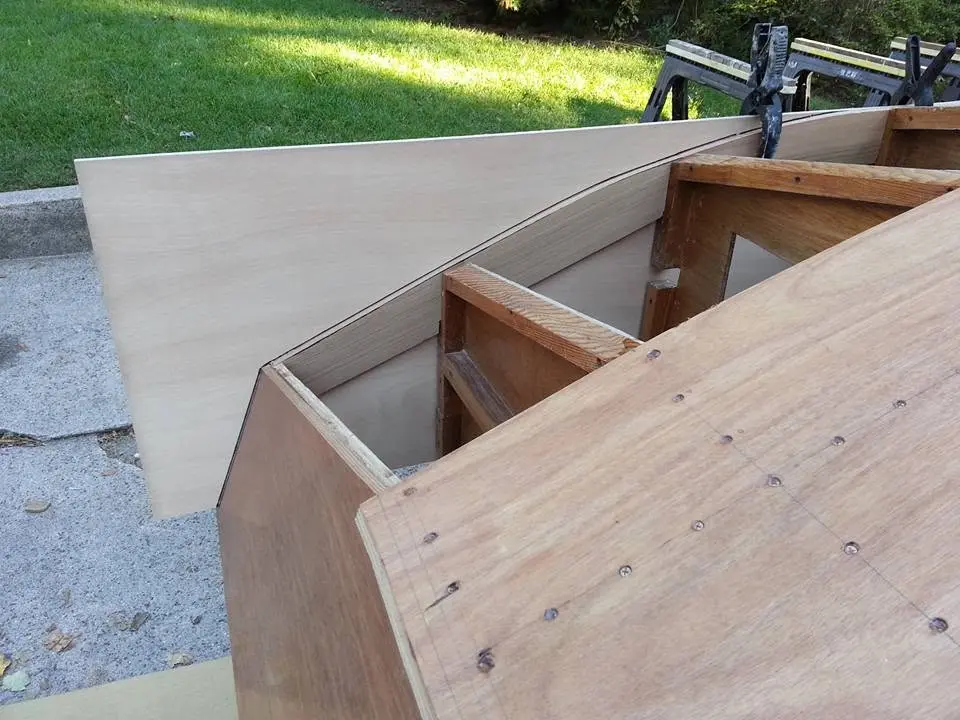
Oct. 2, 2017. Hanging the side panels temporarily, to check for fit. By the way, the topmost edge of the side of a boat is called the "sheer." A plank is called a "strake." These three pieces, when joined, will be the "sheerstrake." In the second picture, you can see the bow section from the inside. I'll use a pencil to trace the outline of the curve of the bow, then cut that section of the sheerstrake on the line I scribe.
3 Oct 2017Glassing & Epoxy
Starting to fiberglass the backs of the side panels -- the sheer strakes.
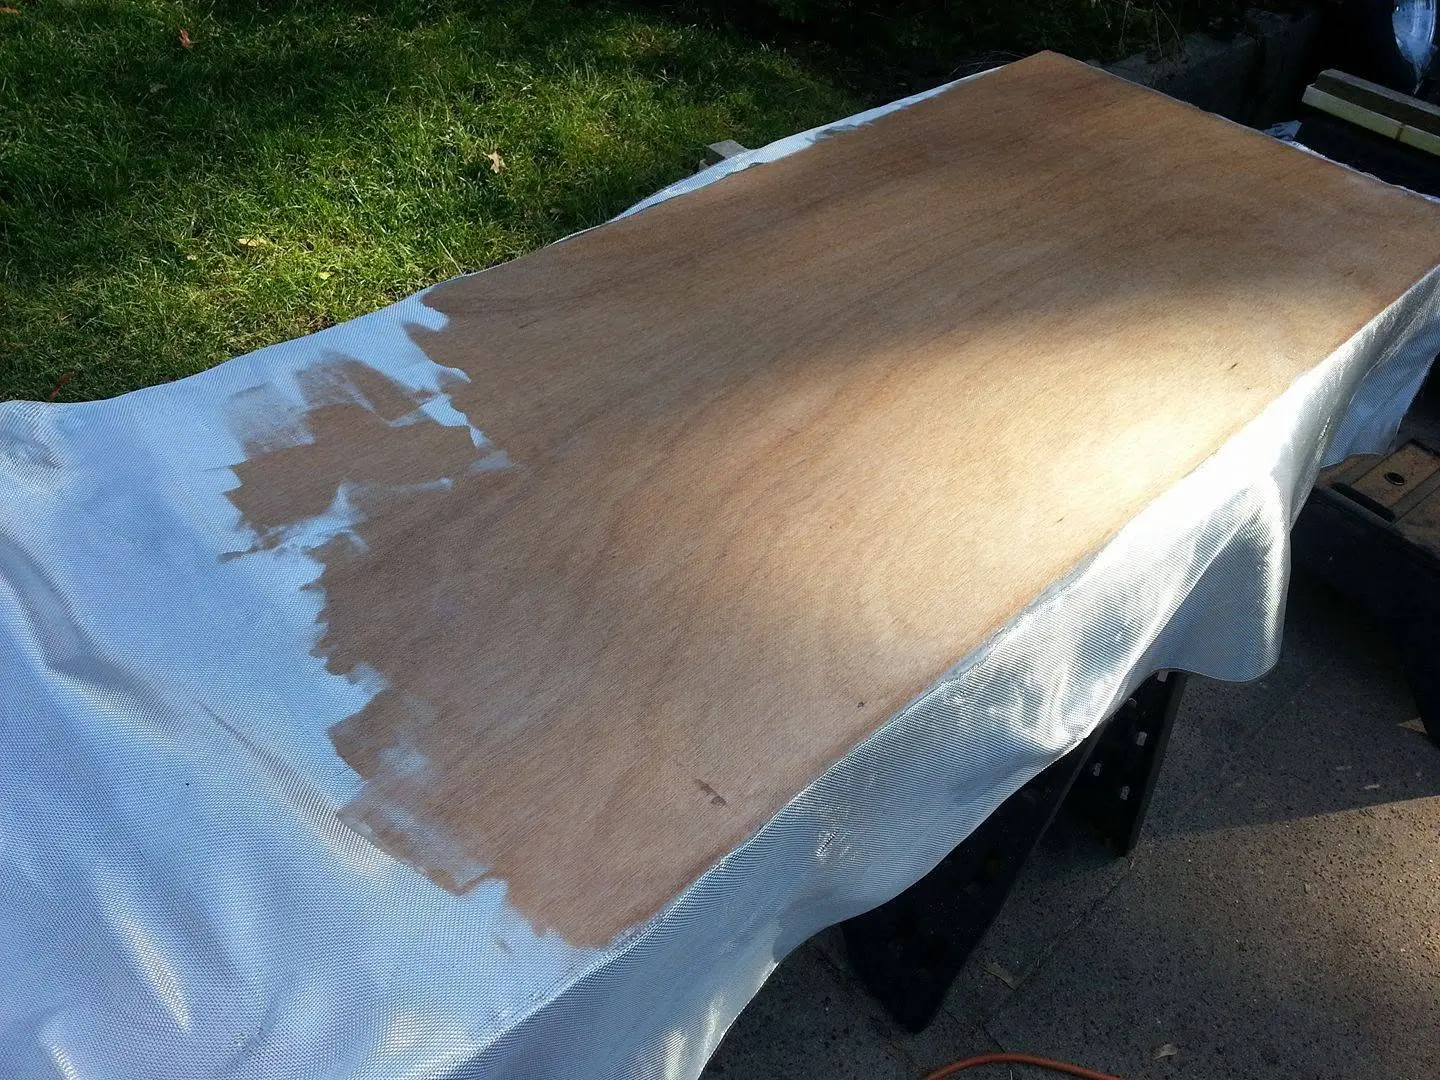
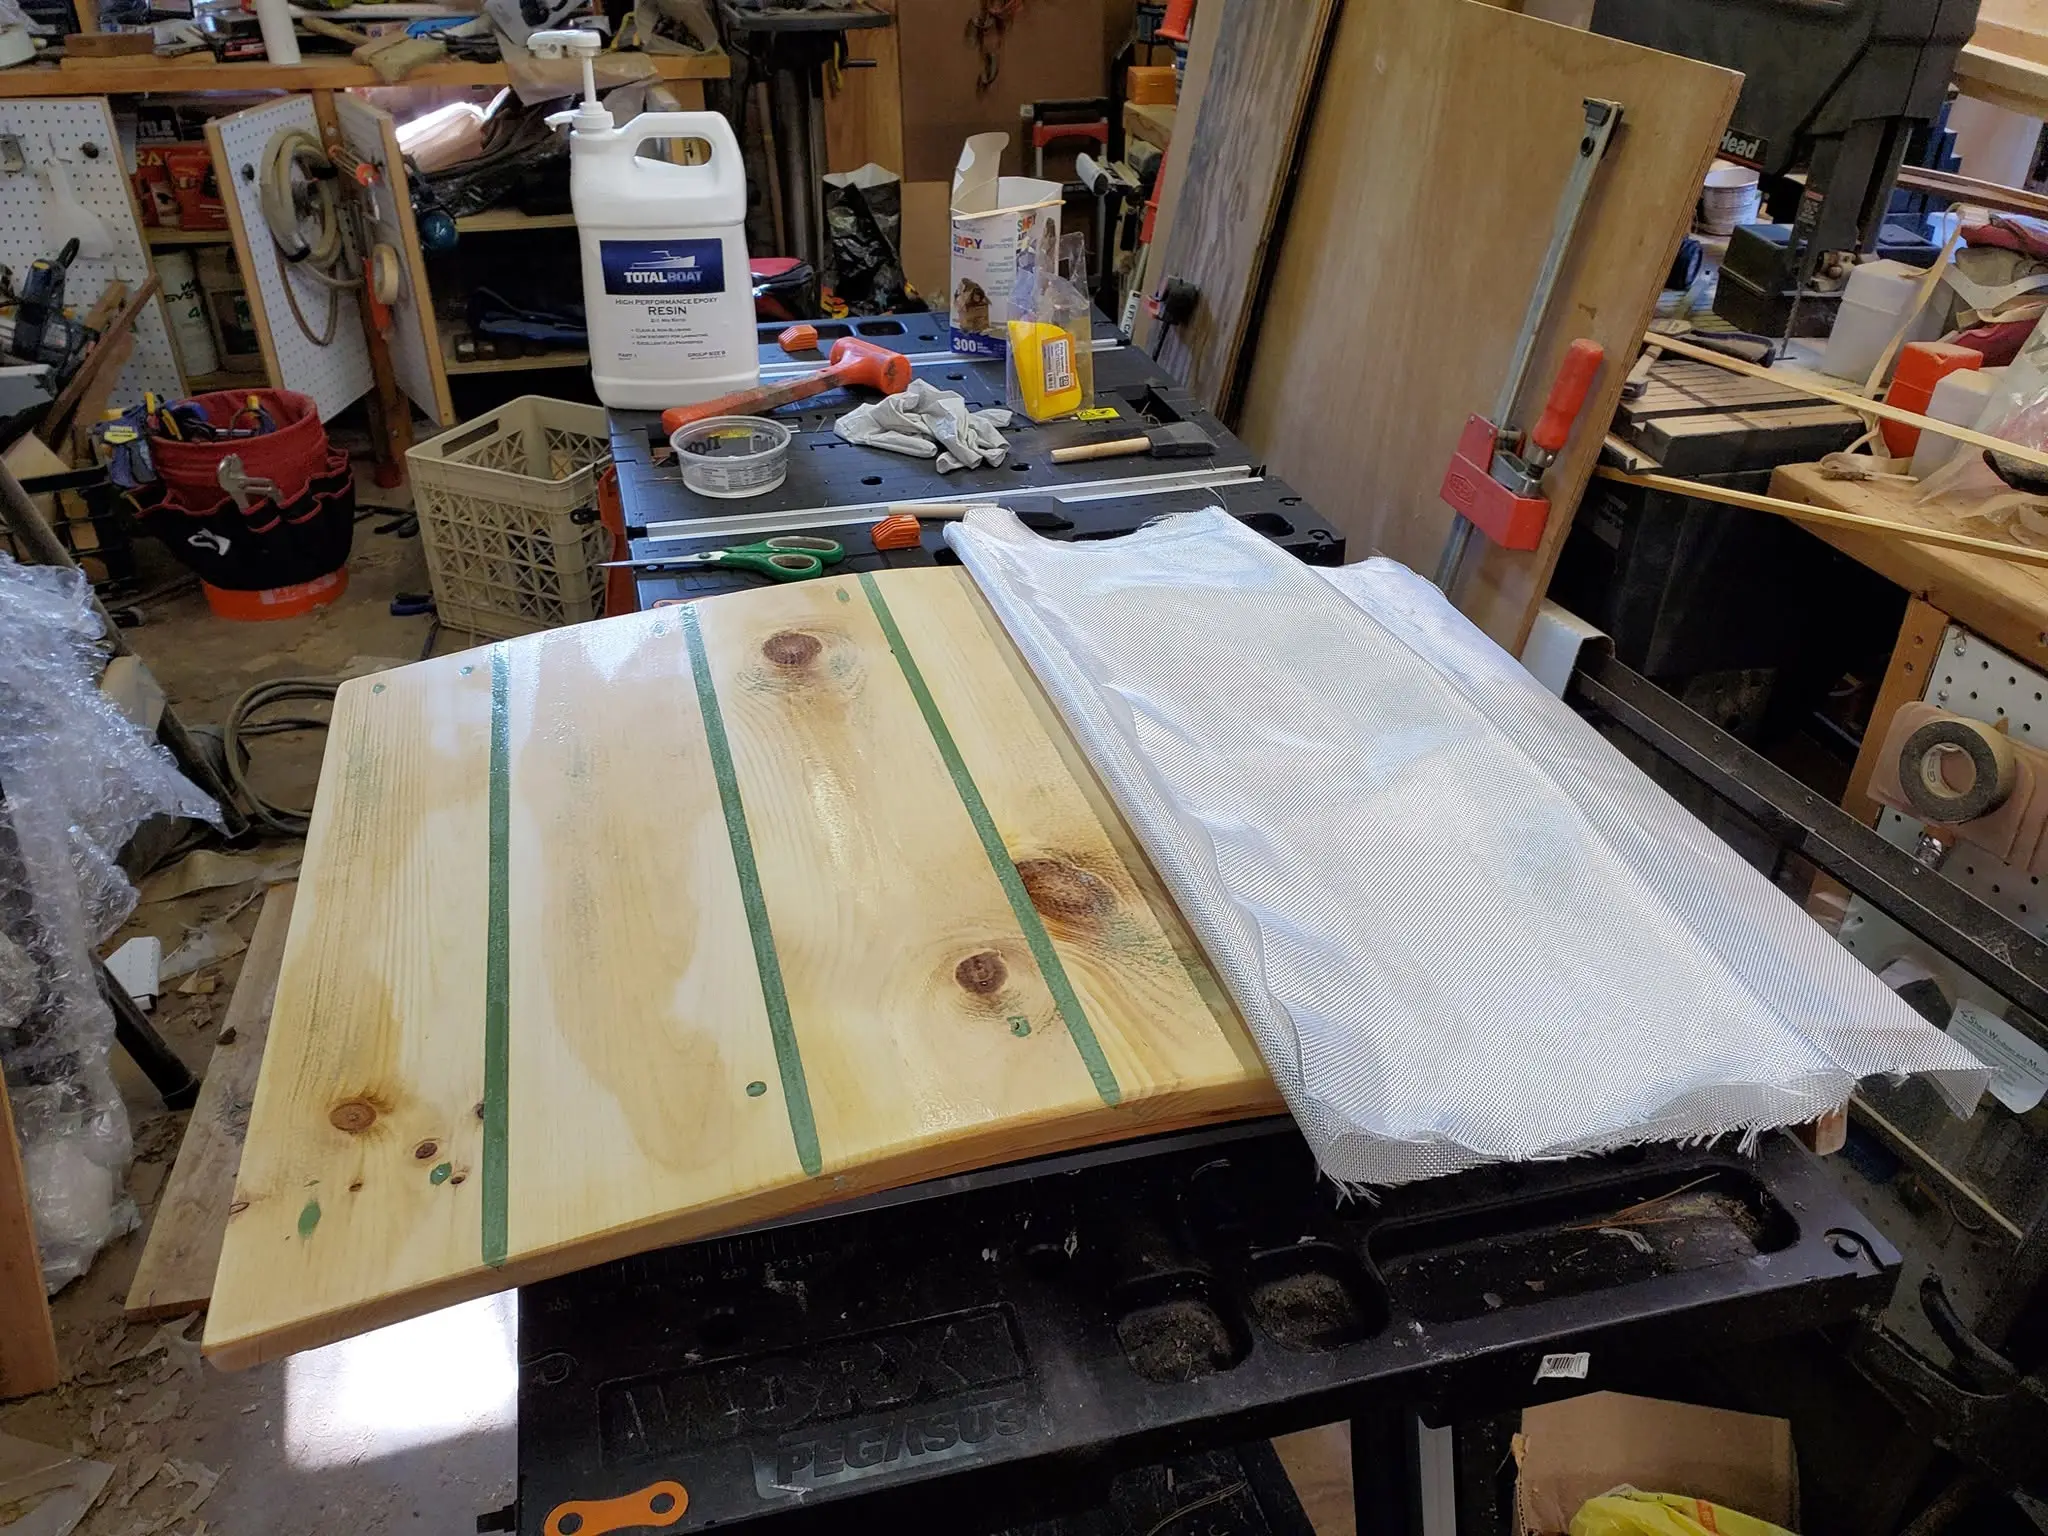
Oct. 3, 2017: Starting to fiberglass the backs of the side panels -- the sheer strakes. I will want to be somewhat neat about this, because some of these surfaces will be visible from inside the cabin. When I lay out the fiberglass fabric, it is opaque white. As I permeate the fiberglass weave with the two-part epoxy mixture, the fabric turns from opaque to transparent, allowing the grain of the wood to show.
10 Oct 2017Hull Panels
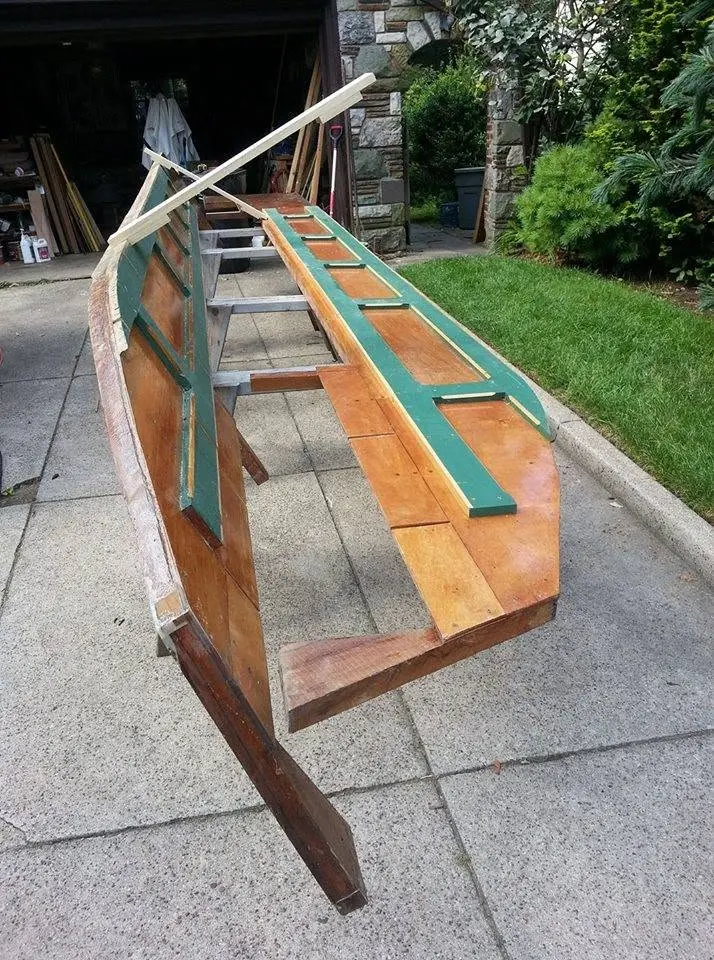
Jersey Girl's port side panels fit perfectly.
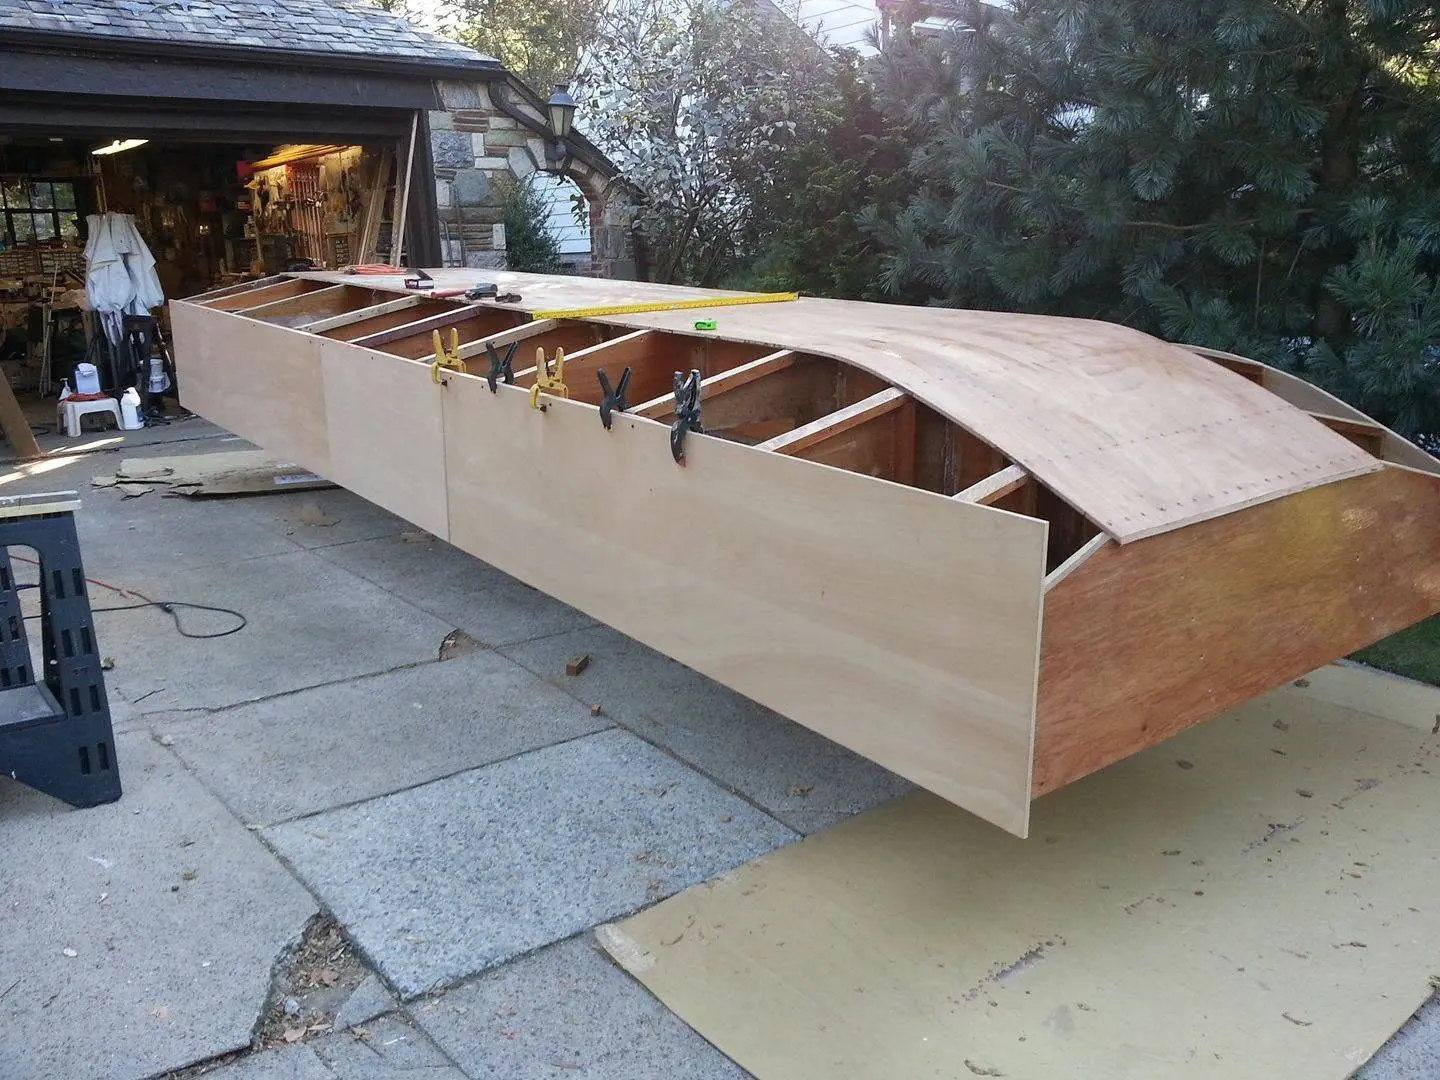
Oct. 10, 2017: Jersey Girl's port side panels fit perfectly. (Port is left; starboard is right. In this picture, Jersey Girl is upside-down. When she's turned right-side up, this will be the port side.) Later today, I'll drill and countersink a couple hundred pilot holes, then screw and glue everything together permanently.
1 Jul 2018Hull Panels
Houseboat look-back to Sunday, July 1, 2018 – There came a time over the summer when...
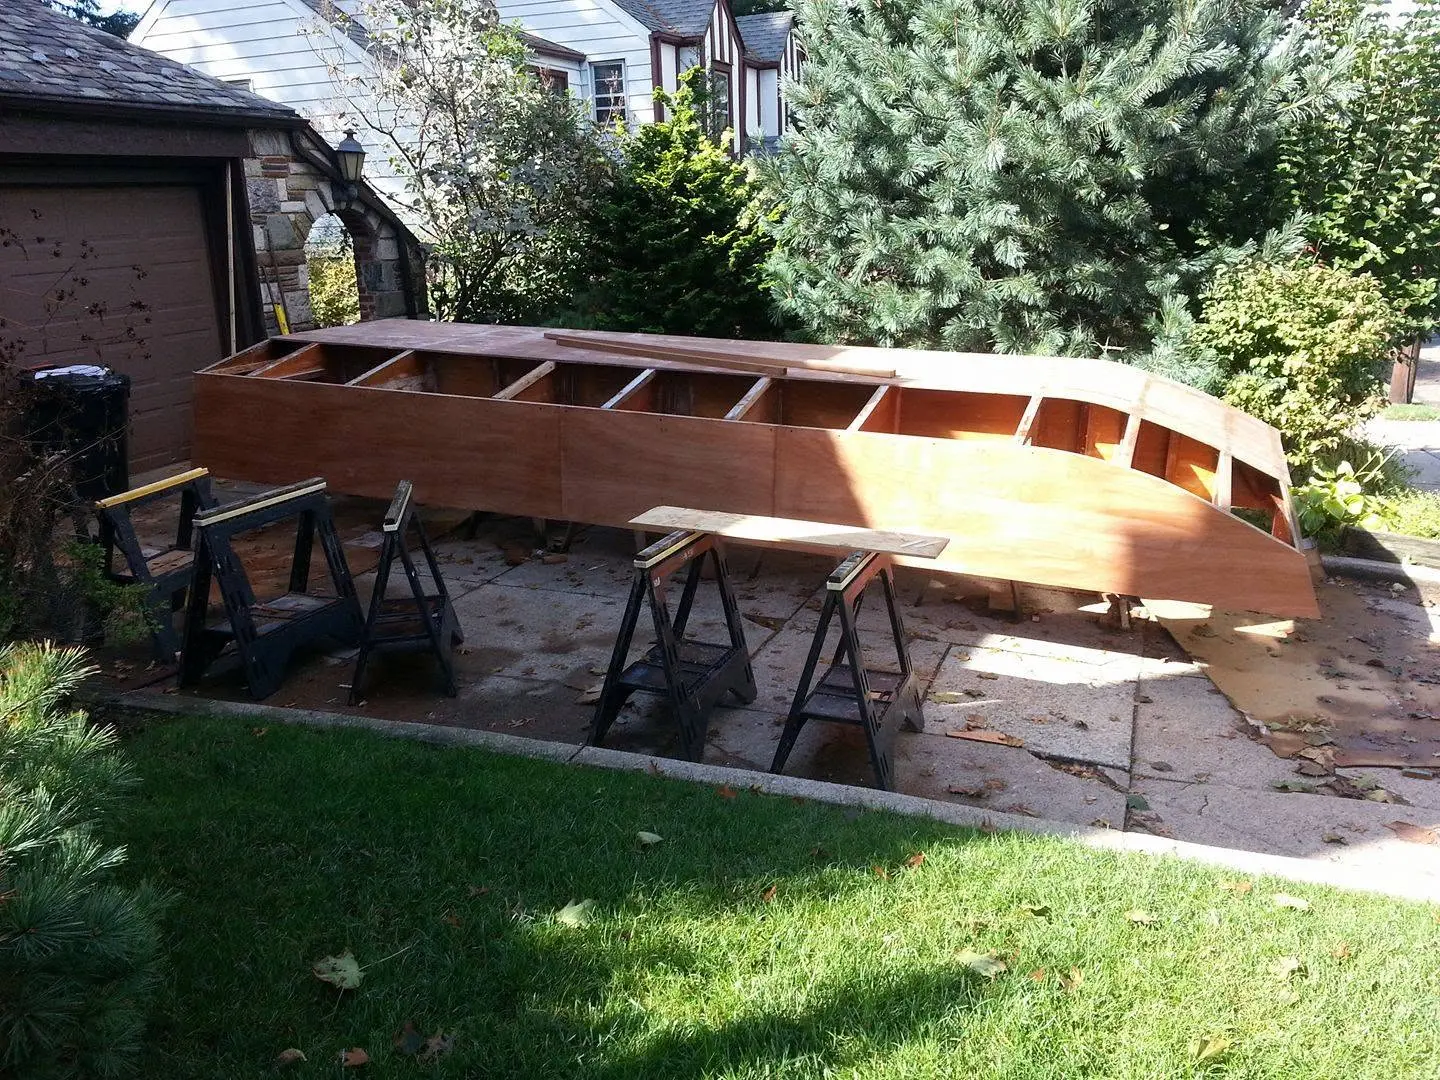
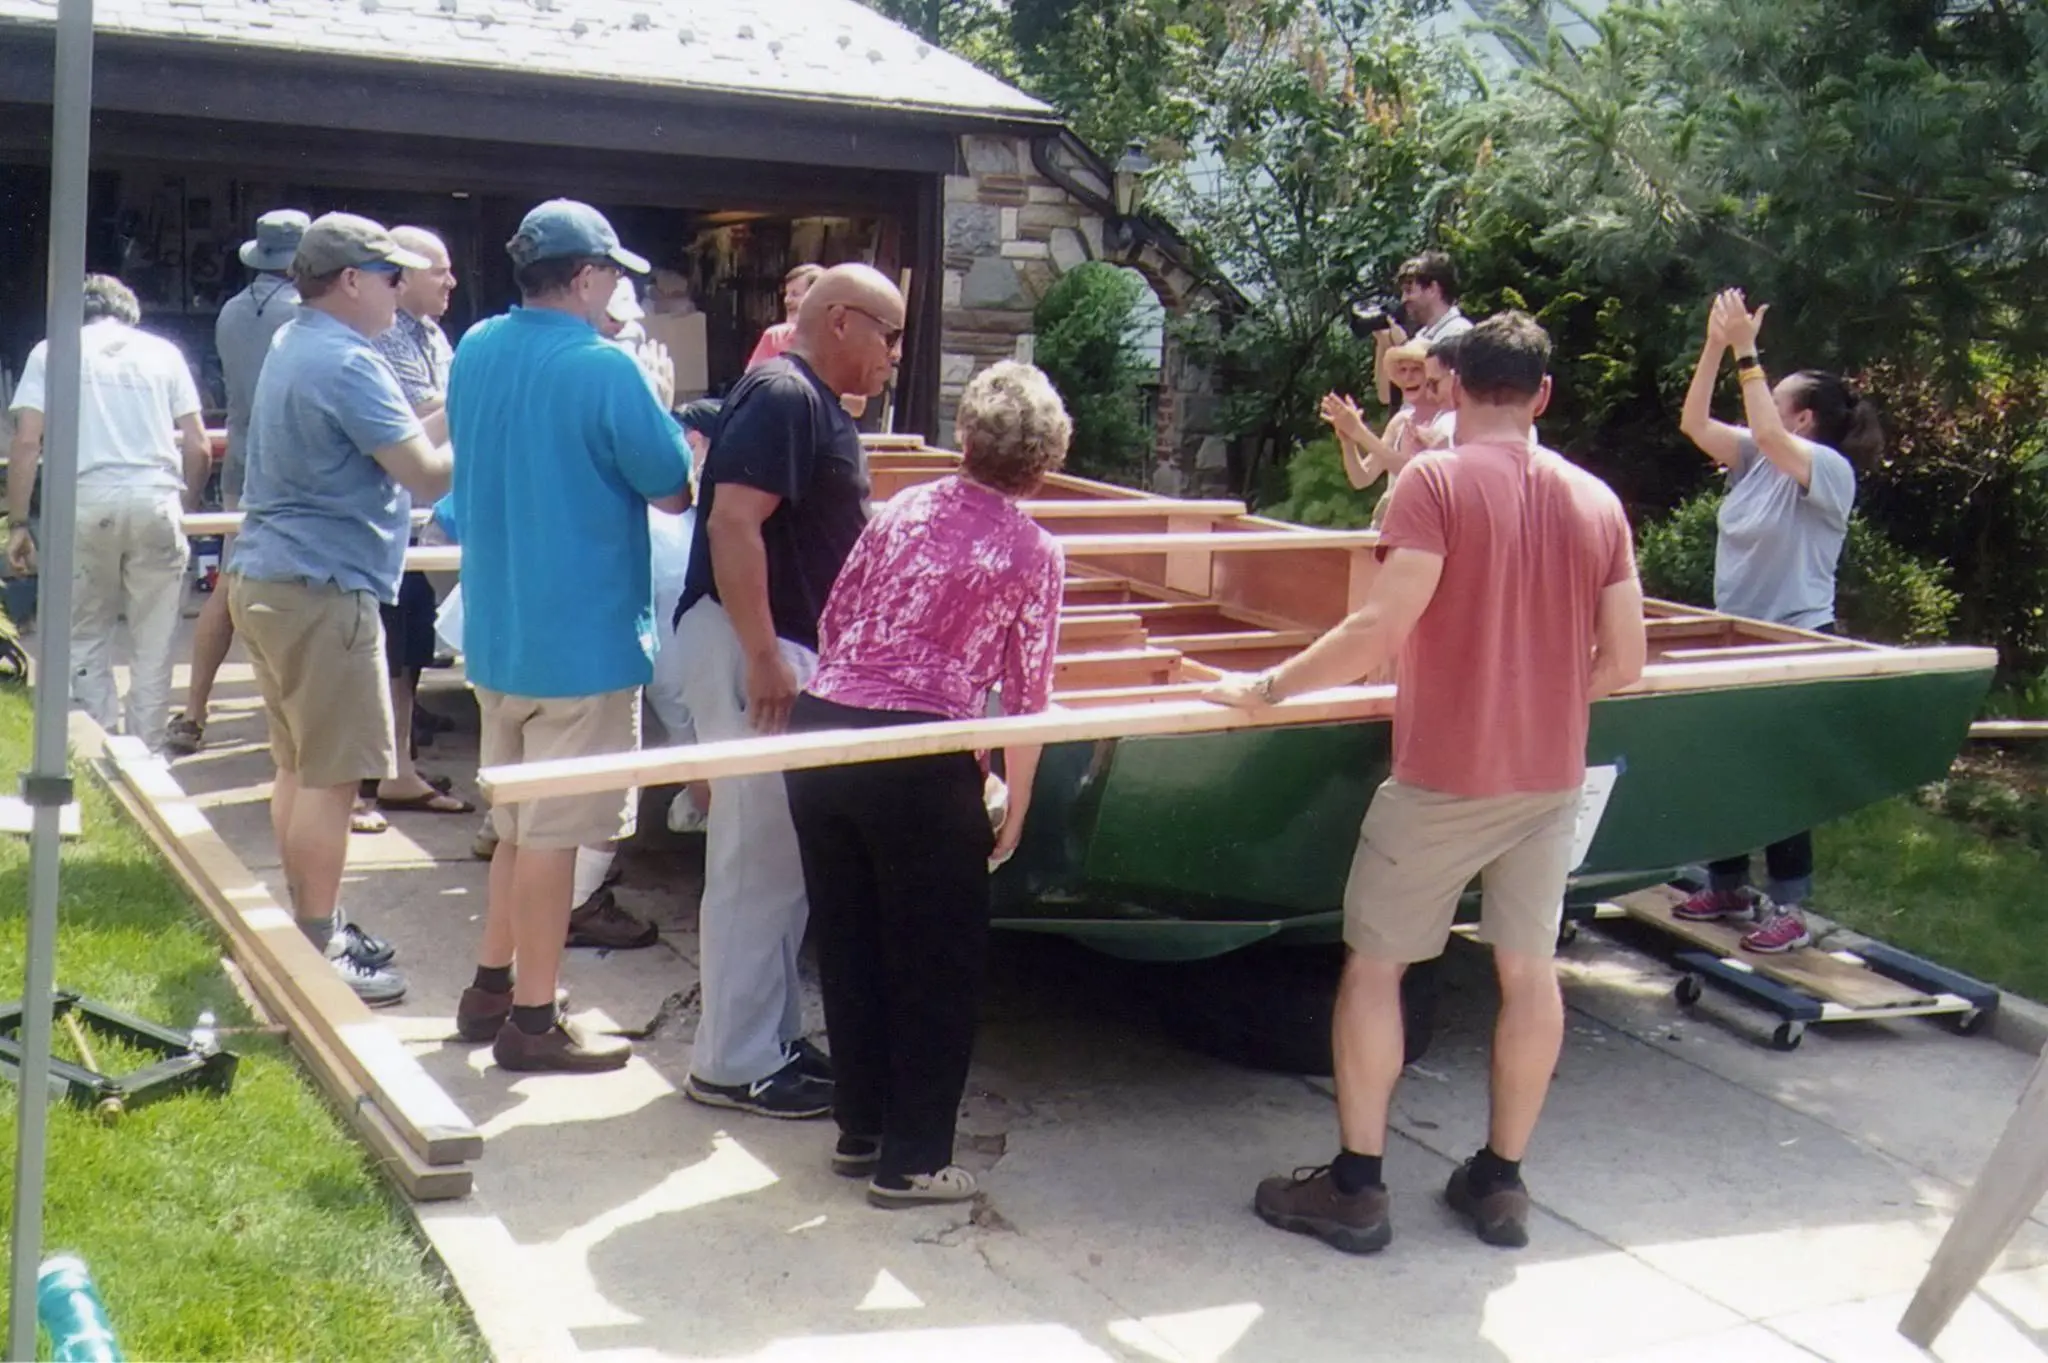
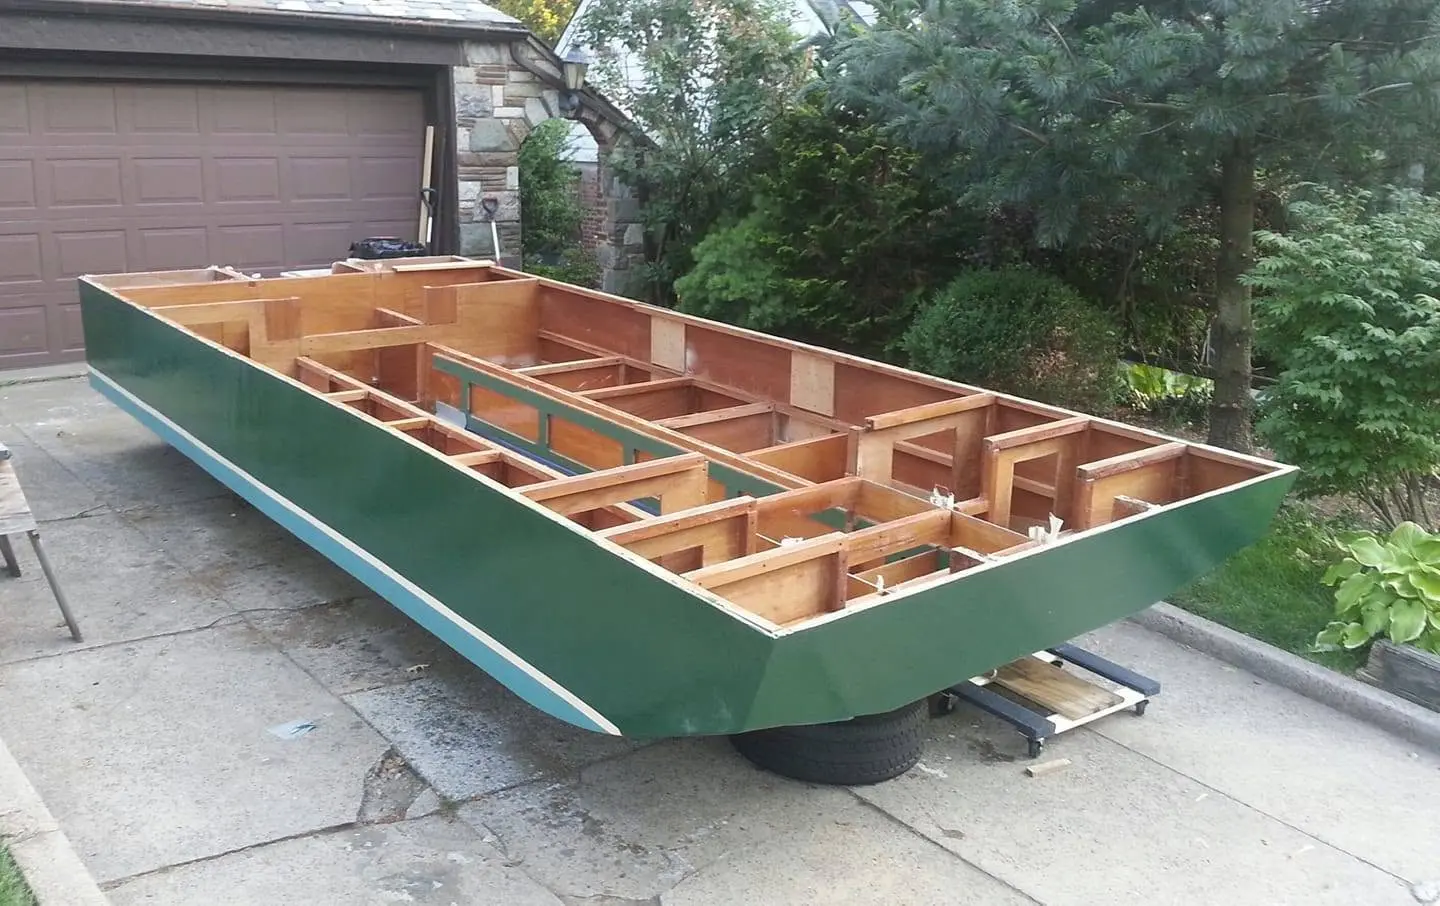
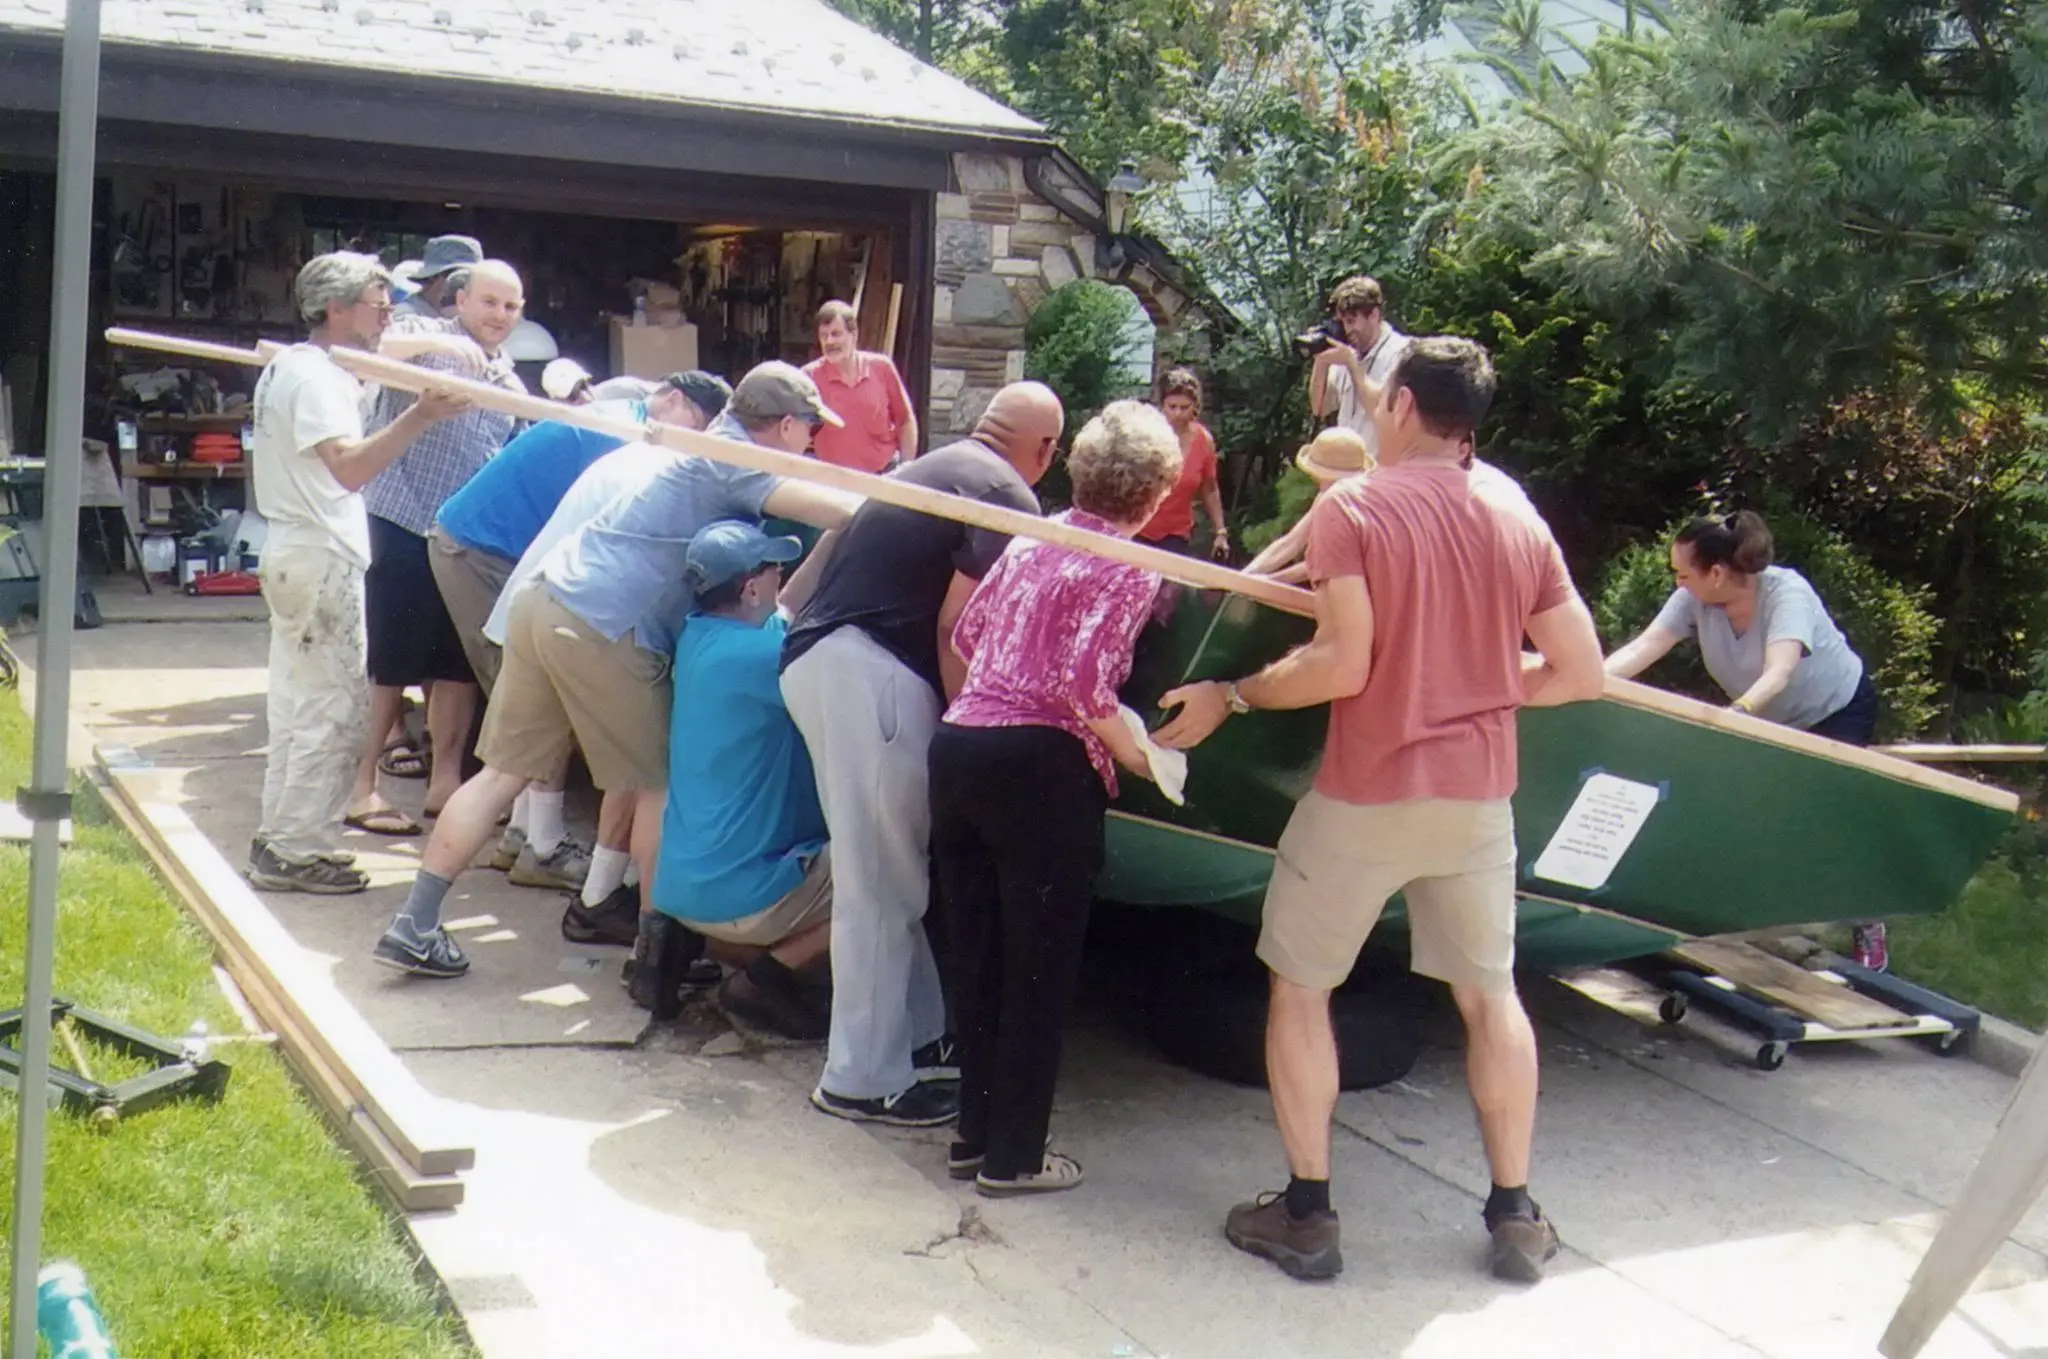
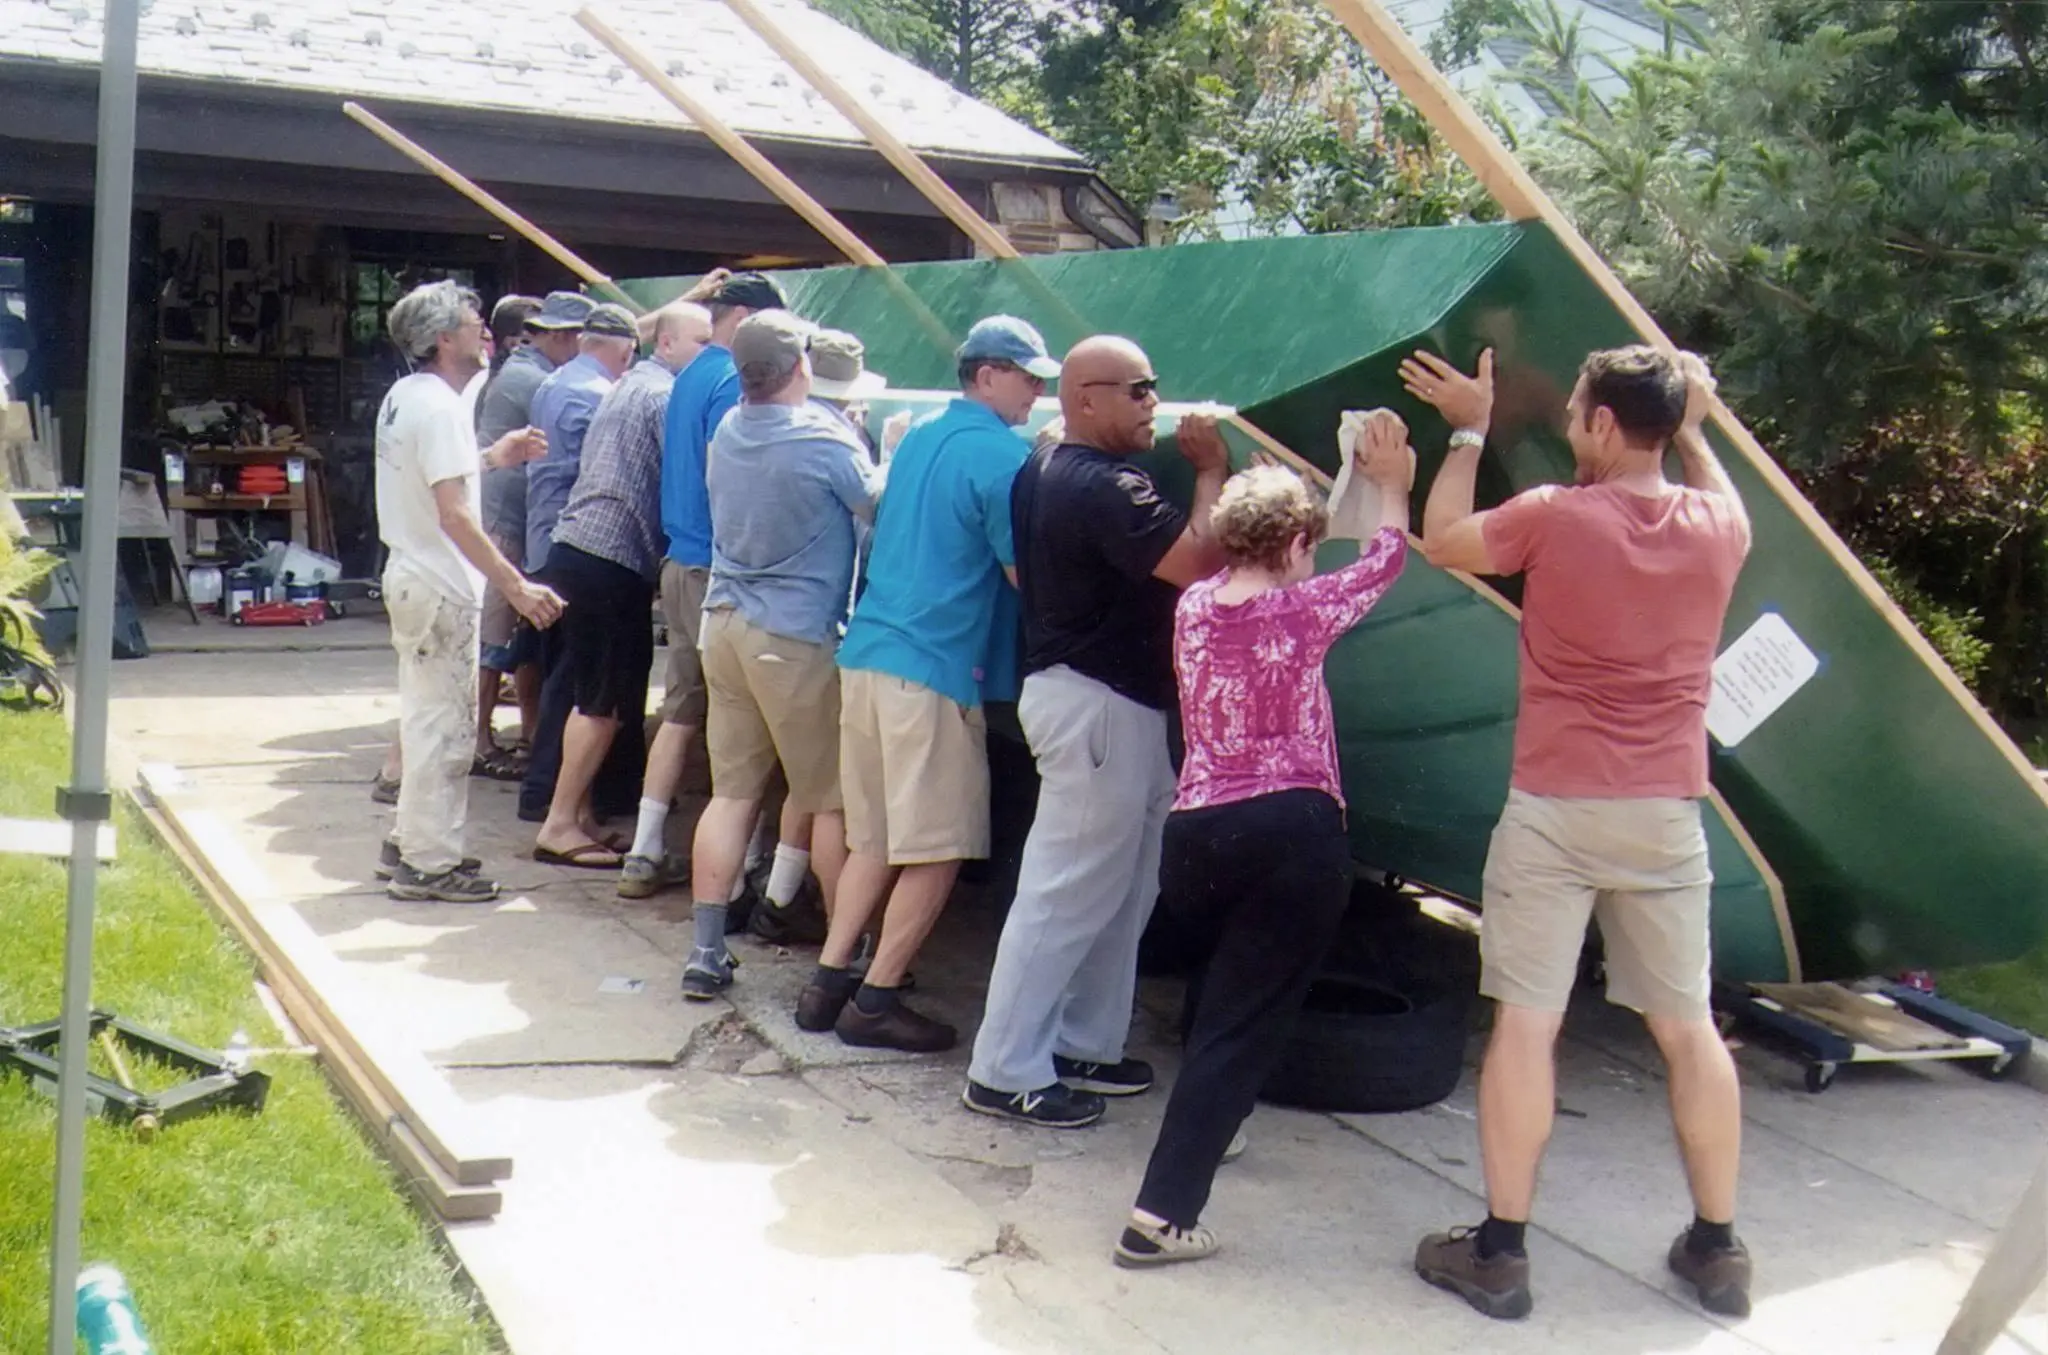
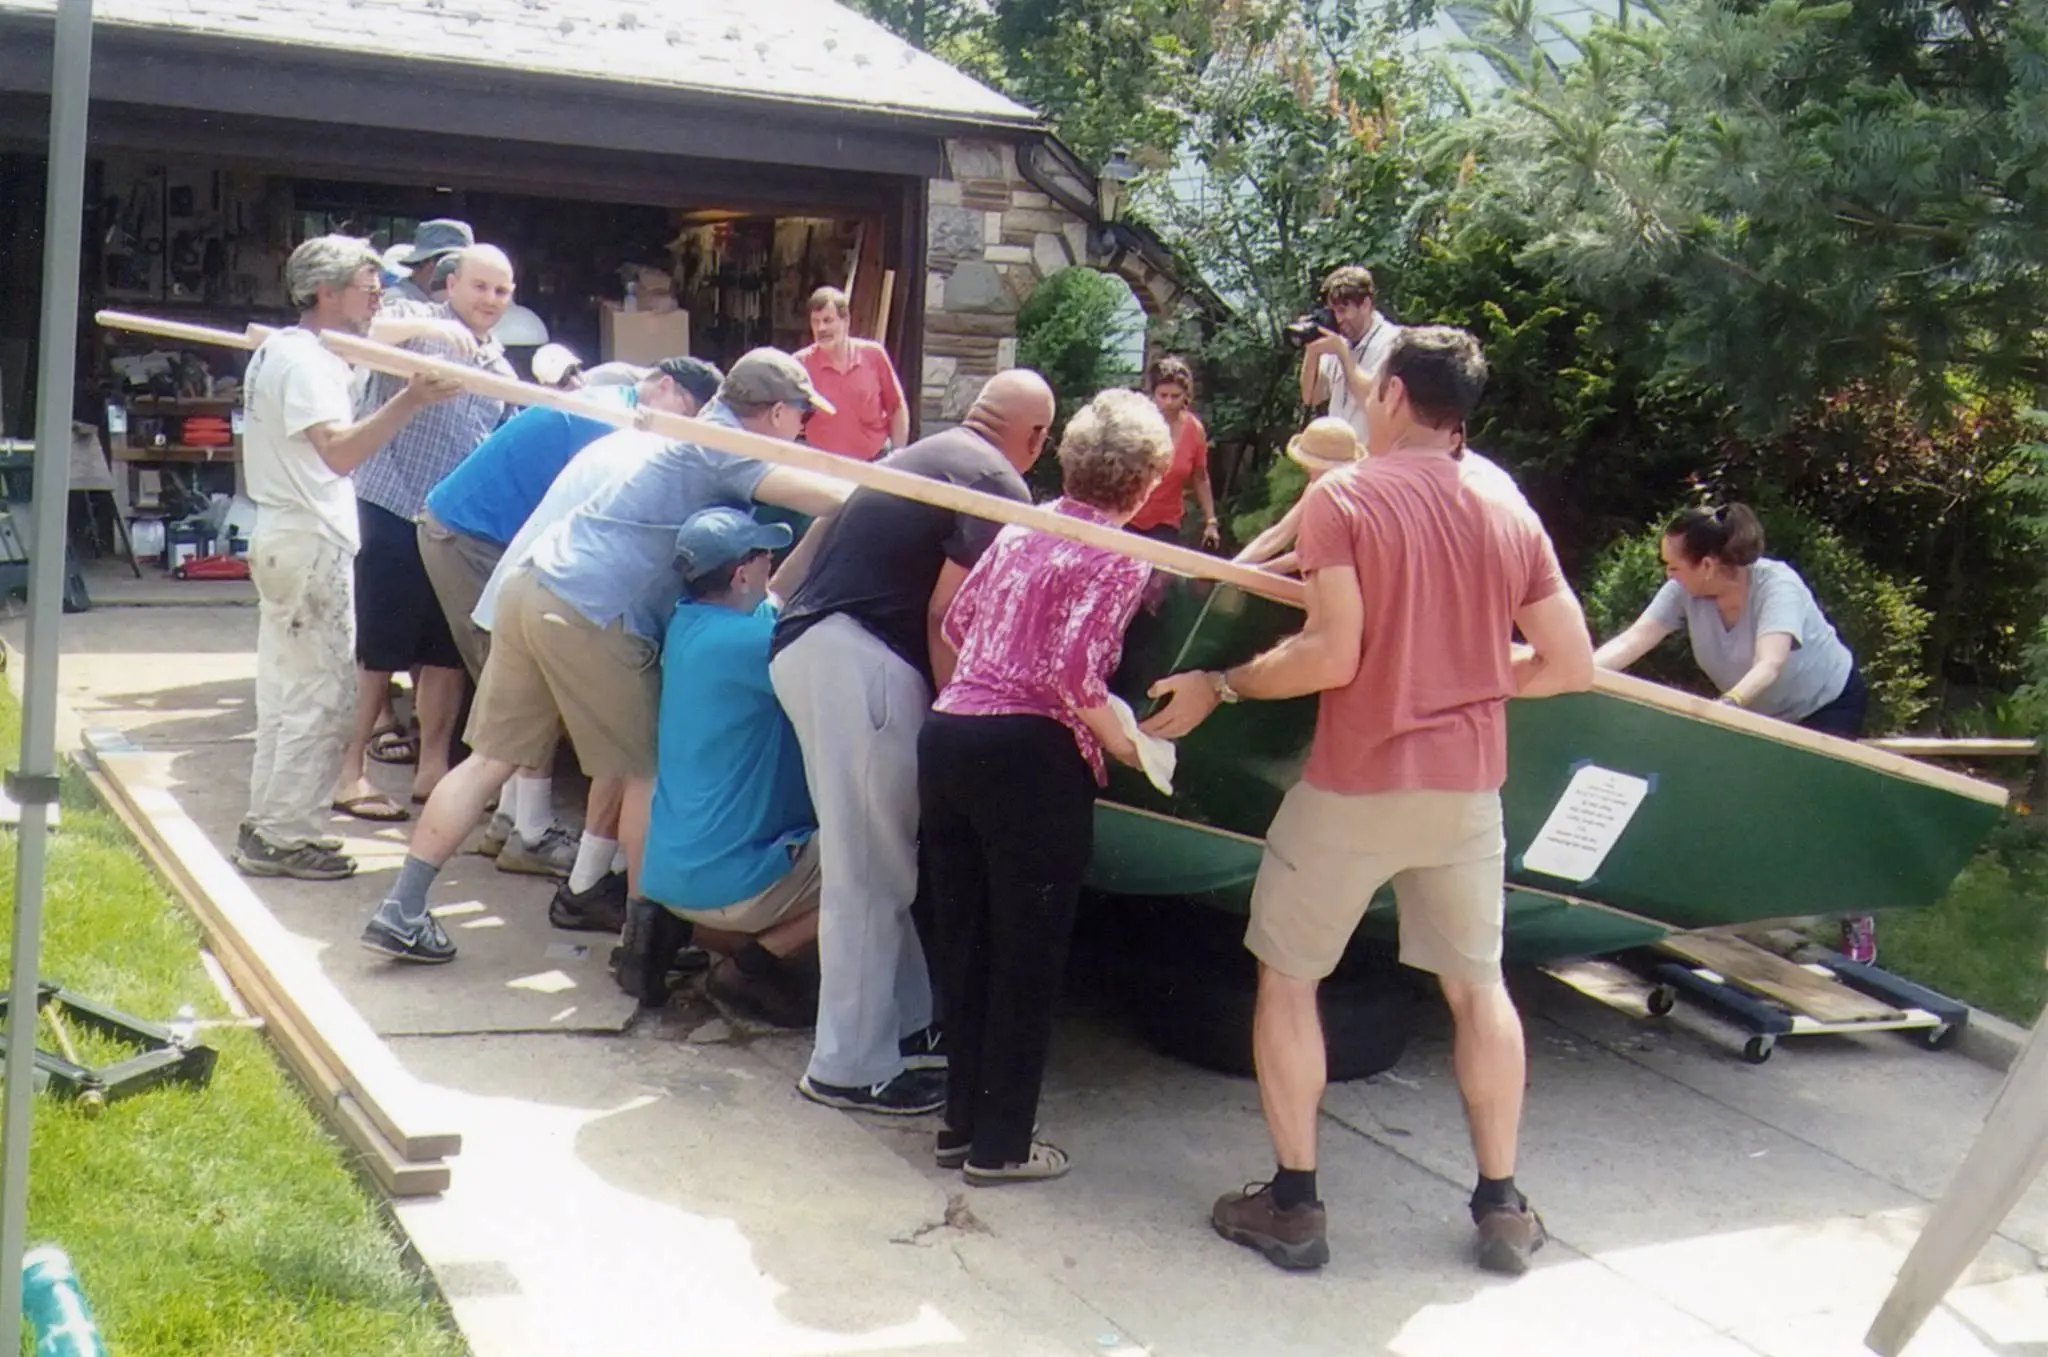
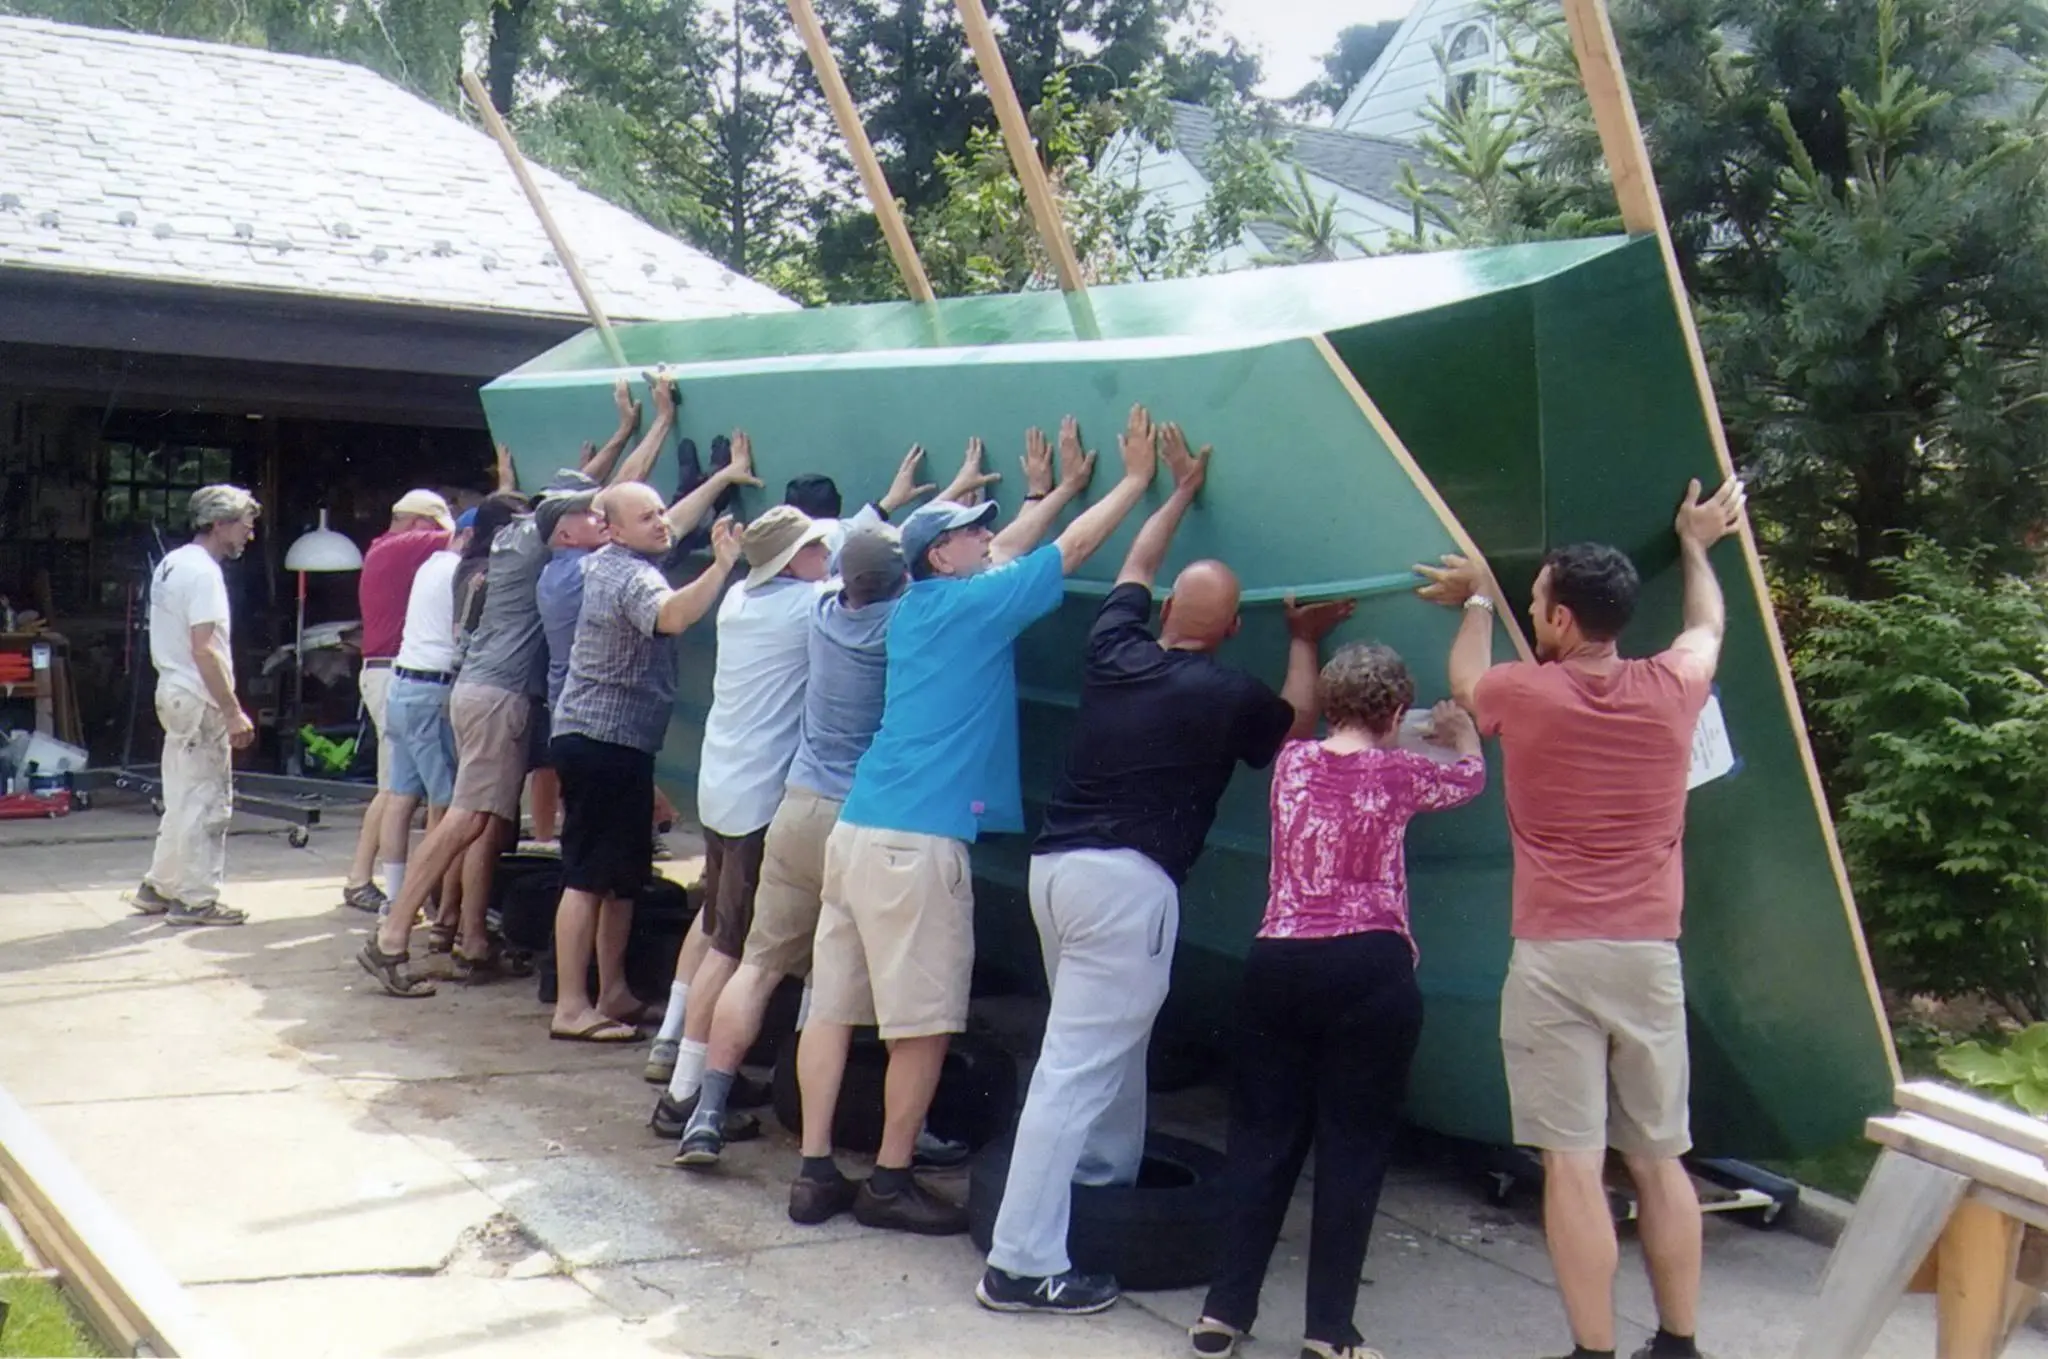
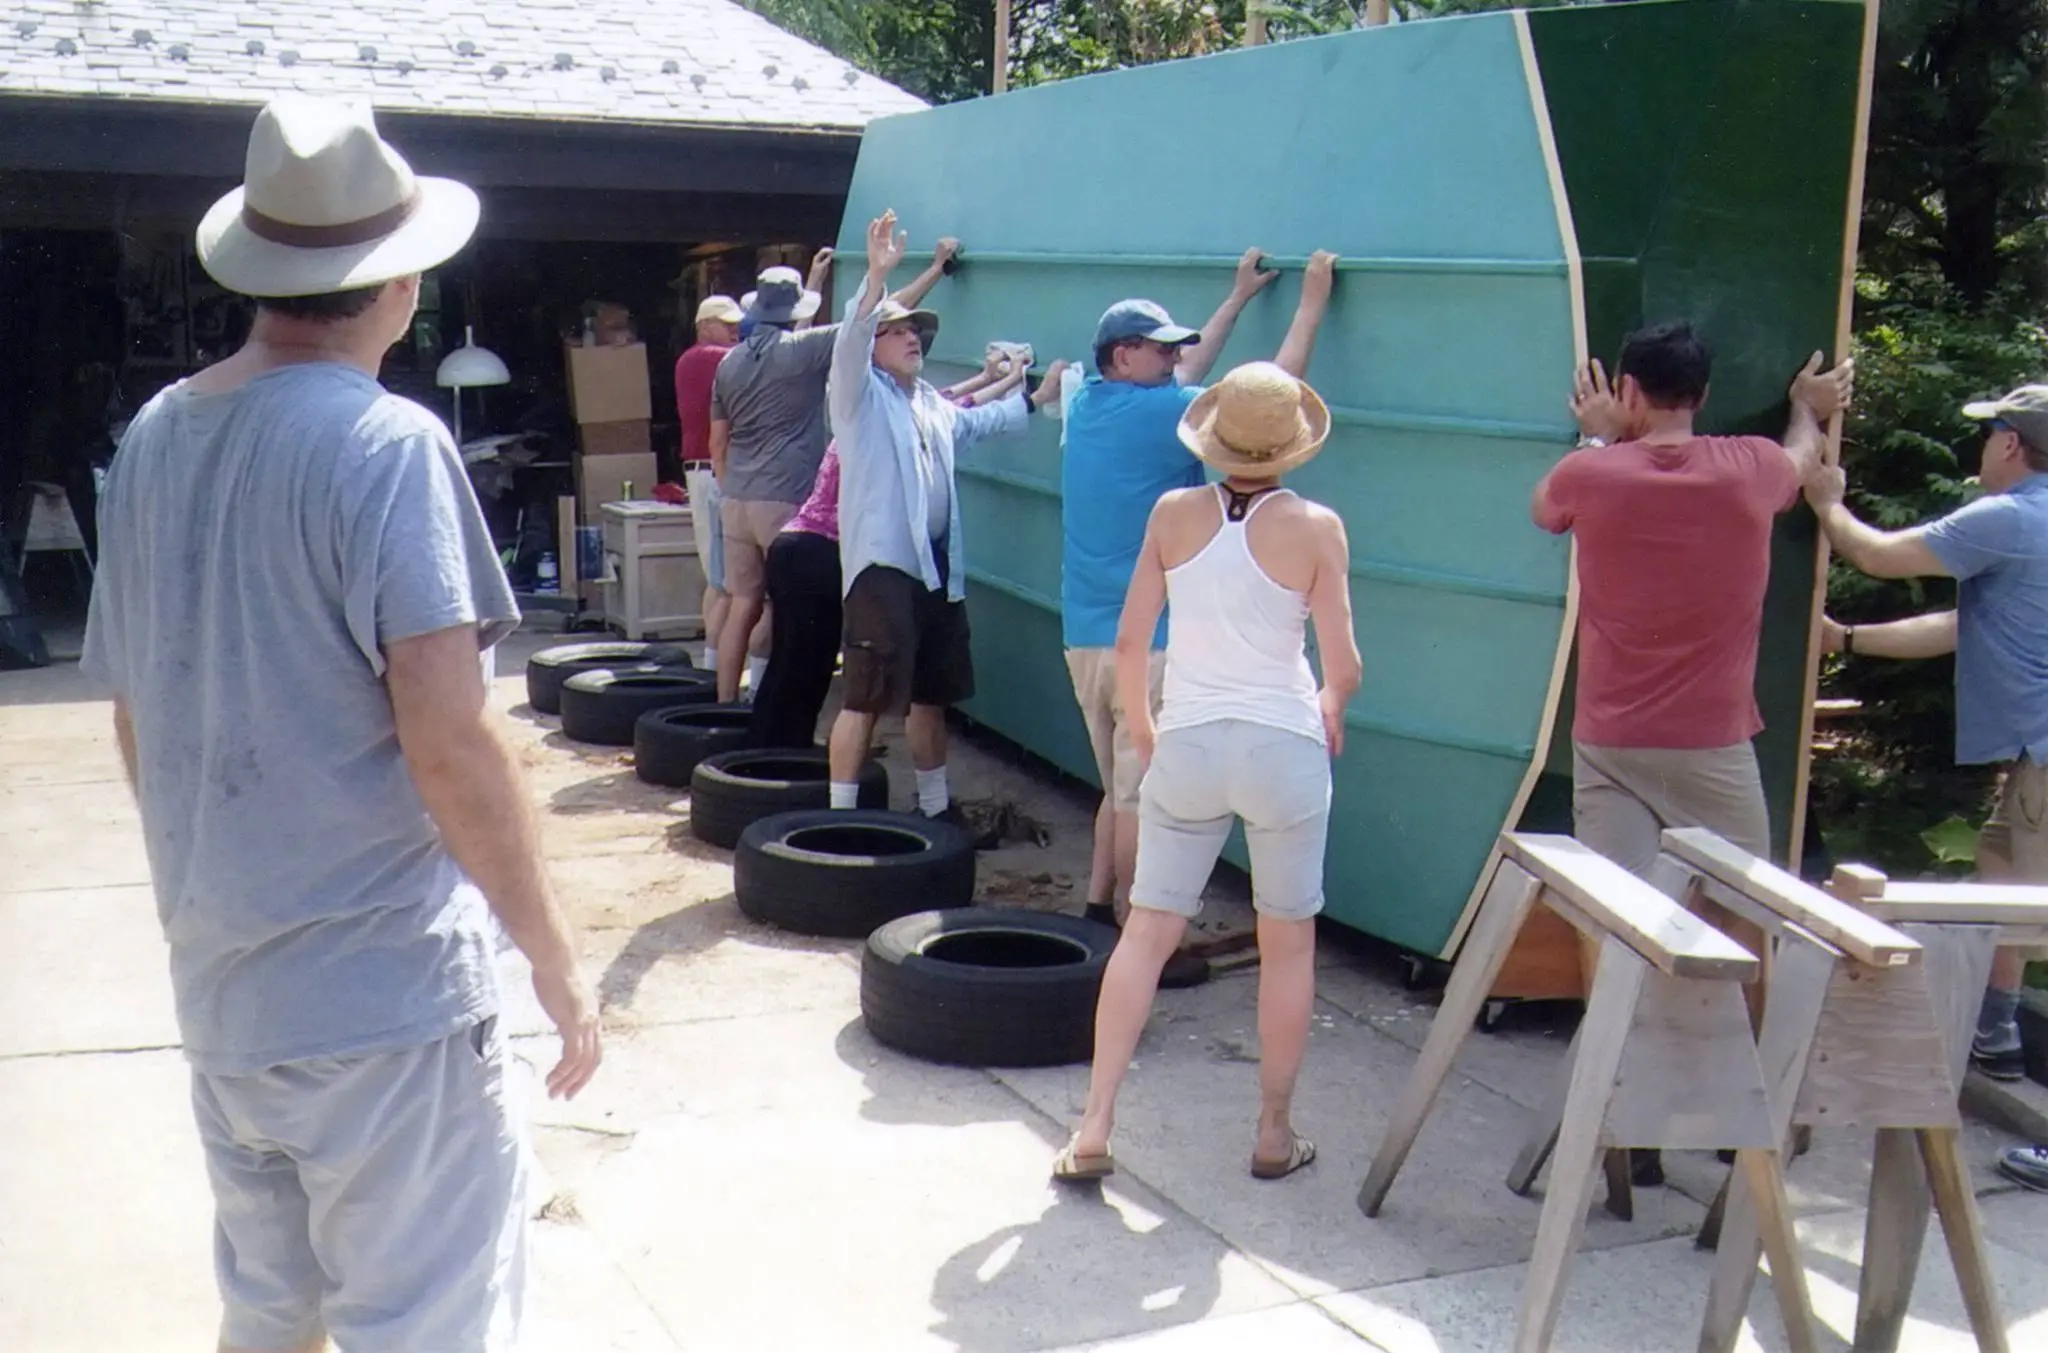
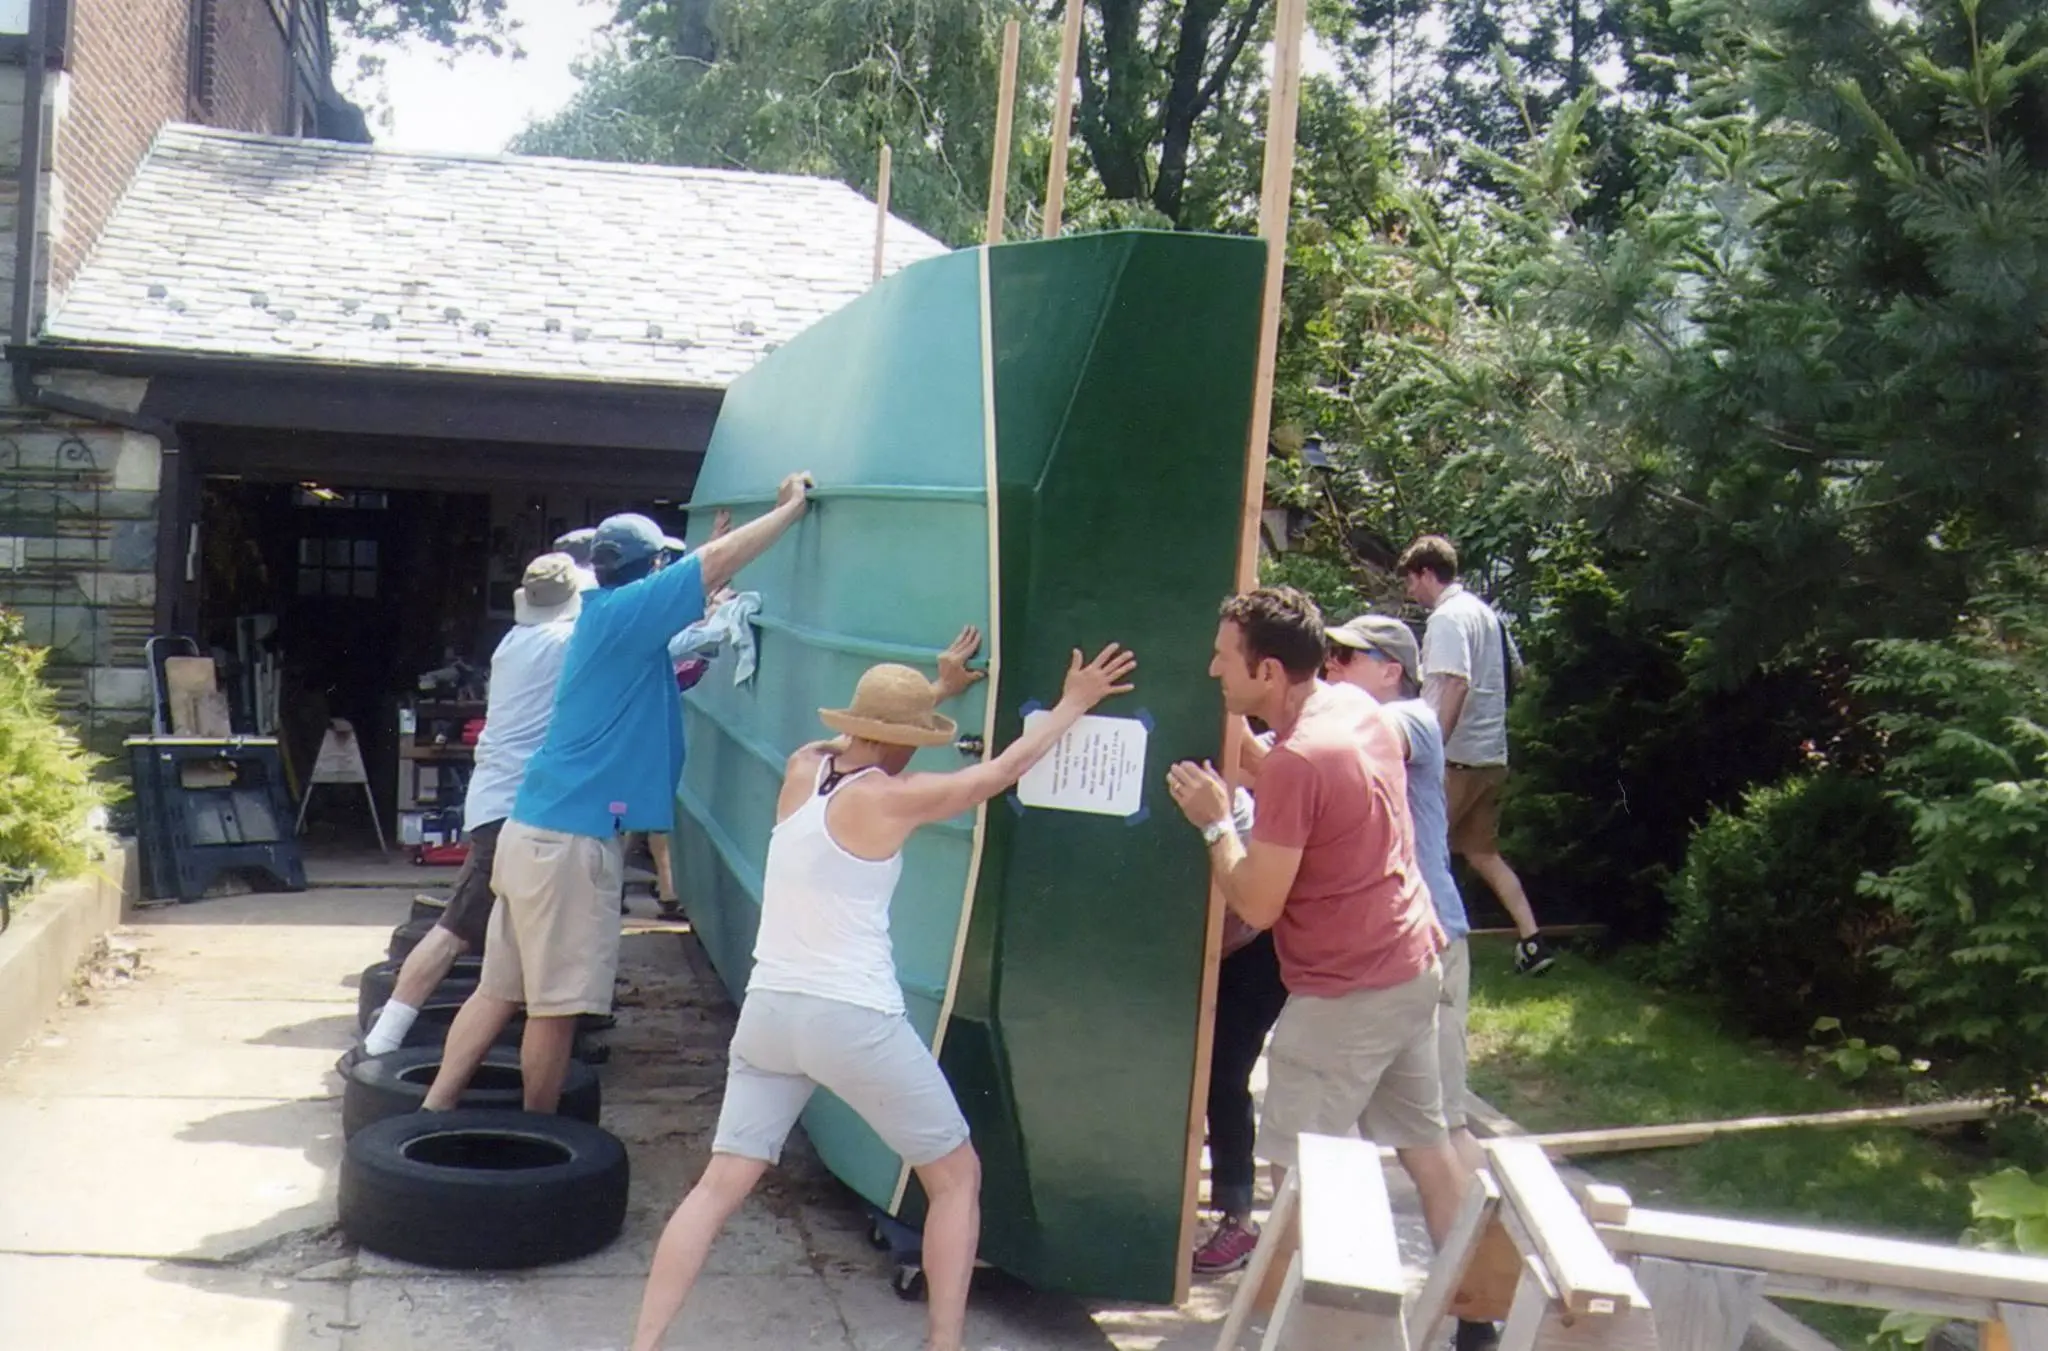
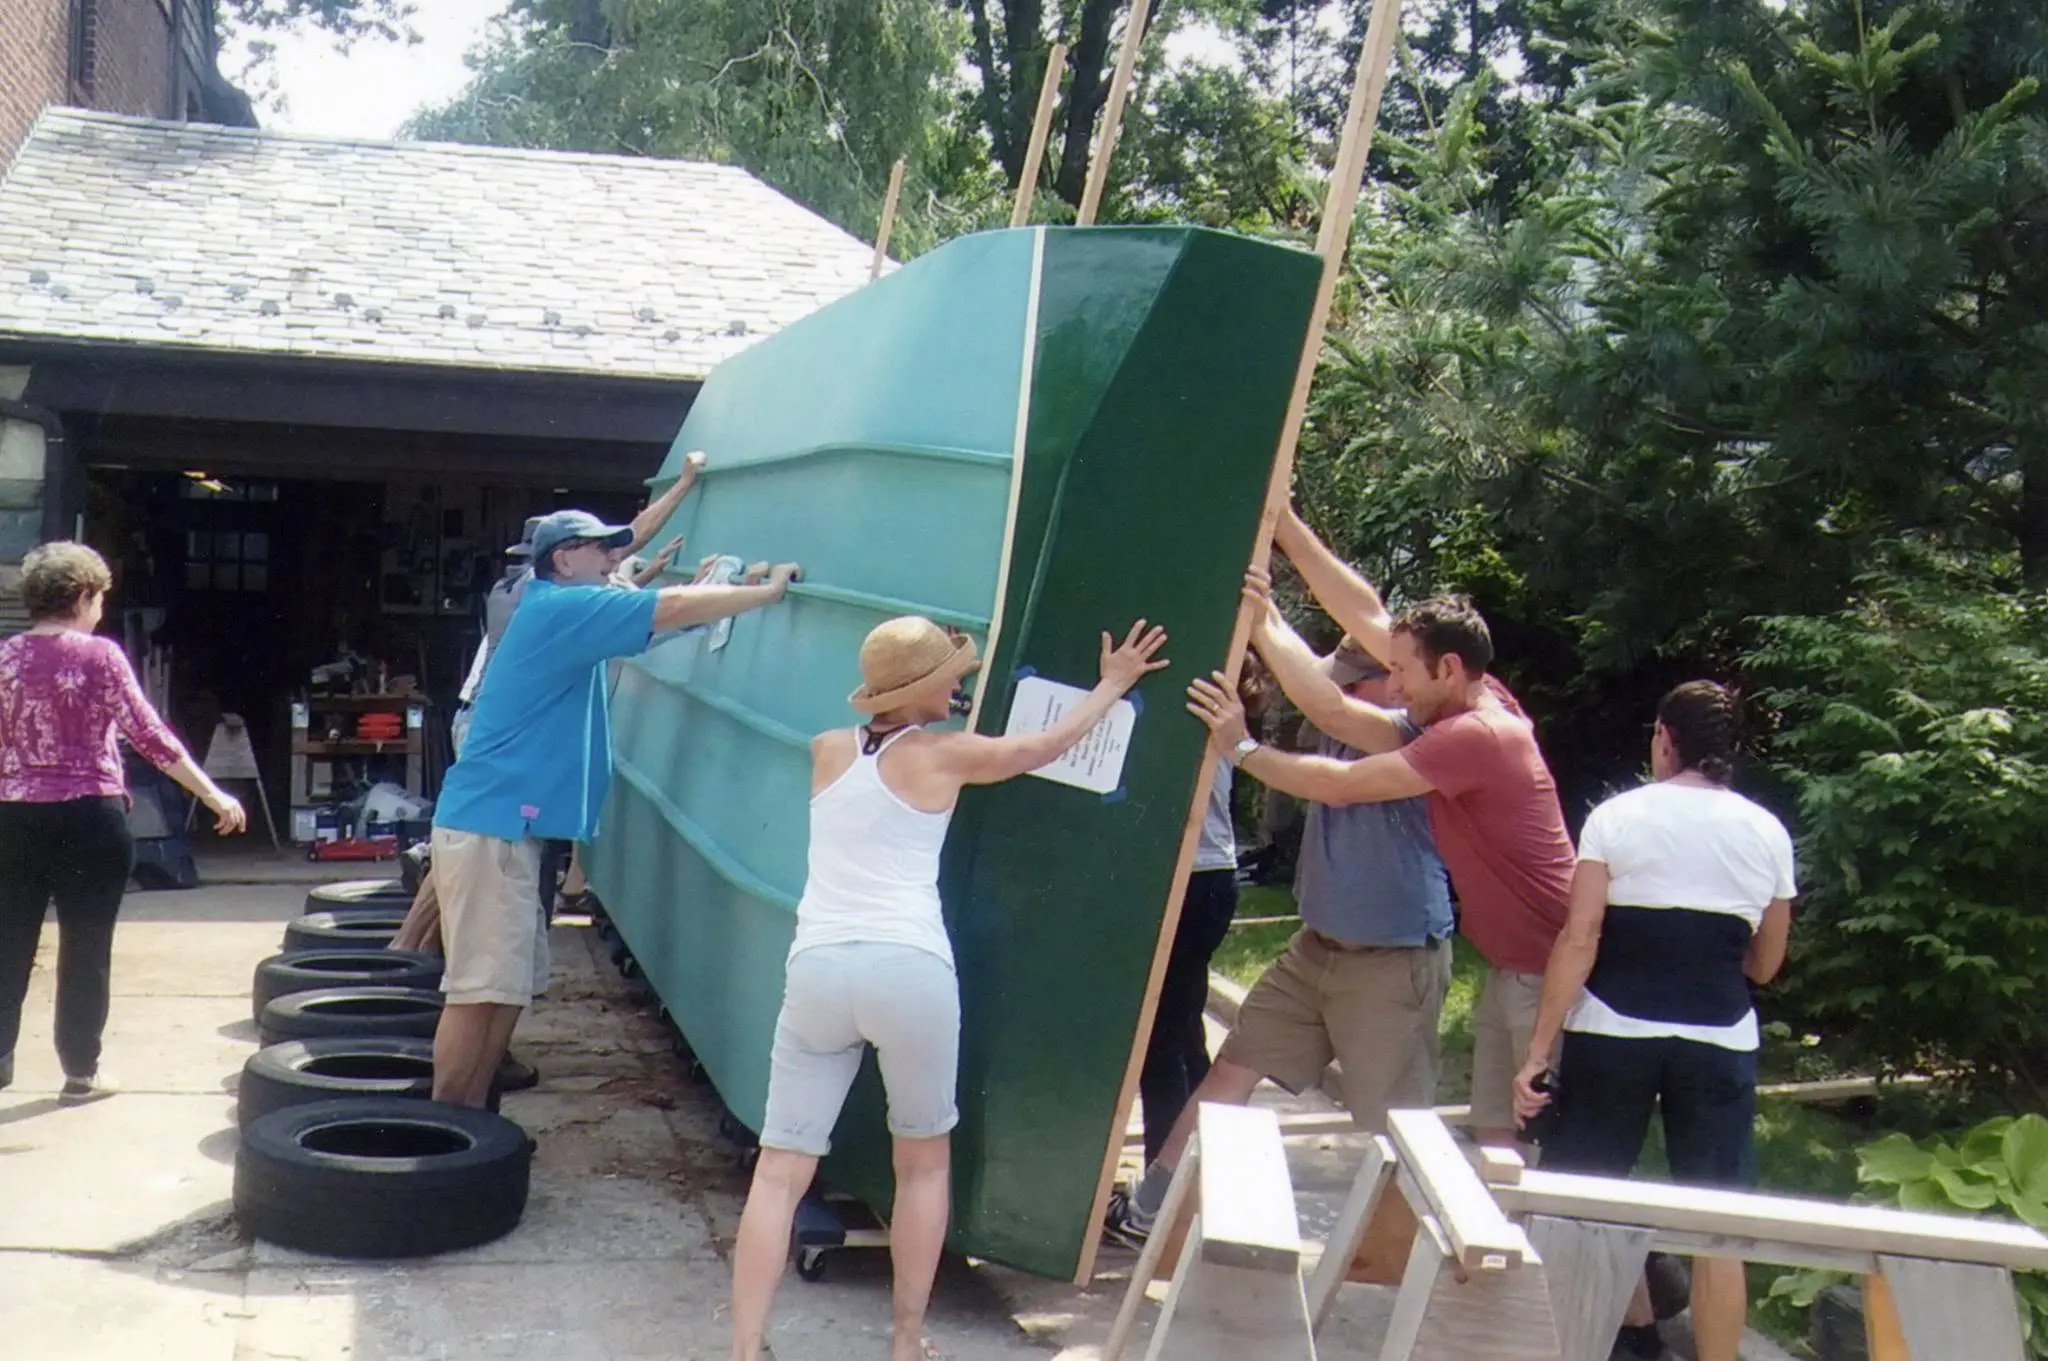
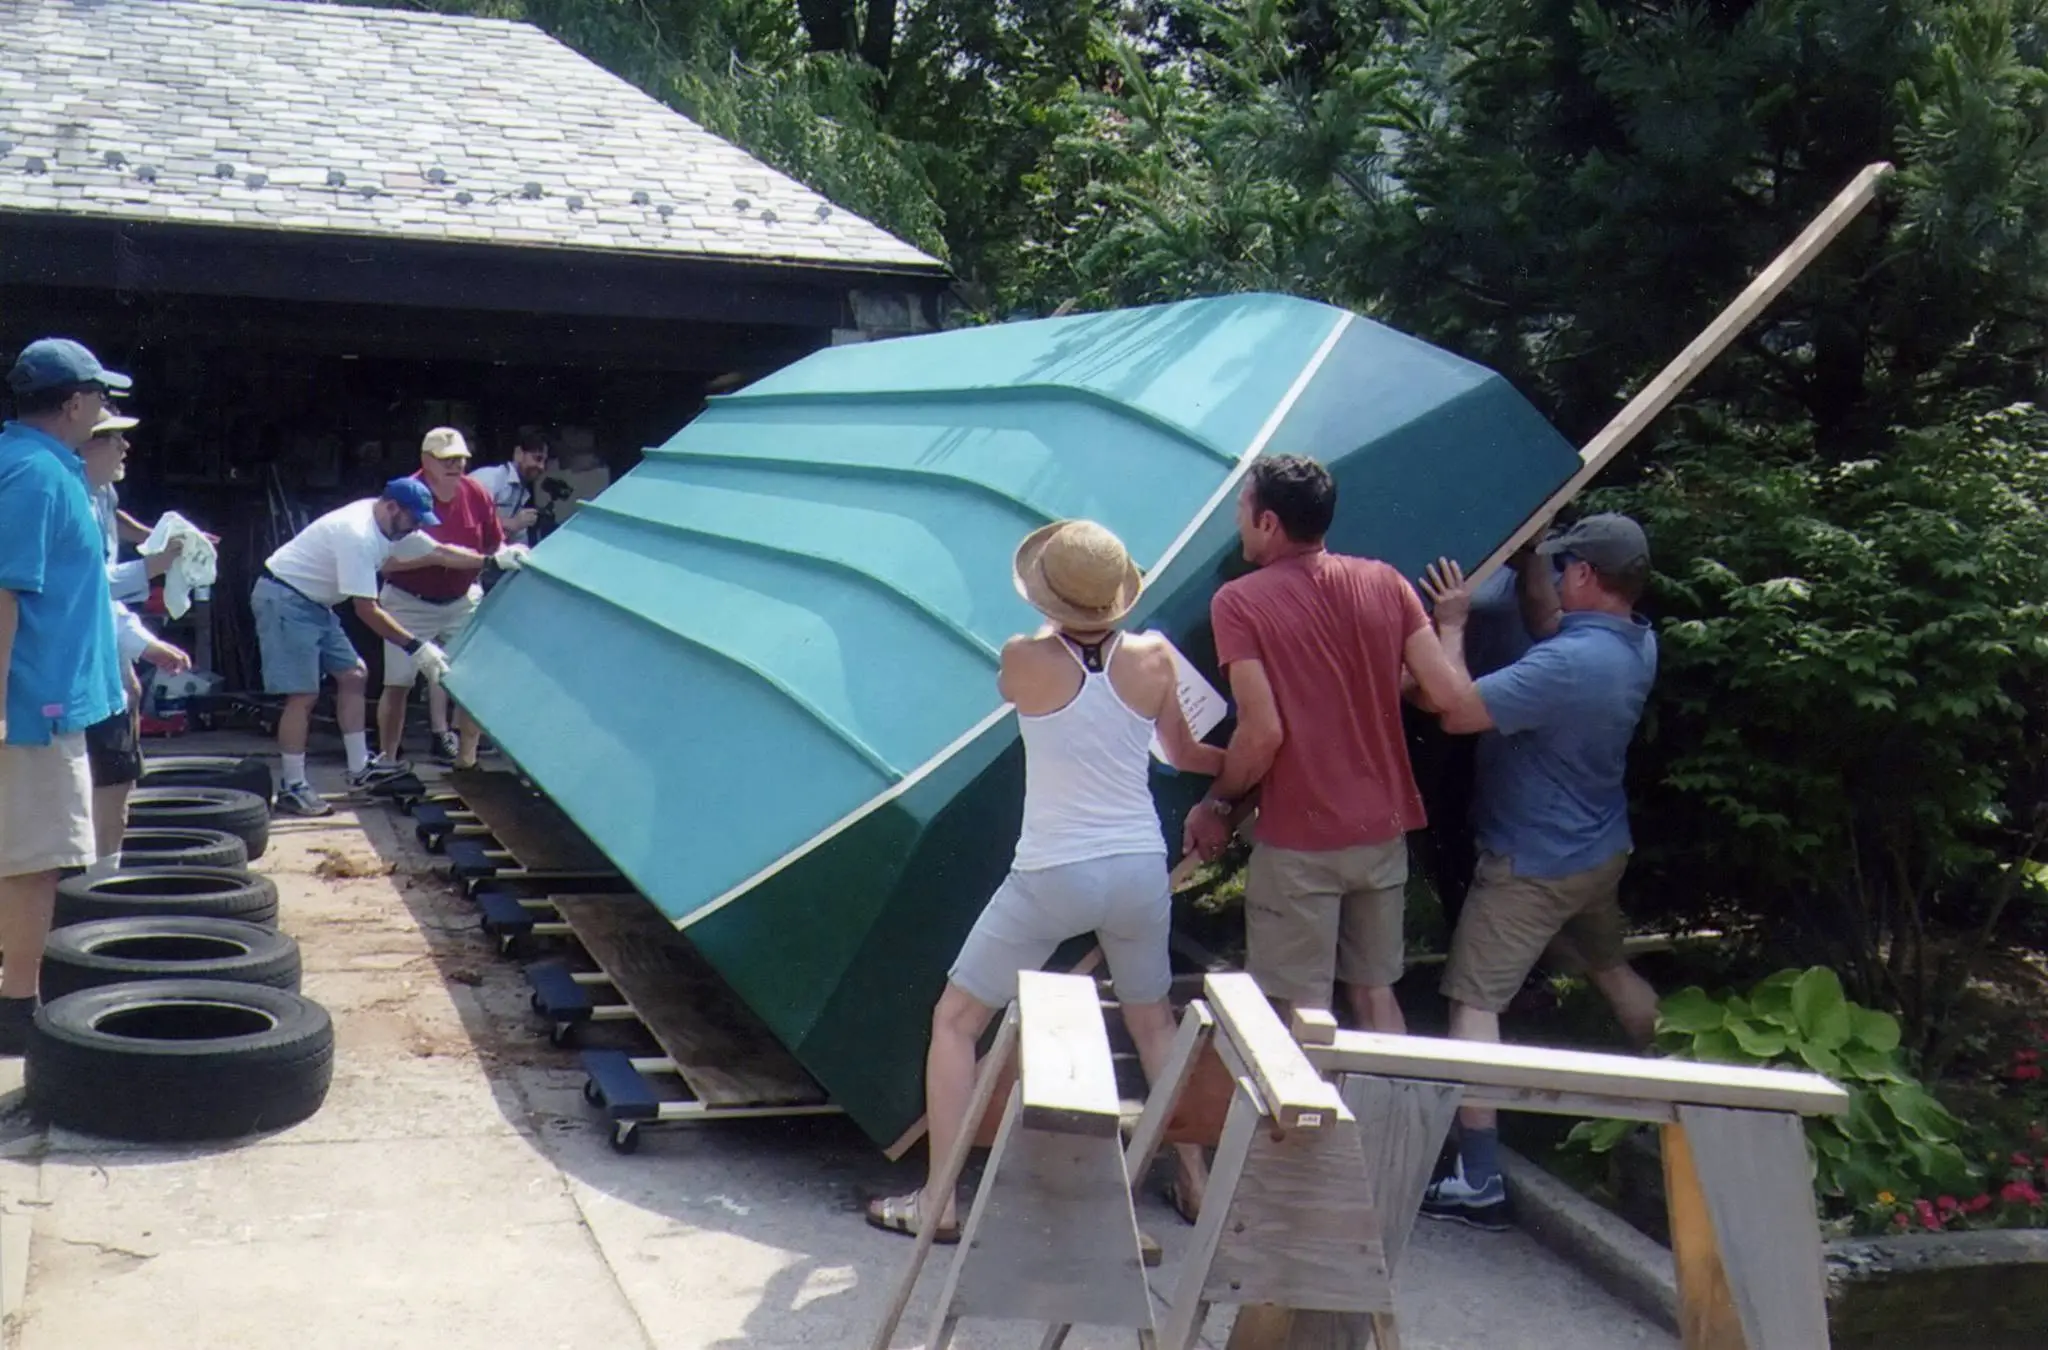
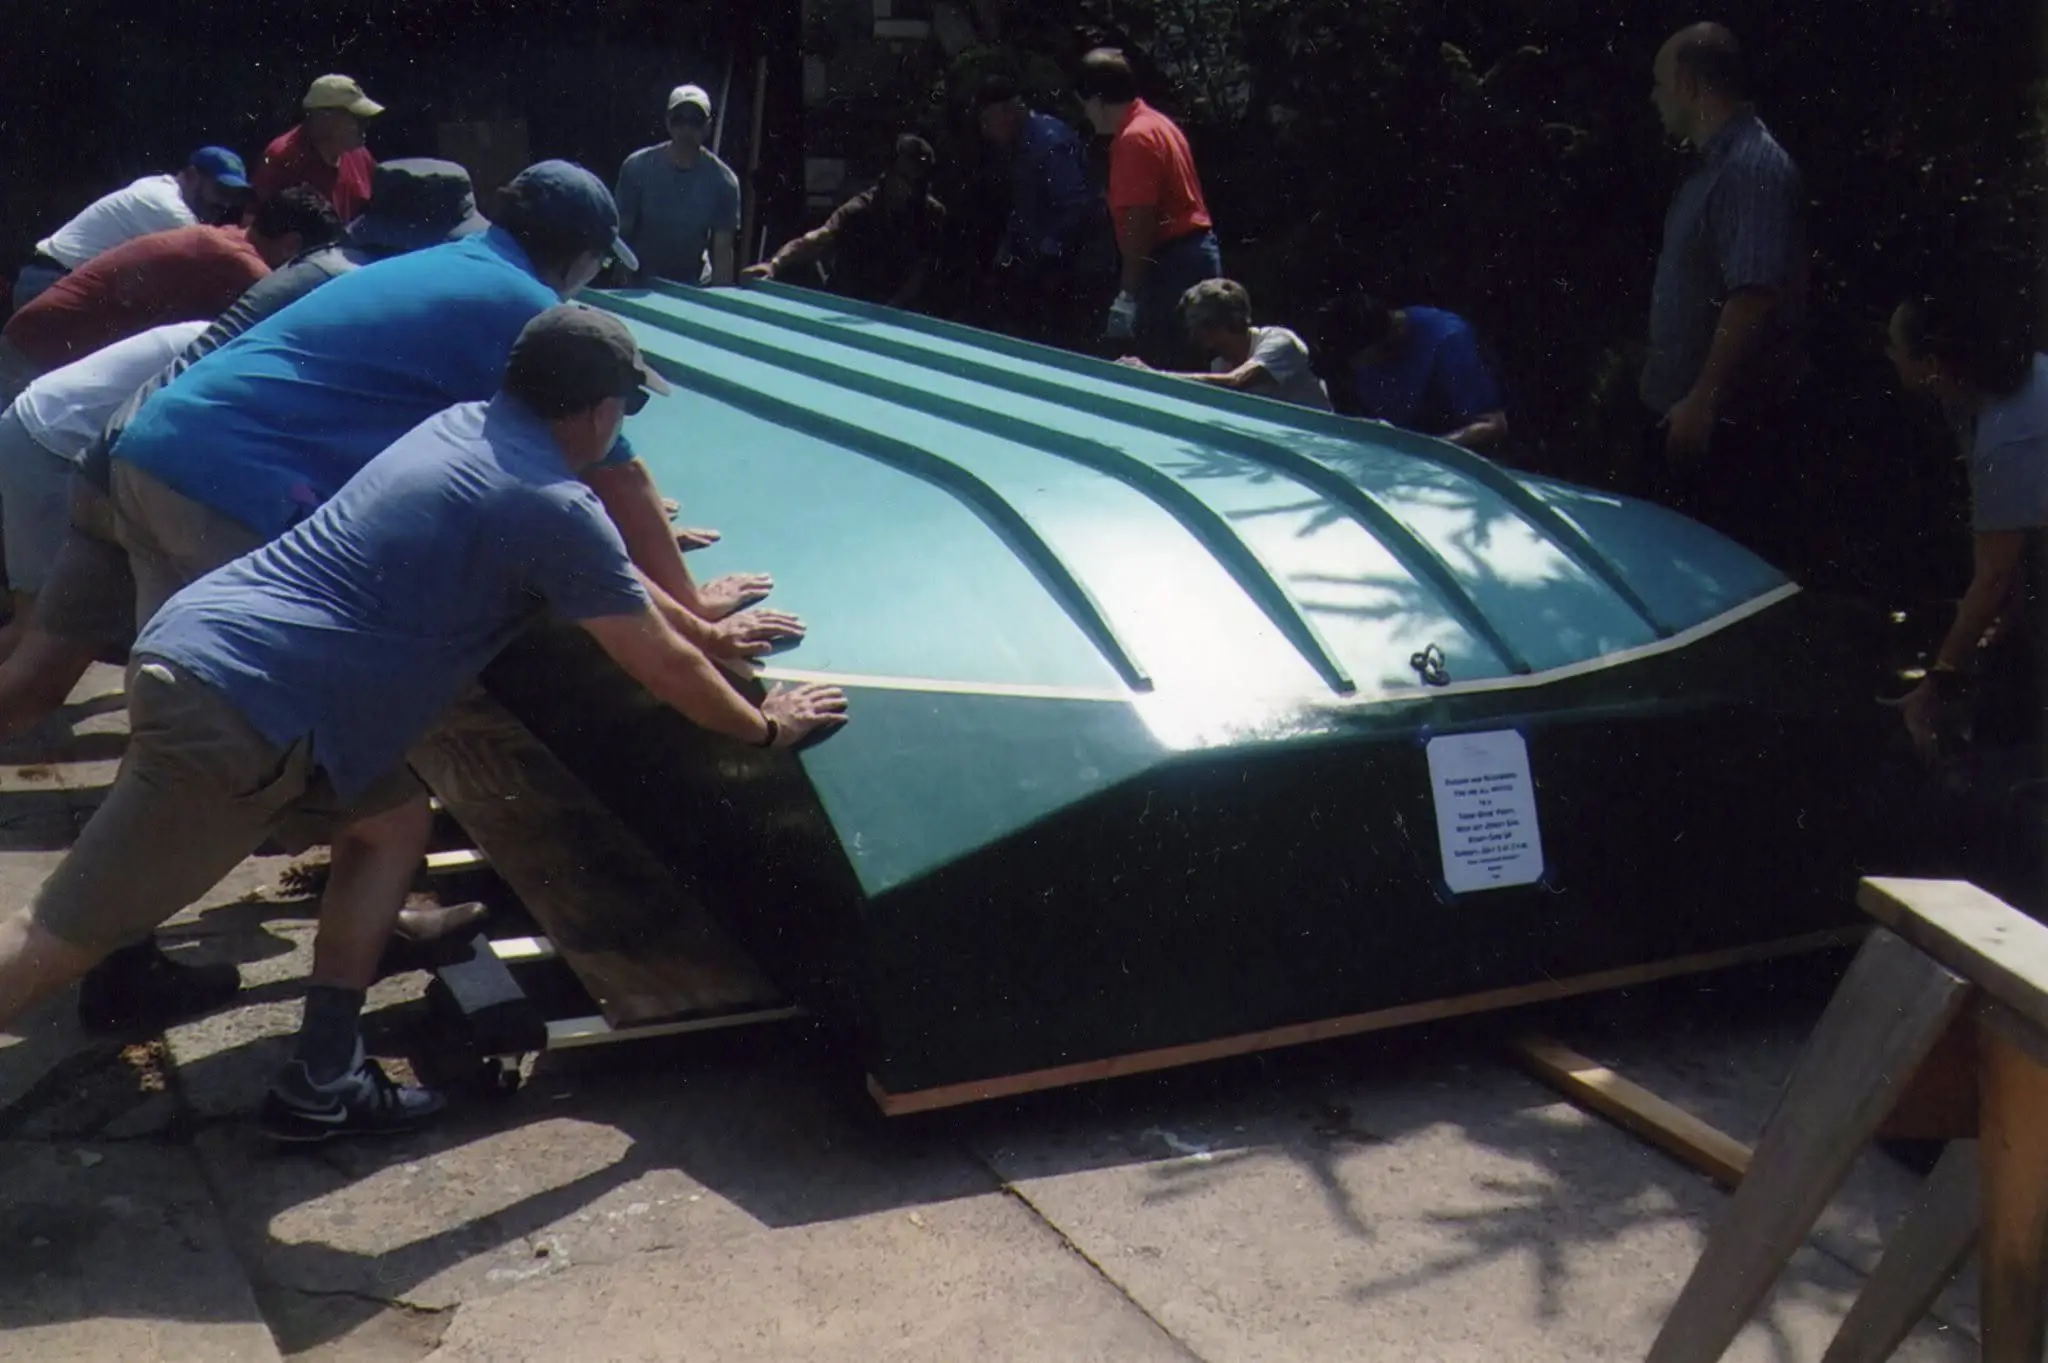
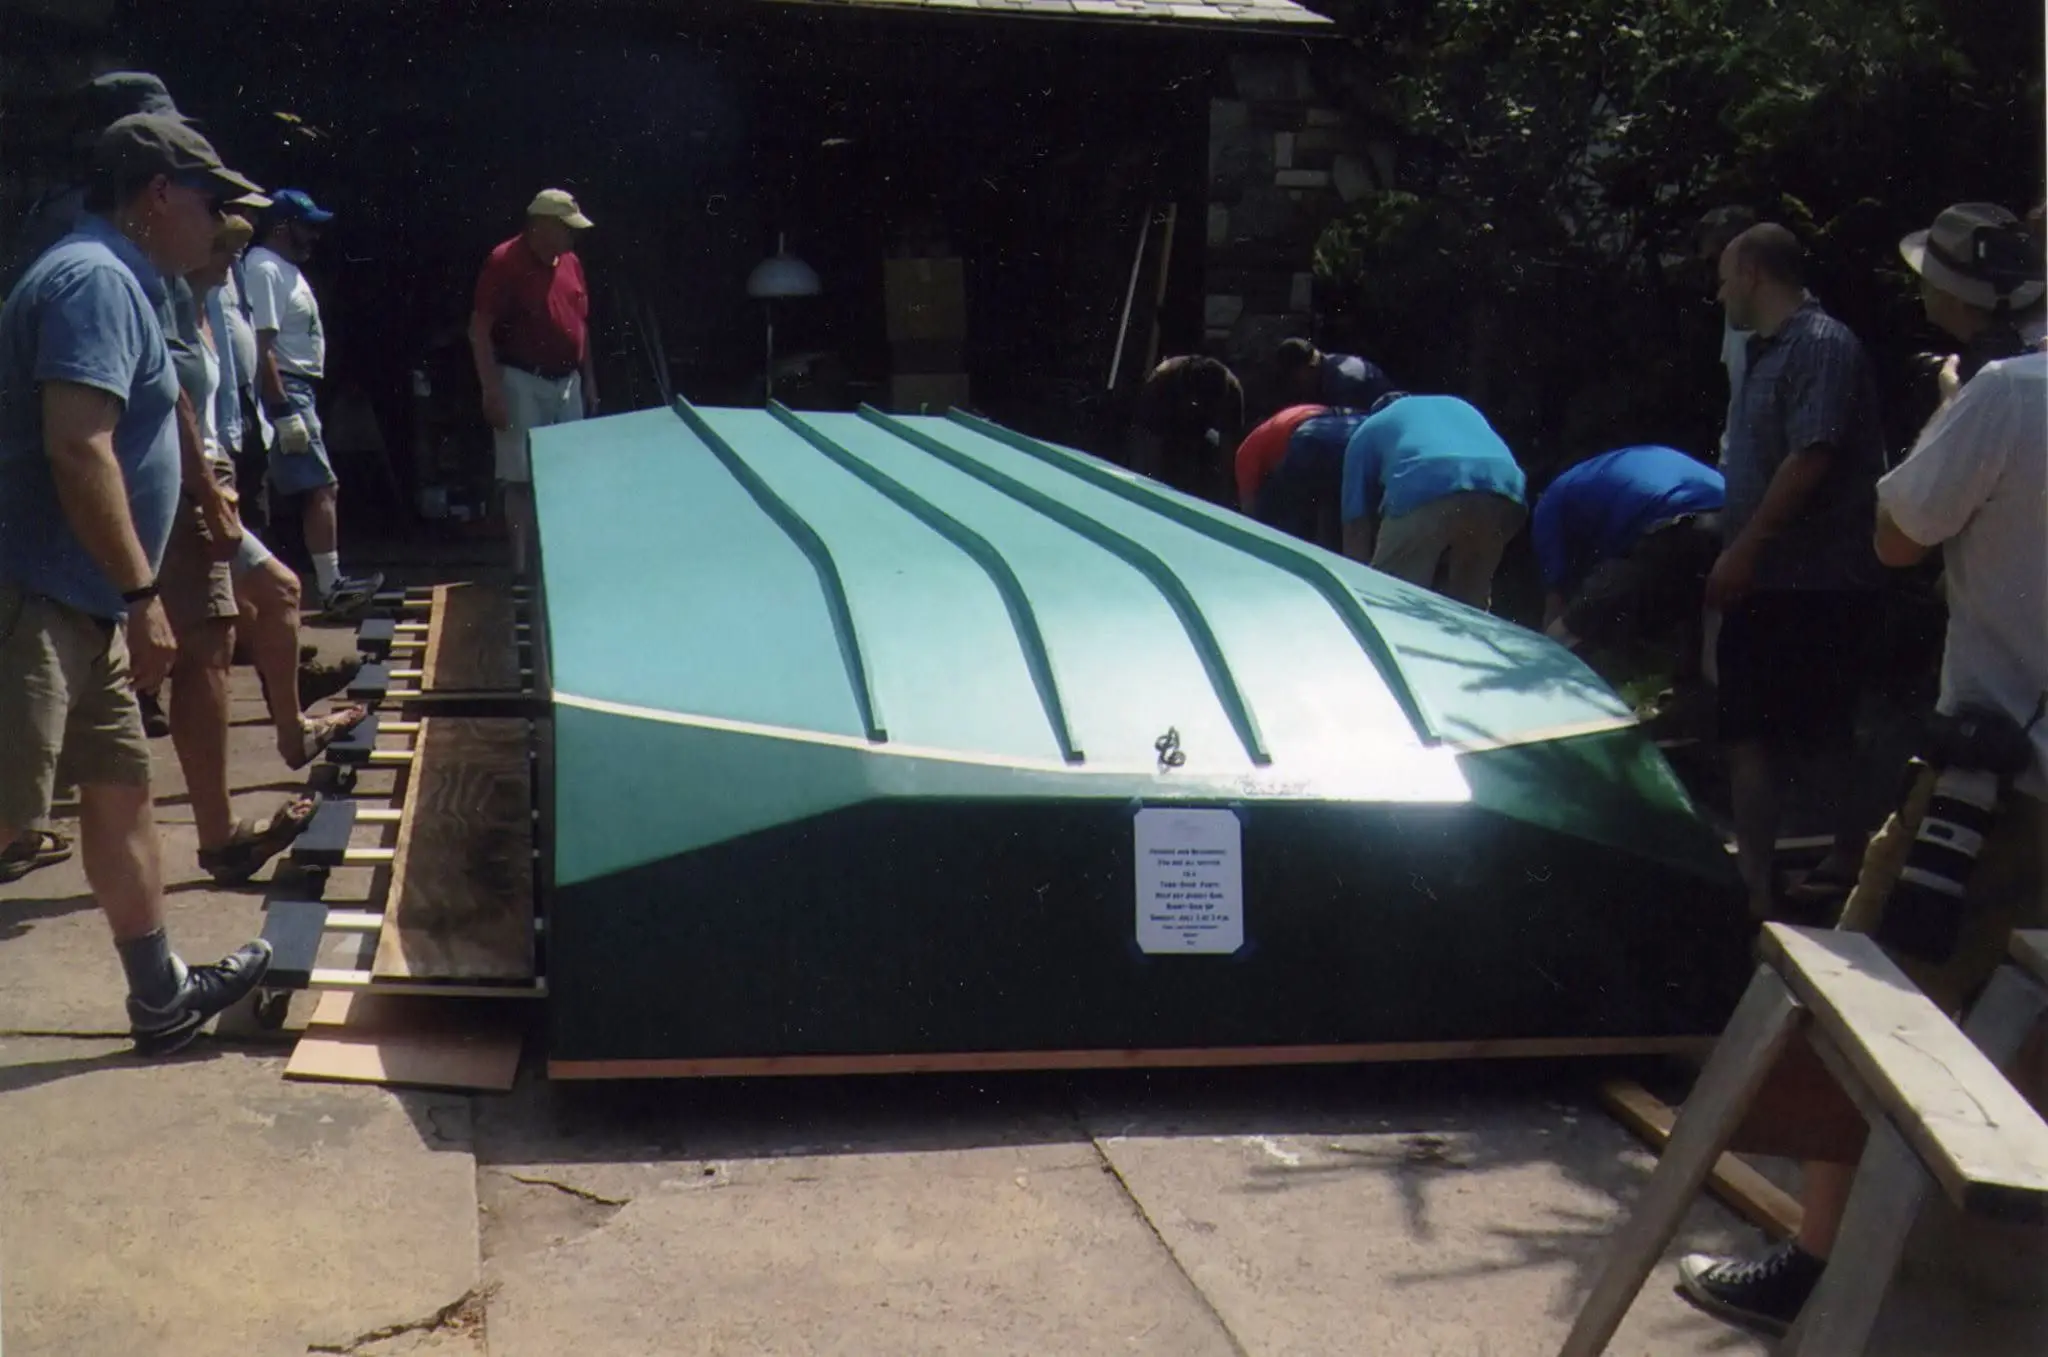
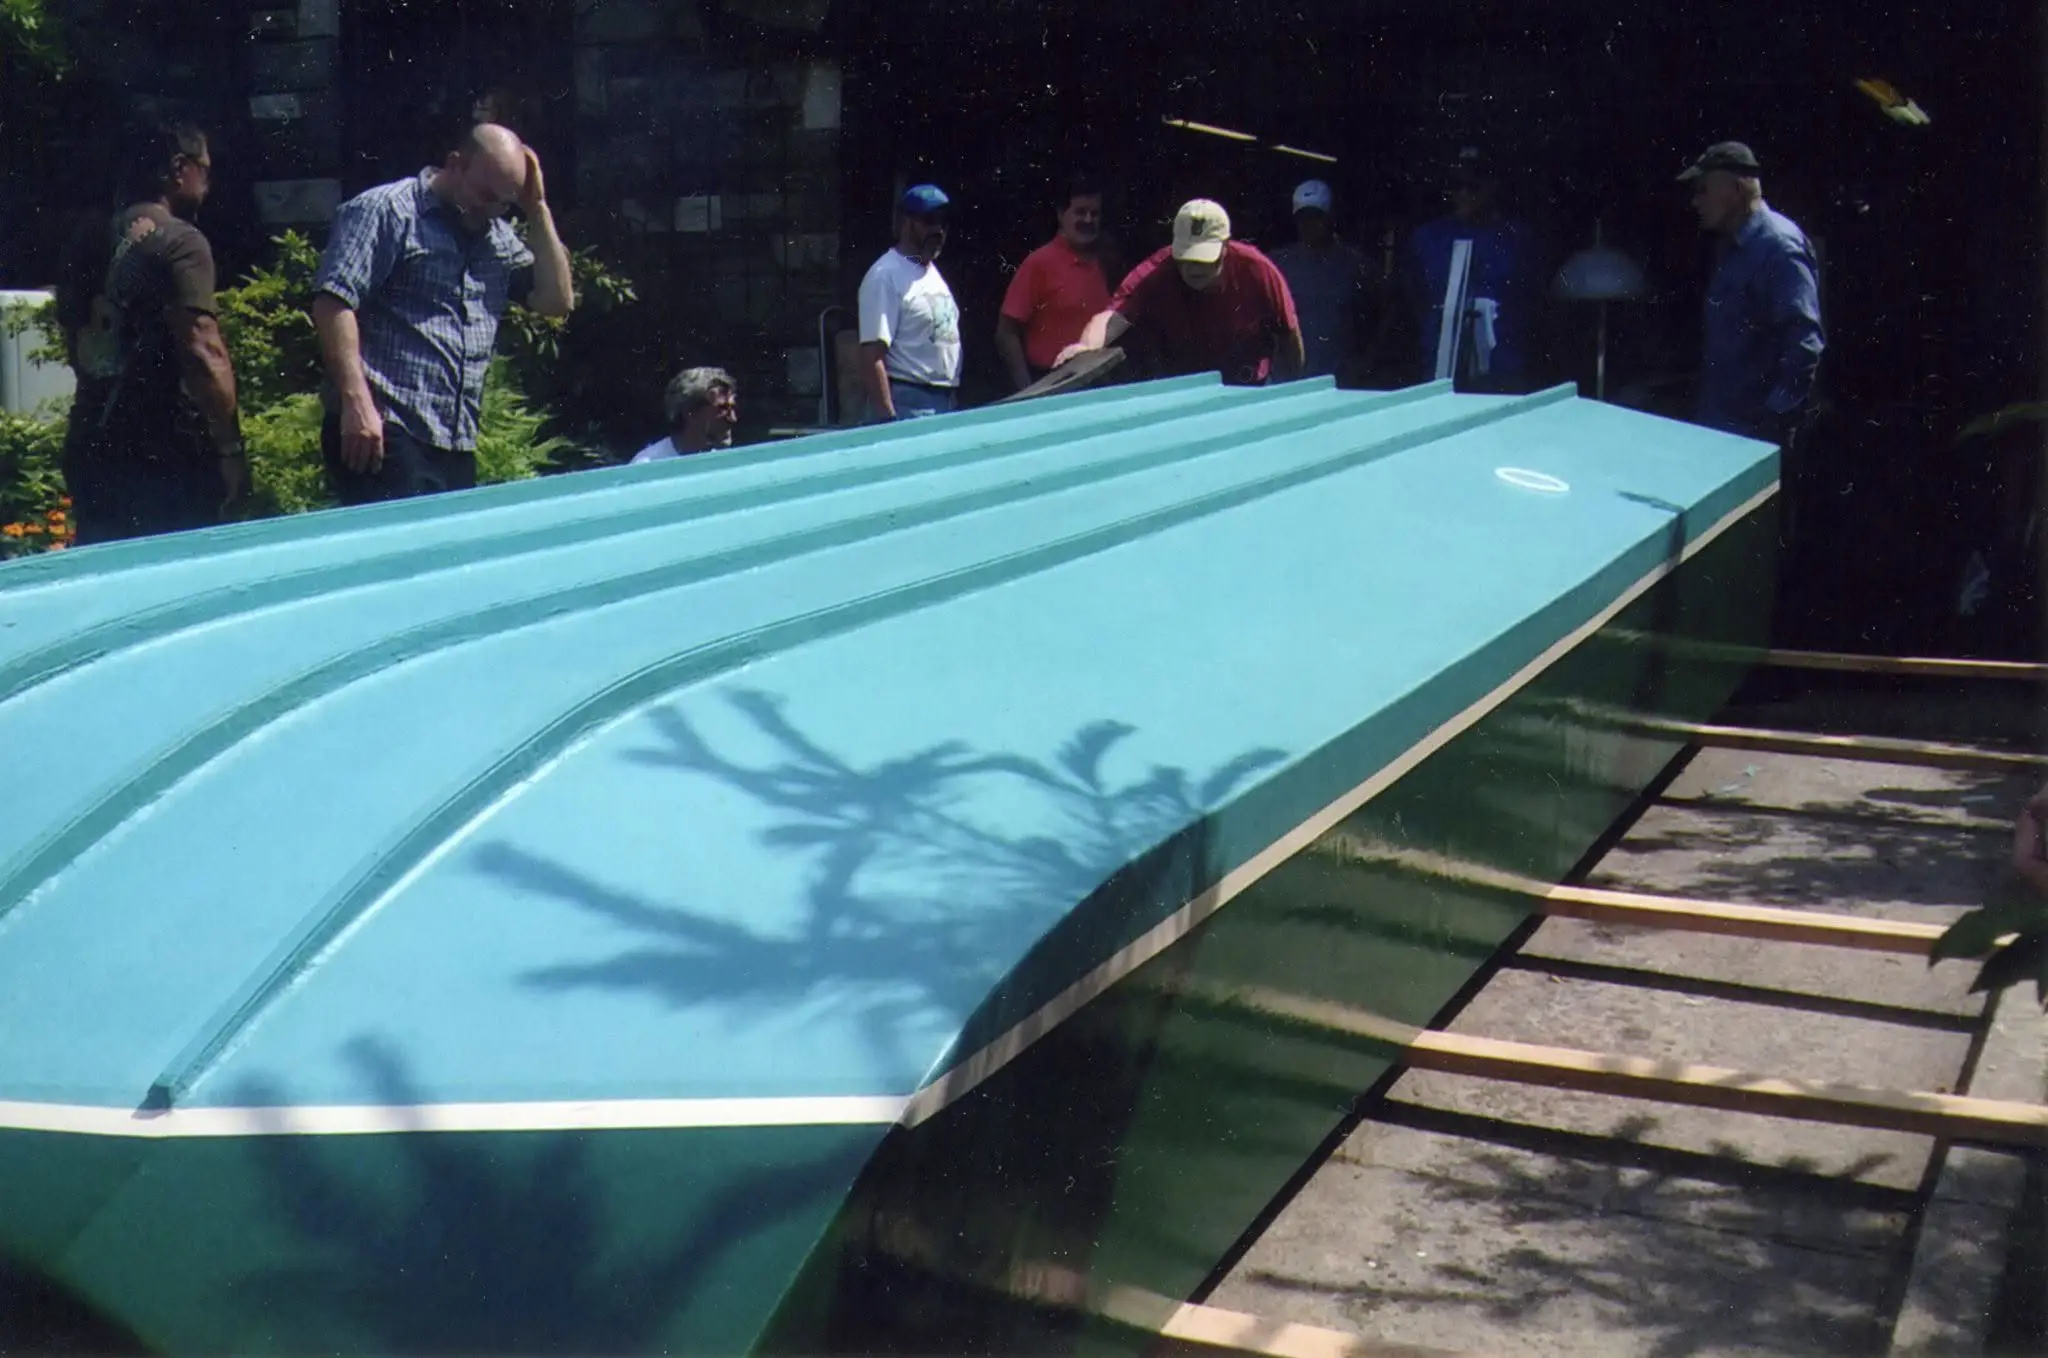
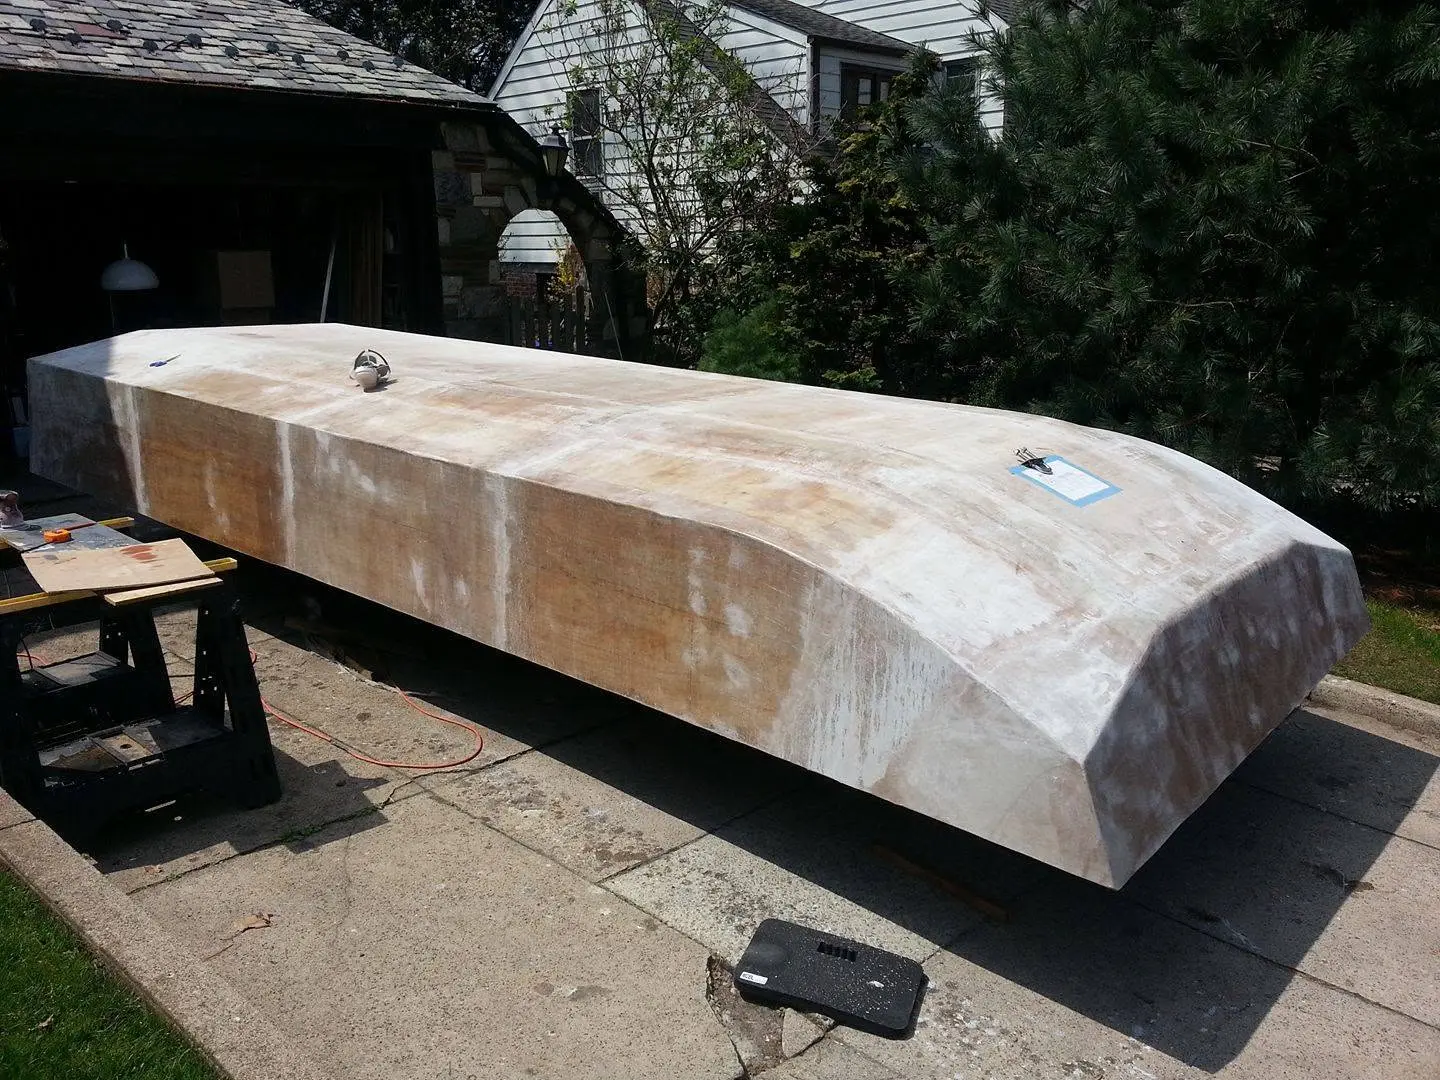
Houseboat look-back to Sunday, July 1, 2018 – There came a time over the summer when friends and neighbors showed up to help me flip over Jersey Girl. A few days ago, my friend Jerry handed me a packet of photos he made of the occasion, a sequence of 13 pictures. Here they all are, from the hull upside down to right-side up. Before the festivities started, I used a heavy-duty motor hoist to lift the bow first and then the stern, so I could remove the four sawhorses on which I had built the hull. Then, we raised one side so I could slide six movers’ dollies under that edge. Next, we rolled the hull all the way over to one edge of the driveway, then lifted it up on that edge and slid it over even further. Finally, we s-l-o-o-o-o-l-y lowered Jersey Girl’s hull, right-side up, onto a bunch of scrap tires. Many hands made light work.
21 Jul 2018Deck & Coamings
The motor well area is complete, with a raised and angled false bottom to allow rain...
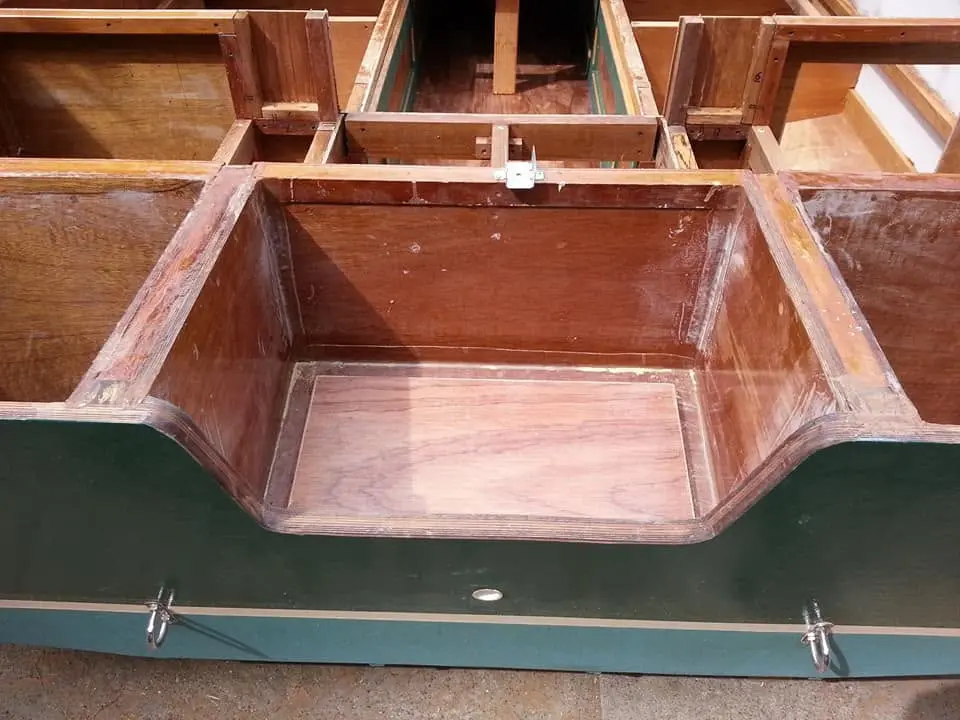
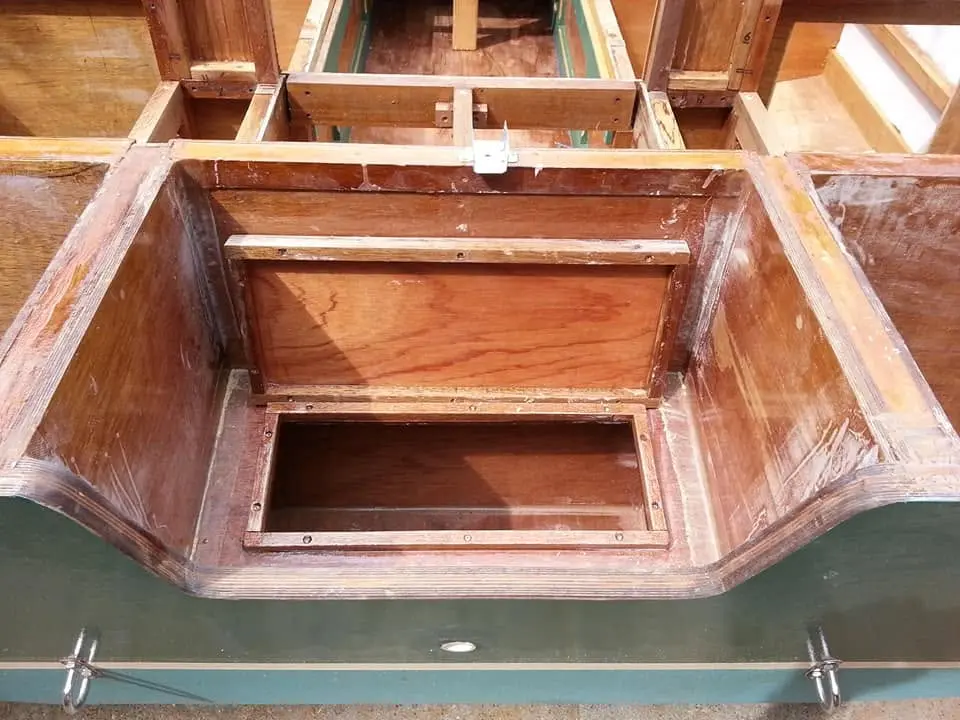
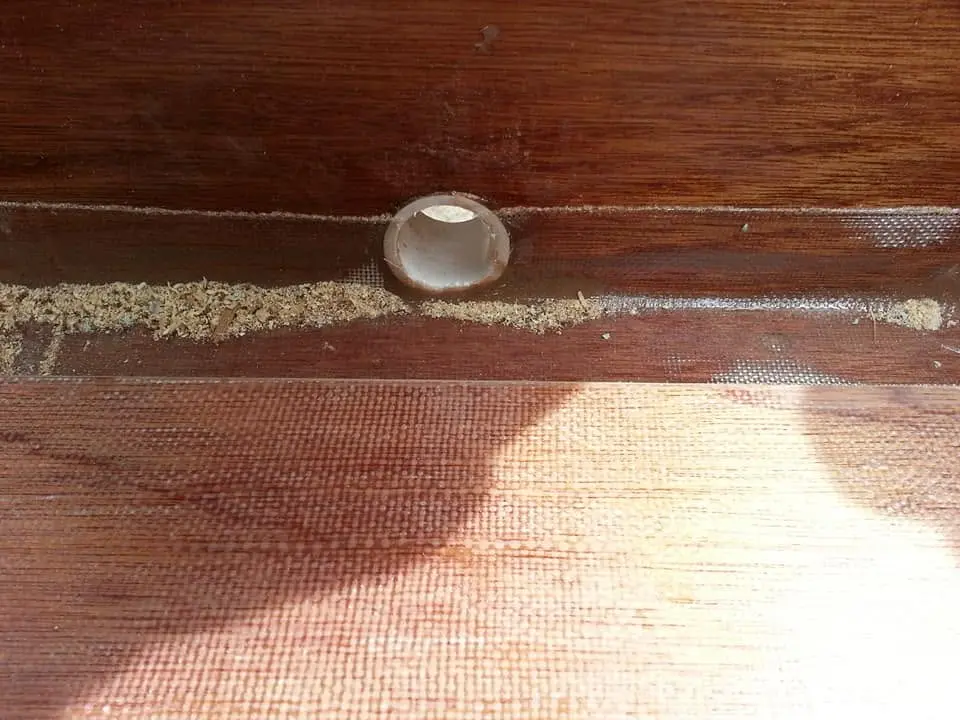
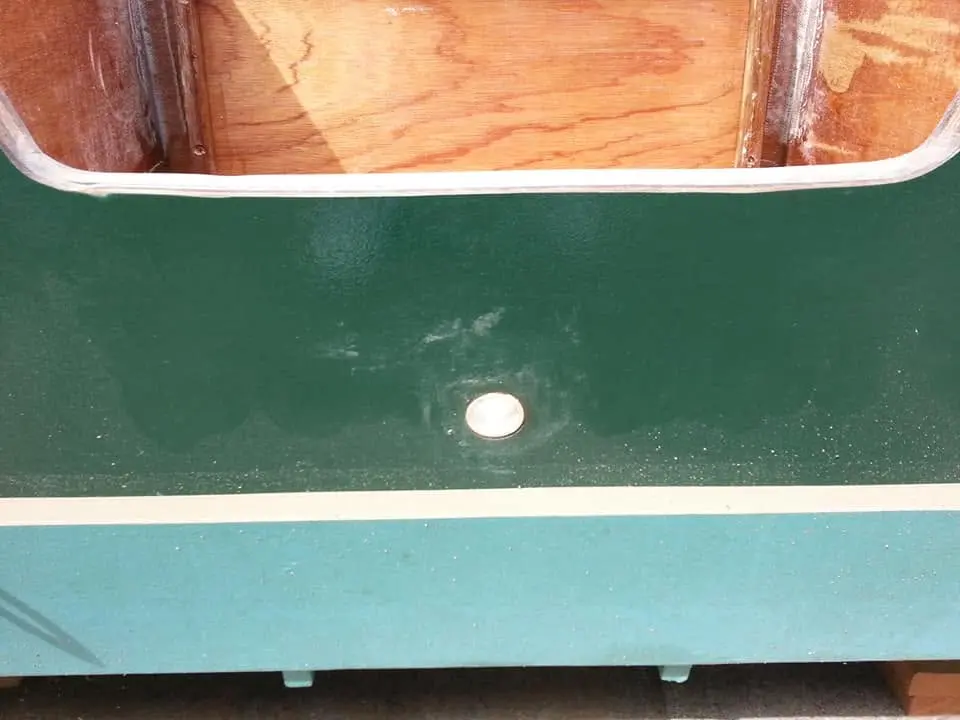
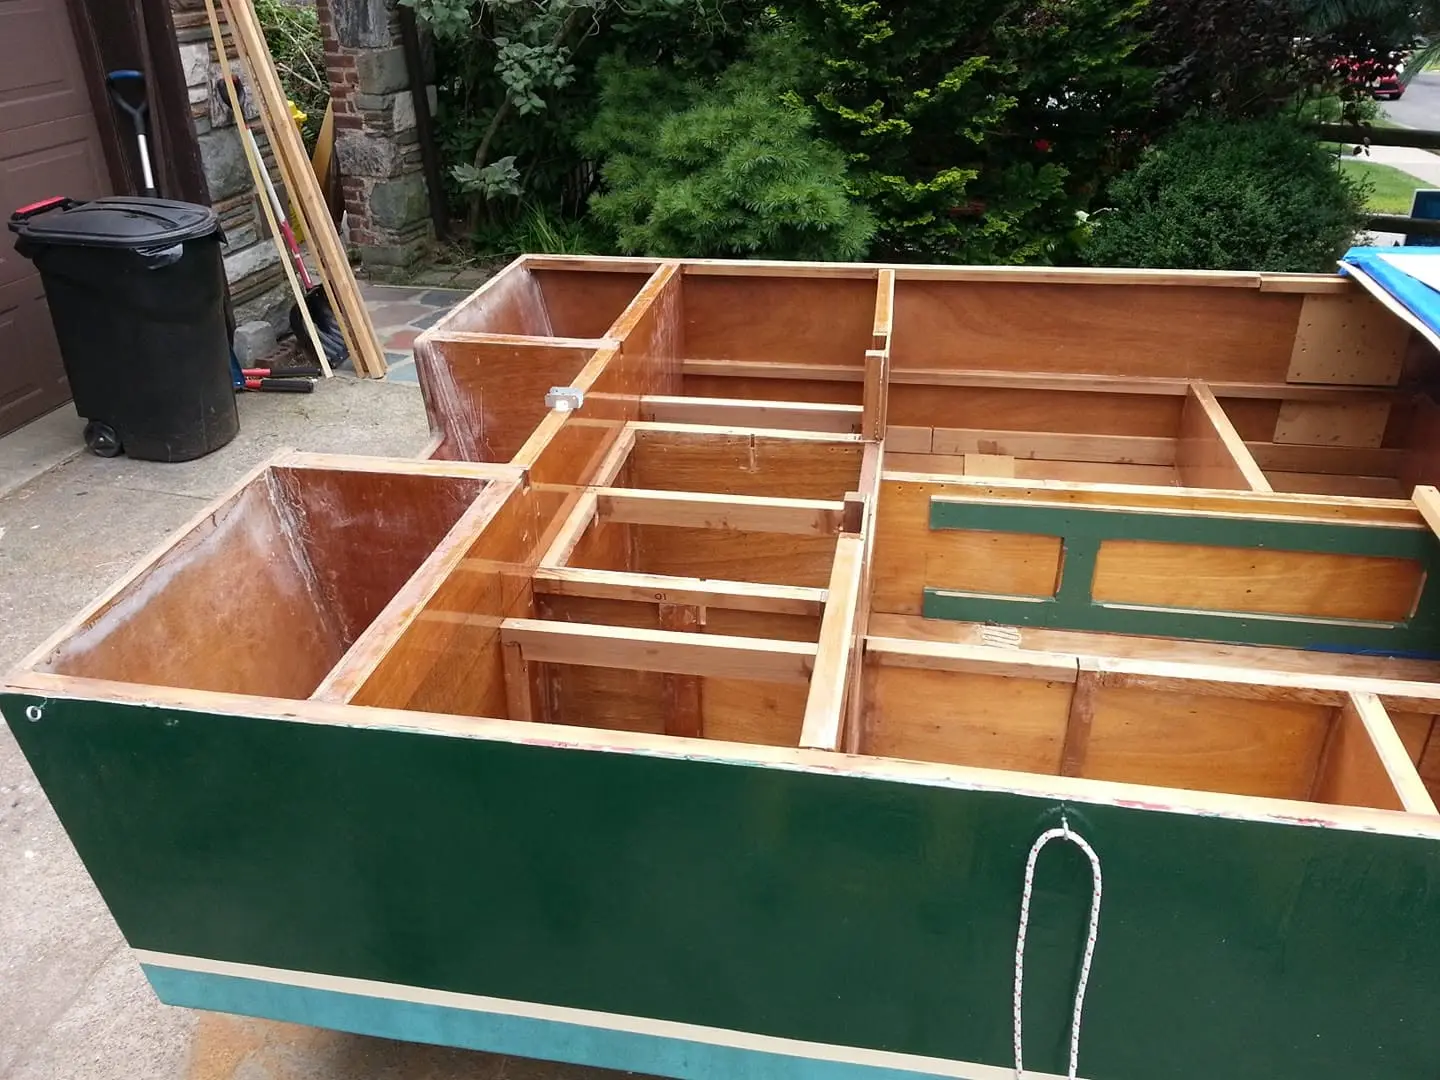
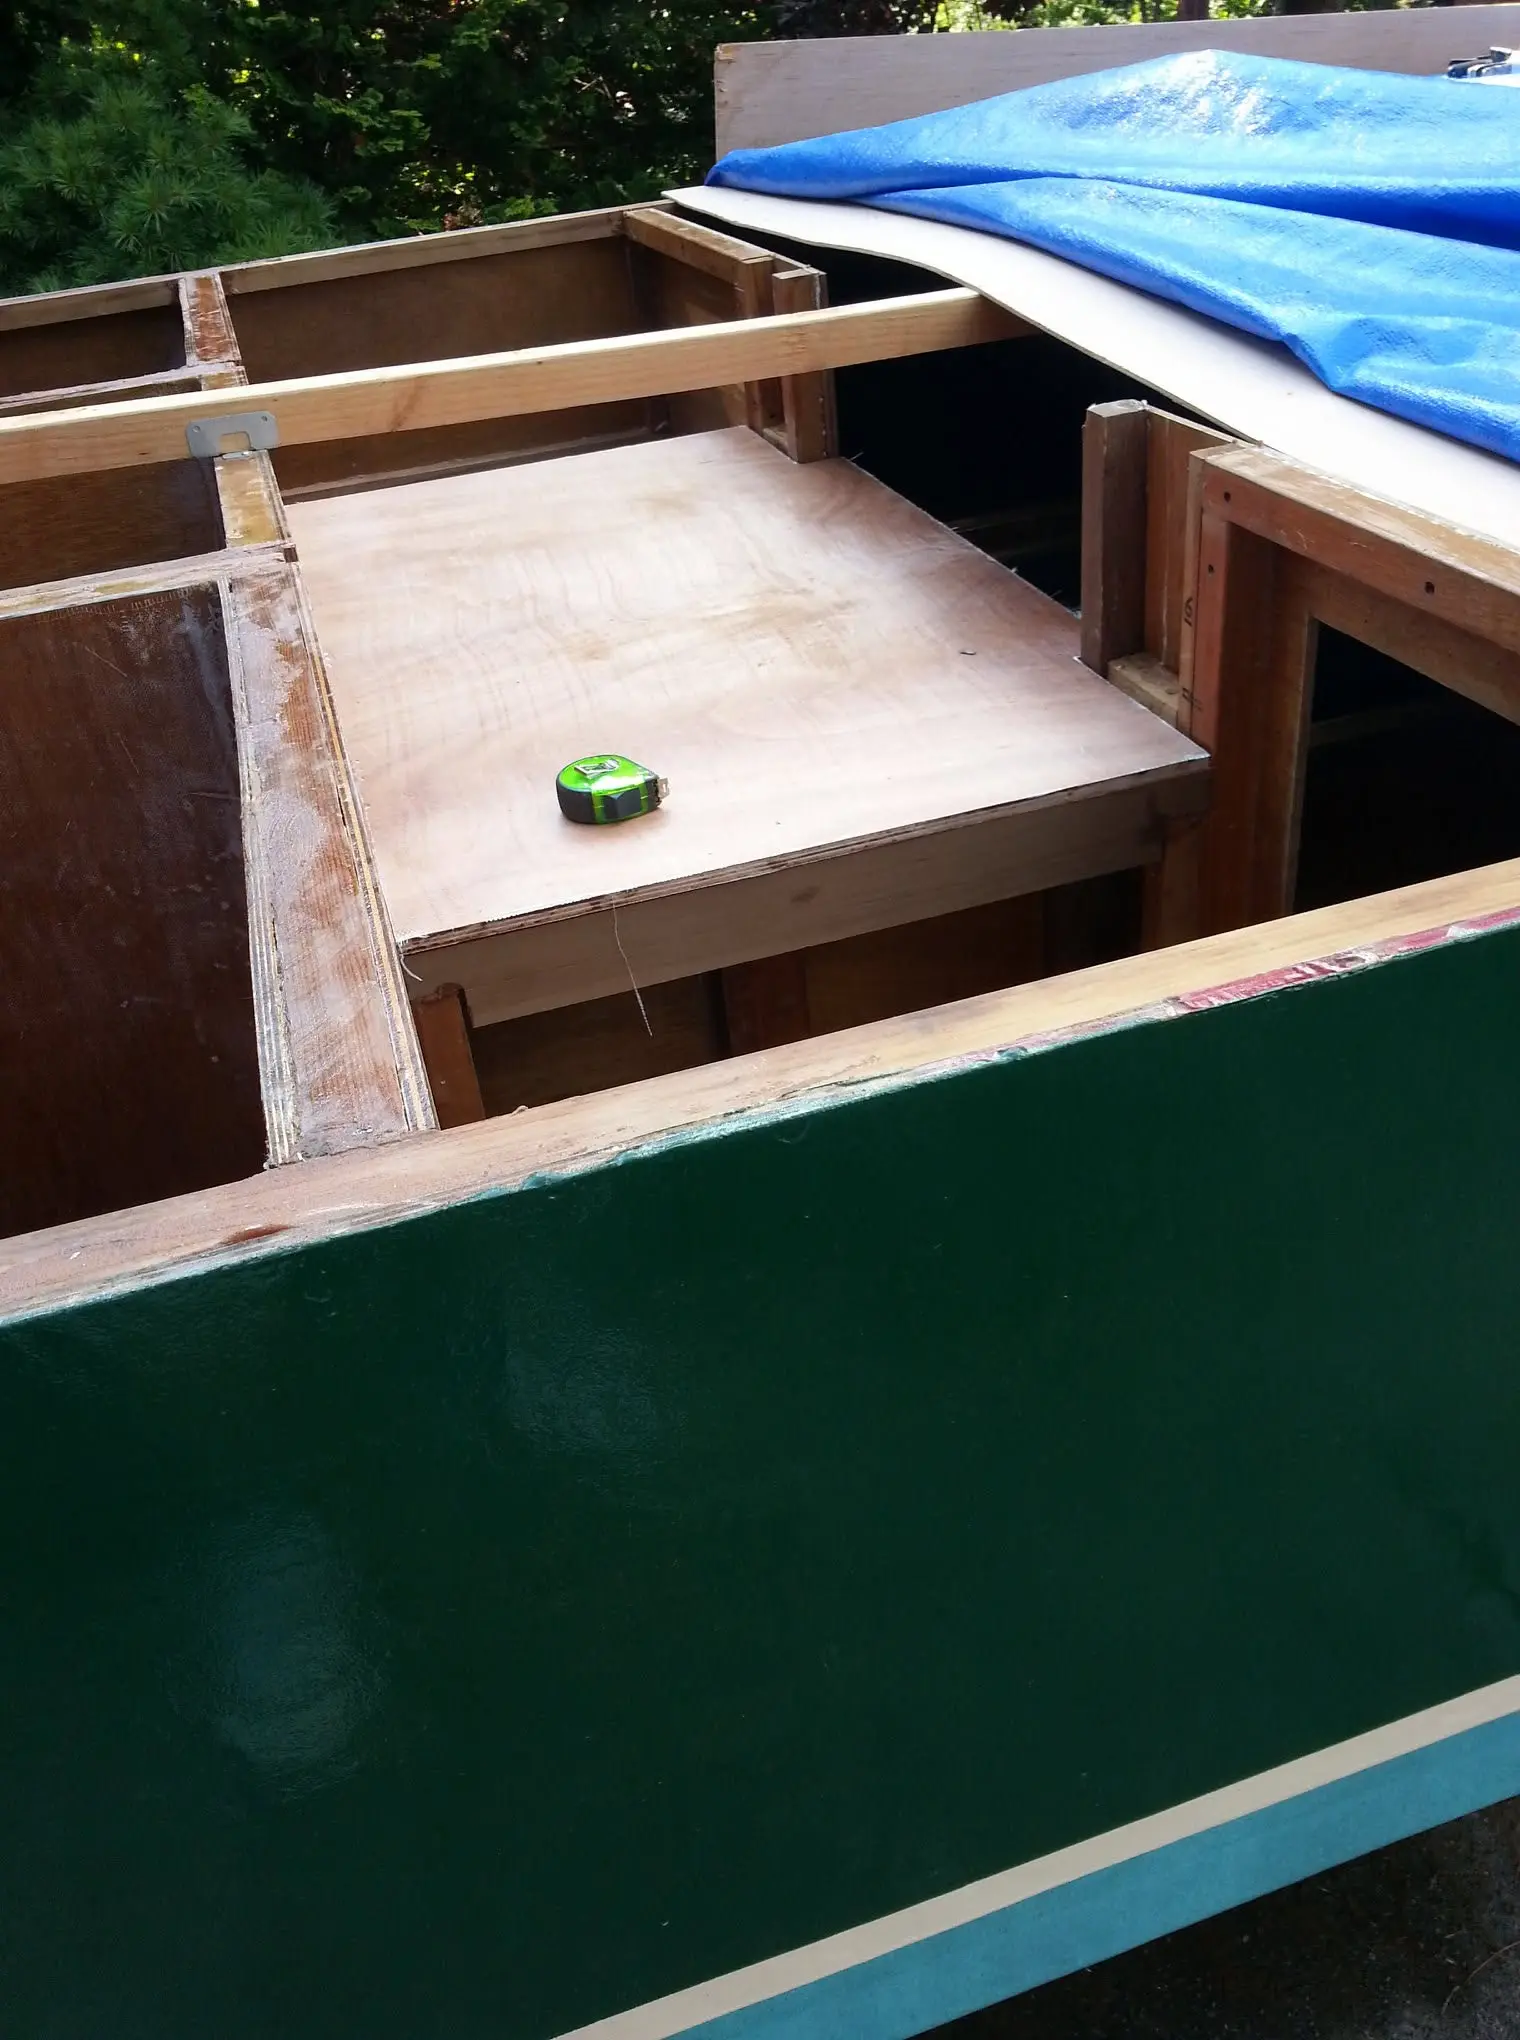
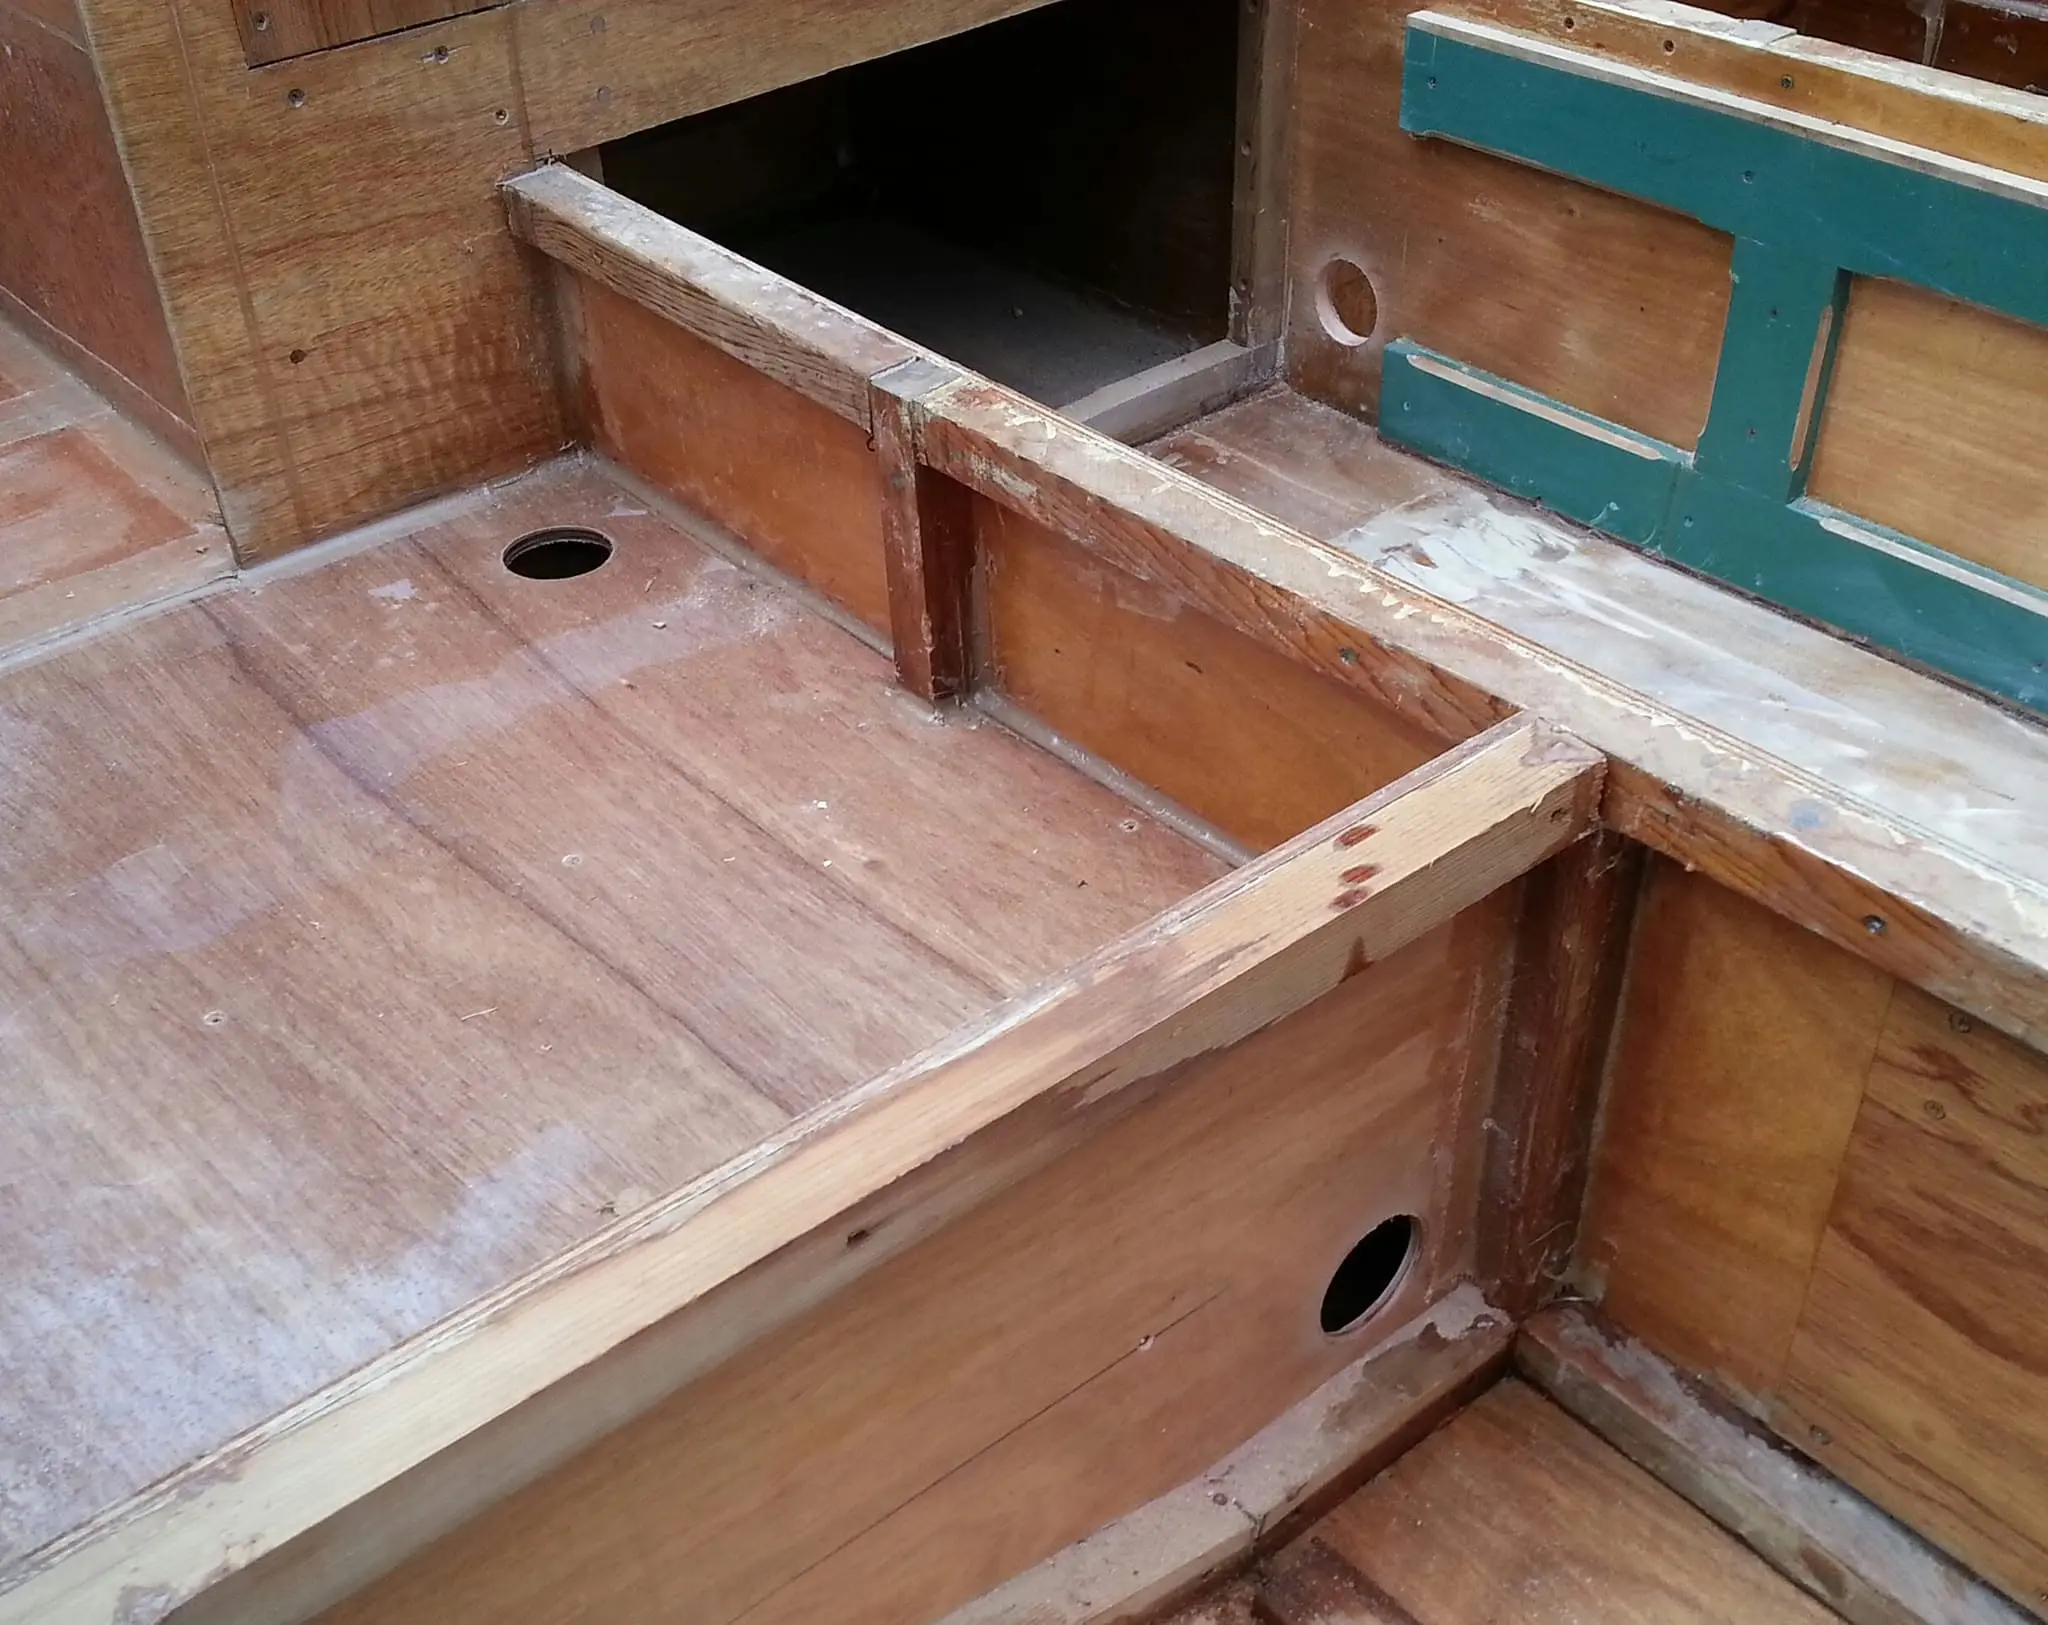
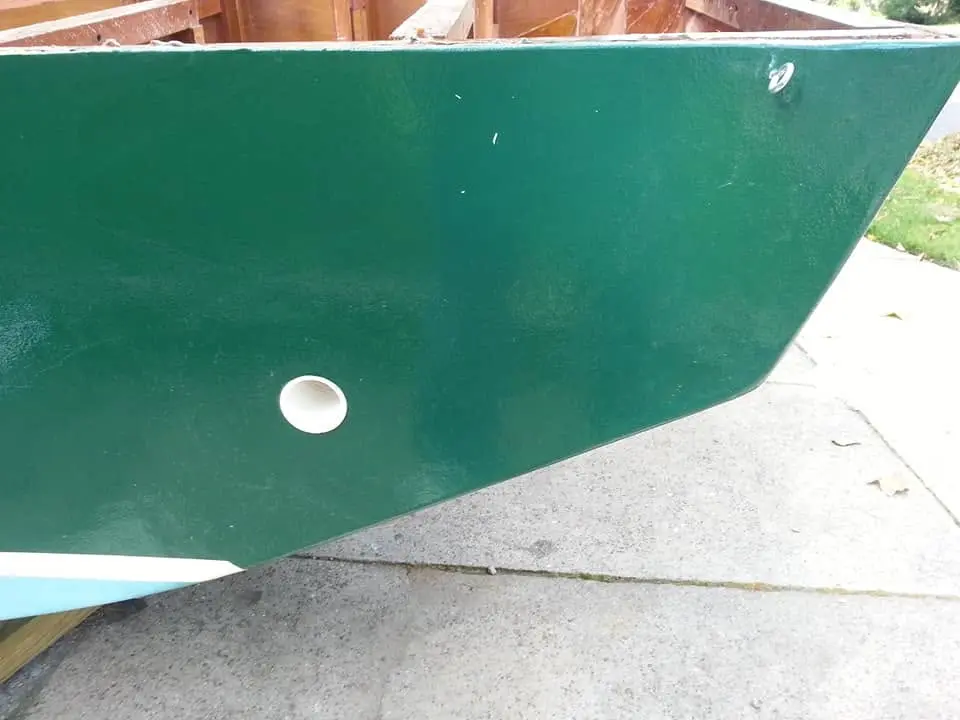
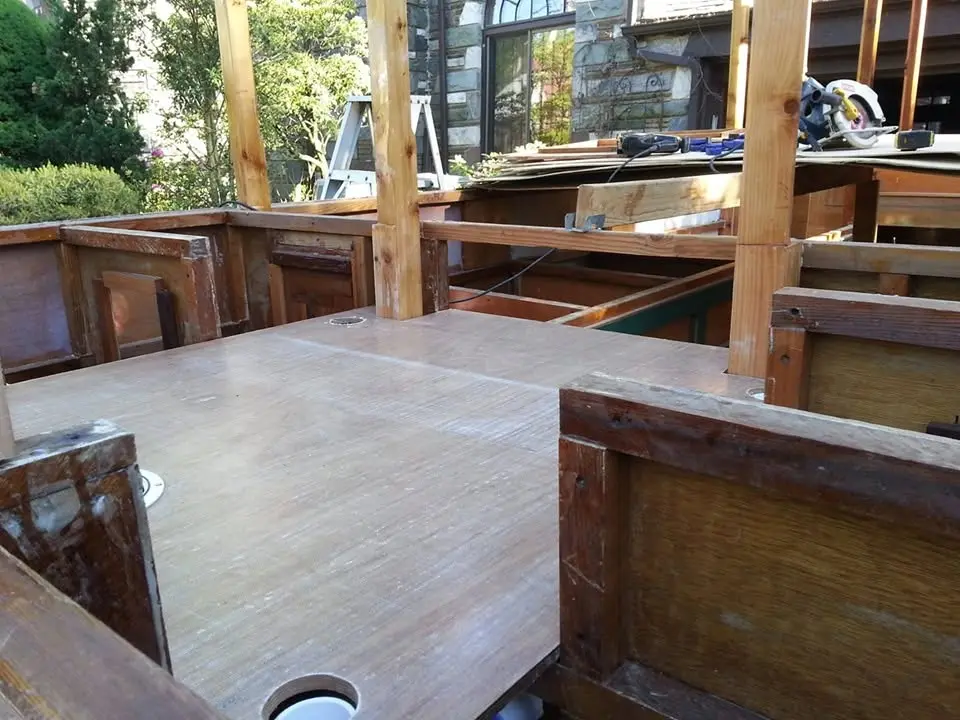
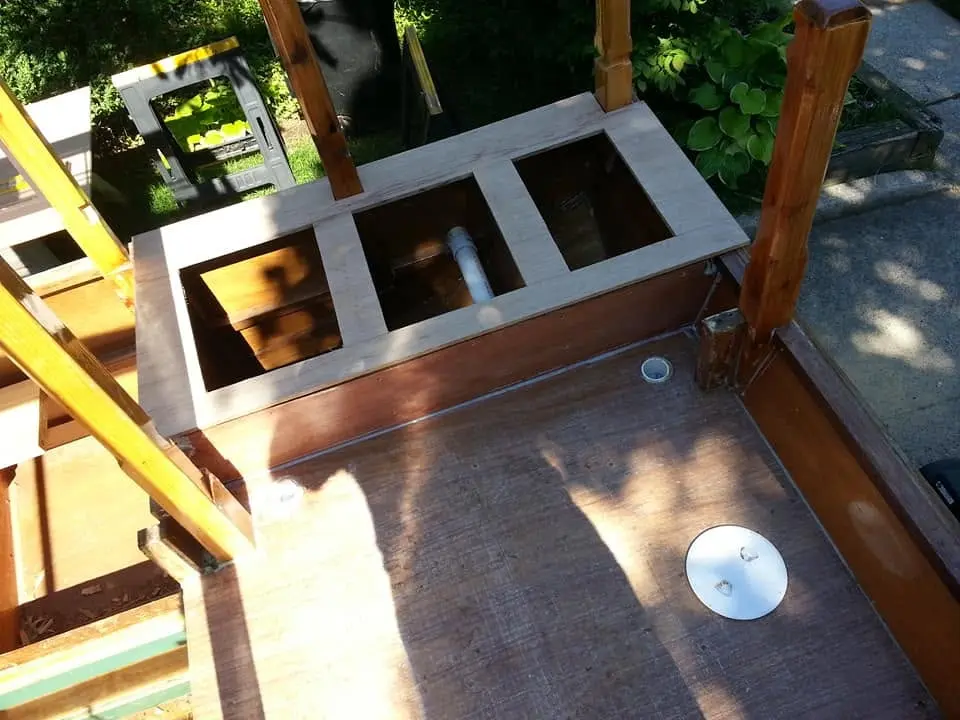
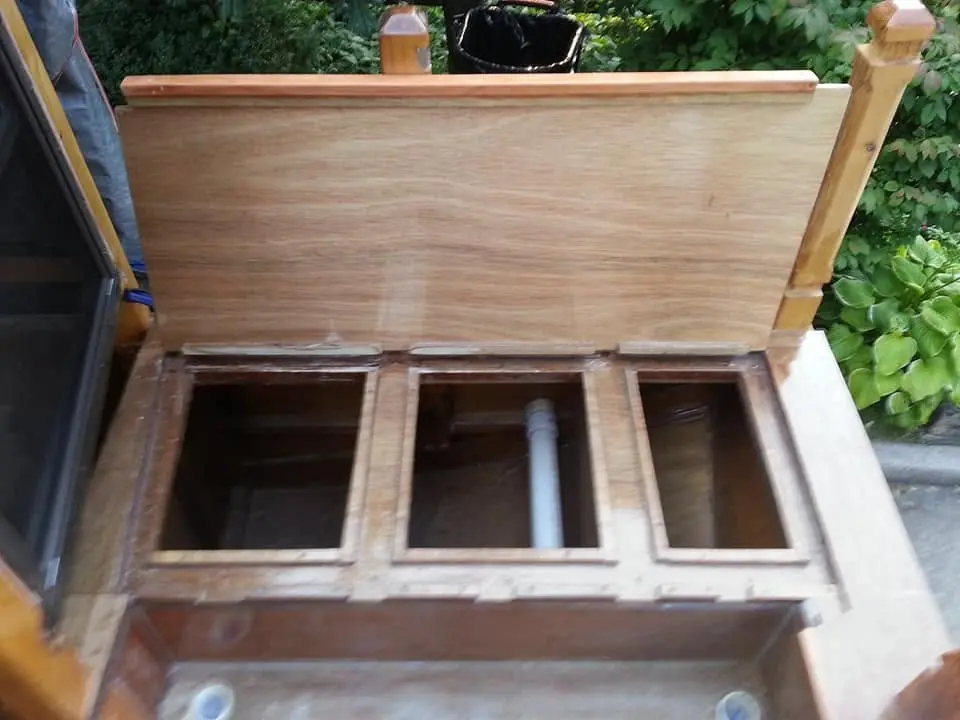
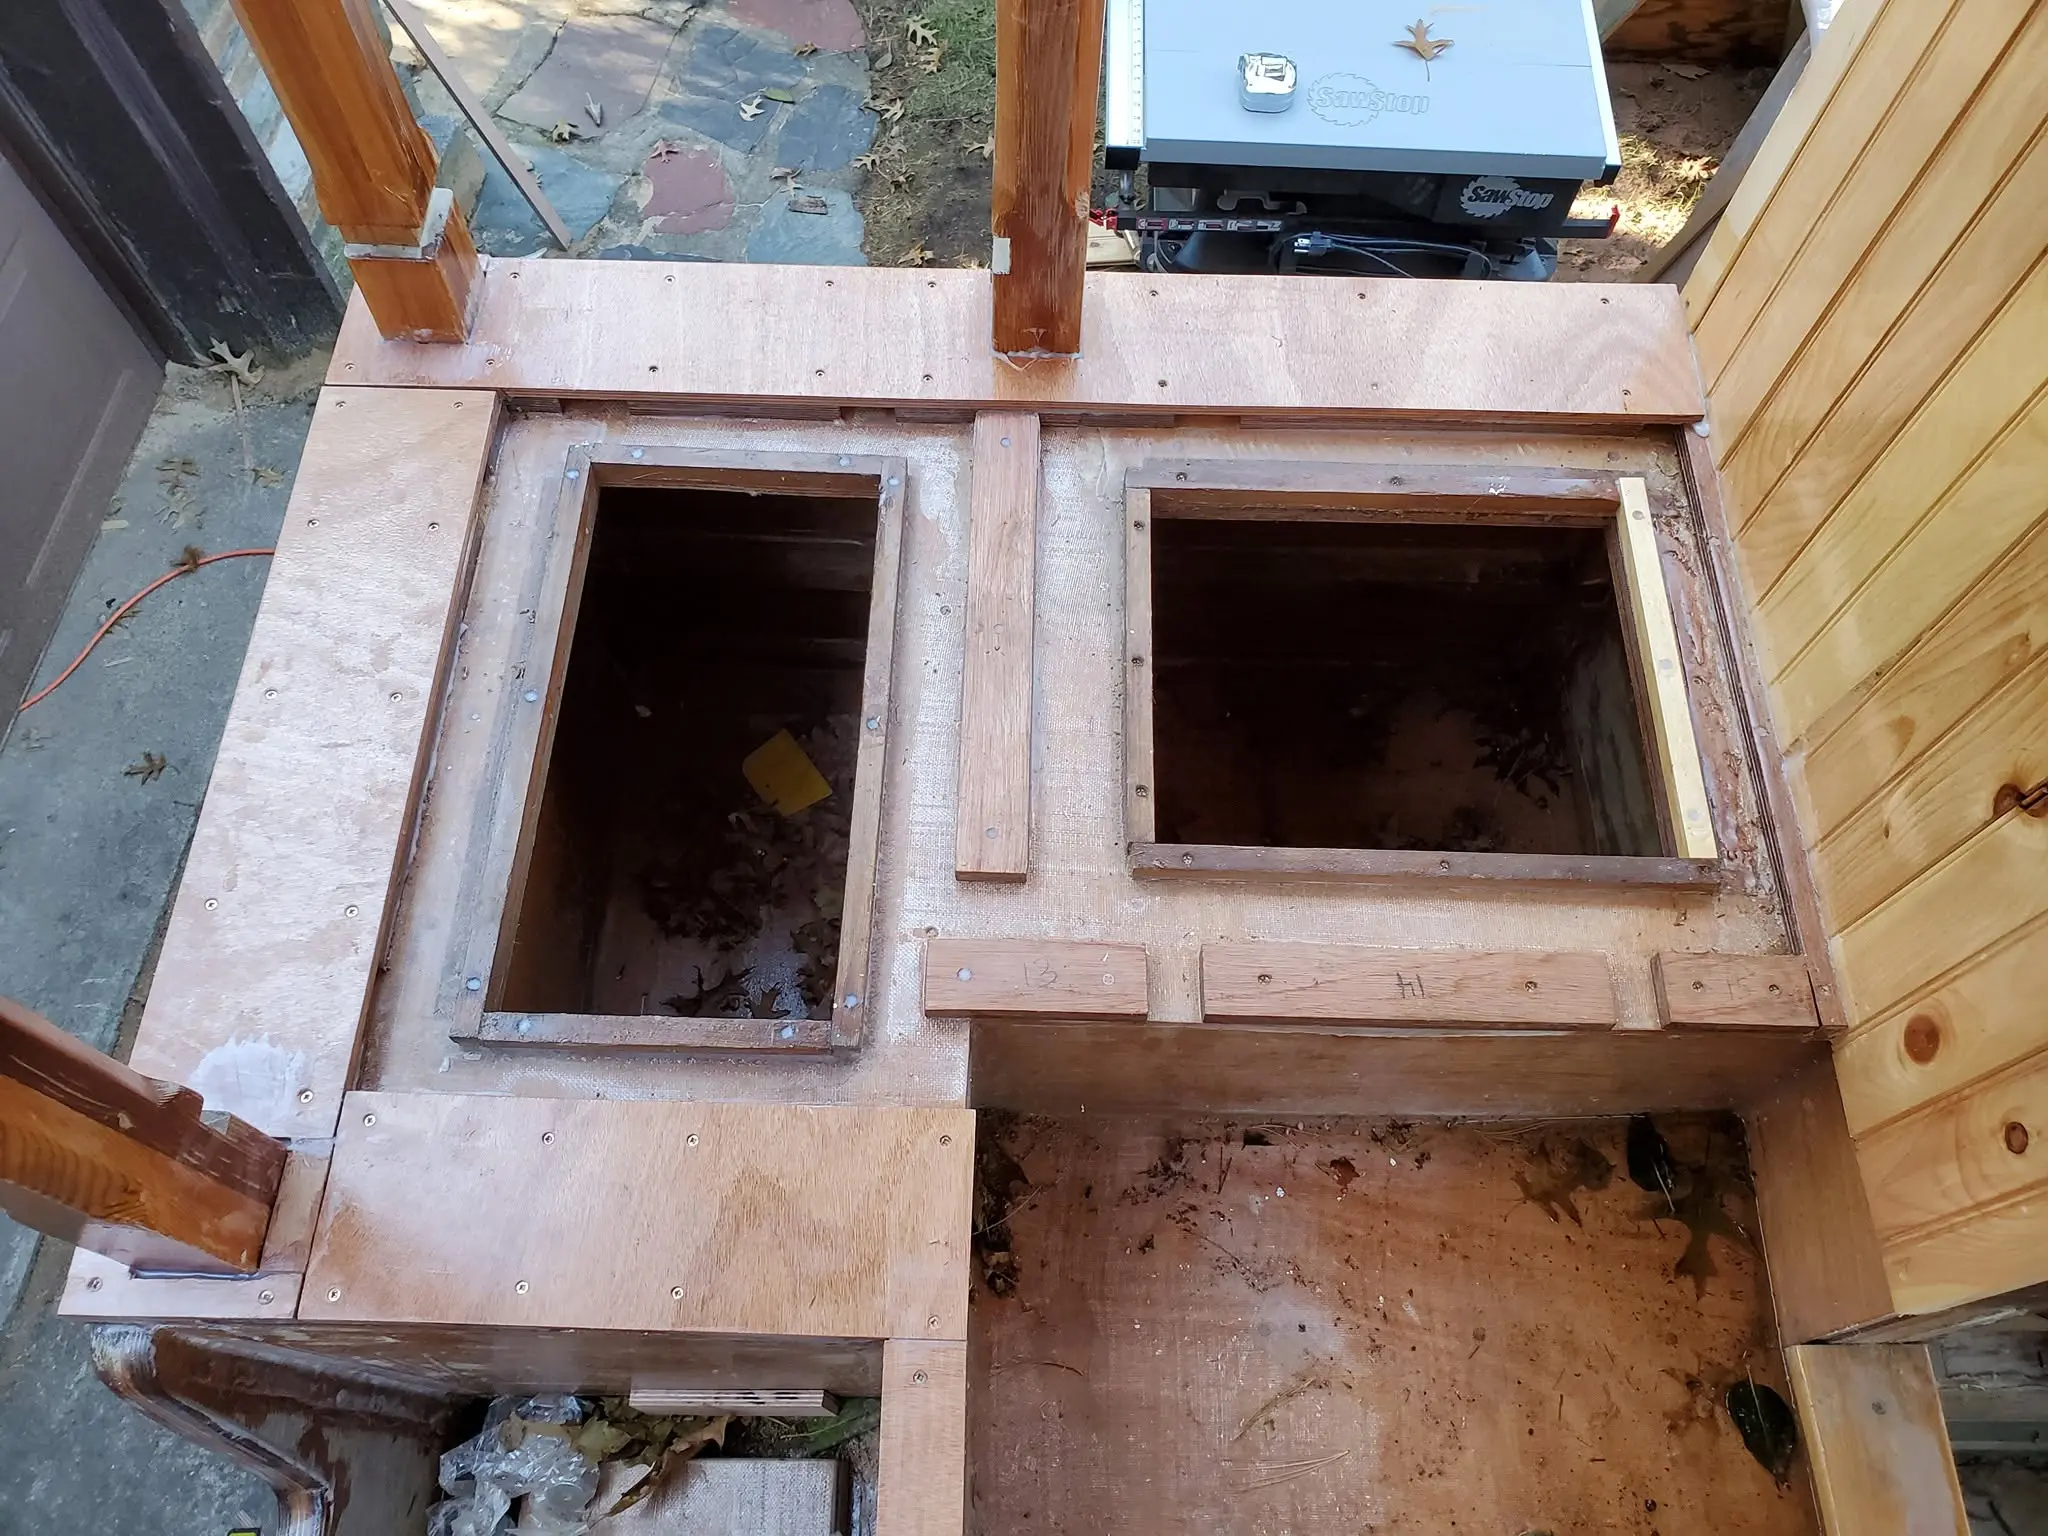
Houseboat update, Saturday, July 21, 2018 -- The motor well area is complete, with a raised and angled false bottom to allow rain water to drain through a scupper. The scupper, Jersey Girl's first thru-hull, is made from a short length of PVC pipe set in epoxy in the center of the transom. Because I did not want the true bottom to be unavailable for occasional inspection and maintenance, I cut a rectangular opening, surrounded it with wooden dam, and made a cover to fit over the opening. All the wooden parts are well sealed with epoxy, so any rain will be diverted away from the inspection opening and out through the scupper.
21 Jul 2018Deck & Coamings
The framing for the aft deck is complete.
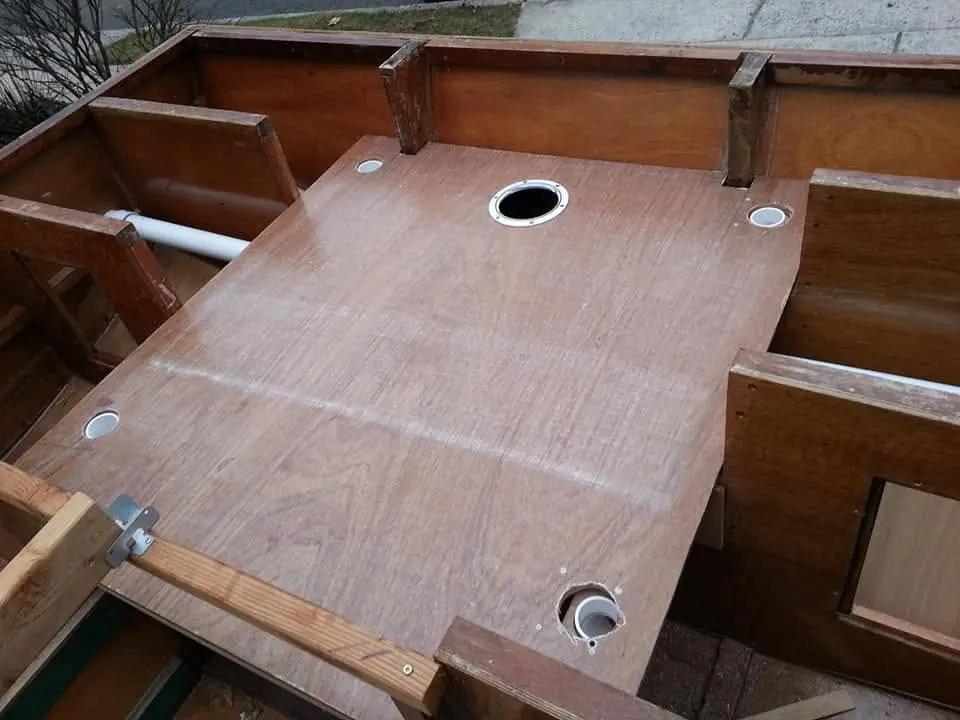
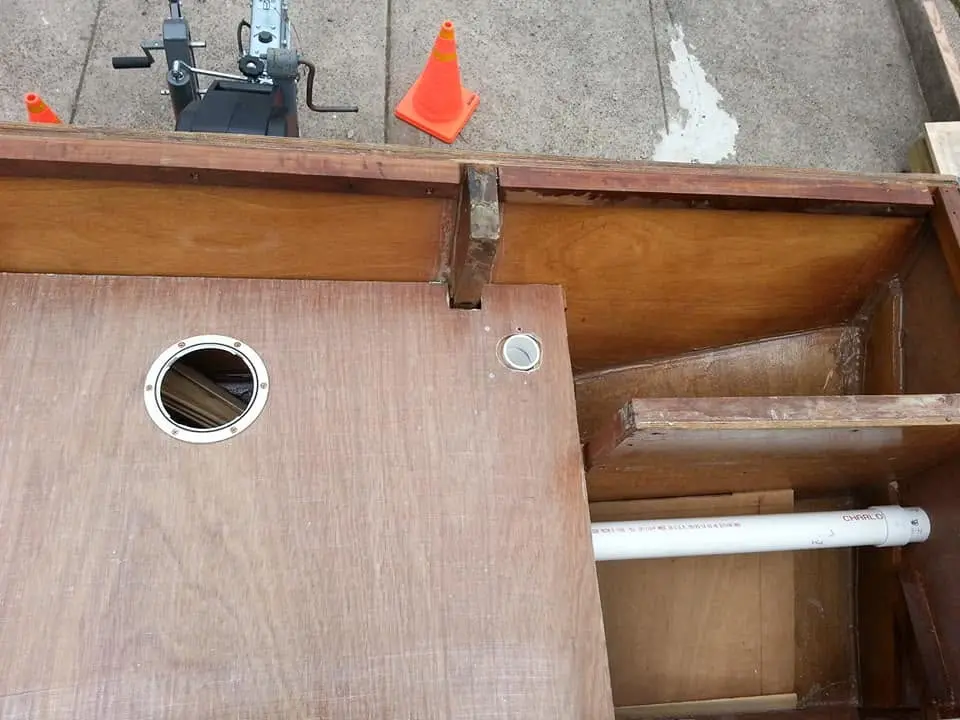
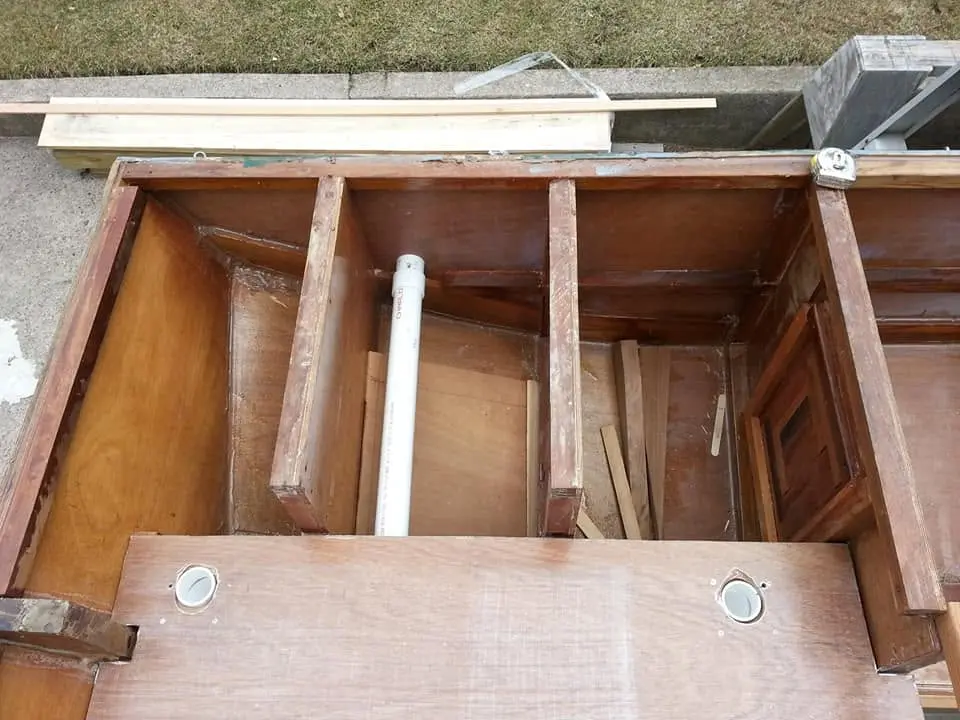
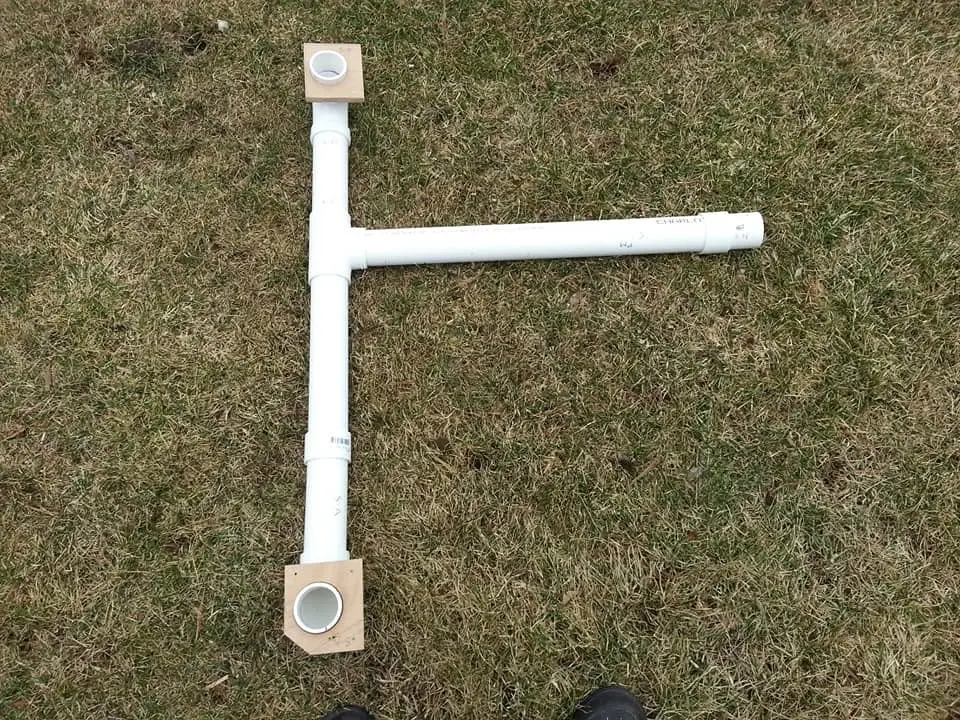
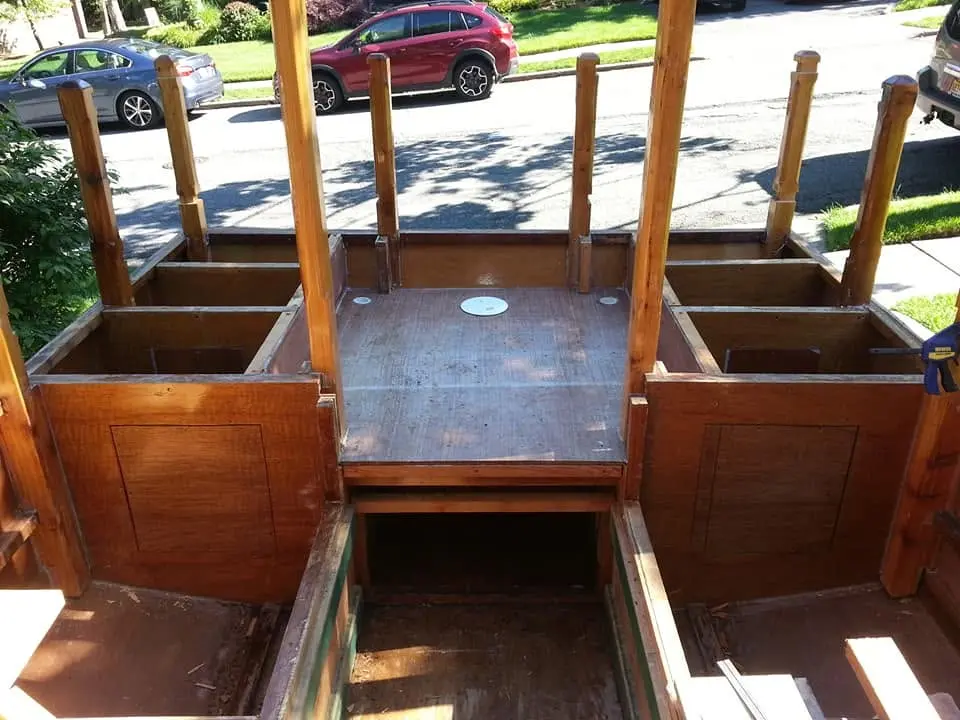
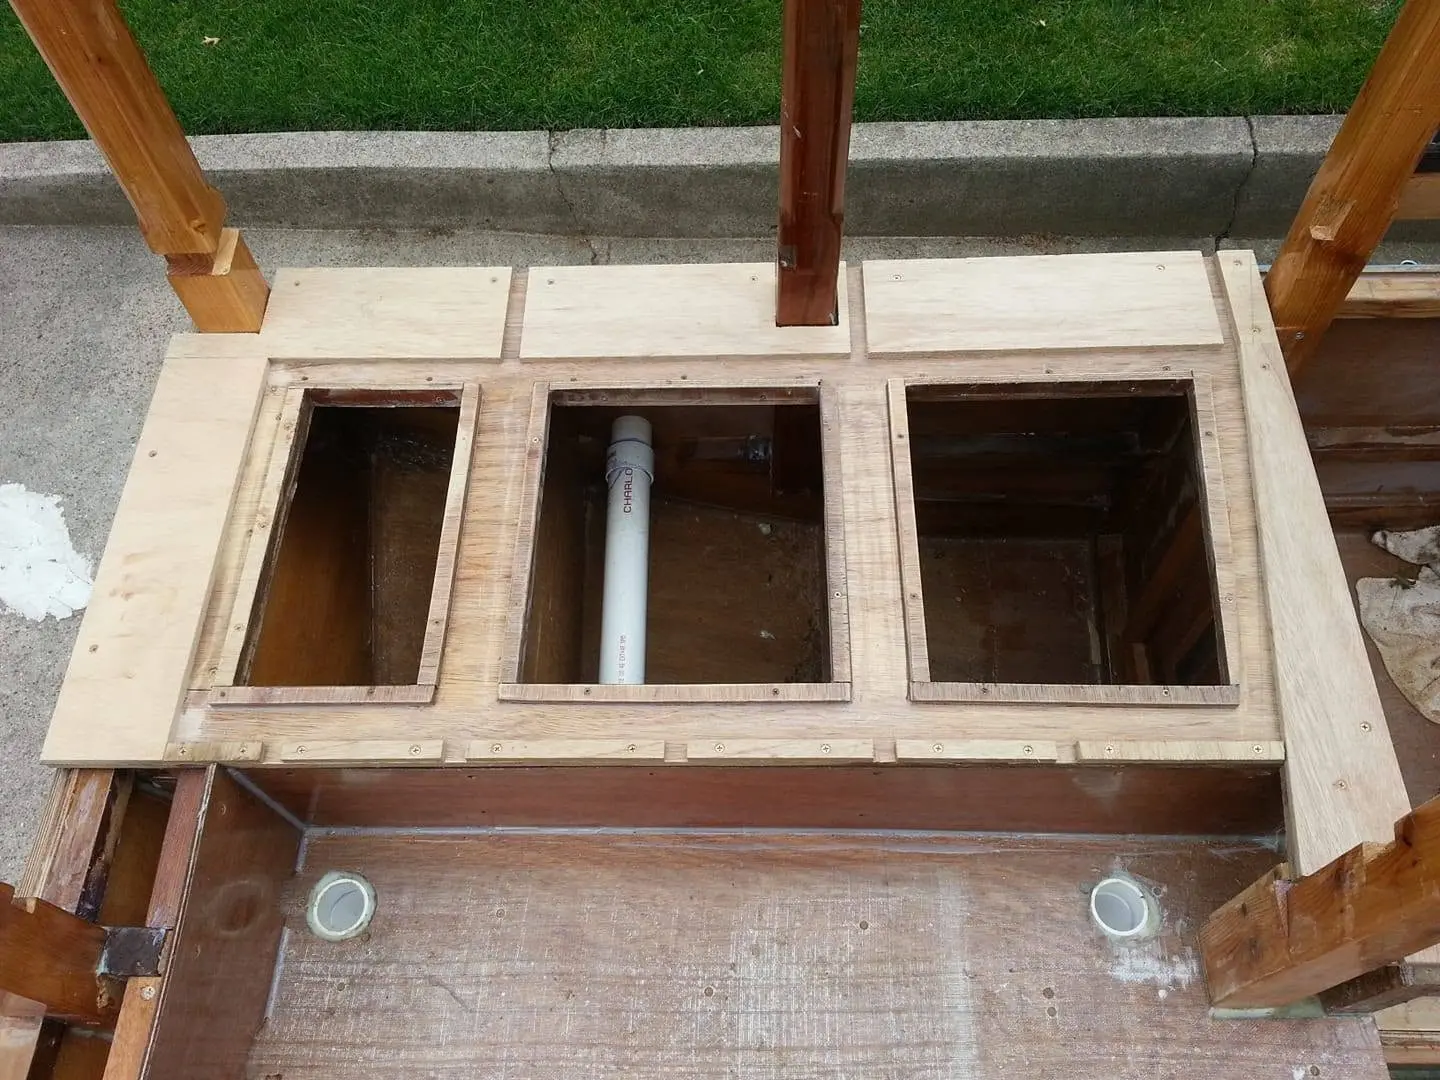
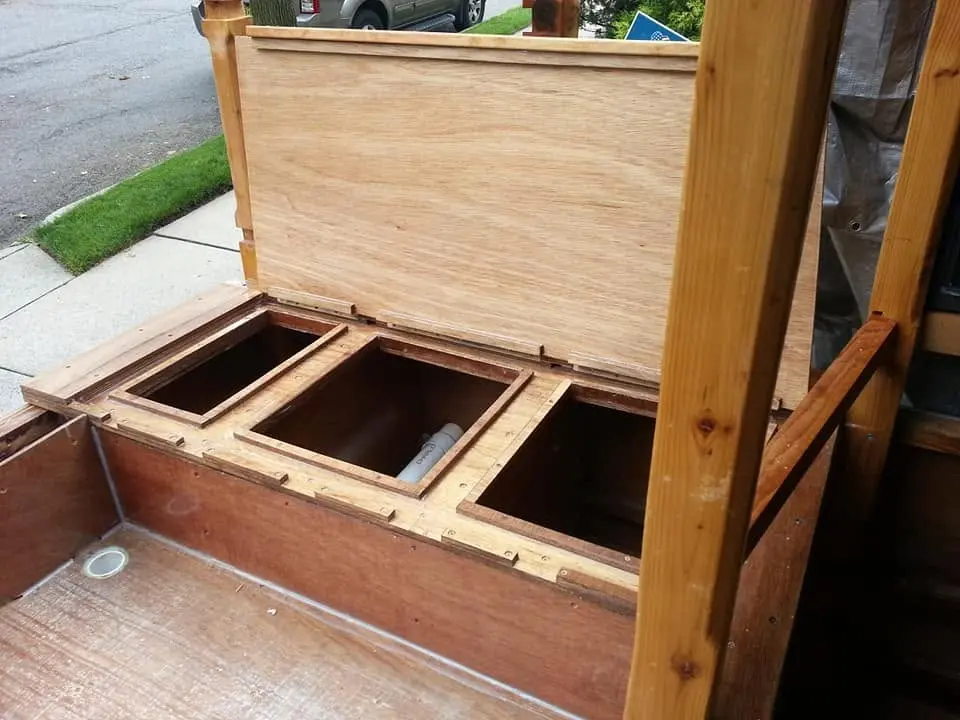
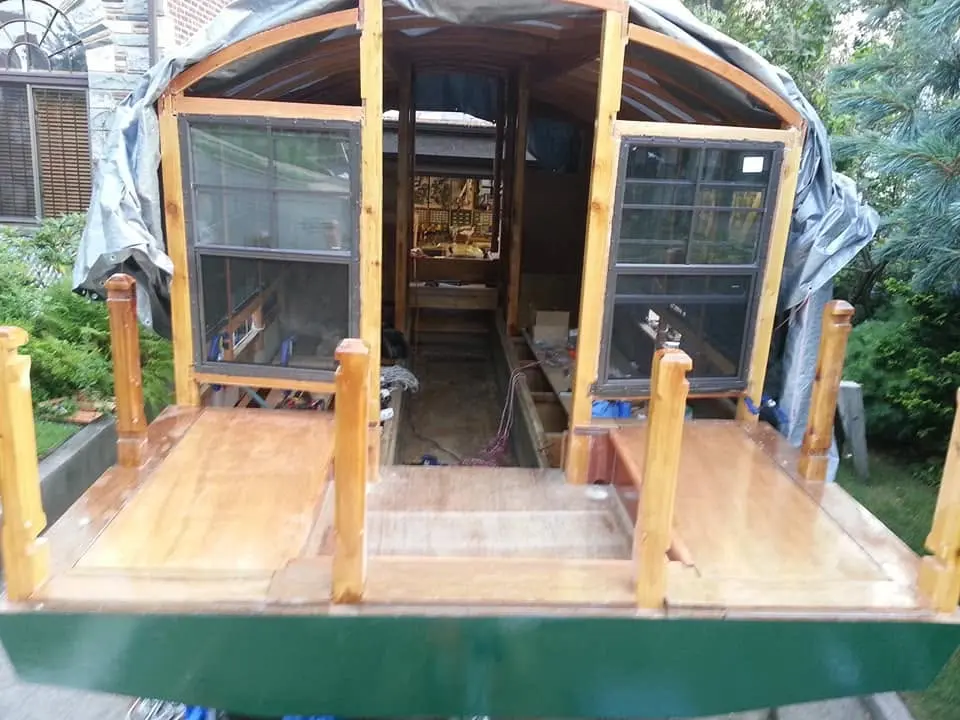
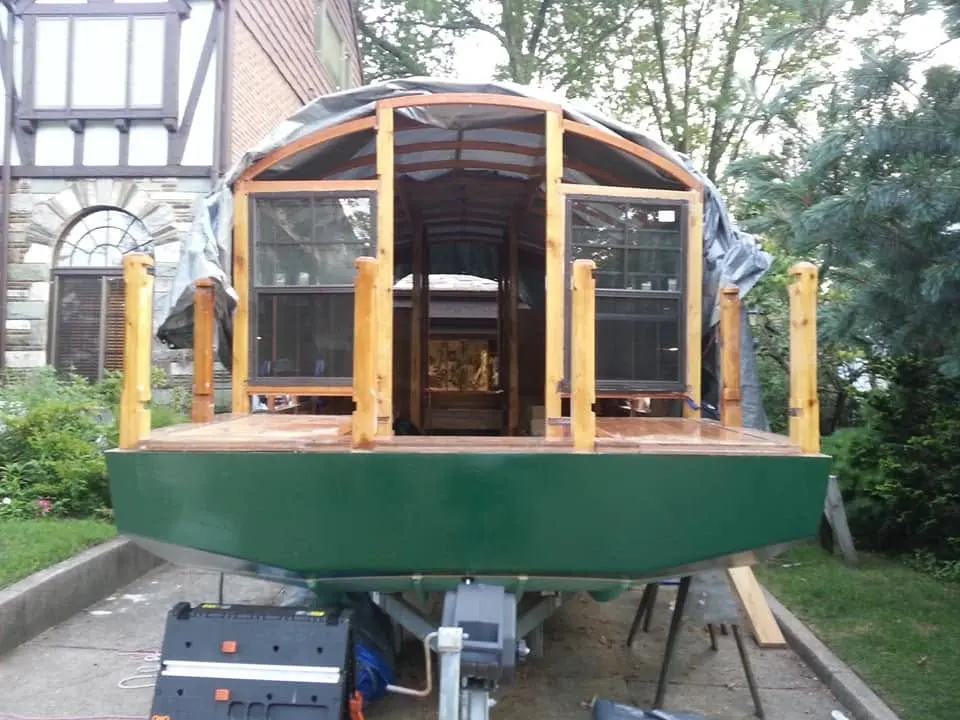
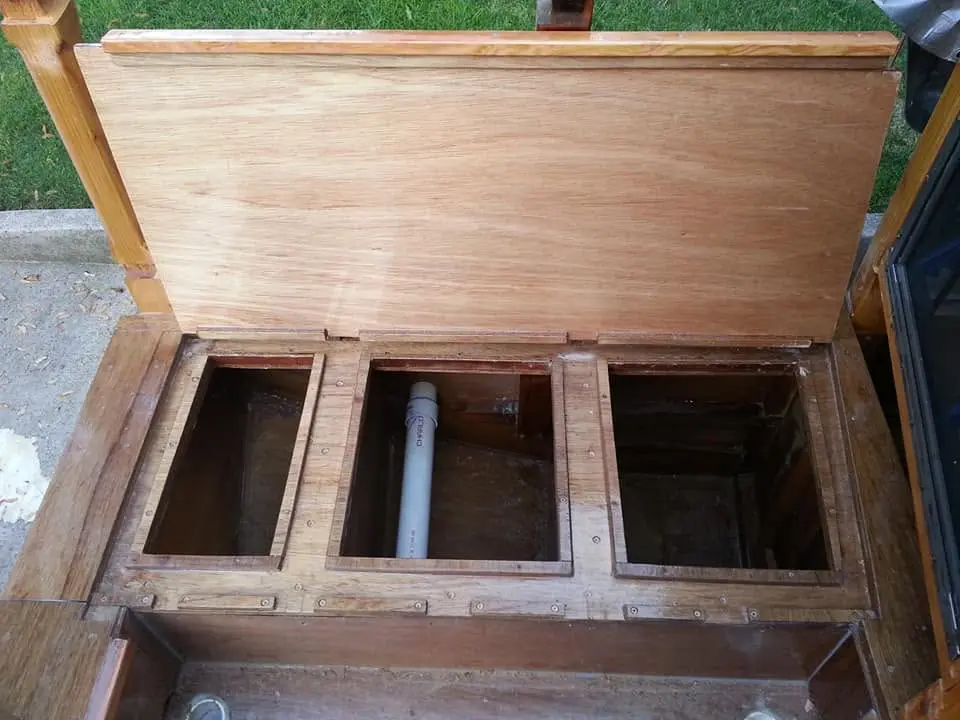
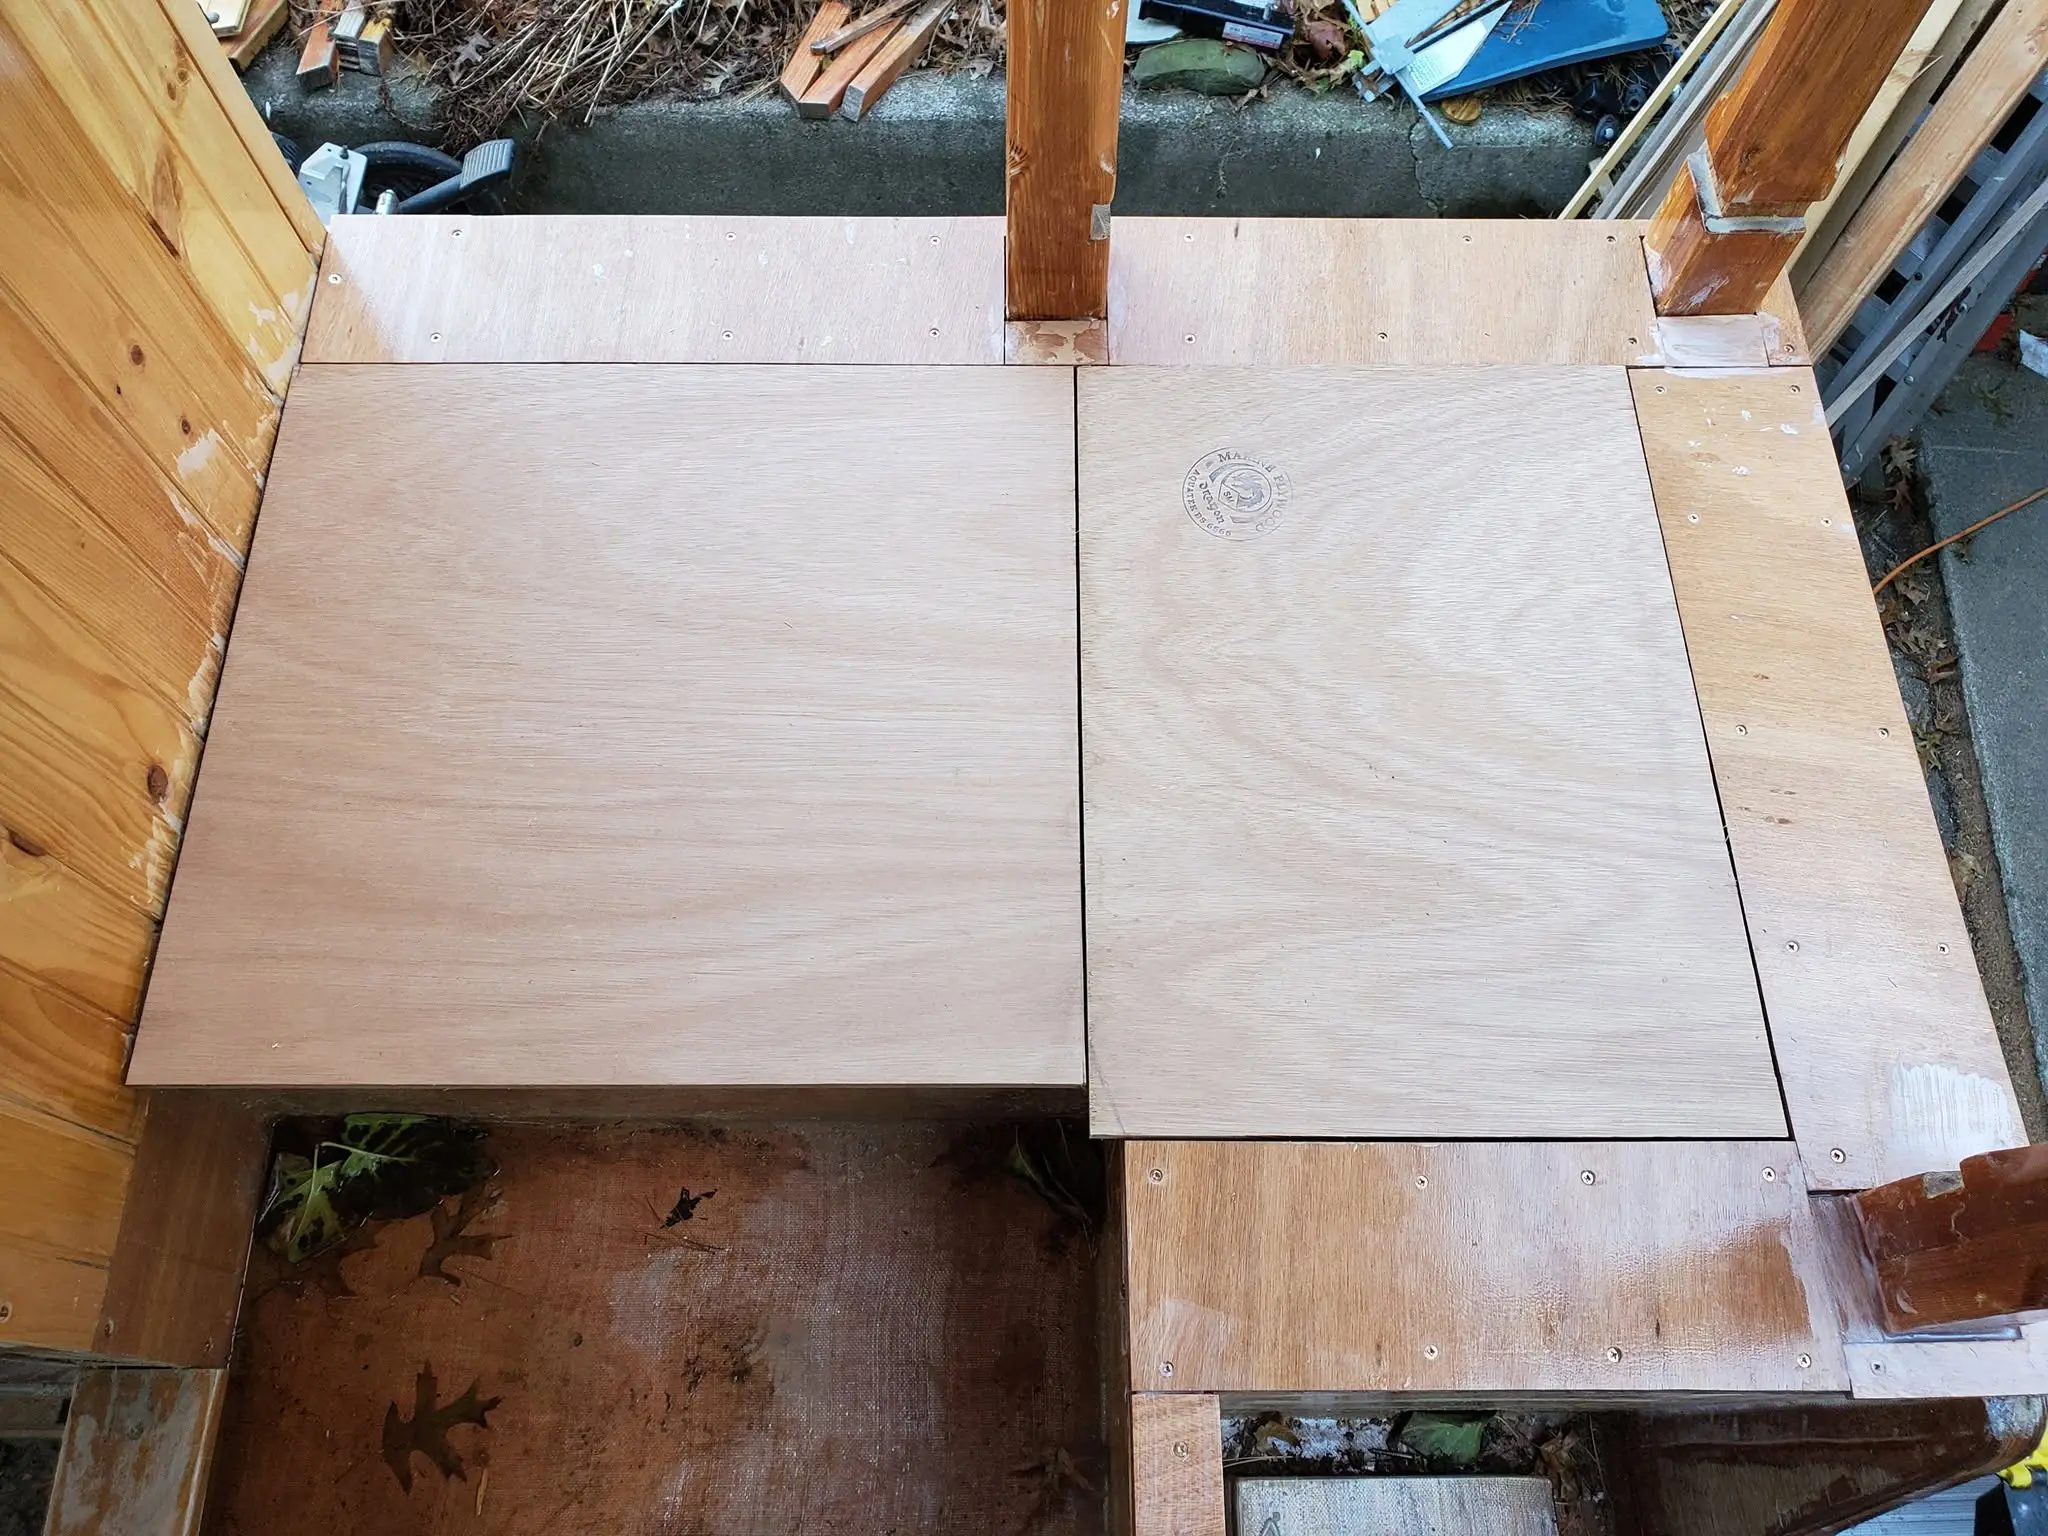
Houseboat update, Saturday, July 21, 2018 (Part 2) -- The framing for the aft deck is complete. When the deck is installed, it will be 47 inches wide by 27 inches long. The forward part of the aft deck will have a door to enter the cabin. The deck will be flanked by two seats, hinged for access to storage compartments below. One compartment will contain a tank for waste water and the other will be for fresh water. Drainage from the recessed deck will be a two-way system. The default will be passive, allowing rainwater to pass through a PVC pipe scupper into the motor well, then out the transom scupper. A secondary drain will divert waste water from a planned shower into a holding tank, so no contaminated water is discharged into public waterways.
26 Jul 2018Glassing & Epoxy
Jersey Girl's aft deck, sealed in fiberglass fabric and epoxy on both sides, is dry...
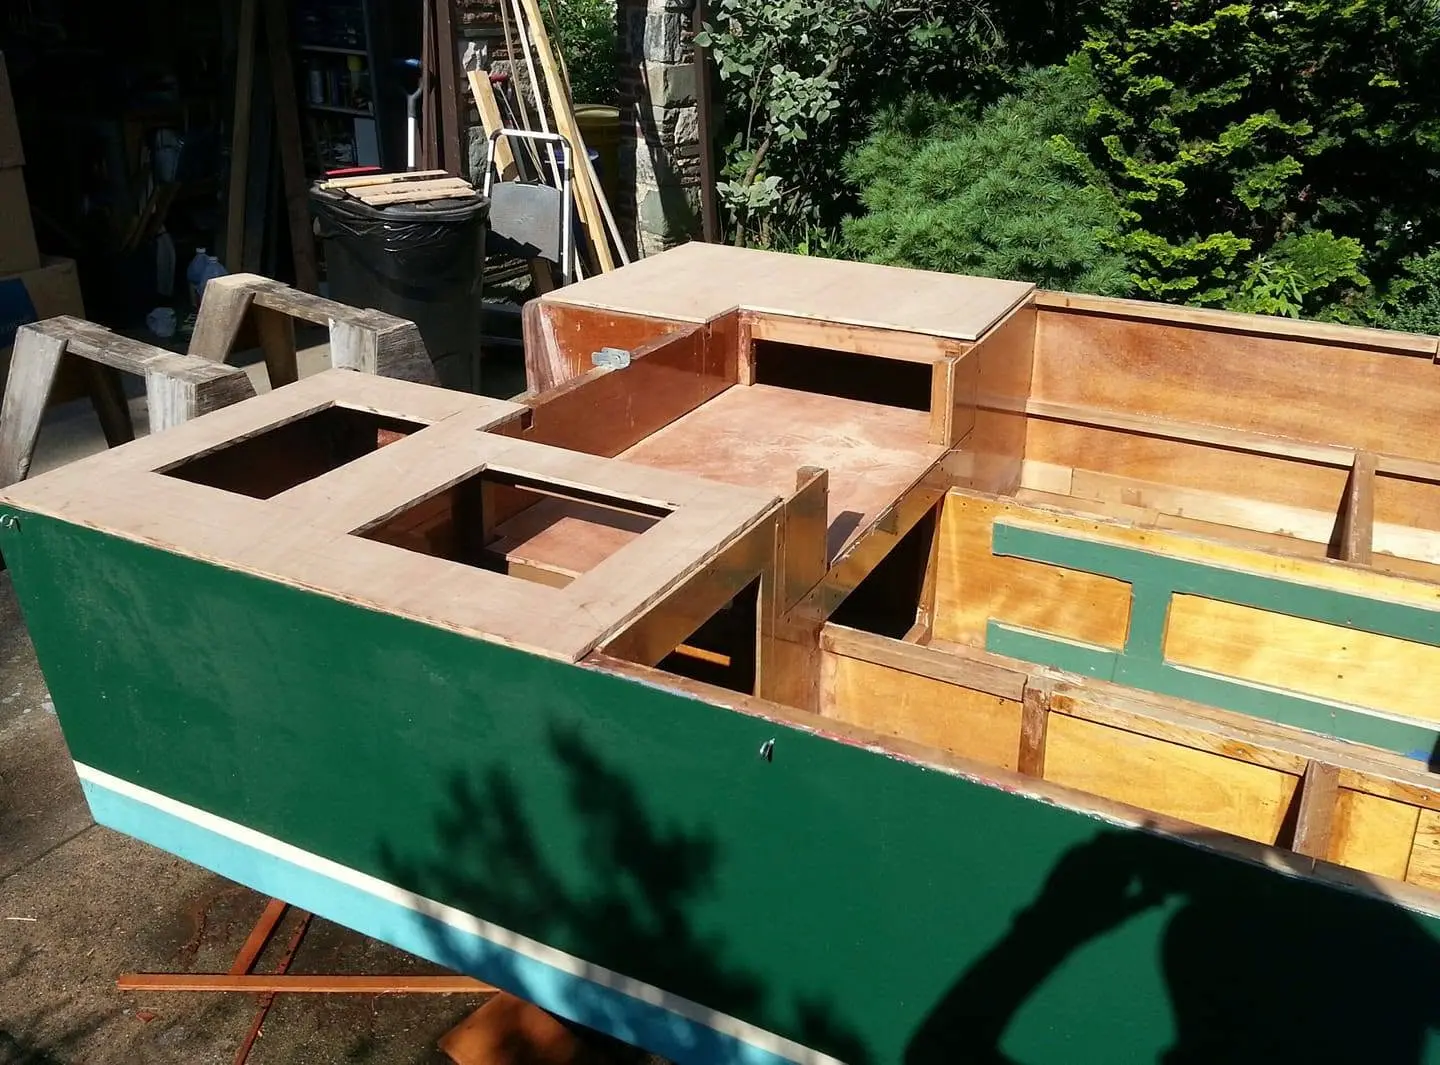
Houseboat update, Thursday July 26, 2018 -- Jersey Girl's aft deck, sealed in fiberglass fabric and epoxy on both sides, is dry fit in place. Before I can glue it and screw it permanently, I'll have to pay attention to all the bottom and bulkhead joints that will be difficult to reach once the deck is installed. I'll have to run a bead of thickened epoxy along each such joint and work it into a running cove-shaped "fillet," then cover each length treated that way with a strip of fiberglass tape set in epoxy. That will greatly strengthen the joints and contribute to the hull's resistance to undue flexing when Jersey Girl encounters choppy water. I'll try to get that done tomorrow, because after that I'm taking a week off to attend a plein air watercolor workshop in the picturesque harbor town of Belfast, Maine. Can't wait! (Maybe I'll post a few pix of some of the paintings, if they're halfway decent.)
9 Aug 2018Deck & Coamings
I'm back to work on Jersey Girl.
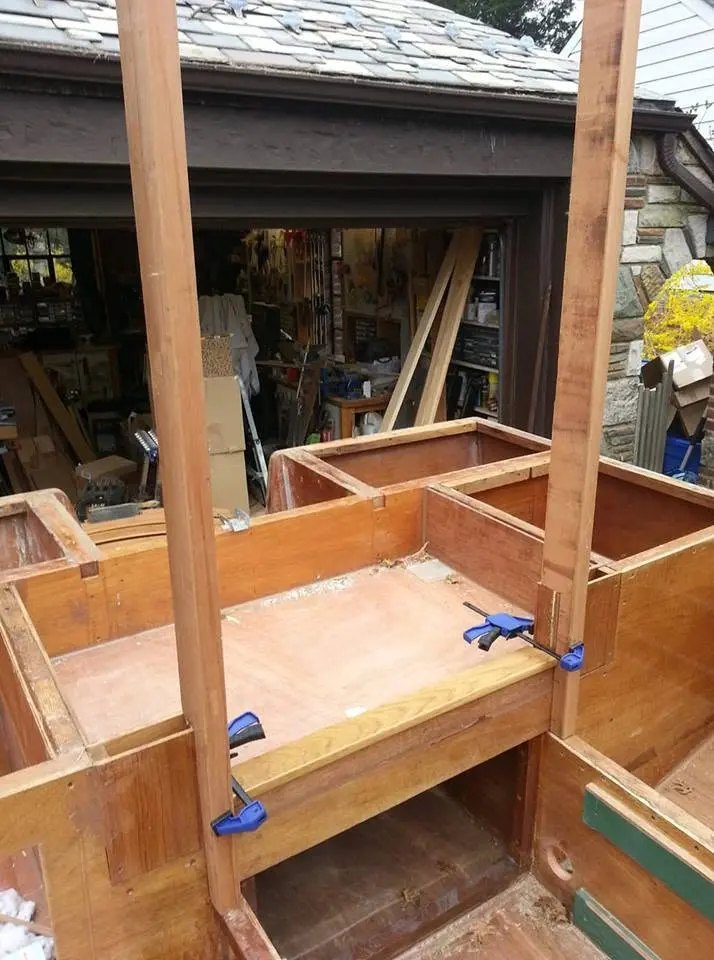
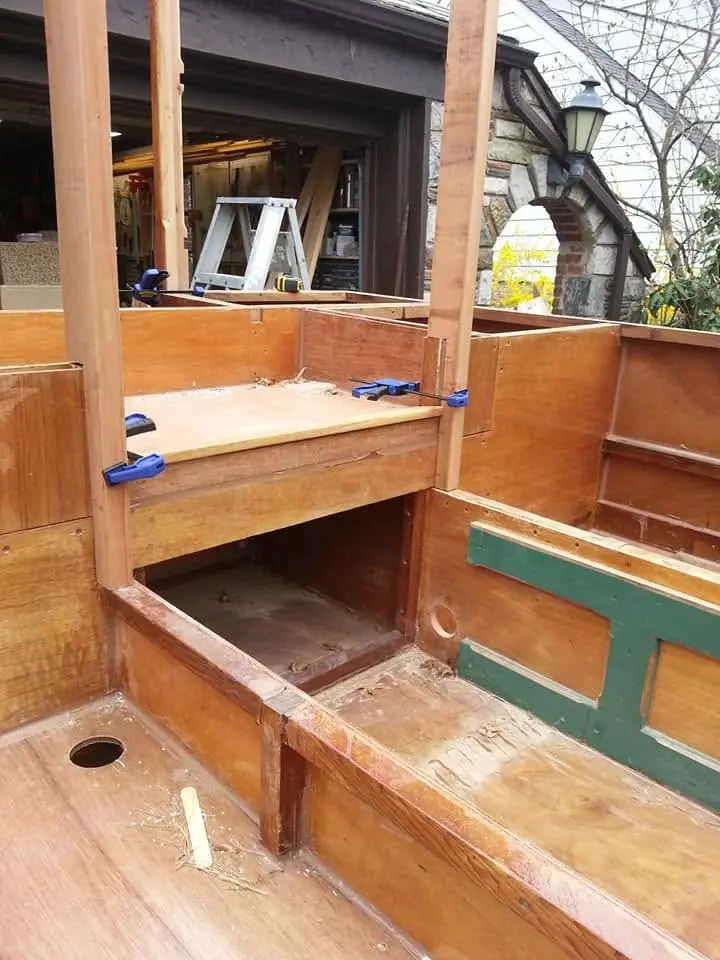
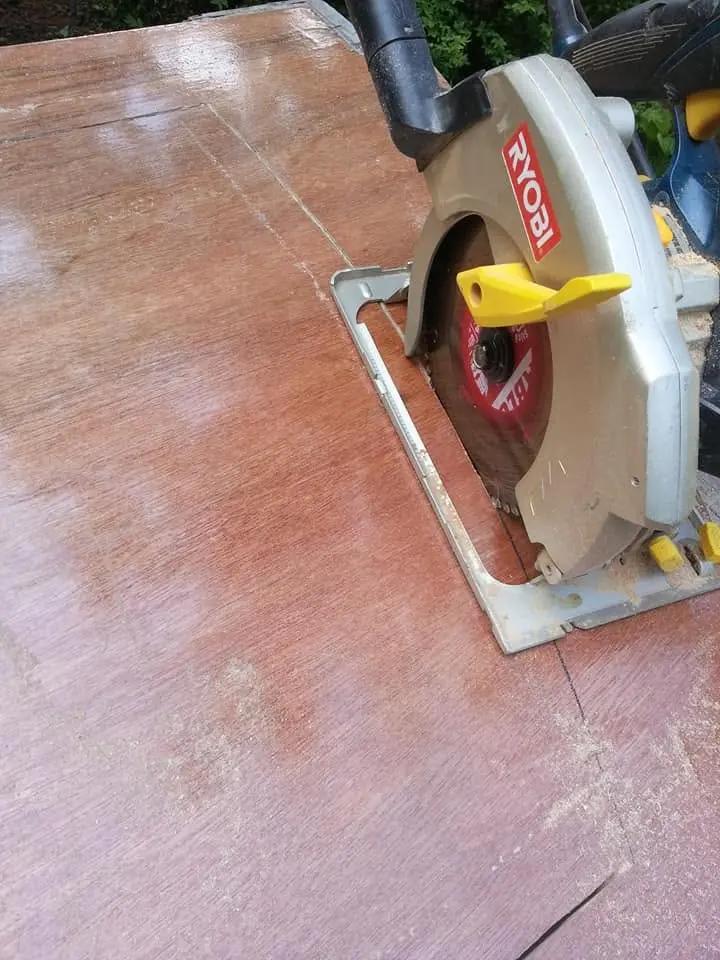
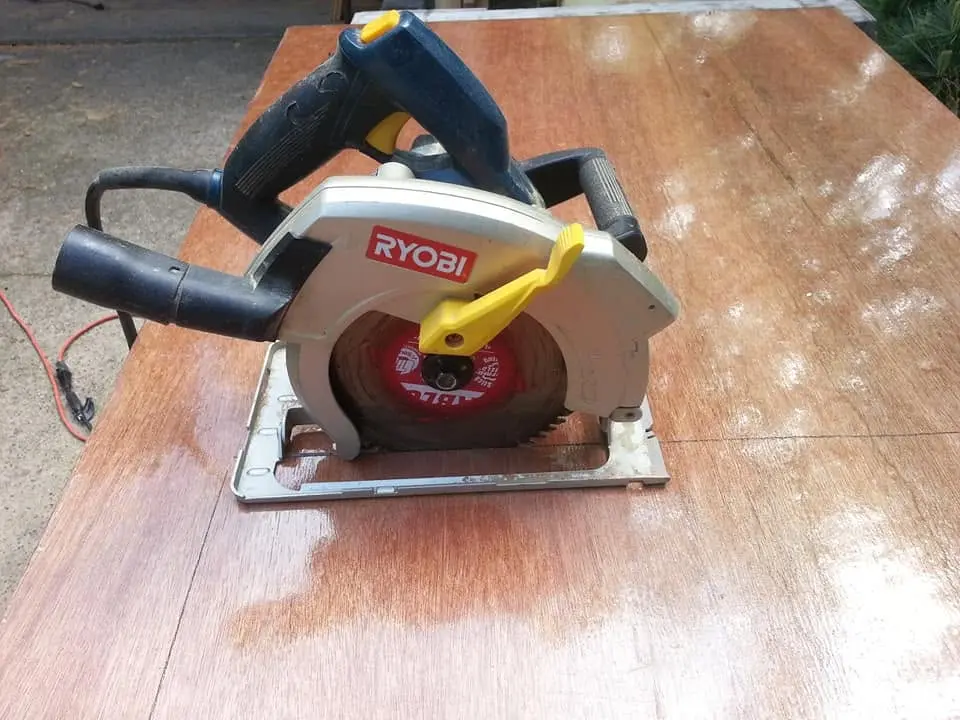
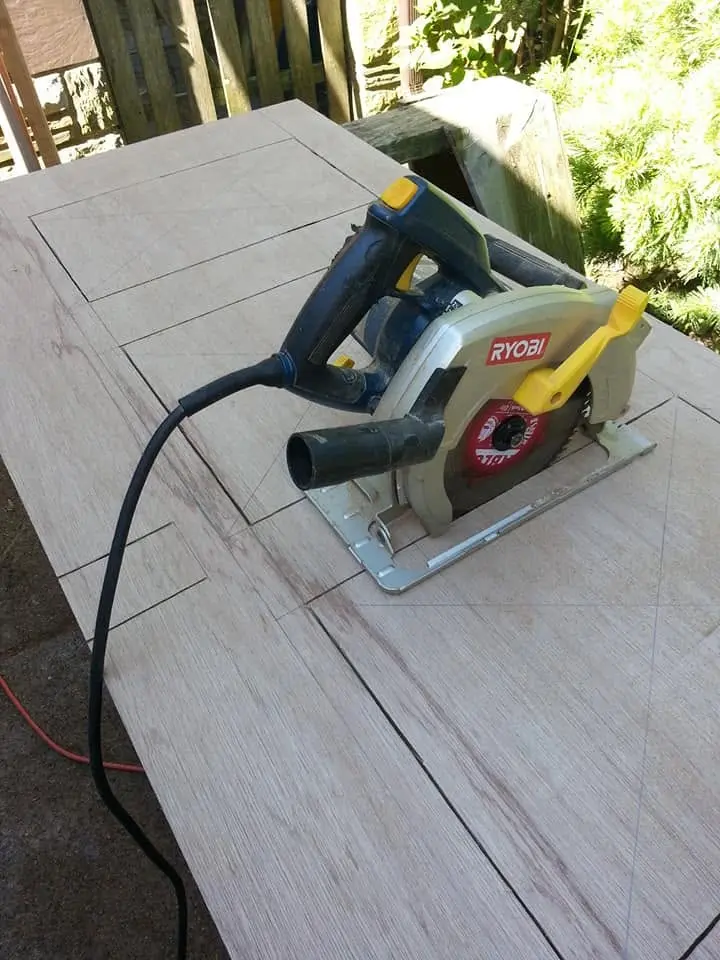
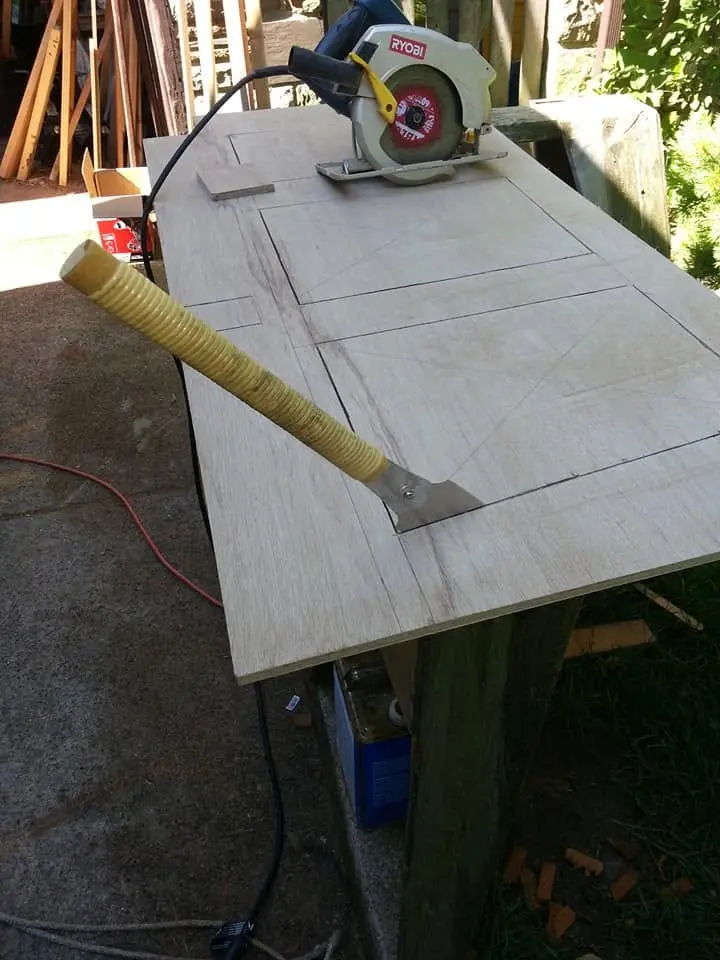
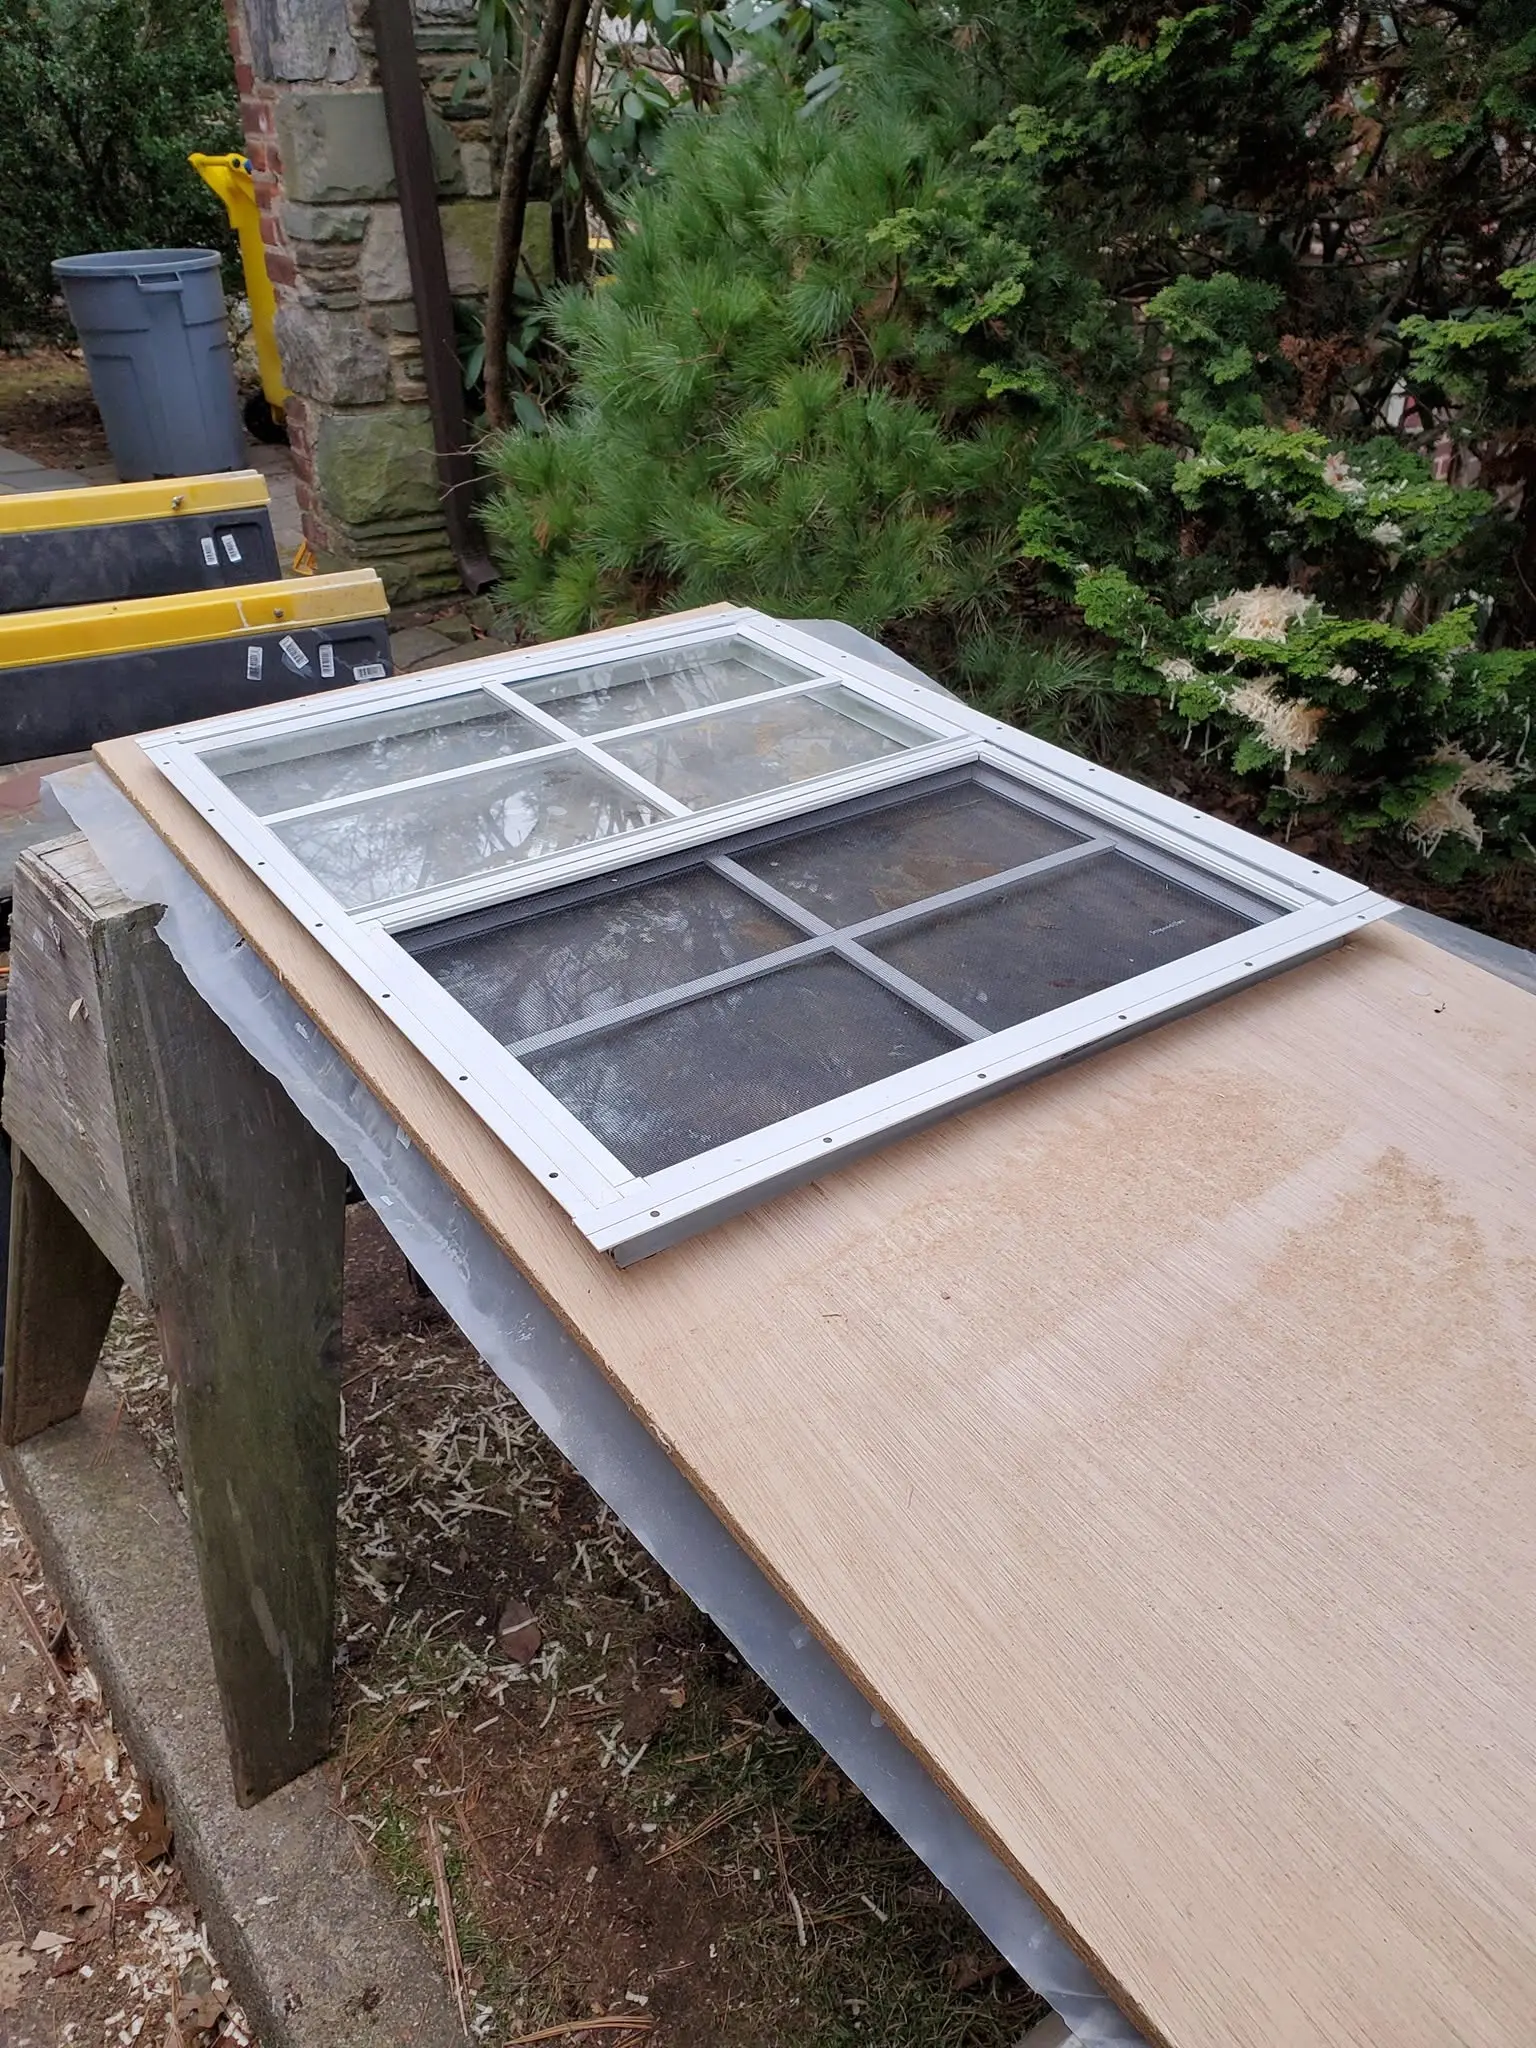
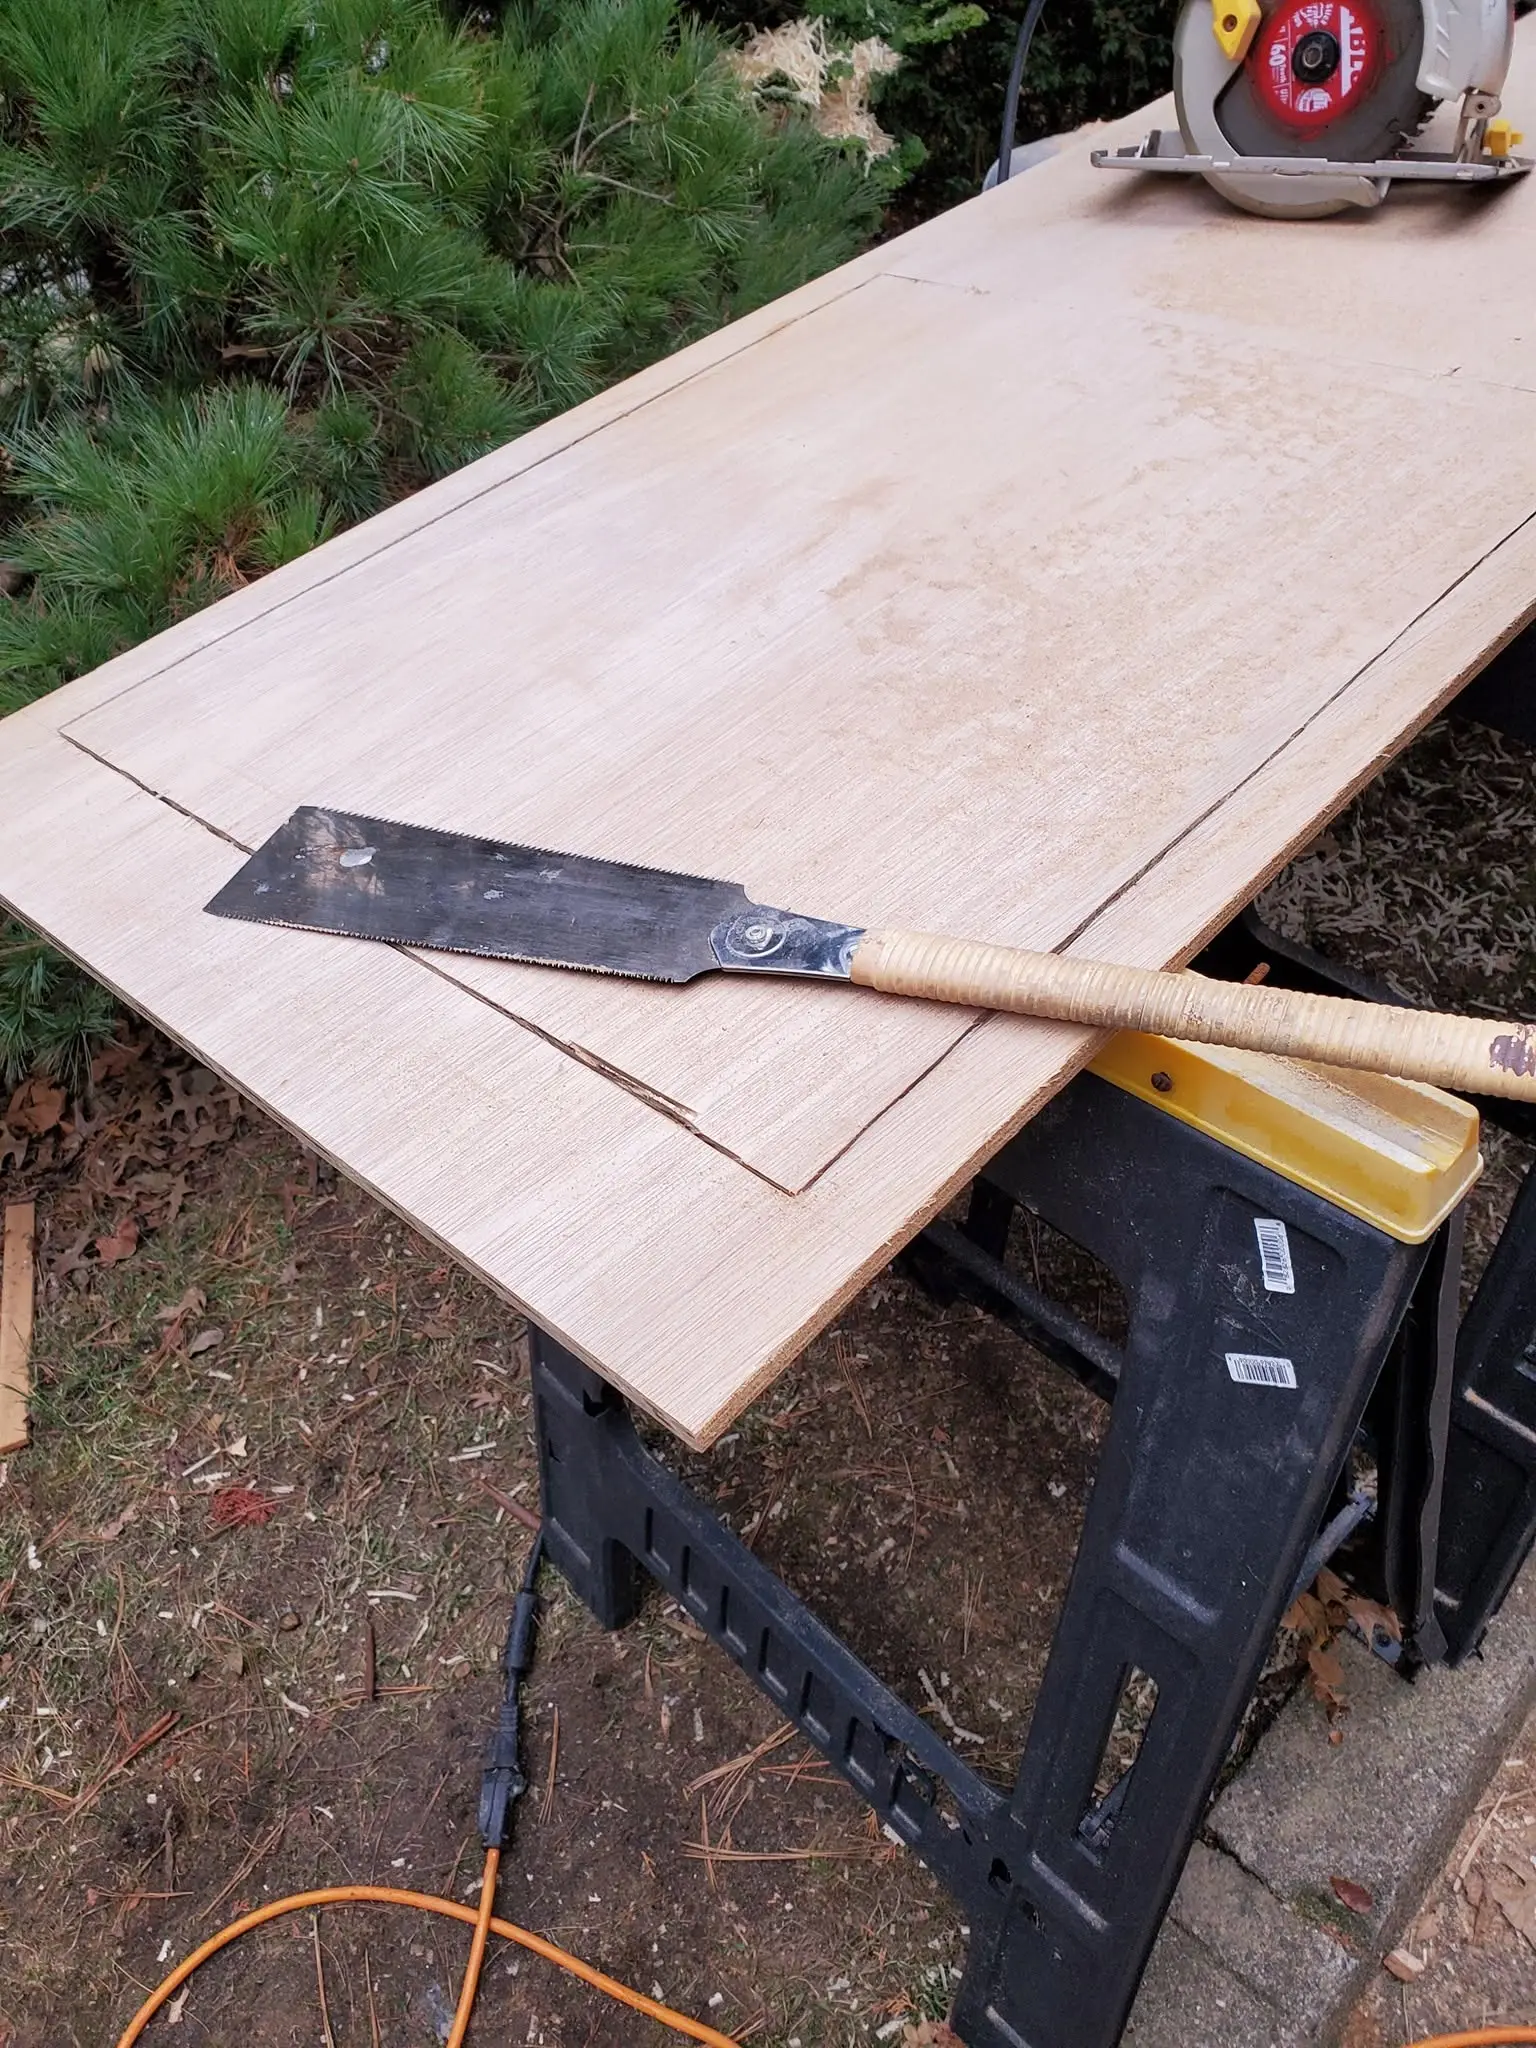
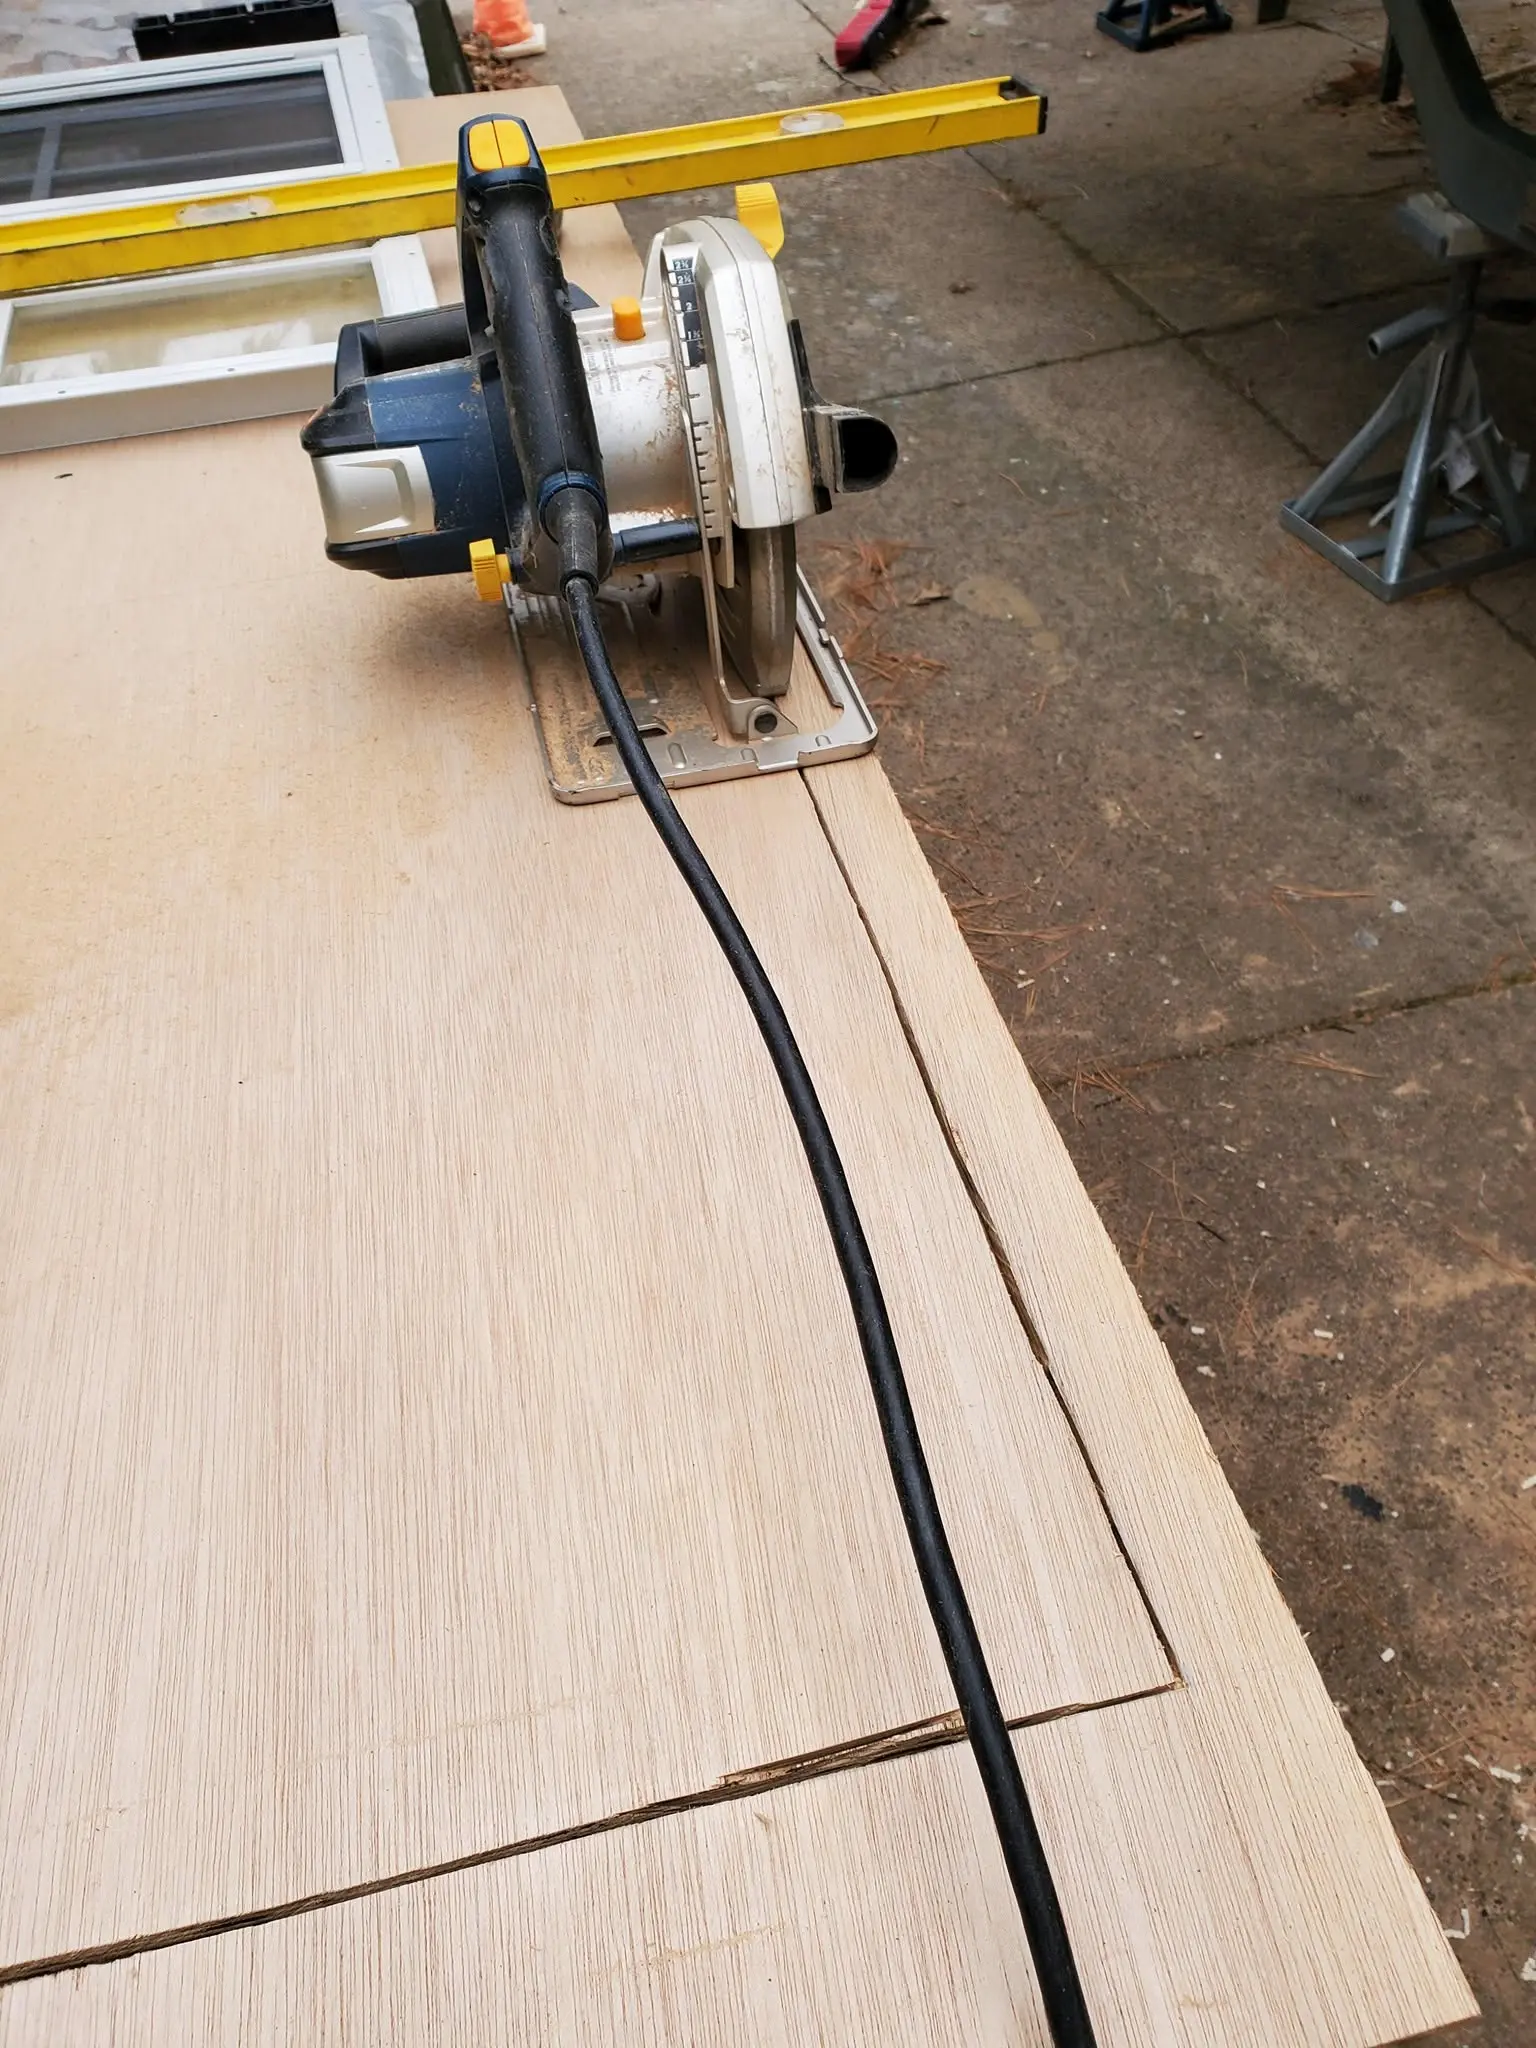
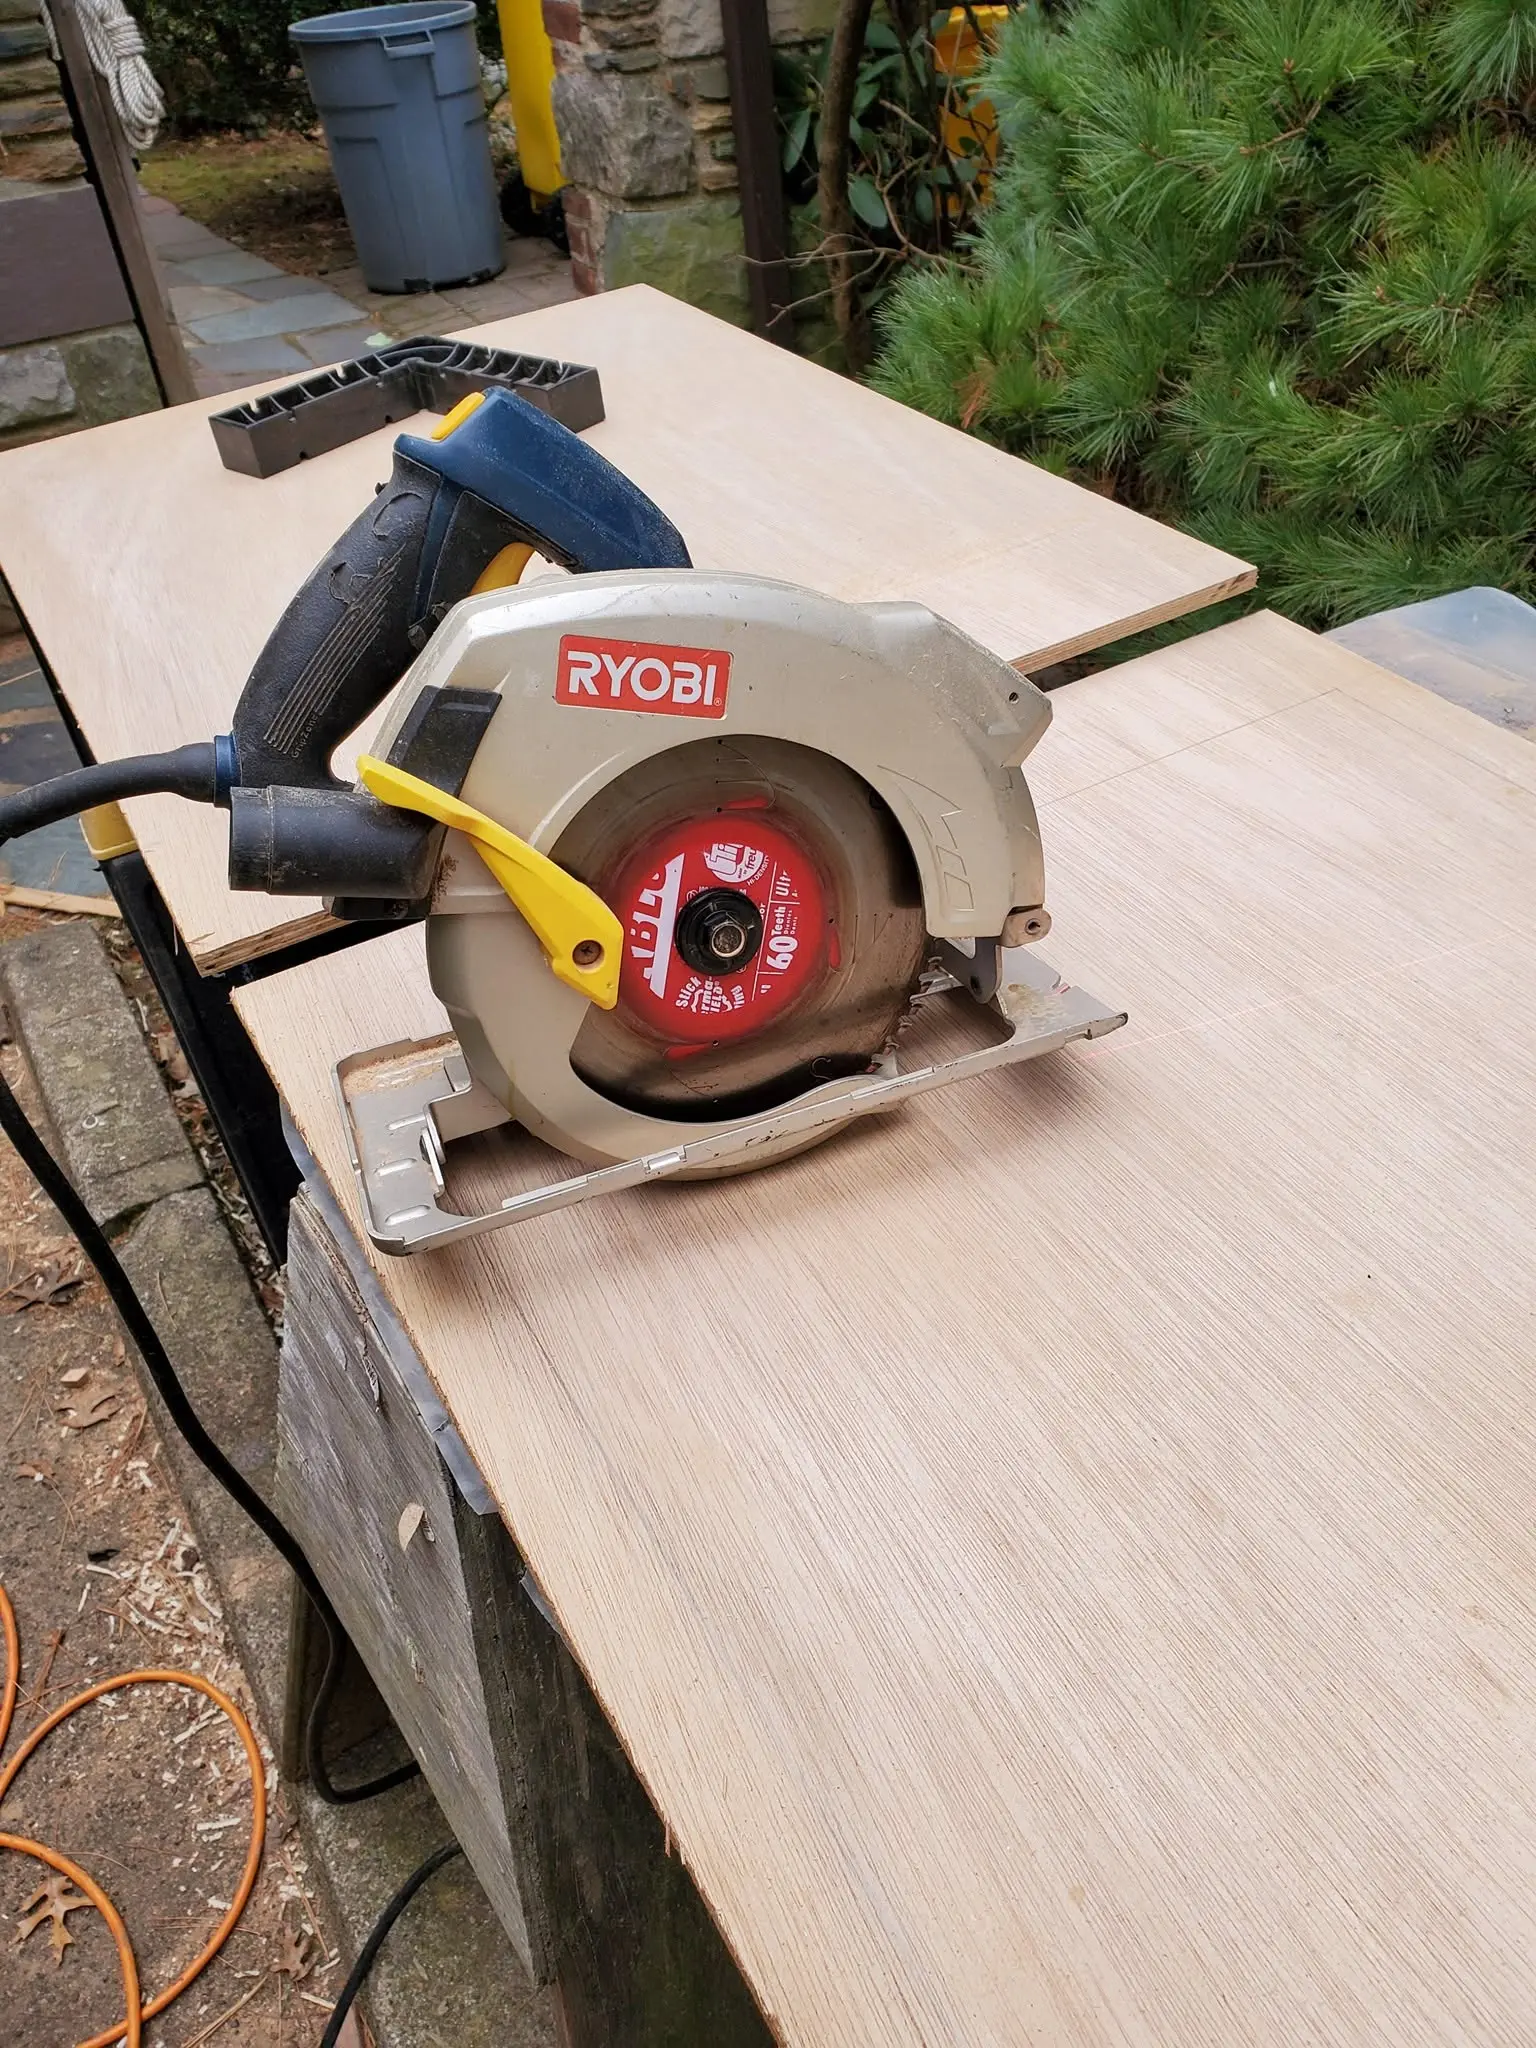
Houseboat update, Thursday, August 9, 2018 -- I'm back to work on Jersey Girl. Here you can see I have started construction on the aft deck seats and stowage areas. The hatches that I have plunge-cut with a circular saw allow access to below-decks, where I will keep water and fuel tanks. I will cut similar openings in the deck on the port side. The openings will be surrounded by wooden dams to divert water away from the openings, and the decks will be covered by hinged seats that will also serve as hatch covers. When these panels are fiberglassed and glued and screwed into place, they will help to provide considerable stiffness to the hull.
11 Aug 2018Glassing & Epoxy
It's getting to the time when Jersey Girl starts growing up, and I need to start by...
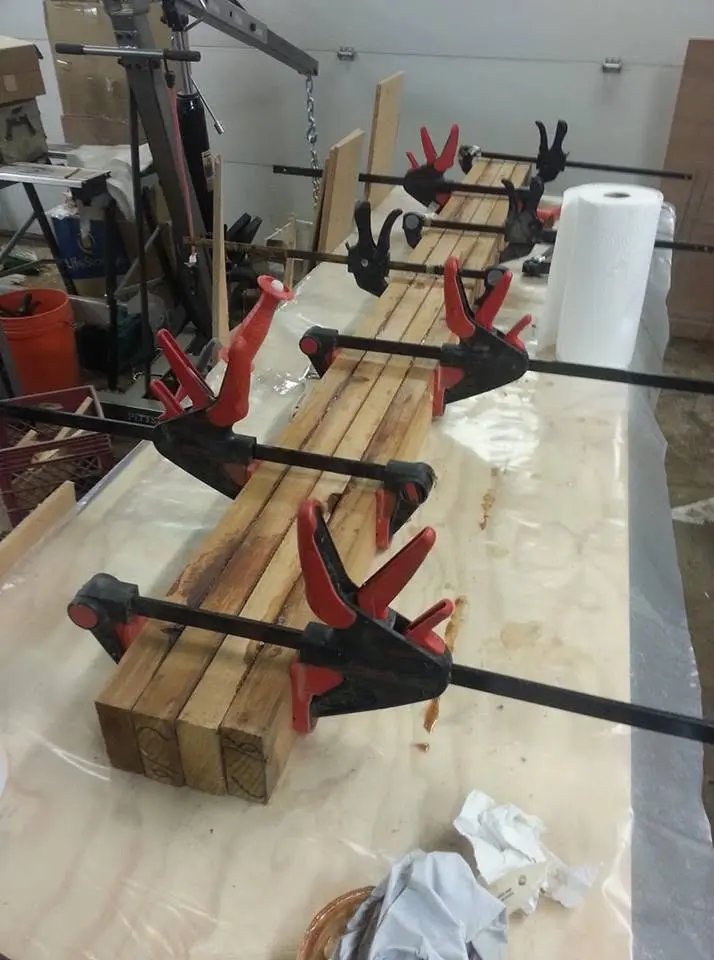
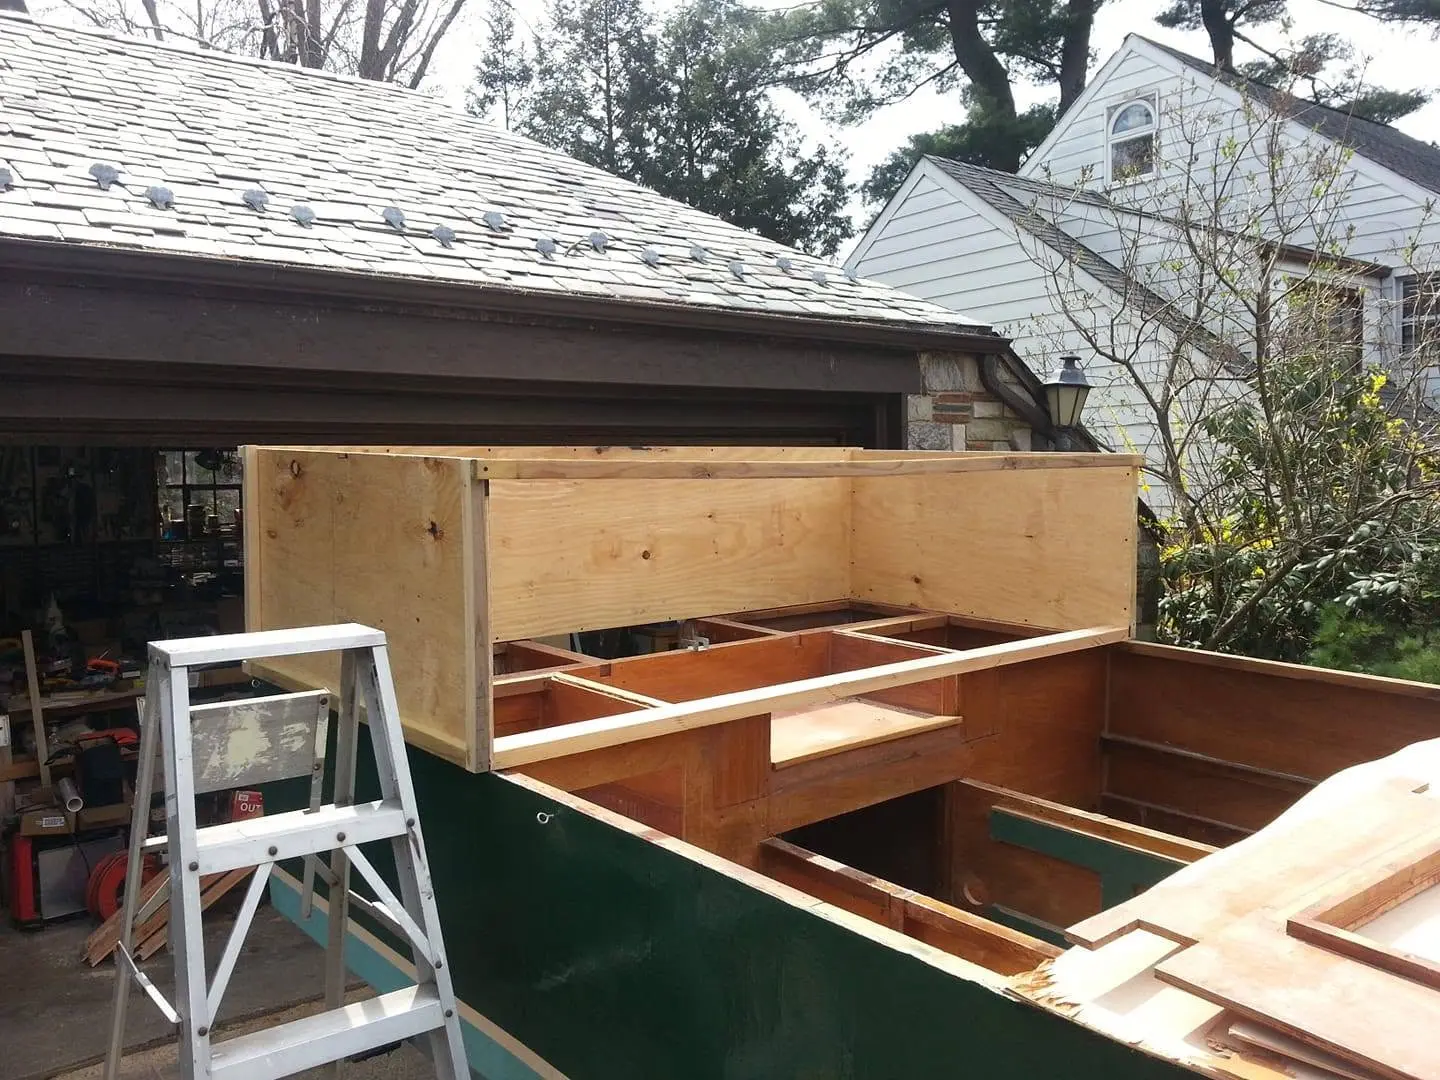
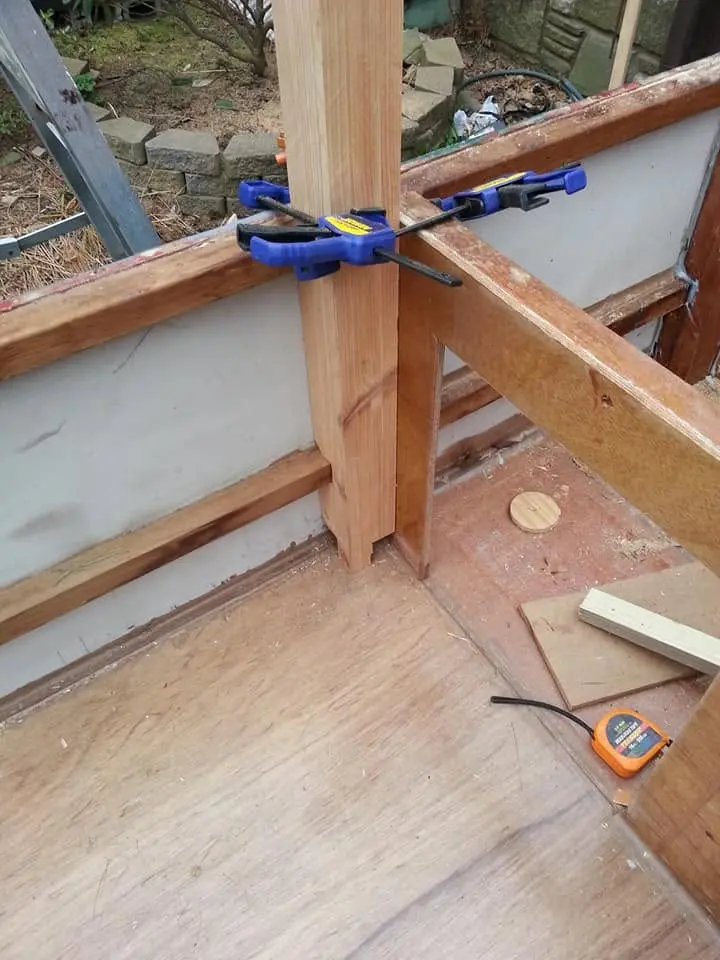
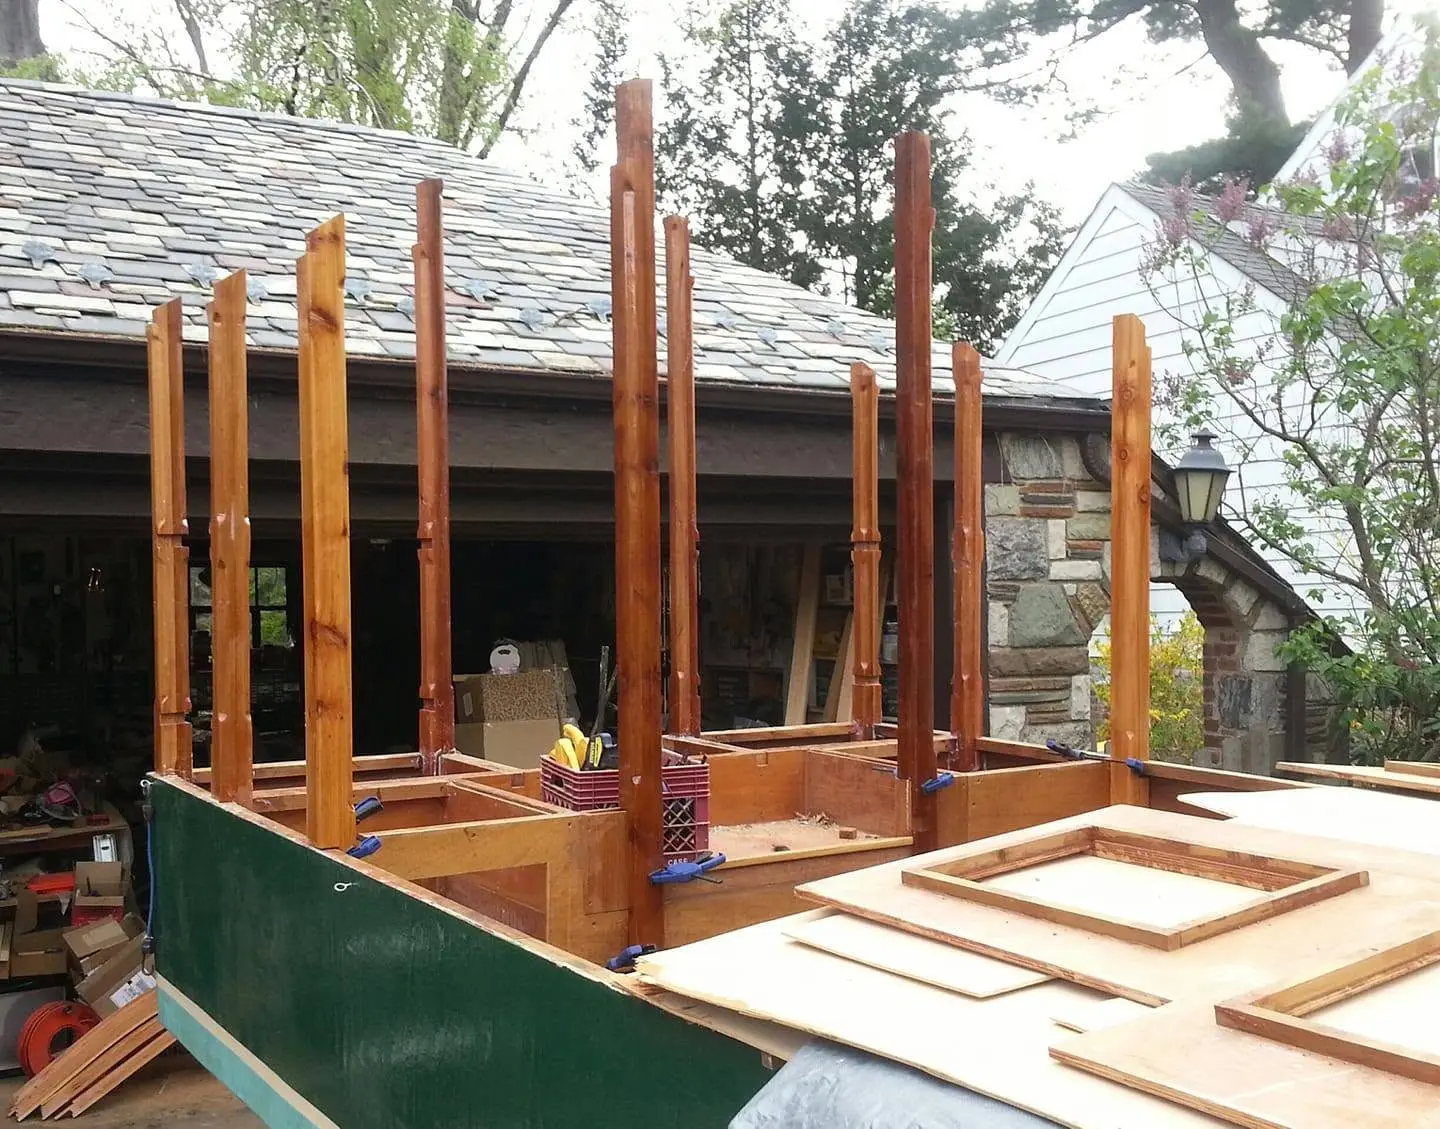
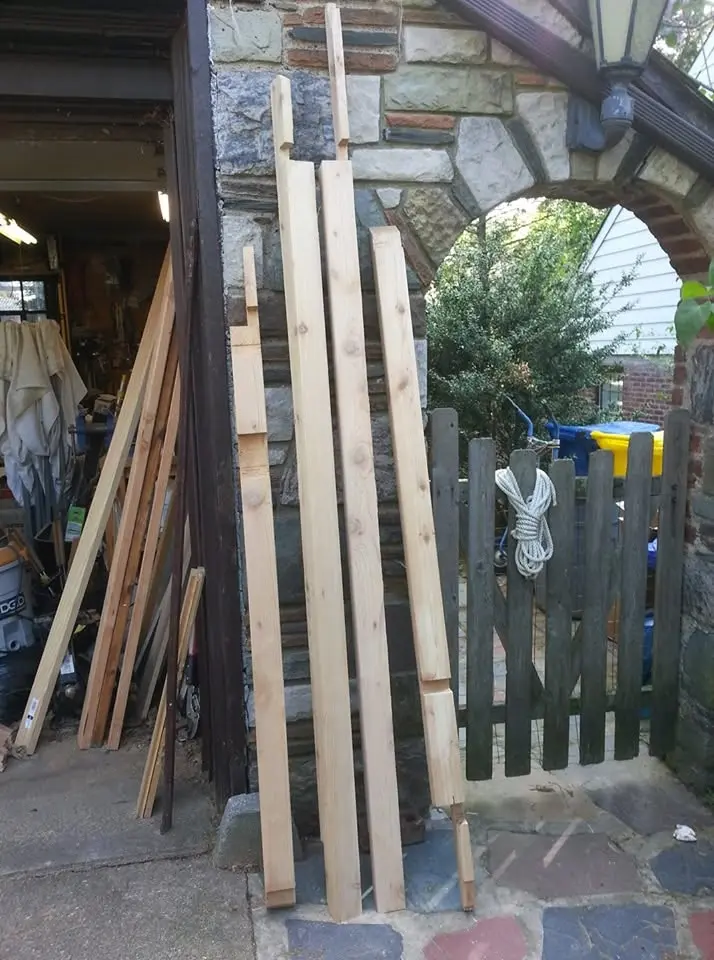
Houseboat update, Saturday, August 11, 2018 -- It's getting to the time when Jersey Girl starts growing up, and I need to start by defining her superstructure with eight clear red cedar vertical posts that will support the roof over her aft deck and serve as the jambs for the door from there into the cabin -- or, as I like to think of it, the salon. I have not been able to find a local source for clear eight-foot 3 x 3 cedar posts that I need. ("Clear," in woodish, means almost completely free of knots, straight-grained and having no twist or warp.) I could order them, but they'd take weeks to arrive and they'd be horribly expensive. But 2 x 4's are available and relatively reasonably priced, so I'm gluing them up in pairs, two at a time. I've done this before, with Sitka spruce, for a mast on a sailing dinghy I built 27 years ago, and it worked very well. If this works as well, I will be happy. I just hope the relatively "thirsty" grain of the cedar does not absorb the epoxy so quickly that it siphons the adhesive away from the joint. I won't know until tomorrow, when the epoxy is cured and I release the clamps. Then, I will have to trim the assembly from its present dimension to the 3 x 3's that I need. (Did you know that the actual dimension of a single finished 2 x 4 is 1 1/2 x 3 1/2 inches -- meaning that my glued posts will be 3 x 3 1/2 before I trim them?)
30 Aug 2018Deck & Coamings
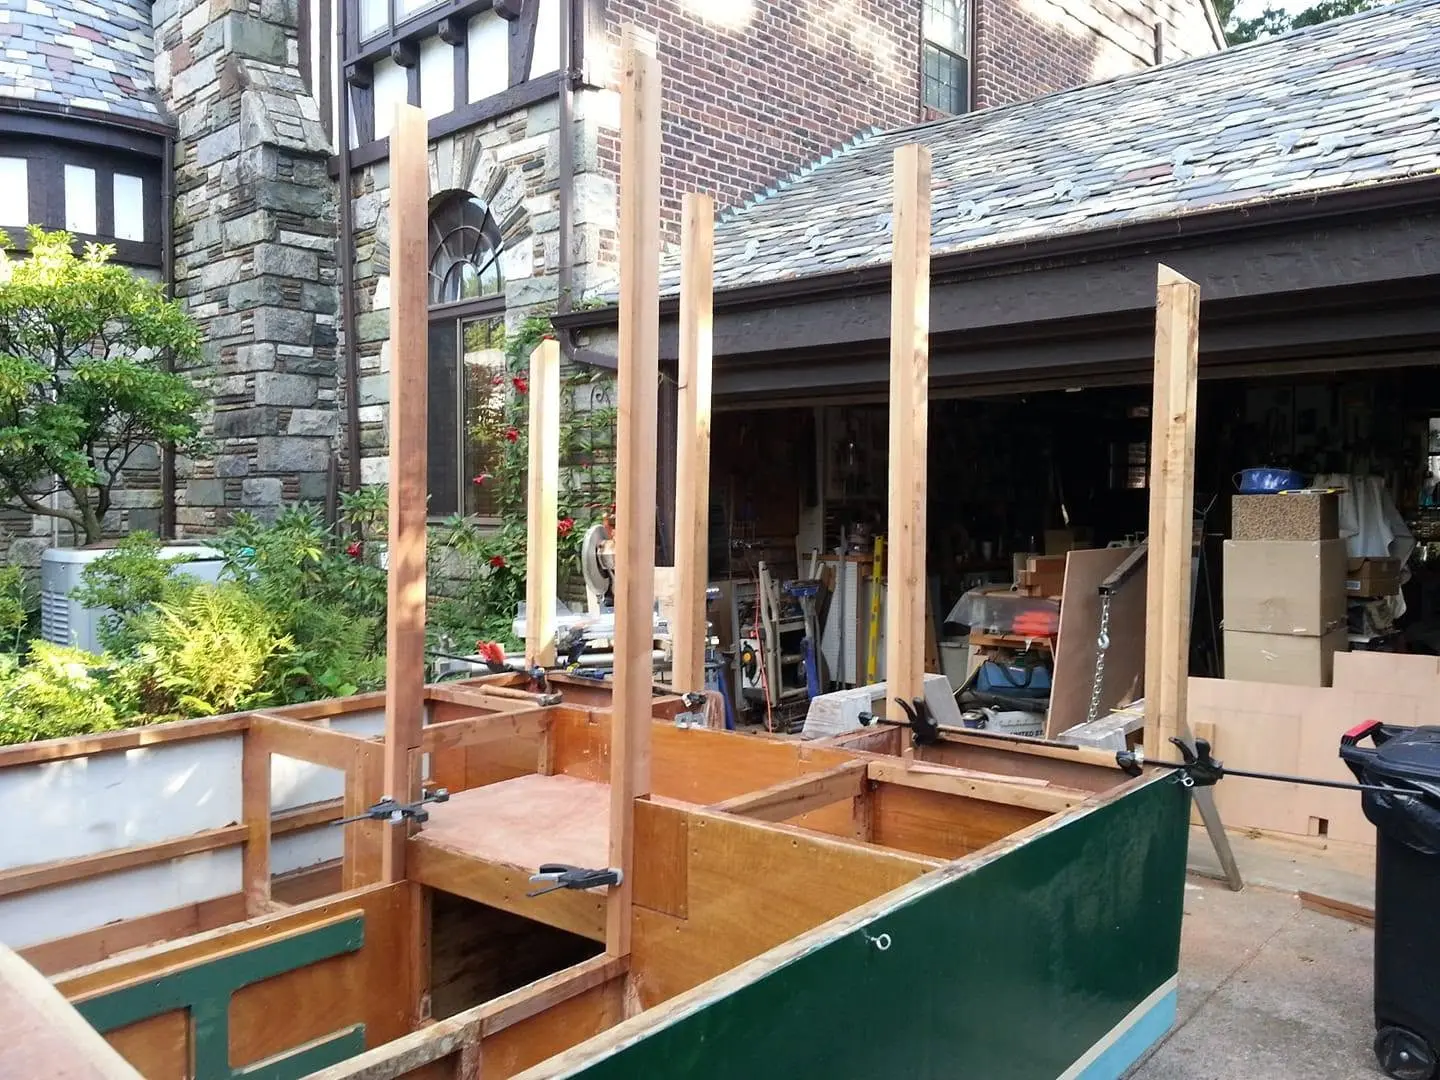
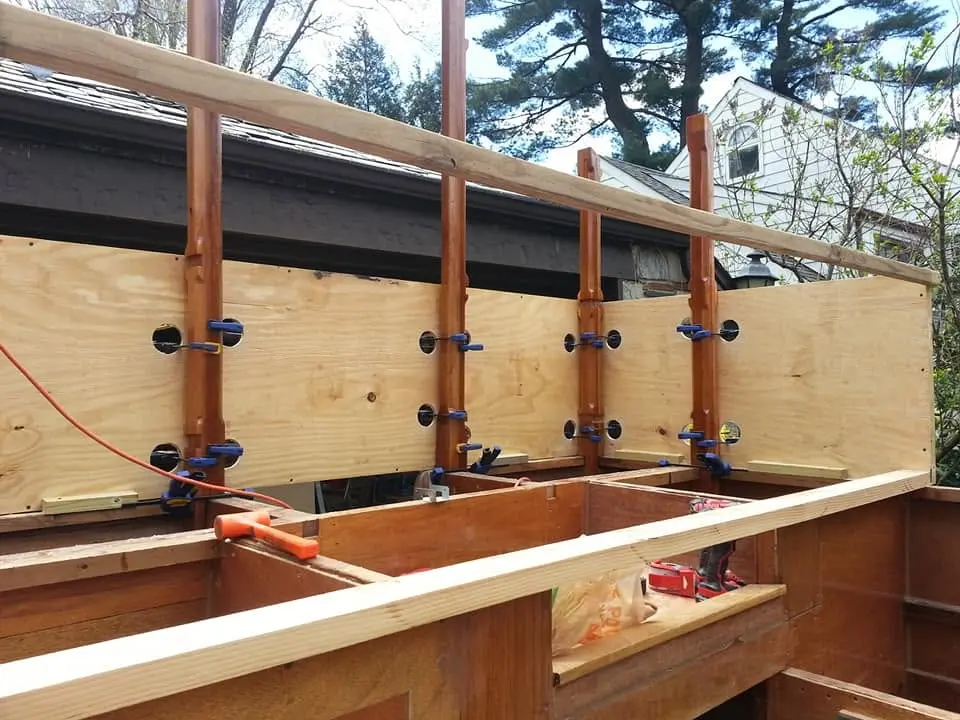
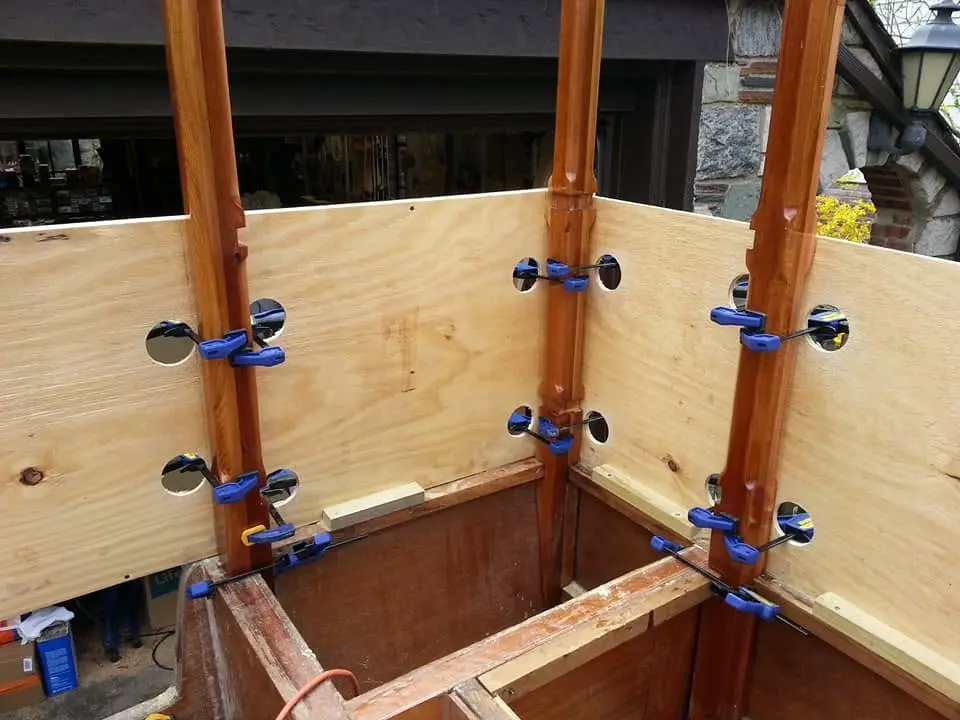
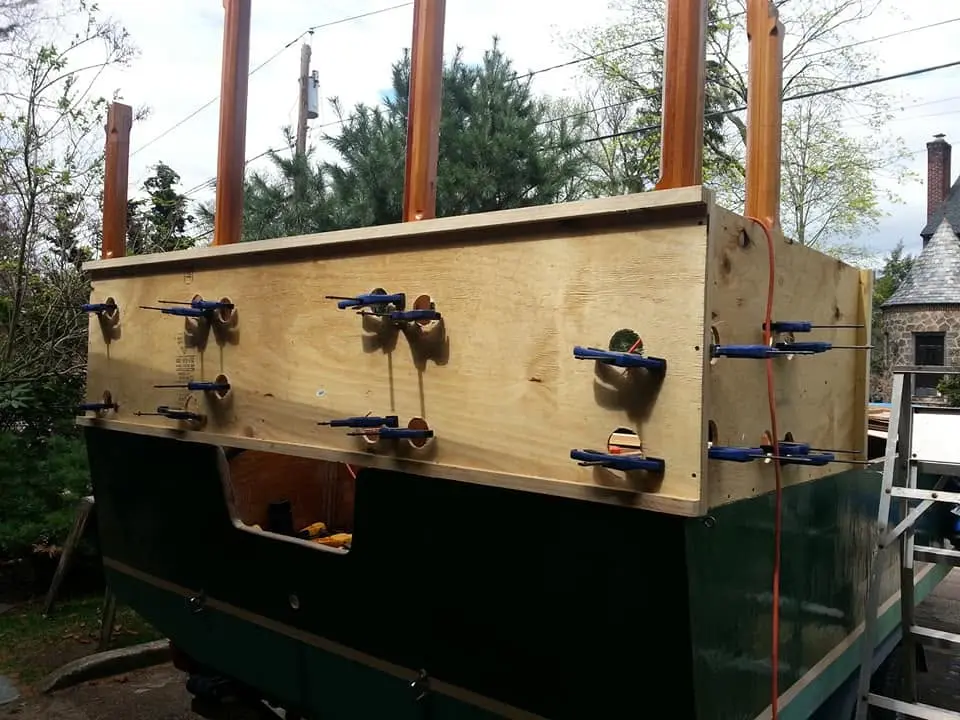
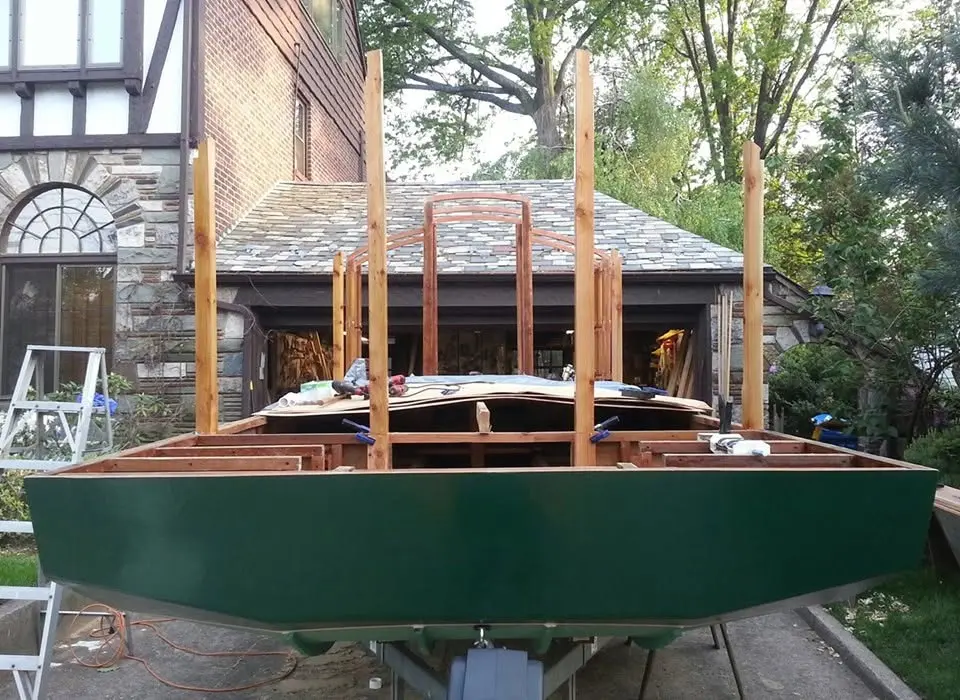
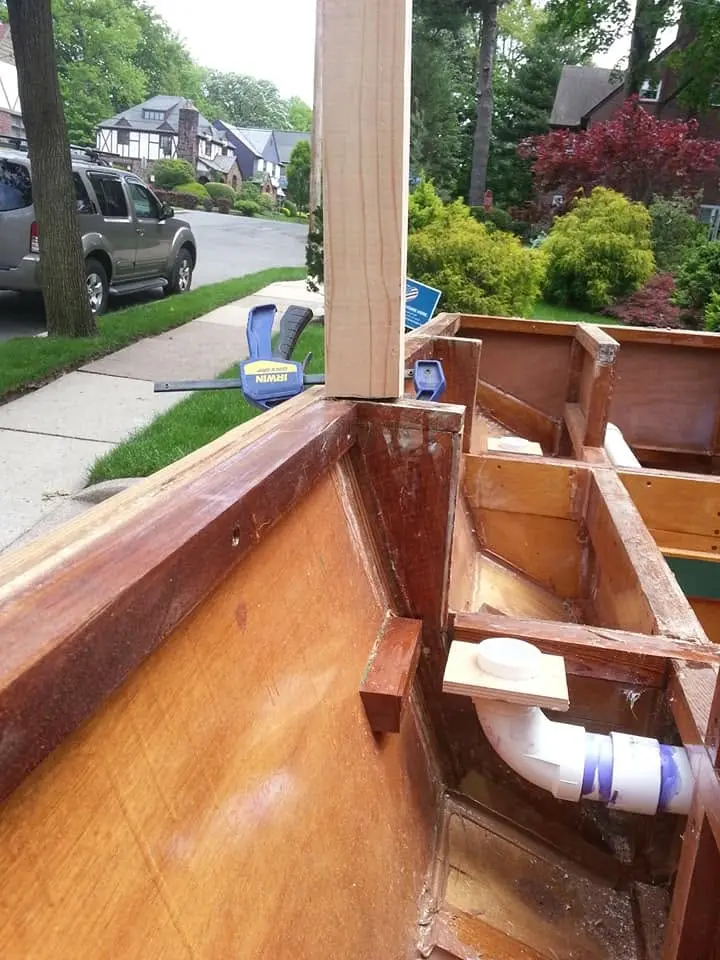
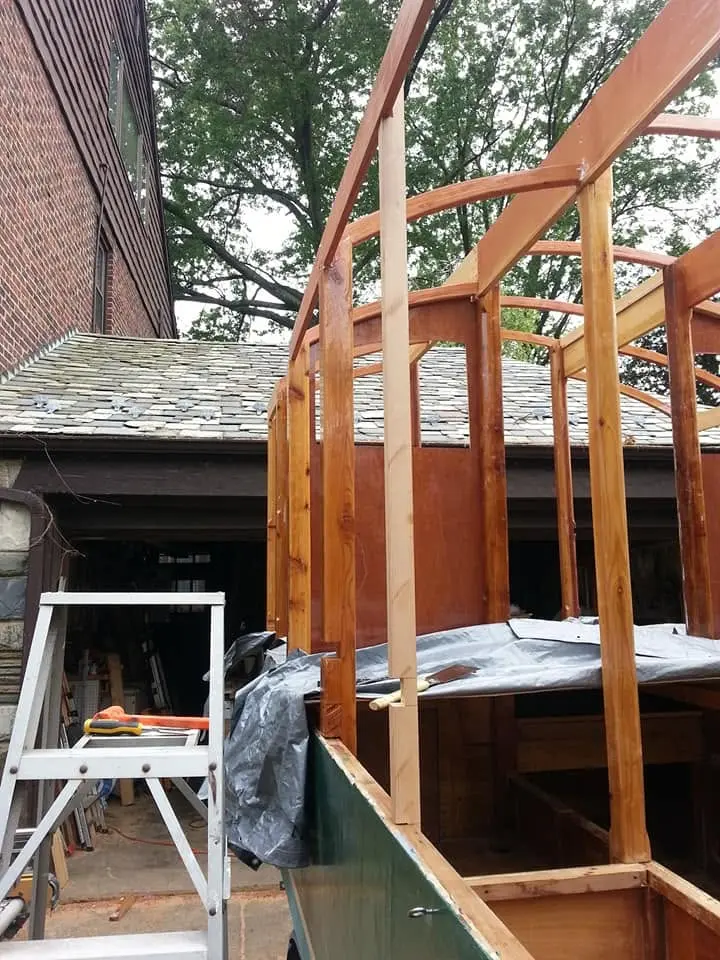
I am dry-fitting the support posts for Jersey Girl's aft deck roof.
Houseboat update, Thursday, August 30, 2018 -- I am dry-fitting the support posts for Jersey Girl's aft deck roof. It was quite complicated to cut the below-deck portions of these posts to accommodate for framing, and it will require some bit of nipping and tucking before everything is shipshape. Ultimately, these posts will be chamfered along the corners, to make them lighter in both appearance and weight.
1 Sep 2018Deck & Coamings
When I said I had to do a little nipping and tucking to make the aft deck roof posts...
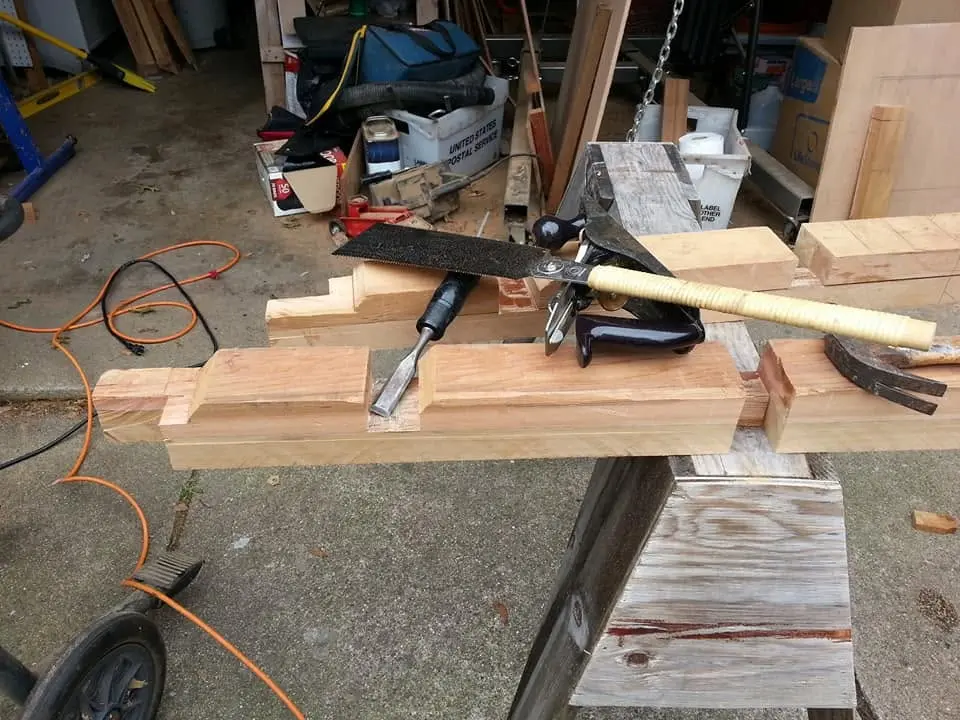
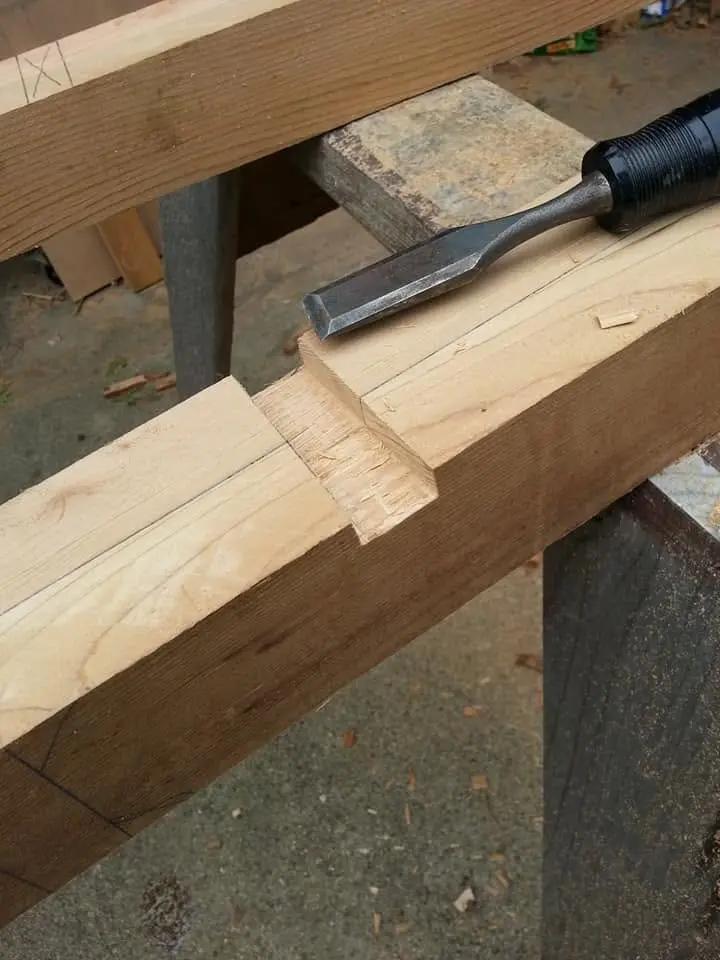
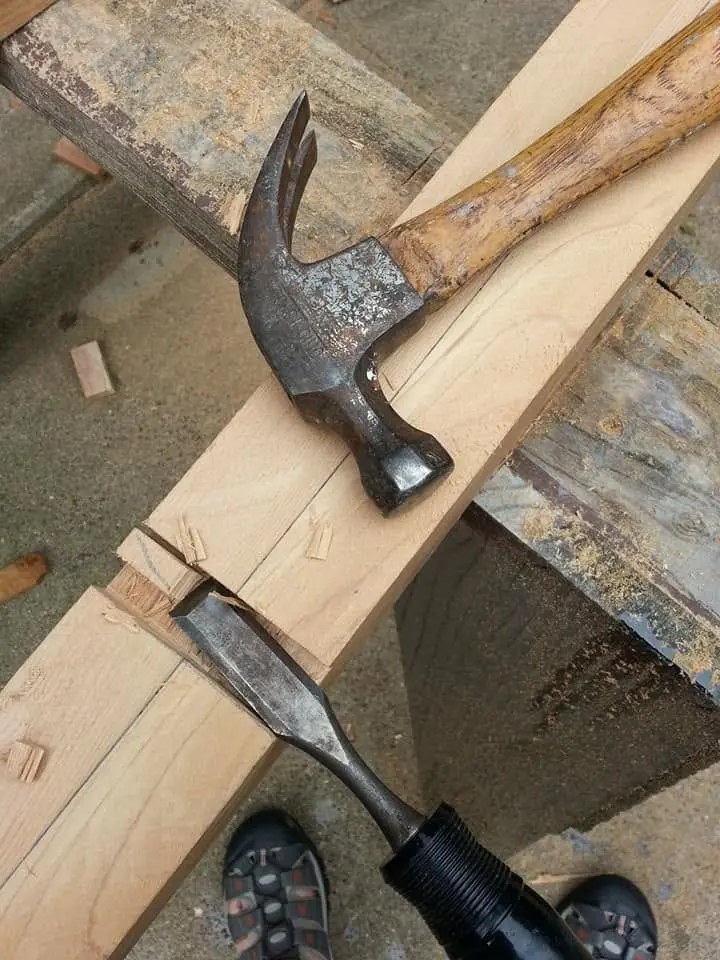
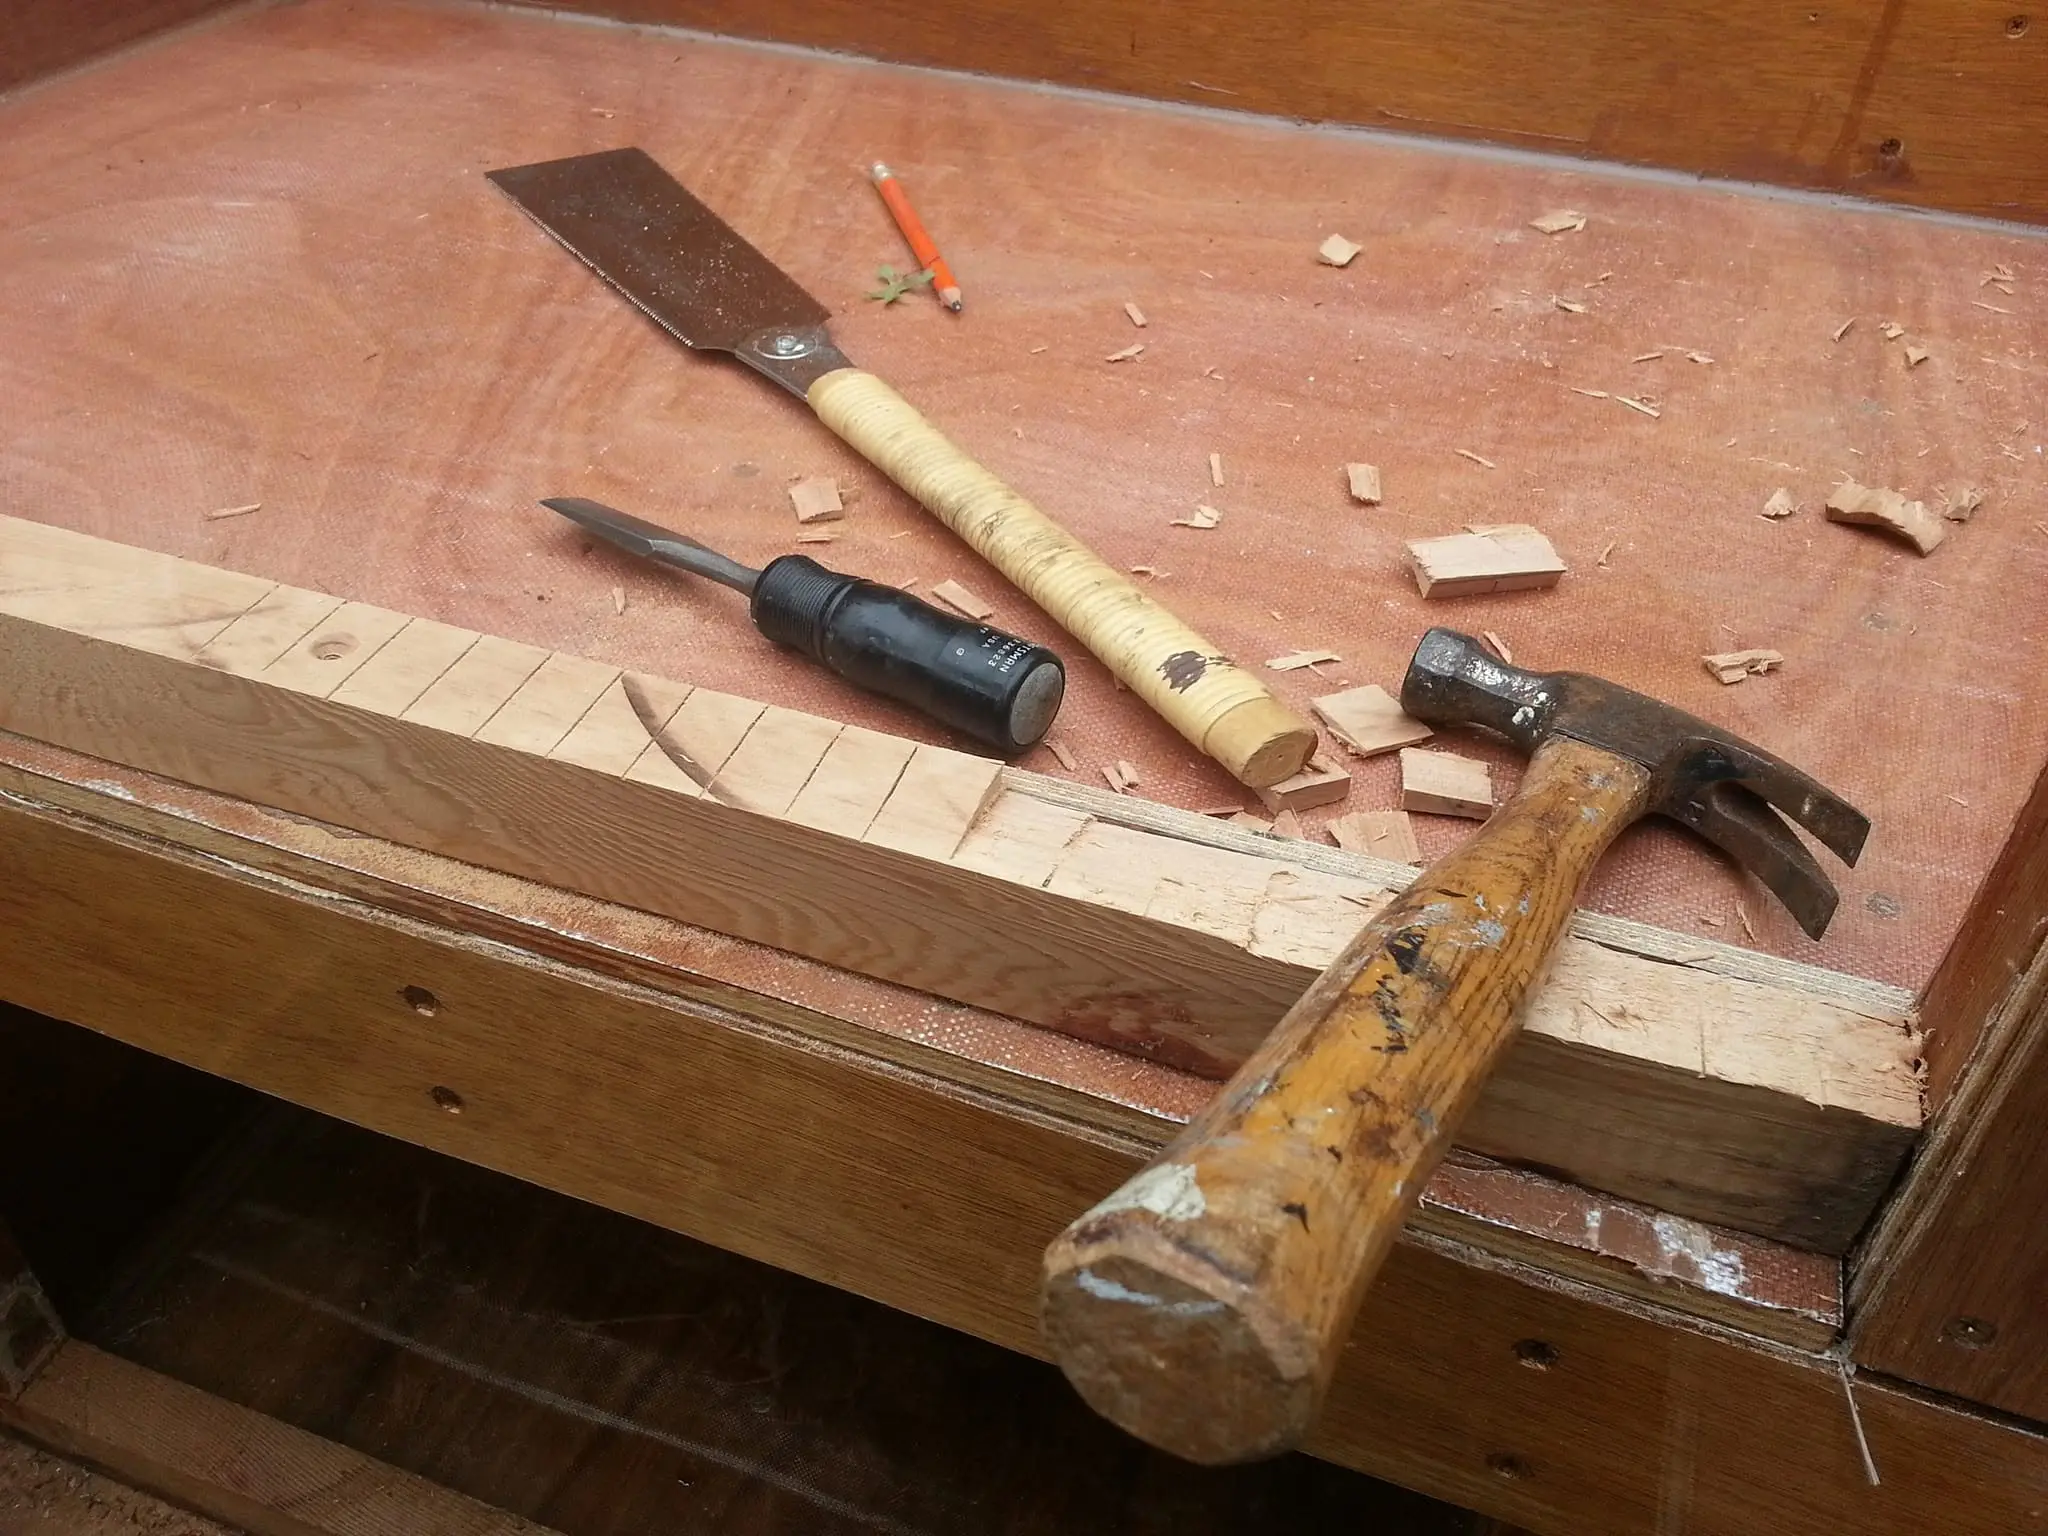
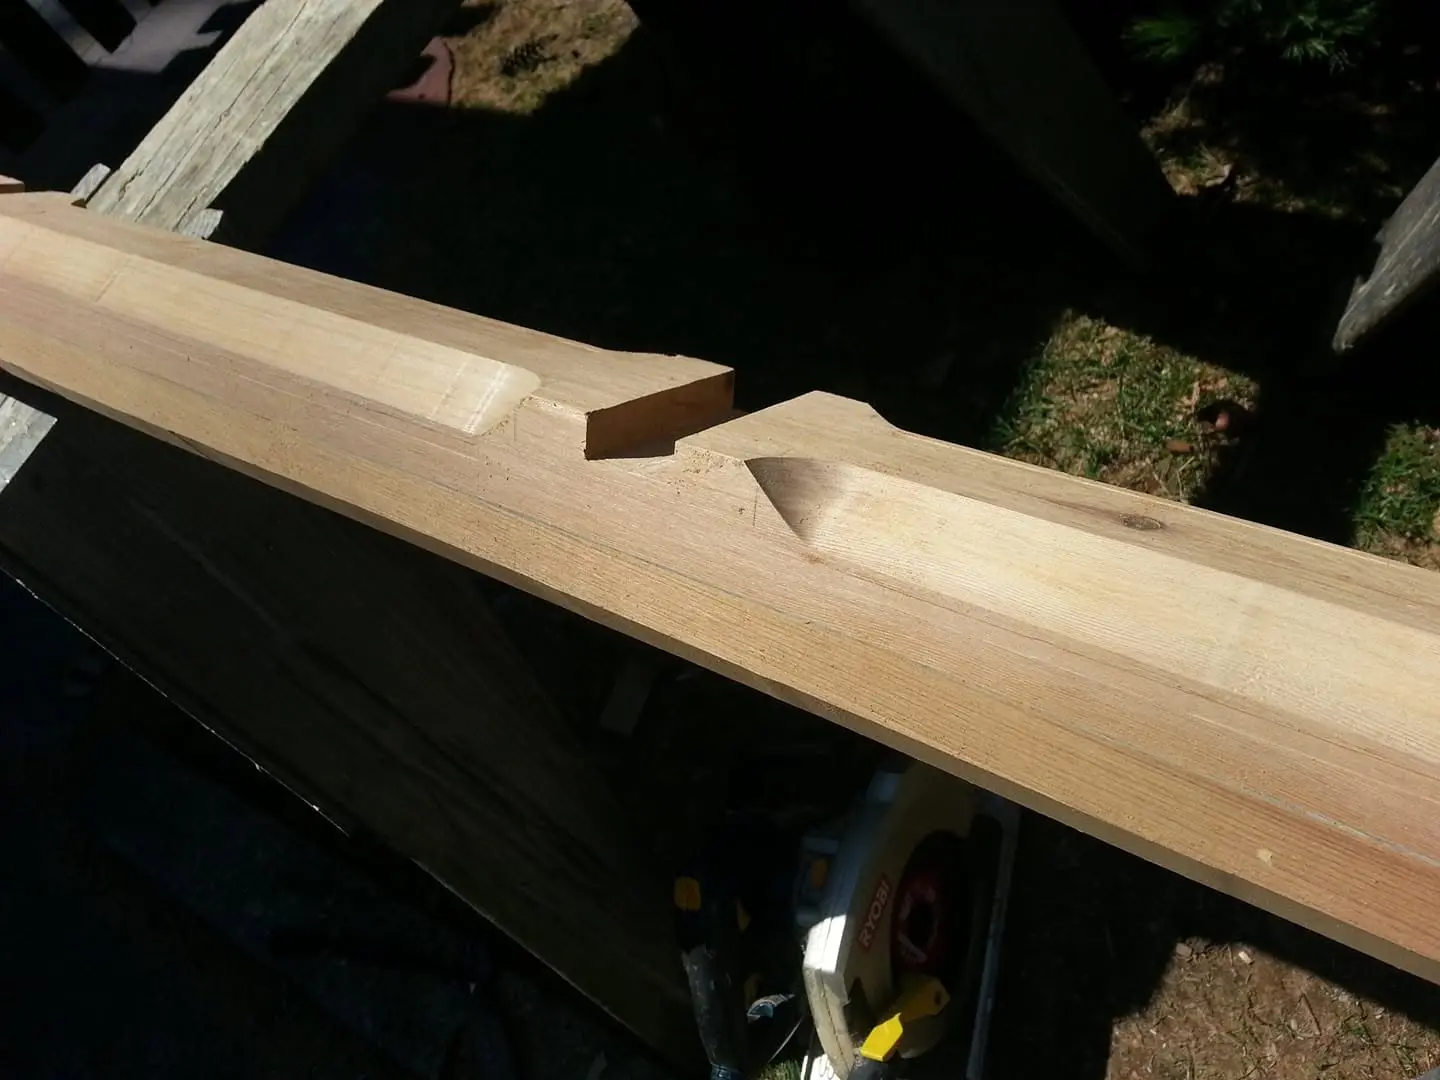
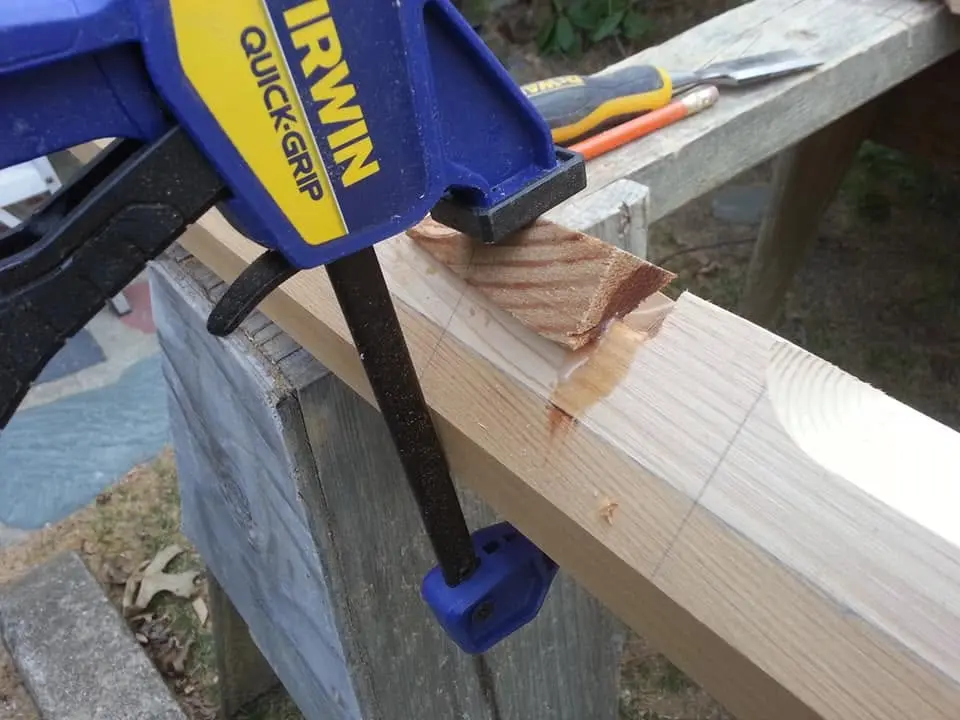
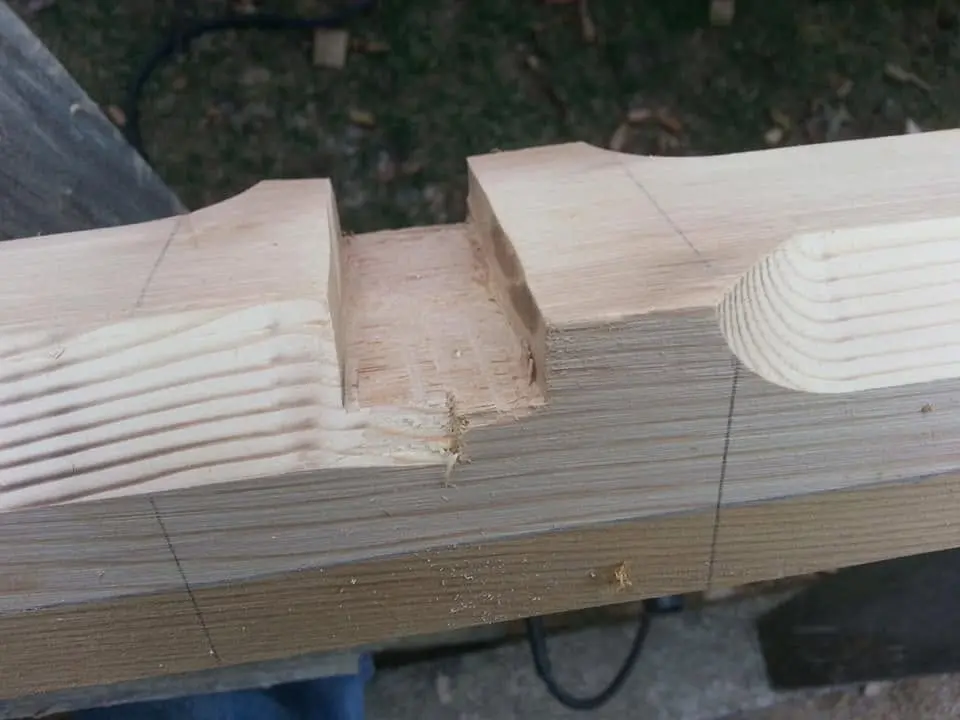
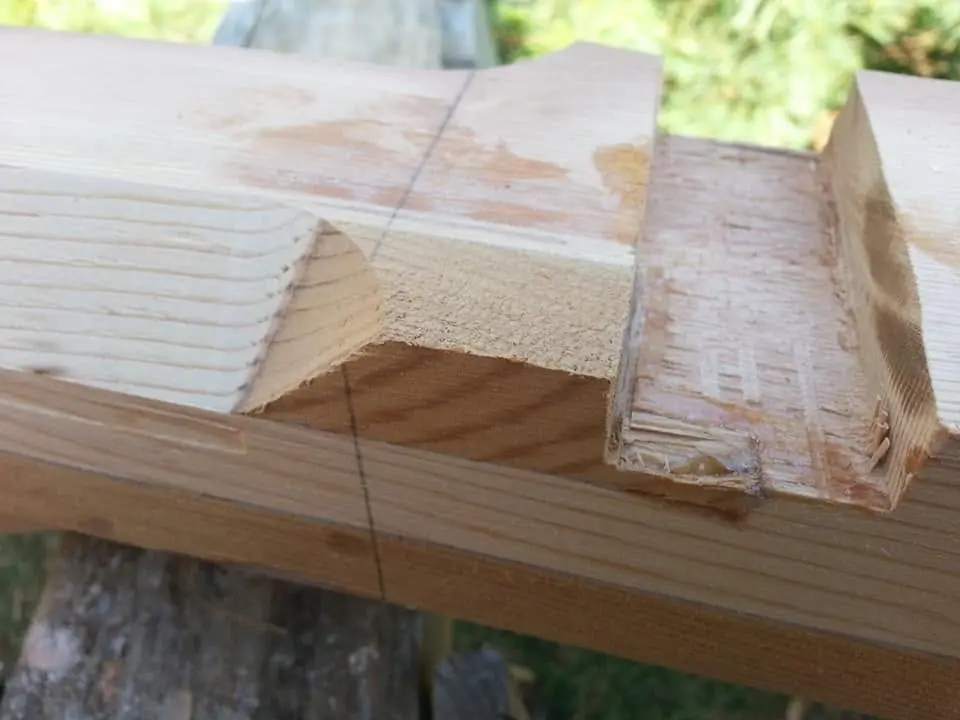
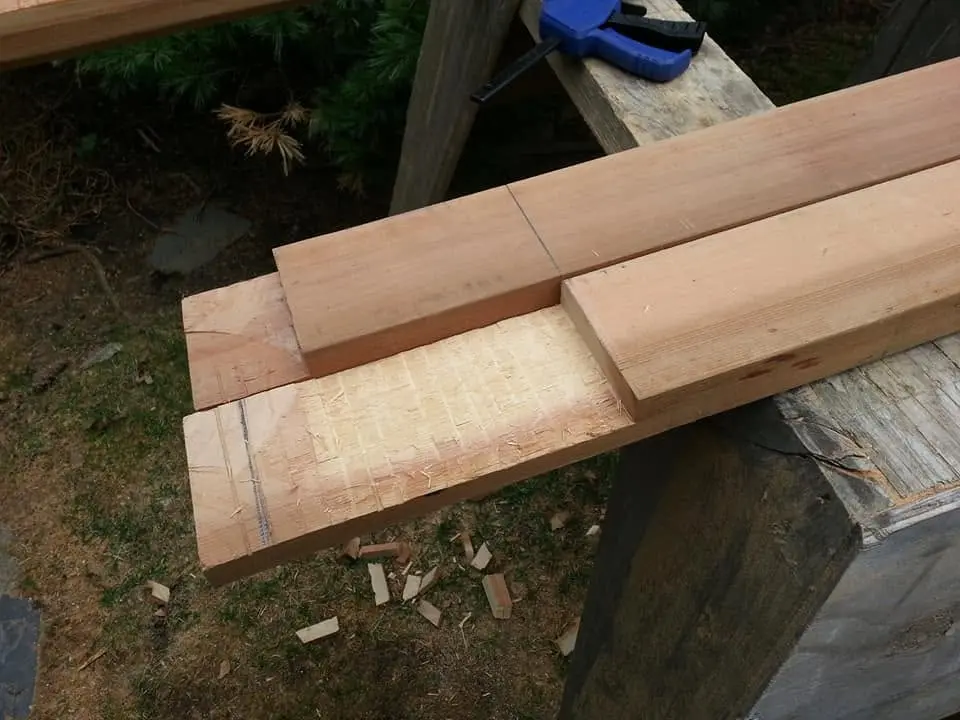
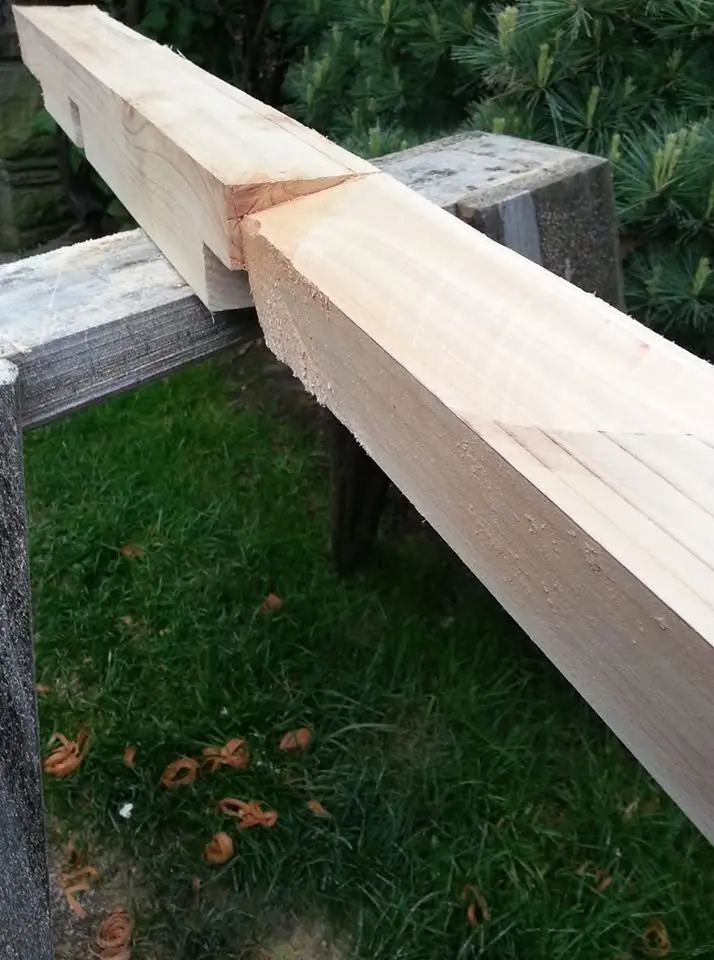
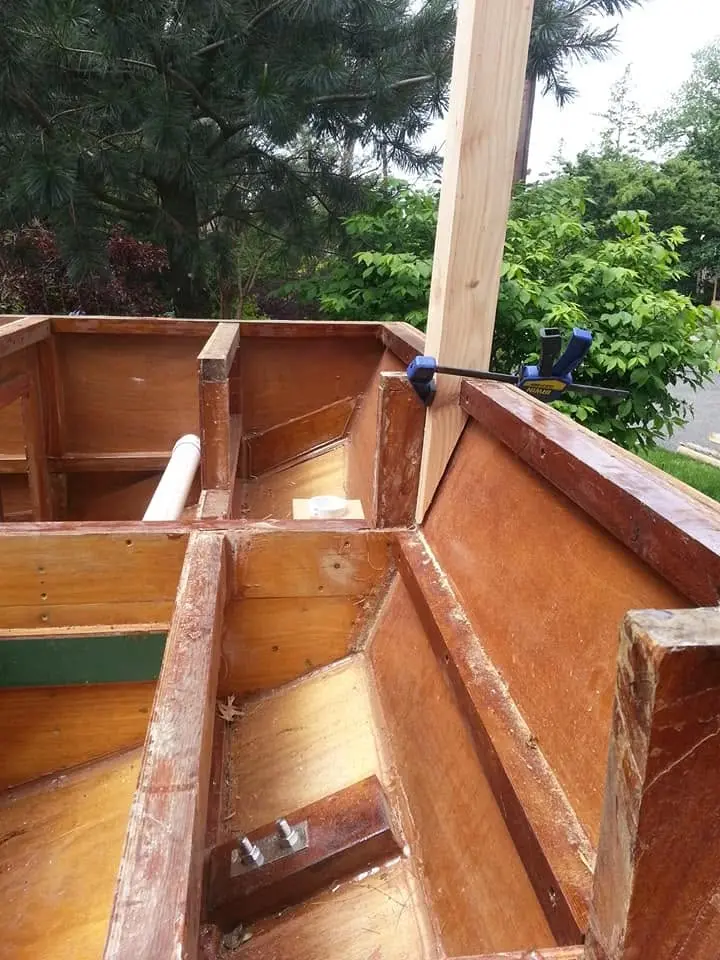
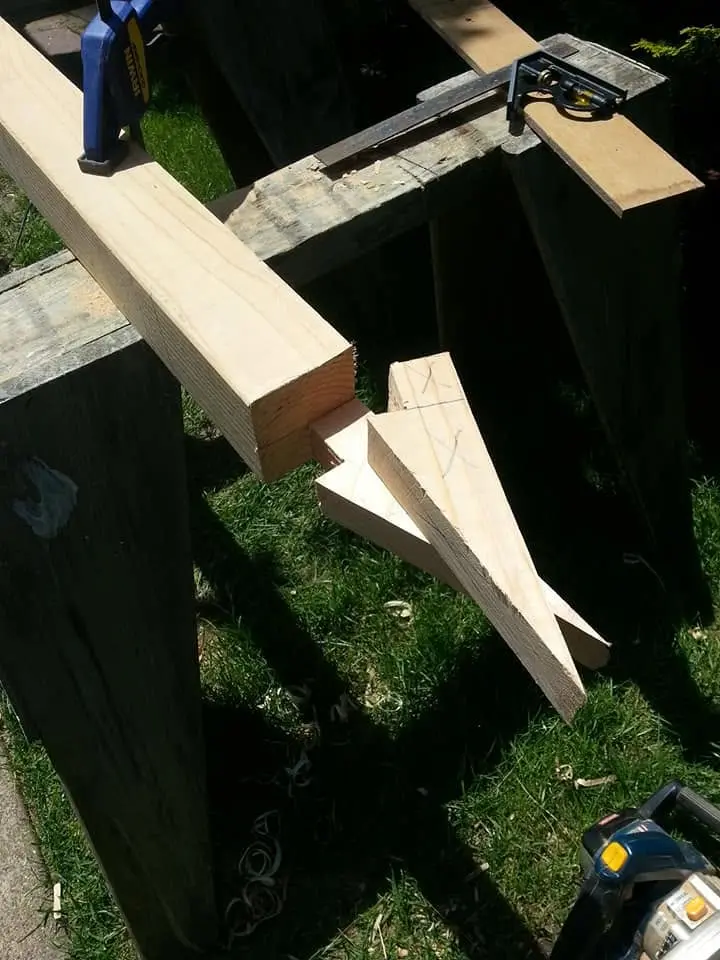
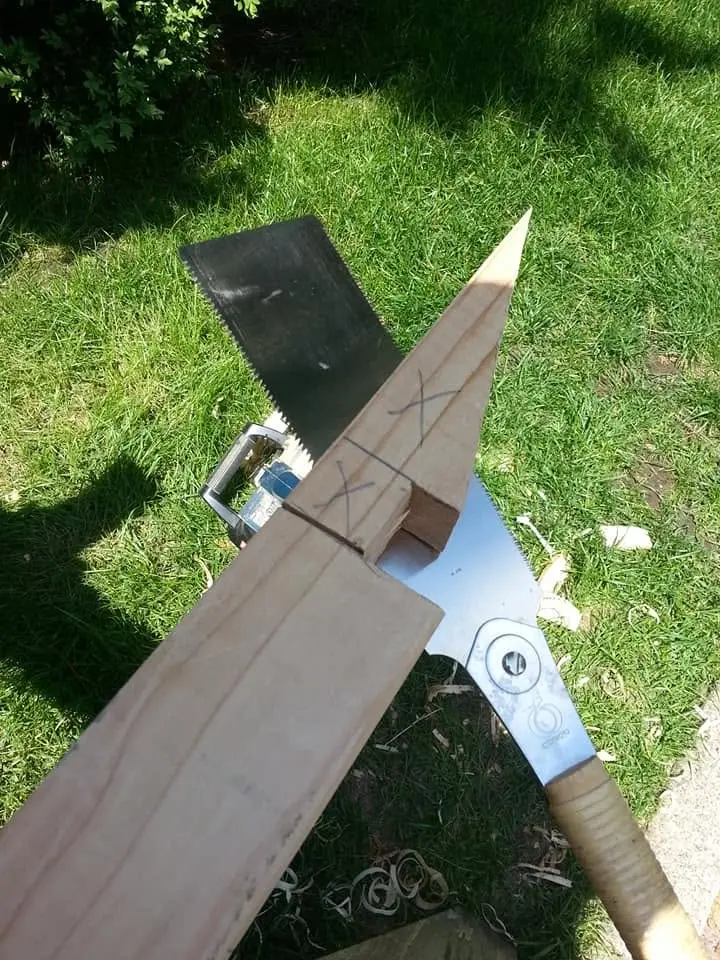
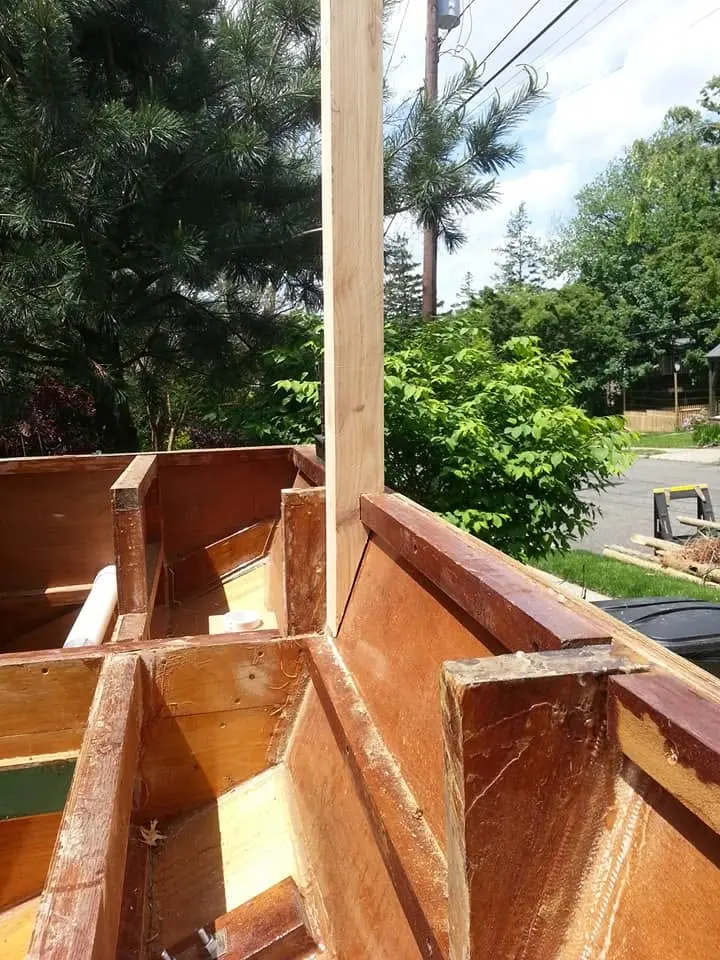
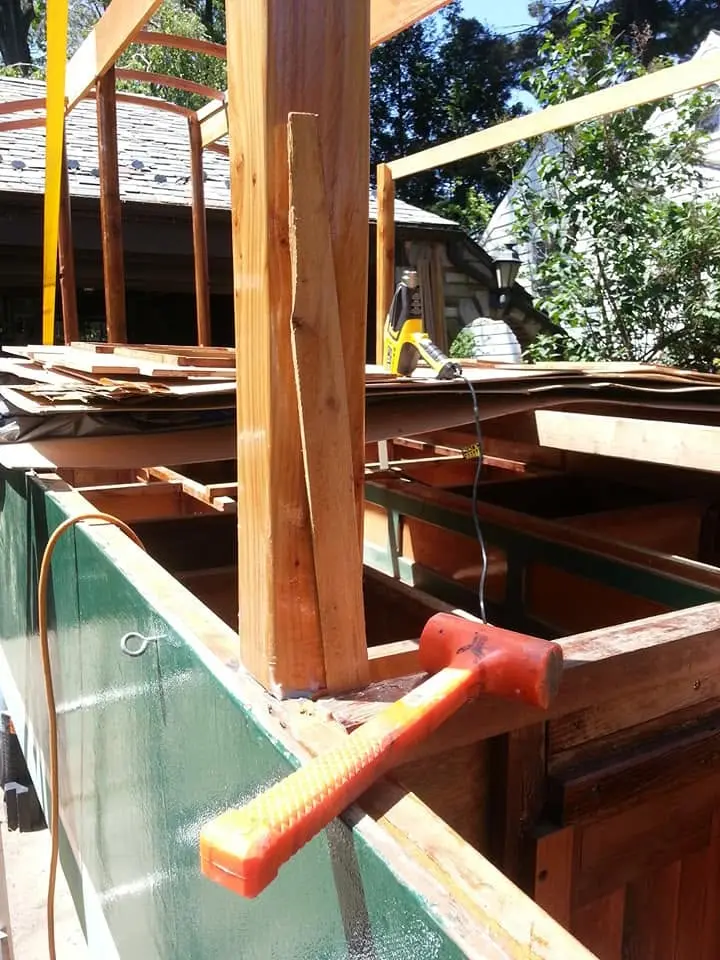
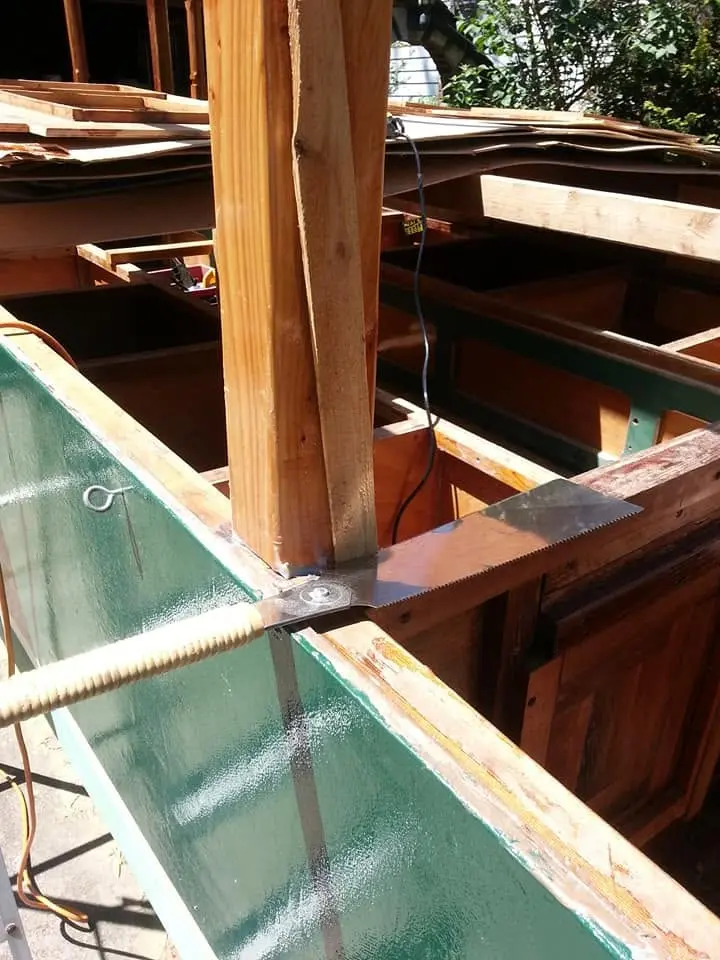
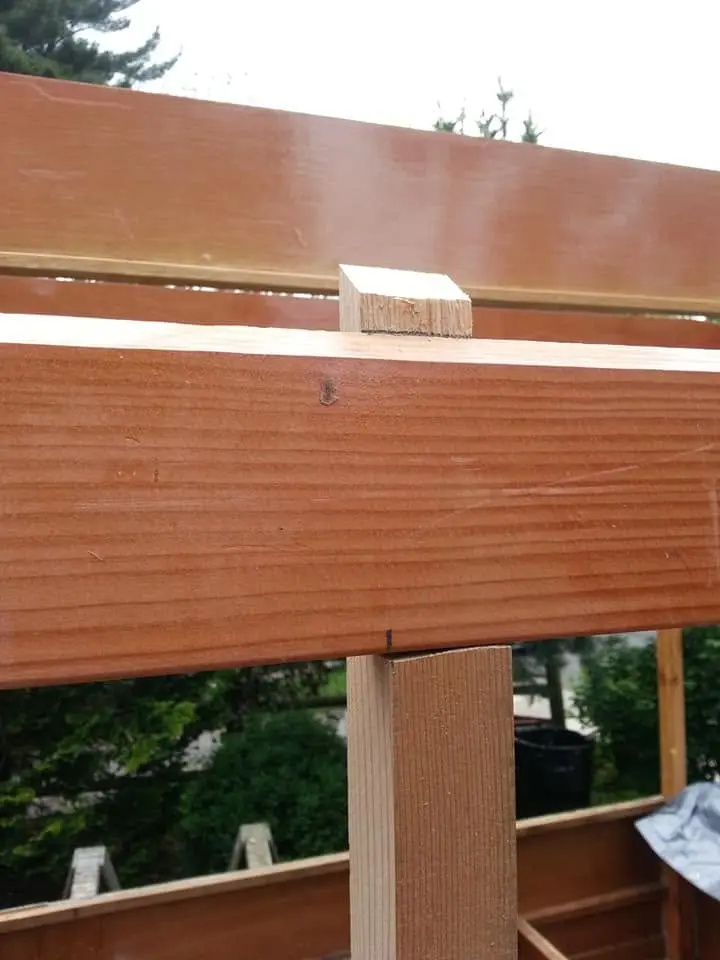
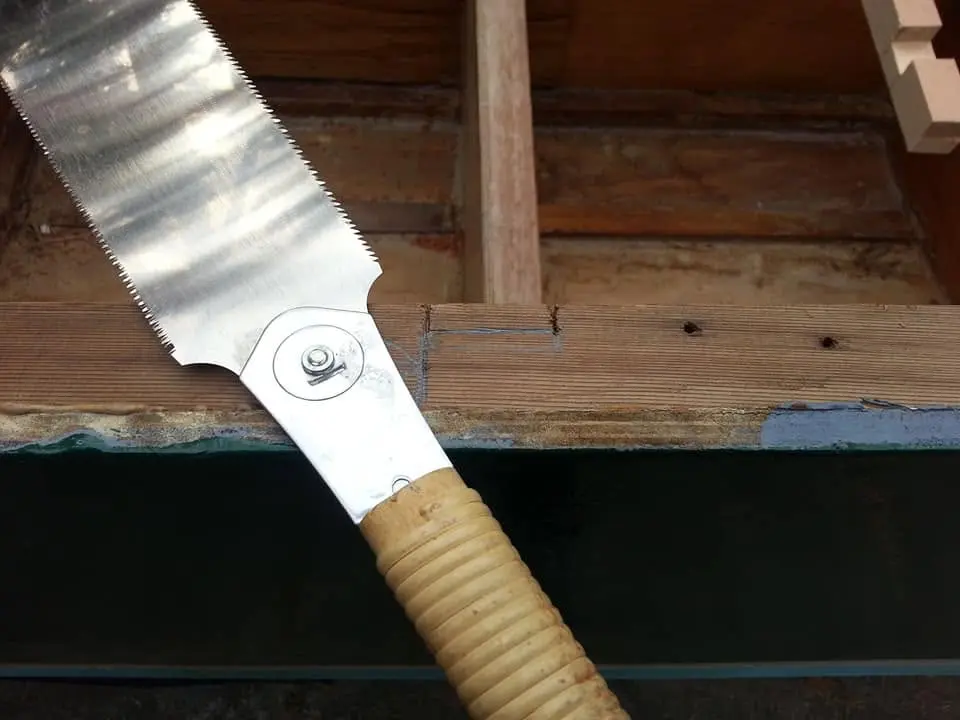
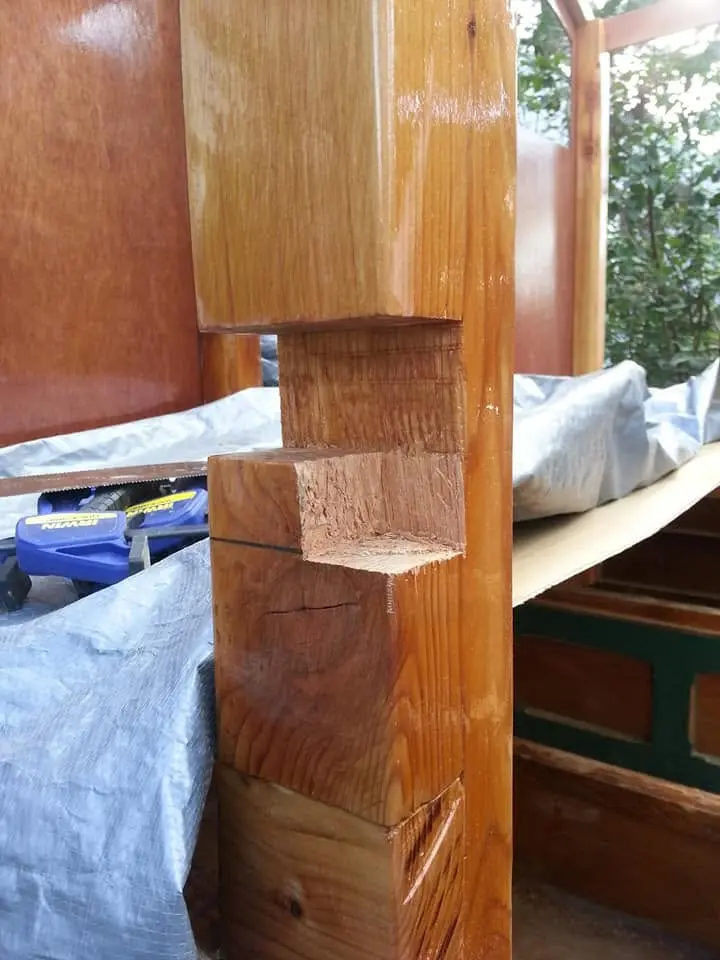
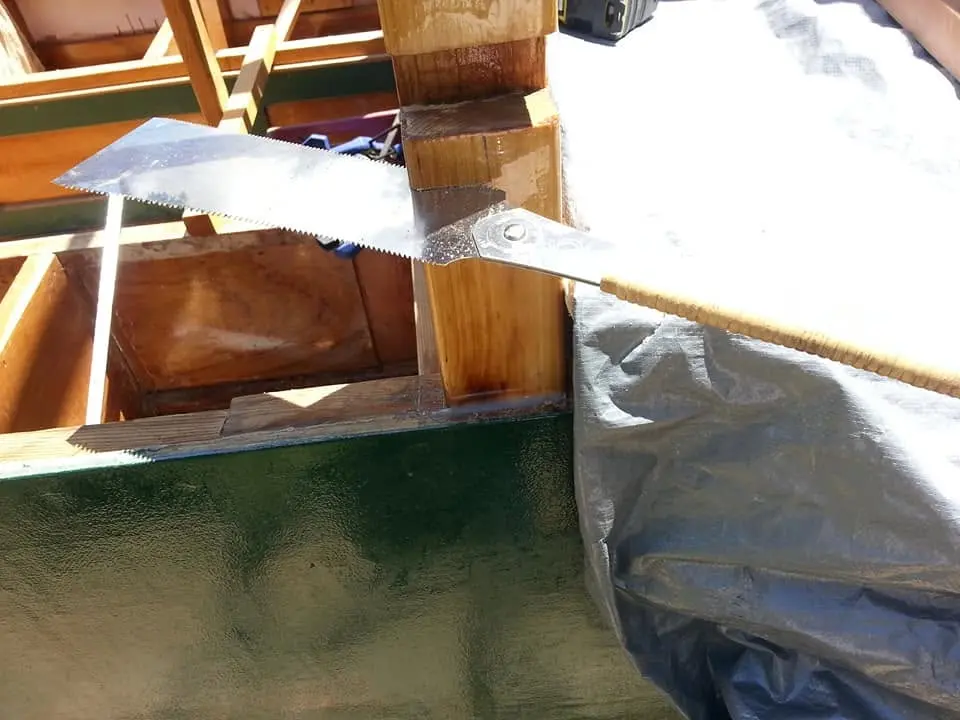
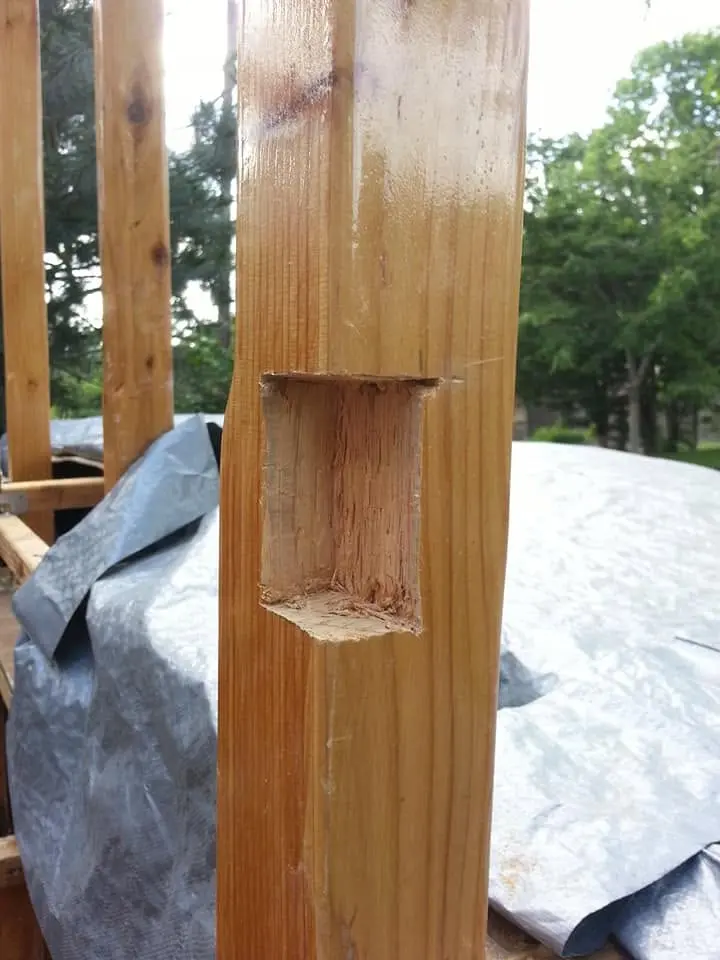
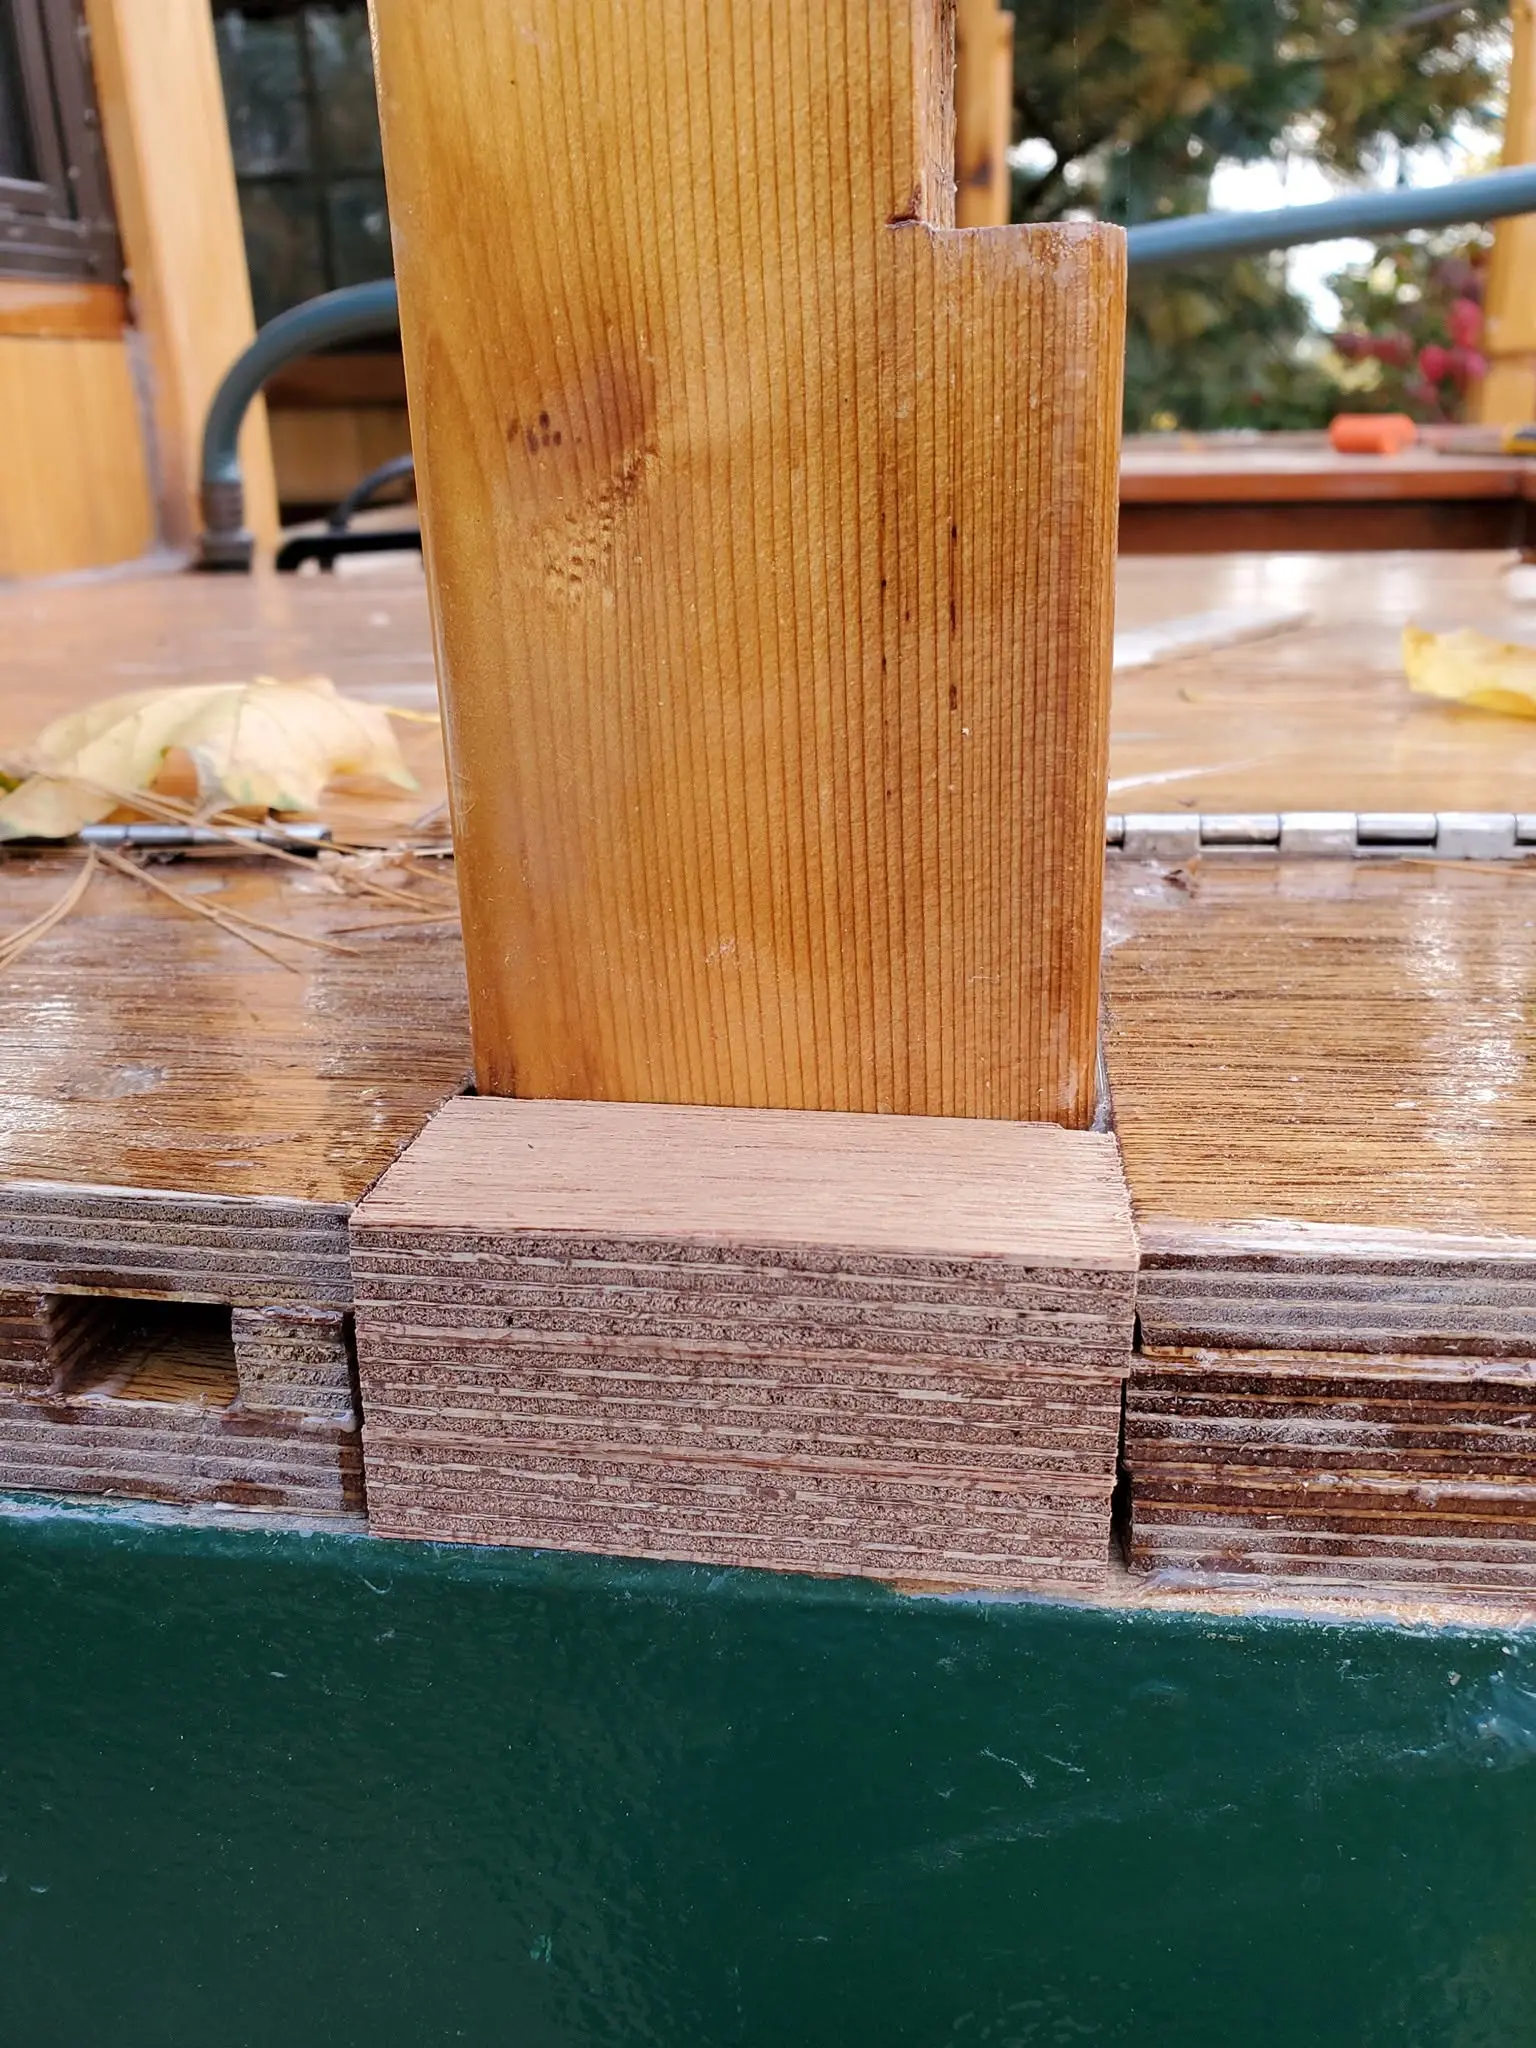
Houseboat update, Saturday, September 1, 2018 -- When I said I had to do a little nipping and tucking to make the aft deck roof posts fit properly, I wasn't kidding -- except for the "little" part. As you can see, there are quite a few irregularly sized and shaped notches that have to be cut to make sure this post fits perfectly around the below-deck framing and still stand plumb in relation to the hull. A circular saw is good to start with, but to really make it fit, I had to fall back to more traditional tools -- a hammer and chisel, a hand plane and a Japanese pull saw. The fit is now perfect, but before I can install it, I have to fill any imperfections in the wood with epoxy putty, sand everything smooth, cut top and bottom dadoes to receive the upper and lower horizontal rails, and cut the corner chamfers with a router. Then I will be able to install the first of six such posts. Now I understand why it takes so long...
1 Sep 2018Deck & Coamings
Here's how I cut the dadoes in the roof support posts for the railing tops and...
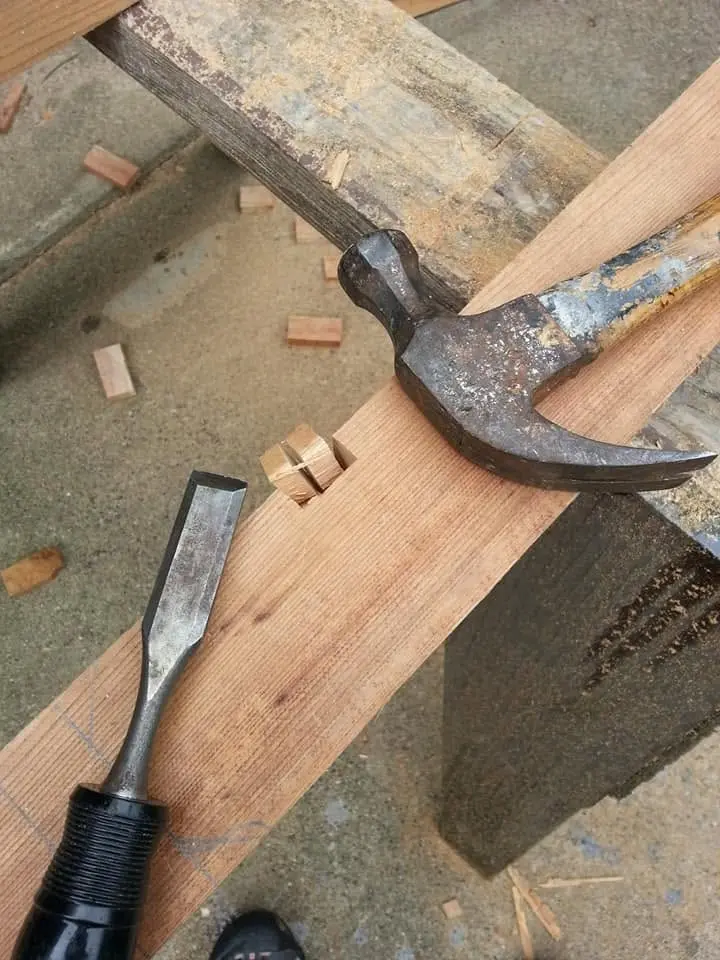
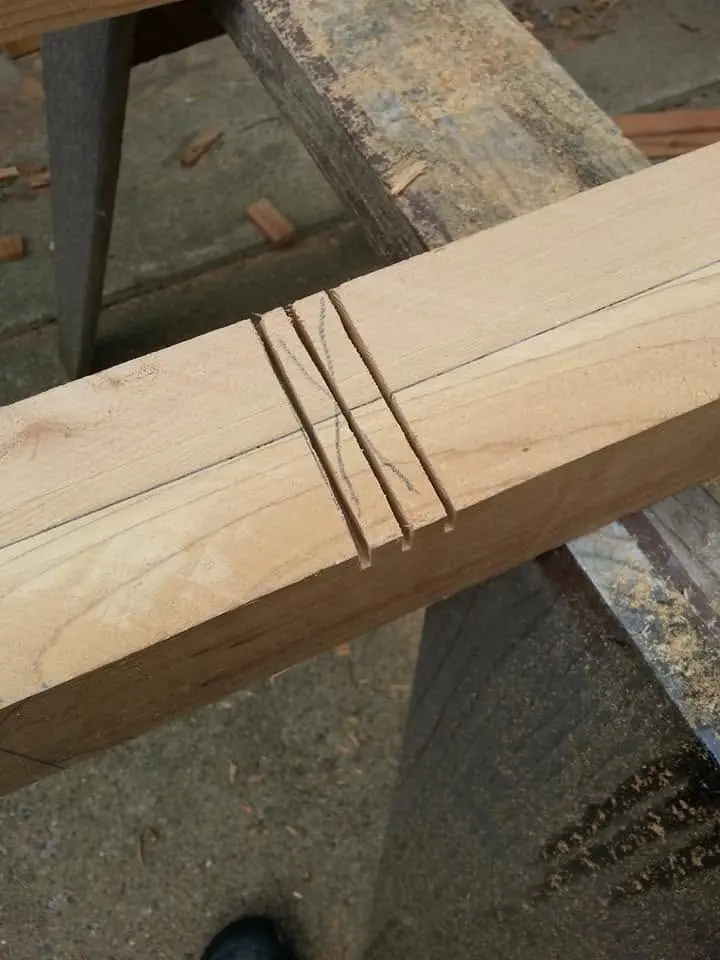
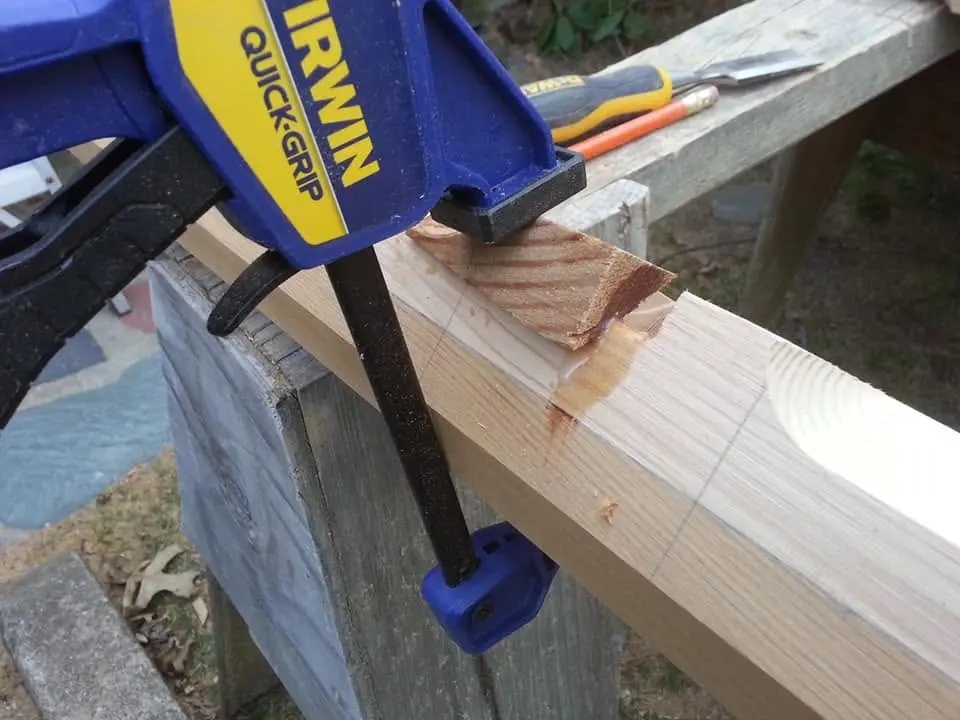
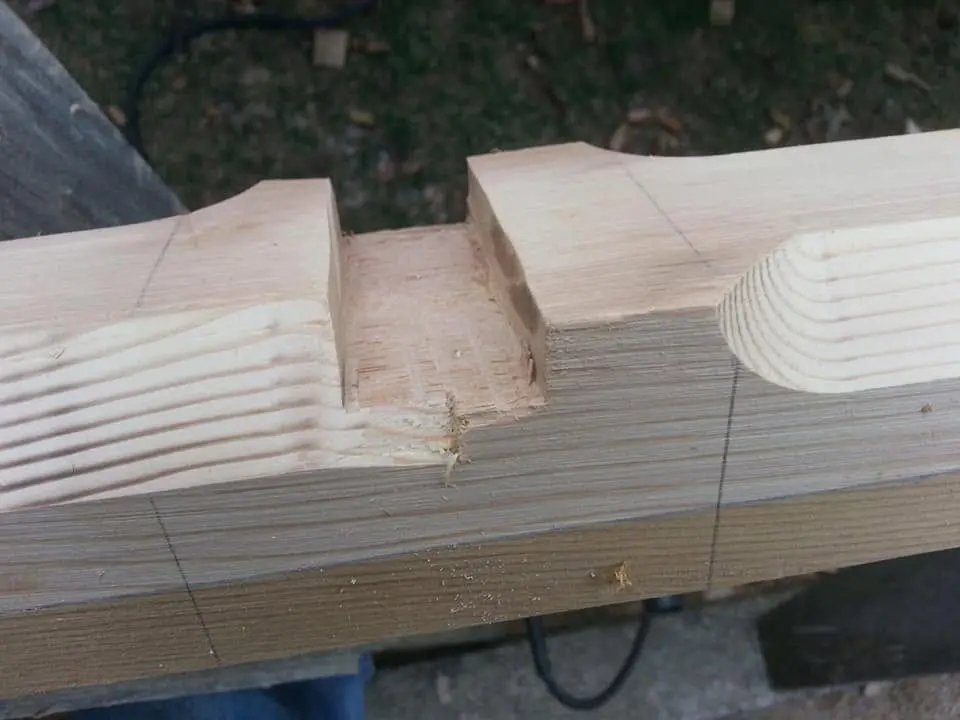
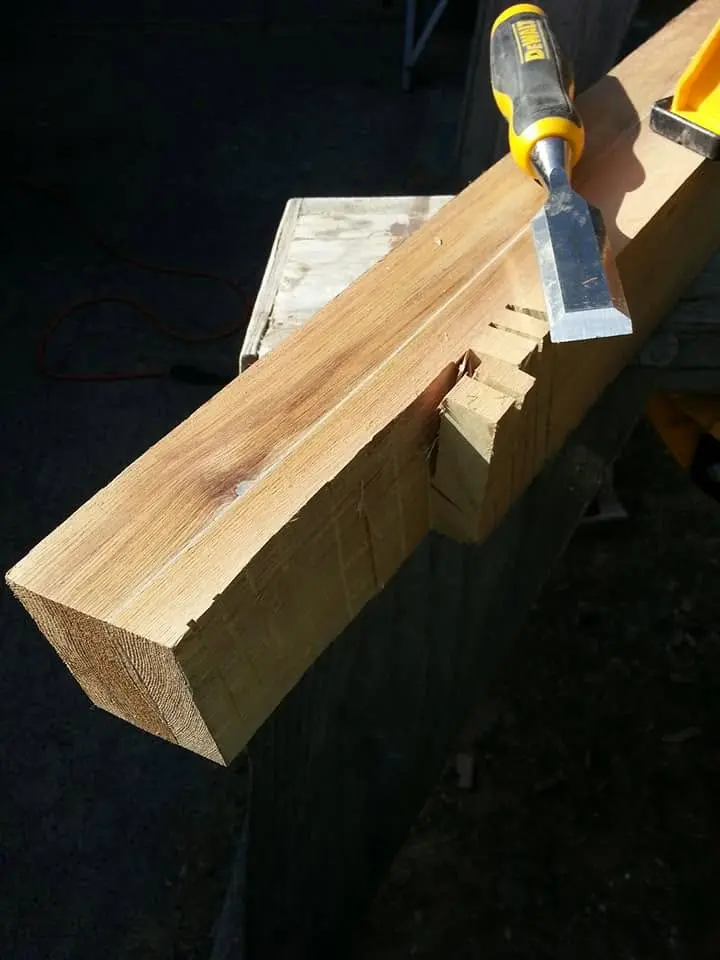
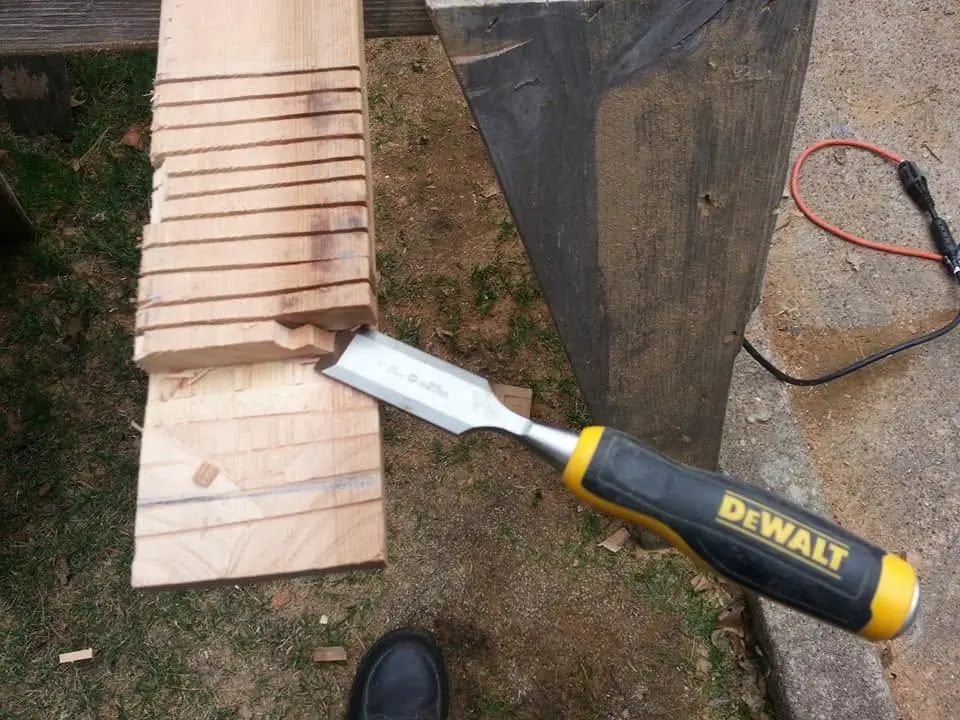
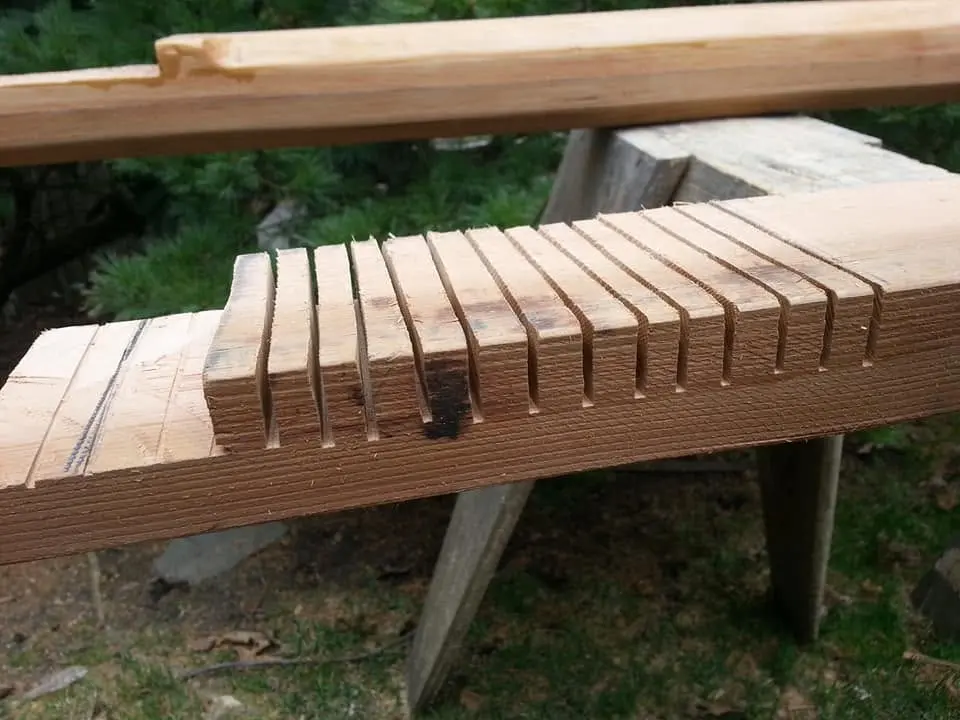
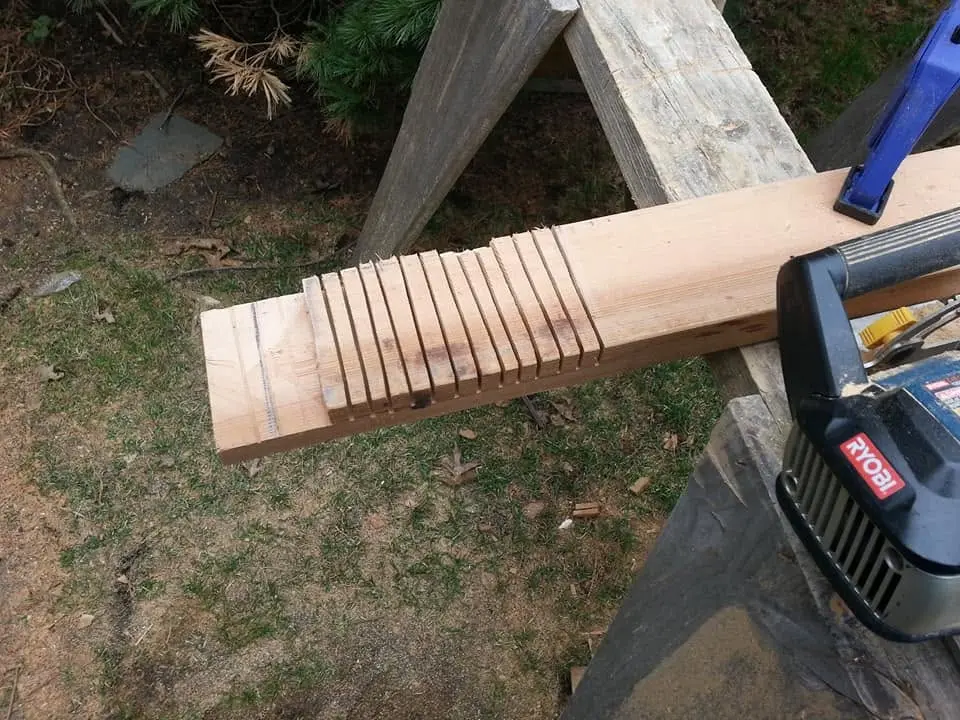
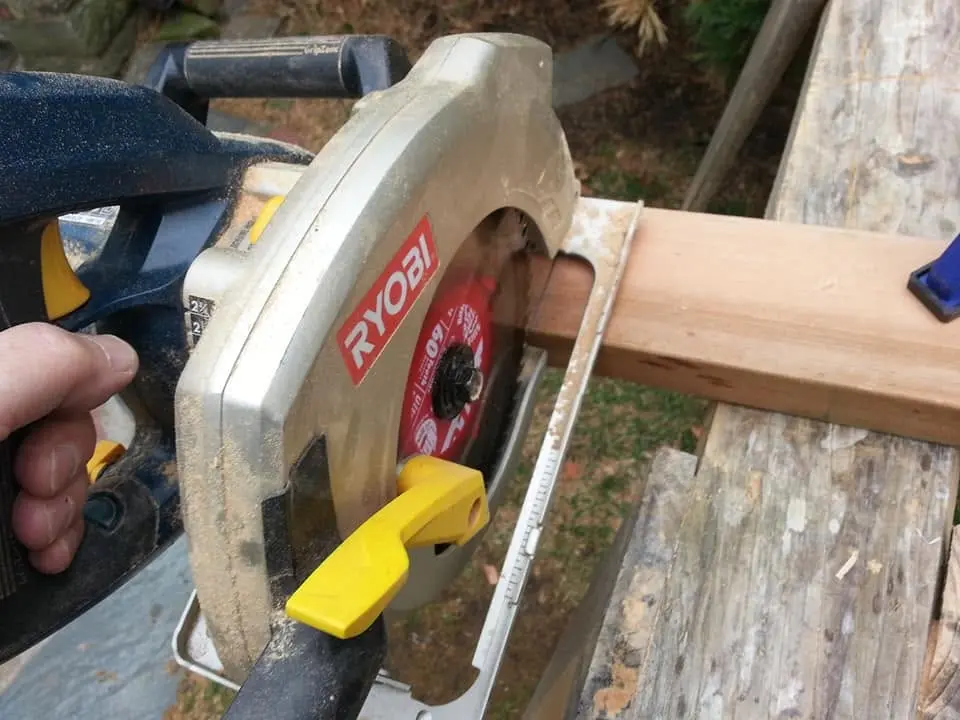
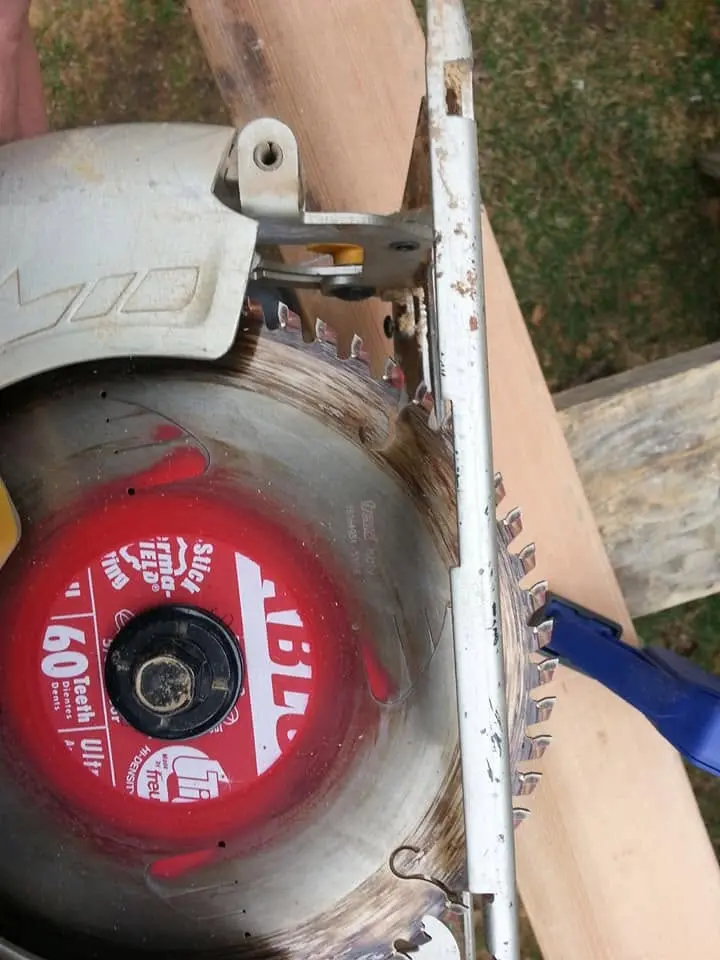
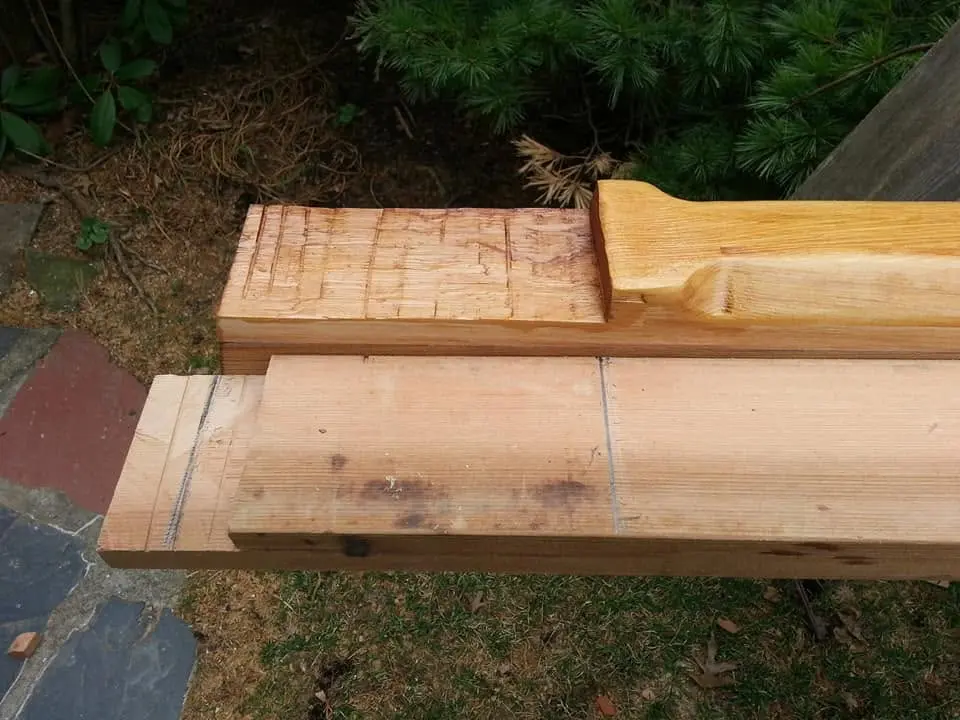
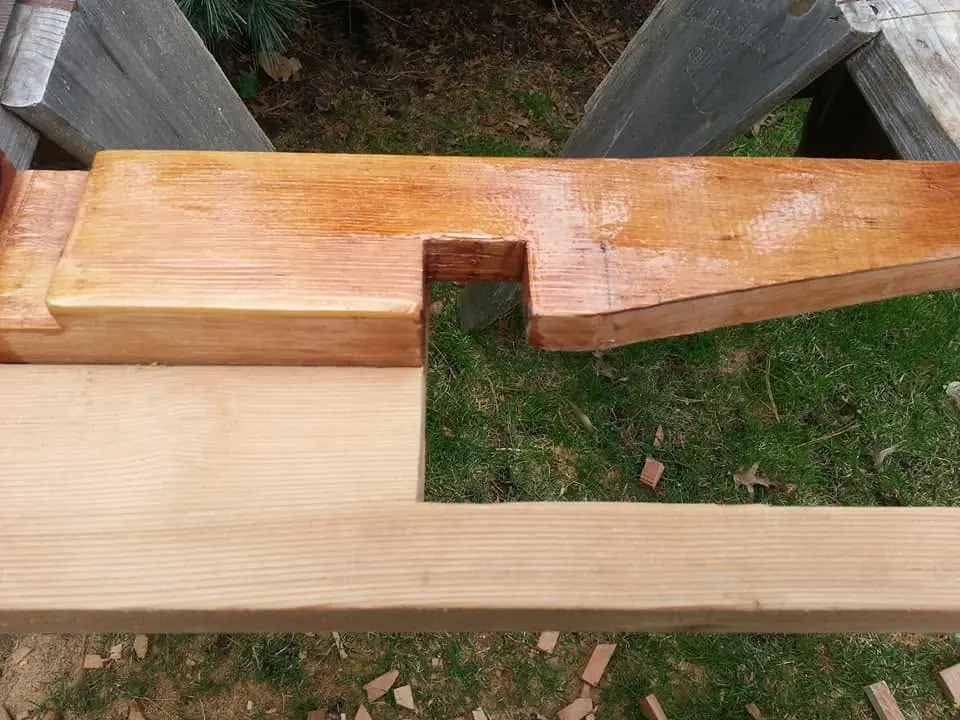
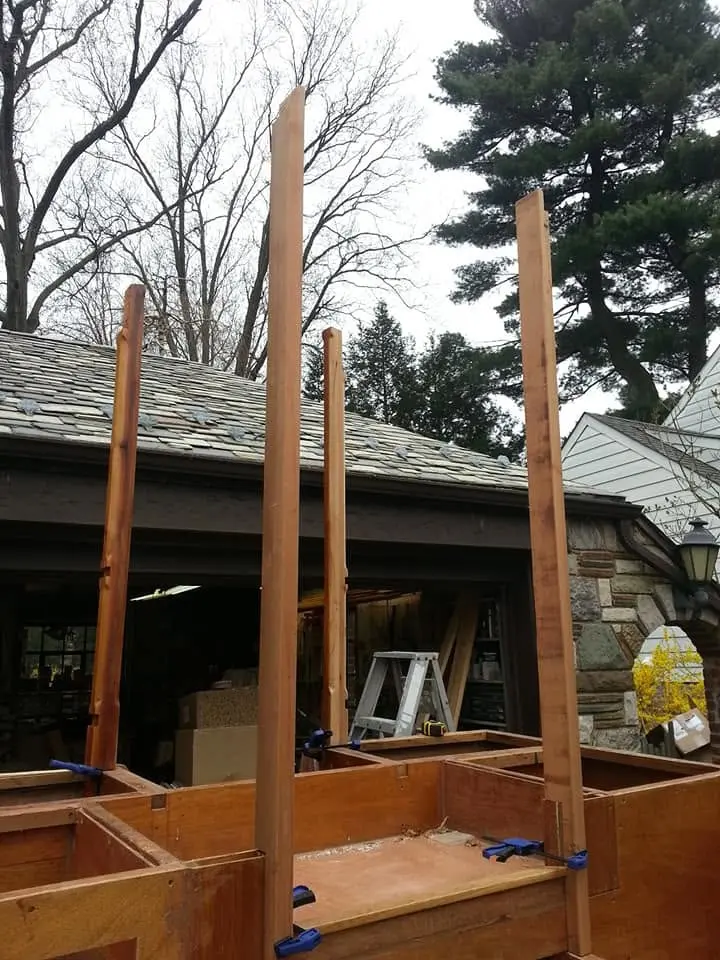
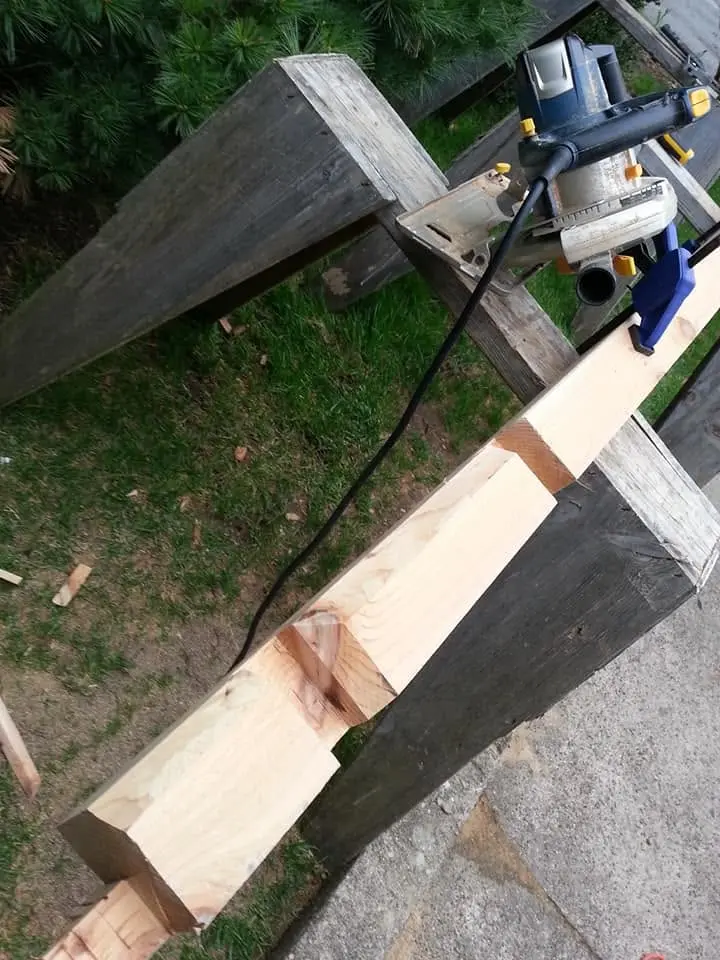
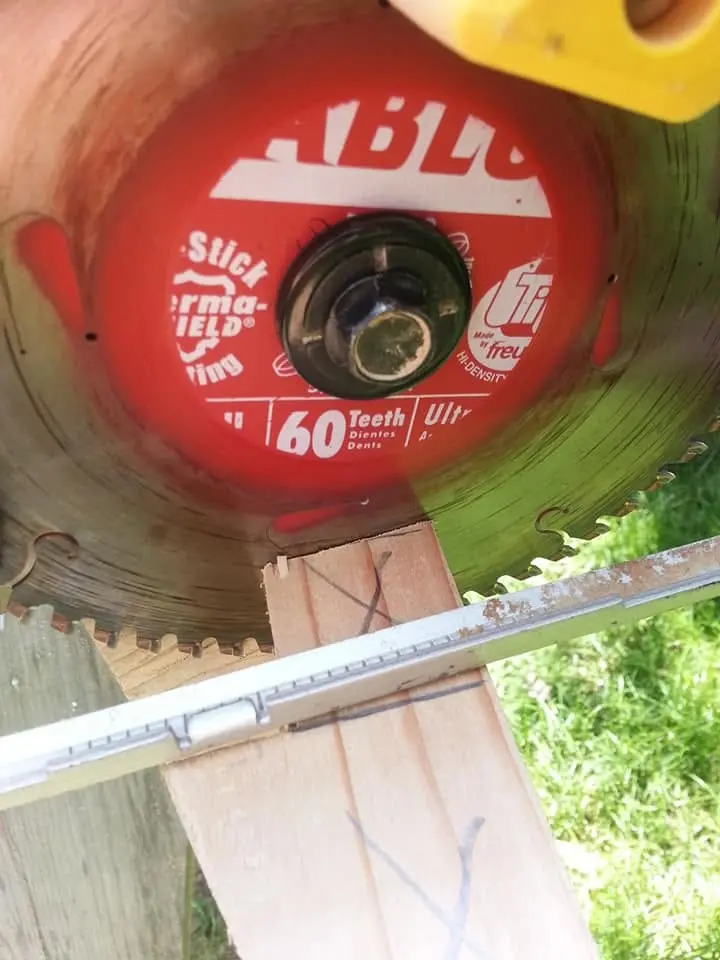
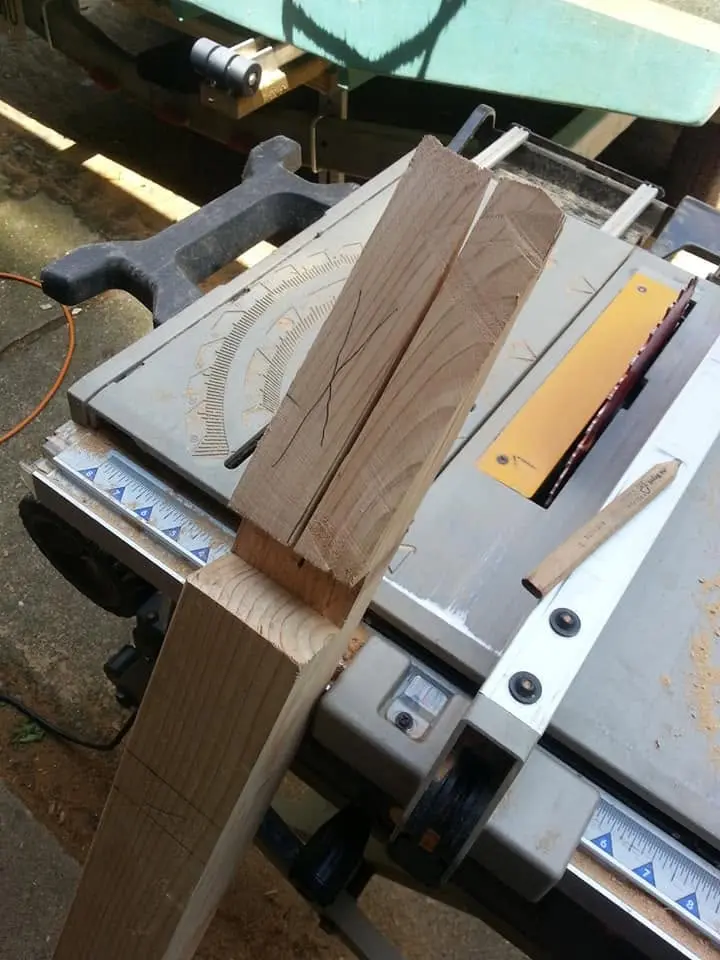
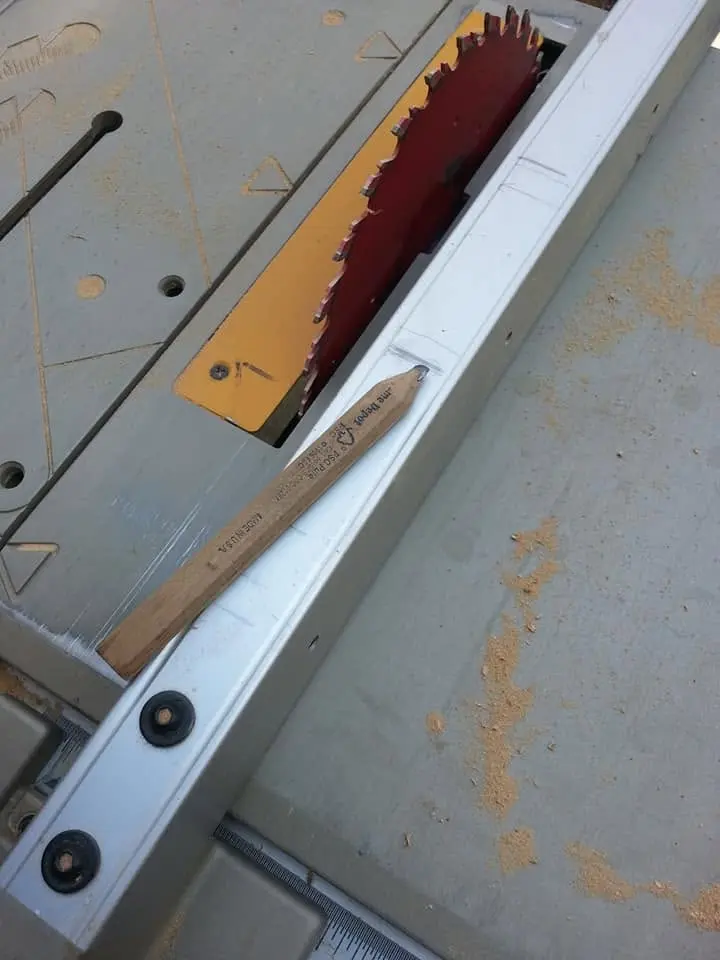
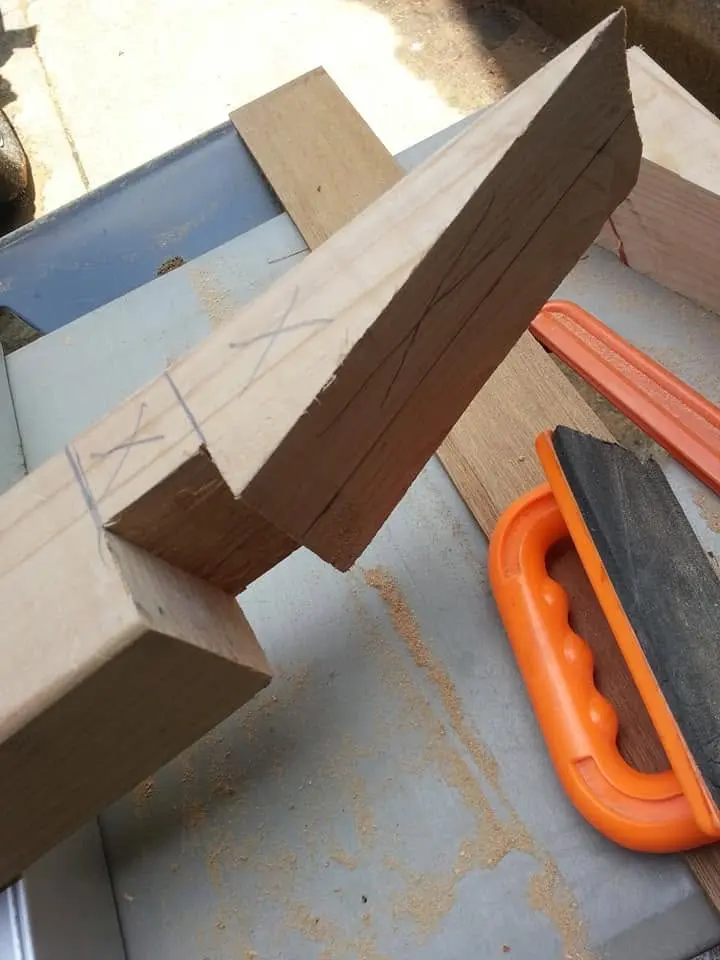
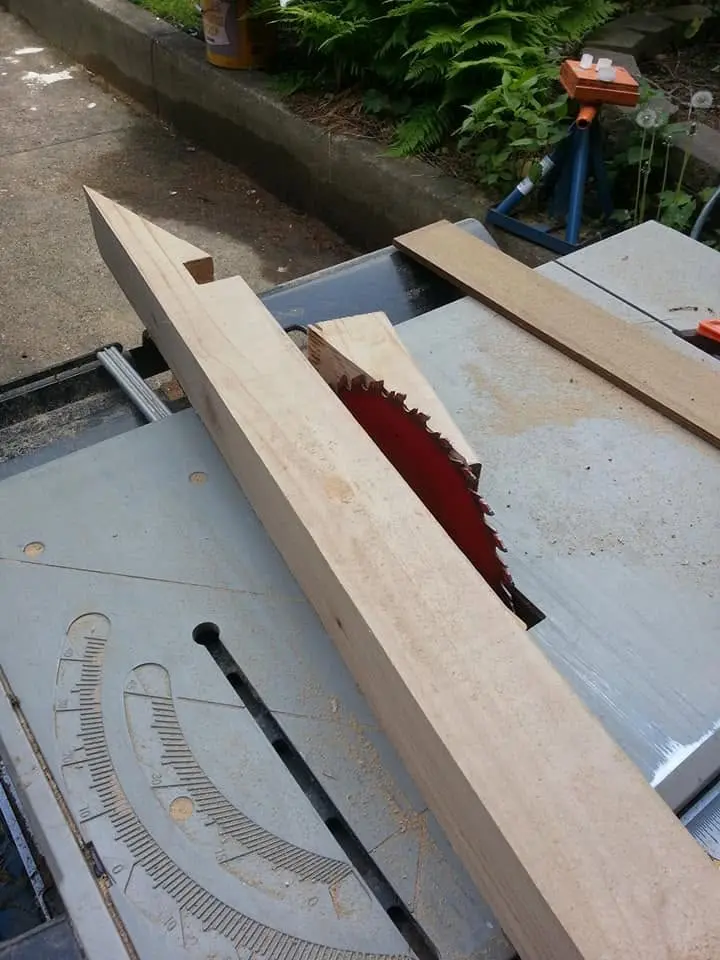
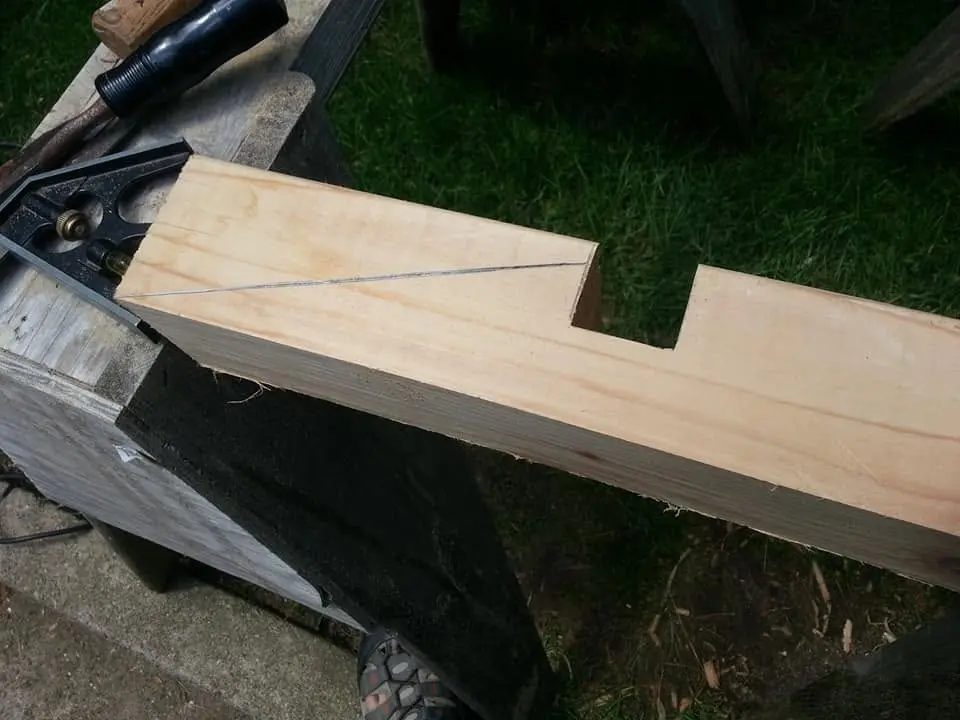
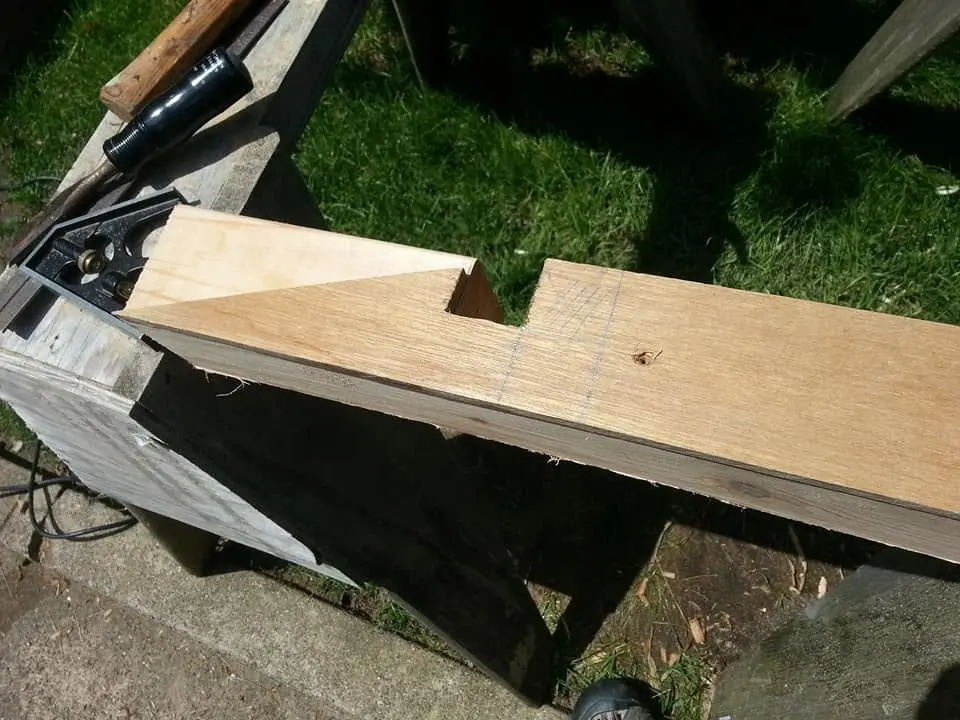
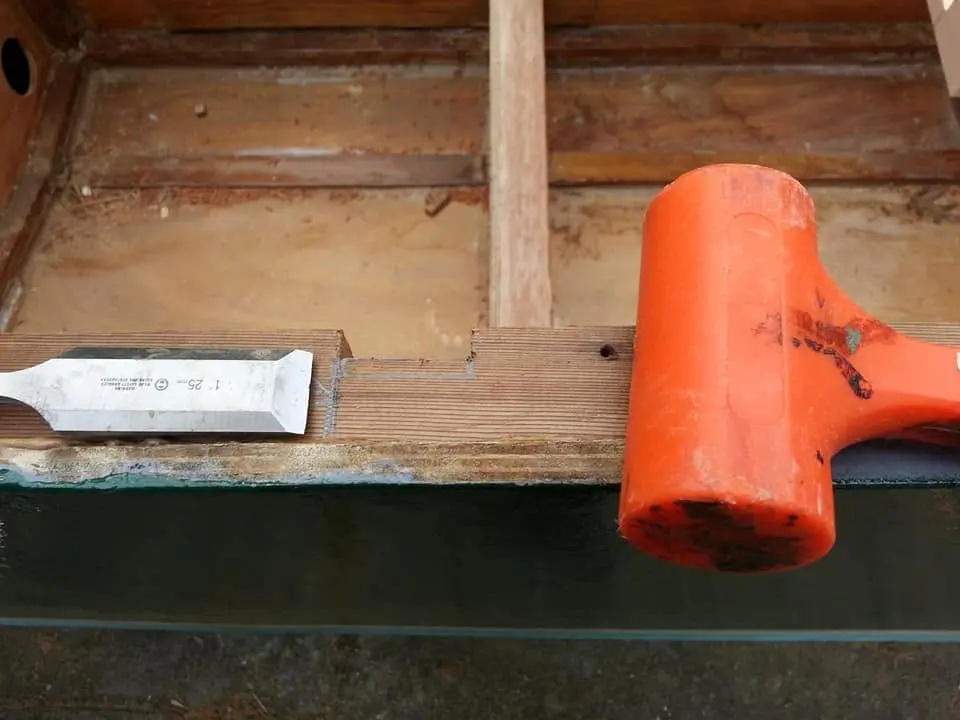
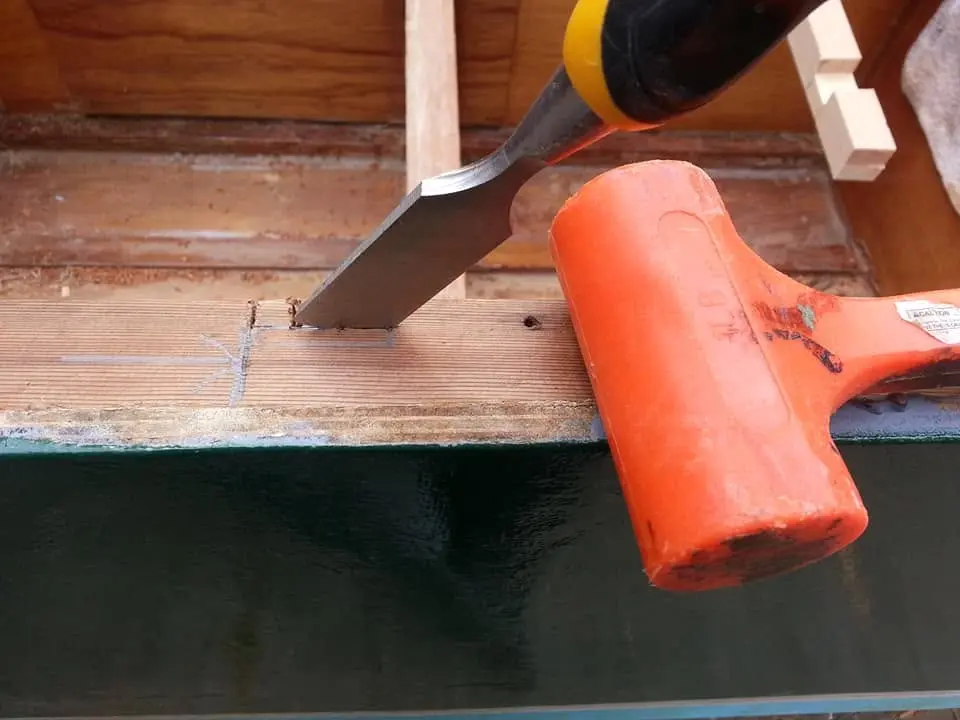
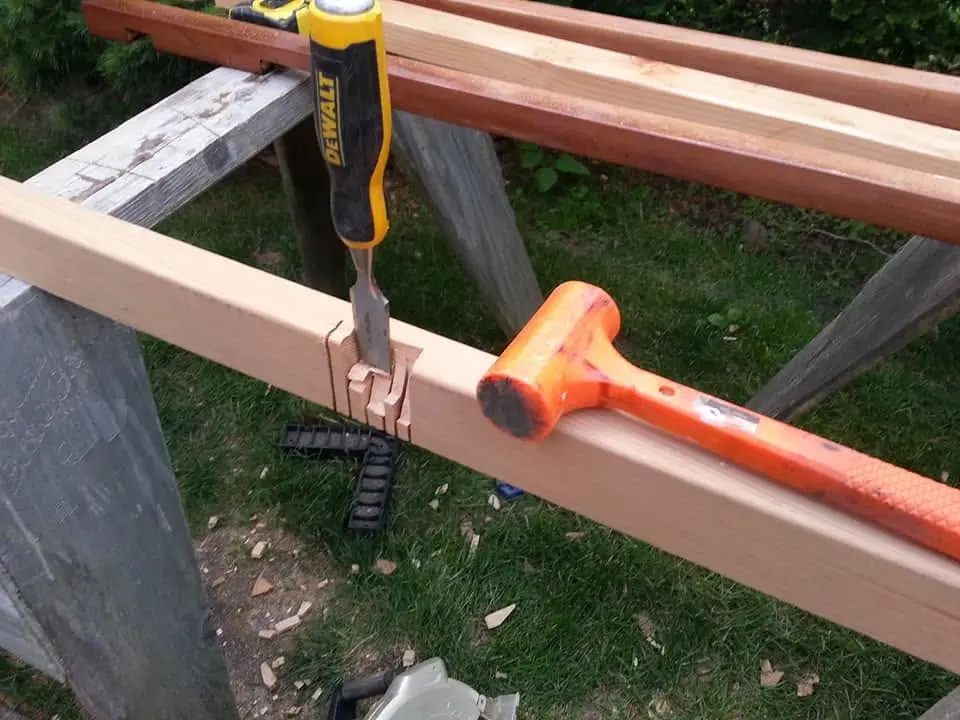
Houseboat update, Saturday, September 1, 2018 (Part 2) -- Here's how I cut the dadoes in the roof support posts for the railing tops and bottoms: First, I scribe where I want them with a pencil. Then, I use a circular saw with the blade set to a half-inch and make cuts within the scribed lines. In this case, for a one inch wide dado, three cuts are enough. Next, I use a hammer and chisel to knock the waste blocks down almost to the depth of the initial cuts. Finally, I use the sharp chisel blade, by hand and without the hammer, in the manner of an ultra-low angle block plane, to smooth the bottom of the dado.
7 Sep 2018Deck & Coamings
Today was an important day.
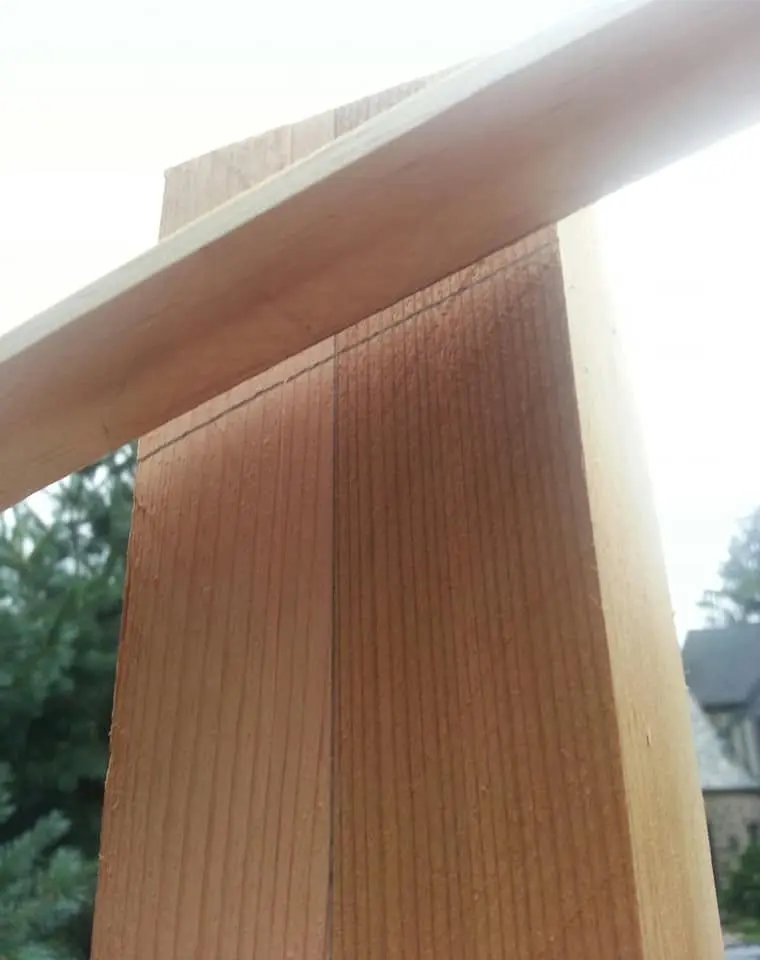
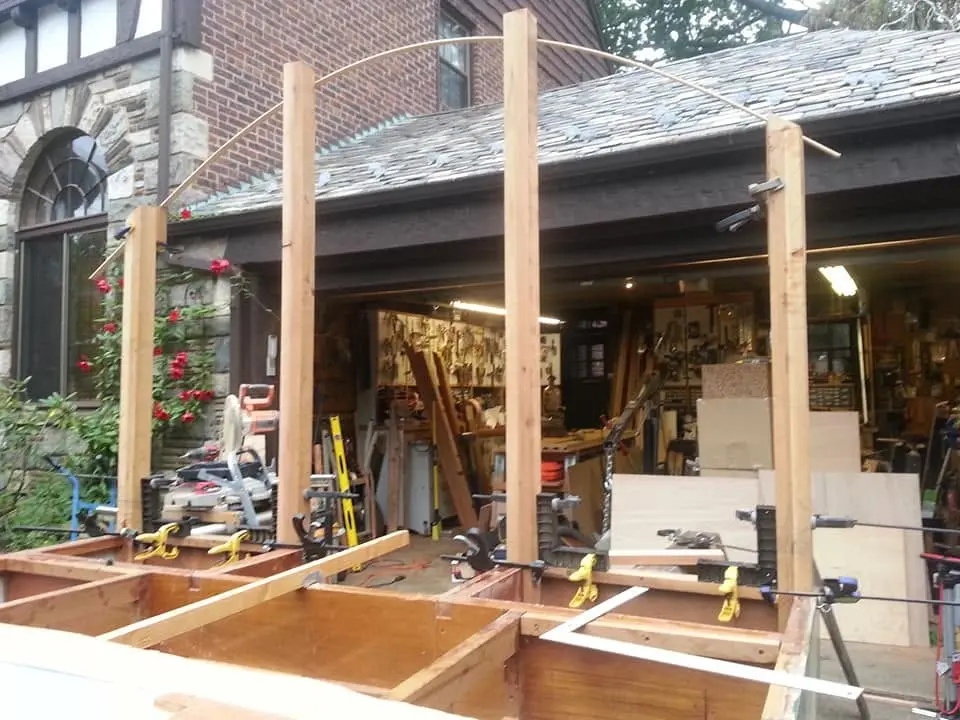
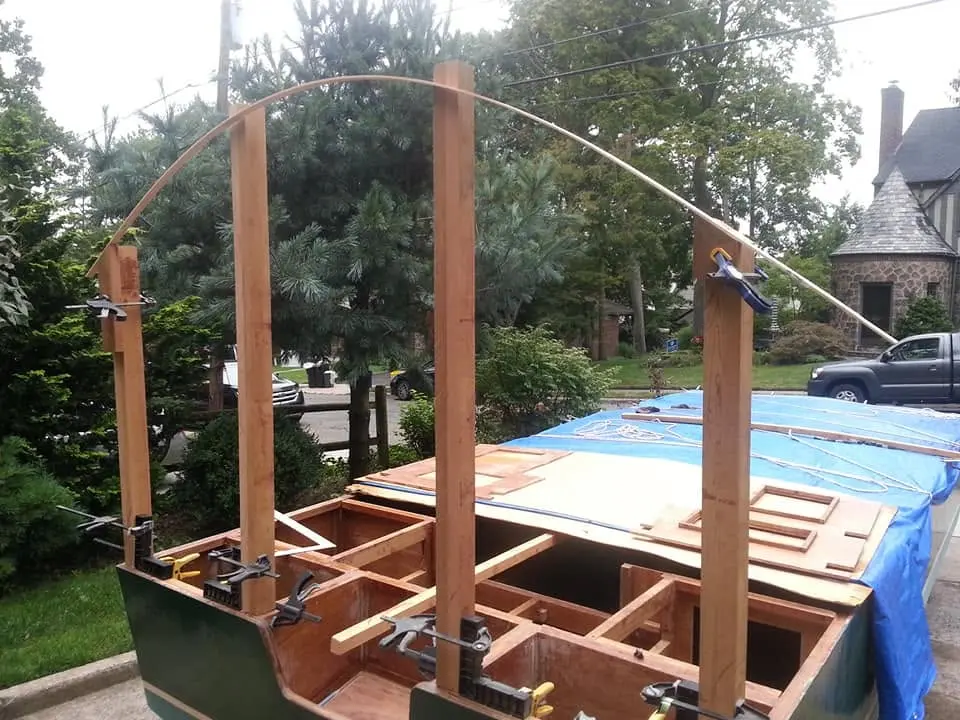
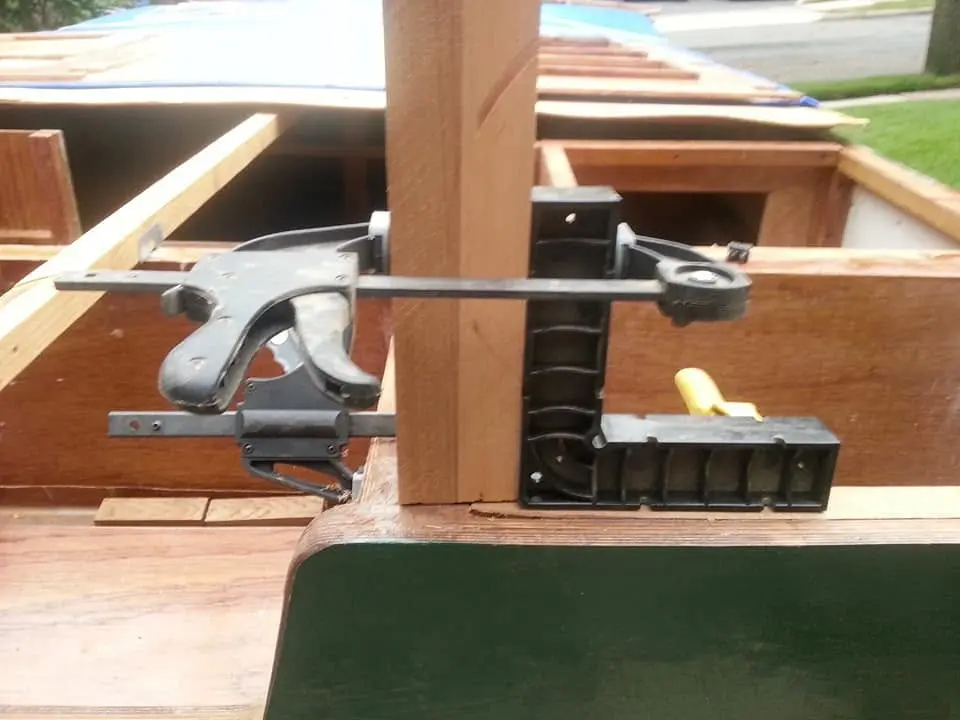
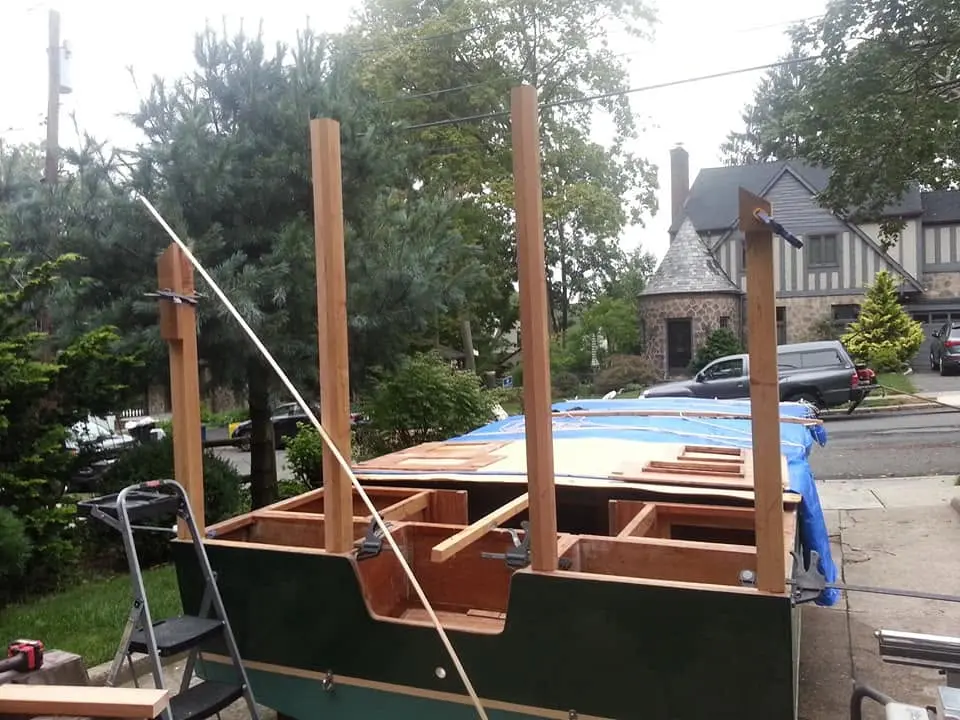
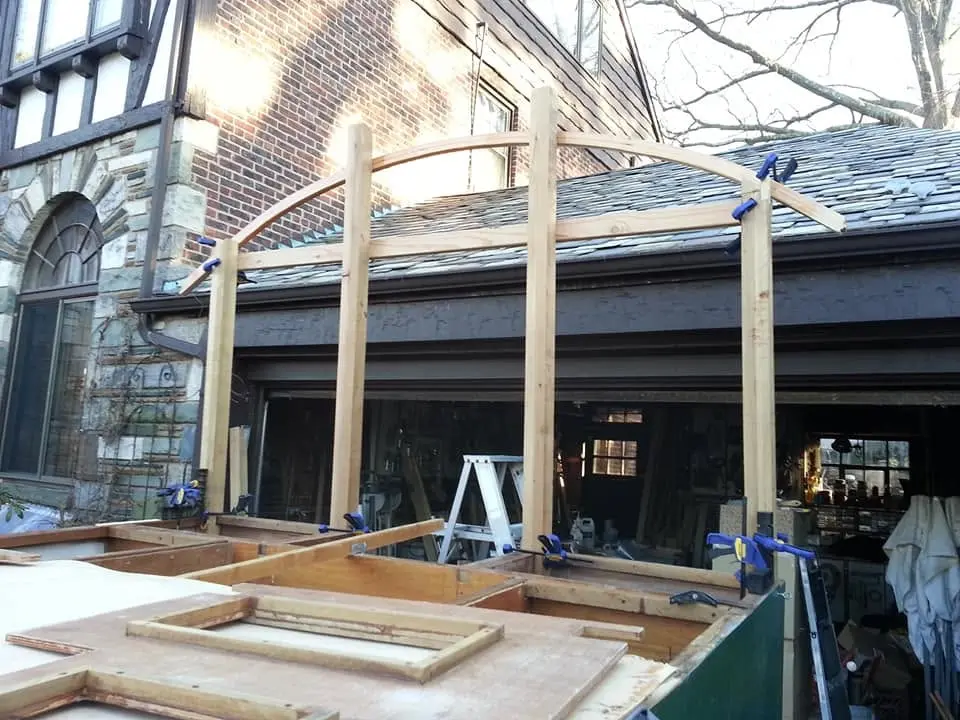
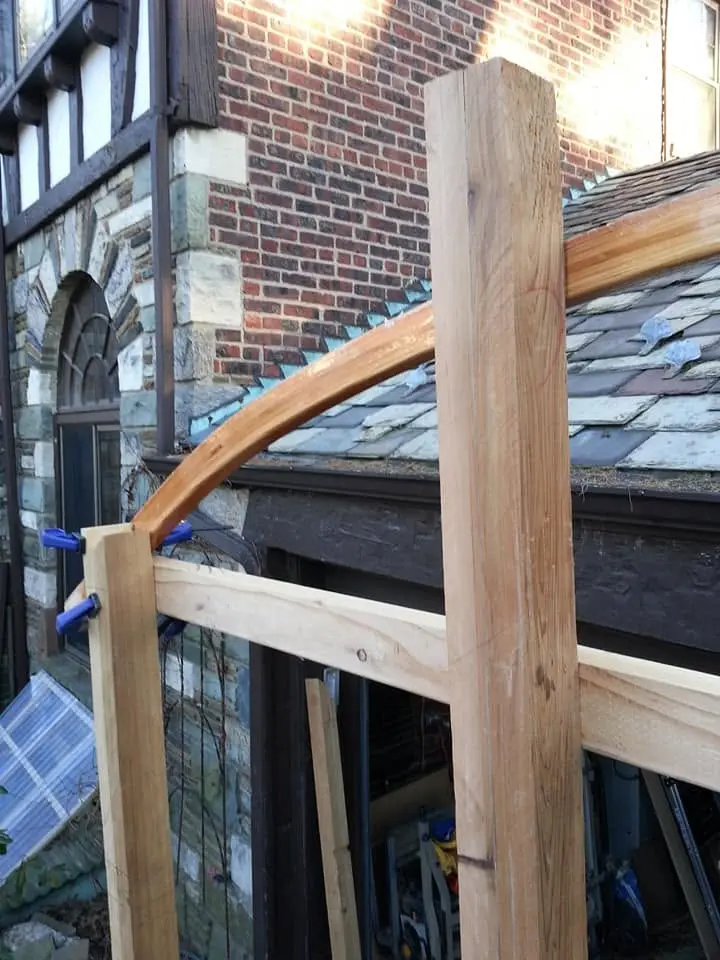
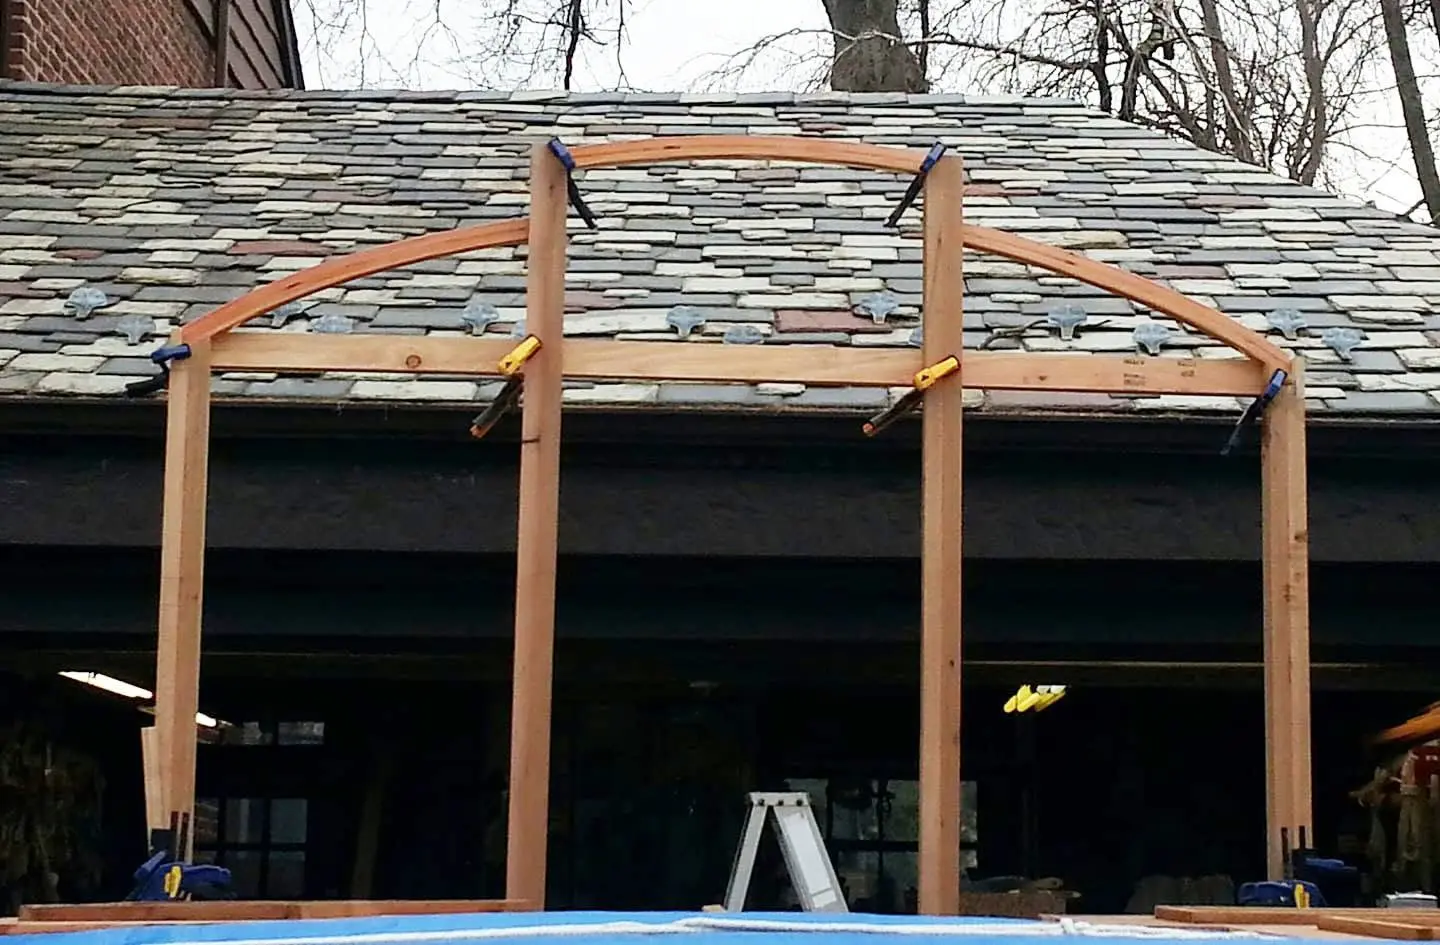
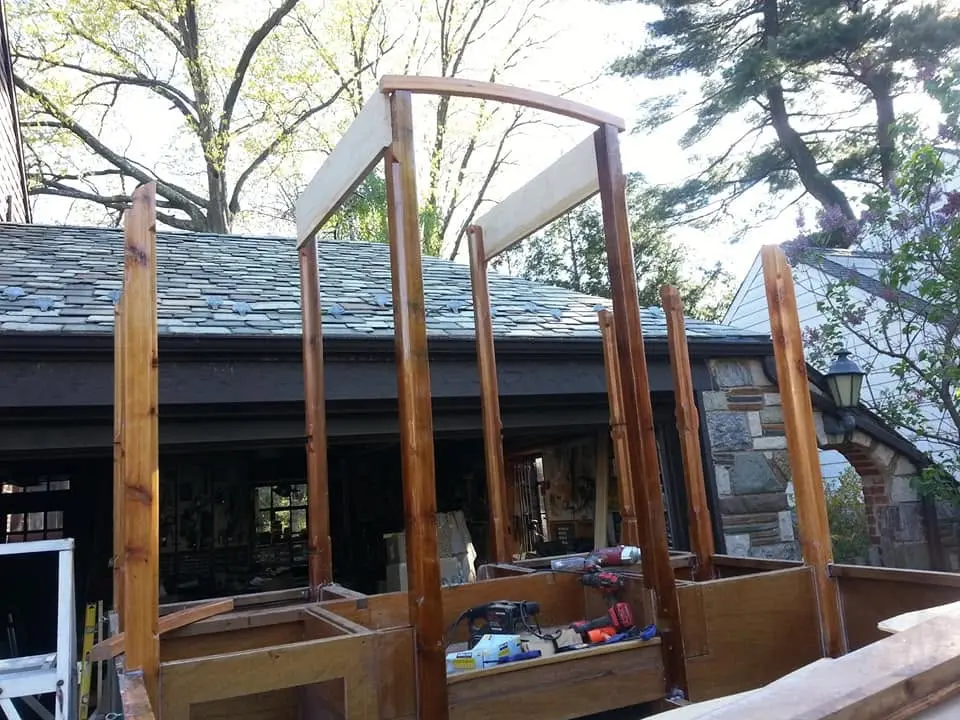
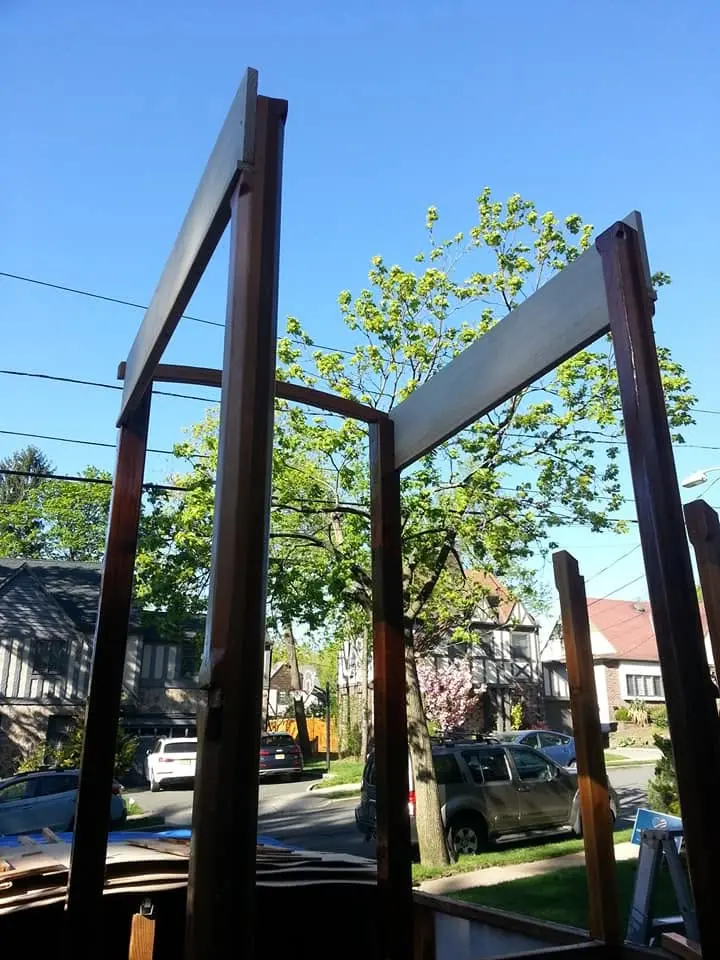
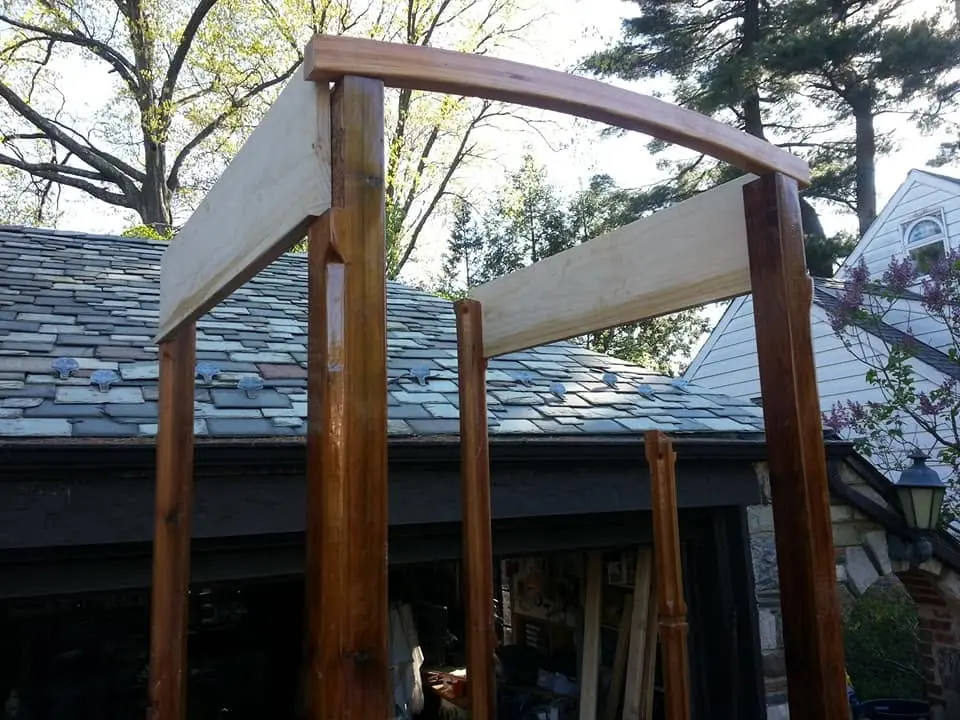
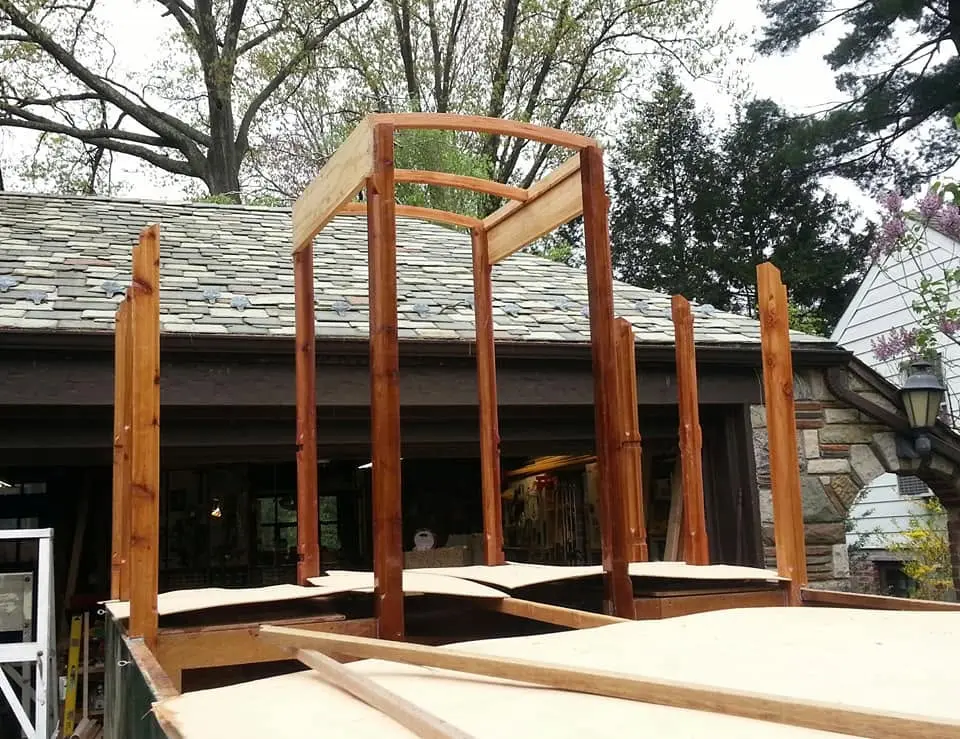
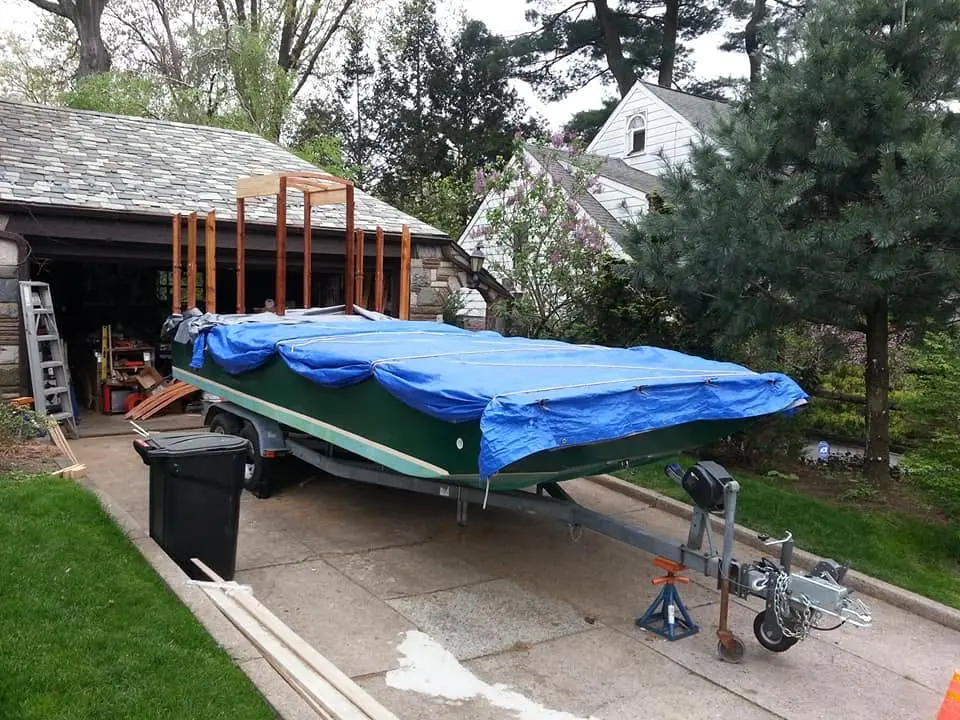
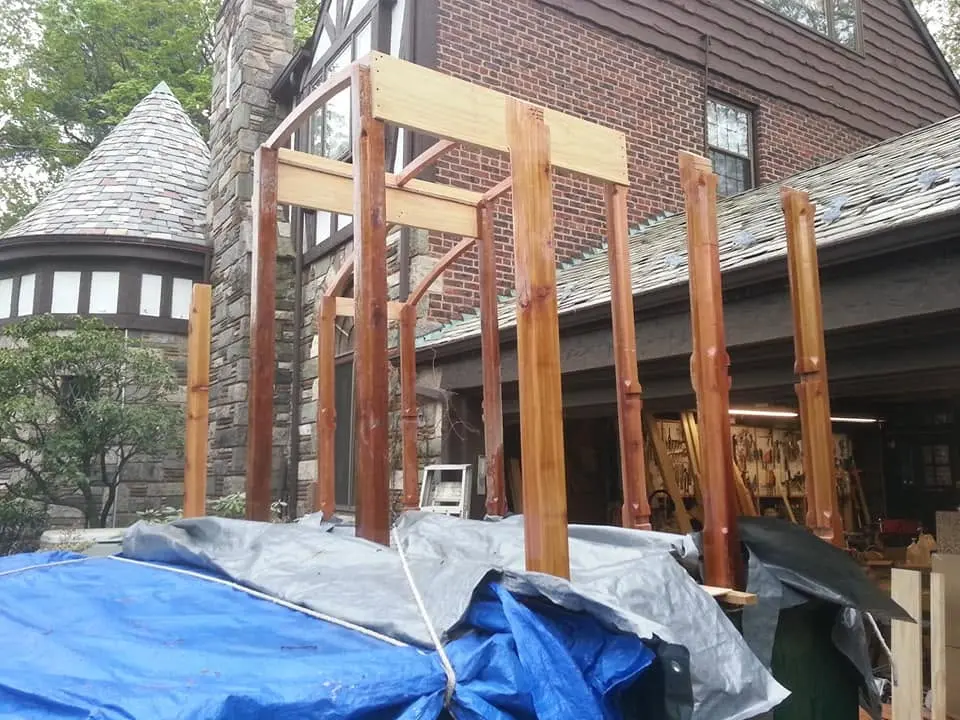
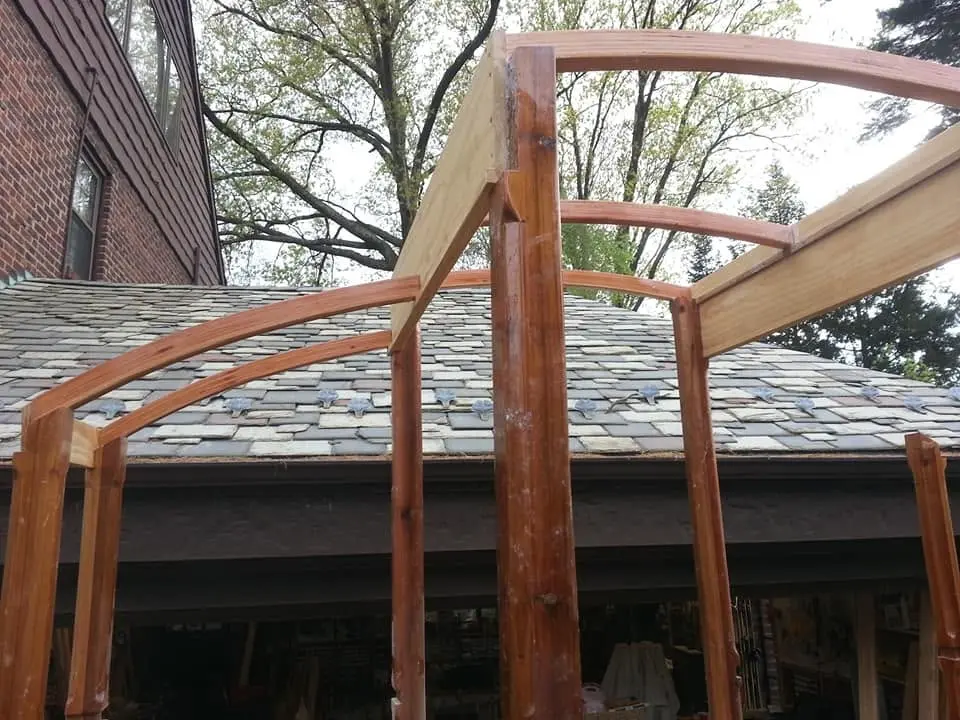
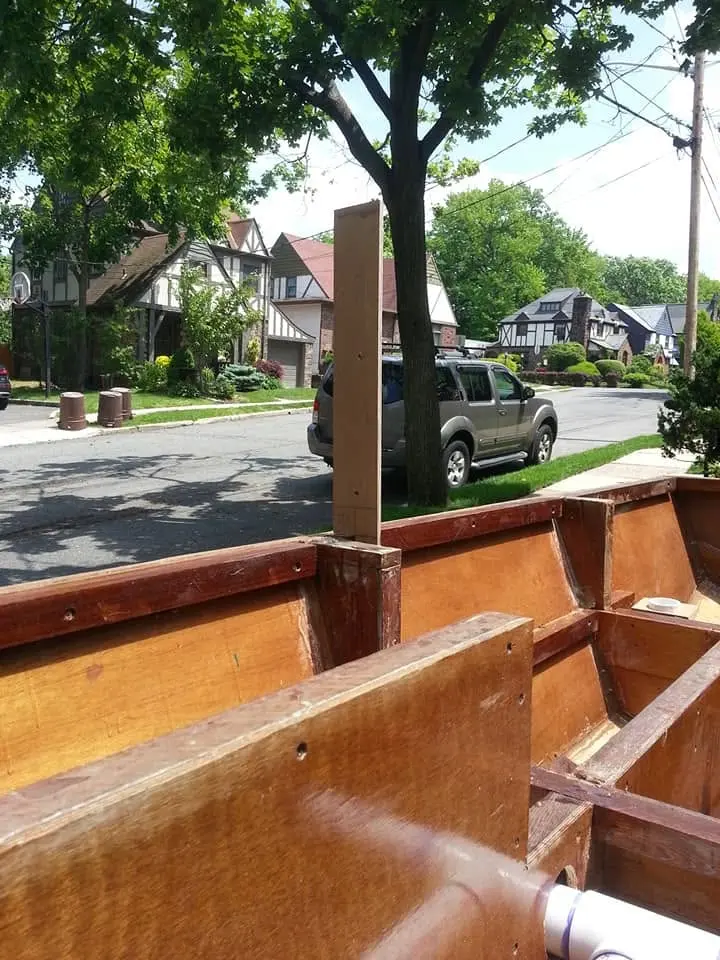
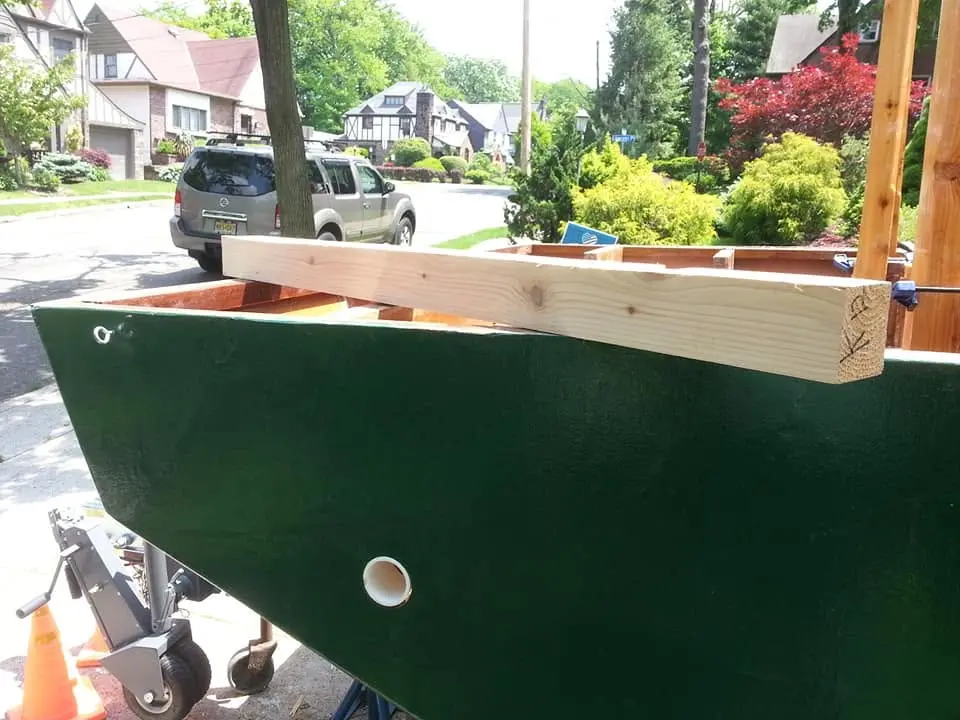
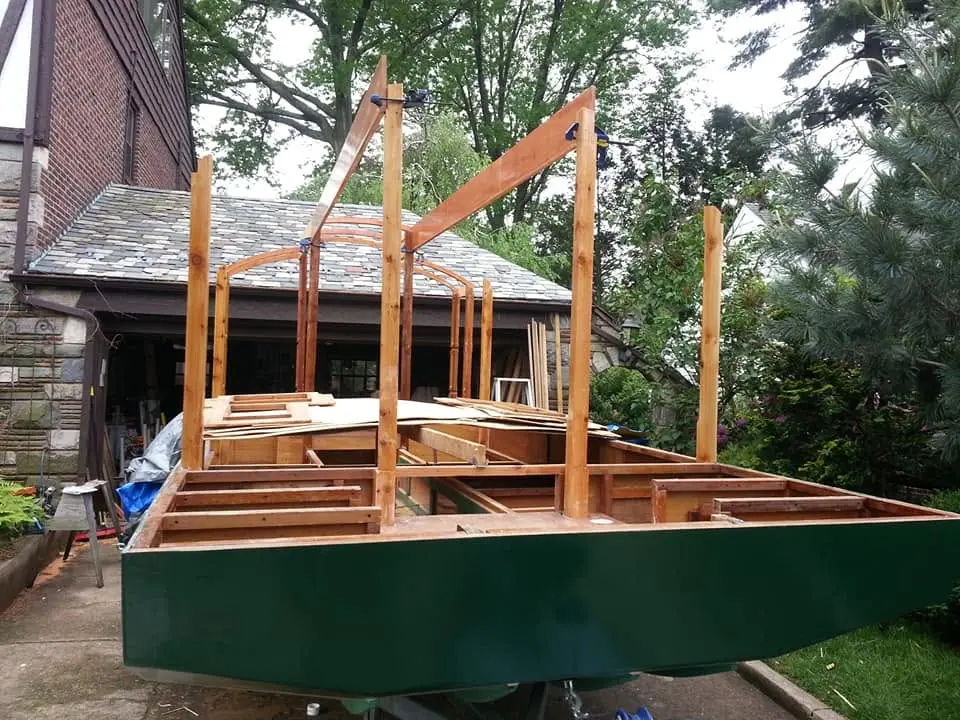
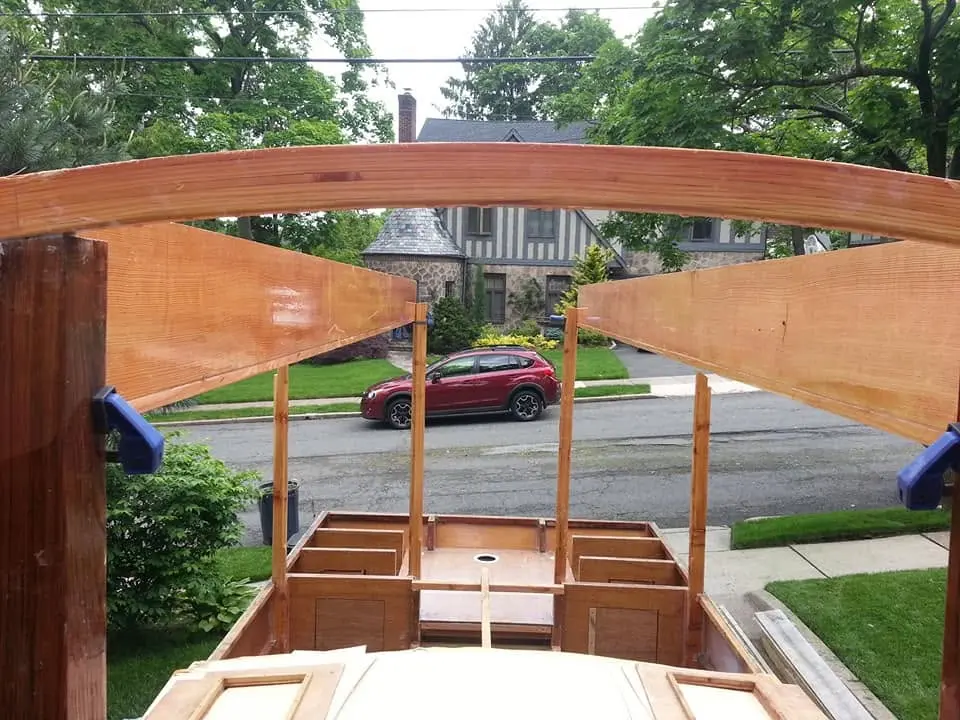
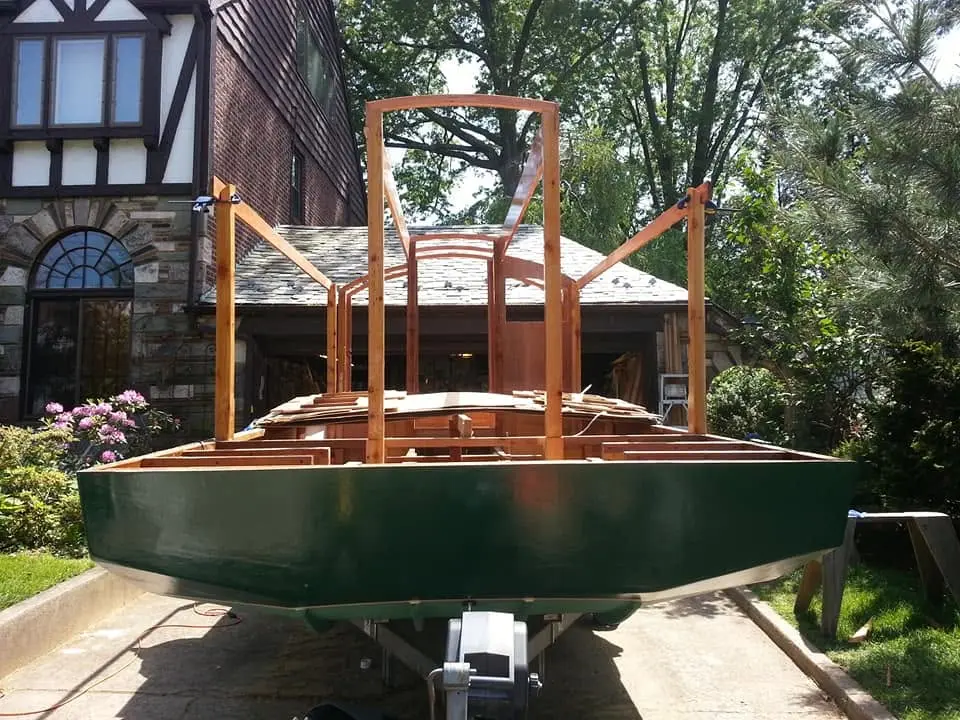
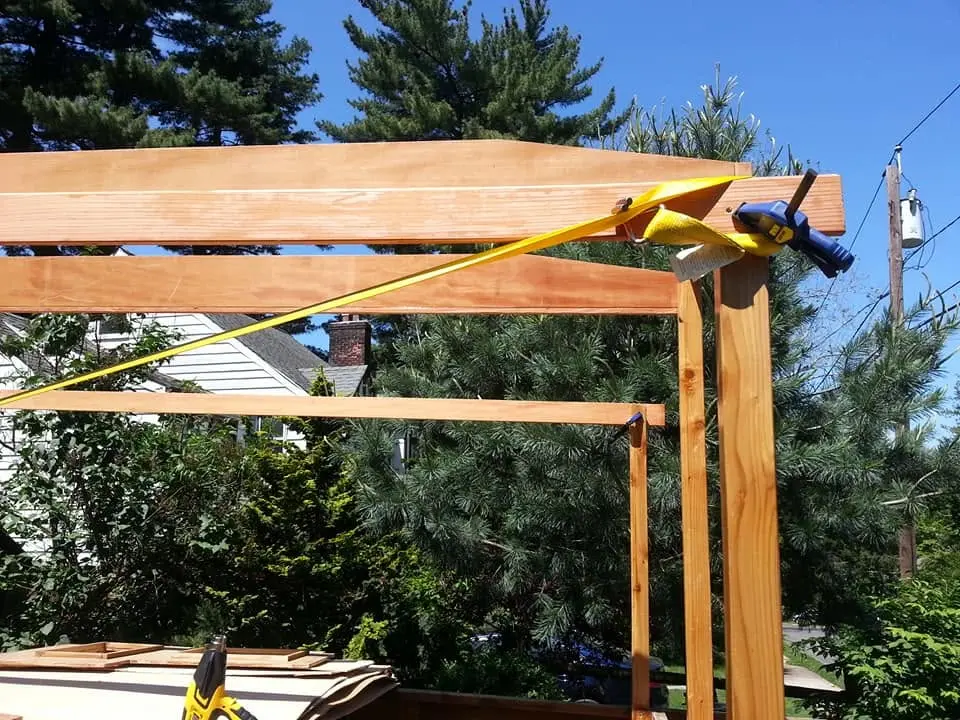
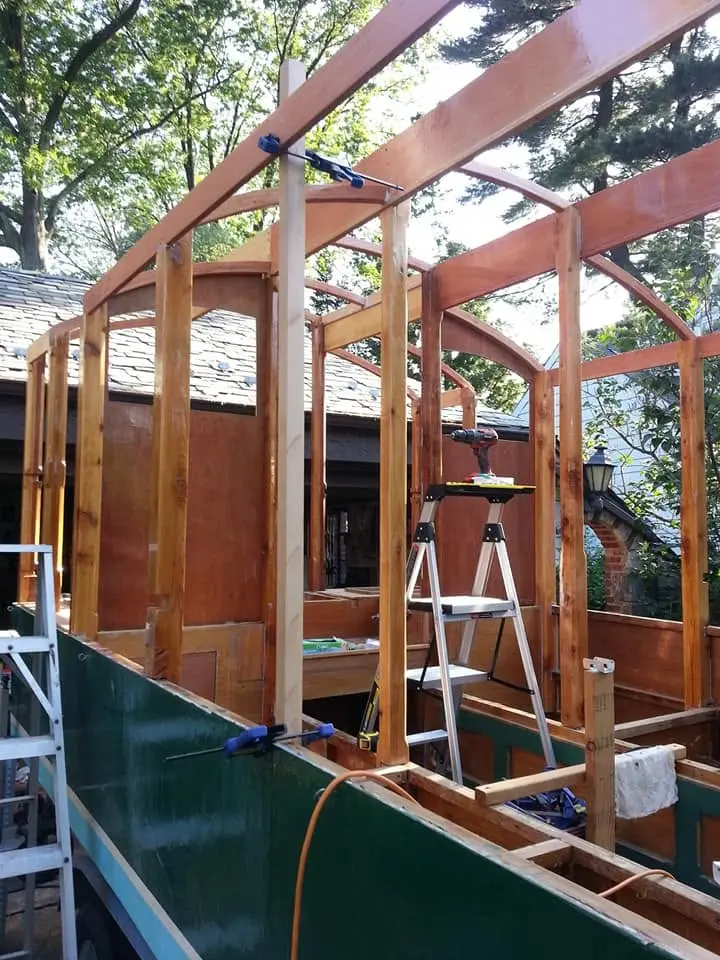
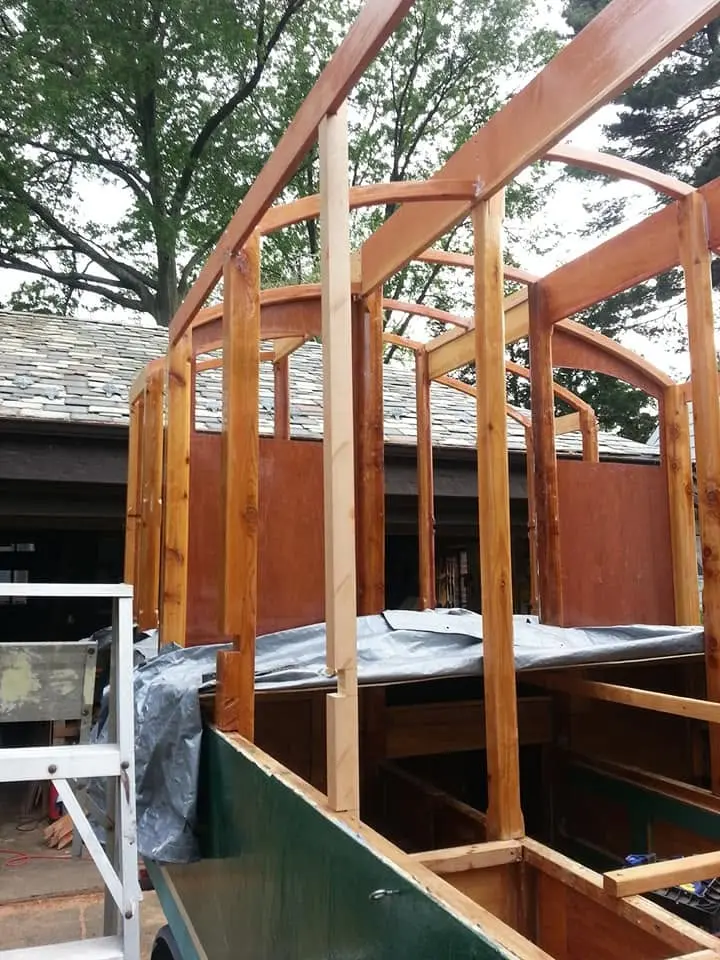
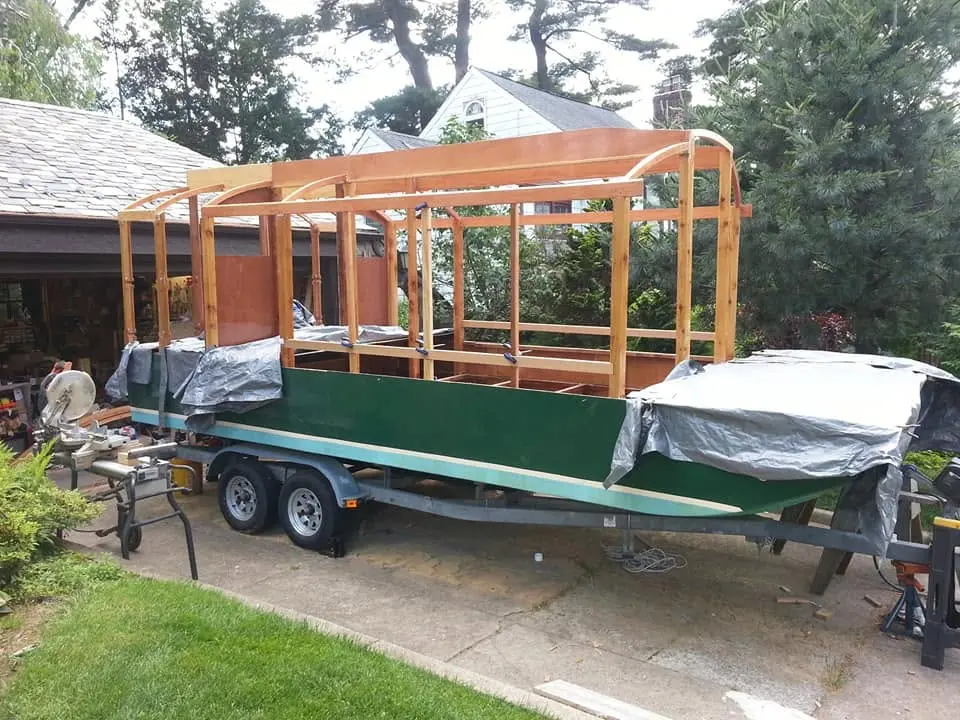
Houseboat update, Friday, September 7, 2018 -- Today was an important day. I laid out the basic shape of Jersey Girl's roof line, using a flexible batten bowed between the two aft-most outer roof posts. First, I used clamps and plastic squaring forms to make sure the posts were absolutely plumb, relative to the hull. Next, I did the same for the two inner posts, which will be fastened to the transom. Then, I fastened the batten to the 35-degree sloped top of one of the outer posts and and bent it in pleasing curved shape to the top of the other outer post. Where the batten crossed the faces of the two inboard posts, I scribed lines with a pencil. I will use measurements I derive from this setup to lay out a work-table jig to guide me in laminating multiple roof beams that will exactly replicate the curve you see here. But that won't be the final shape of the roof. As you'll see in future log entries, the central portion of the roof will be raised by about six inches. To do that I'll cut each laminated roof beam into three parts -- but I am getting ahead of myself. Stay tuned, and you'll see.
20 Sep 2018Deck & Coamings
Back to work on Jersey Girl.
Houseboat update, Thursday, September 20, 2018 -- Back to work on Jersey Girl. Over the past week, I have almost finished the poop deck. I'm as scatologically inclined as anyone (OK, call it arrested development) and I get a kick out of writing "poop deck," but it's not what you think. It means the highest, aft-most deck on a vessel. It comes from an old French word for exactly that, "poupe." On Jersey Girl, it'll be a nice place to sit and enjoy the fresh air with a sunset cocktail, perhaps, or a place to set up my easel to do some plein air harbor painting. It'll be covered by an extension of the arched cabin roof, so it'll even be available to use during a nice summer rain. The poop deck will also be surrounded by a curtain that can be drawn closed for privacy, when I want to take a shower, for instance. Did I mention I am planning a solar-heated shower installed in the center of the roof arc? What about drainage, I hear you say. That will be taken care of, as you will see. Stay tuned.
Chapter 07
Interior & Cockpit
Bulkheads, seats, buoyancy, sole, storage.
32 daysfrom September 2018
20 Sep 2018Interior & Cockpit
Speaking of drainage from the poop deck, what's to prevent water from running down...
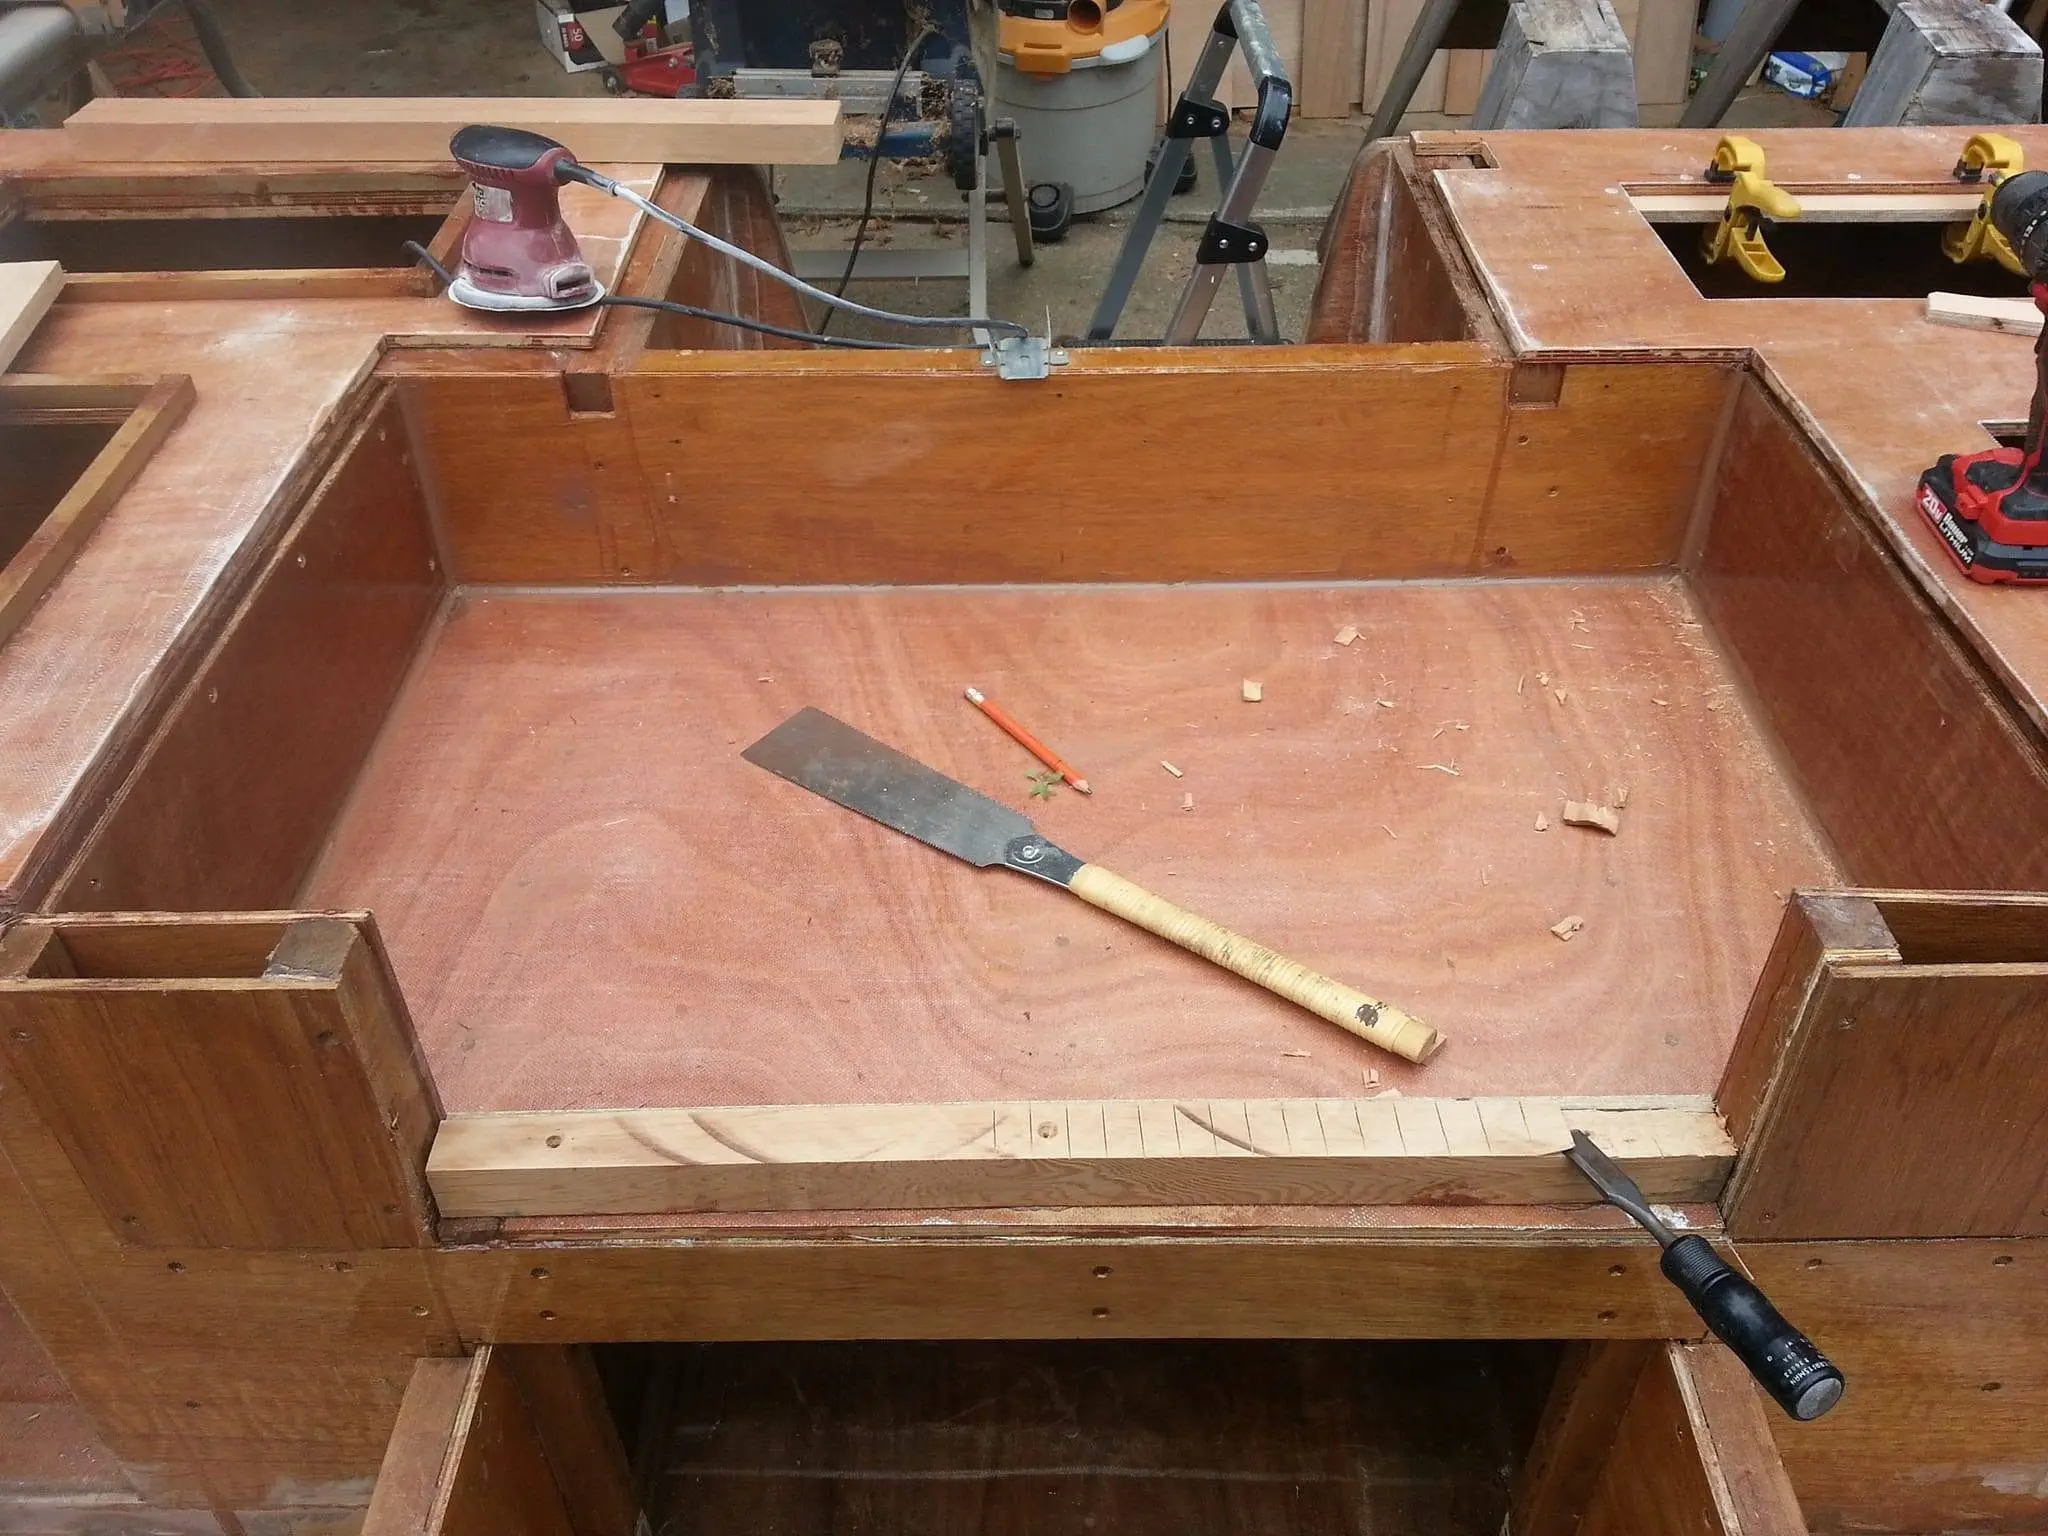
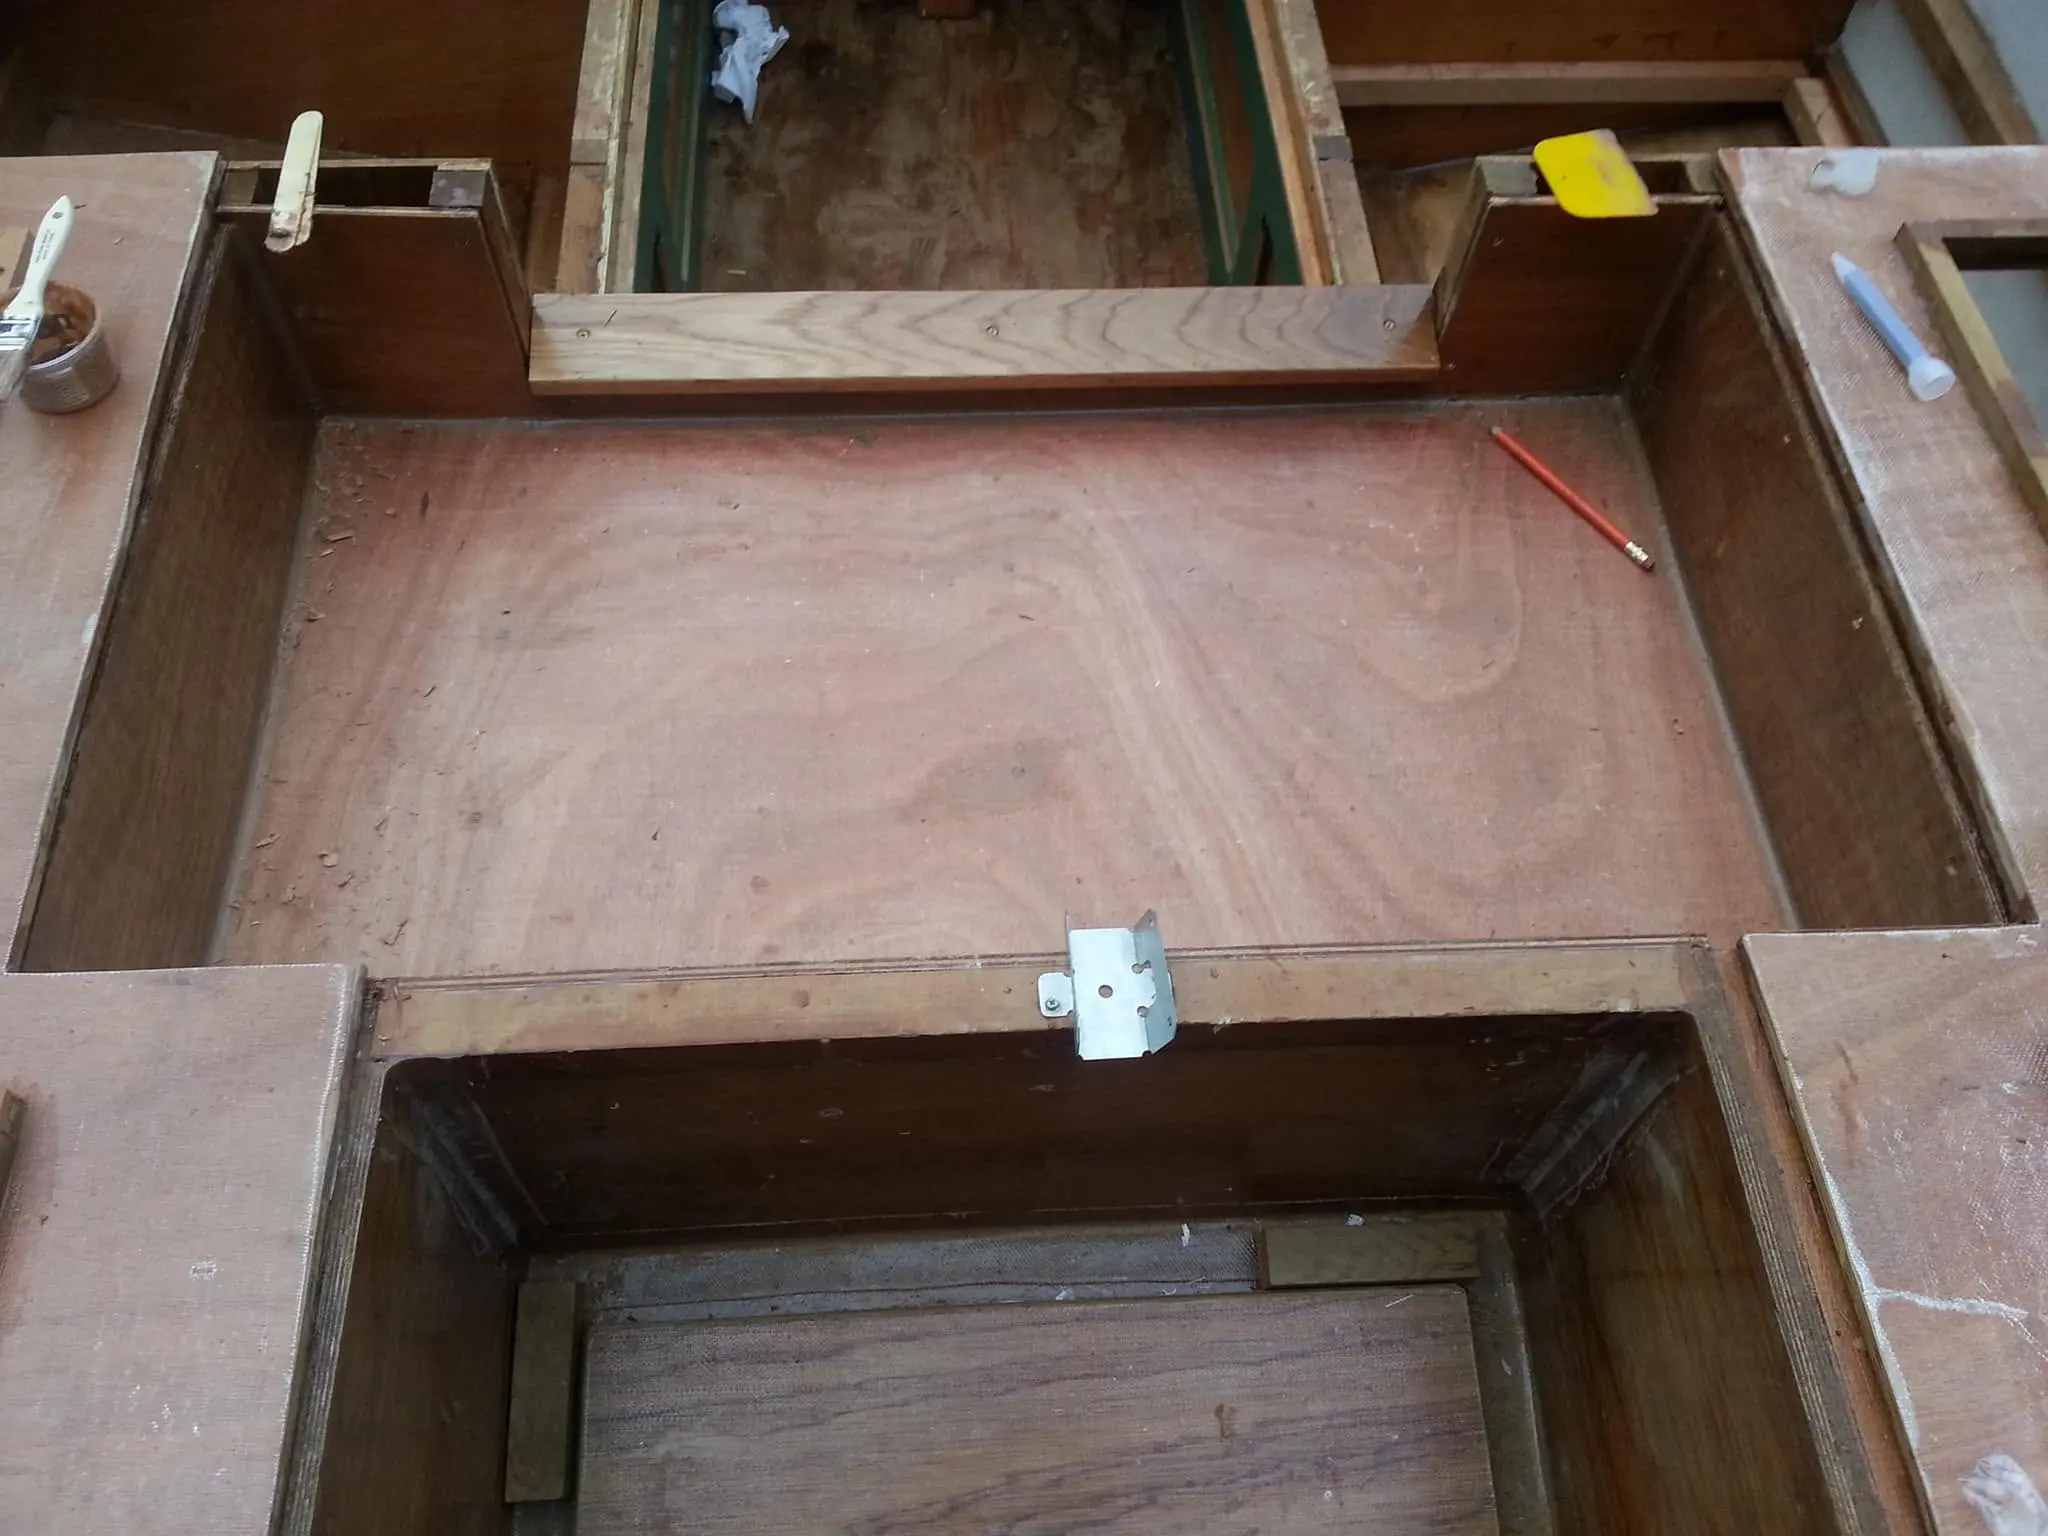
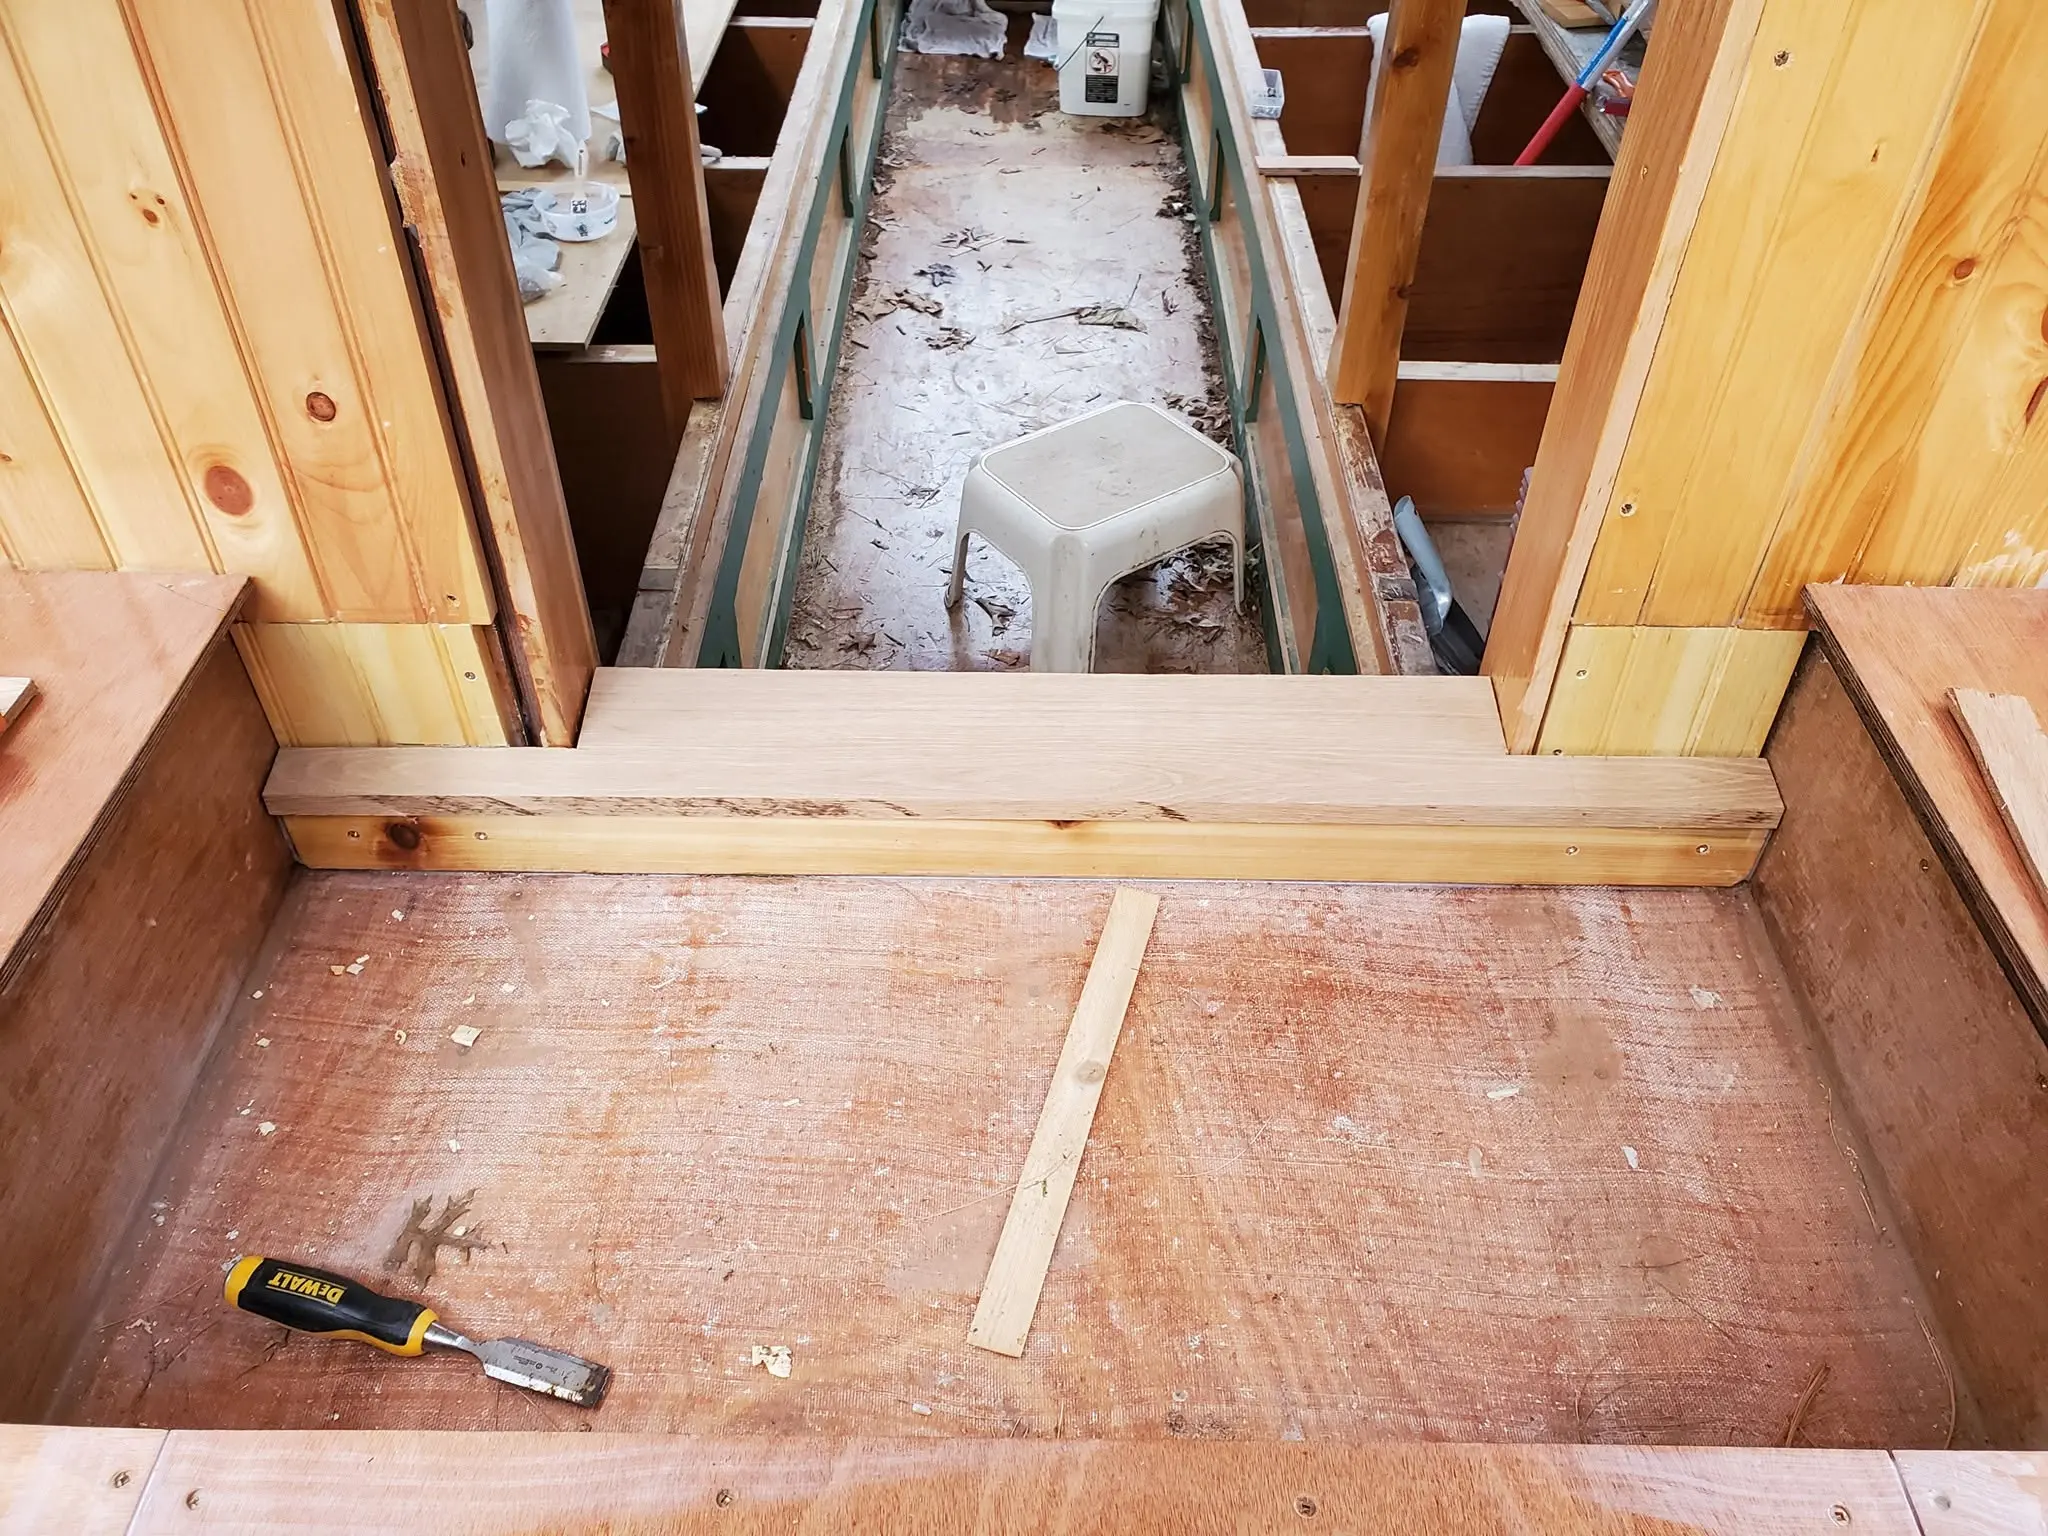
Houseboat update Part 2, Thursday, September 20, 2018 -- Speaking of drainage from the poop deck, what's to prevent water from running down into the cabin? I'm installing a raised sill with a saddle of white oak, a beautiful, tightly-grained, tough wood that I think will resist wear over the years. To prevent water from leaking across the saddle under the aft cabin door, I am angling the red cedar undersill down toward the stern, so any water will drip away from the cabin, not into it. To do that, I'm making a series of angled cuts, using a Japanese pull saw, then a hammer and chisel to knock out the waste blocks between the cuts. It probably would have been easier to cut the angle into the cedar with a table saw, but I didn't think of the potential for inward water flow until after I glued it into place. Yet again, the opportunity for problem-solving.
21 Sep 2018Interior & Cockpit
Jersey Girl's poop deck is virtually complete, now that I have installed a white oak...
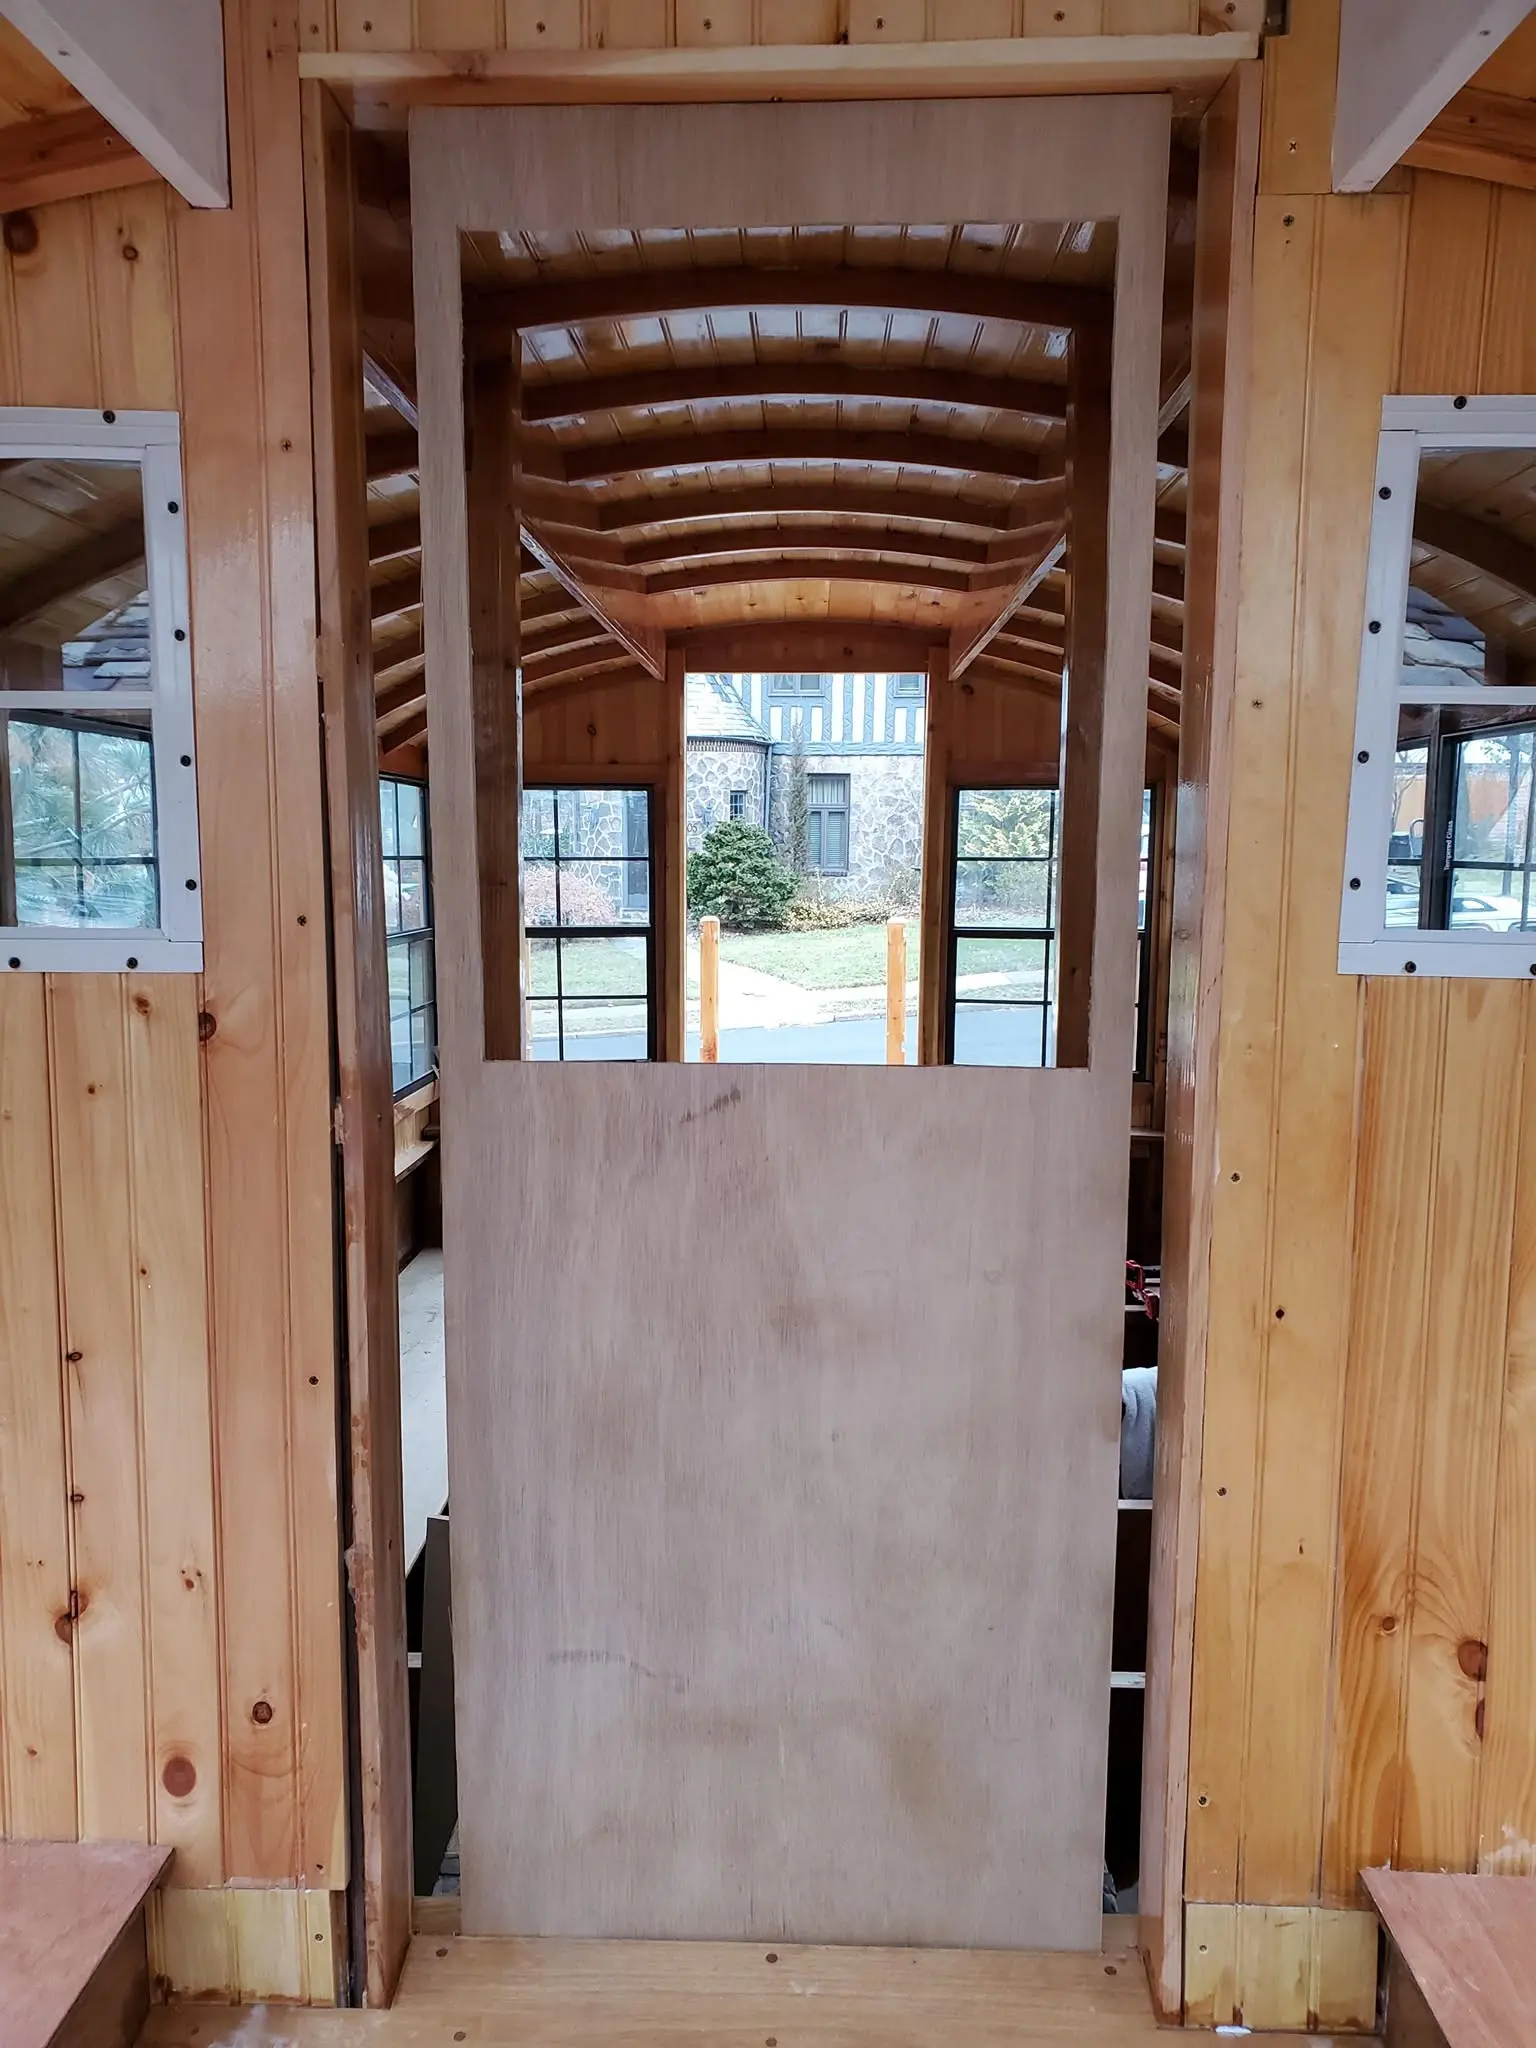
Houseboat update, Friday, September 21, 2018 -- Jersey Girl's poop deck is virtually complete, now that I have installed a white oak door sill leading into the cabin below and just forward. What could be more natural than moving from the poop deck, which has nothing to do with poop, to the head, which does? In the second photo, you can see the framing in a compartment on the starboard side of the aft end of the cabin, which support a flat floor in the head. I don't know anyone who would relish a squat on the pot while sitting on a slope, which is the shape of the hull bottom. Flat and level is the way to go. By the way, I've seen WCs in New York City apartments smaller than this. So we're living large, folks.
24 Sep 2018Hull Panels
The floor of Jersey Girl's future head was glued and screwed into place today.
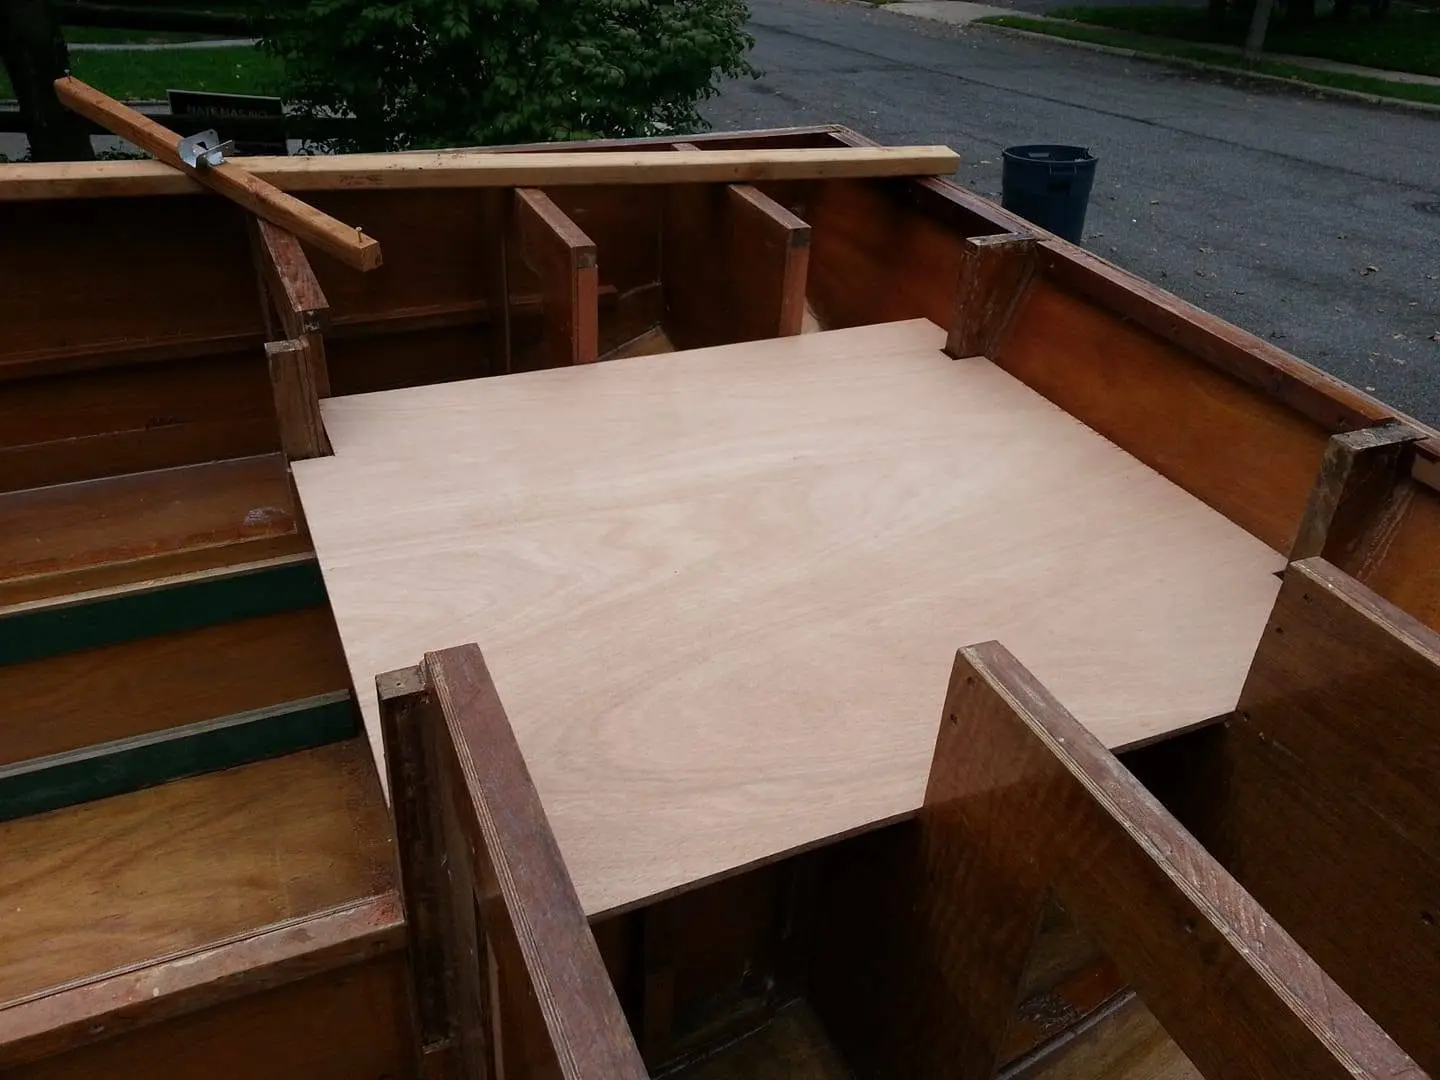
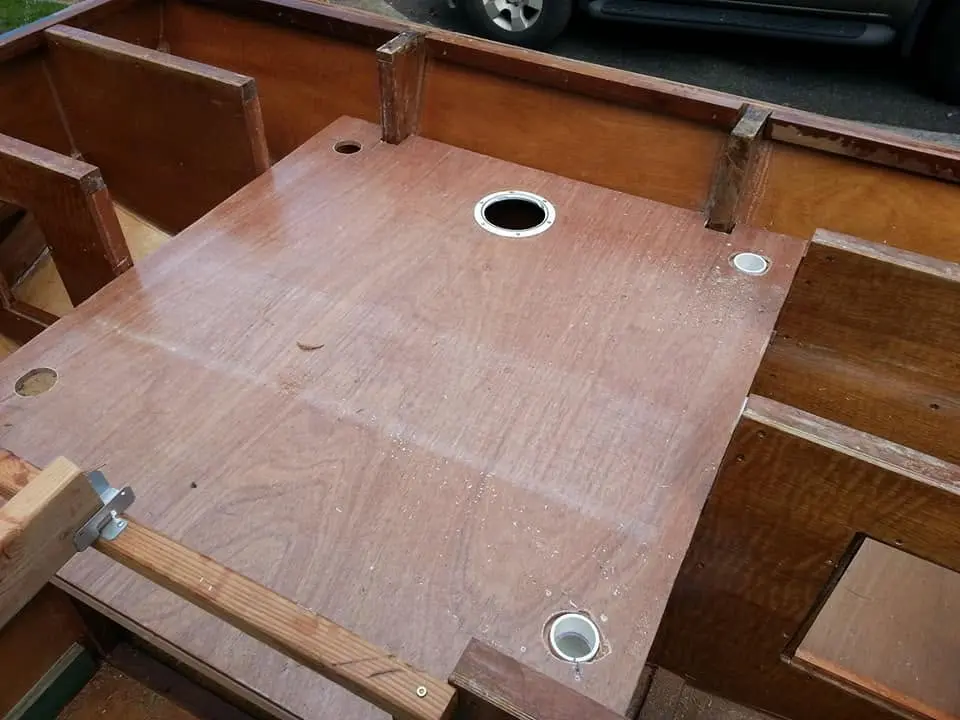
Houseboat update, Monday, September 24, 2018 -- The floor of Jersey Girl's future head was glued and screwed into place today. I love the grain pattern in this plywood, and I may decide to leave it exposed rather than go to the trouble of fastening individual floorboards to the top of it. It's luan, sometimes inaccurately called Philippine mahogany, produced from the same tree we can thank for the crap quarter-inch underlayment available at big-box home centers. For years, the word among professionals was, "boat builders do not use luan." Now, thanks to new cutting and production methods, luan is a wonderful alternative to the more traditionally used African species, okoume, at a fraction of the price. I started this boat three years ago using okoume and I rather hide-boundedly stuck with that wood for the first two years. I'll use luan to finish it.
27 Sep 2018
Water is sneaky stuff.
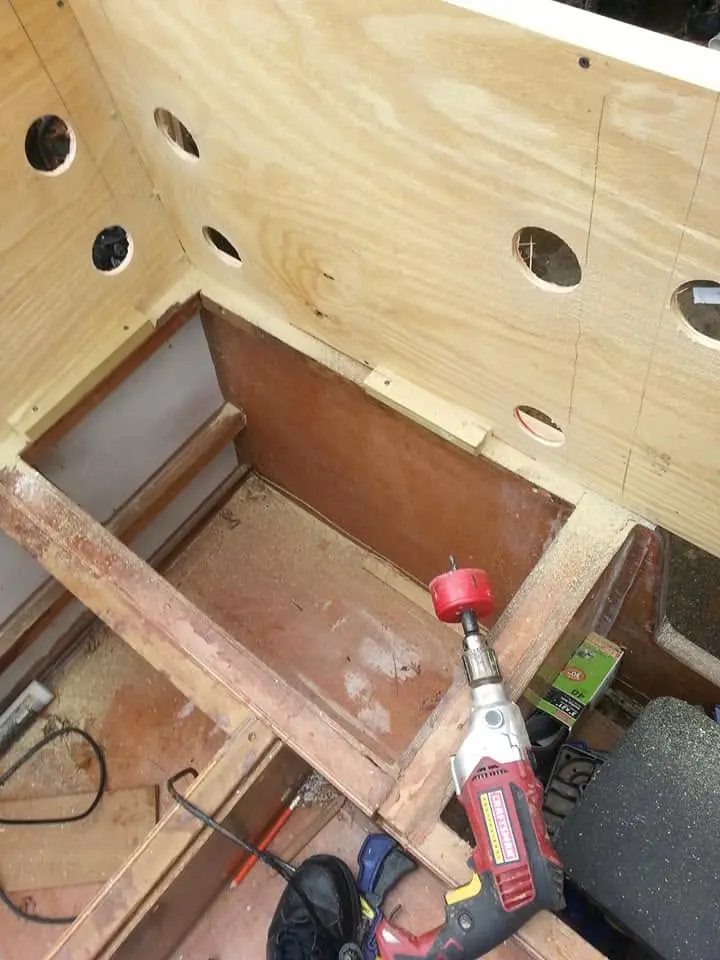
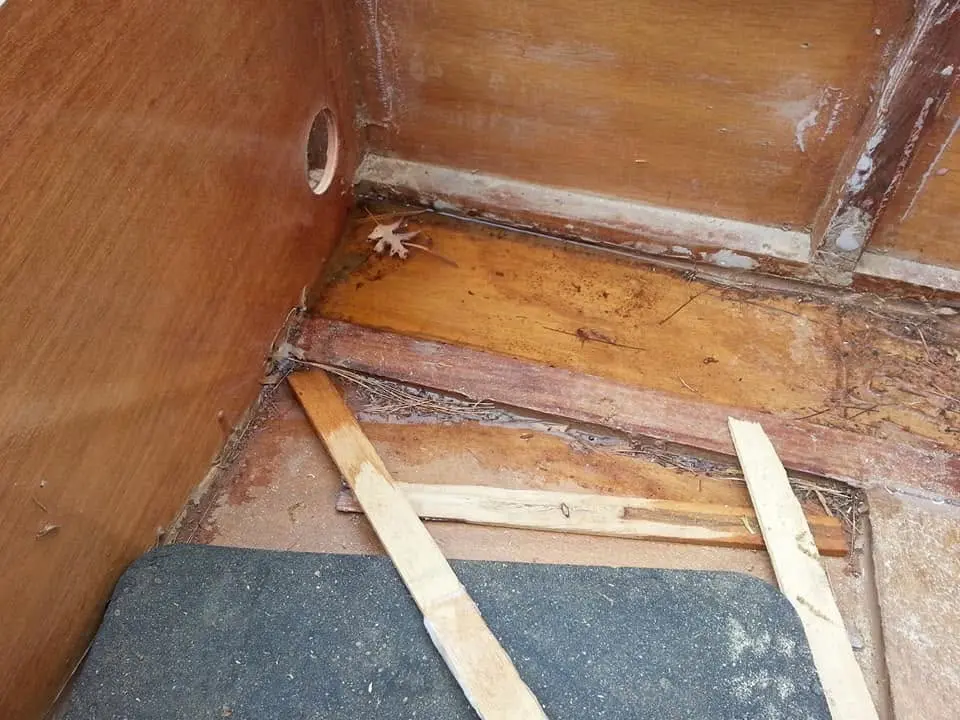
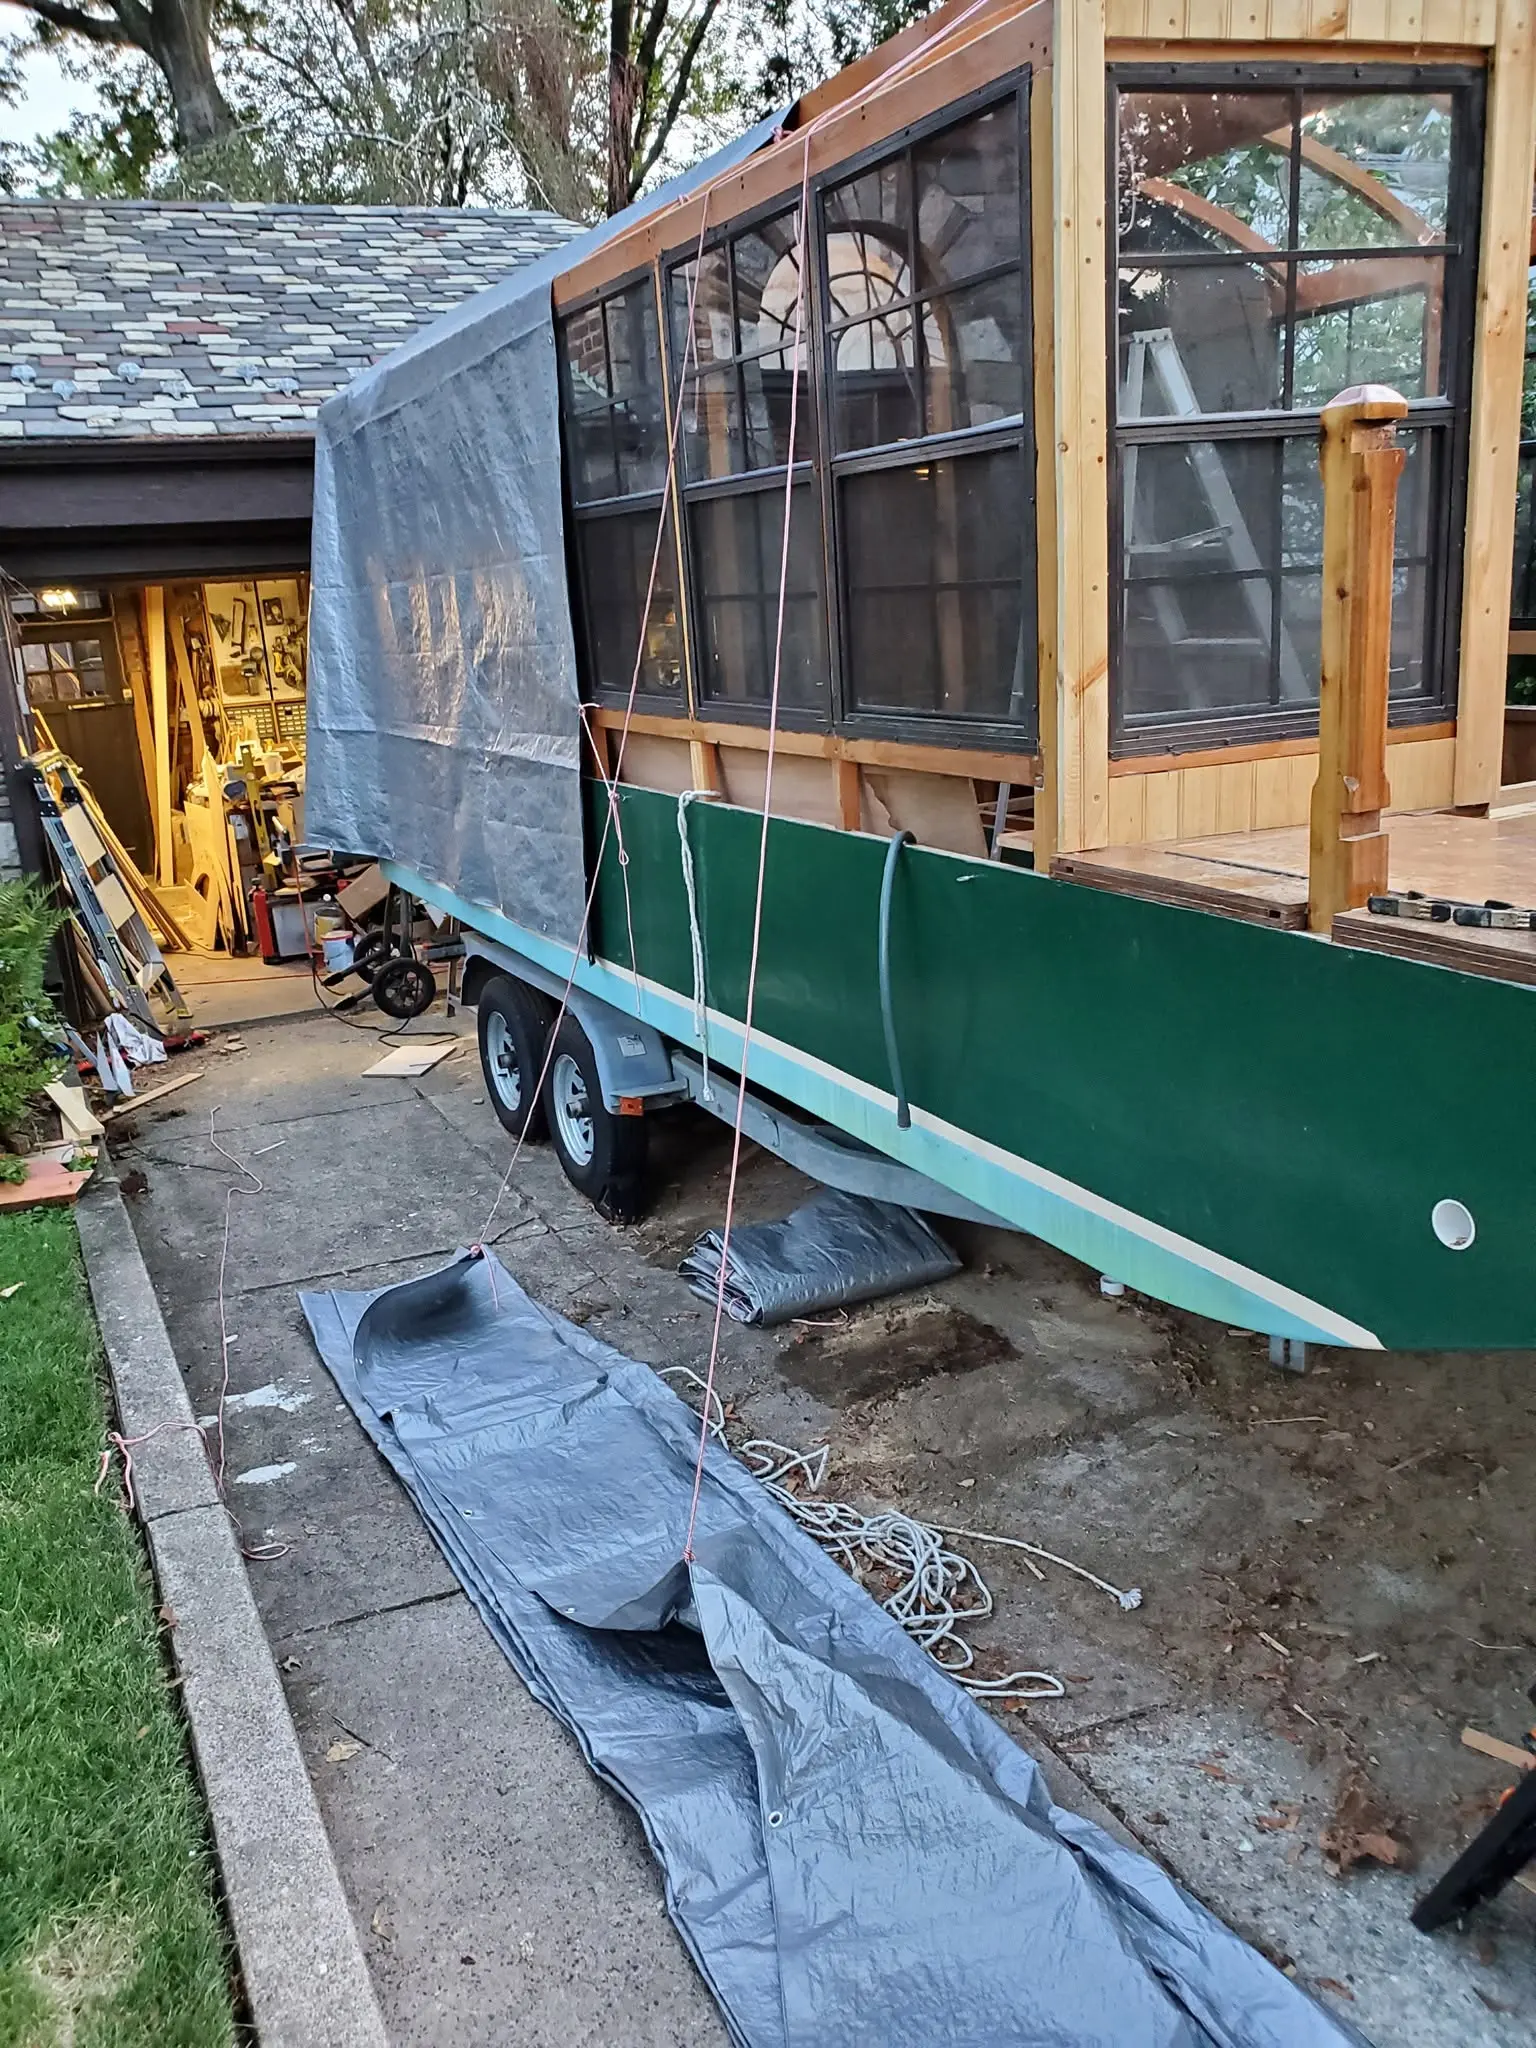
Houseboat update, Thursday, September 27, 2018 -- Water is sneaky stuff. I think I have conscientiously tucked Jersey Girl in for the night, well covered with sheets of plywood and a tarp laced on top with criss-crossed rope, but no.That nice head floor that I glued and screwed down a few days ago, creating an inaccessible void beneath it? Somehow water from a torrential downpour two days ago all found a way to stream into that void. You can't beat water. All you can do is try to figure out how to deal with it. I decided to cut three-inch access holes in strategic places, to be capped with plastic air vent covers. Then, if (read that "when") I need to, I can suck out the water with a shop vac hose. When I am afloat, a bilge pump will do. Jersey Girl has a way of keeping me humble.
1 Oct 2018Deck & Coamings
I'm starting to frame the support timbers for Jersey Girl's recessed fore deck.
Houseboat update, Monday, October 1, 2018 -- I'm starting to frame the support timbers for Jersey Girl's recessed fore deck. Like the aft deck, the "front porch" will provide space for comfortable seating for two, and a place to watch the world go by. It'll be a little tricky, because this area lacks the obvious opportunity to build in drainage. But I have a few ideas to explore, and I'm sure I'll figure it out. It'll probably involve a "thru-hull" or two. The framing that I am working on now will probably be the last thing I can do before I tuck Jersey Girl in for a long winter's sleep. I'm going to miss her, but I will keep busy in the heated garage, prefabricating things like cabin walls and laminated arched roof beams.
1 Oct 2018Deck & Coamings
I'm getting ready to cut some red cedar 2 x 2s to use in framing Jersey Girl's fore deck.
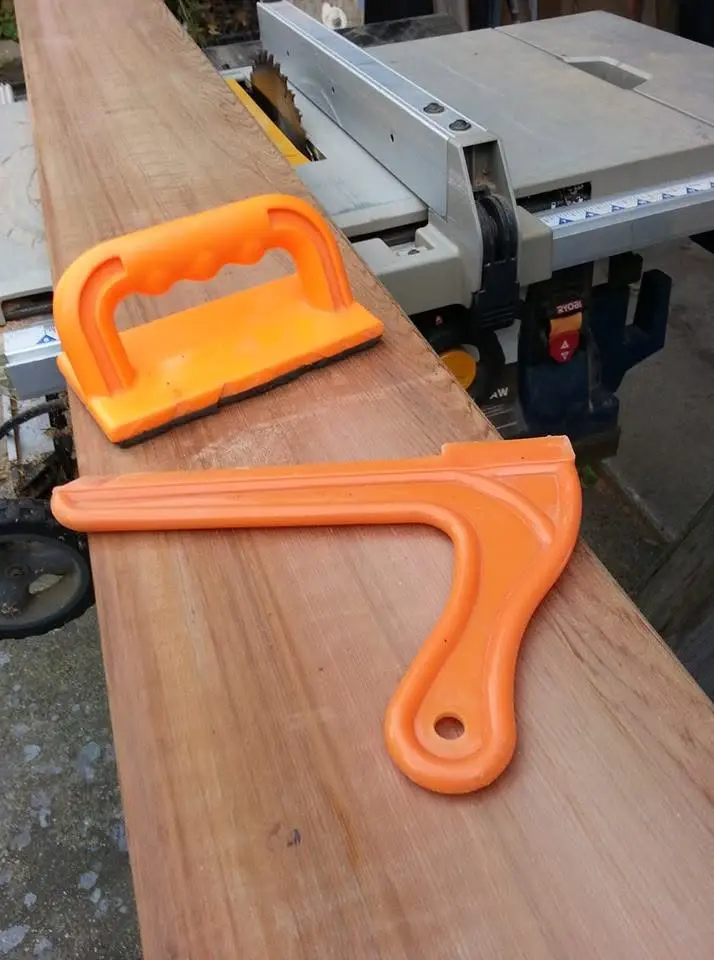
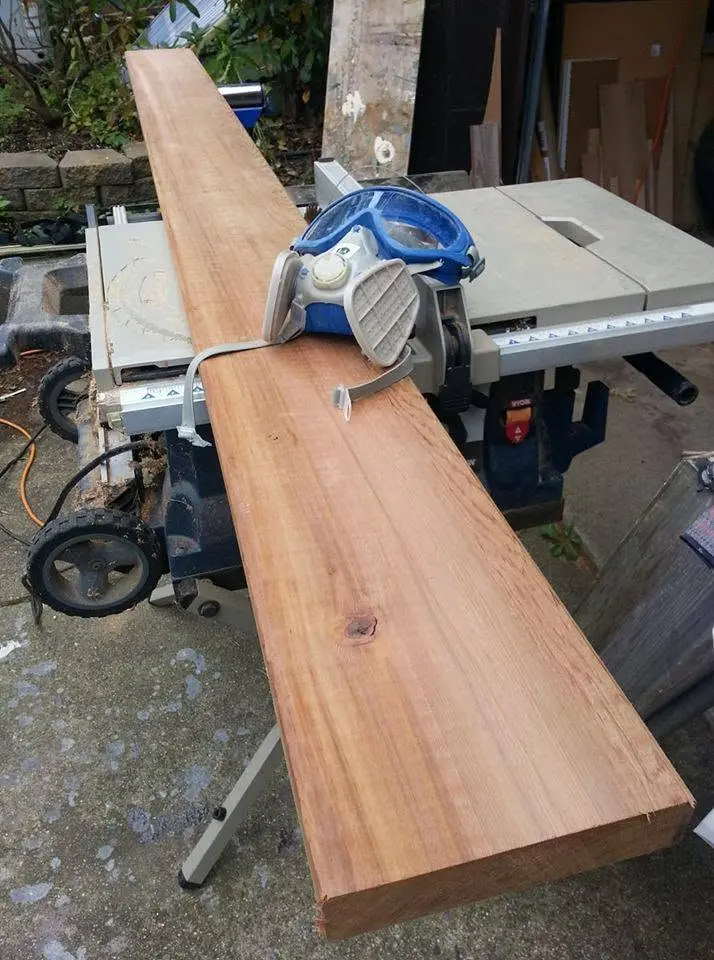
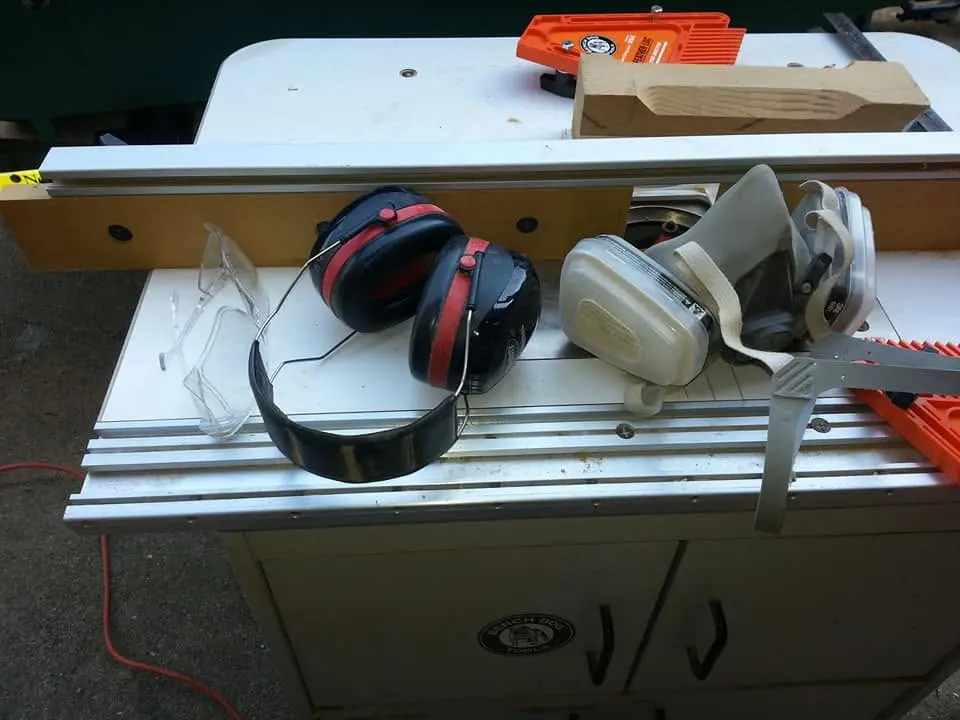
Houseboat update, Part 2, Monday, October 1, 2018 -- I'm getting ready to cut some red cedar 2 x 2s to use in framing Jersey Girl's fore deck. Cedar is wonderful wood for boats. It's lightweight and very rot resistant. I'm no "woodologist" but I suspect the same properties that make it unattractive to the critters that play a starring role in the cycle of rot also make its dust play havoc on the lungs of boat builders. Thus, the full-face respirator. I'm just making note of this in case anyone cares to engage in my obsession. Gotta protect the ol' blowholes if you want to live long enough to pilot the boat you're building!
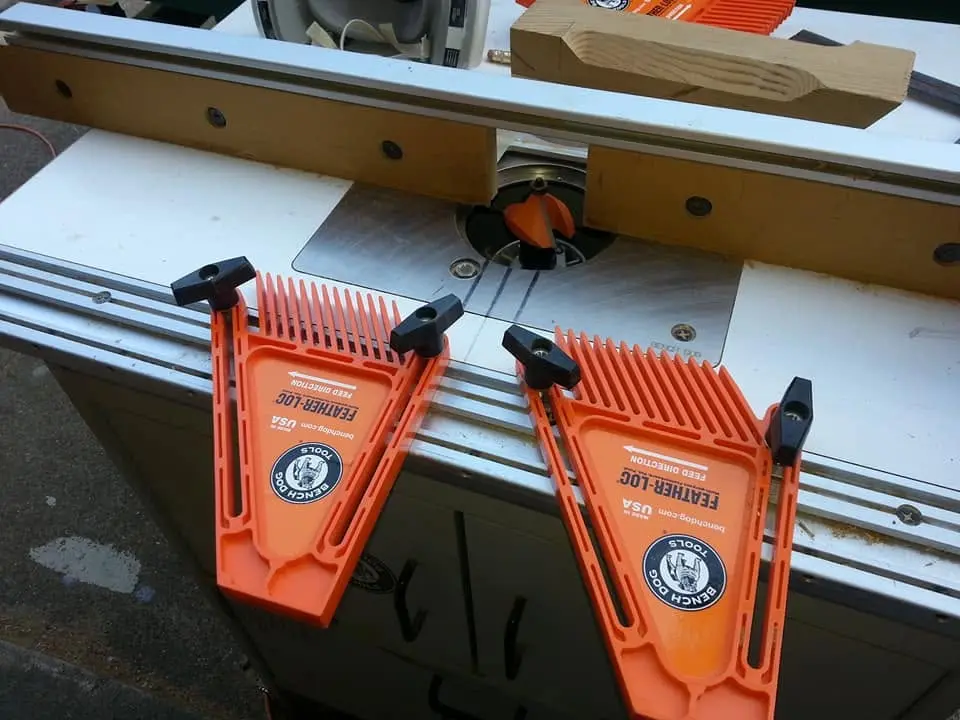
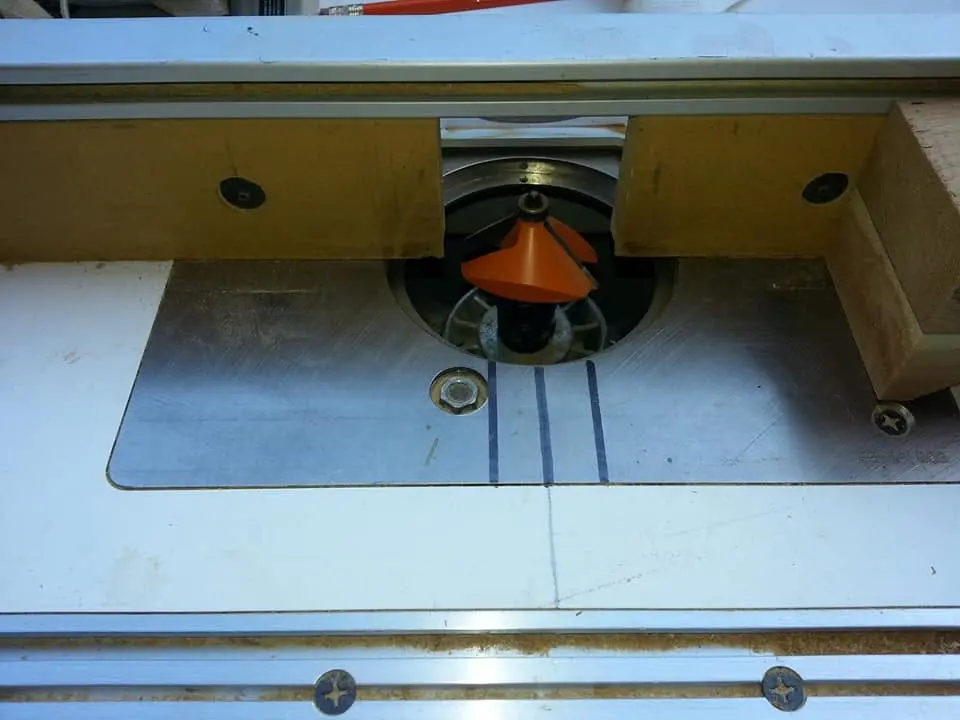
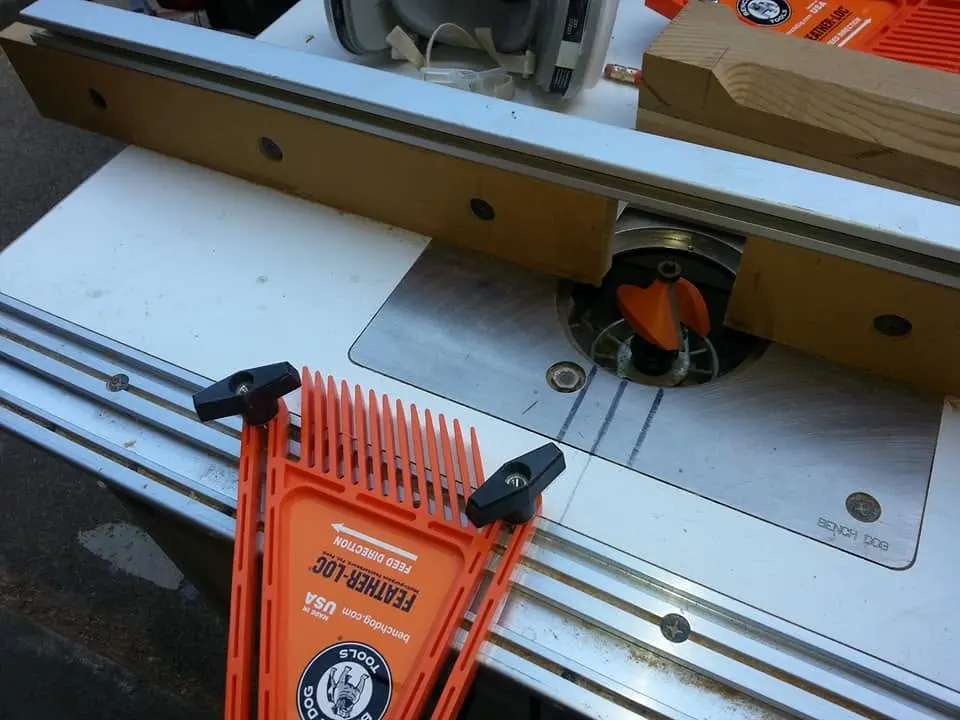
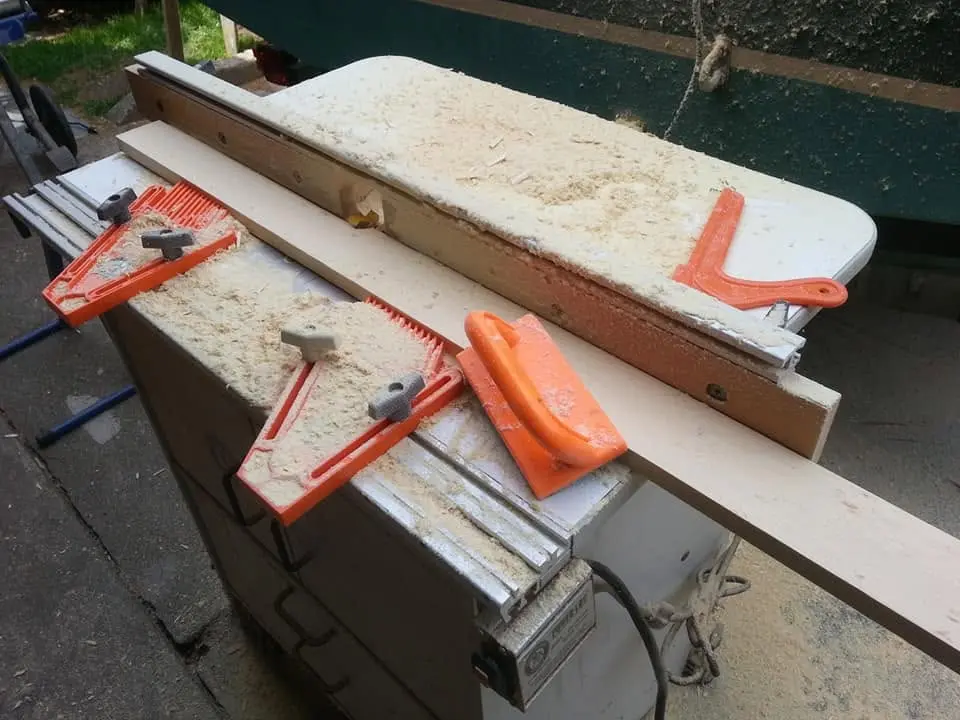
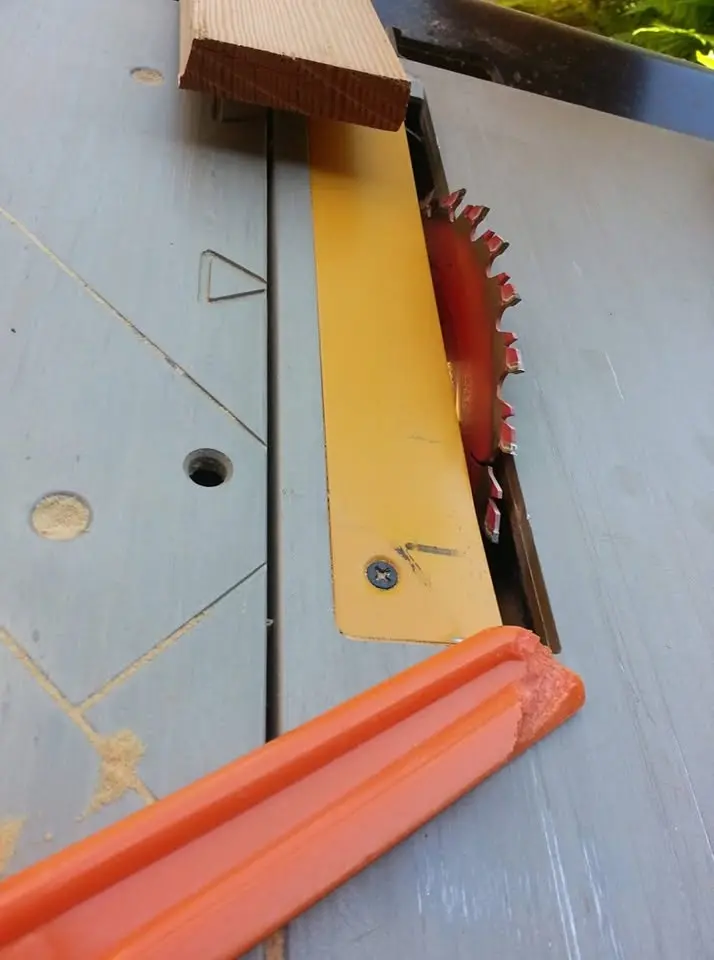
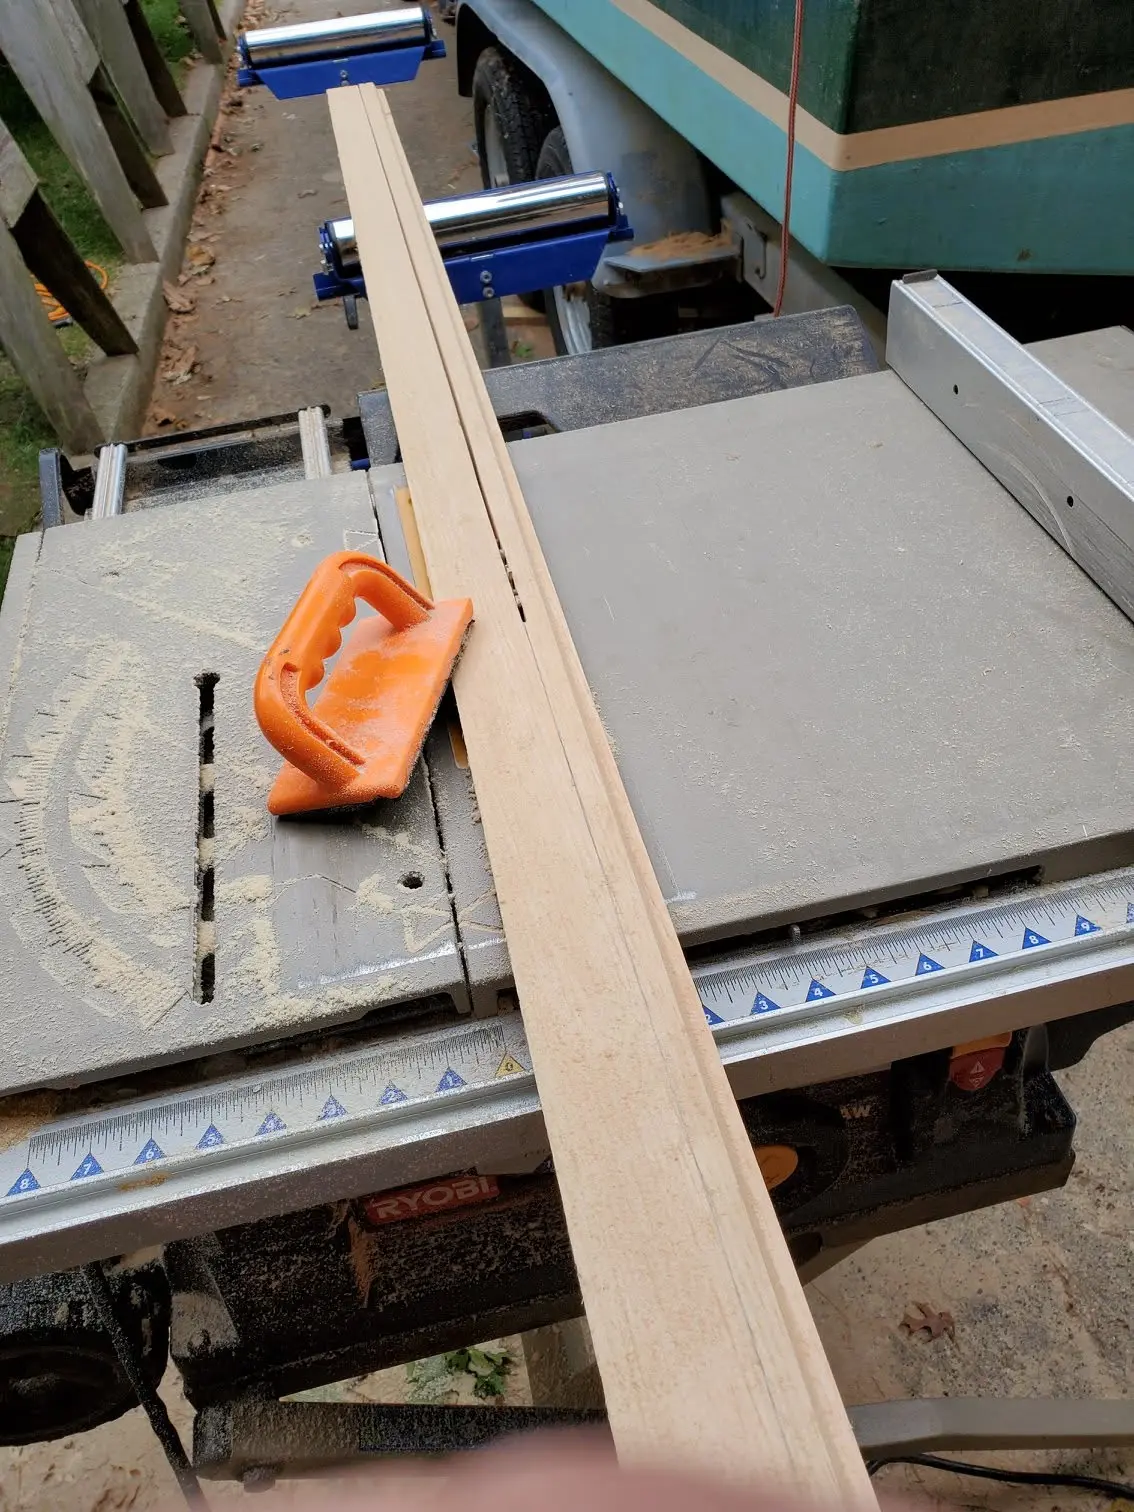
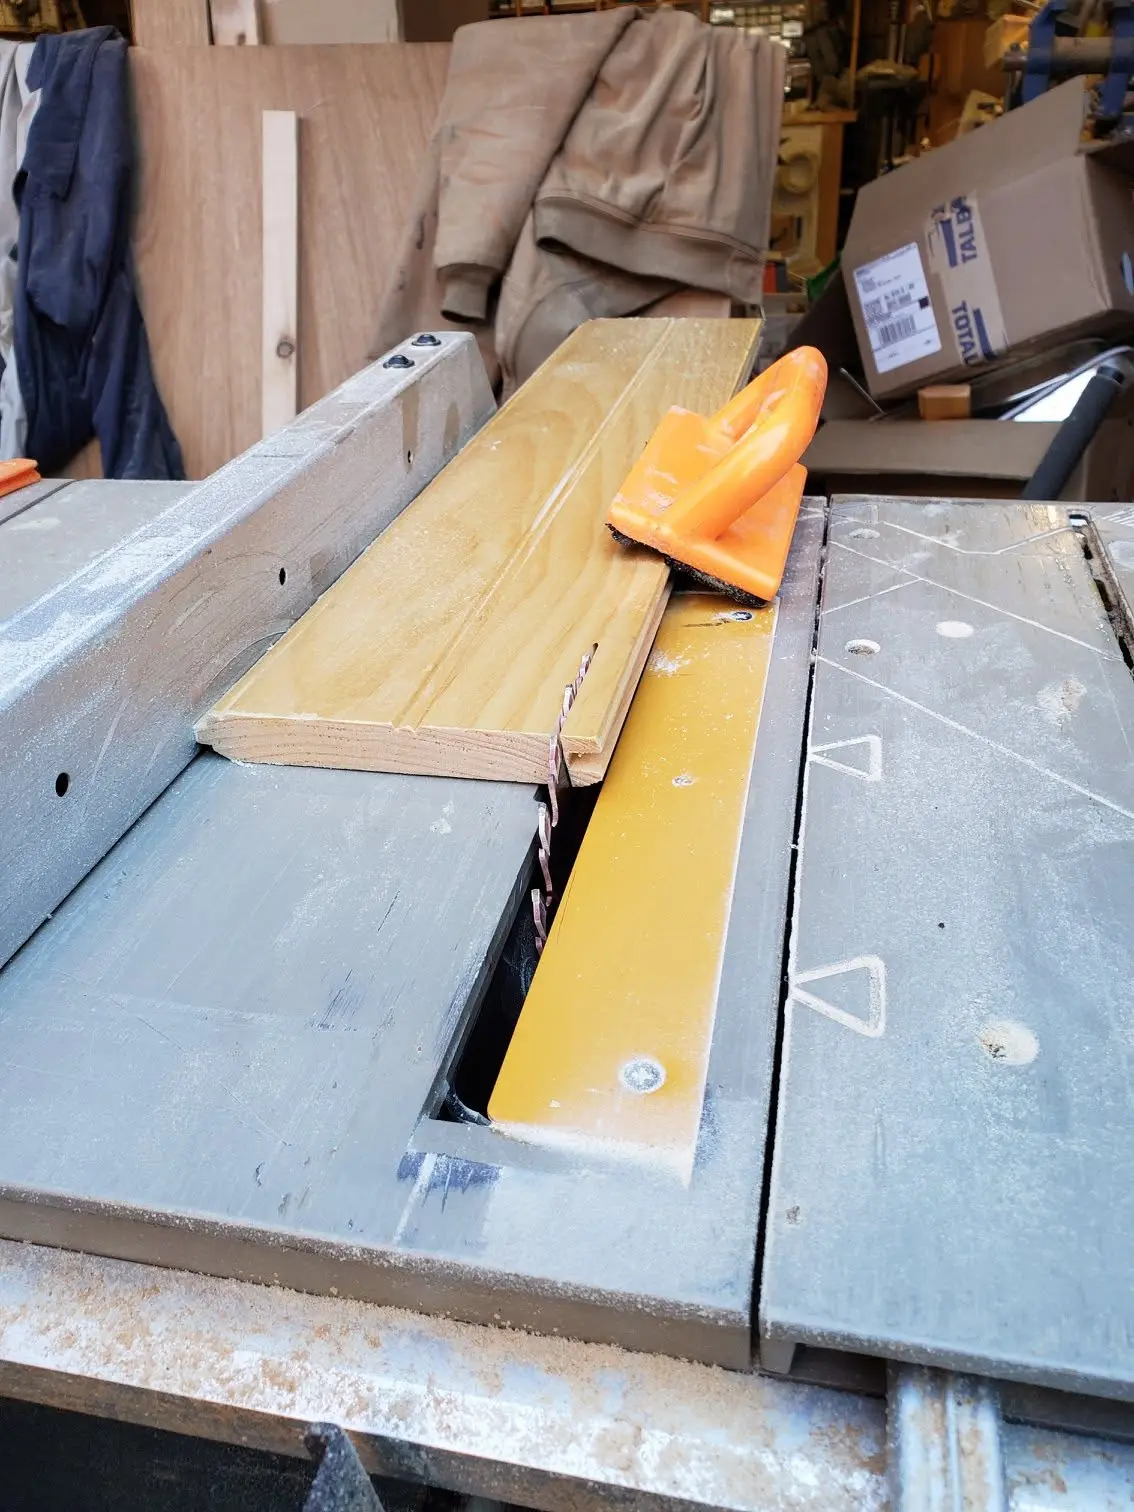
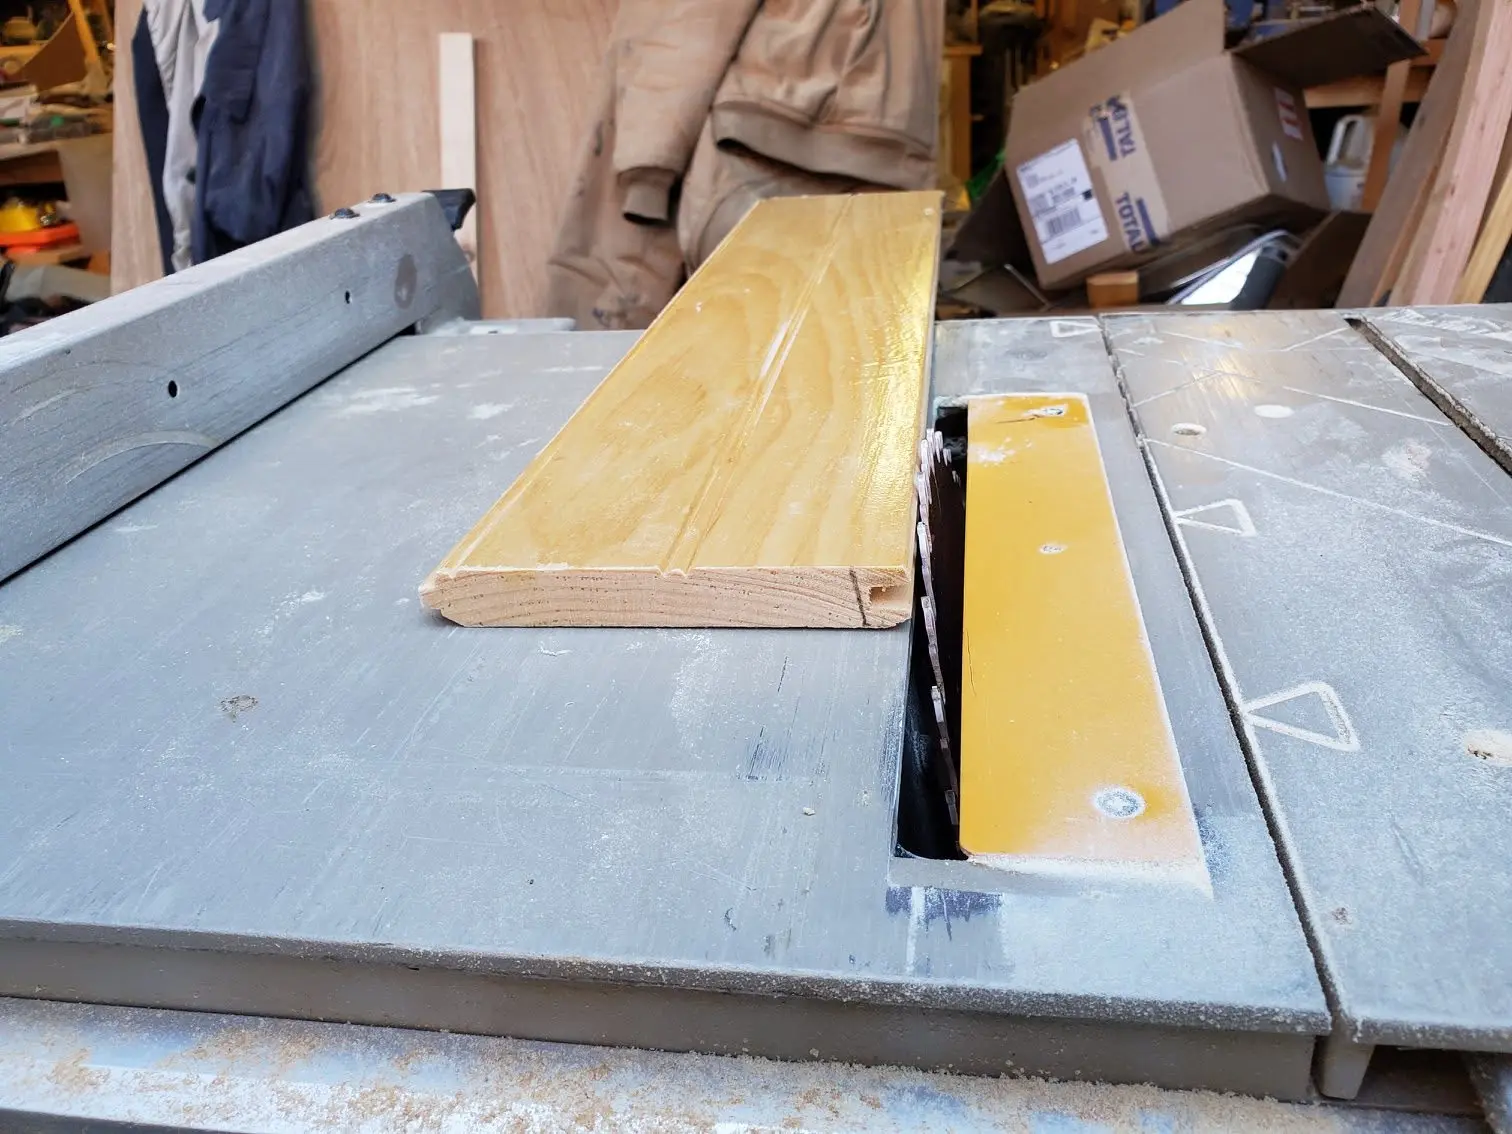
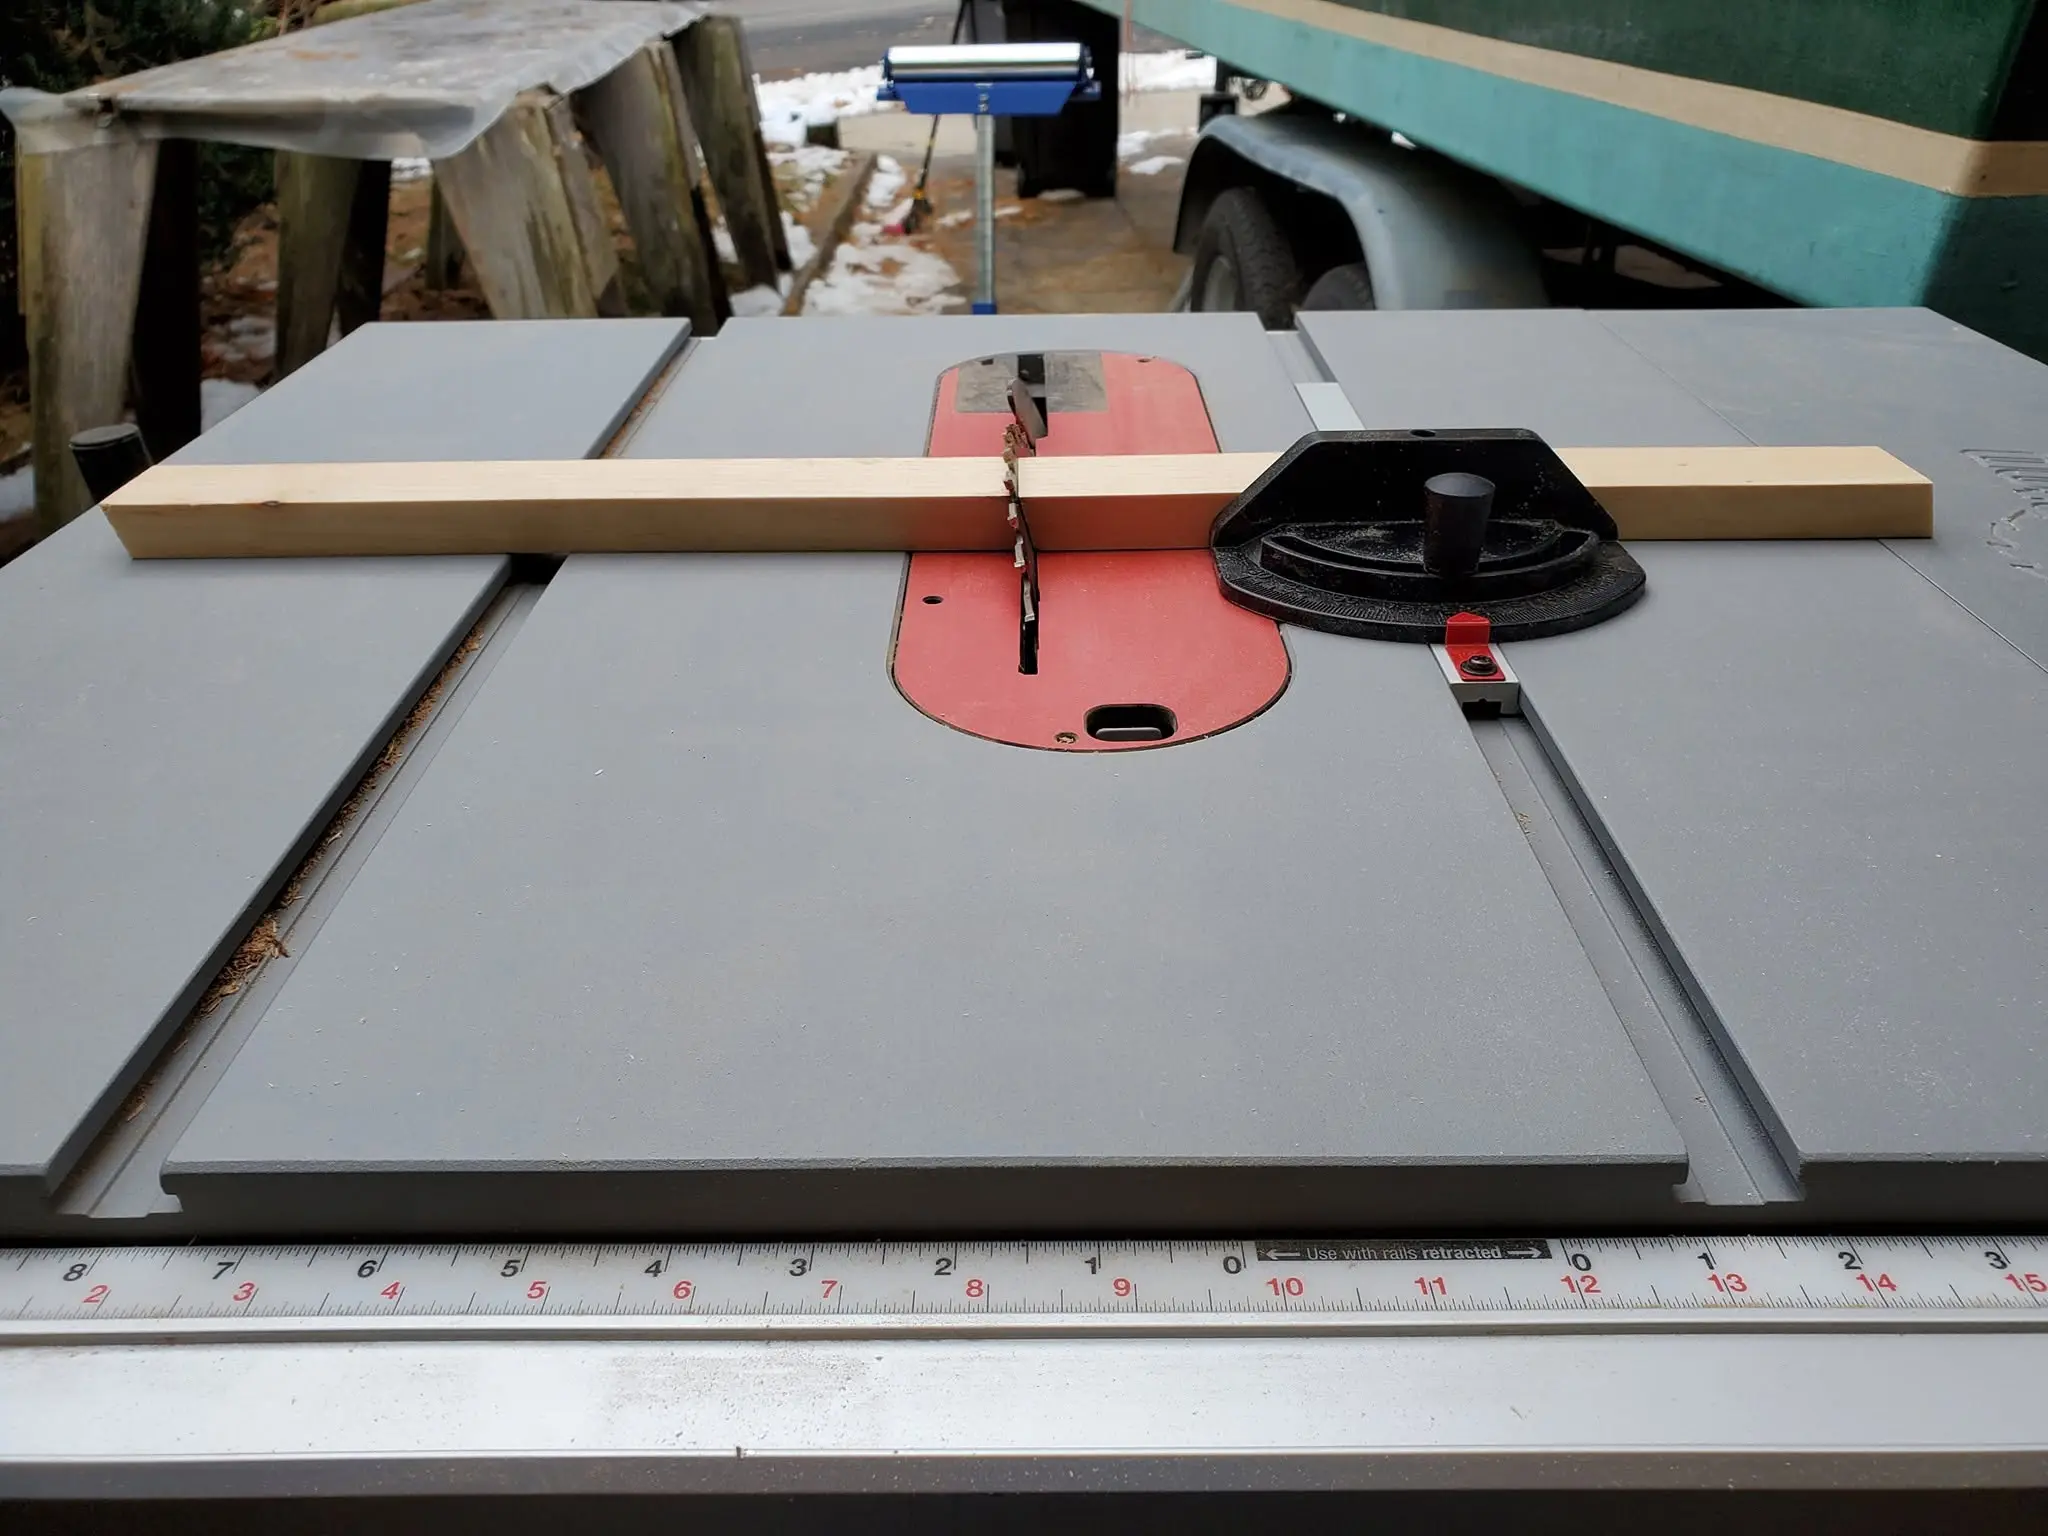
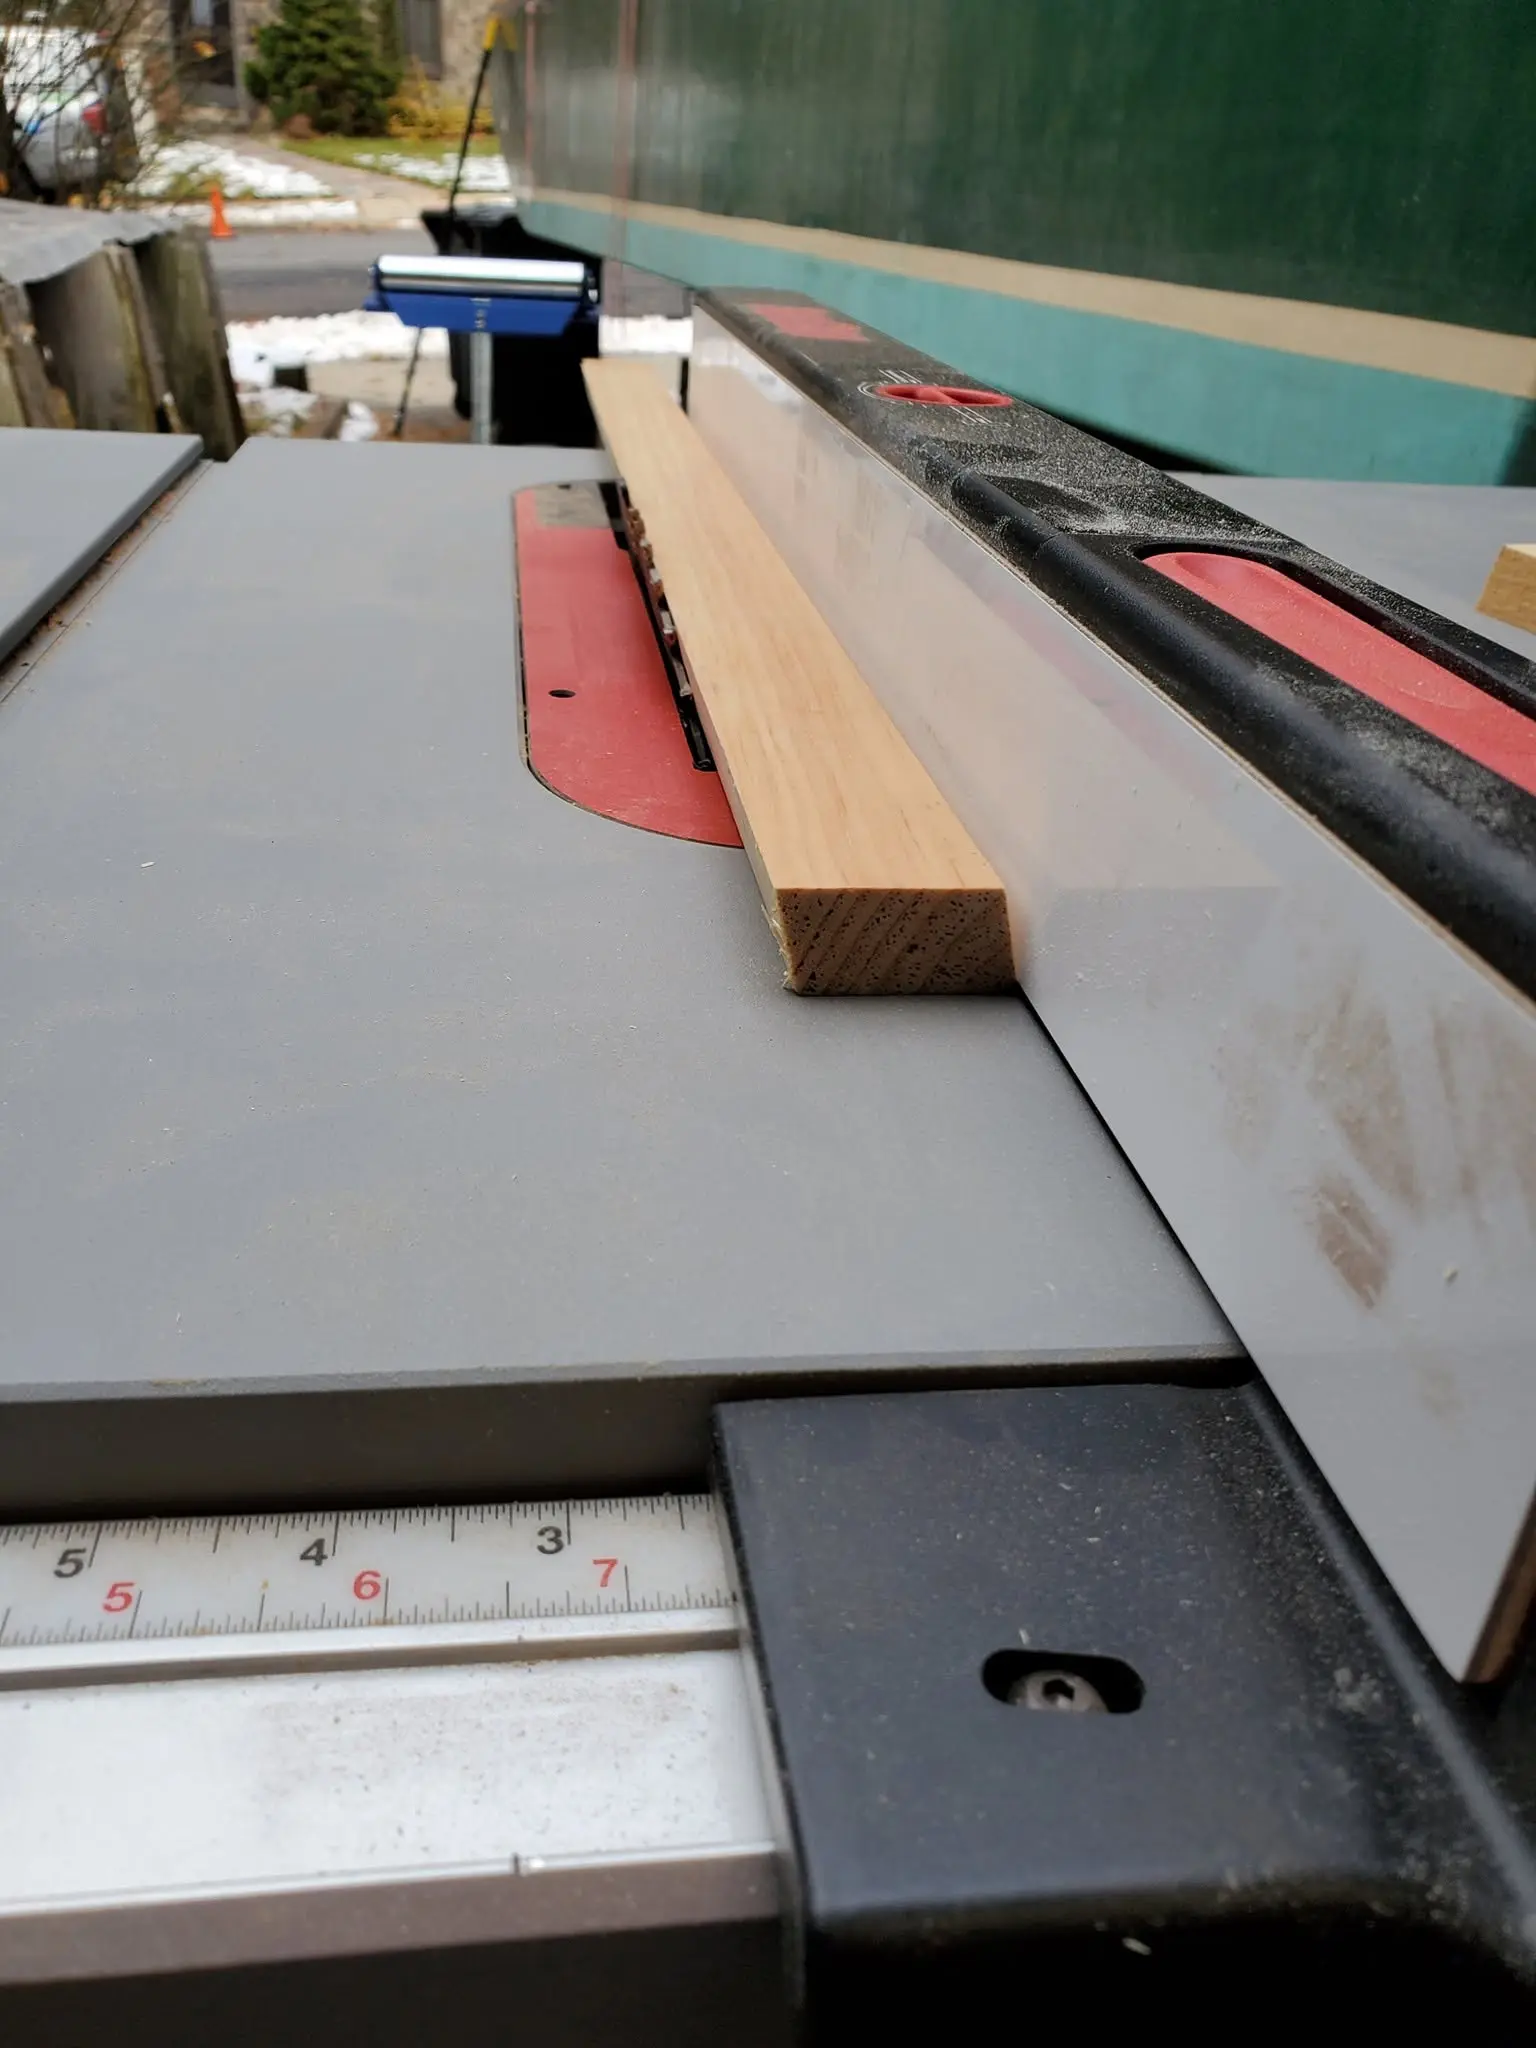
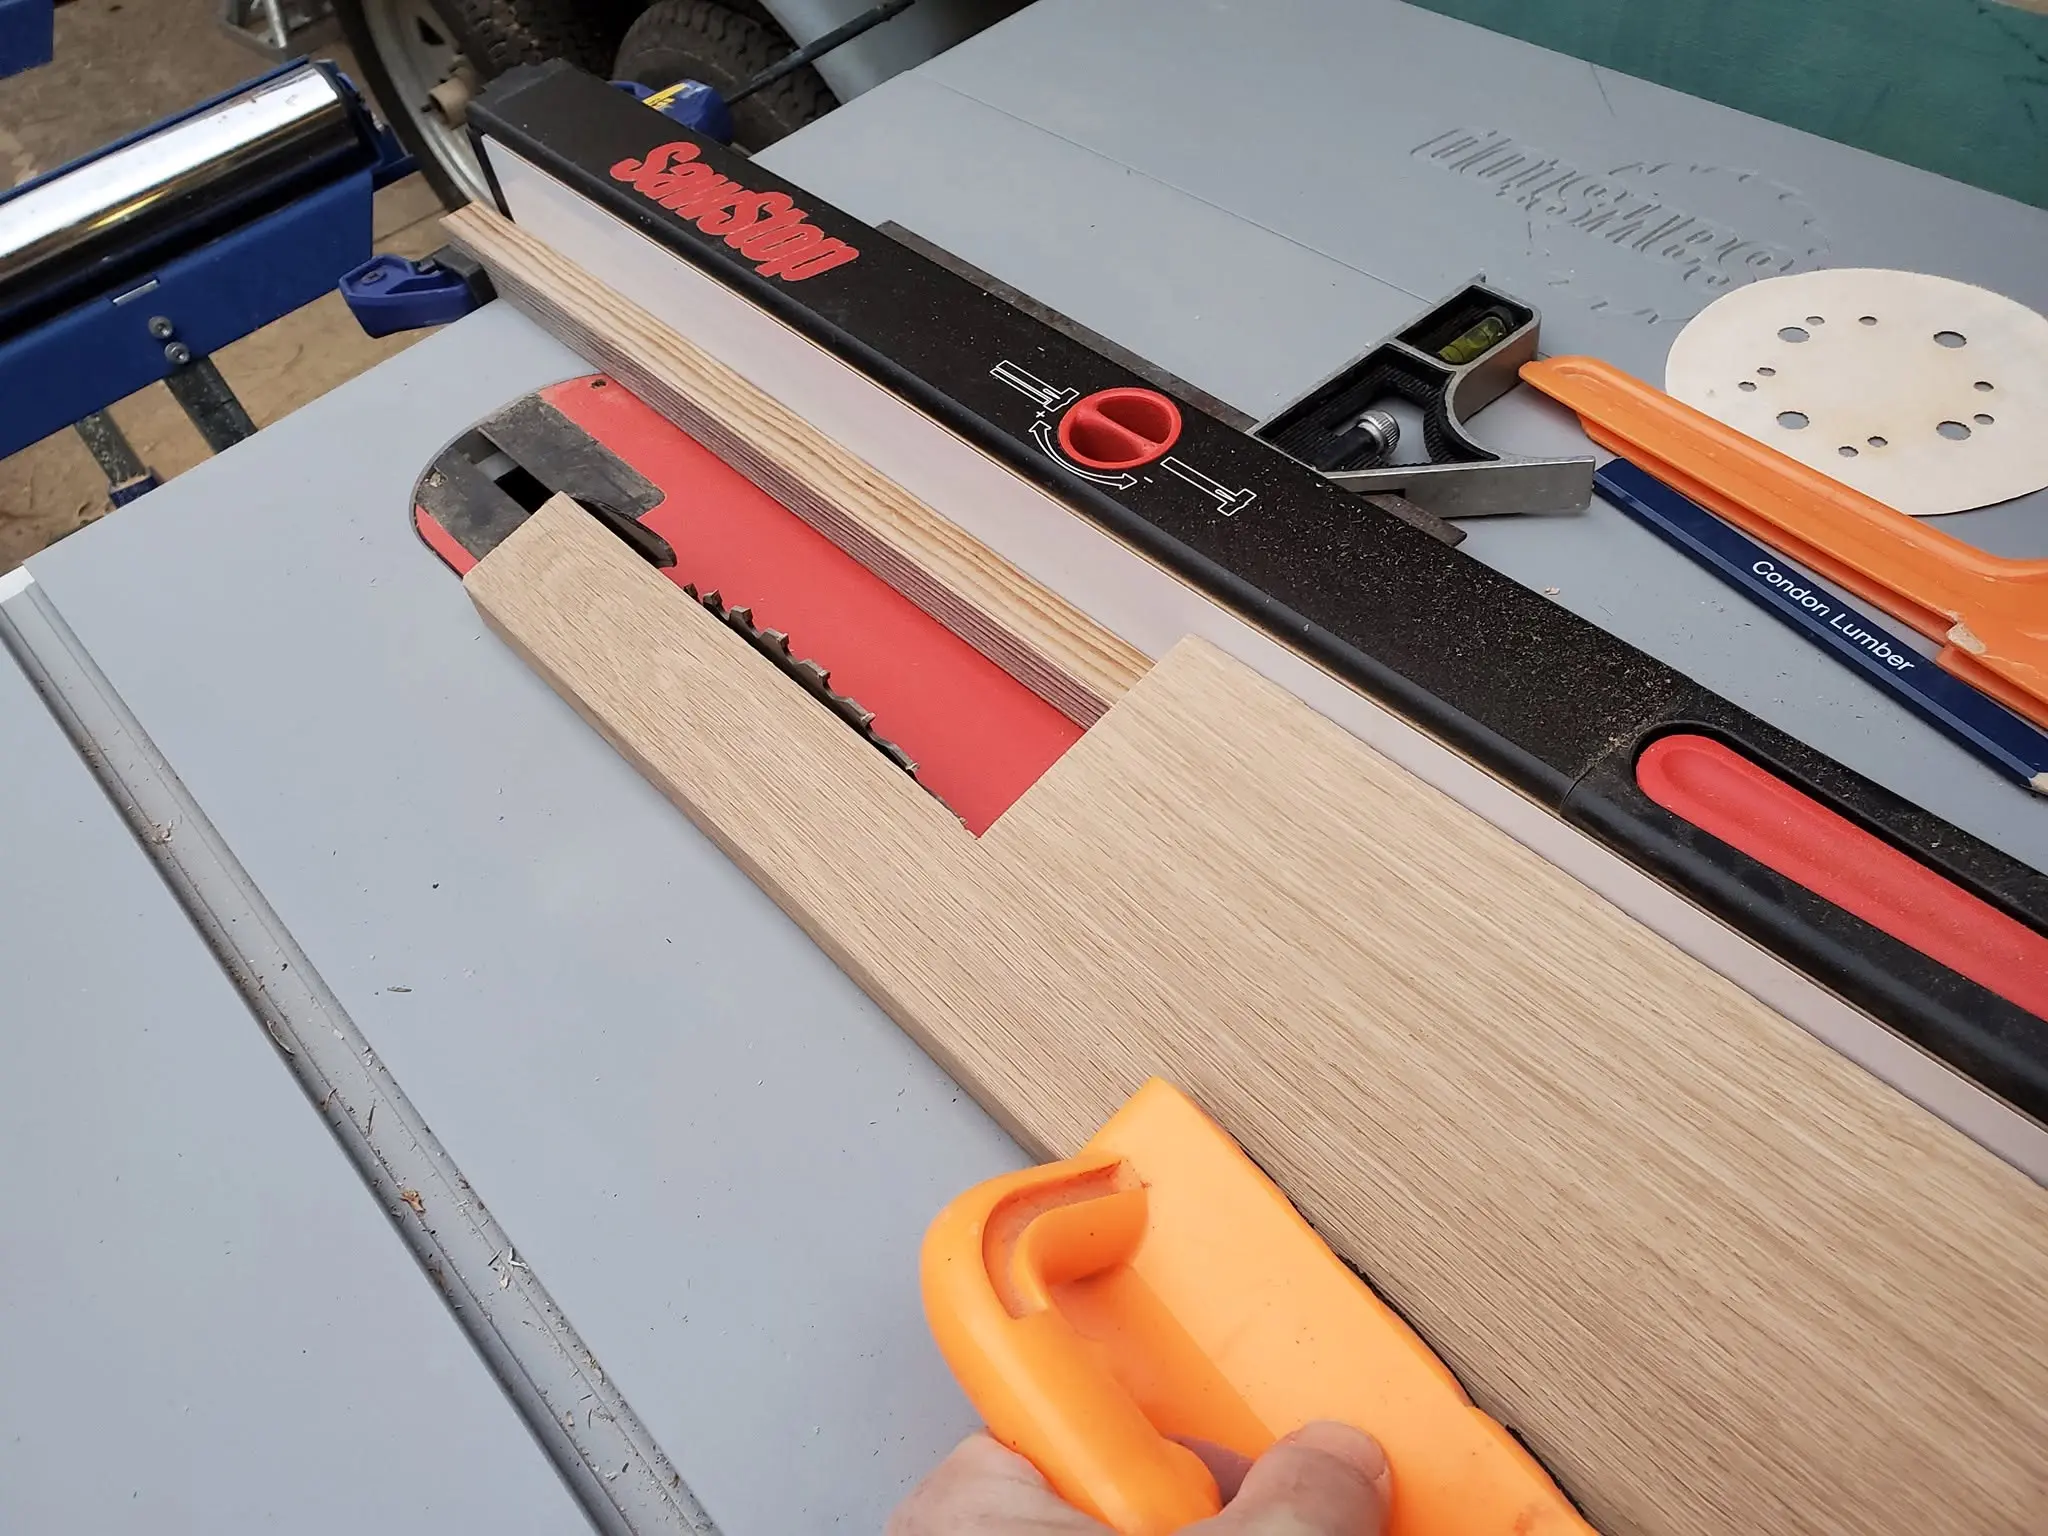
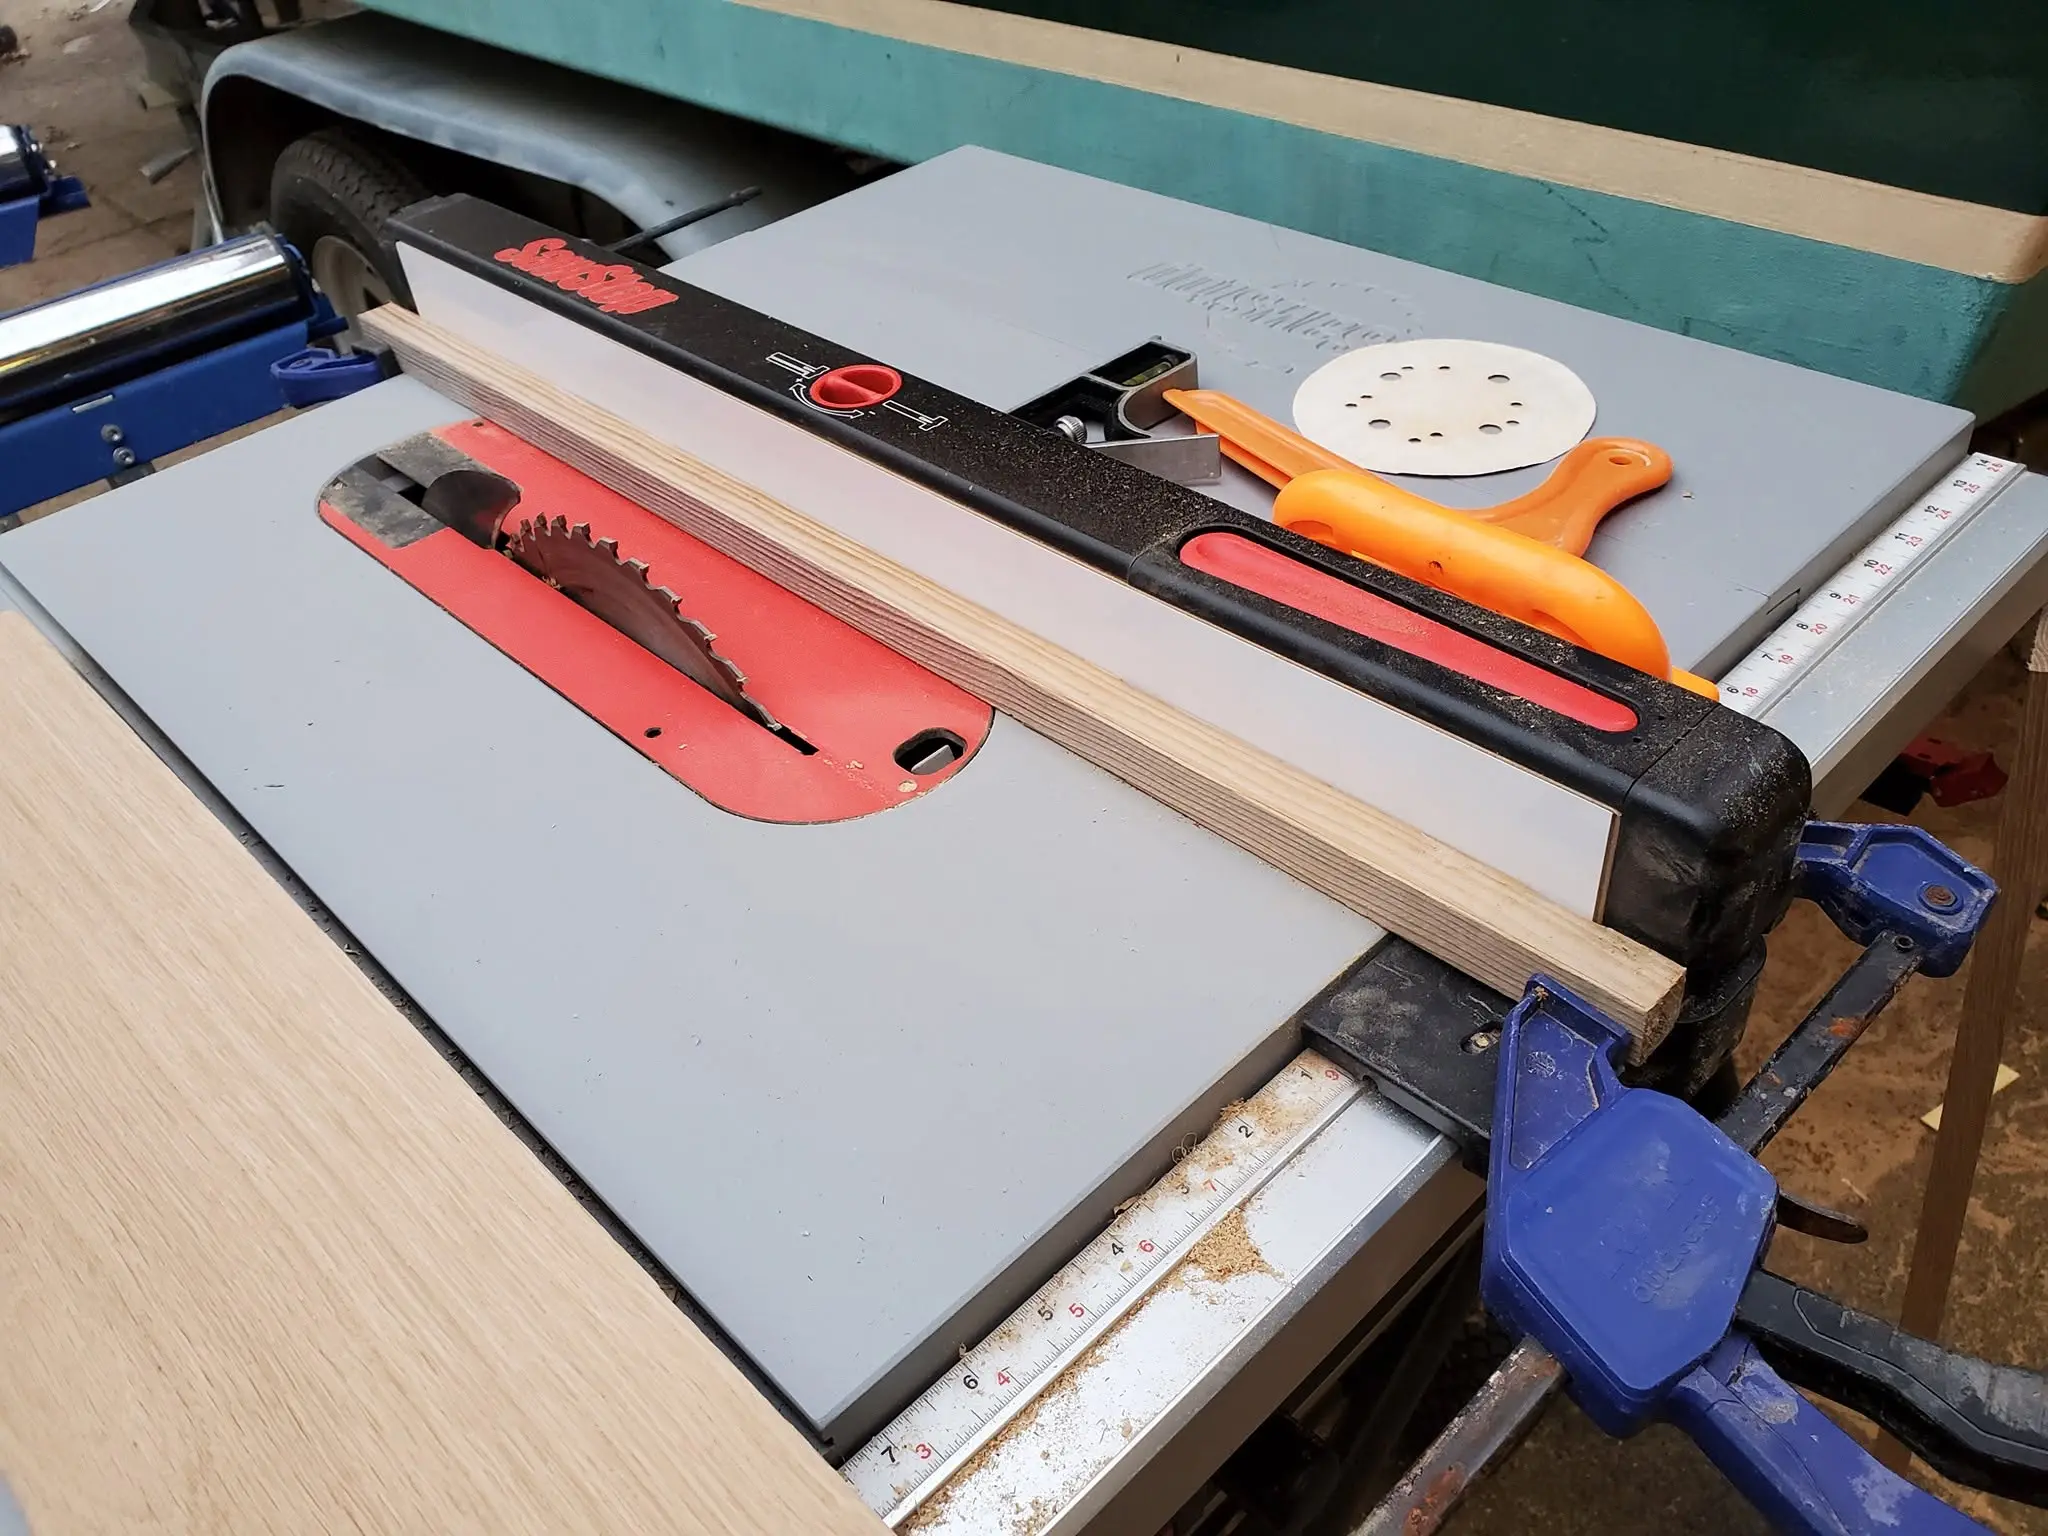
Also, if you think 10 is perfect for the number of fingers you have, use tools like these to guide and push the wood through the saw. Just saying. ...
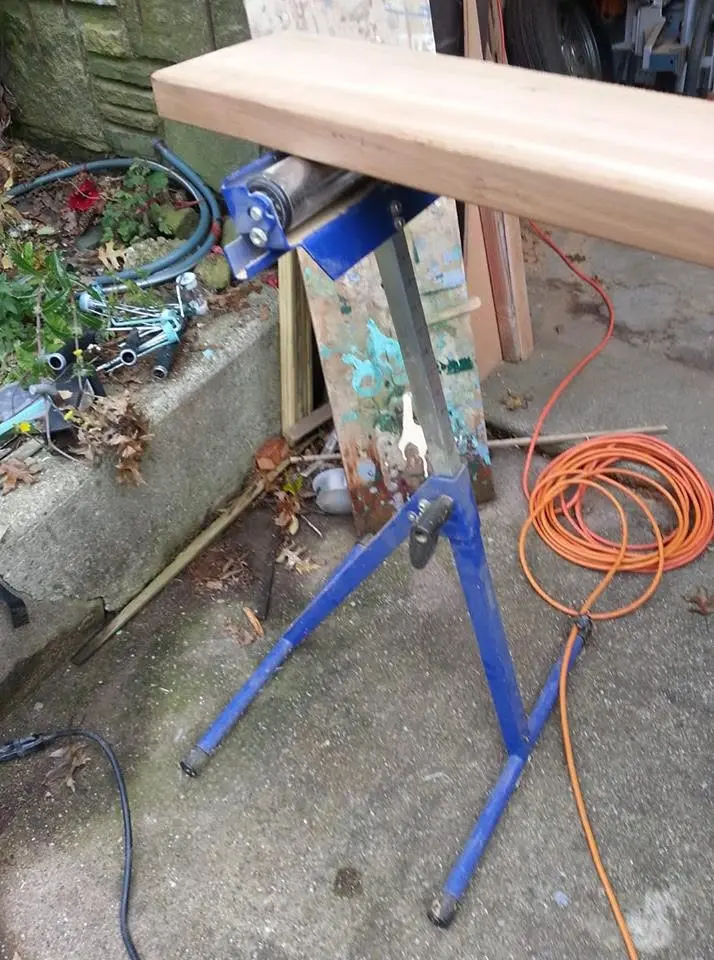
Also, if you're ripping a heavy, ungainly piece like an 8-foot 2 x 8, use a roller stand or something like it to support the outfeed.
Chapter 08
Fillets & Taping
Epoxy fillets, taped seams, structural joints.
2 daysfrom October 2018
7 Oct 2018Fillets & Taping
I love fillets.
Houseboat update, Sunday, October 7, 2019 – I love fillets. I hate fillets. It occurs to me it may be time for a small discourse on the difference between filleting and filleting. I don’t mind filleting, although I am not especially skilled at it. Filleting, on the other hand is an almost intolerable chore to me, although I have gotten to be passably good at making effective if not altogether decent-looking fillets. “He must be sniffing solvents again,” I hear you say. That may or may not be true, but not particularly useful to the discussion. If I want to toss a slab of salmon on the grill, I’ll get out the knife and fil-LAY it first. But if I want to reinforce a 90-degree joint between two pieces of wood that have been screwed and glued together in perpendicular orientation, I’ll mix up a batch of epoxy thickened with wood dust and run a bead of the stuff along the corner and shape it into a coved FILL-et, using the end of a wooden tongue depressor. Jersey Girl is loaded with such joints, and if I want to be reasonably confident that she’ll stay in one piece under the flexing forces of currents and swells in the water, I must be diligent in making sure every one of them is well filleted. This is time-consuming, frustrating, mind-numbing, boring, arduous work, often requiring me to bend into shapes no 76-year-old body was ever intended to do. Did I say I do not like filleting? I like it even less than sanding, and that’s not at all.
8 Oct 2018Deck & Coamings
Jersey Girl gets her fore deck fitted today.
Houseboat update, Monday, October 8, 2019 – Jersey Girl gets her fore deck fitted today. After measuring carefully and cutting out notches to accommodate the framing, I am glad to report that we have a perfect fit. If it were not such a drizzly day, I’d fiberglass this piece and start working on the drainage system. But the threatening weather gives me the opportunity to restore order in my incredibly messy garage. If I can tidy up a bit, there’s a good chance I can make space to fiberglass the deck inside, then get to work on installation and drainage tomorrow. In the meantime, it felt good to be able to walk on the deck and feel how solid it is. I can just see myself, sitting out in the breeze with a nice drink and a book, or setting up my easel and doing some plein air (or plein eau?) painting, or maybe even re-learning how to play the guitar….
10 Oct 2018Interior & Cockpit
Disaster averted!
Houseboat update, Wednesday, October 10, 2018 – Disaster averted! Lesson possibly learned, again (or not). I had an Idea that it would be nice to have access to storage below the fore deck from the pilot’s position inside the cabin, so I made sure to plunge-cut an opening in the forward starboard bulkhead, literally years ago. I saved the cut-out wood to turn into a grain-matched door. I actually found that wood, from three years ago, in the dusty clutter of my shop. Feeling pretty puffed up, I turned that piece of wood into a beautiful door, and I was just about to attach it with a continuous hinge this morning. But a little, mocking voice prodded me into wakefulness last night. “Pretty proud of yourself, aren’t you,” it said. “Okay, smart guy, exactly where did you intend to install that gorgeous antique wooden-spoked ship’s wheel you bought a couple of years ago, huh?” Yes, I was about to install a cabinet door in a position where it could not possibly be opened, barricaded in place by the ship’s wheel at Jersey Girl’s helm. So, instead of being a door, that framed-out and finished piece of matched-grain plywood will be inserted back into the place from whence it came, in my three-year-old burst of creativity. It’s not the first time I have learned – and forgotten – the lesson, not to fall too deeply in love with the sometimes misguided peregrinations of my own wandering mind. It has happened before in this project -- remember the aluminum runners I was going to install with bronze screws, until someone pointed out the corrosive consequence of combining these particular dissimilar metals – and I suppose it’ll happen again. One thing I have learned: it seems I never learn. Oh well. And, by the way, I’ll still have access to that storage compartment, through a deck hatch outside. I’m sure I will need that access, first to install the cable connecting the helm to the motor at the stern, for steering, and then to maintain it over the years.
13 Oct 2018Planning & Research
I've decided to scale back a bit on the grandiosity of my tweaks to Jersey Girl,...
Houseboat update, Saturday, October 13, 2018 -- I've decided to scale back a bit on the grandiosity of my tweaks to Jersey Girl, bringing her more into line with Roy Schreyer's excellent plans. She's stretched out by 3 feet to a 20-footer, and I'm sticking with my plans to recess the central ares of the fore and aft decks. I'm also extending the main cabin roof out over the aft deck, for a shaded outdoor sitting area and a place to install a real stand-up solar-heated shower. But after getting great advice from fellow boat builders on Facebook, I've decided to step away from my earlier notion to add a second-level sleeping loft. First, with the convertible settees in the cabin, I don't really need the extra space; and second, I'm persuaded that the extra height will add more opportunity for unwanted "windage" and thus make Jersey Girl harder to keep on course if the breeze kicks up. So, as you'll notice on Jersey Girl the Houseboat's Facebook page, I've changed the cover photo.
25 Oct 2018Deck & Coamings
It's been a while since I've posted new developments in Jersey Girl's construction.
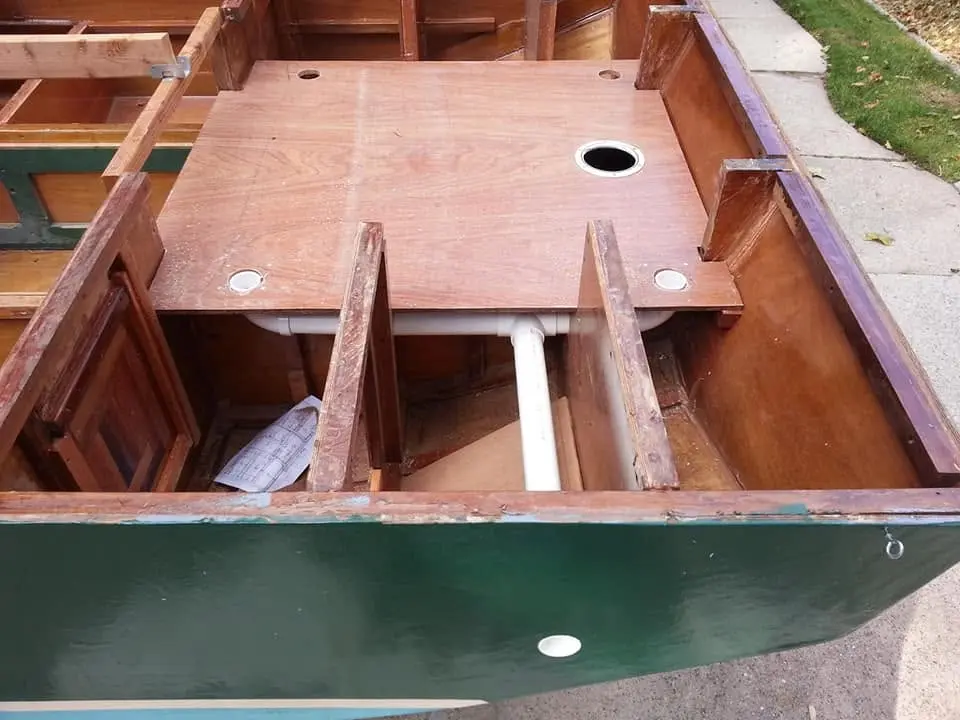
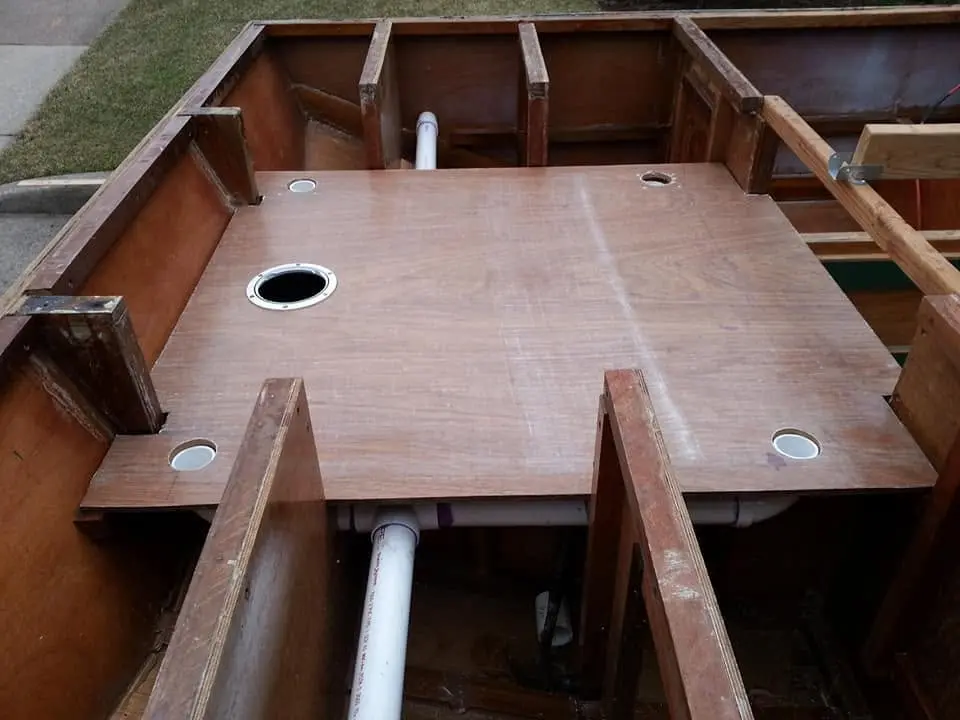
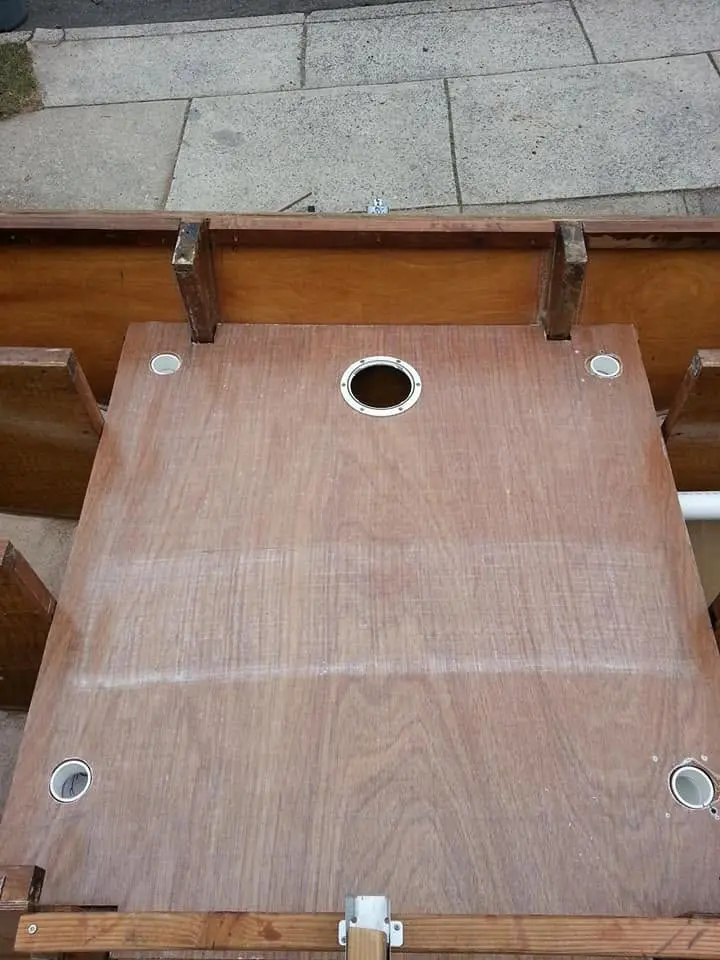
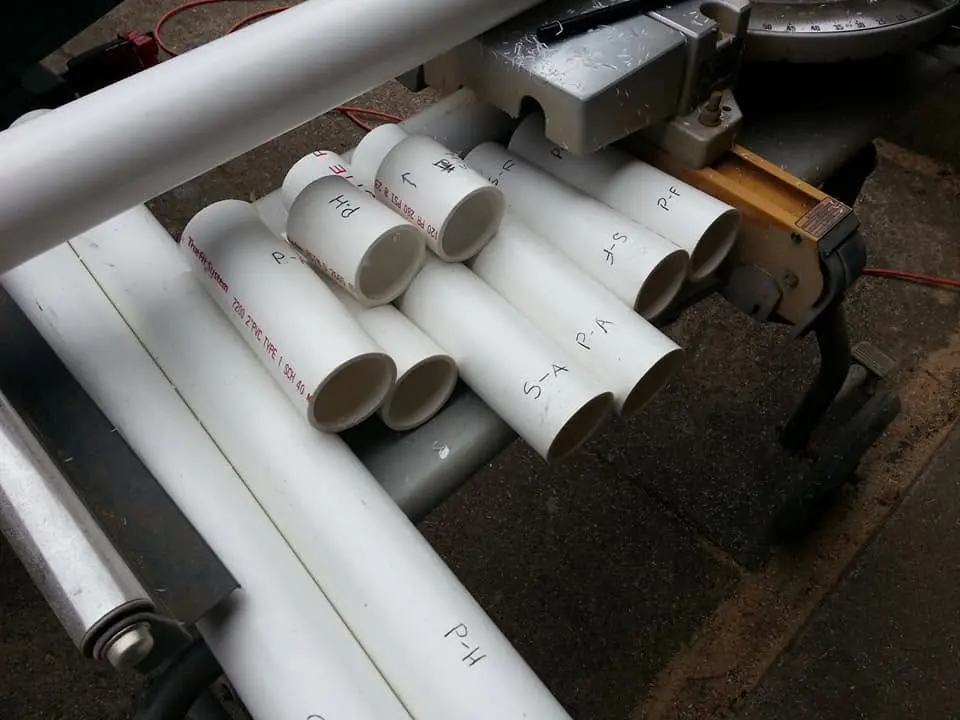
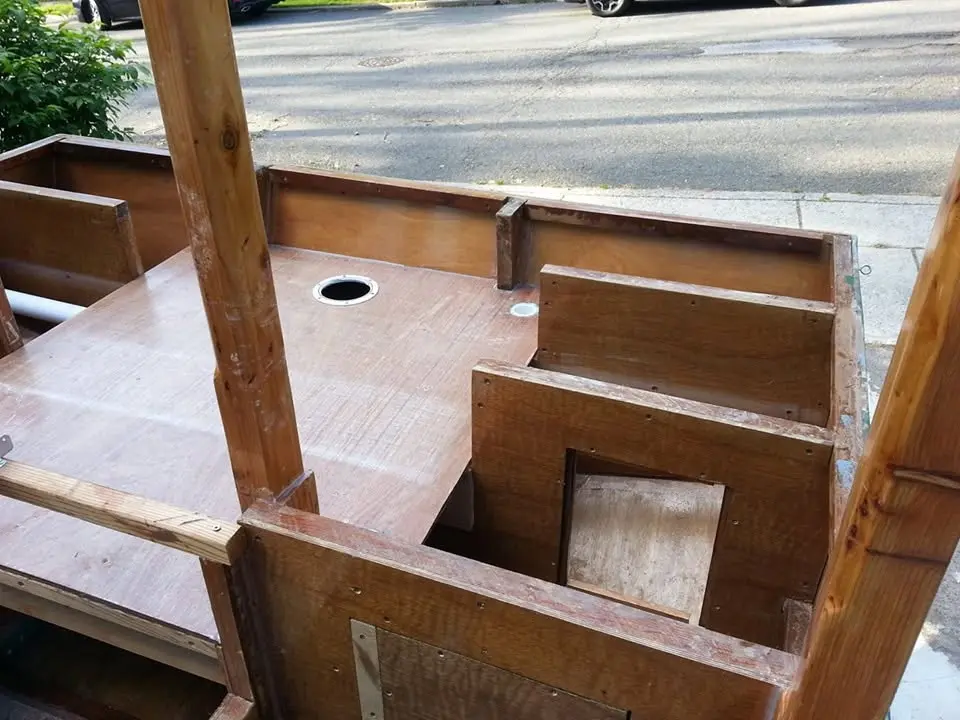
Houseboat update, Thursday, October 25, 2018 -- It's been a while since I've posted new developments in Jersey Girl's construction. Things are slowing down a bit as the temperature drops and stops the epoxy I use from curing properly. But a few last-minute details before I wrap her up and tuck her in for a long winter's sleep. As you can see, her recessed fore deck is in place, but not yet glued and screwed down. I'm in the middle of designing and installing a drainage system, so any rain or spray that might fill the recessed area will flow easily through a scupper in the side of the hull to the water outside. There will be four drains. Each pair will be plumbed through 2-inch PVC pipe to a single scupper on each side. The big hole in the forward center of the deck is an access port, so I can see if any water is collecting below, and so I can tighten the nuts fastening the tow hook at the bow, if necessary. It'll be capped with a watertight screw-in cover. In a couple of weeks, I will hoist a well wrapped Jersey Girl onto her trailer for winter storage.
20 Nov 2018Interior & Cockpit
The California grands are visiting for the week, so a special tour of Jersey Girl was...
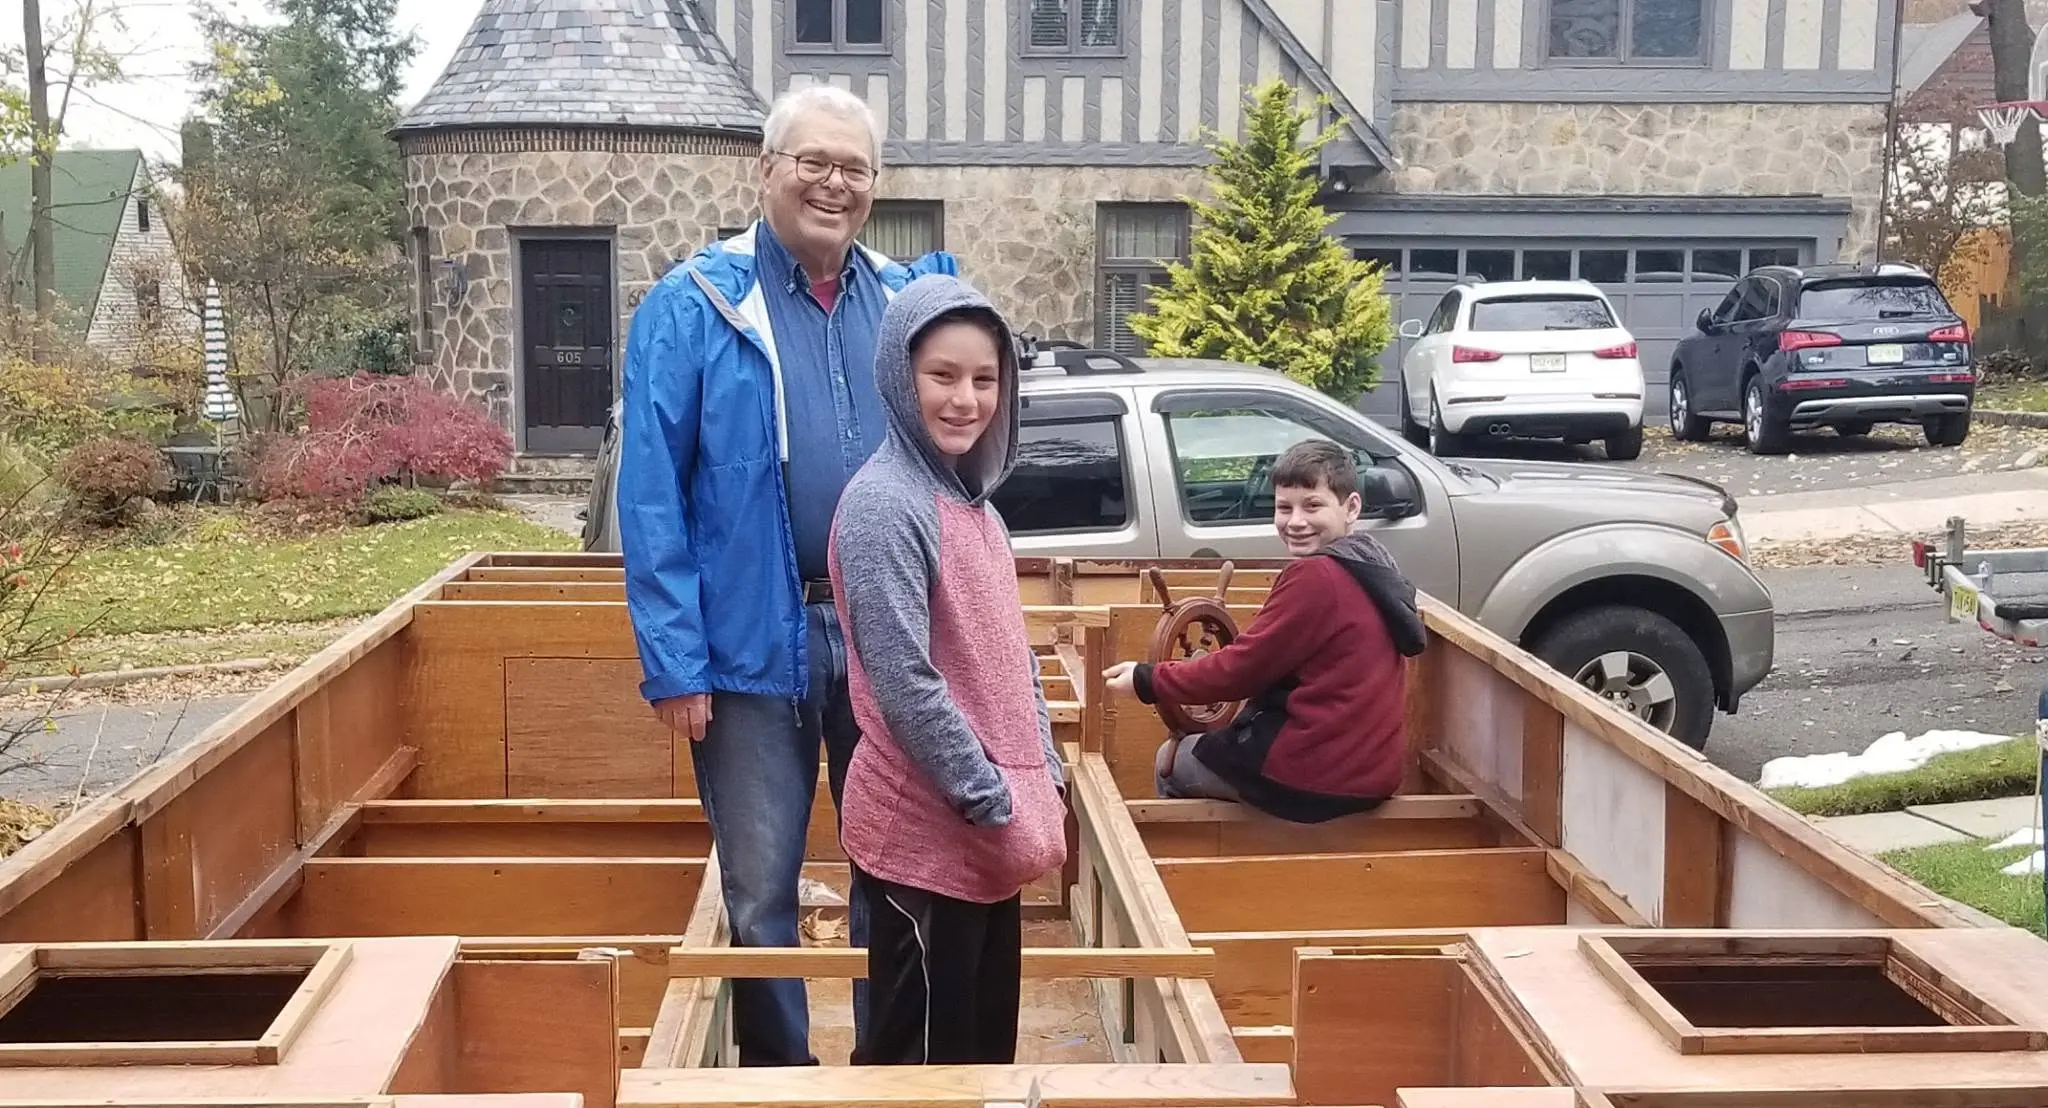
Houseboat update, Tuesday, November 20, 2018 -- The California grands are visiting for the week, so a special tour of Jersey Girl was arranged. That's Noah at the helm, and Taylor with me in the cabin.
Chapter 09
Trailer & Gear
Trailer build or rework, cradles, covers, launching gear.
5 daysfrom November 2018
26 Nov 2018Trailer & Gear
I'm getting Jersey Girl's trailer ready to put her into winter storage.
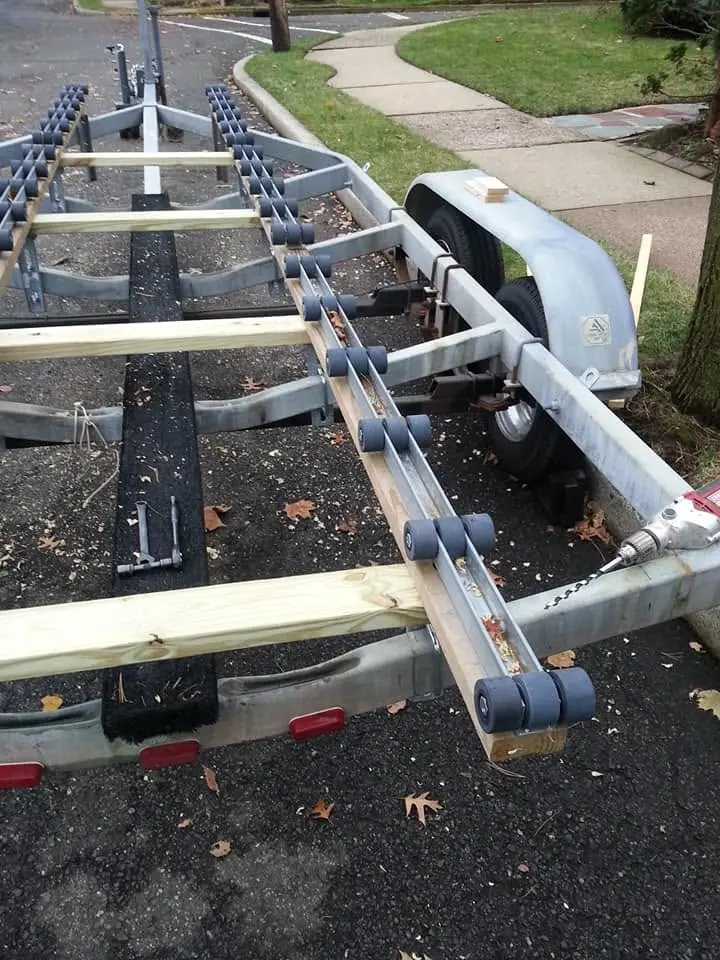
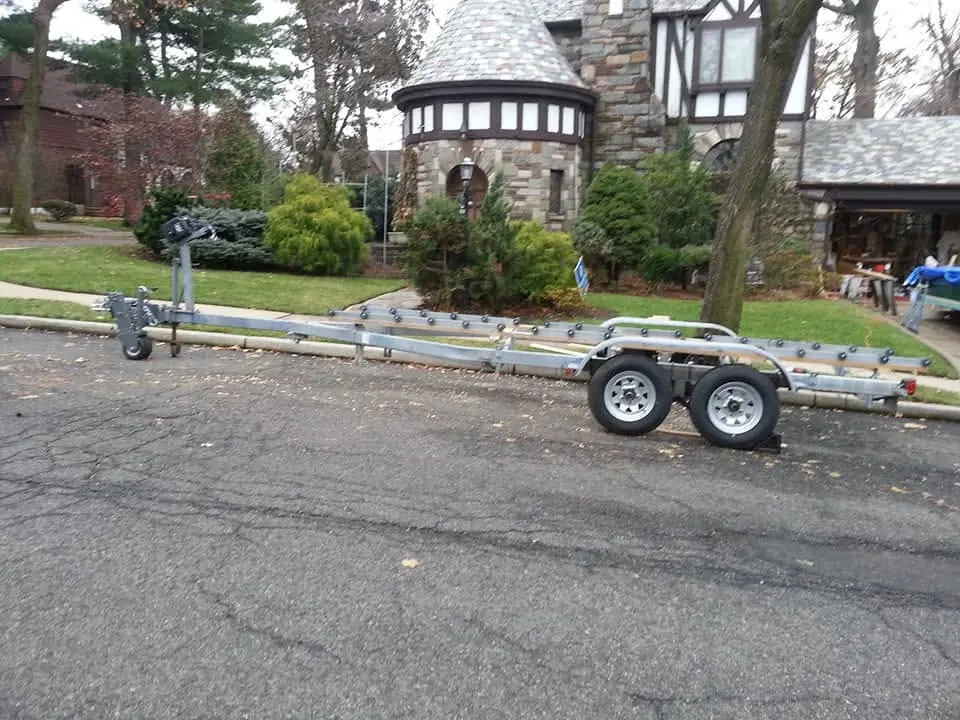
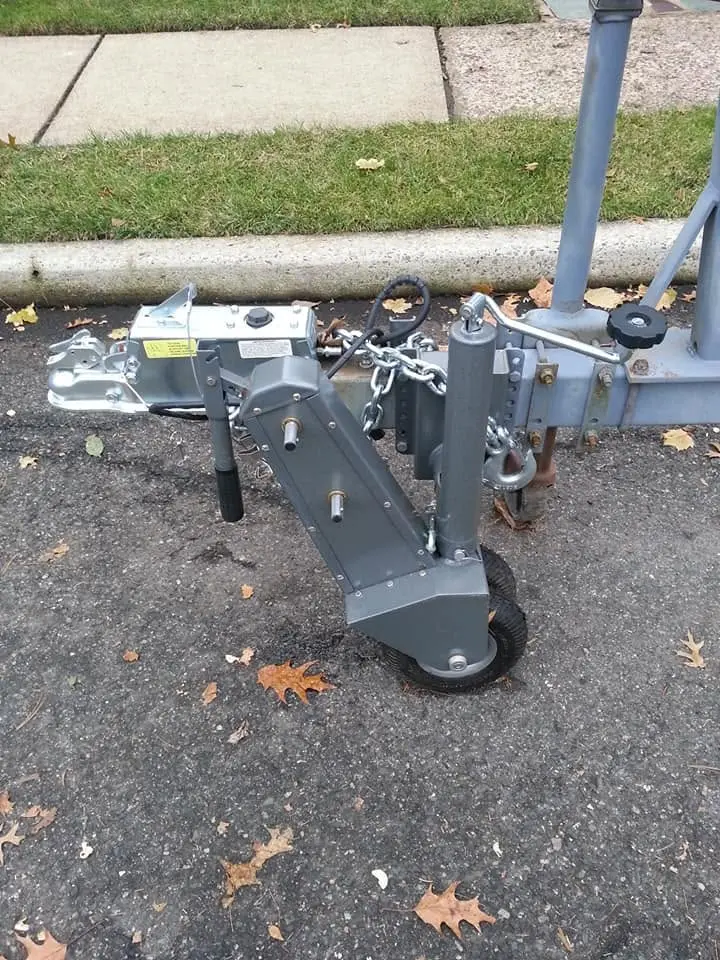
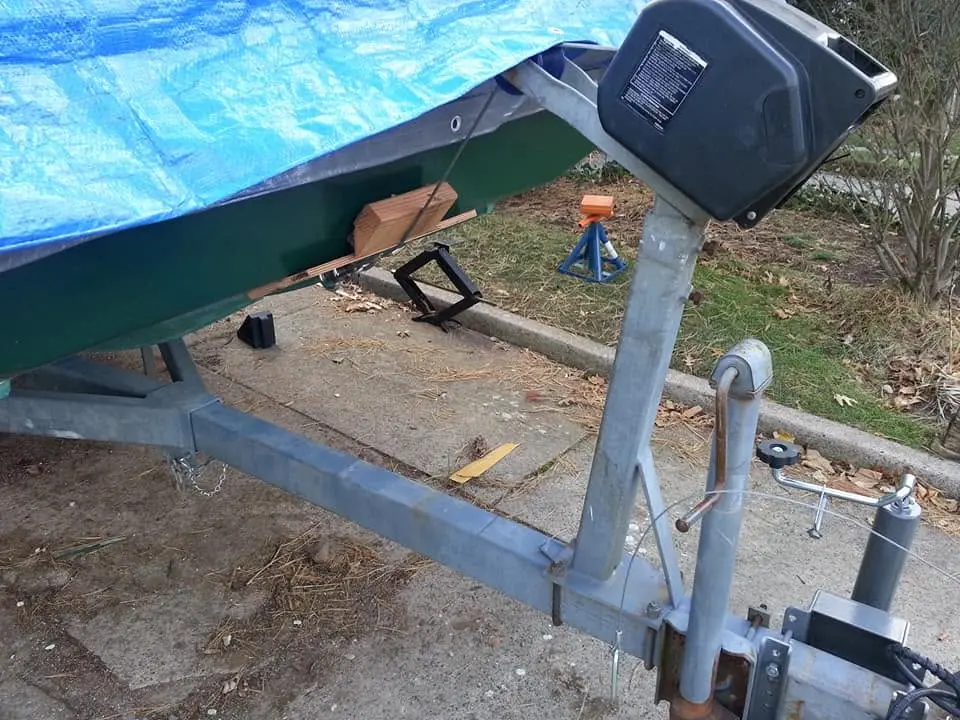
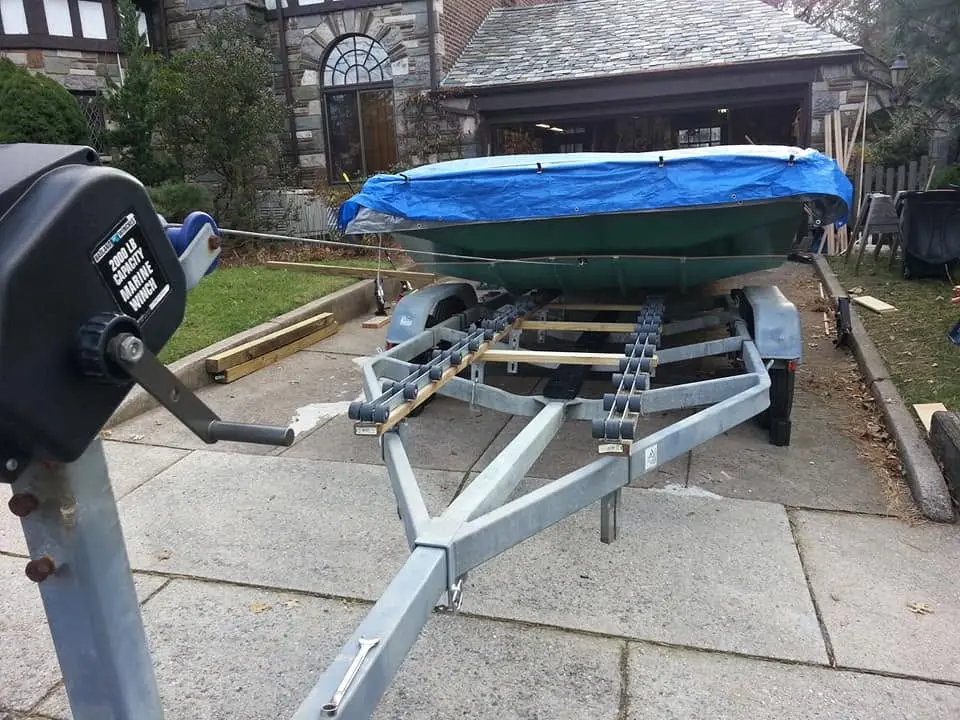
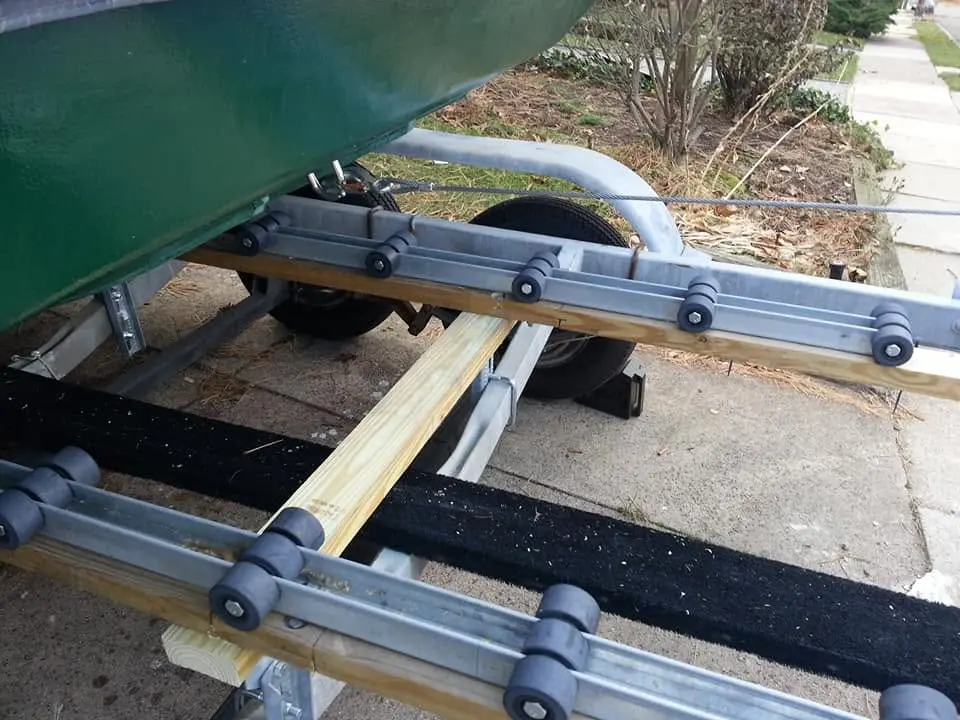
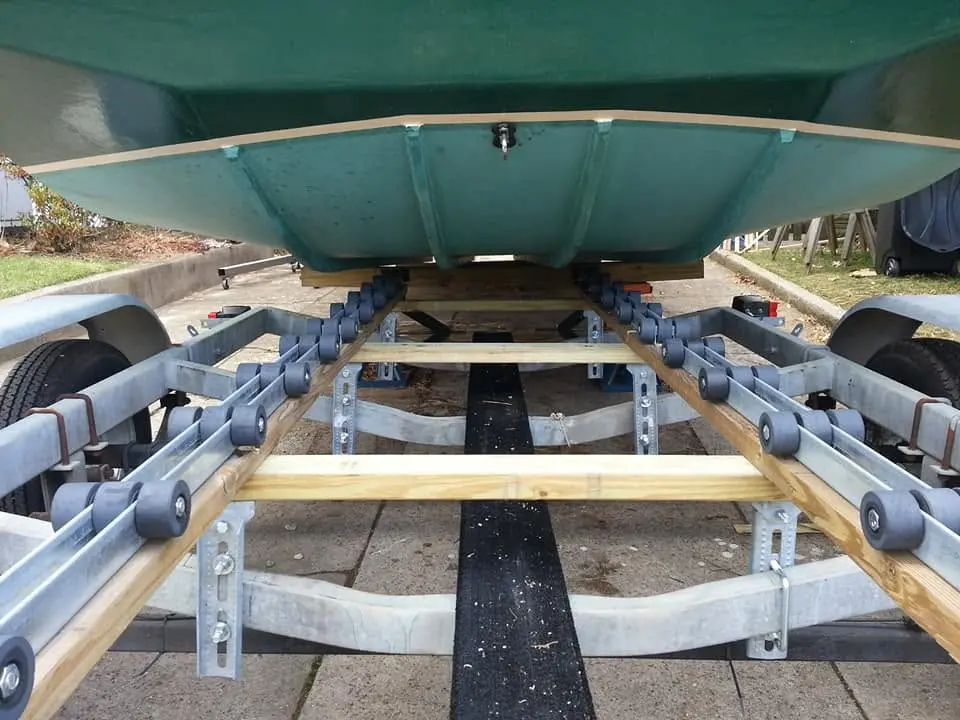
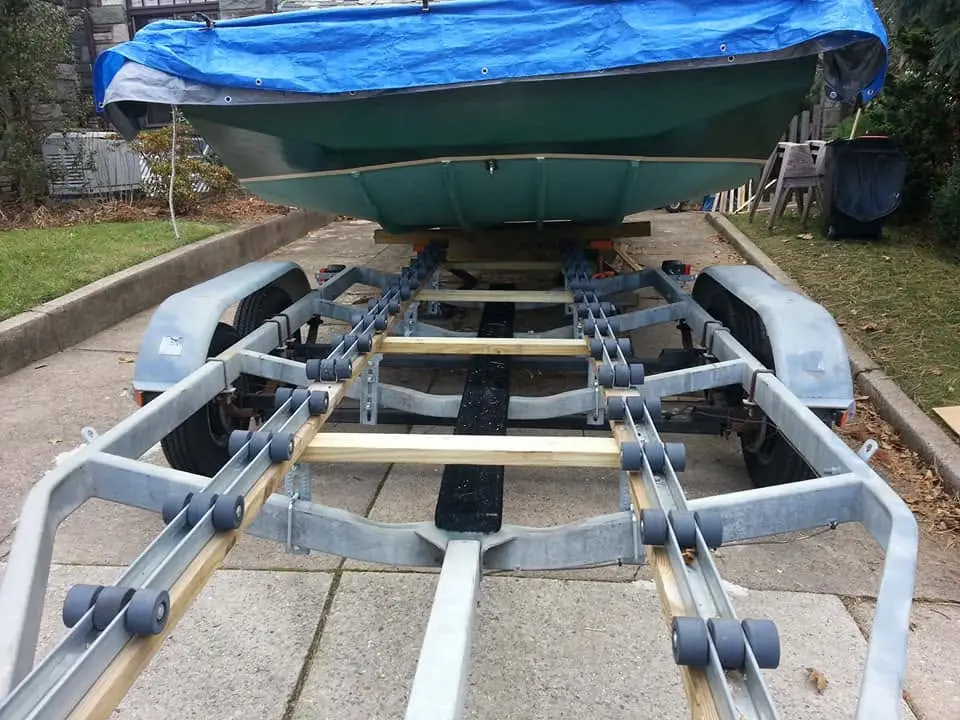
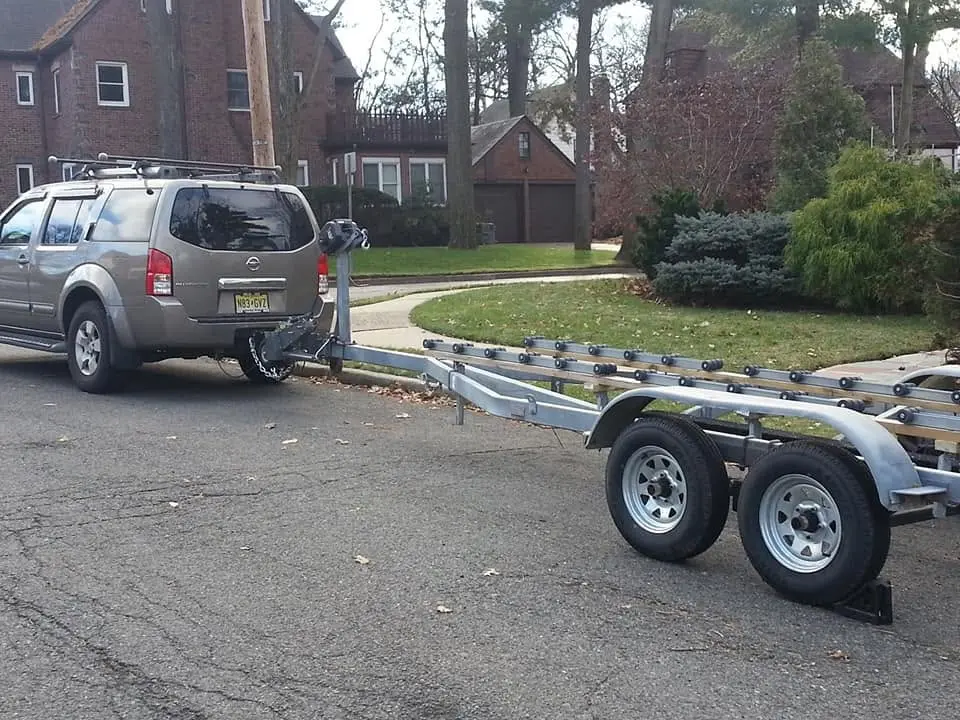
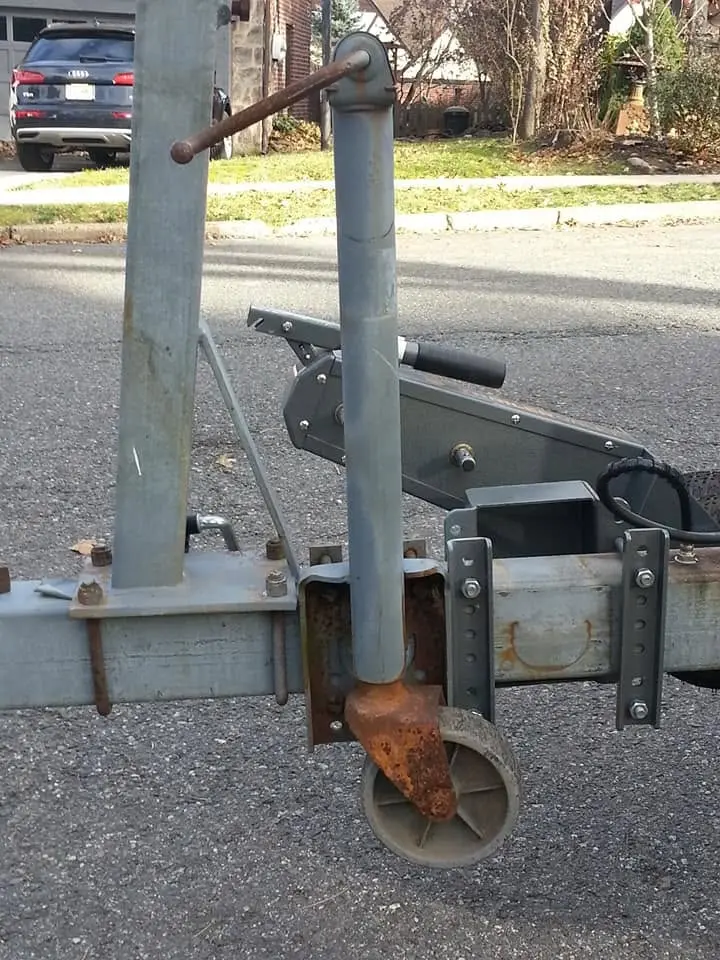
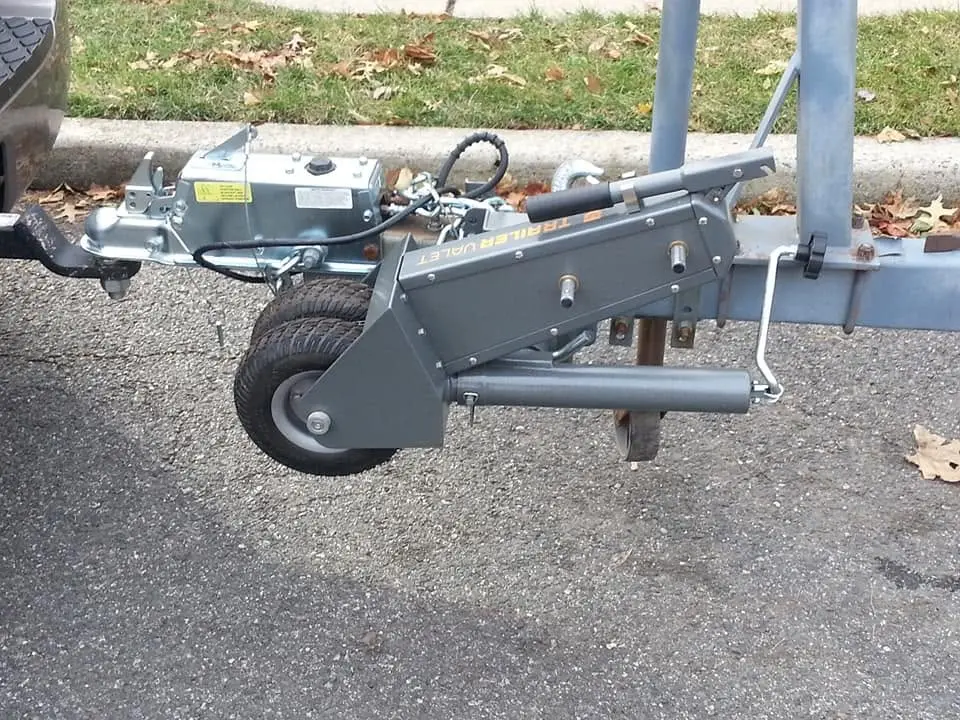
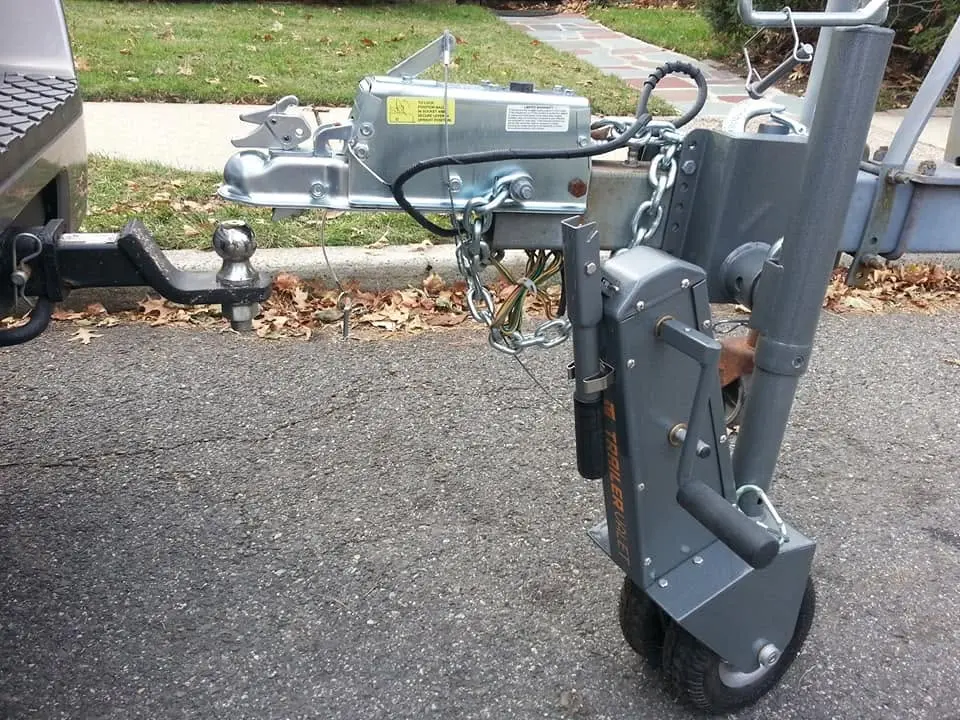
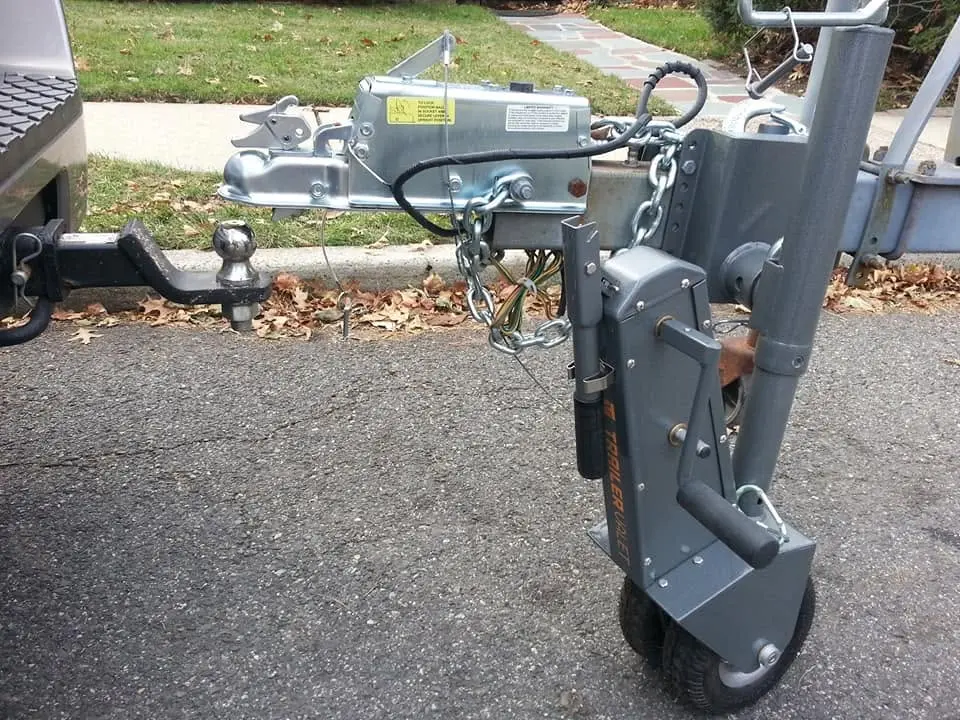
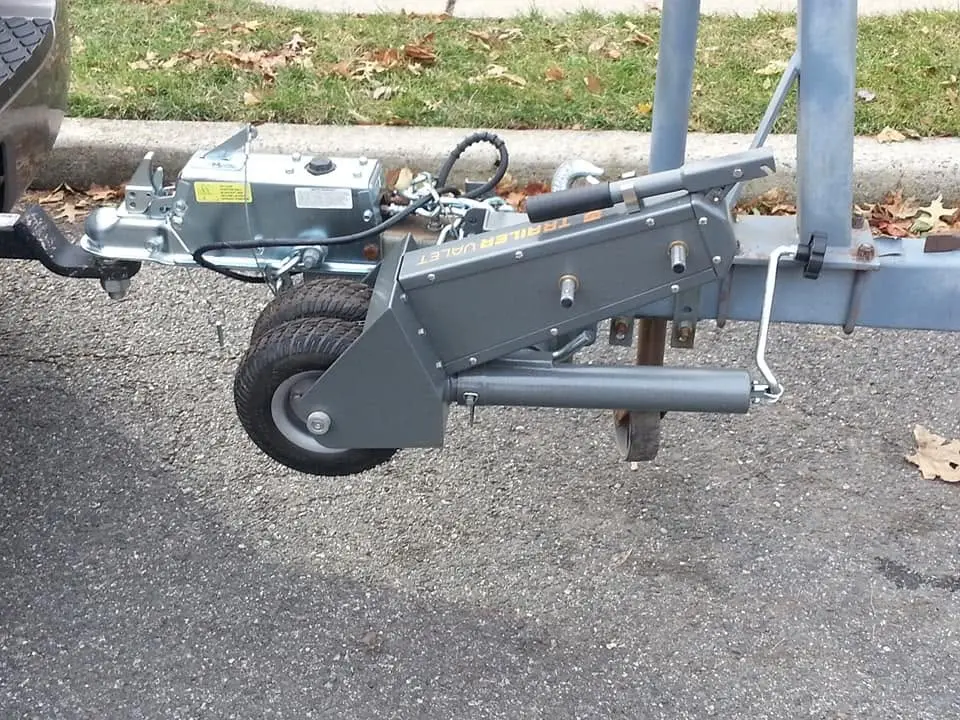
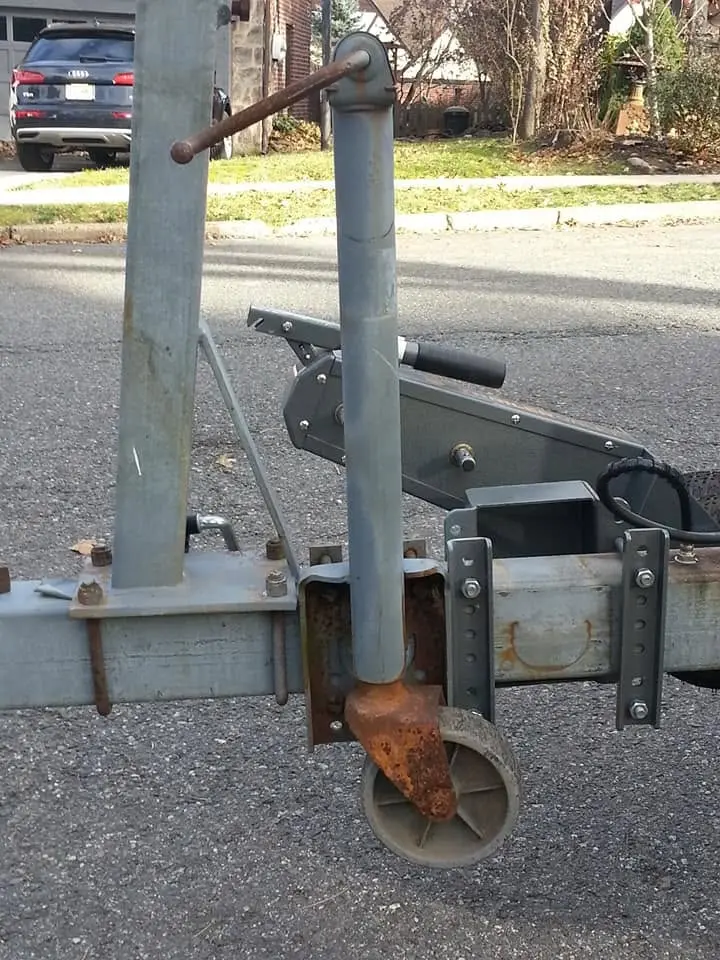
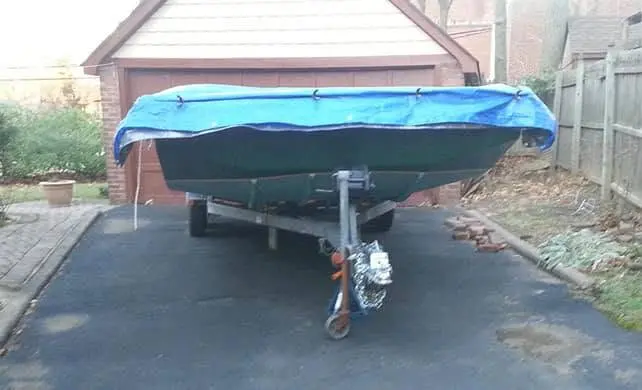
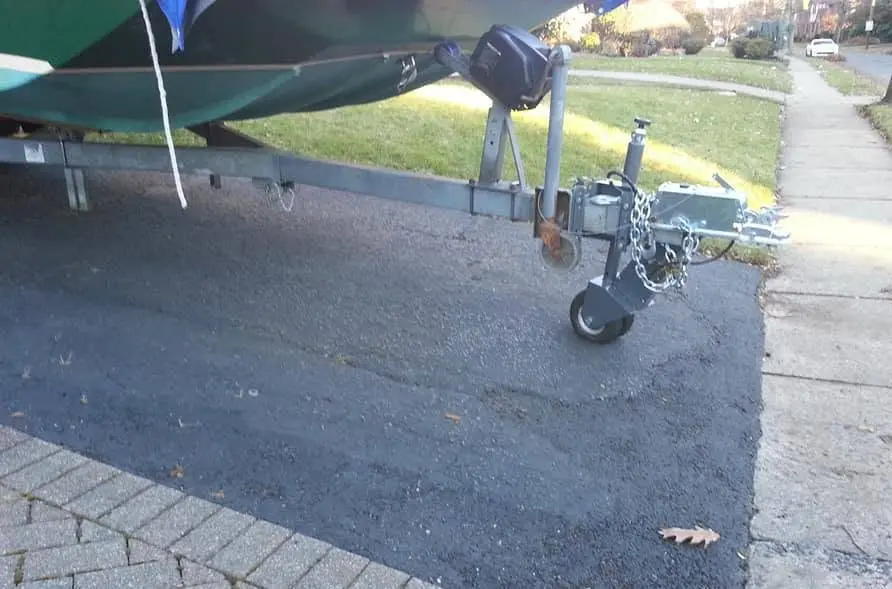
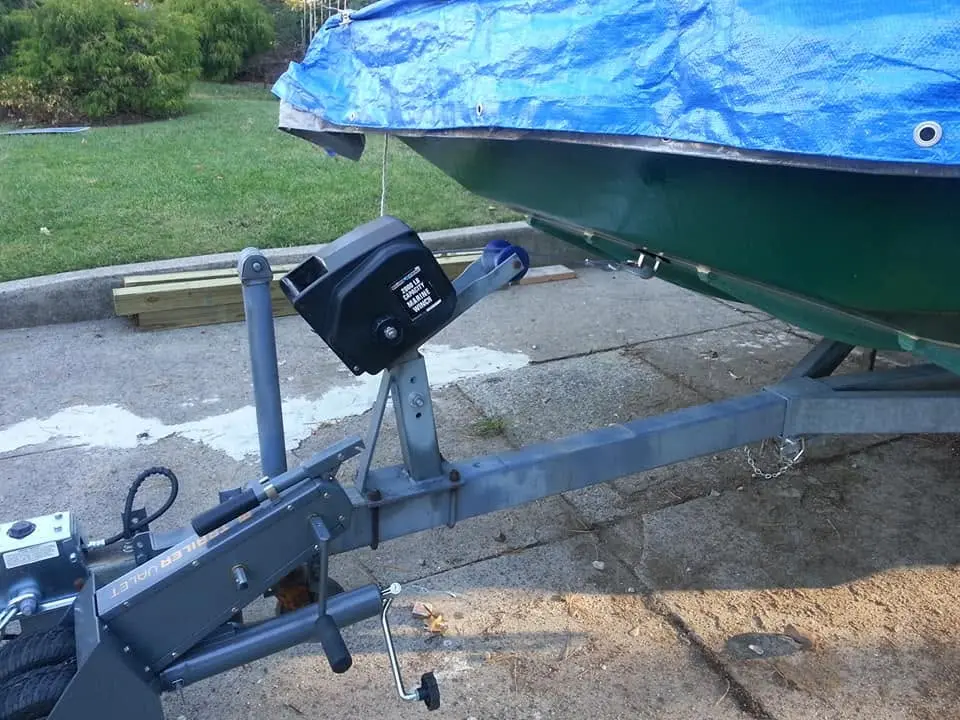
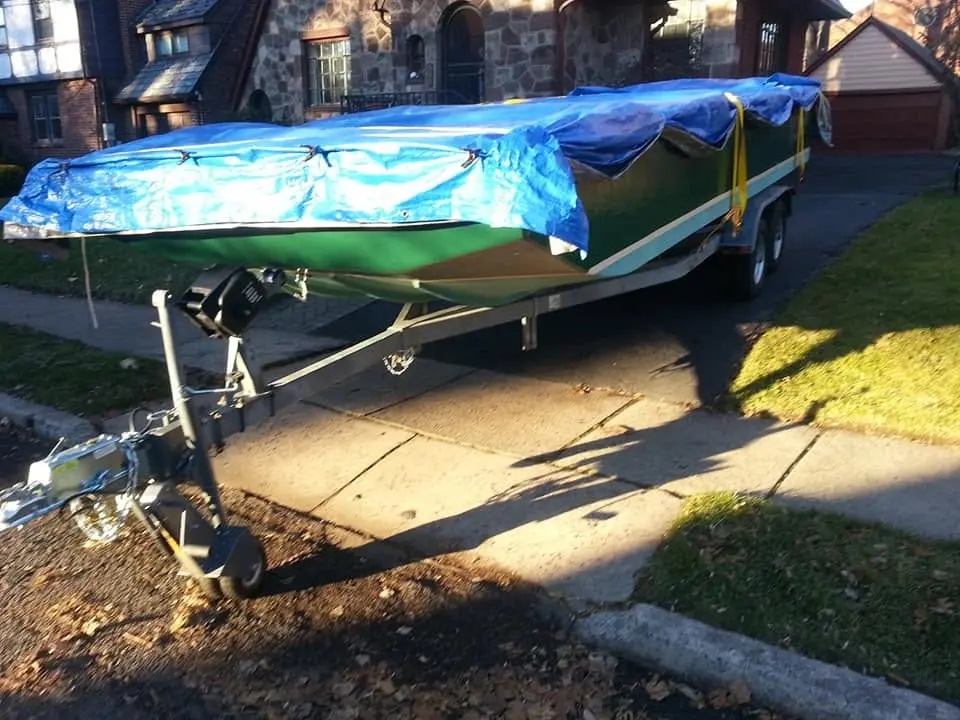
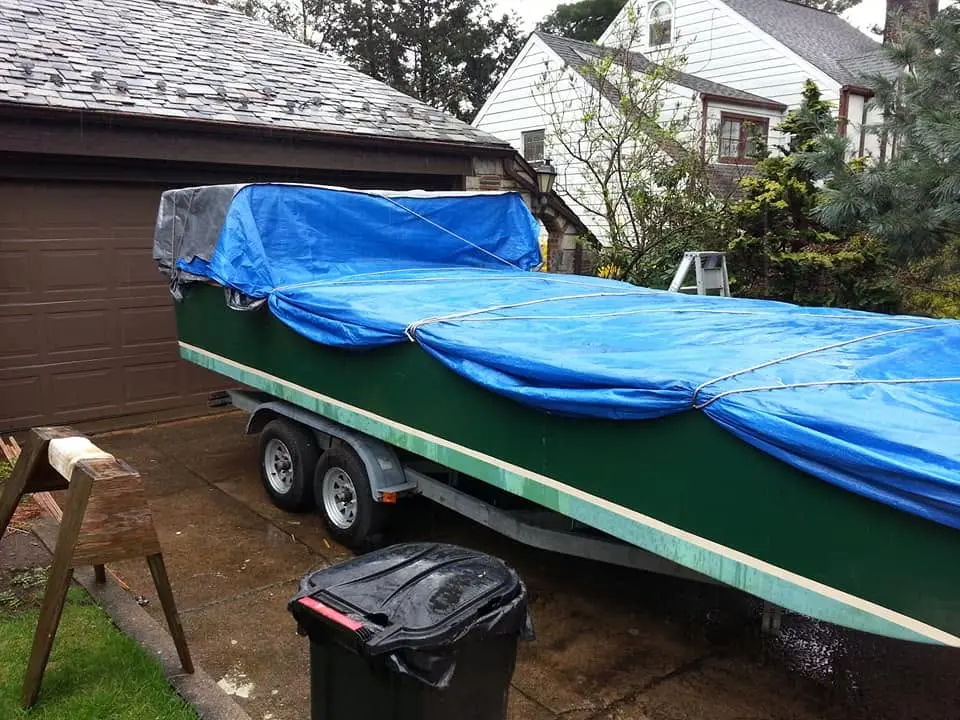
Houseboat update, Monday, November 26, 2018 -- I'm getting Jersey Girl's trailer ready to put her into winter storage. The rubber-covered rollers I'm installing on the wooden bunks should help the hull glide smoothly on and off the trailer. That's my hope, at least. A nice addition I have installed on the trailer is a chain-driven dolly. By turning a crank, I can manually move the trailer into tight spots, maneuvering back and forth into a driveway that would be difficult to manage by backing up with the trailer hitched to my car. If the weather cooperates, I will pull Jersey Girl onto the trailer later this week and tuck her in for a winter's hibernation. I'll be working on smaller components in my heated garage over the winter, like arched roof beams, cabin sides and windows. Stay tuned.
27 Nov 2018Trailer & Gear
The time has come to get Jersey Girl into position to winch her up onto the trailer...
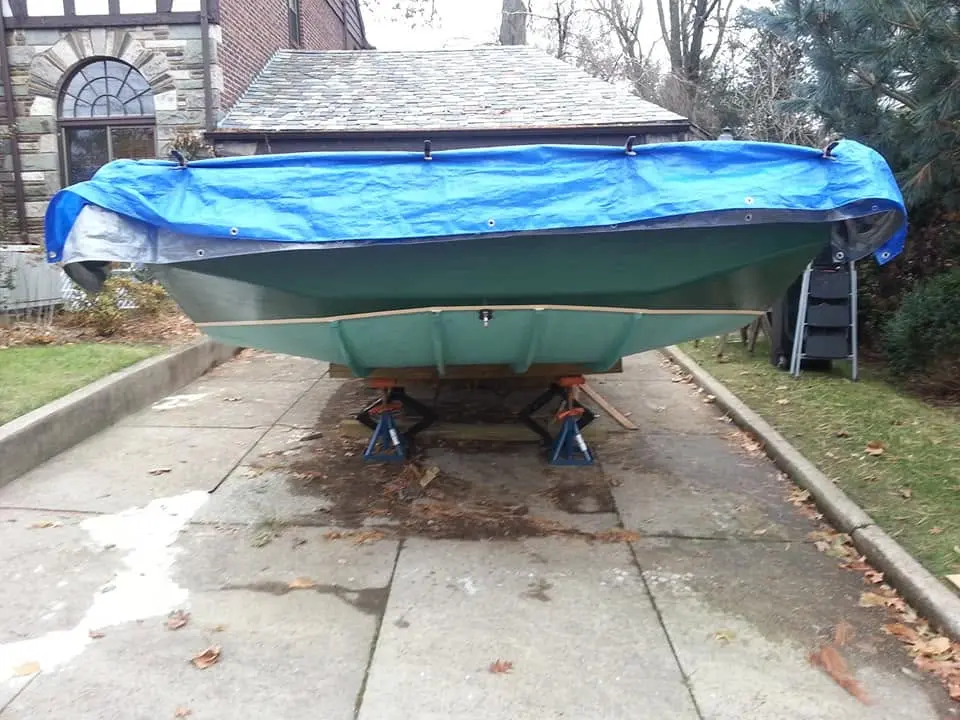
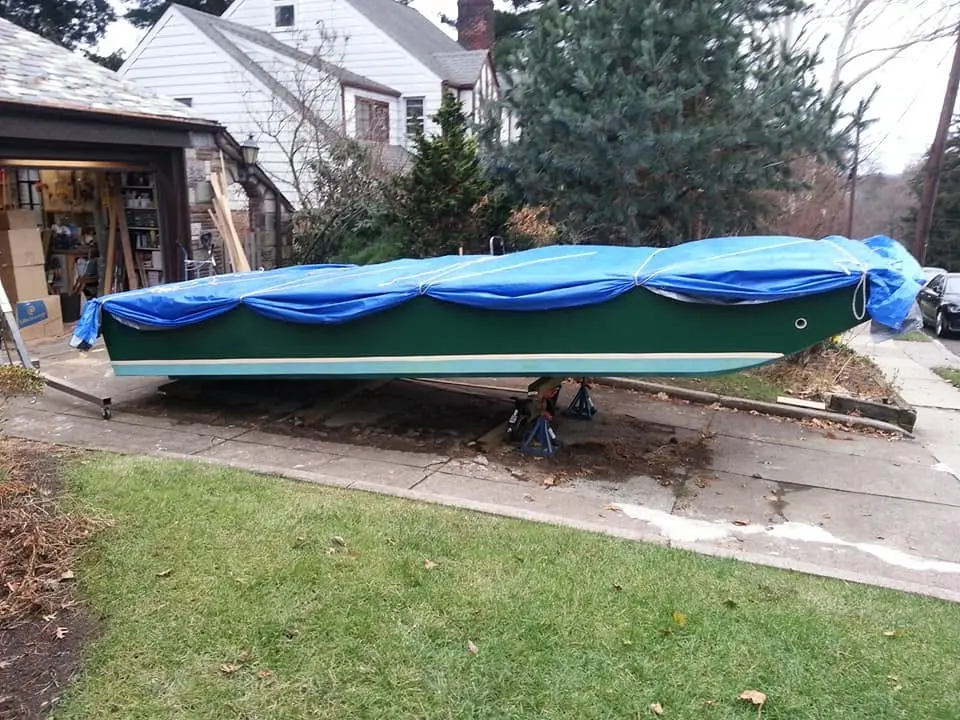
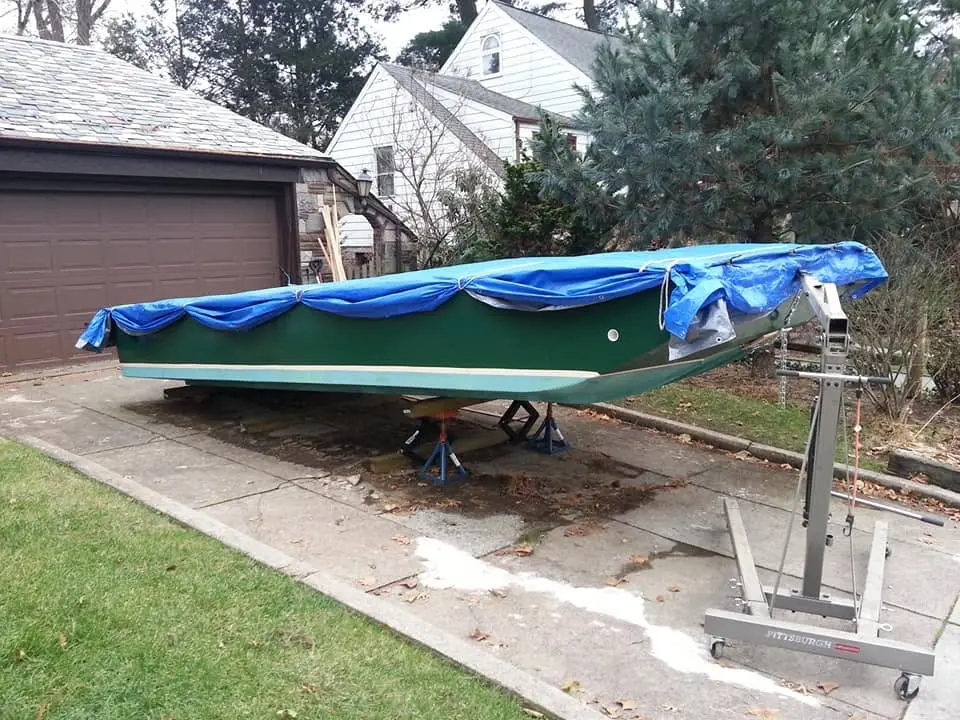
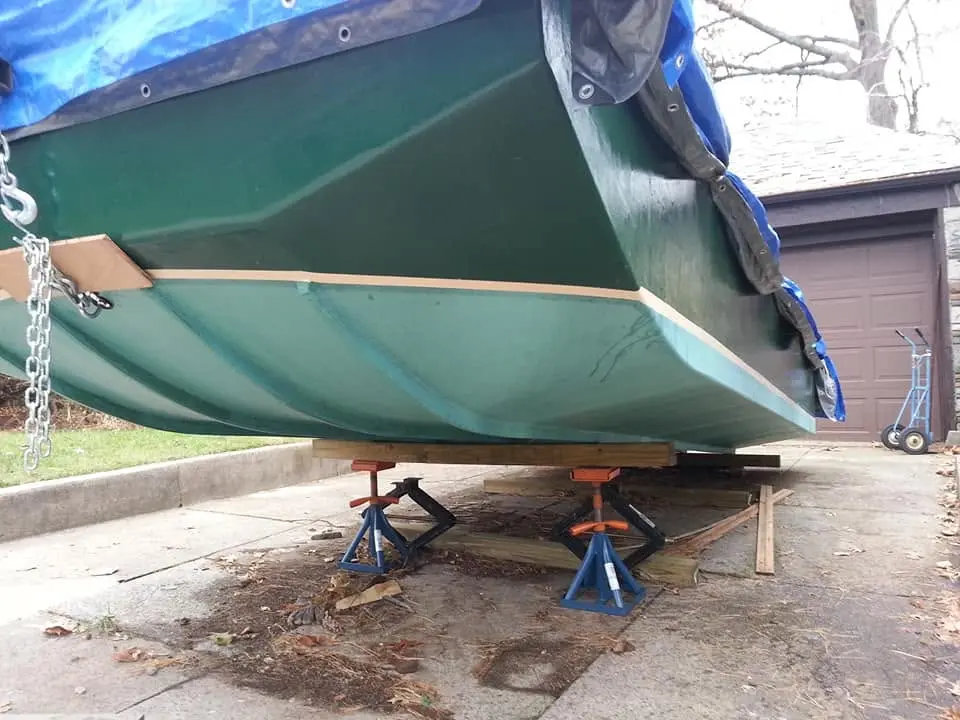
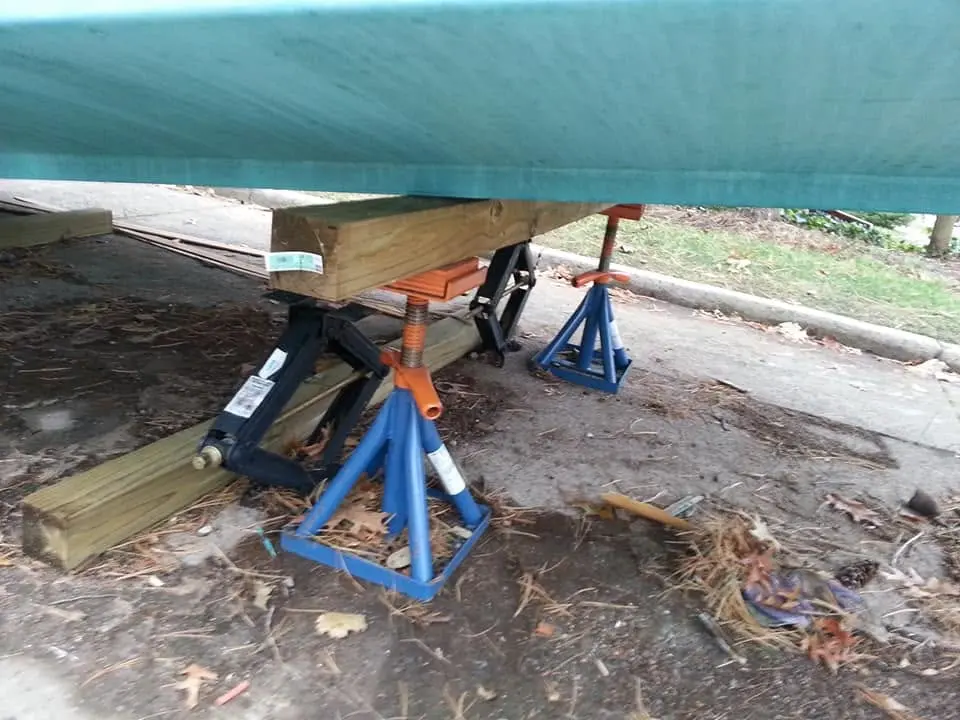
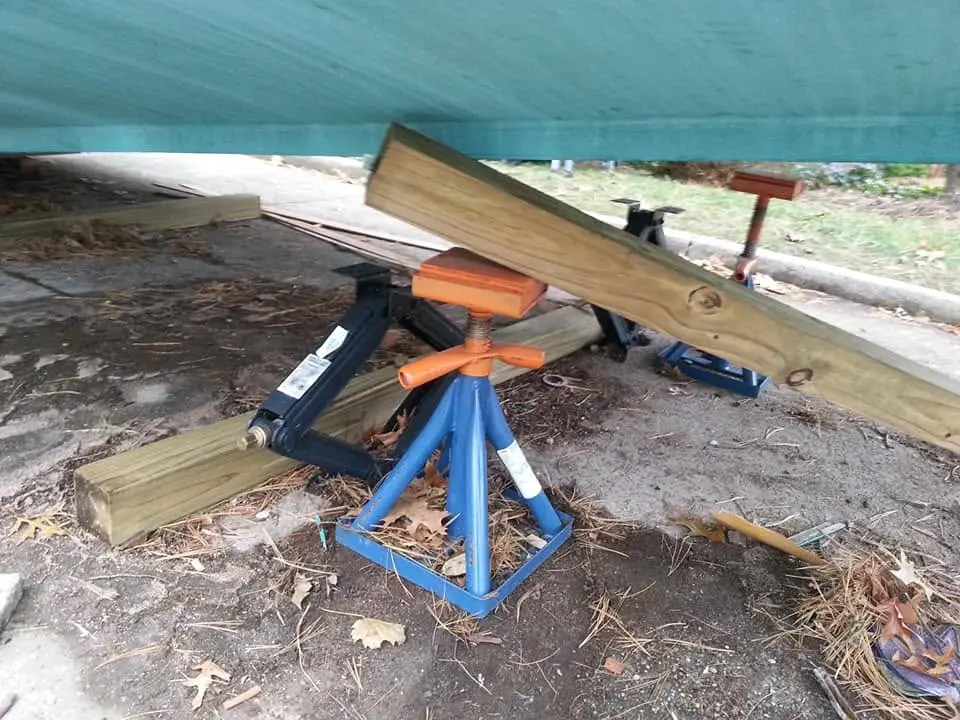
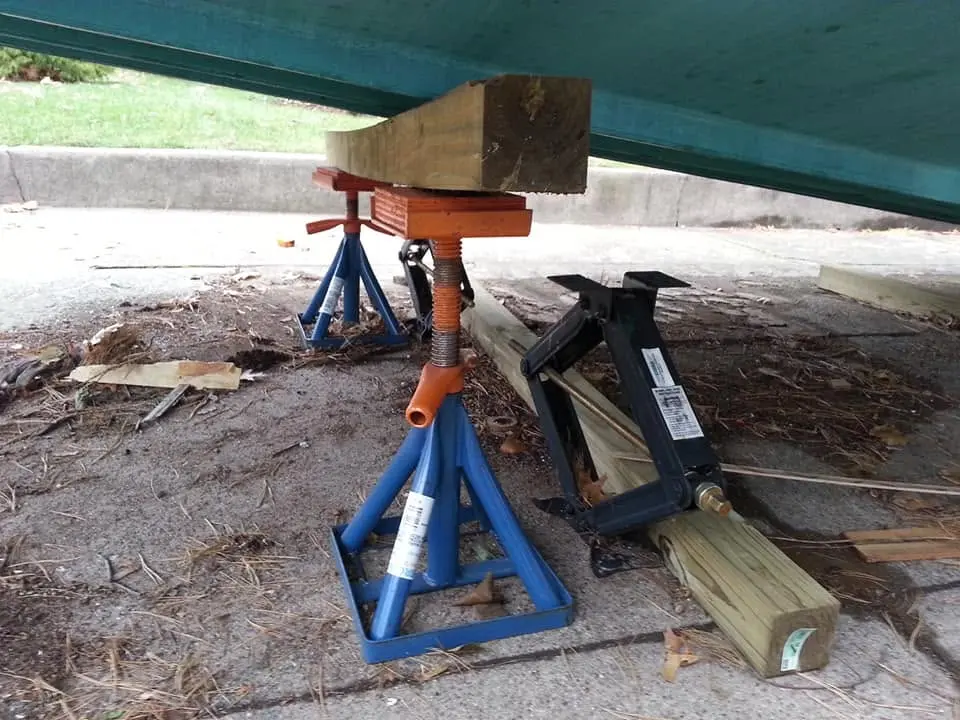
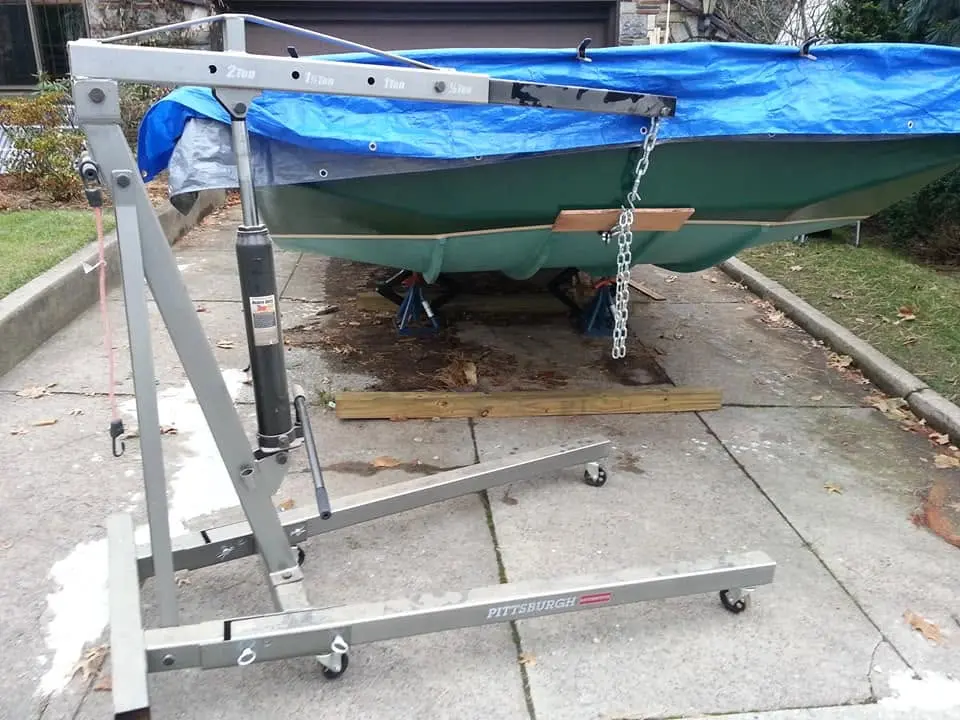
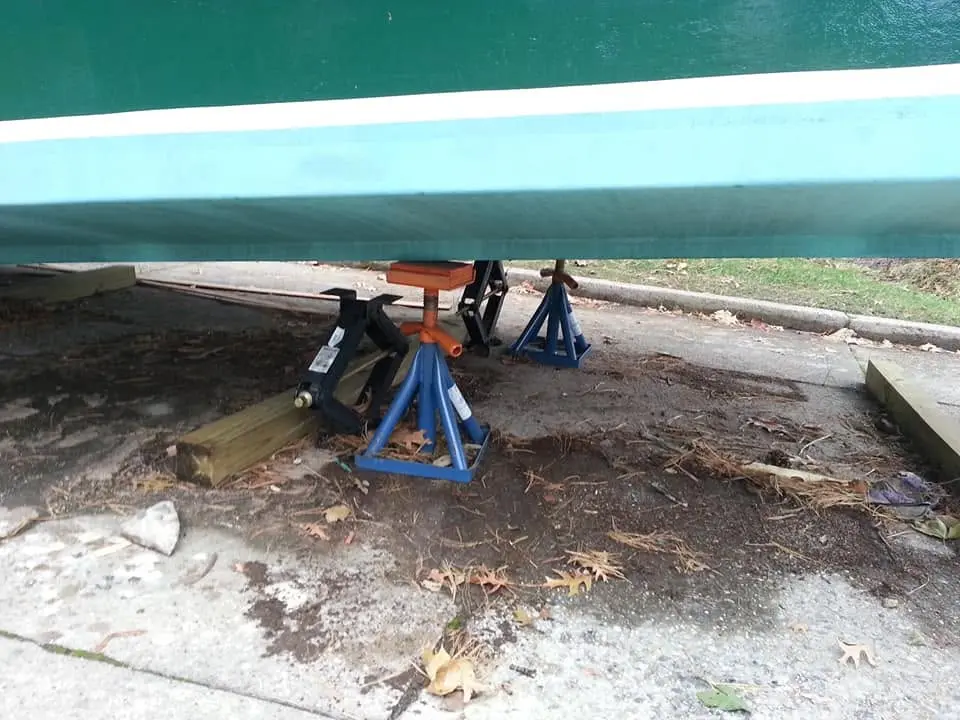
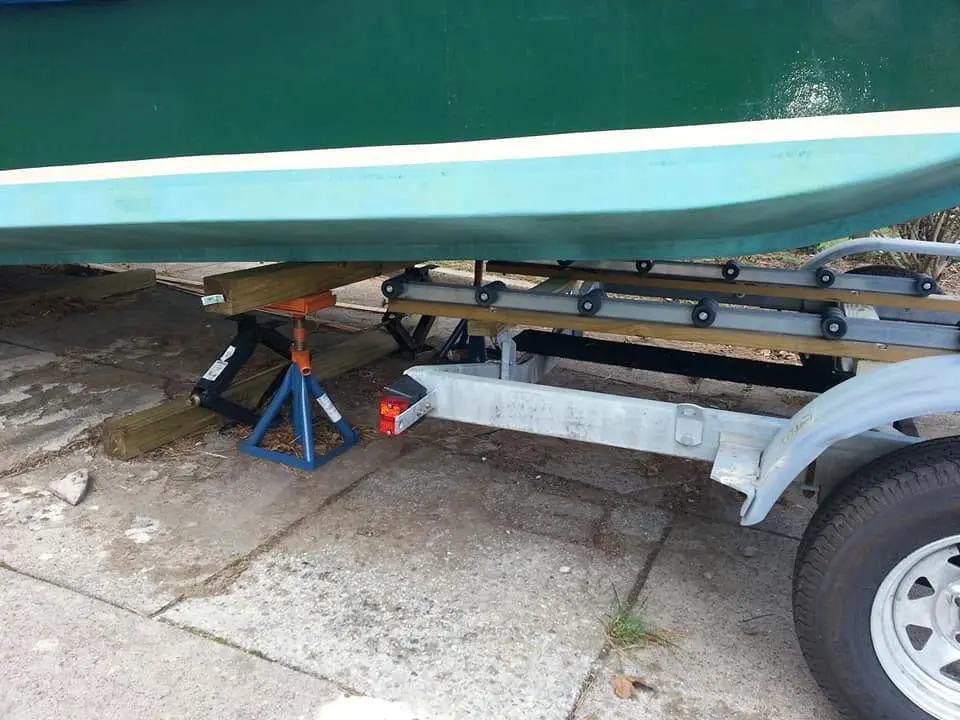
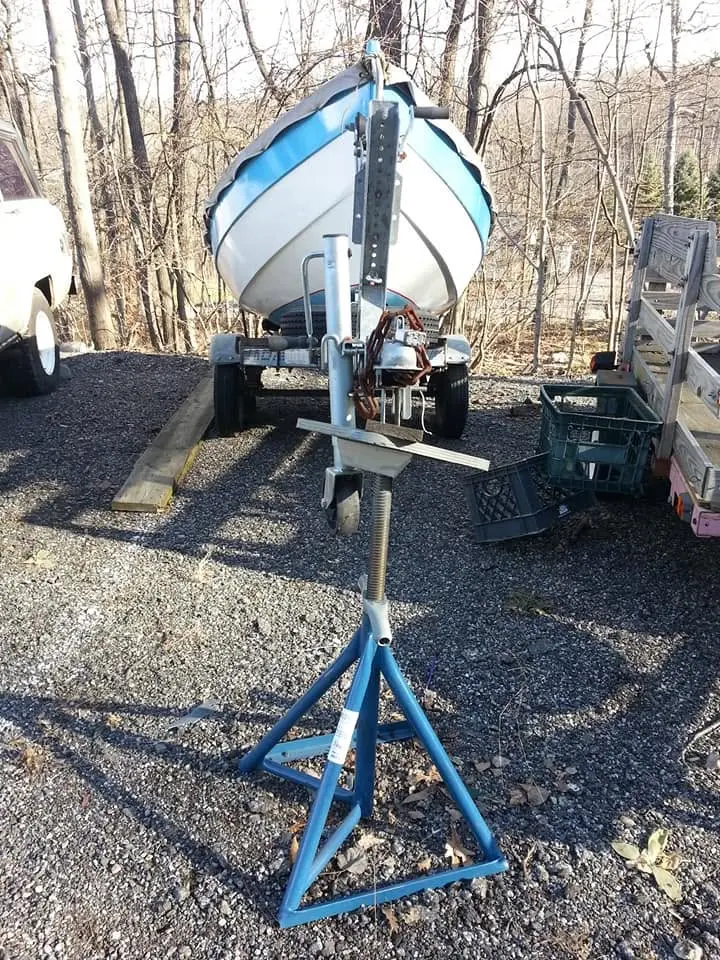
Houseboat update, Tuesday, November 27, 2018 – The time has come to get Jersey Girl into position to winch her up onto the trailer for transport to her winter hibernation. First, I measure the distance from the ground to the tops of the rollers – about 29 inches. Next, I attach the hook of the hydraulic hoist boom to the pad eye at Jersey Girl’s bow, and with a piece of plywood scrap to protect her paint, I start pumping the lever. Slowly and cautiously, a bit at a time. She’s got to go up about 10 inches to be able to slide the rear of the trailer under her hull to start hauling her aboard. Every inch or so, I stop to adjust the jack stands, so if anything slips, she won’t fall far. Finally, I have her in the tight orientation. She’s well supported, and she’ll stay that way until tomorrow.
29 Nov 2018Trailer & Gear
Using the Trailer Valet, I’ve started to manually maneuver the trailer into the...
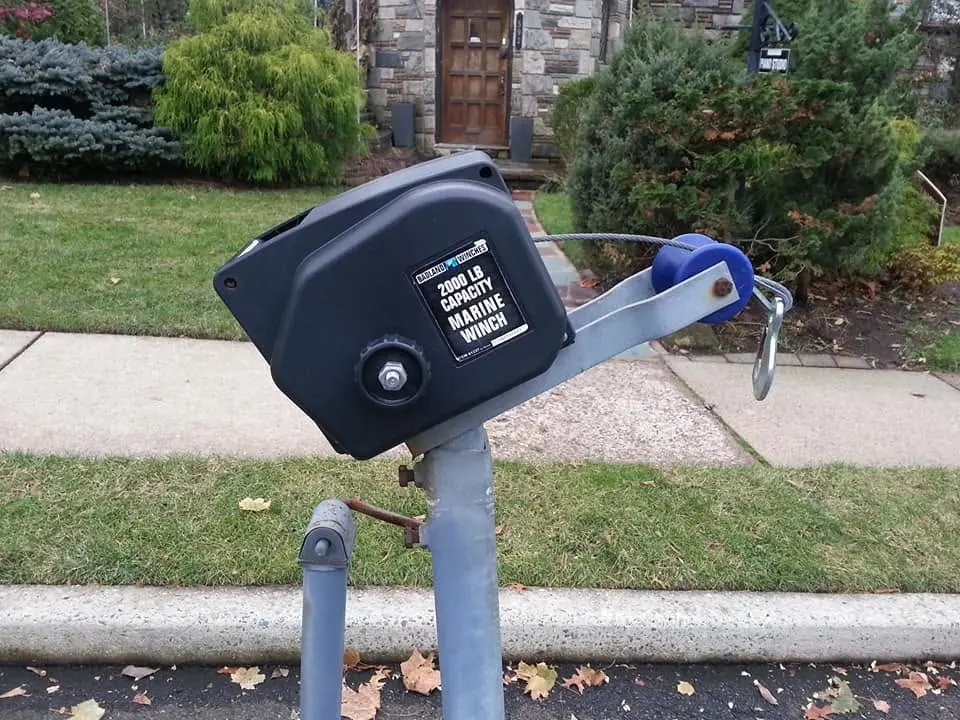
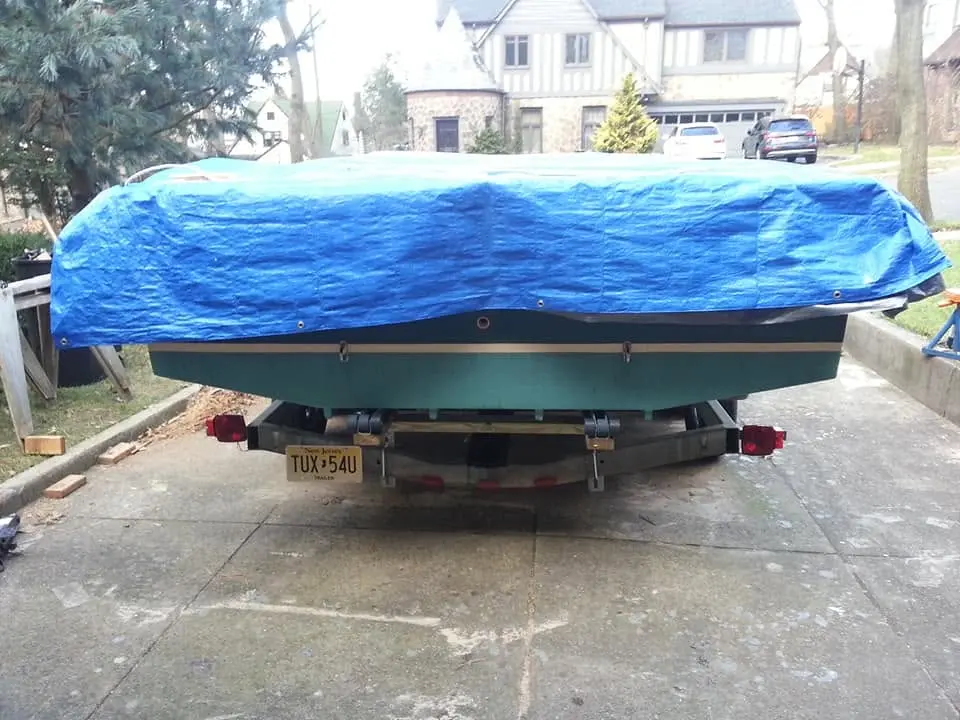
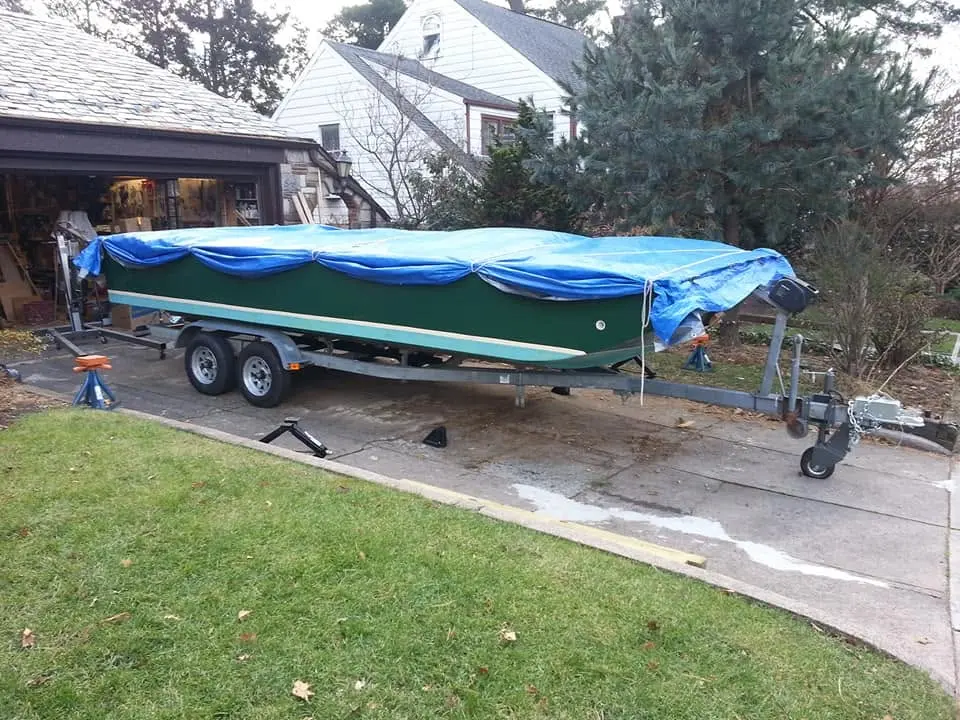
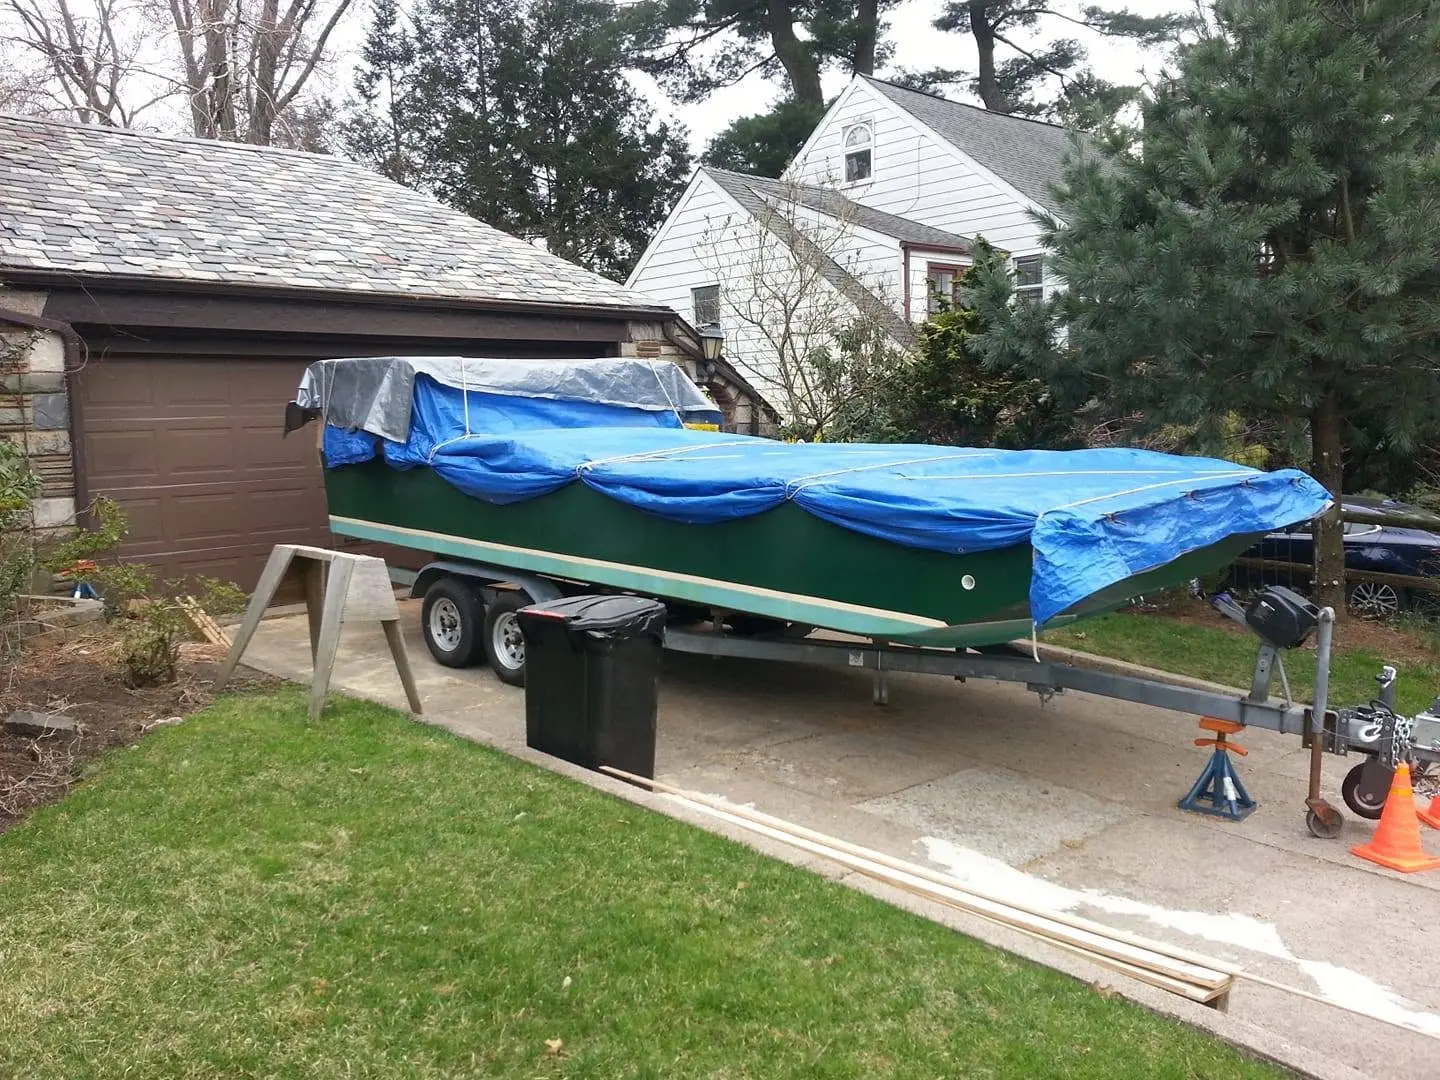
Houseboat update, Thursday, November 29. 2018 (Part 2) – Using the Trailer Valet, I’ve started to manually maneuver the trailer into the driveway and under Jersey Girl’s raised bow. My first approach was about an inch and a half off-center, but with the valet it was an easy matter to crank the trailer back into the street and get it centered properly. I lowered the support stands until the bottom of the hull was resting on the first two sets of rollers, hooked up the winch to the bow pad eye and started cranking the cable taut. As I cranked, the trailer moved further under the hull, and the boat began to settle into a more horizontal orientation as the bunk roller moved underneath it. Eventually, the stern rose off its support and the gently dropped into a perfectly centered position on the trailer, then rolled easily toward the winch as I continued to crank. I had spent a lot of time thinking about every move, choreographing every step, and it all went smoothly, exactly according to plan. I can see I will have to get a much shorter winch mast than the one that came with the trailer, but that should be no problem. As it sits on the trailer, the bottom of the hull is less than 23 inches above the pavement. The chines clear the trailer fenders by about an inch and a half, and the fenders clear the wheels by about three inches. If I need to, I can lower the fenders a bit, and that will allow me let the hull sit lower on the trailer.
29 Nov 2018Trailer & Gear
This is the day to get Jersey Girl Up on her trailer.
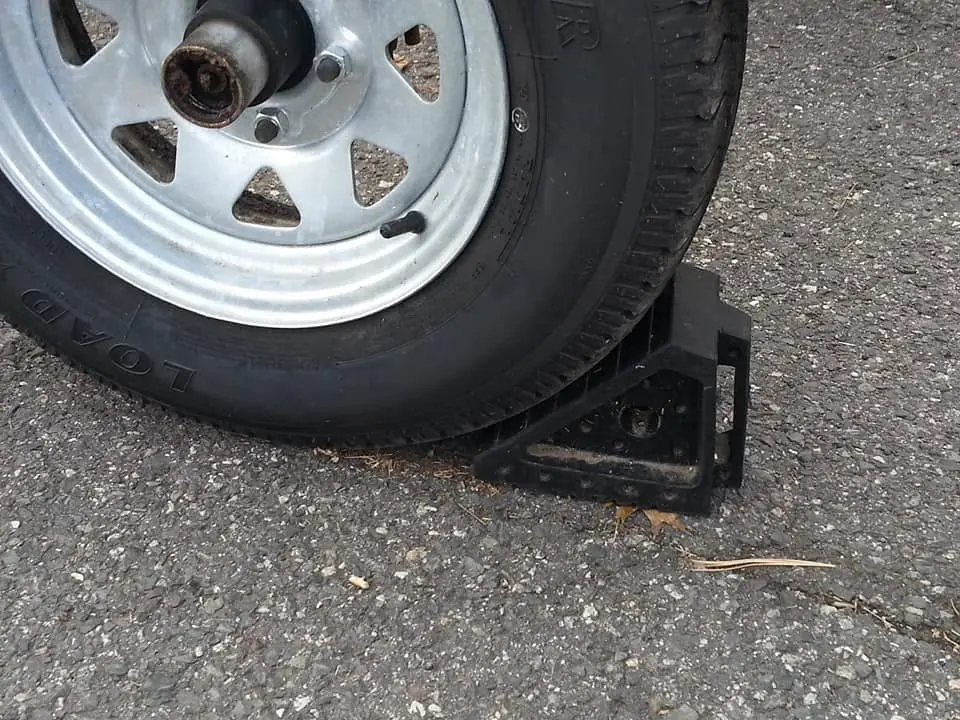
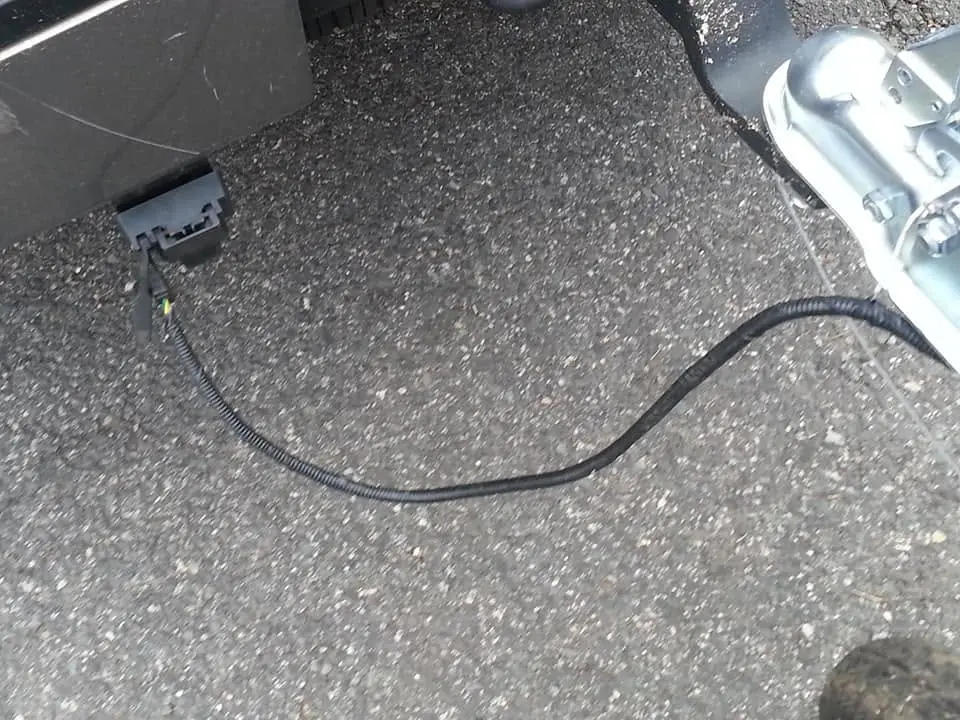
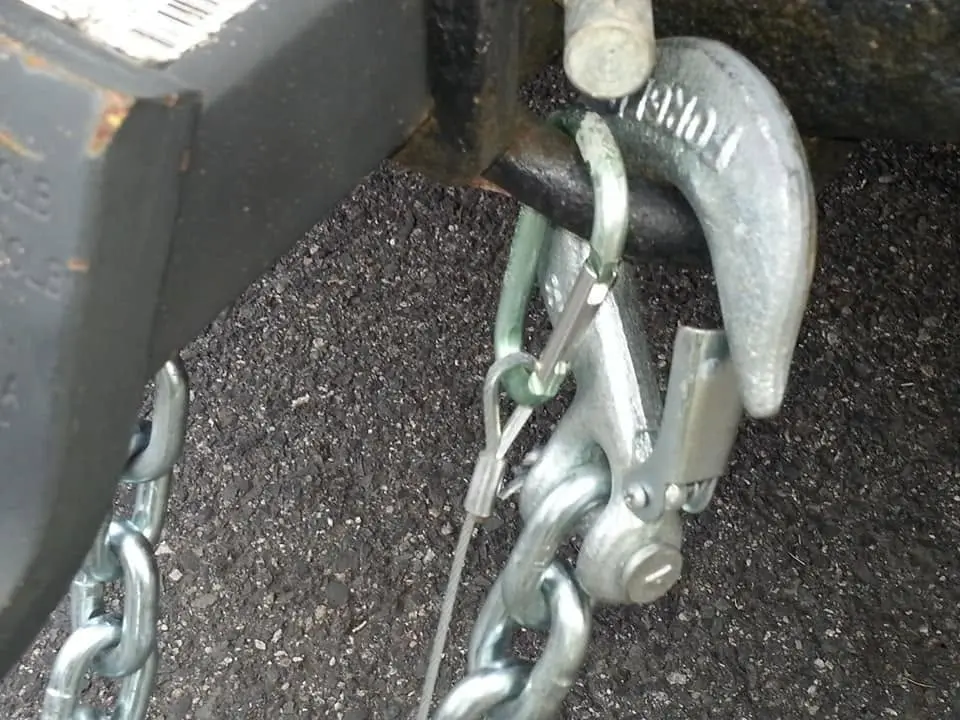
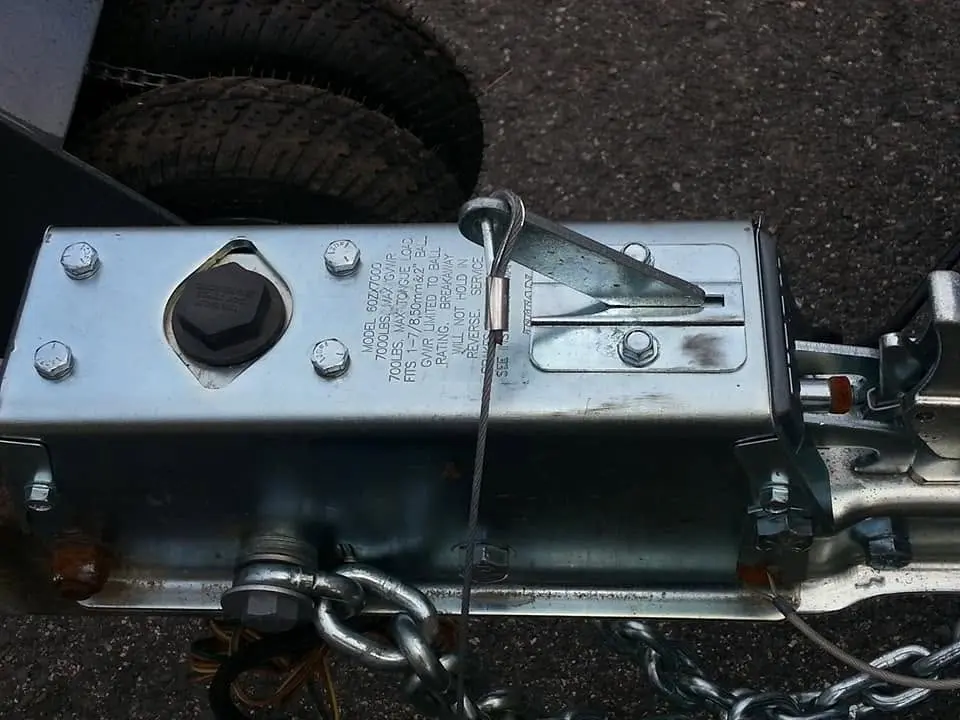
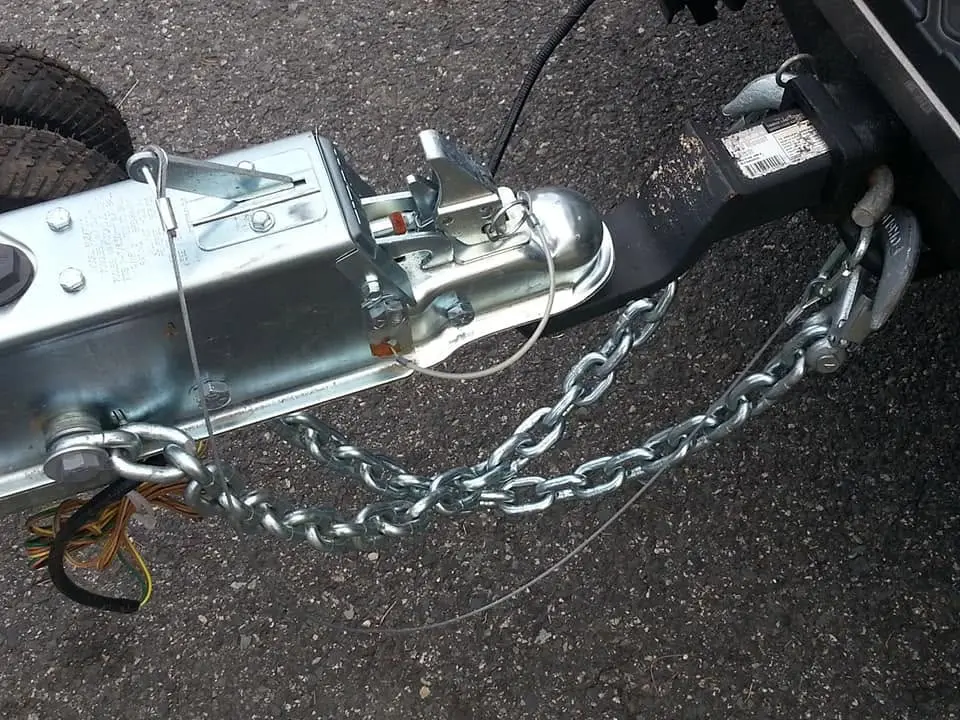
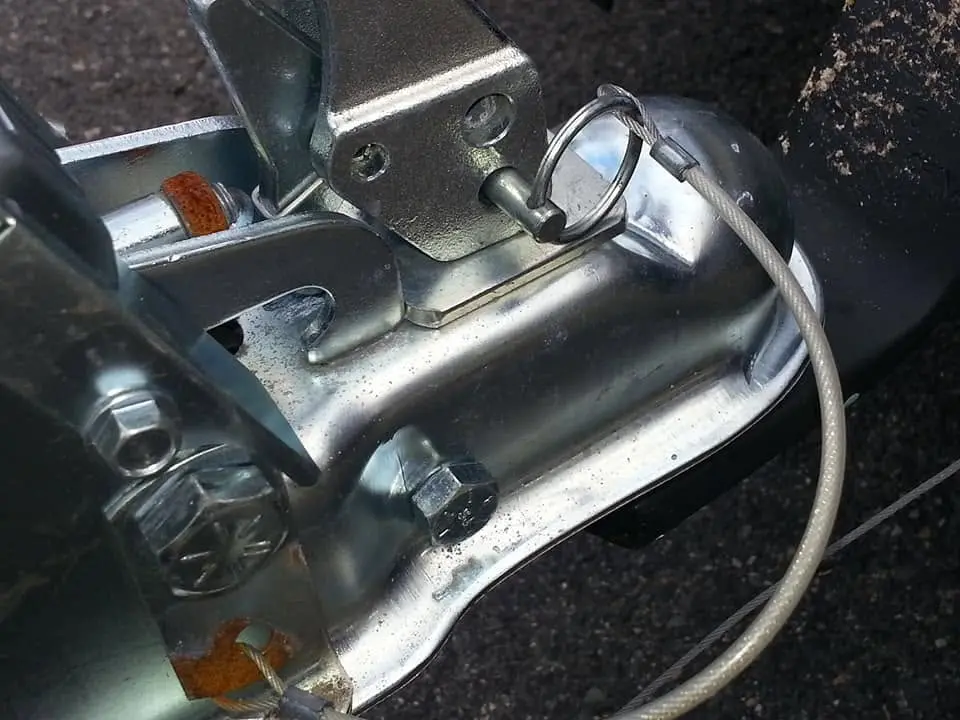
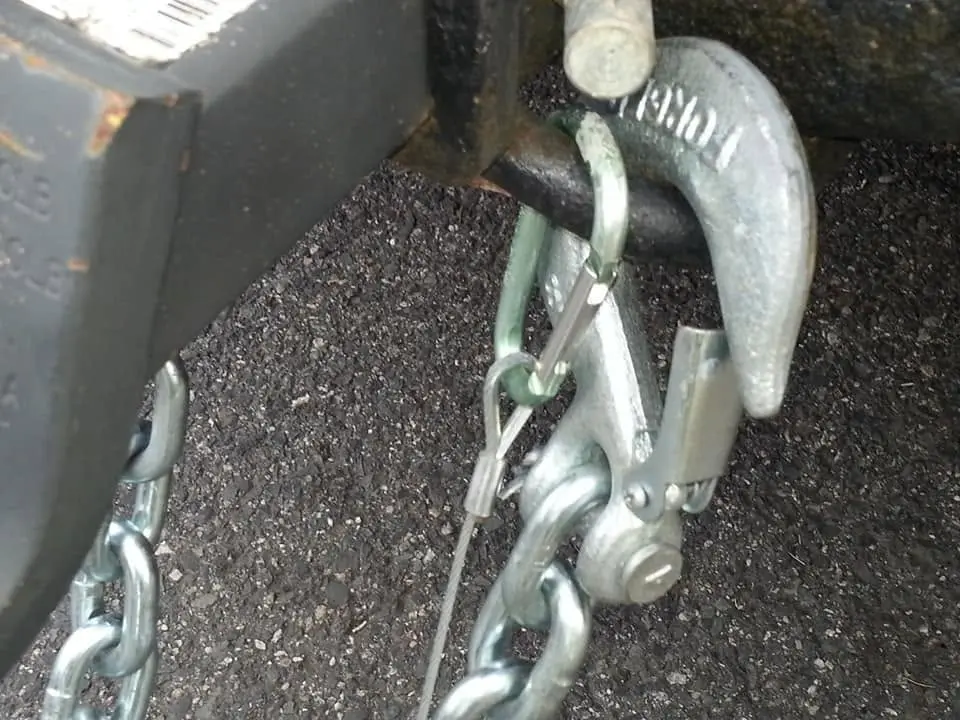
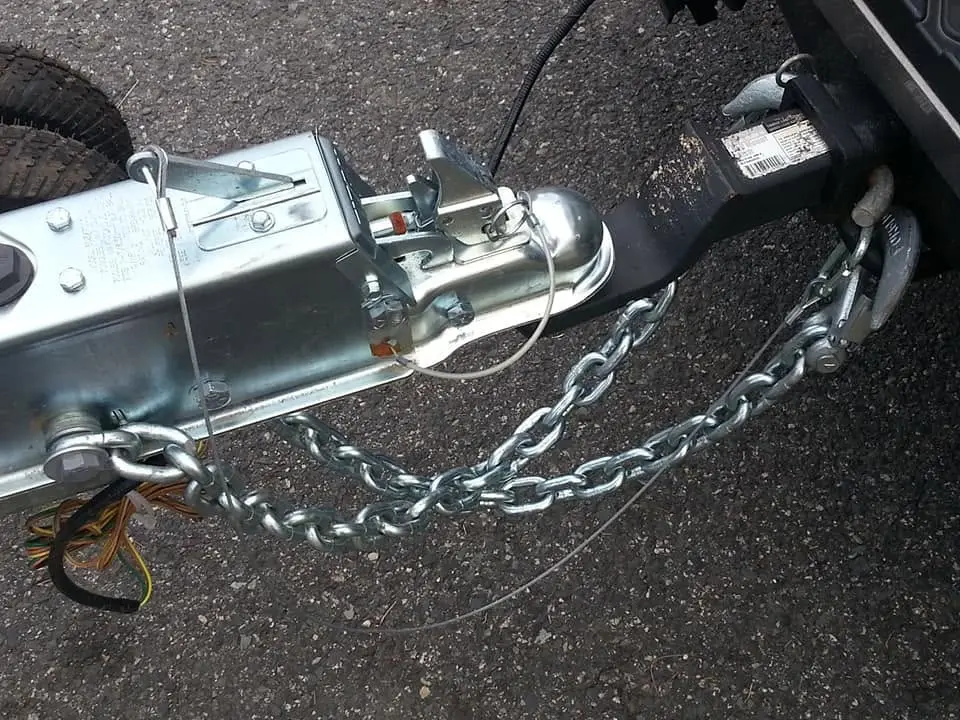
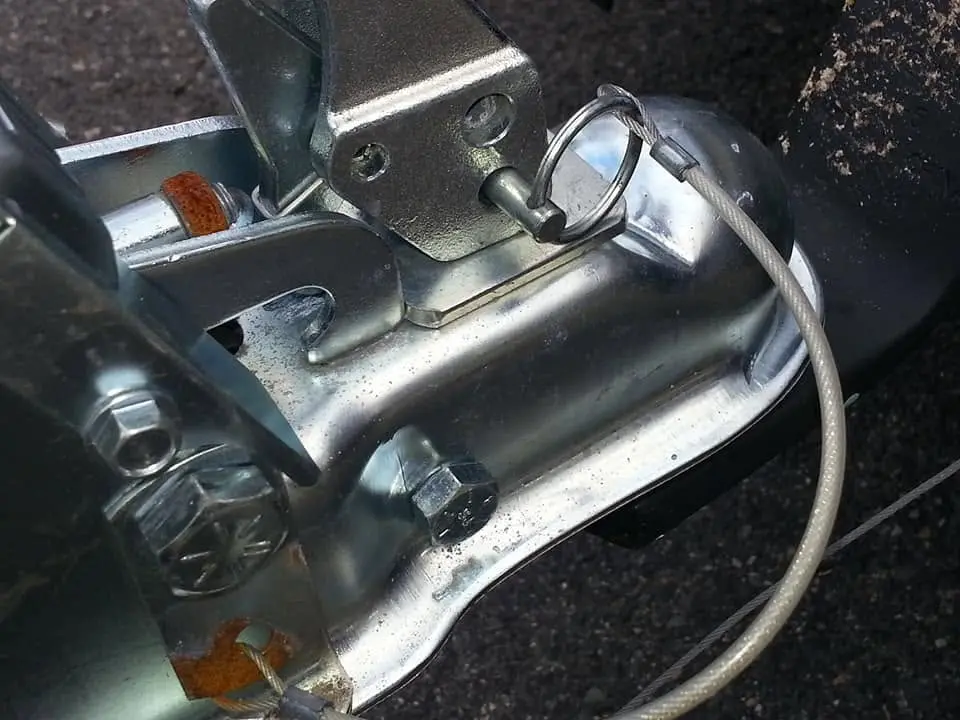
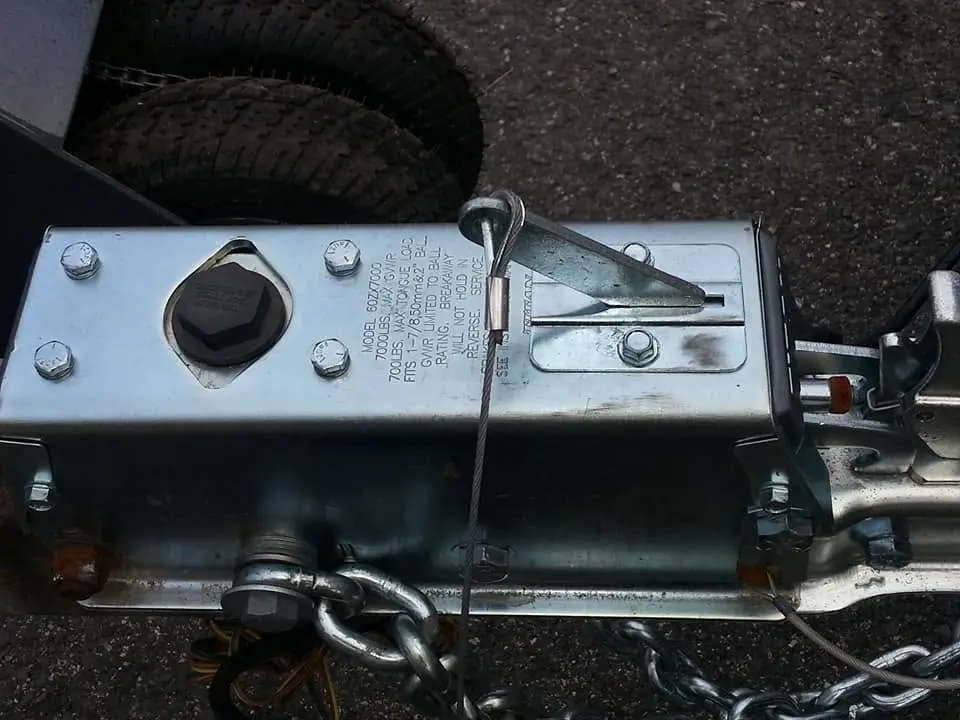
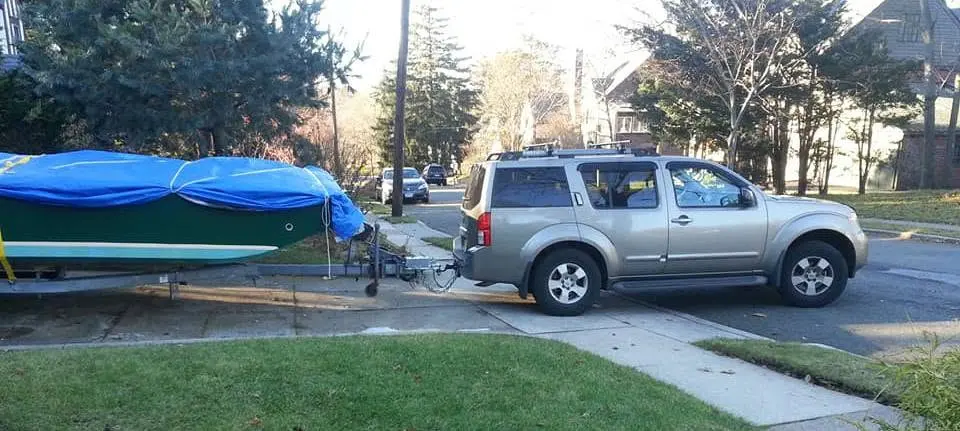
Houseboat update, Thursday, November 29, 2018 – This is the day to get Jersey Girl Up on her trailer. First, I’m going to have to hitch the trailer to my car for a drive around the block, so I can position the trailer to be able to maneuver it into the driveway and under the hull. In younger days, I might have been able to manhandle it around by brute strength. Now, not so much. The Trailer Valet that I’ve installed on the tongue will make it possible to position the socket directly over the hitch ball, so all I have to do is turn the crank to lower the hitch socket for a perfect connection. Even for a short ride around the block, I’m mindful that with equipment like this, things can go very badly very quickly. I have to make sure all the redundant safety systems are in use. First, I lock the ball into the socket and insert the safety pin. Even with the trailer hooked up, as long as I am parked, I keep the rear wheel chocks in place. Next, I swing the Trailer Valet up and lock it into place, and crank the trailer’s tongue jack into its raised position. The hitch I’ve installed on the trailer incorporates a surge brake system – If there’s ever a break-away while I am driving, a cable attached to the car will be stretched taut and pull a lever on top of the hitch forward, and when that happens, the trailer wheels will lock up and bring the trailer to an abrupt stop. But because I do not want to rely on that emergency measure, I make sure to properly attach the safety chains to the car, criss-crossed under the tongue so it’s cradled and supported without falling to the road surface if the ball-and-socket hitch comes undone. Then, I make sure the electrical connector is attached to the car, so the tail lights, brake lights, directional signals and side marker lights work. Before I can move, I must remember to pick up the wheel chocks, remove the crank from the Trailer Valet and stow them in the car. (I know from sad experience how easy it is to forget these items and lose them. Now, I’m all hitched up and ready to go. But it’s c-c-c-cold out, I’m going into the house to warm up for a bit before the next step.
4 Dec 2018Trailer & Gear
Today’s the day for the big move to winter storage, four houses up the block.
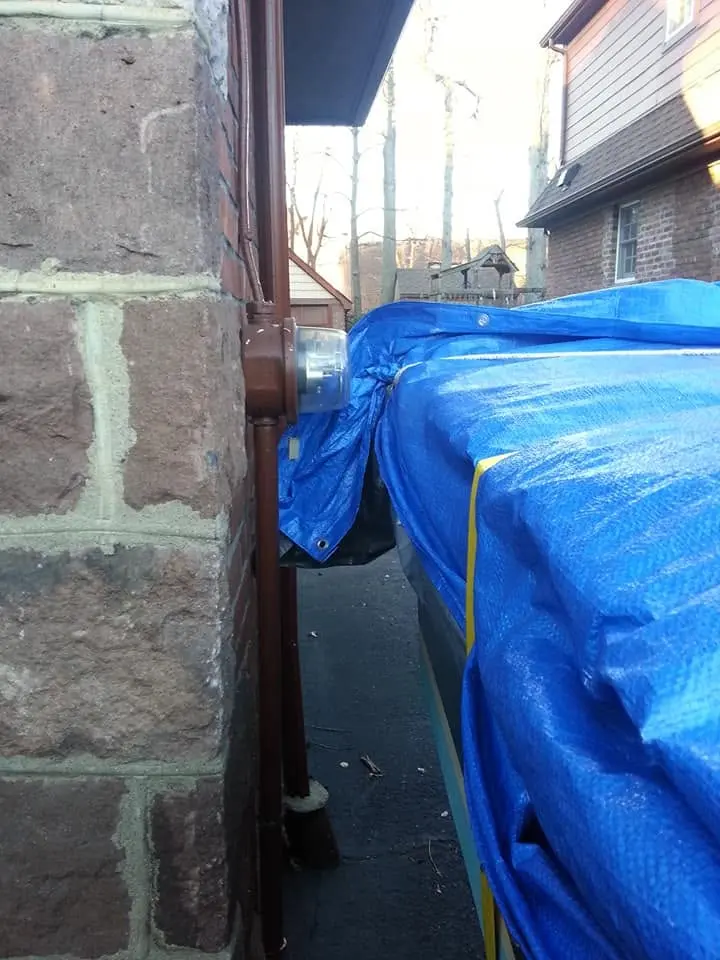
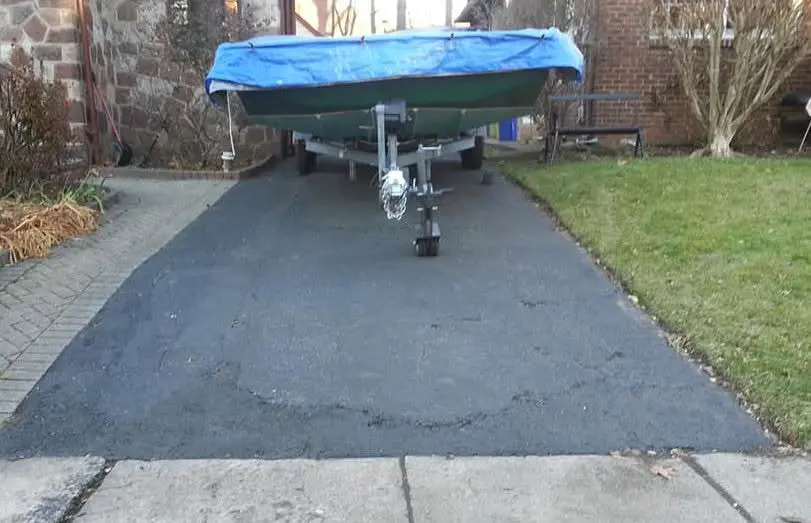
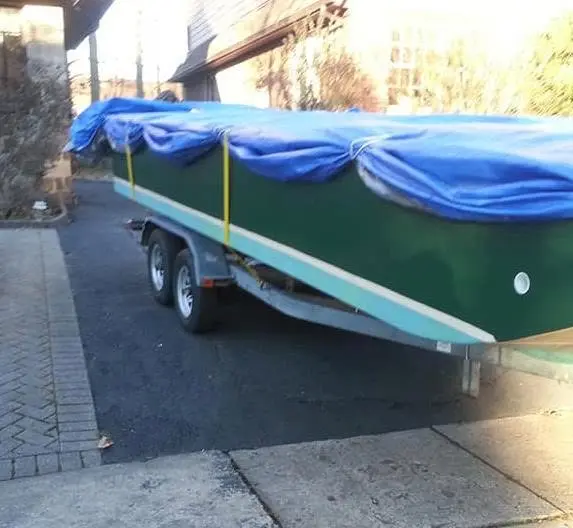
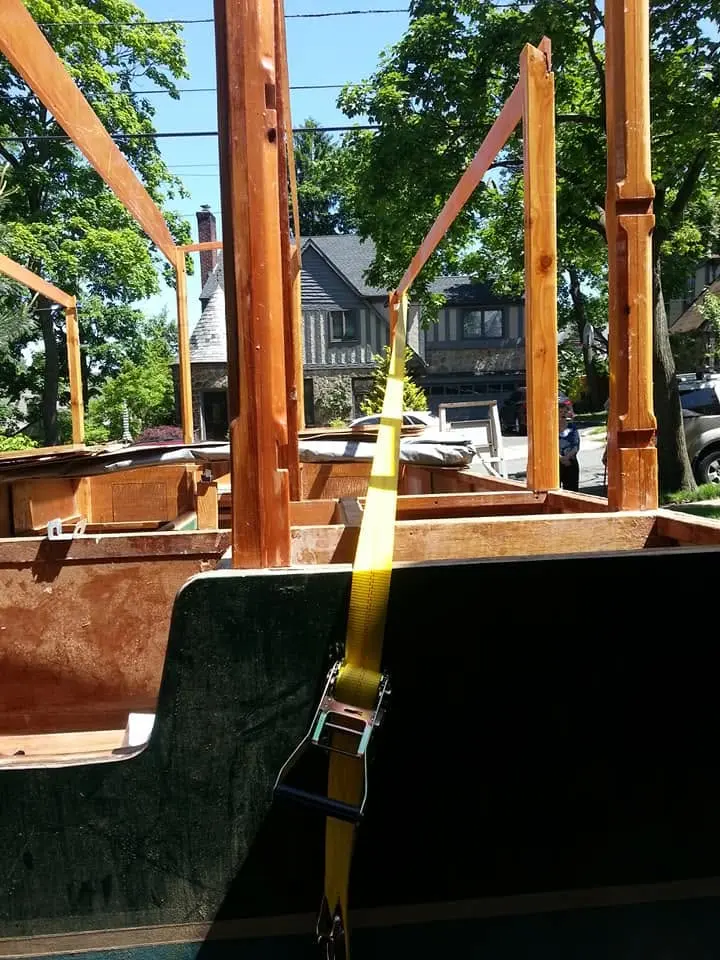
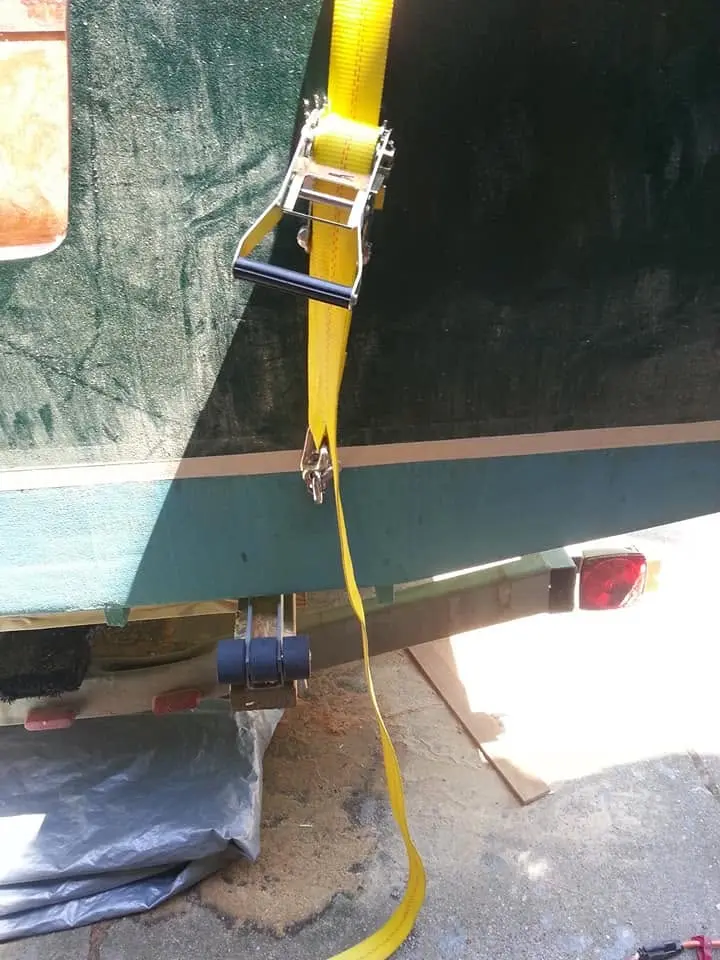
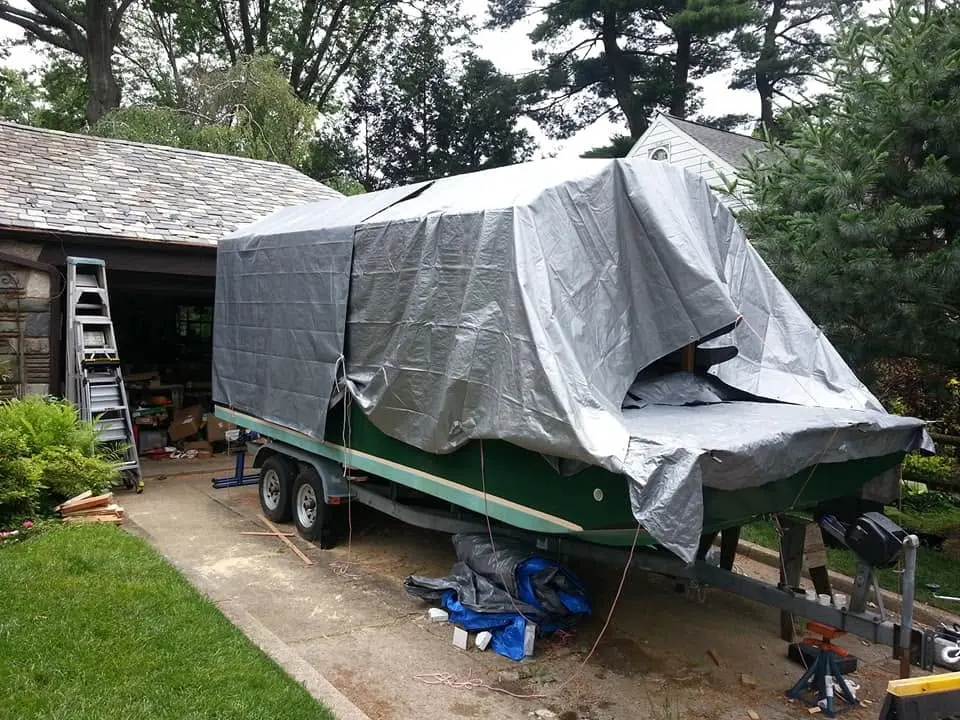
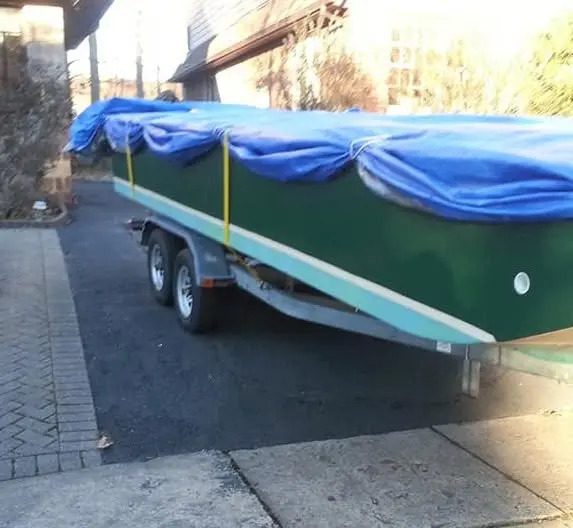
Houseboat update, Tuesday, December 4, 2018 – Today’s the day for the big move to winter storage, four houses up the block. A neighbor with a long driveway offered to make the end of it Jersey Girl’s winter home, as long as I left space for her family’s cars. This is great! I’ll be able to check up on the state of her hull easily if the weather turns foul over the winter. So I strapped her down to the trailer, hooked her up to the car and towed her about 150 yards east. That was the easy part. Backing her into the long, narrow driveway was a tough job. I wasn’t able to do it with the car, so I had to unhitch the trailer and maneuver it by hand up a fairly steep initial grade. This is where the chain-driven Trailer Valet proved its worth. Turning the drive crank and steering with the tiller, I was able to get it up the grade. Then, with inches to spare, I steered the trailer around a protruding glass electric meter and a couple of drainpipes, finally coming to rest at the back of the driveway in front of my neighbor’s garage. It wasn’t easy, and I had to stop every few feet to see how I was doing and take a short rest. But it’s done!
6 Dec 2018Hull Panels
As I tuck Jersey Girl in for winter hibernation, I must not forget Thistledew, the...
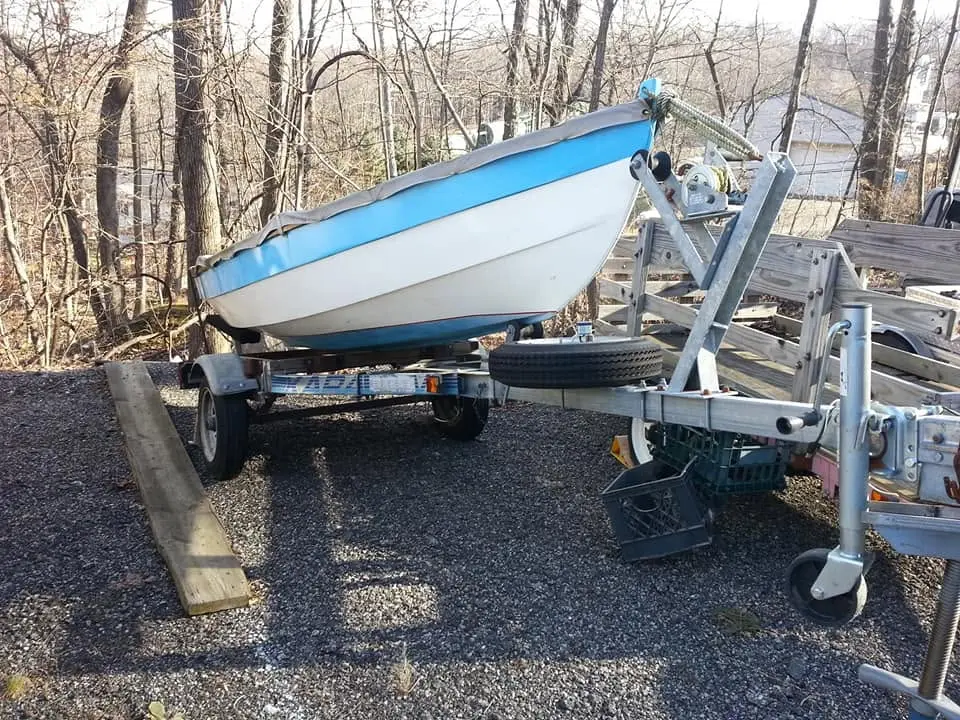
Houseboat update (with a slight course correction), Thursday, December 6, 2018 -- As I tuck Jersey Girl in for winter hibernation, I must not forget Thistledew, the sailing dinghy I built more than 25 years ago. She's still in great shape, but if I don't tilt her up to let any water run out her transom scupper, freeze/thaw cycles will quickly take their toll. I haven't had a chance to sail her for at least four years, and I have to decide whether to make use of her or let her go to a new owner.
22 Dec 2018Deck & Coamings
Jersey Girl is in hibernation for the winter, but while she sleeps her faithful...
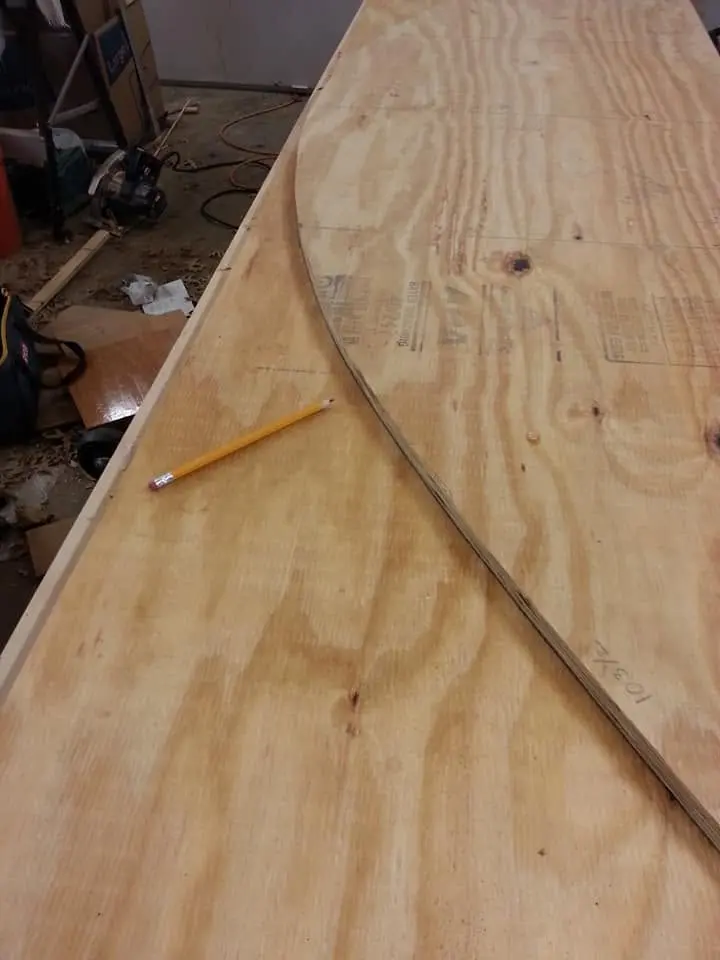
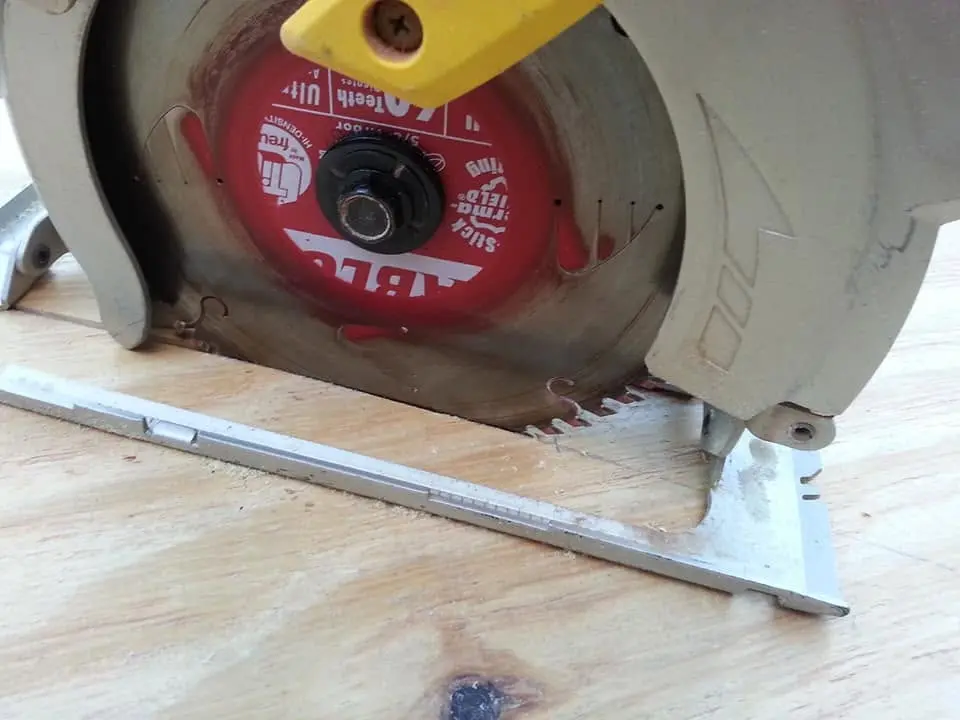
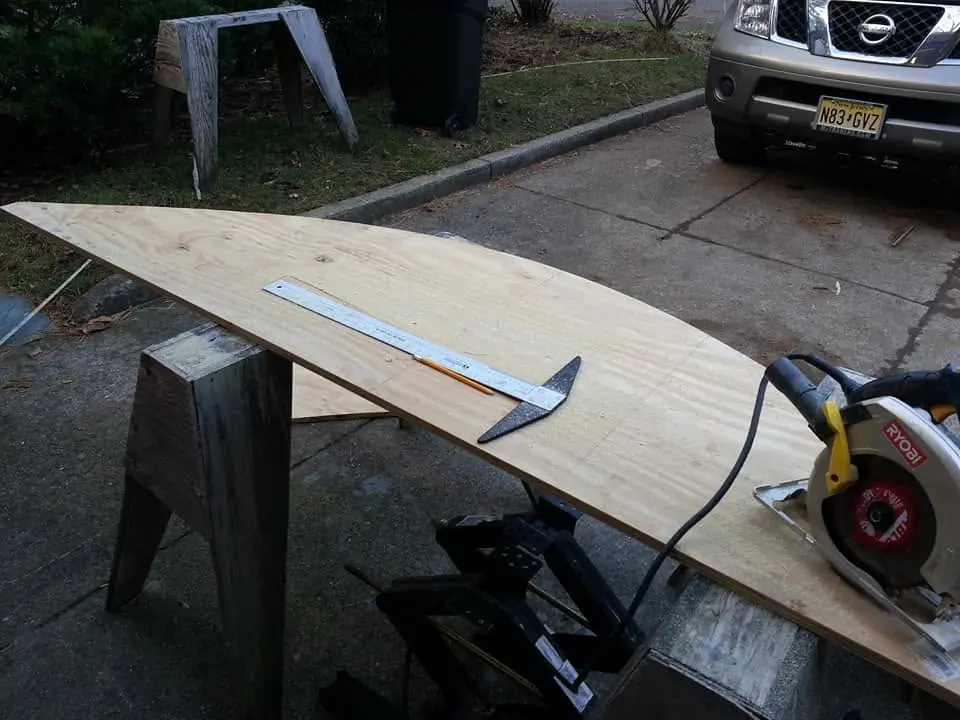
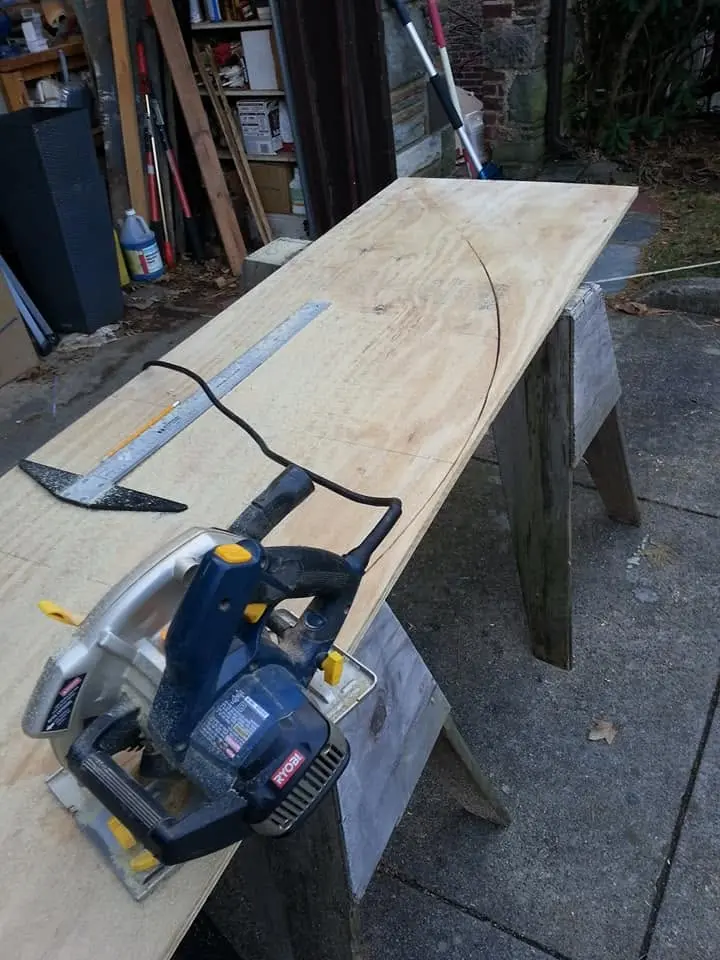
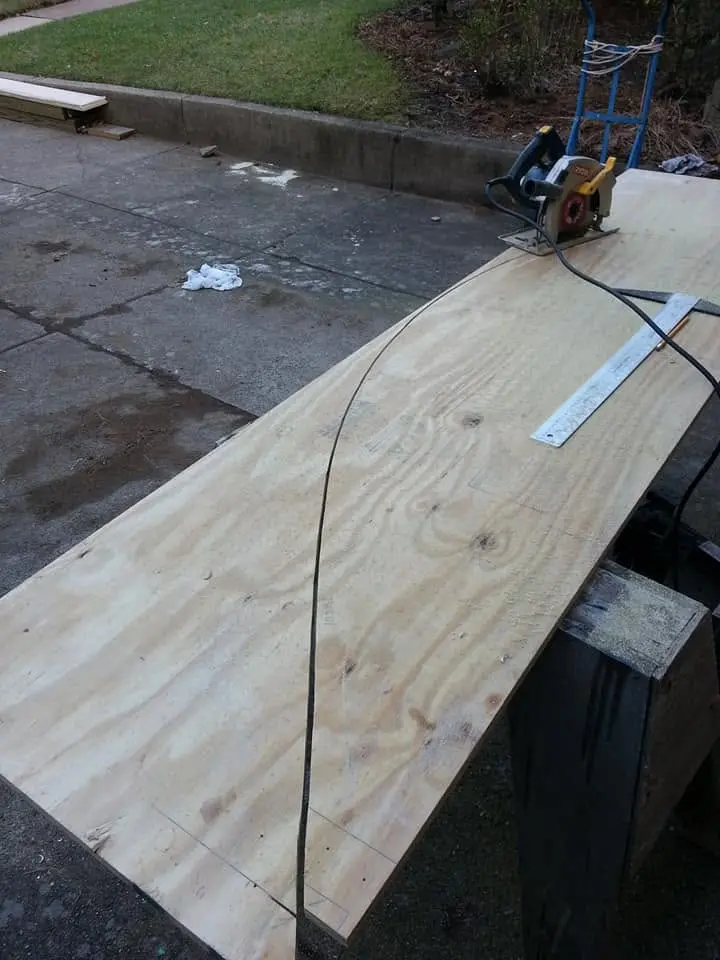
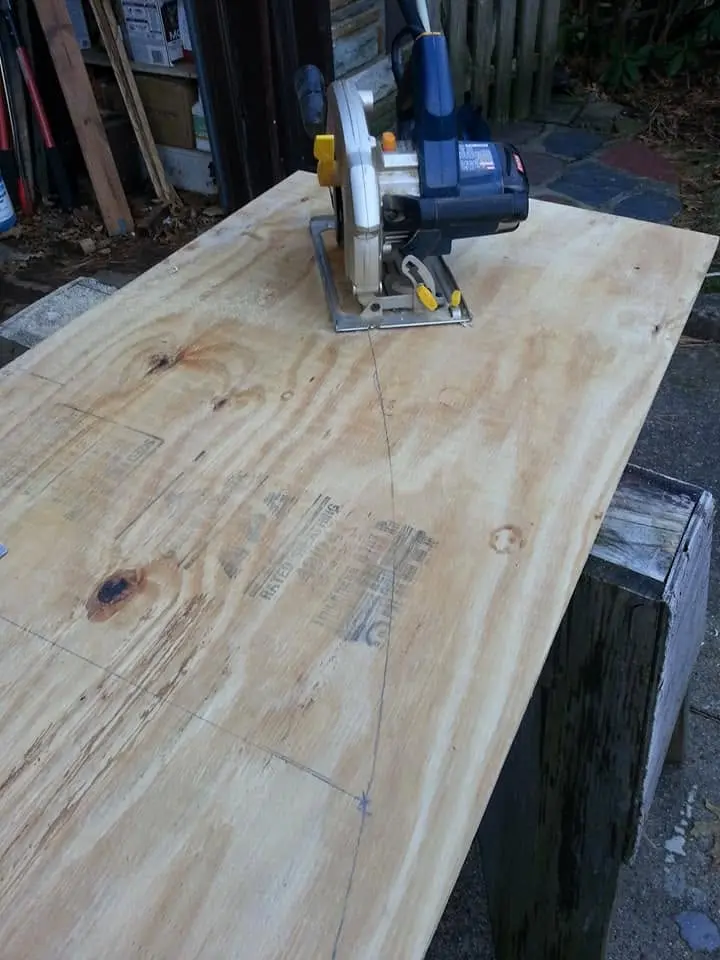
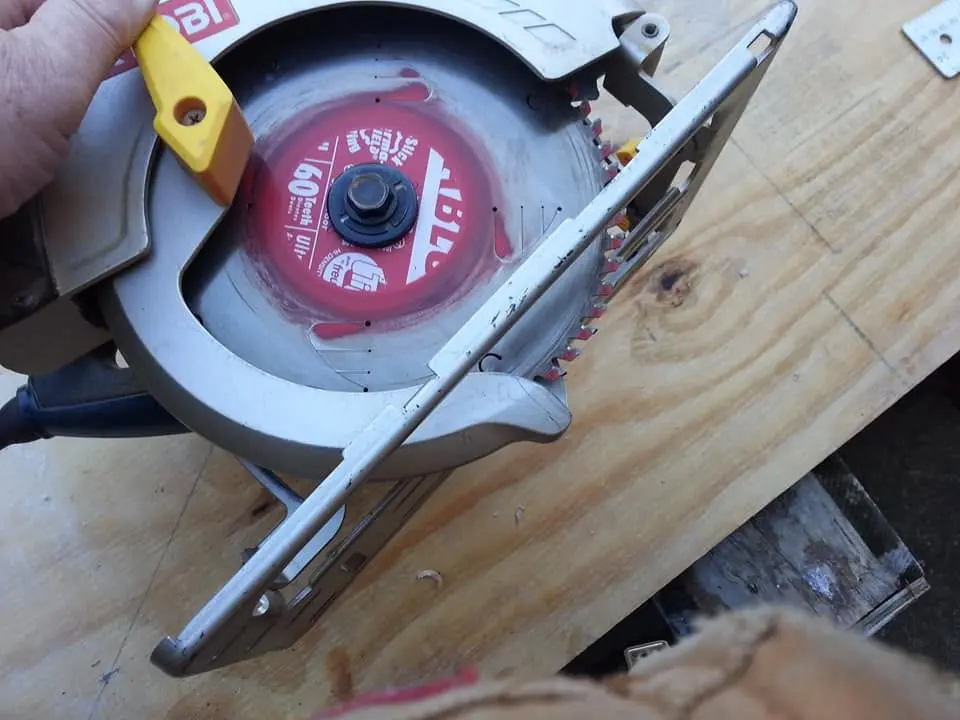
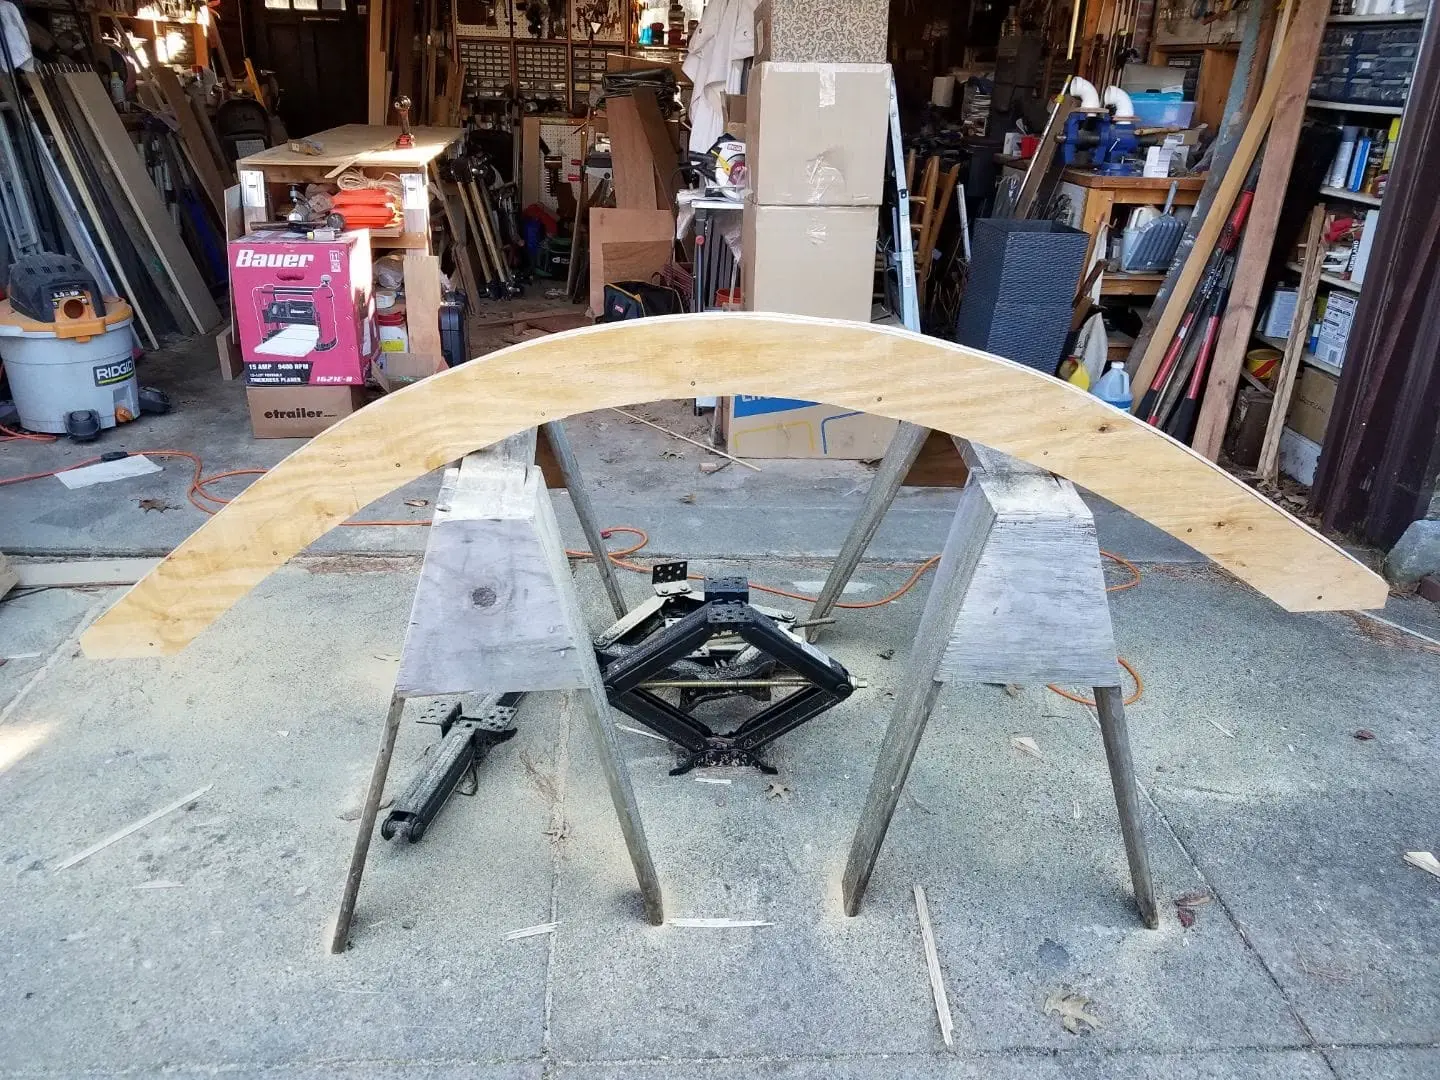
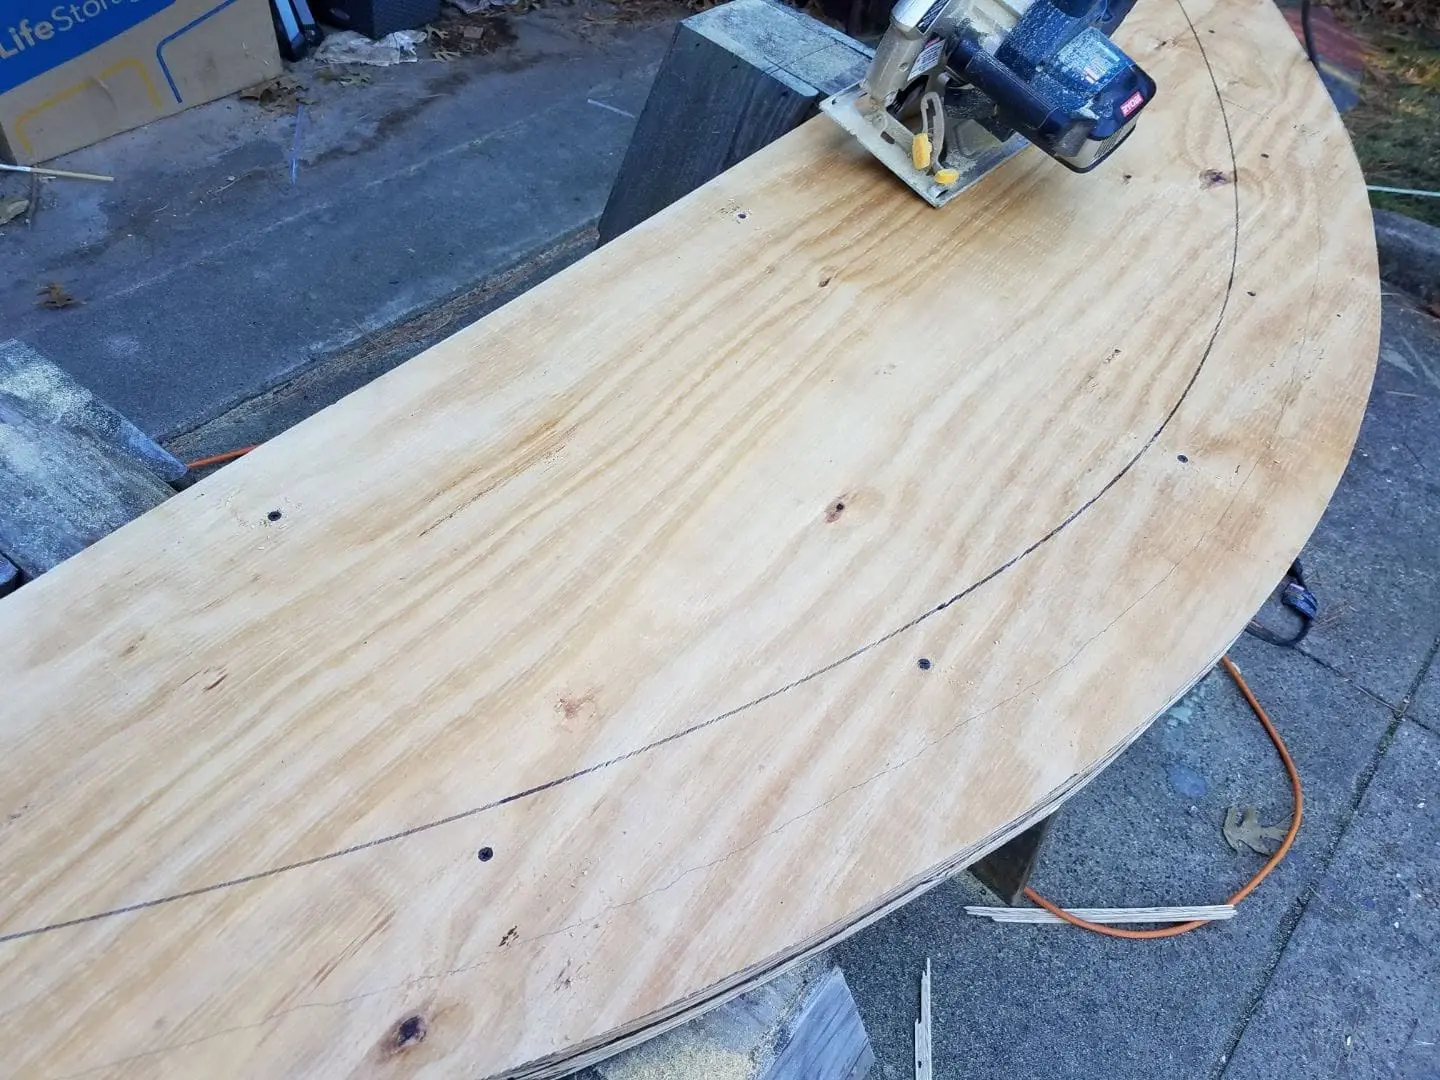
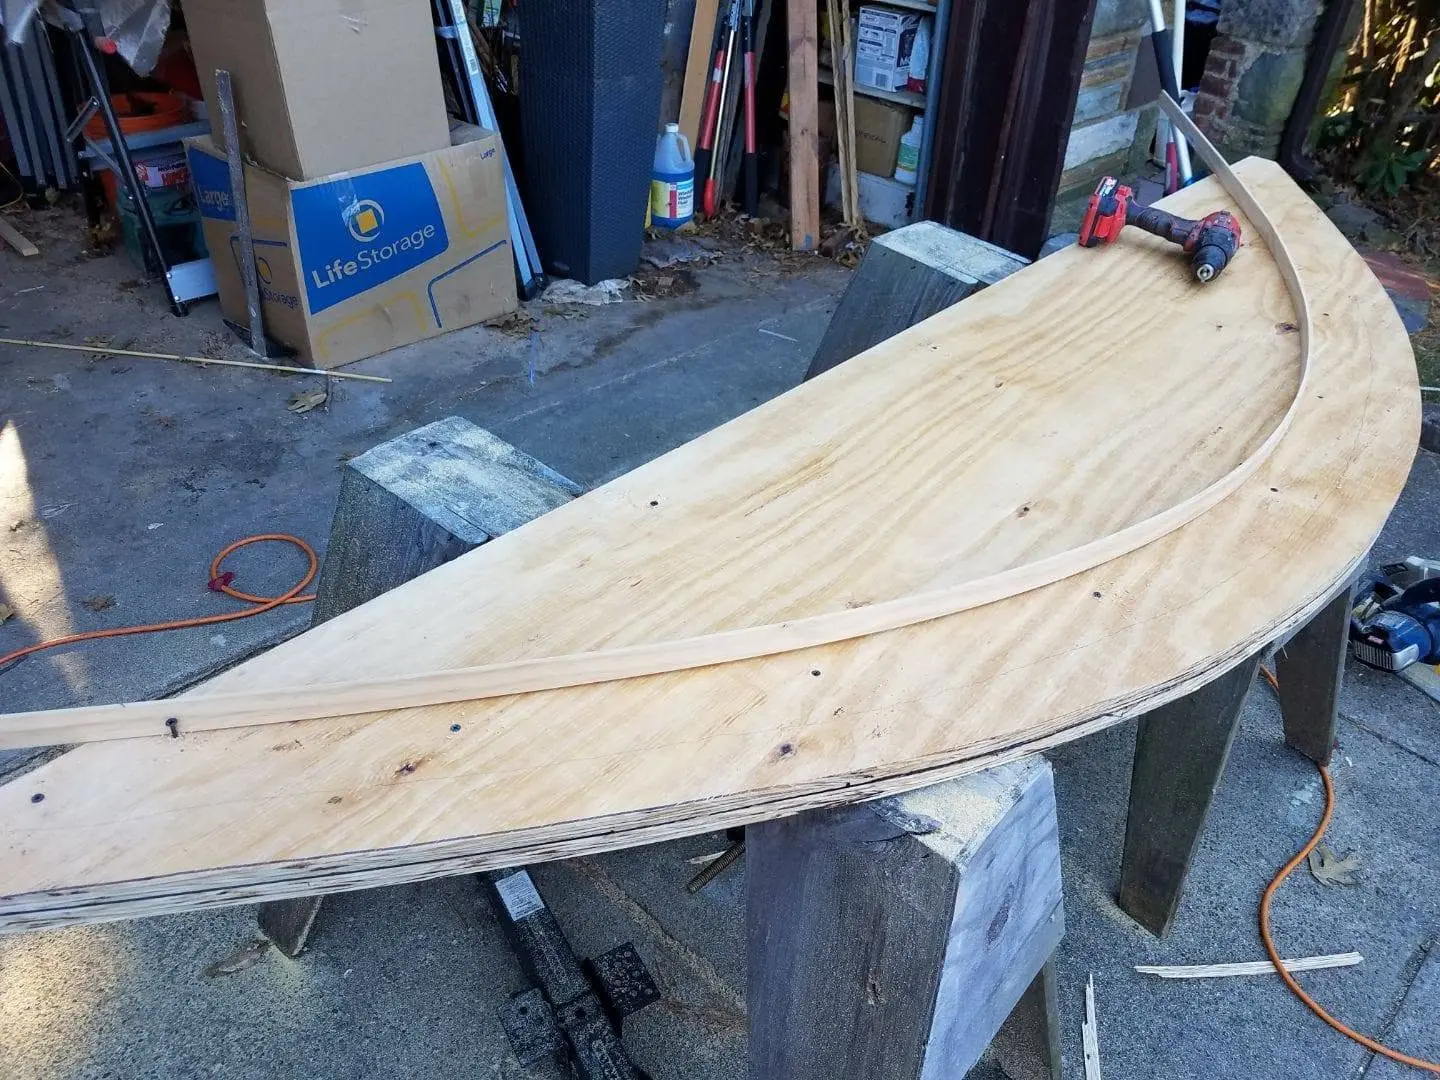
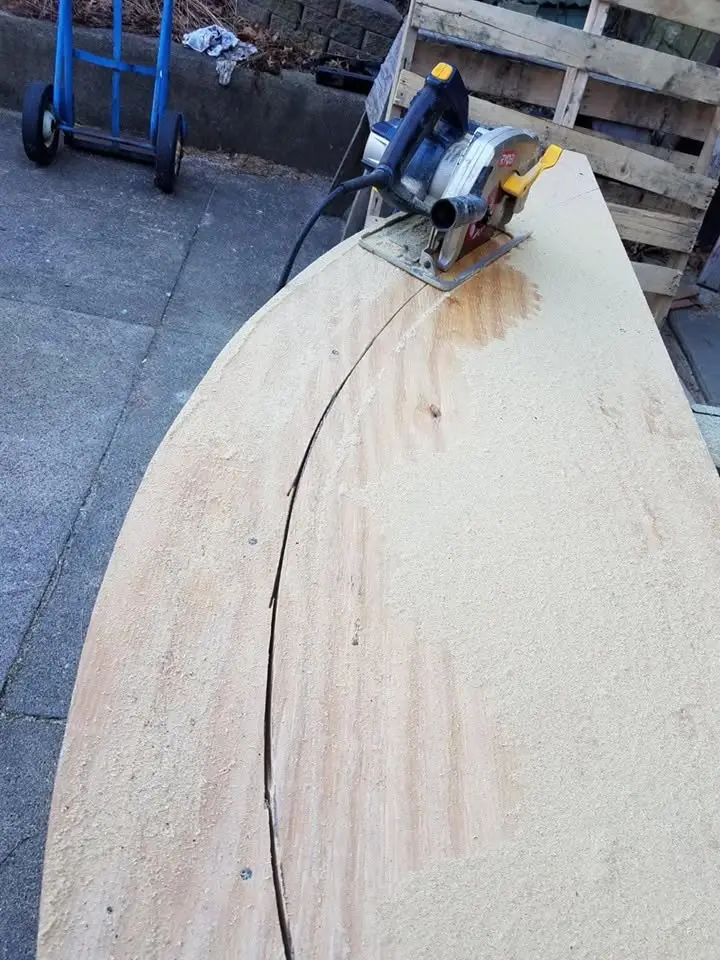
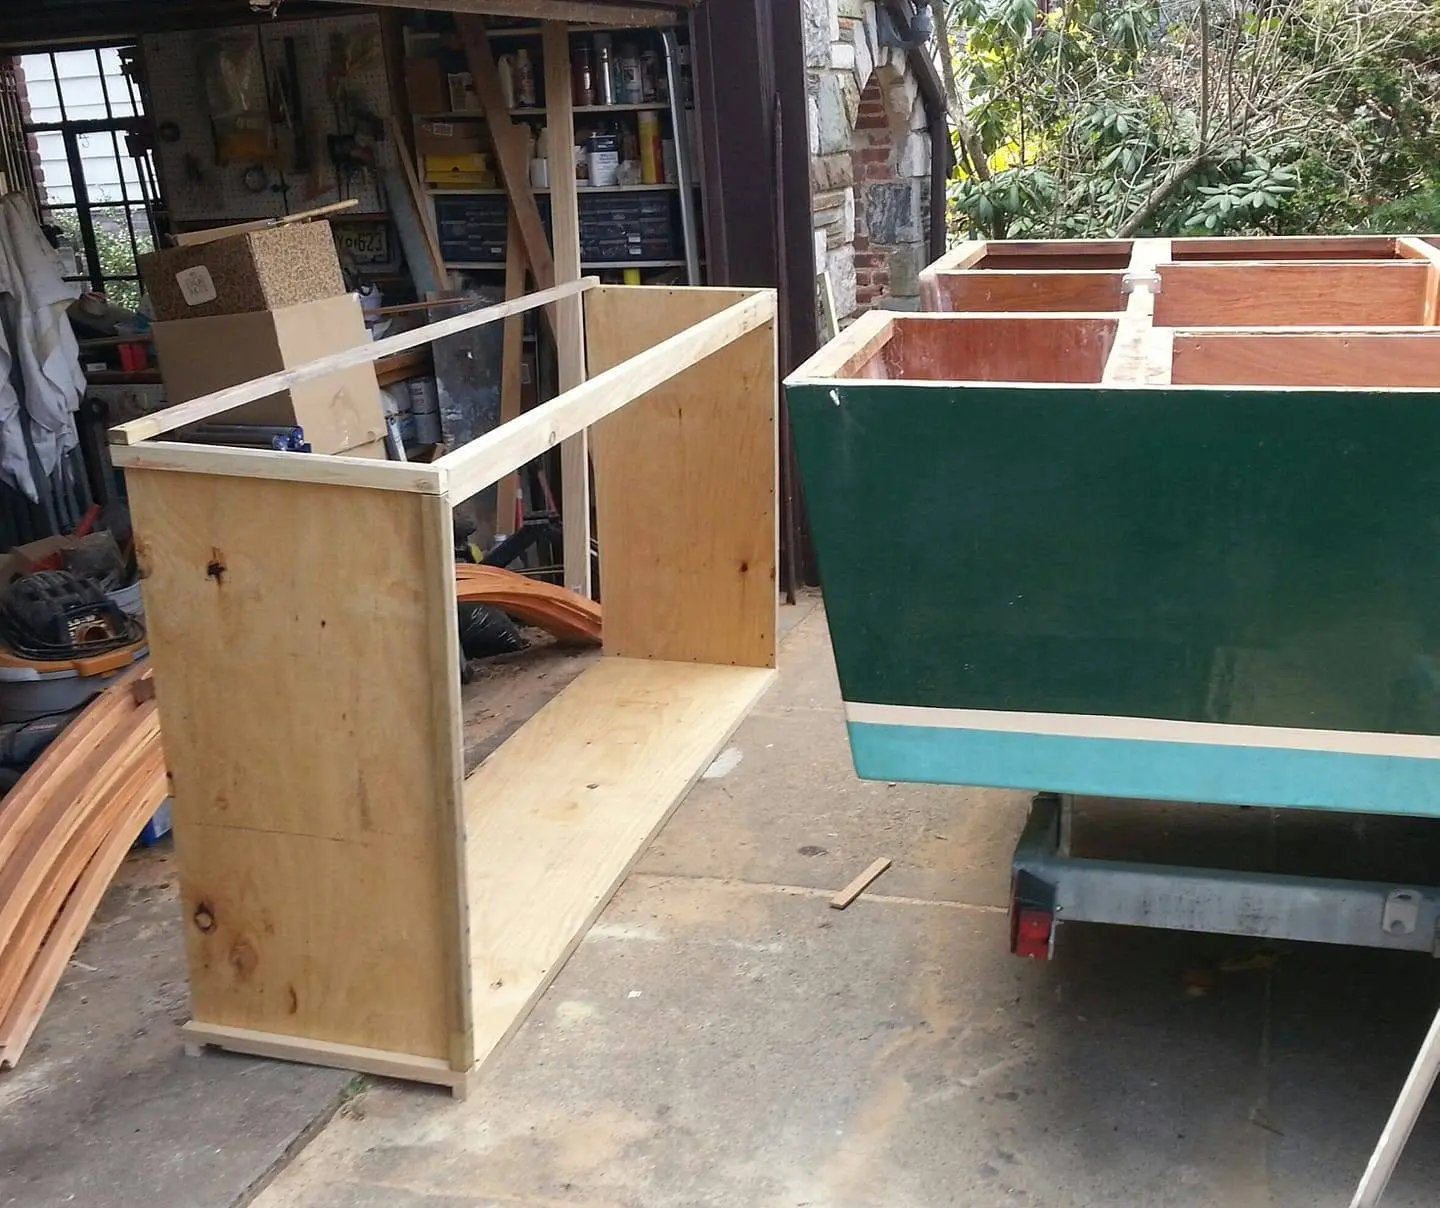
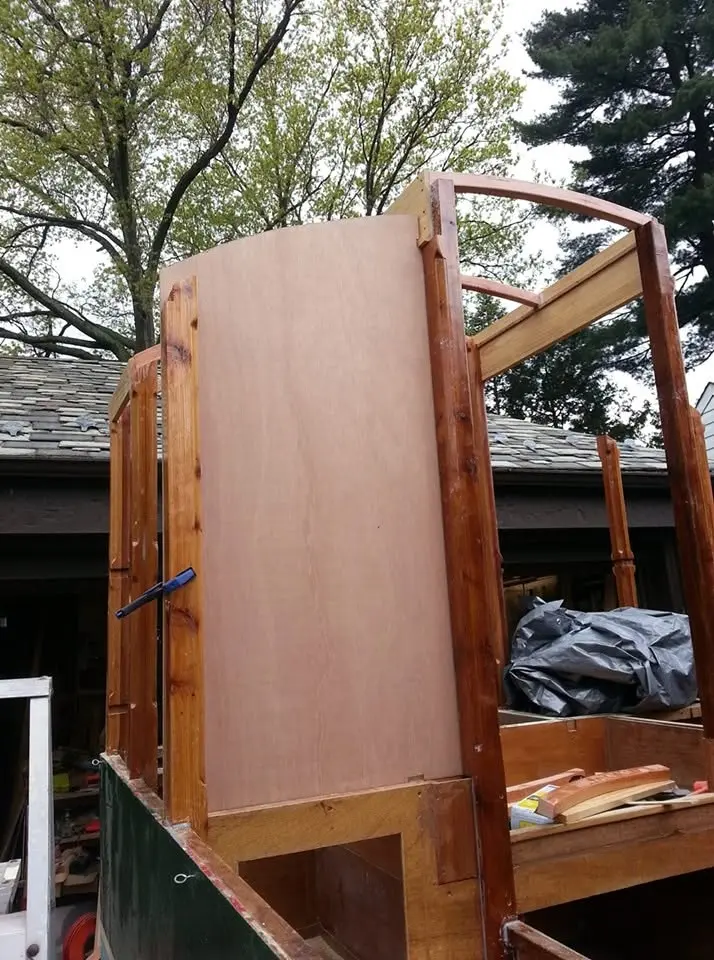
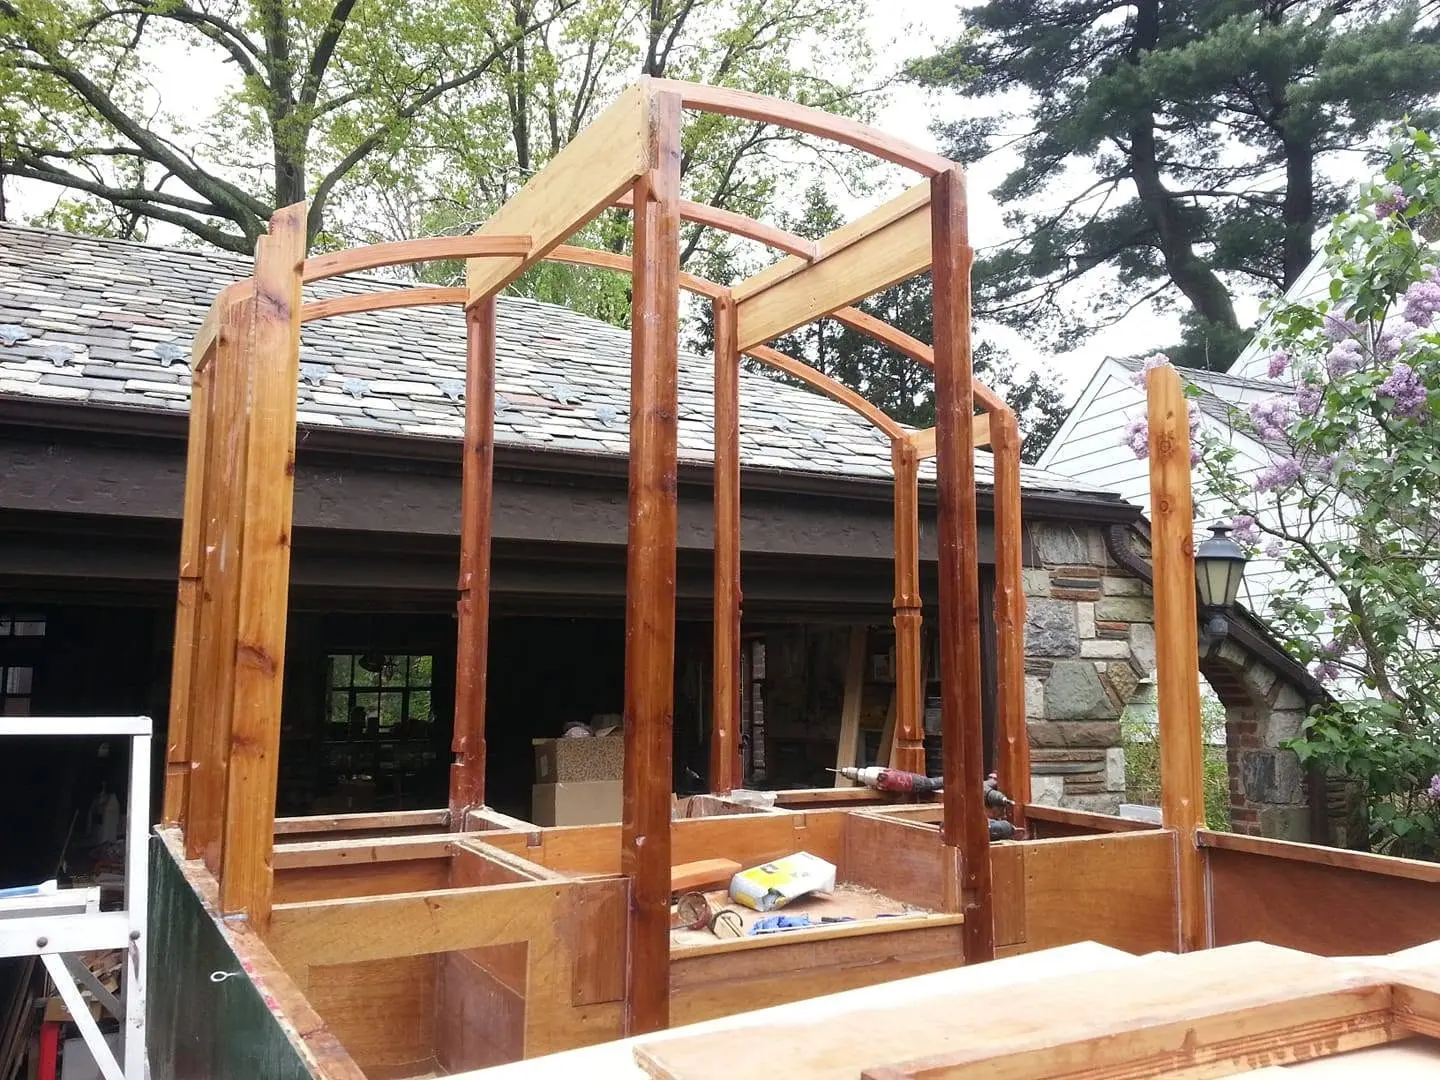
Houseboat update, Saturday, December 22, 2018 -- Jersey Girl is in hibernation for the winter, but while she sleeps her faithful builder is starting work on her Spring bonnet -- an arched roof that begins with symmetrically arched beams made of laminated cedar strips. The first step is to make a jig, a mold to set the strips against as I glue them up, the idea being to make all of them identical. The beams will be 1 1/2 inches thick, so I'm making the jig out of two layers of 3/4-inch plywood. The first step to get a nice fair arc was to establish a center line and decide the ultimate maximum height relative to the tops of the cabin side walls. Then, I used a batten -- a thin, springy length of knot-free wood -- to bend around the prospective top of the center line, between the two cabin sides. I traced around the inside curve of the batten to mark the line of the roof curve. I checked for symmetry by making a series of lines perpendicular to the base and measured out from the center line that I had established earlier. If the arc intersected at the same points on the correspond perpendicular lines, I would be satisfied; if not, I would start again. I made up my mind that I would consider variations of up to 1/16 inch "perfect." I needn't have bothered. They really were perfect. Next, I had to cut along that nice curve. From my earlier experience cutting the curve of Jersey Girl's bow, I knew that I could cut a perfect curve with a hand-held circular saw, if I set the blade at a depth of just a hair more than the thickness of the material. Any more than that and the chord of the blade that would be buried in the developing cut at any time would be too wide to effectively maneuver around the curve without binding and dangerously kicking back. As you can see from the pictures, I was able to cut exactly to the line, and my method worked perfectly. Next, I used the cut plywood as a pattern to trace on the second thickness.
23 Dec 2018Deck & Coamings
Still working on the jig for Jersey Girl's laminated cedar roof beams.
Houseboat update, Sunday, December 23, 2018 -- Still working on the jig for Jersey Girl's laminated cedar roof beams. Yesterday, I used the first arc, cut from a piece of 3/4-inch plywood to scribe the pattern onto a second piece of ply, to give me a 1 1/2-inch jig to build the laminate on. Today, I checked for symmetry by reversing the first cut arc and flopping it down on the second drawn arc, and discovered they were not quite symmetrical. So I drew a new line at the asymmetrical places, and cut along that line, then matched the new pattern up with the old and trimmed the edge of the old to match the new. Now, I had a jig that I'd be able to use, but I decided to cut away the unnecessary inside to make the jig easier to handle. After screwing the two pieces together so they wouldn't shift, I used the batten again to scribe a line where I'd cut. It didn't need to be precise, and that's a good thing. I learned that there is a practical limit to the thickness of the material I can cut on a smooth, accurate curve with a hand-held circular saw, and 1 1/2 inches is beyond that limit. I'd say 3/4-inch is about the thickest a circular saw can handle with precision. Even for someone who has built a few boats before, building a boat never ceases to be a learning experience.
28 Dec 2018Glassing & Epoxy
I’ve started laying up the first of Jersey Girl’s arched roof beams against the jig I...
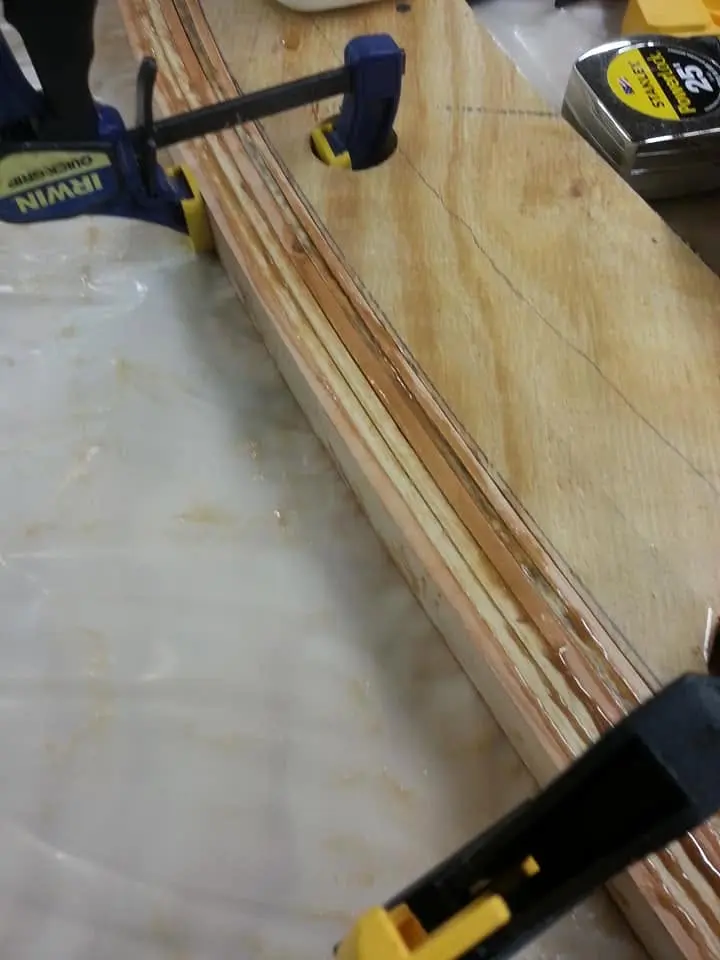
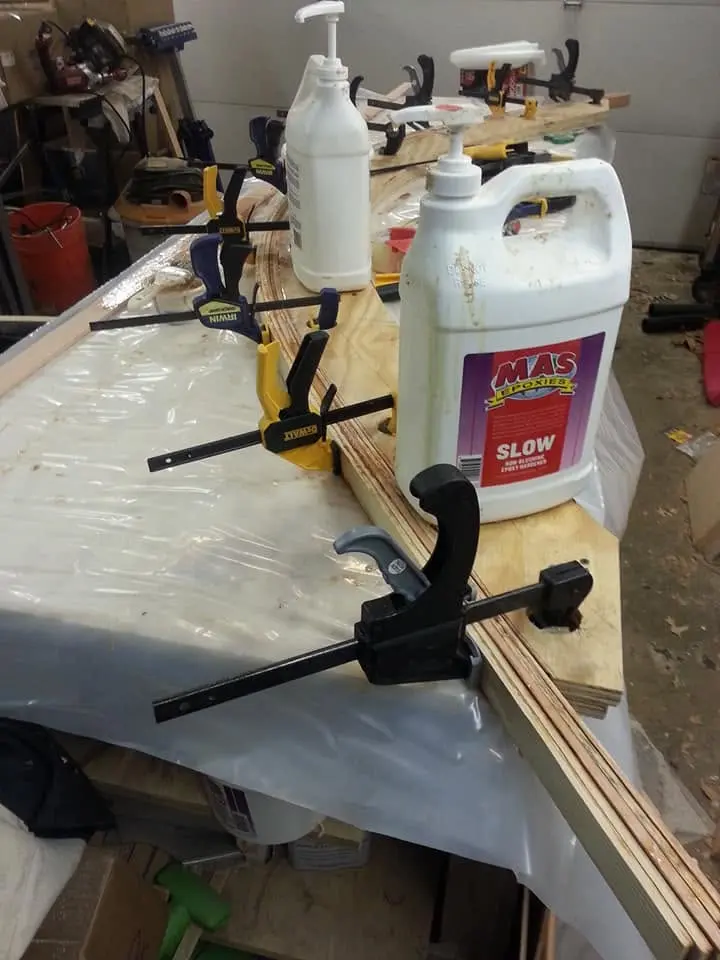
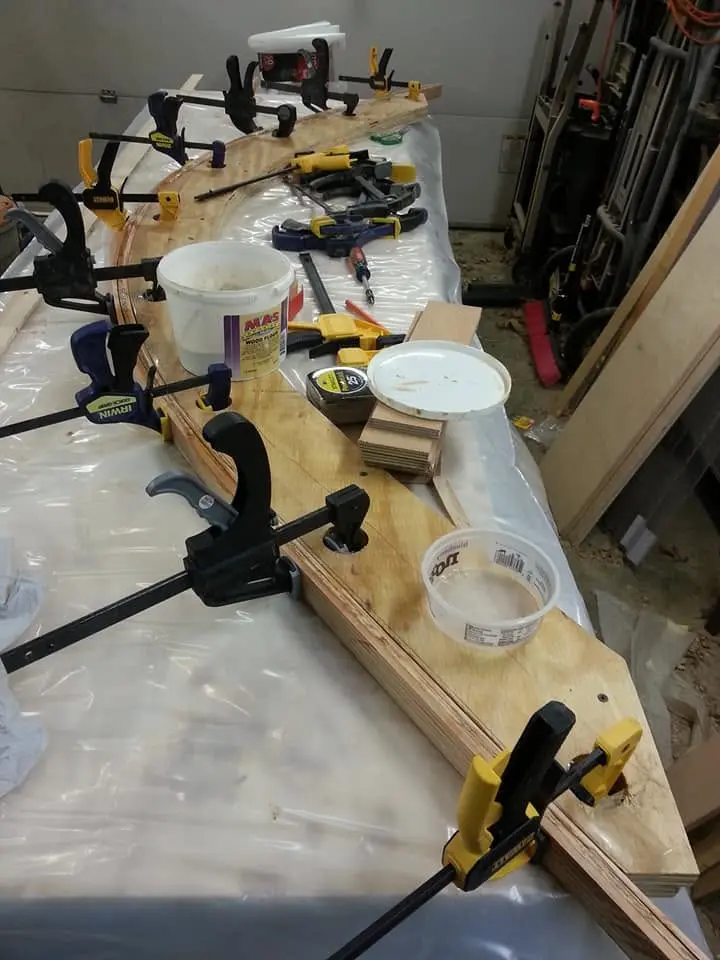
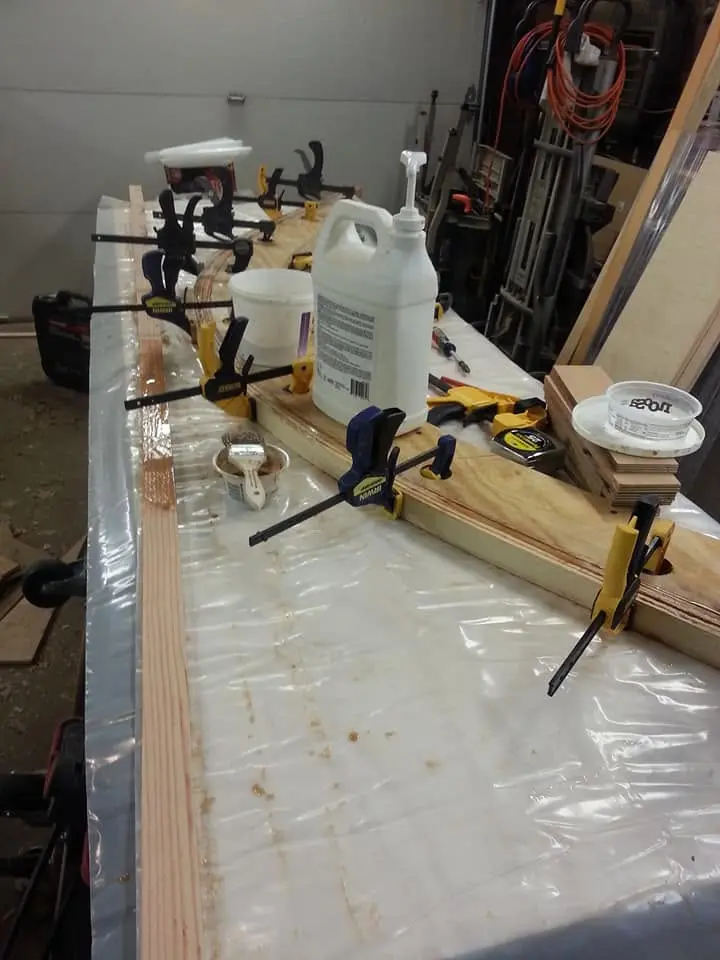
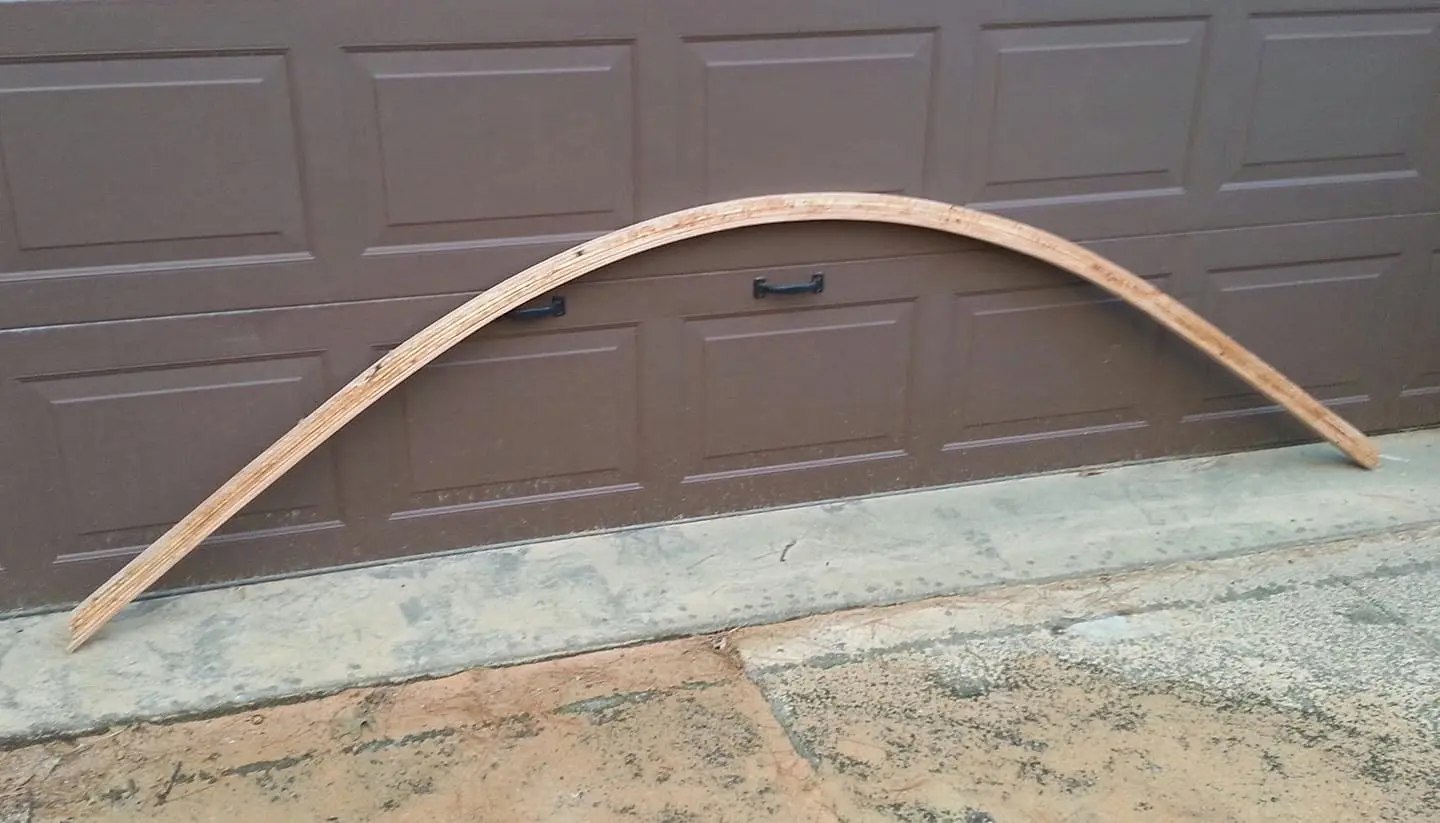
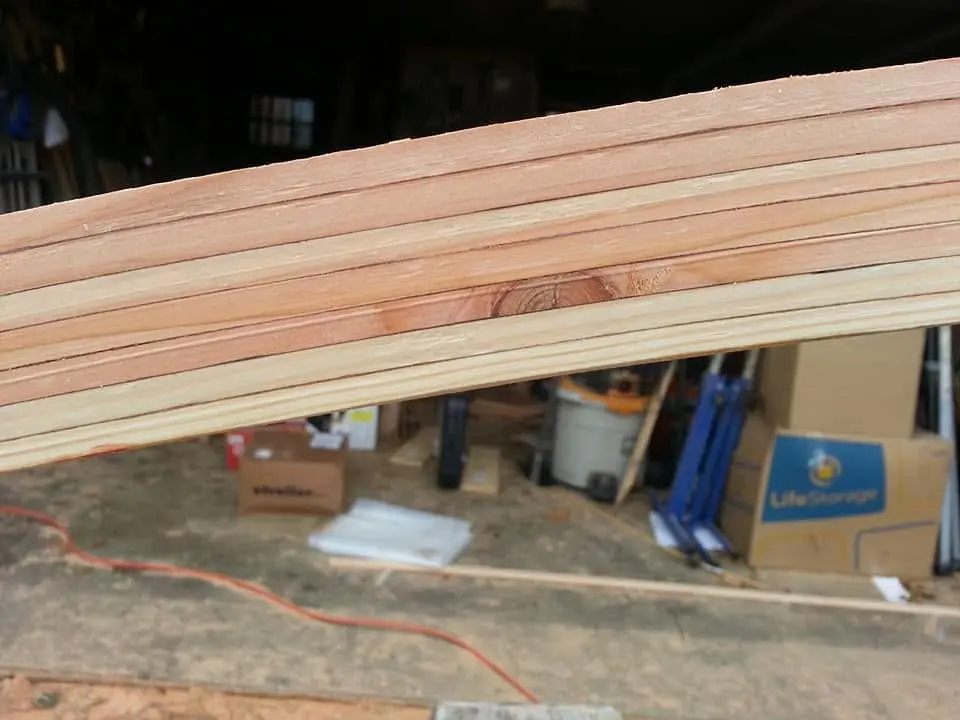
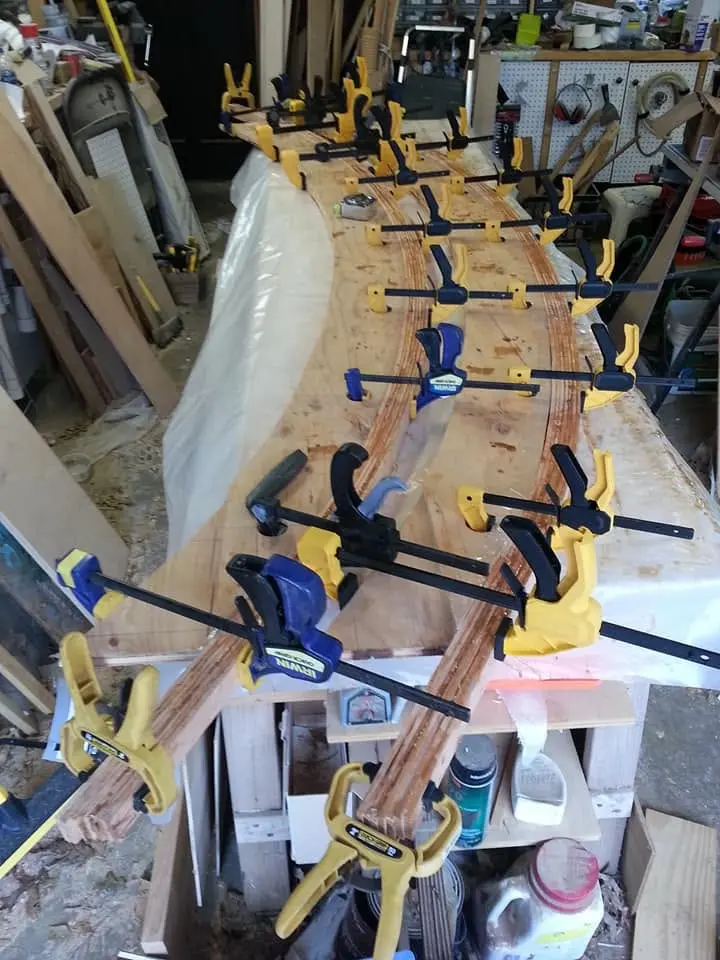
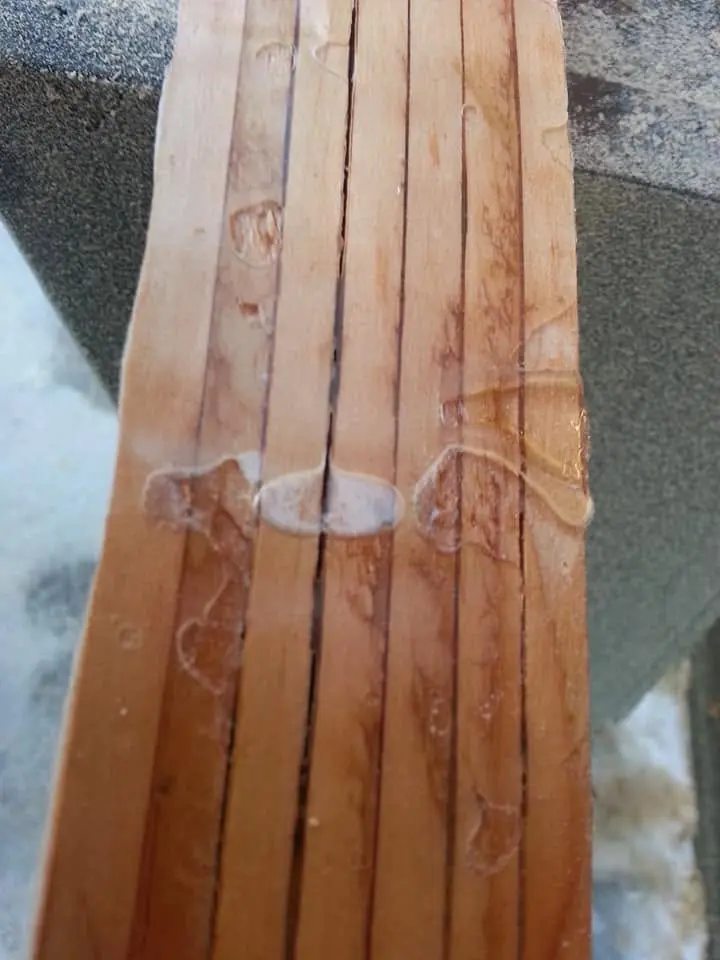
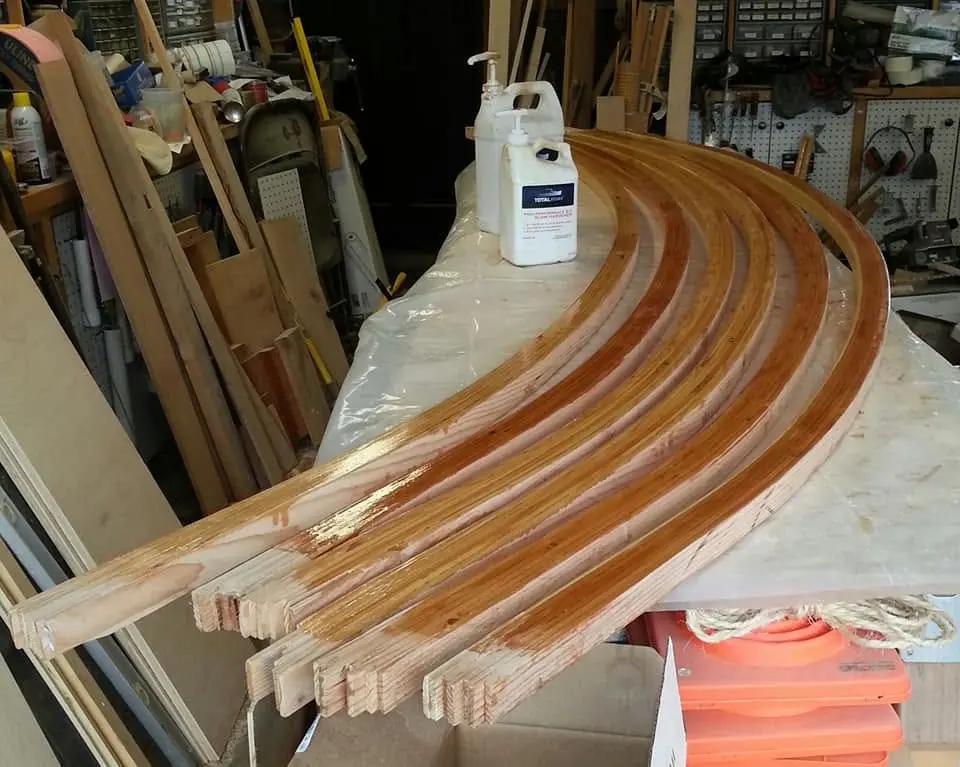
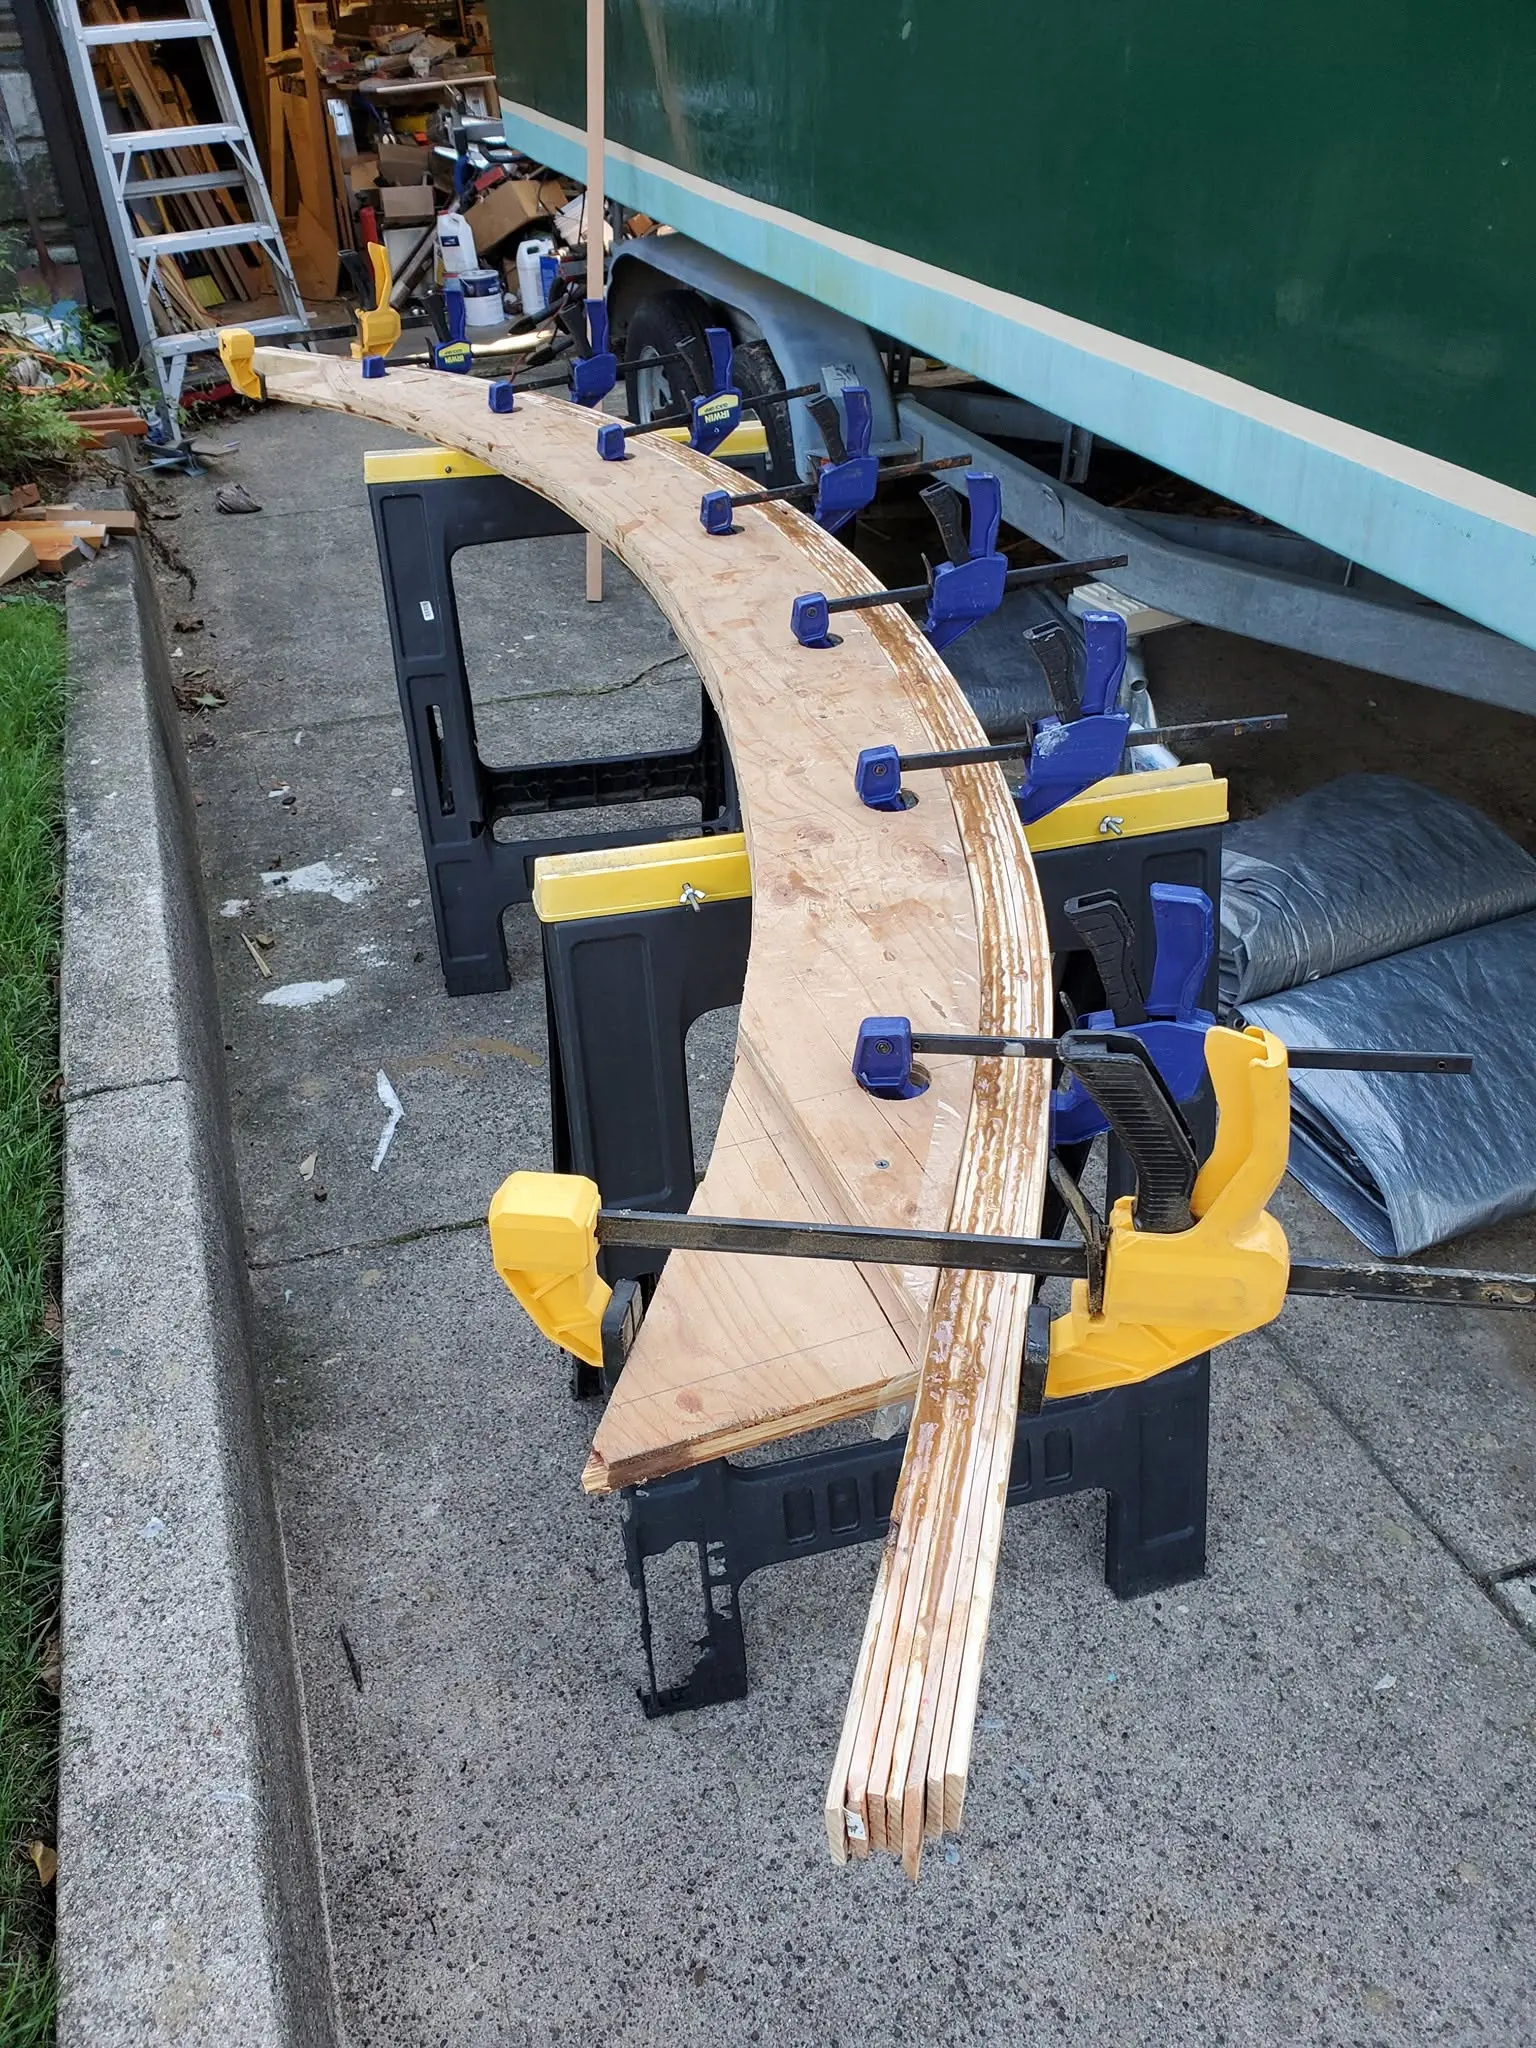
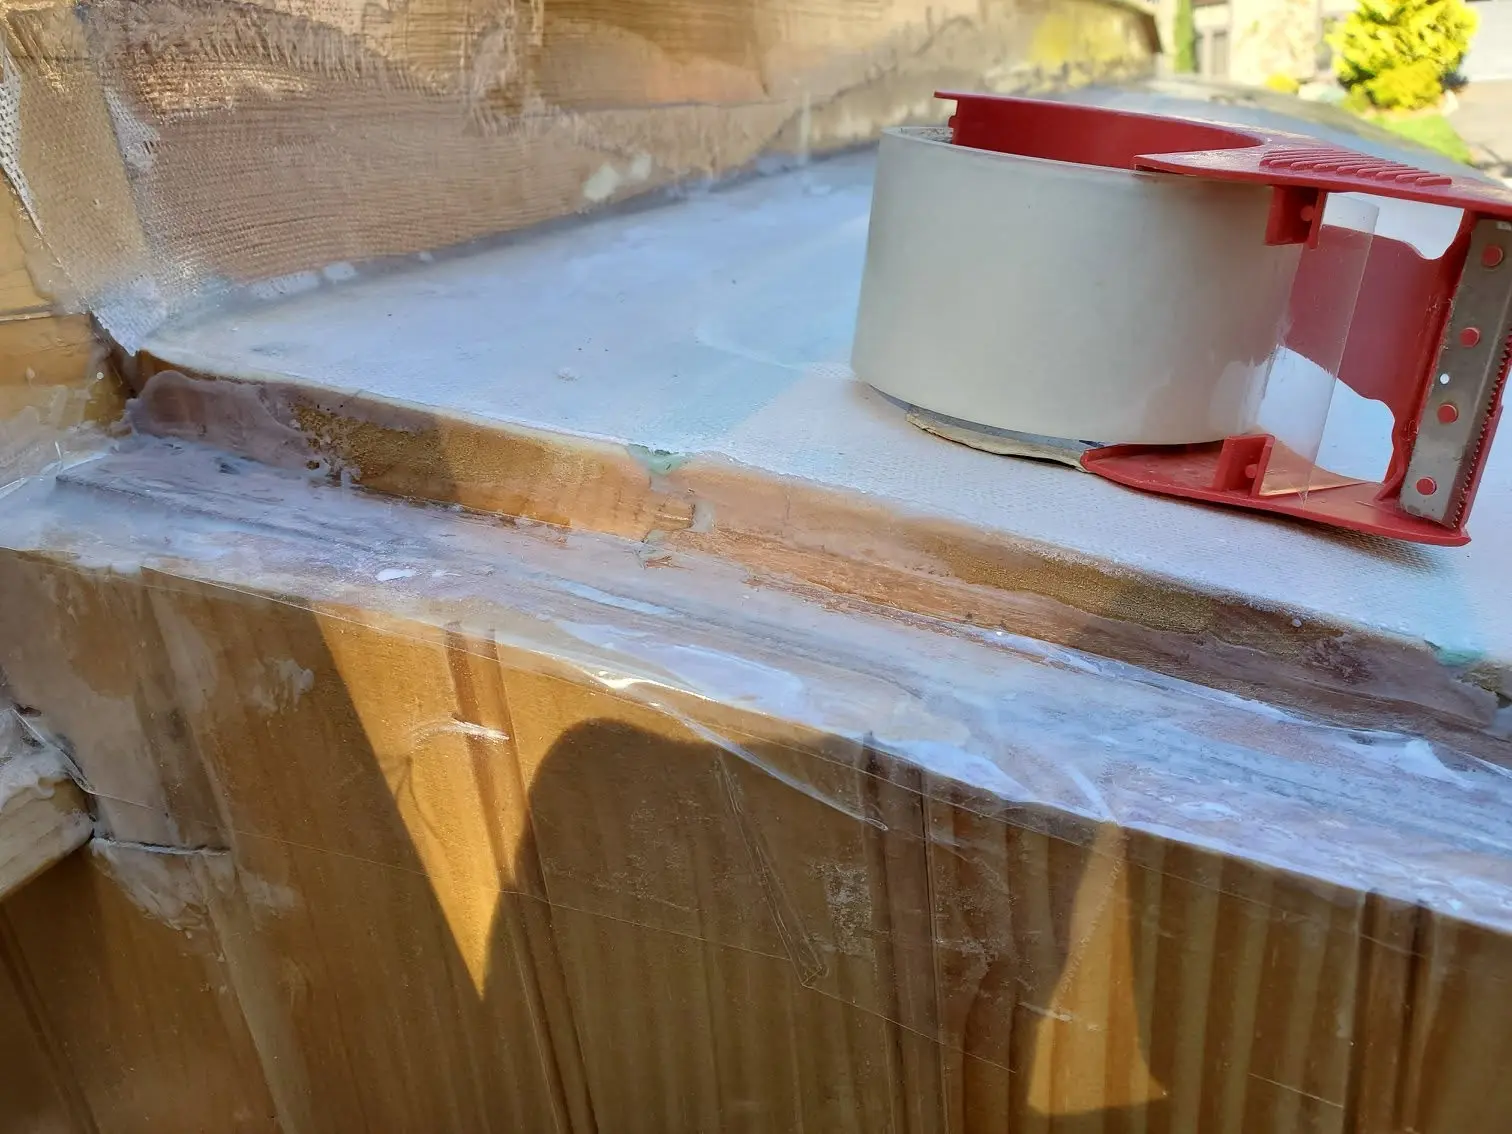
Houseboat update, Friday, December 28, 2018 – I’ve started laying up the first of Jersey Girl’s arched roof beams against the jig I made earlier. Each beam will be made of seven quarter-inch-thick by 1 ½ inches wide Douglas fir. I had planned to make these of clear cedar, but I simply could not justify the cost of turning that much high-priced cedar into saw dust, losing an eighth of an inch to the kerf with each pass of the table saw blade. So, I decided to go with plain old Doug 2-by-6 framing lumber. I looked for the straightest, most knot-free ones I could find in the stack of generally horrid crap at the competing big-box home centers, finally deciding that Lowe’s had the best selection. Knots and all, I bent them to the jig, laying them up with clamps and epoxy, a strip at a time. When each beam is fully cured, I’ll release it from the jig and plane down the edges to reveal an attractive laminate. To make certain I did not inadvertently glue the beam to the jig, I covered the edge of the jig with clear package sealing tape, knowing the epoxy will not stick to that. I alternated the strips from different boards to take advantage of the variation in wood colors, rather than have one beam all one shade and the next beam a different shade. I think it will look pretty good, and it will cost less than a tenth of the price of cedar – and that looks VERY good.
29 Dec 2018Glassing & Epoxy
Here's Jersey Girl's first roof beam, released from its jig.
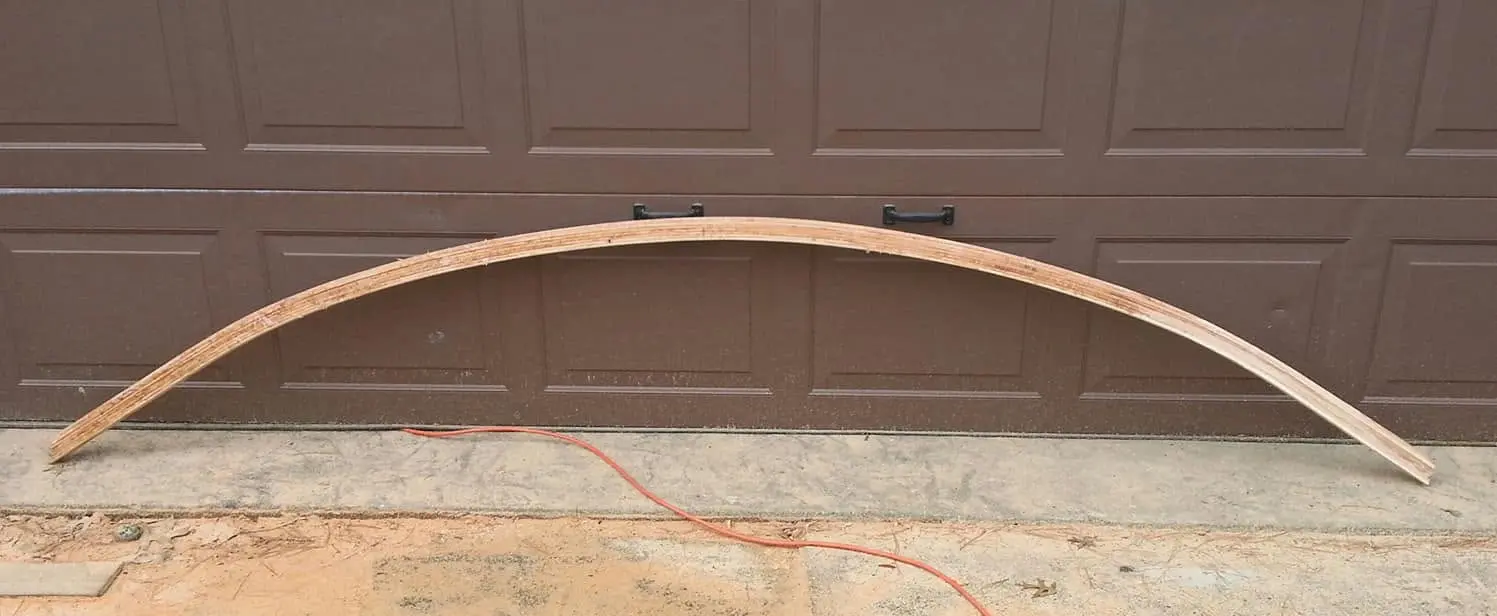
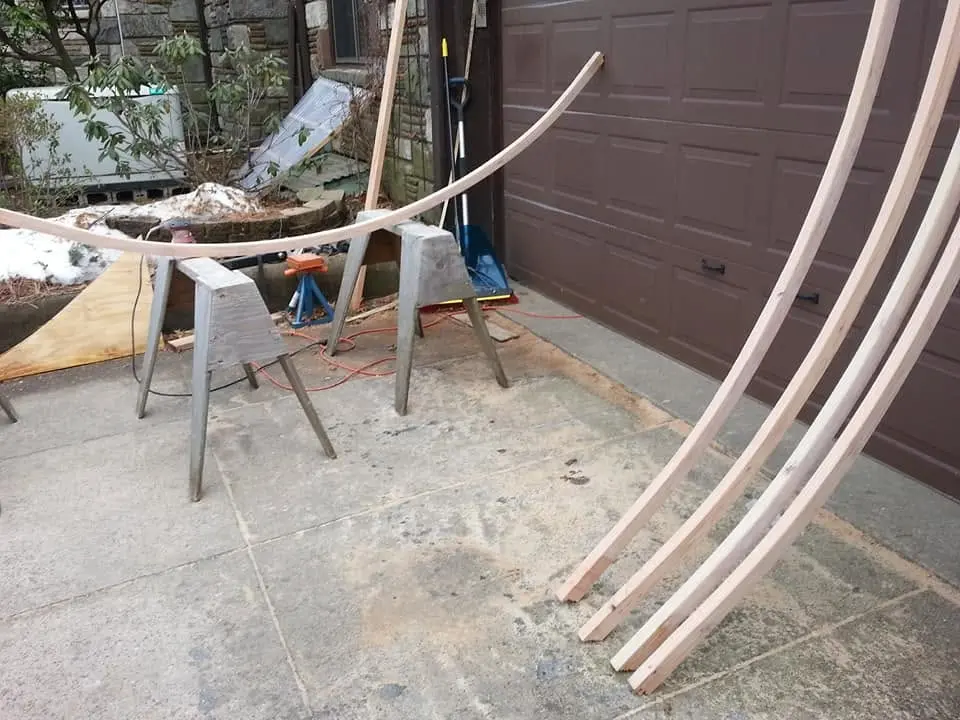
Houseboat update, Saturday, December 29, 2018 -- Here's Jersey Girl's first roof beam, released from its jig. It's made of seven quarter-inch thick strips of Douglas fir, sawn from ordinary 2 x 6 framing lumber from the local big box home center. In all, there's less than three dollars worth of wood in this, and about the same amount in epoxy. I didn't know what to expect in spring-back when I released it from the jig, and I was pleasantly surprised to see it flatten out by less than a half inch over its full eight-foot span. Not only that, it's very light and very strong. This will work!
30 Dec 2018Deck & Coamings
It's back to the drawing board for Jersey Girl's roof.
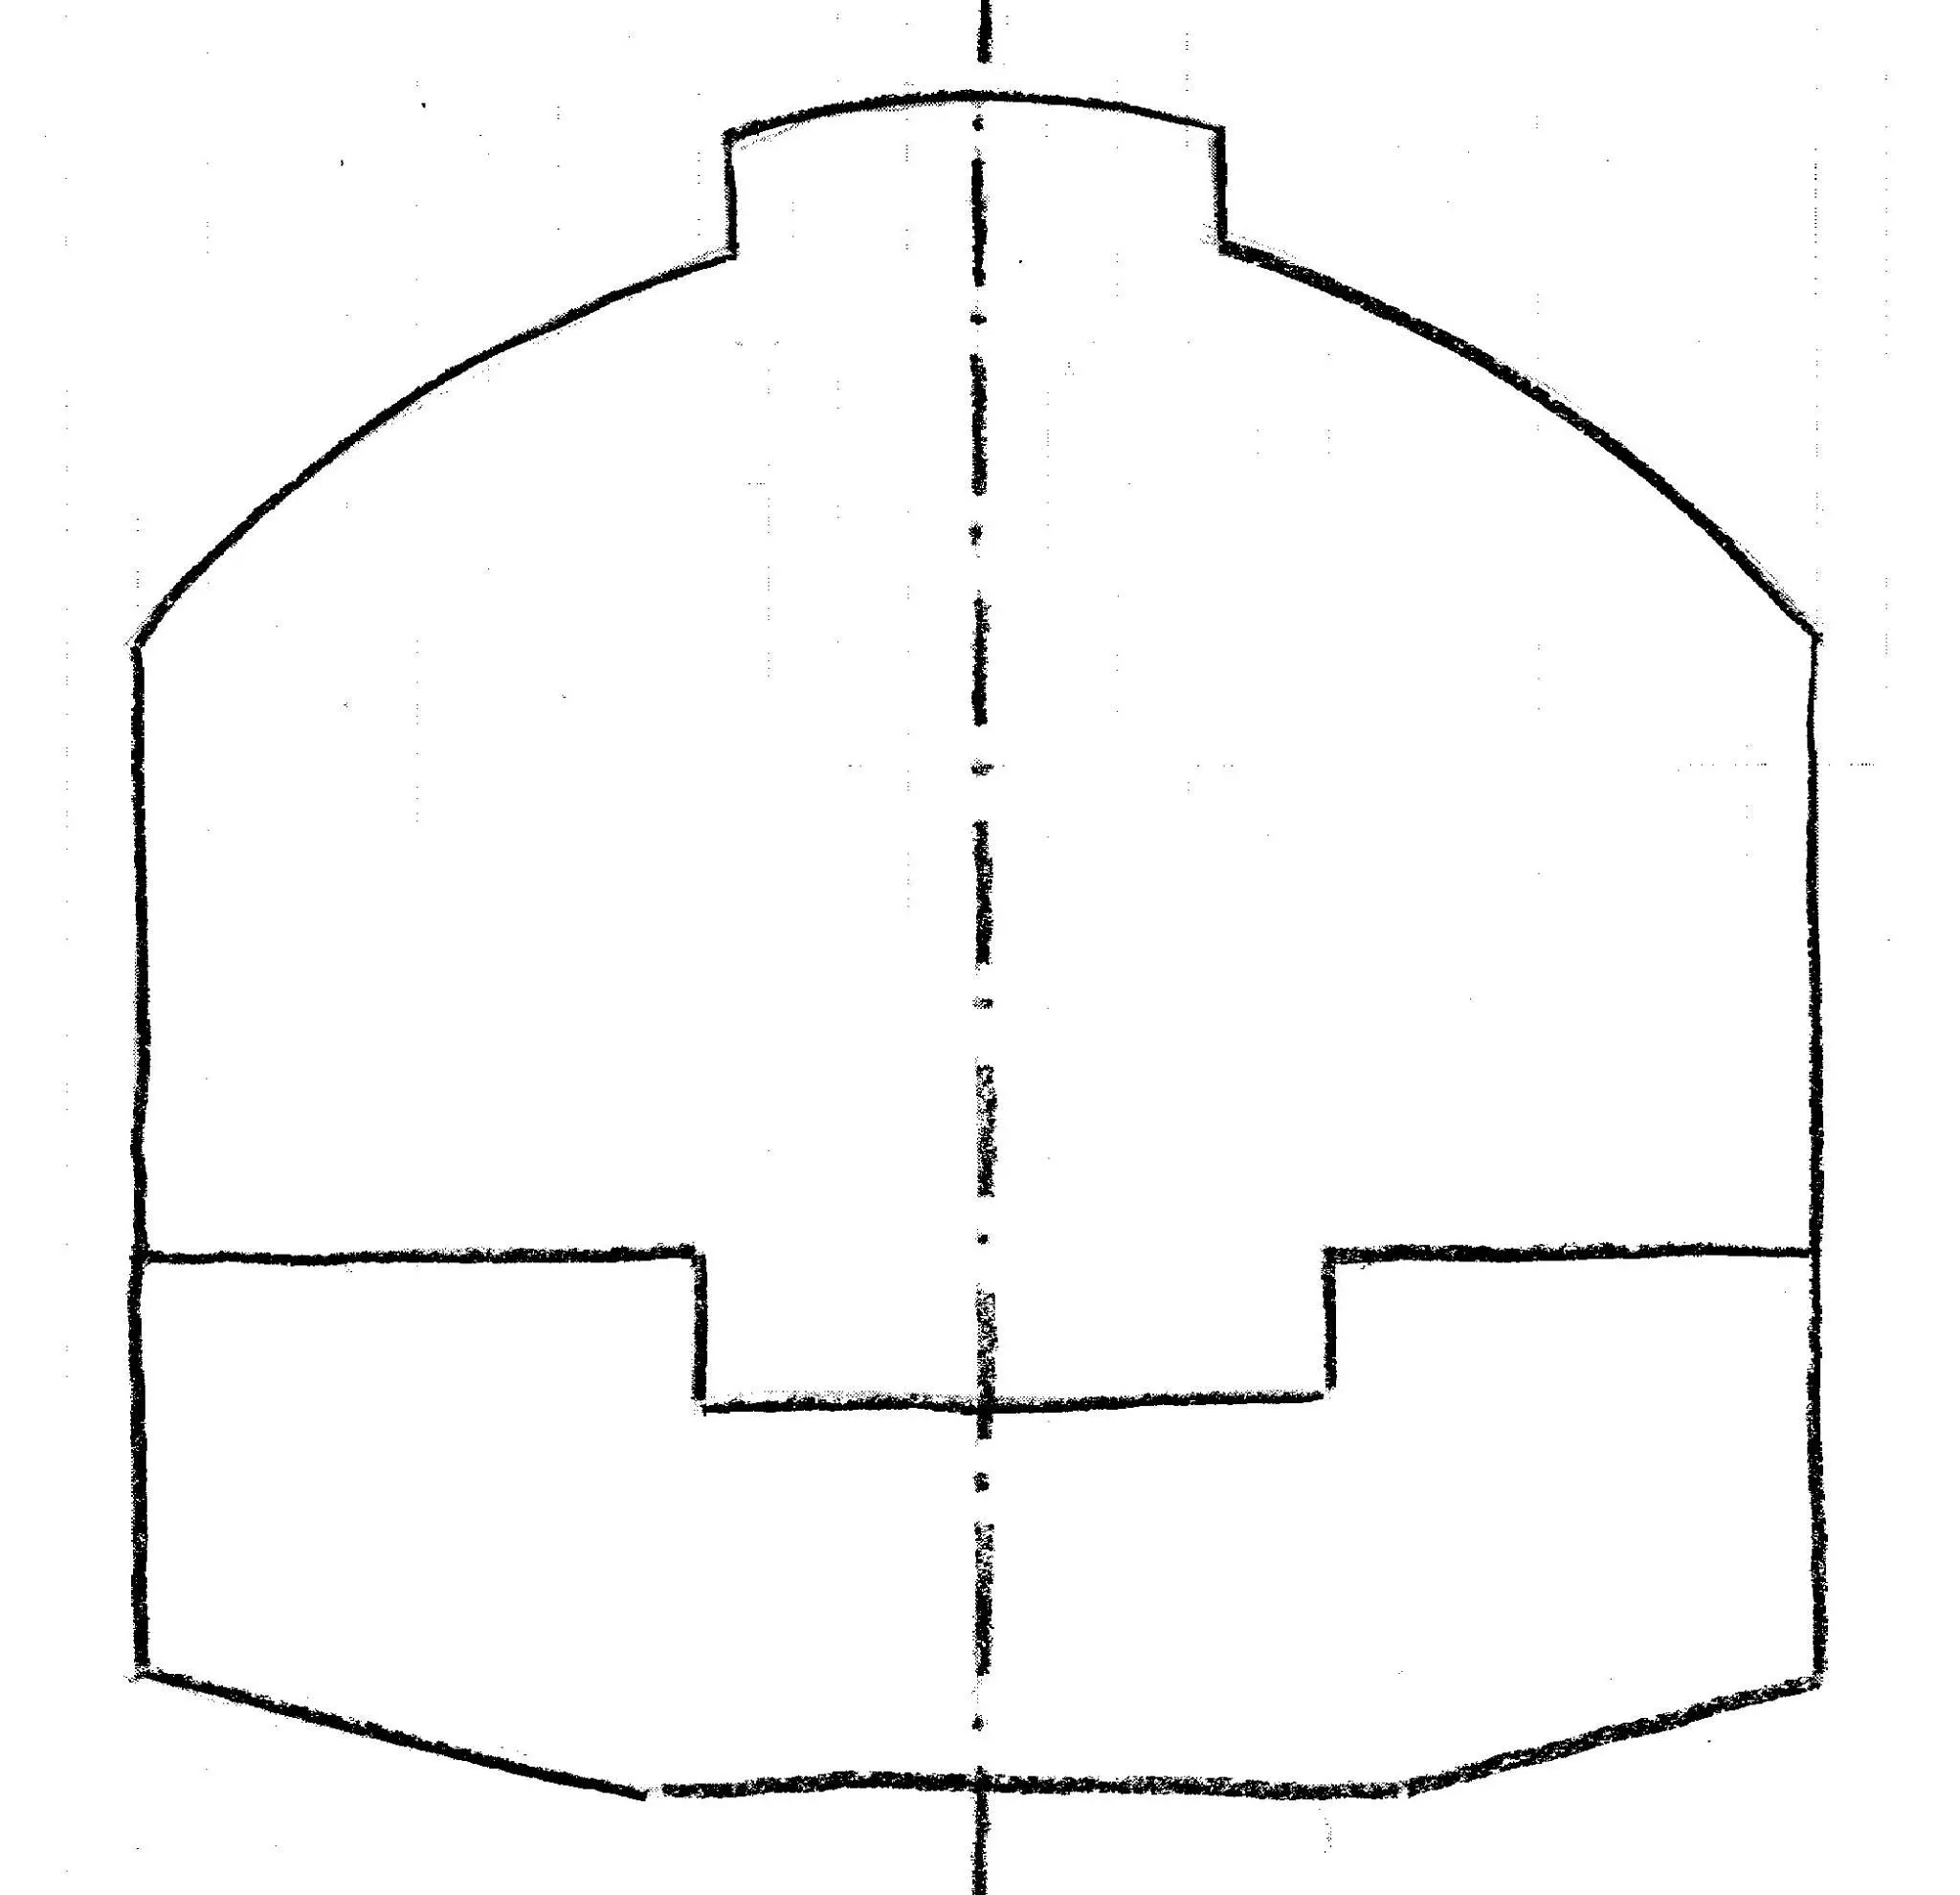
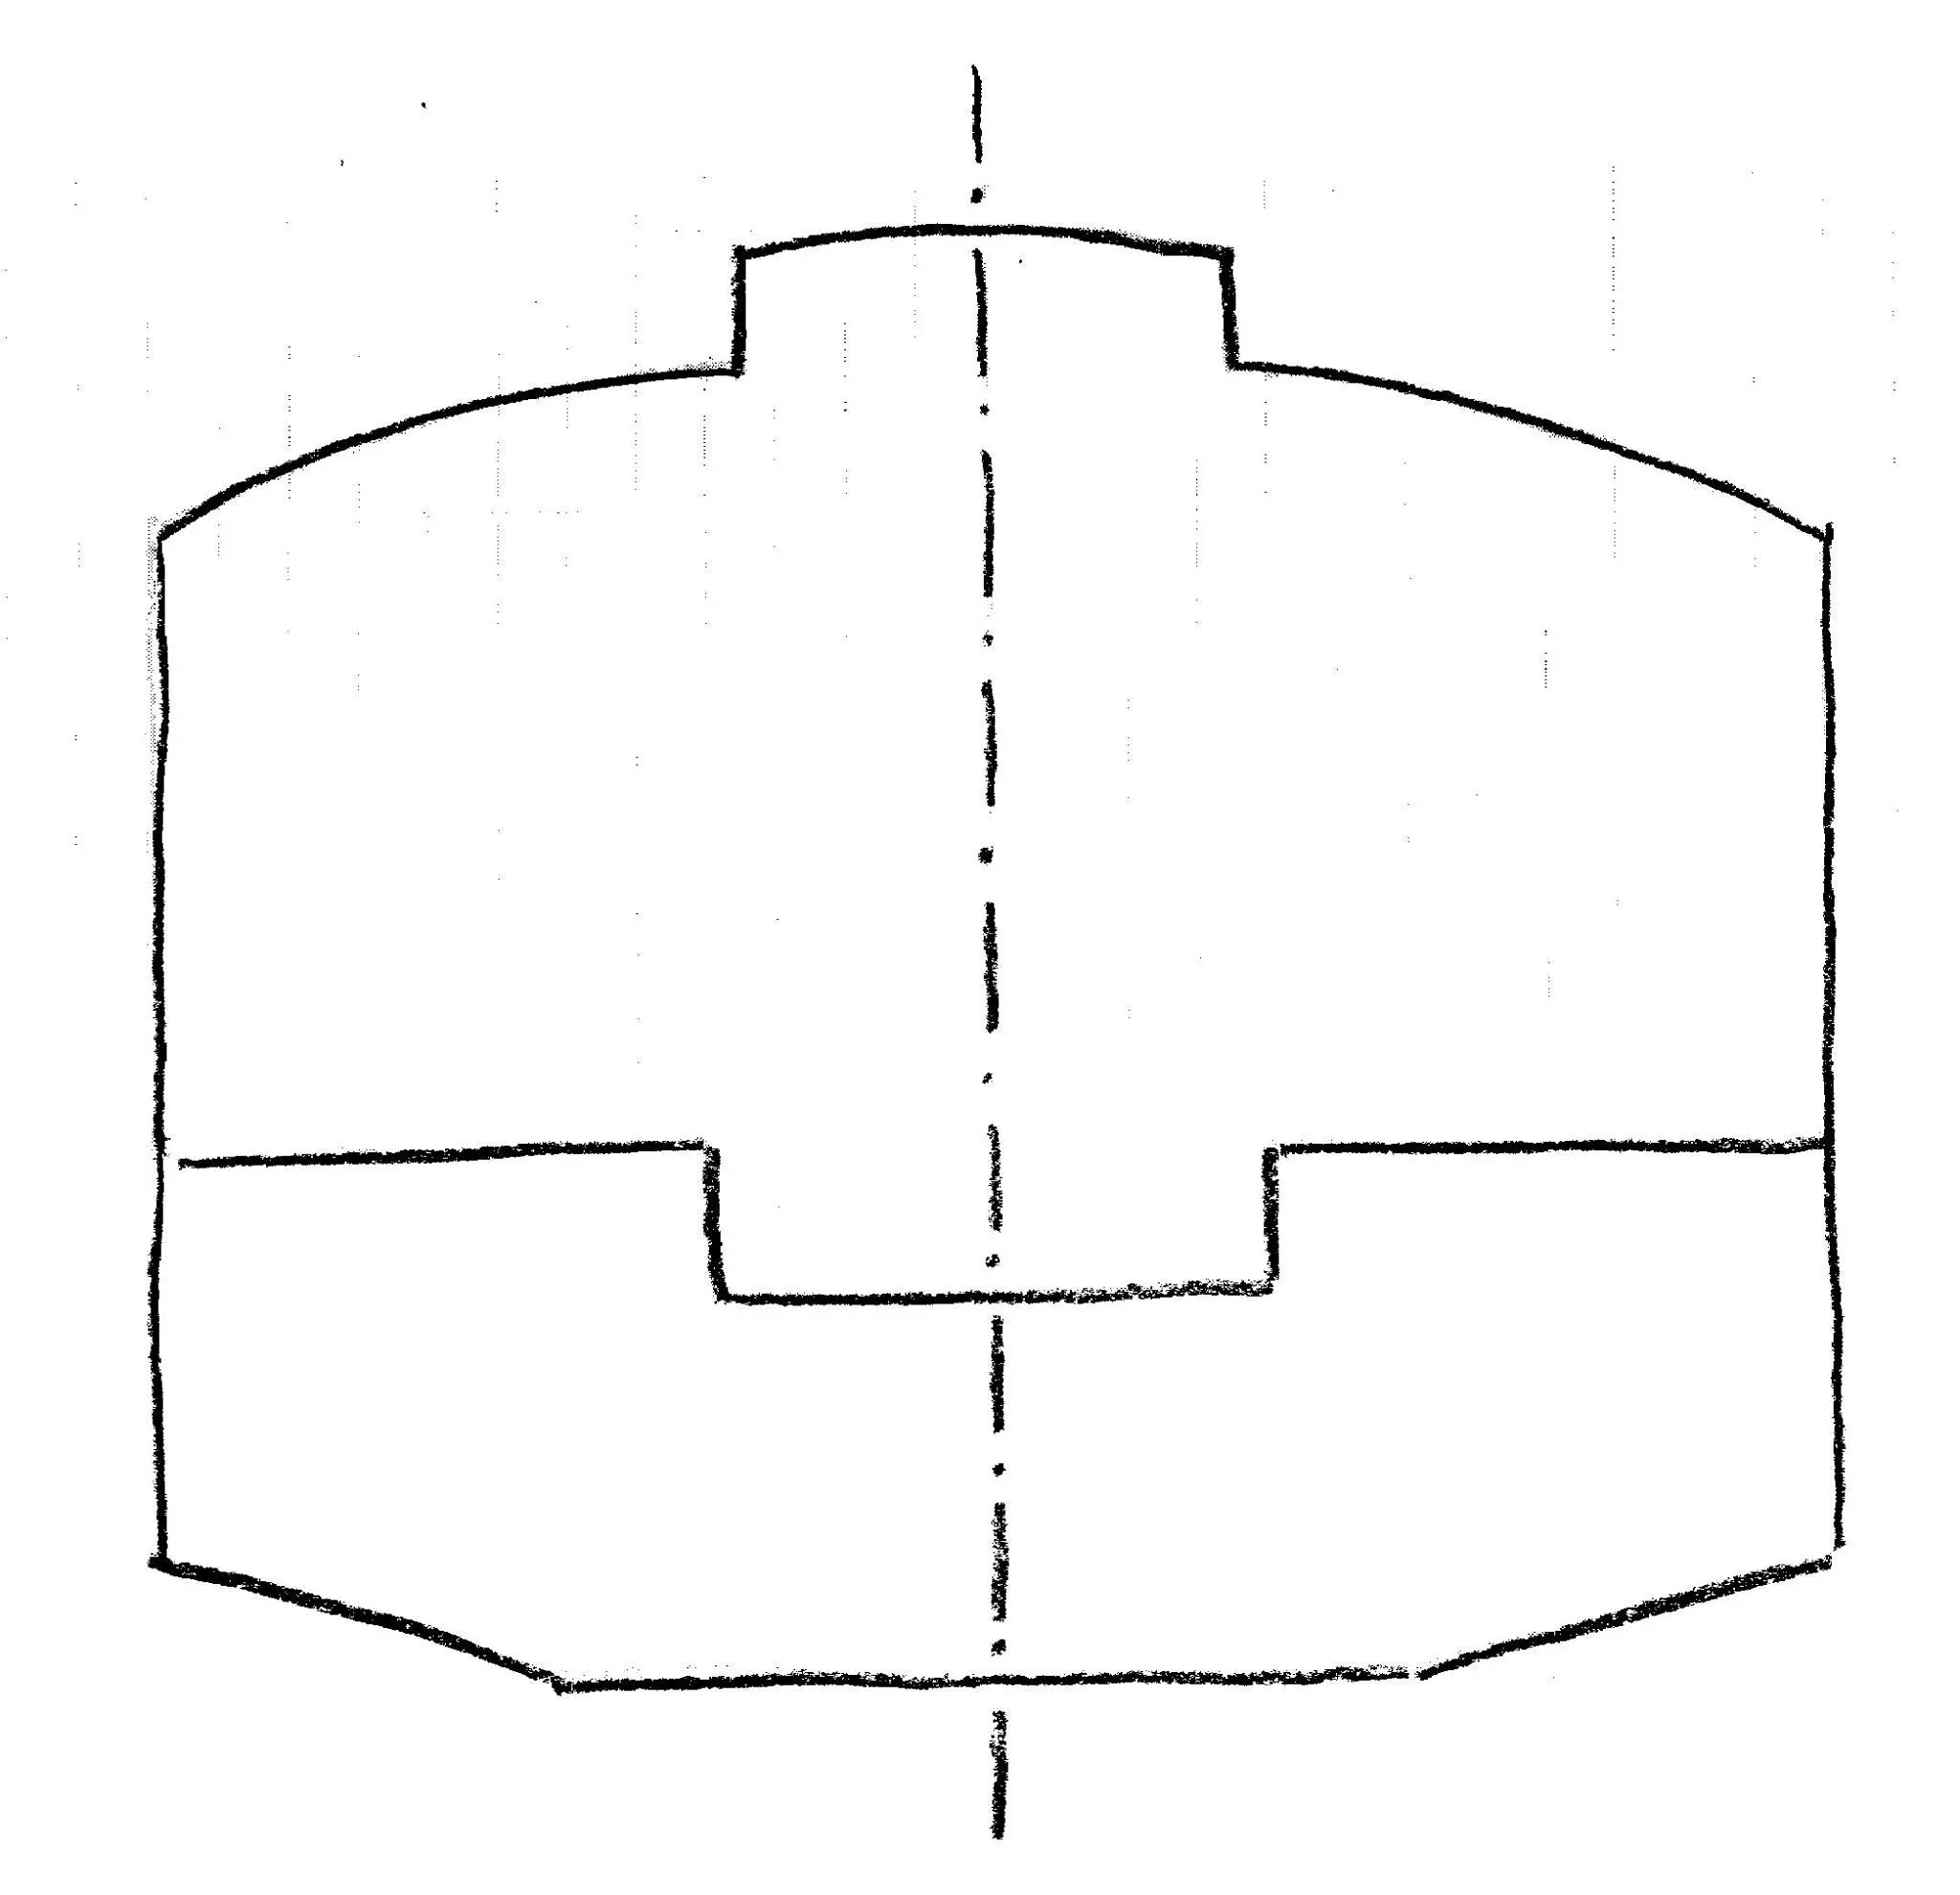
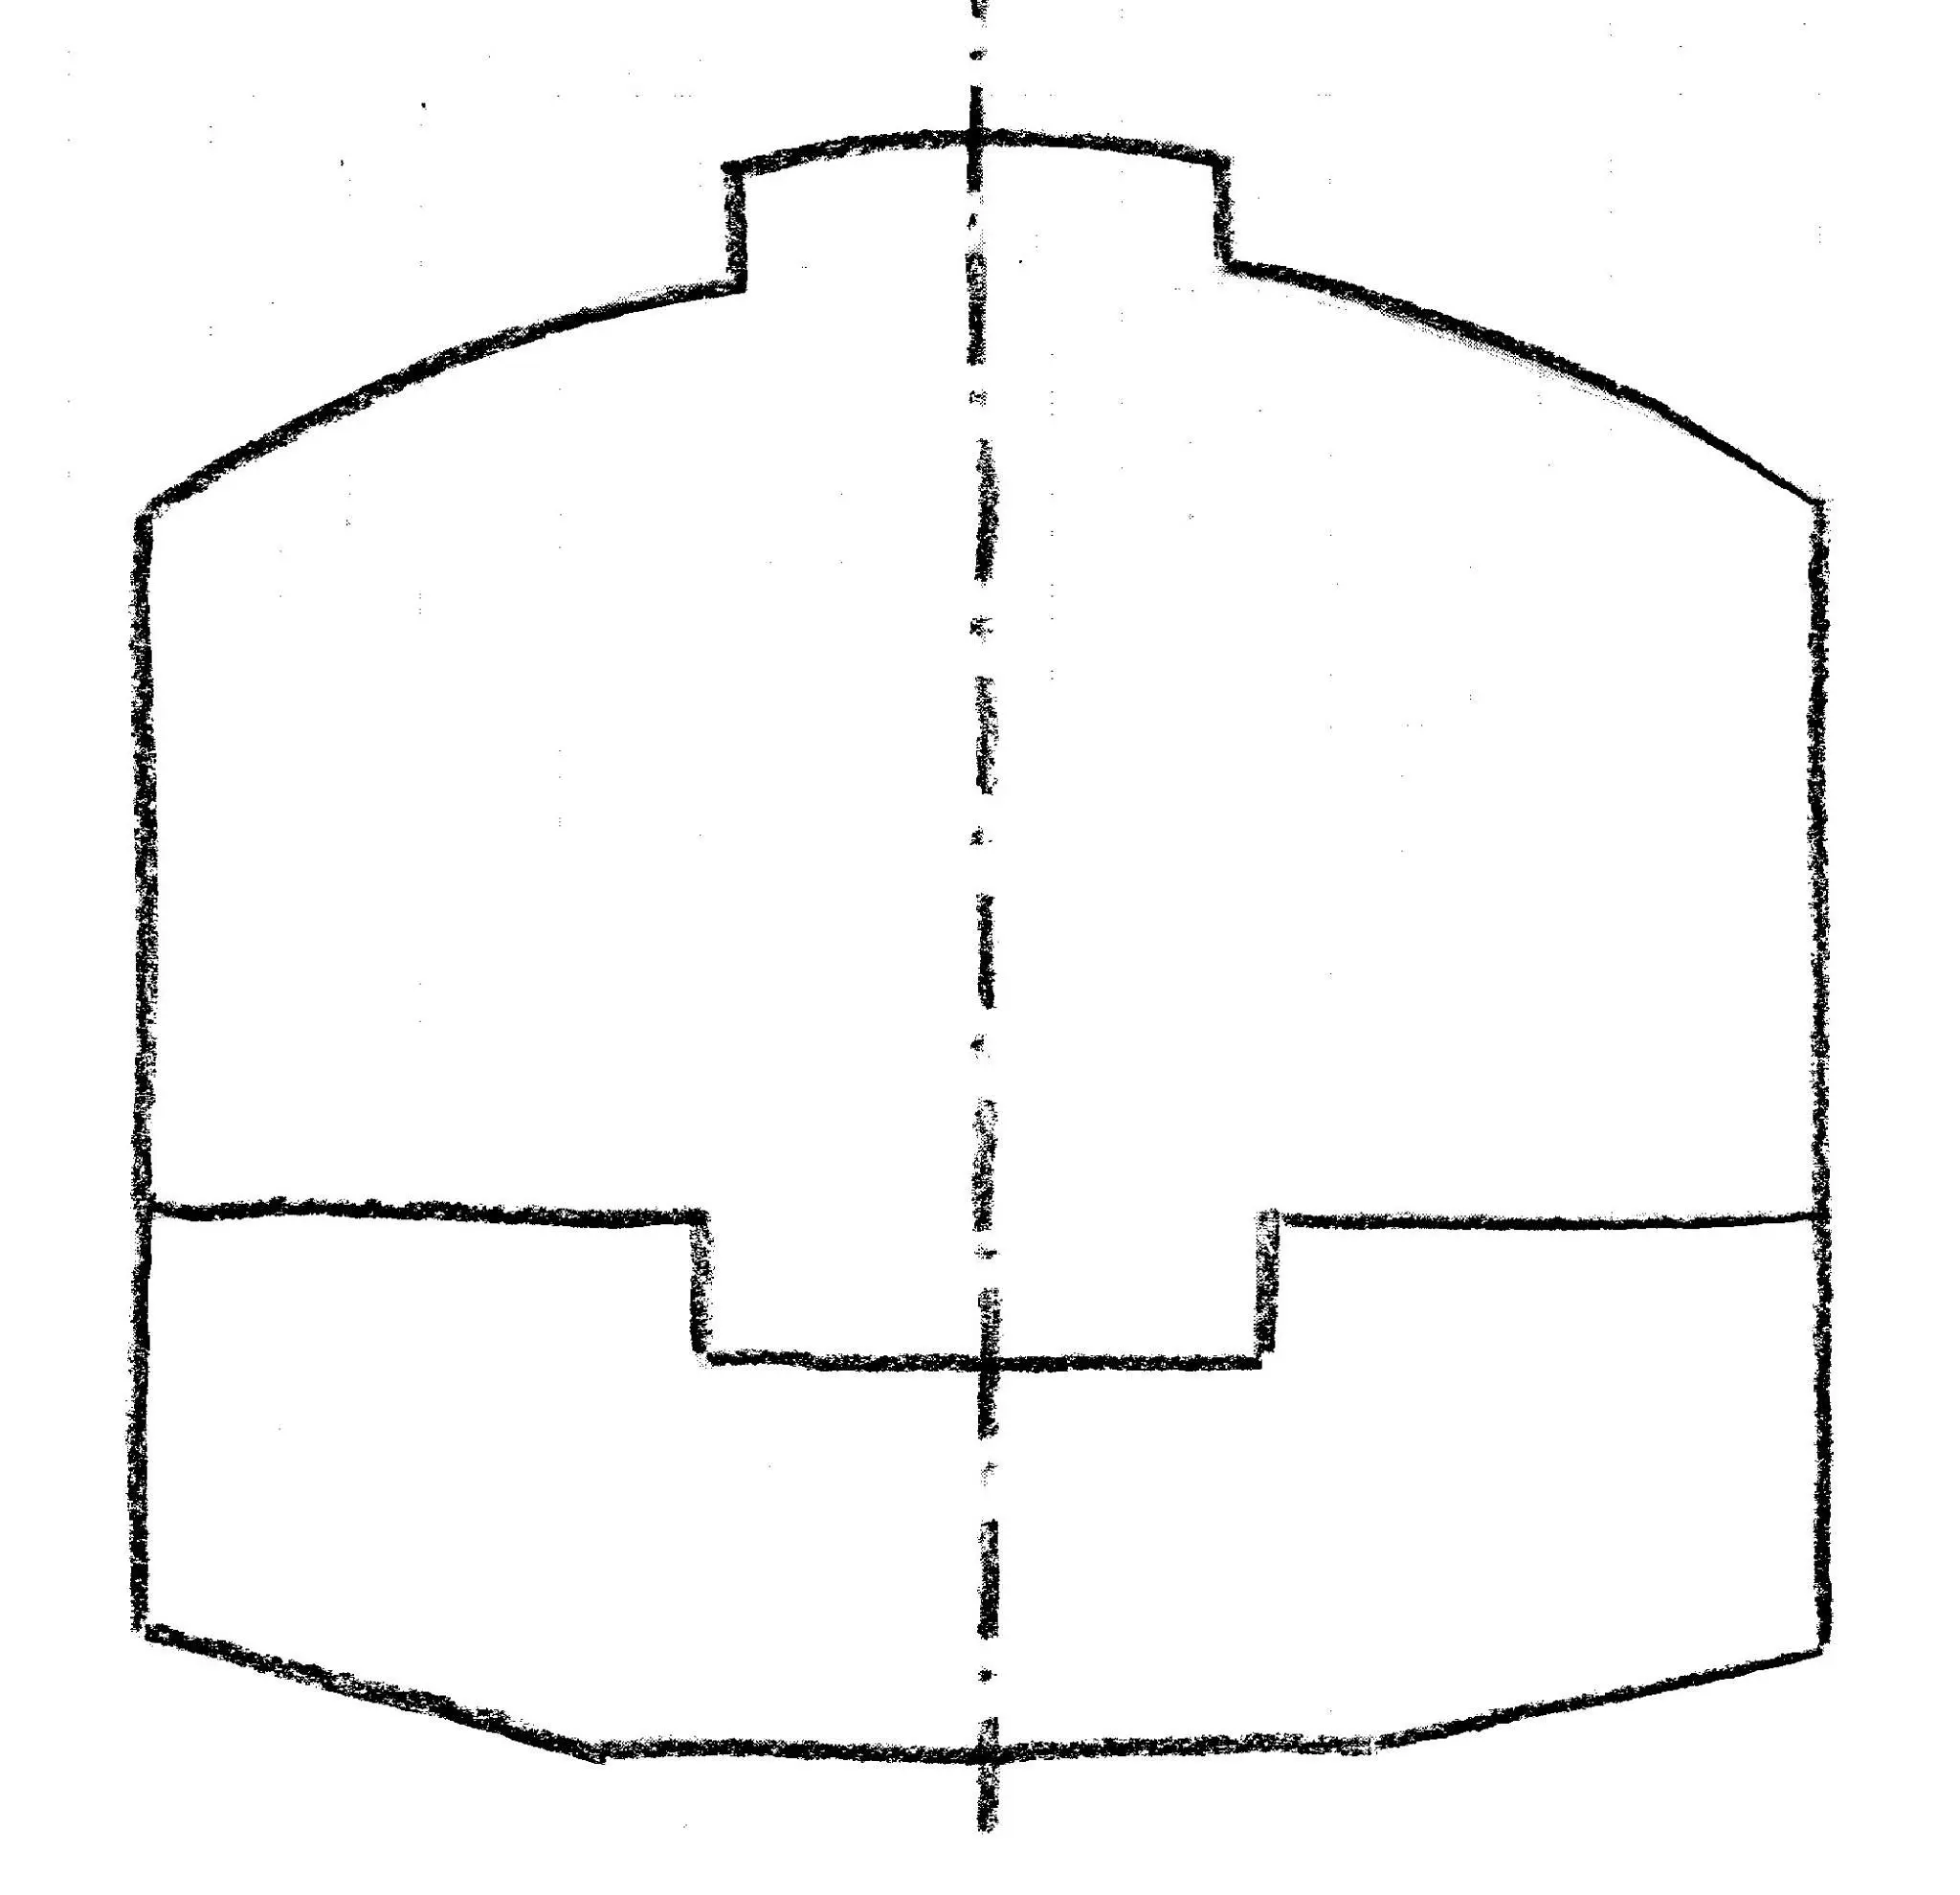
Houseboat update, Sunday, December 30, 2018 -- It's back to the drawing board for Jersey Girl's roof. My first attempt at design change, resulting in the dramatic, high-crown arch I published yesterday, does not do justice to Roy Schreyer's original design, I've concluded. My aim was to raise the headroom by about a foot, to allow more comfortable standing space on the aft deck, for entrance into the cabin and for showering. I still want to do that, but there's an aesthetically better way, I think. In the original design, the cabin sides are about 35 inches from the deck to the start of the roof, and the deflection of the roof arc was about 12 inches from horizontal (with additional headroom gained by raising the central portion of the roof), as seen in the first sketch. In my prior modification, I gained all the extra headroom I wanted by leaving the height of the cabin sides the same, but increasing the deflection of the arc to 22 inches, as seen in the second sketch. Not only do I think that looks disproportionate and ungainly, but it will also make walking on the roof, if I ever have to for any reason, rather risky. So I've decided to scrap the jig I've built and the first beam I've laminated, and start this part over again. As illustrated in the third sketch, I'm raising the cabin sides by 9 inches, to 44 inches, and setting the deflection of the roof beams at 15 inches. Not only does that look better and make the roof less dangerous to walk on, but it allows for taller windows in the cabin, for more light and better enjoyment of passing scenery. I'll start work on this modification during the first week of the new year. Happy New Year, everyone!
3 Jan 2019Planning & Research
The new, lower arc is released from its jig, and I like it.
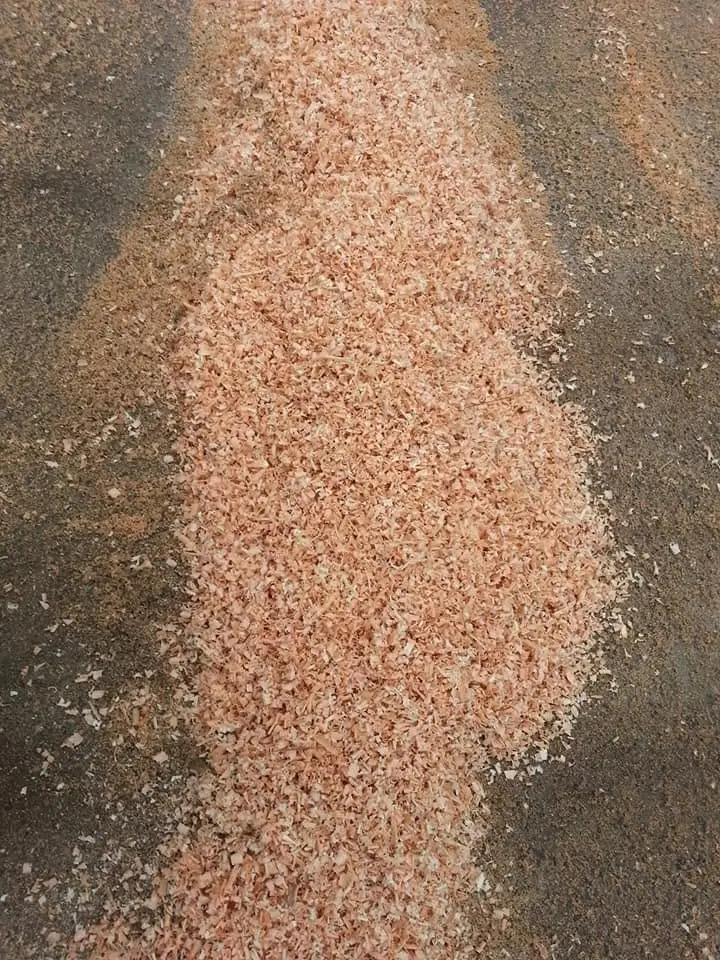
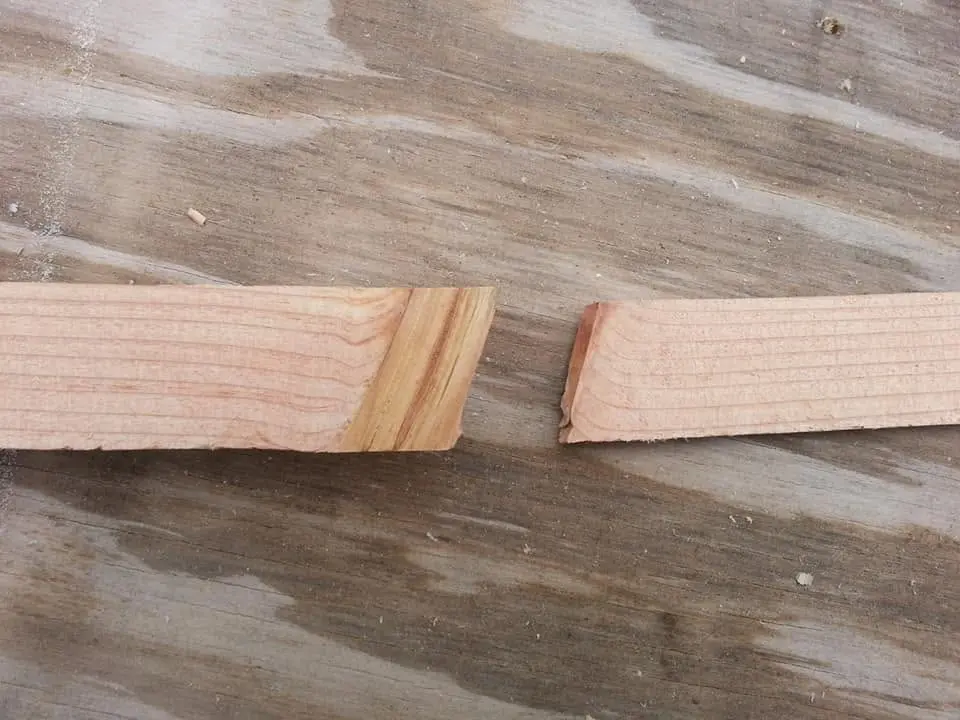
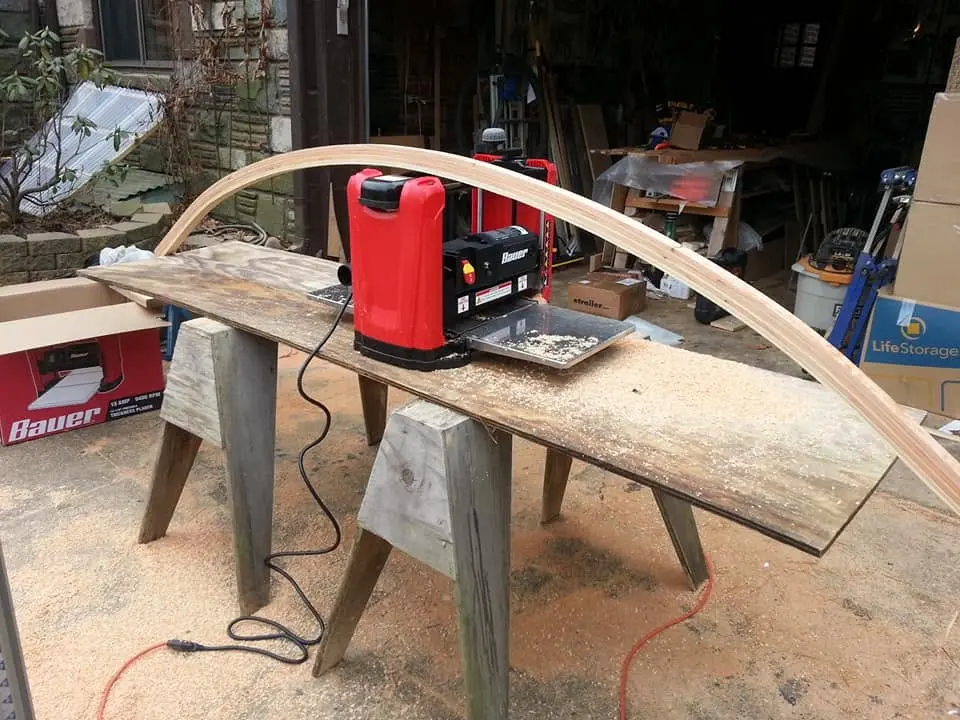
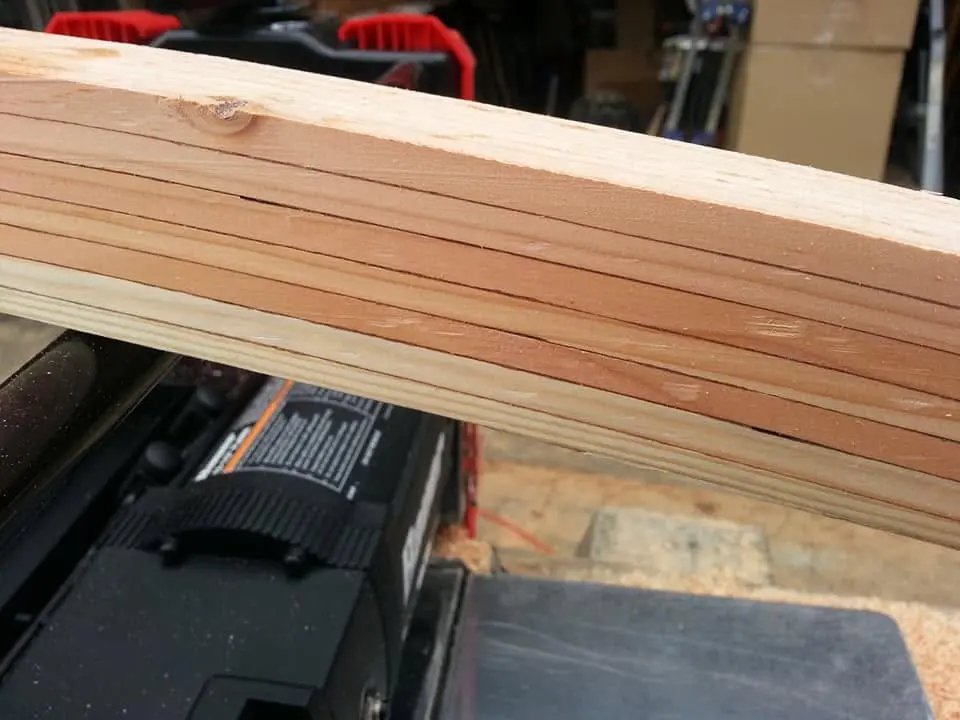
Houseboat update, Thursday, January 3, 2019 – The new, lower arc is released from its jig, and I like it. At first, the sides were uneven due to variations in the thickness of the Douglas fir framing lumber I was using. Not only is a two-by-six not two inches thick, it’s not even reliably an inch and a half thick. What’s good enough for a wall stud in a house is not – at first – good enough for a project like this. Also, the sides of the arc were covered with lumpy hardened epoxy that had squeezed out as I tightened the stack of strips with my clamps. Sanding these imperfections down would have been an arduous, time-consuming task. Planing them down with a hand-held jack plane would have been a pain. But the inexpensive thickness planer I bought at Harbor Freight recently did a quick and beautiful job. At first, I was reluctant to try, thinking I might not be able to control the orientation of the piece as I fed it through the unforgiving blades of this tool. So I tried the overly high arch I had made earlier to see what would happen. It worked beautifully, keeping the flat sides perfectly flat as it fed through the machine. I also want to report something else I learned in making this arched roof beam: I knew when I bought the cheap framing lumber that some of the strips I cut from it would have knots, and that some of the knots would go all the way through and the strips would break where the knot was. I decided to try using a broken strip in this stack anyway, sandwiching it between two clear strips as I glued and clamped them together. That also worked perfectly, and the broken strip is broken no more. The thickness planer generates a huge quantity of wood chips. I’m collecting and bagging them for future use in the composting toilet I plan to use in Jersey Girl’s head.
4 Jan 2019Glassing & Epoxy
Amping up production here, with two roof beams glued up at the same time.
Houseboat update, Friday, January 4, 2019 – Amping up production here, with two roof beams glued up at the same time. I’ve discovered that if I work quickly I can spread glue on all six of the seven strips that comprise one beam, then clamp them all at once before the epoxy begins to catalyze. It’s a great time saver, but I have to work efficiently to do it. If something interrupts me, it’s best to clamp up however many strips I’ve spread glue on, then let that assembly cure before going back to the remaining strips. If I return to the job and release the strips to add more before a full cure has taken place, I run the risk of having partially cured epoxy spring loose, and I am concerned that will prevent a solid cure when I clamp it all back together. I started the first of these two layups yesterday, and was interrupted after I had spread mixed epoxy on four of the six glued surfaces. So I just clamped it all tight to the jig and left it to cure overnight. When I returned to finish the job this morning, there was no springback when I released the clamps to add the two new strips. After I have everything clamped tight, I solve any high-low alignment issues in the strips by whacking them all with a rubber mallet. A few words about epoxy, for those reading this and wondering what it’s all about. Epoxy is a two-part formula consisting of resin and a catalyzing hardener. When it’s mixed in a ratio of two parts resin to one part hardener, a chemical reaction starts, generating heat. If left alone in the mixing cup, it will turn into a hard plastic puck that will have taken on the form of the inside of the cup. If it gets on hands or clothing, it’s just about impossible to remove once it’s cured, so I always use disposable nitrile gloves and wear old work clothing. To prevent the workpiece from sticking permanently to the jig, I cover the contact surface of the jig with transparent package sealing tape – which epoxy won’t stick to. The containers of resin and hardener are equipped with metering pumps that assure an approximation of the correct ratio. I do five pumps of each for one batch, then add enough pulverized wood flour to thicken the mix to a consistency about the same as a creamy salad dressing, which I smear with a disposable brush on the surface to be glued. One of these beams takes a total of 27 pumps each of resin and hardener. I’ve run into some folks who insist that the only way to mix epoxy properly is to measure it out in a graduated plastic cup to assure a two-to-one ratio; others say with great authority that it has to be measured out by weight. While that certainly adds to the mystique of boat building and the impression that mere mortals had best leave this craft to the true experts, it just isn’t true. The supplied pumps are accurate enough to mix epoxy that will cure just fine. The only variable that trips people up is temperature. Epoxy won’t cure at all in temperatures much below 60 degrees F, which is why I have to put the boat into storage for the winter and work on smaller parts inside my heated garage.
Chapter 10
Fairing & Sanding
The long one. Fairing compound, longboards, and the sanding nobody photographs enough.
3 daysfrom January 2019
7 Jan 2019Fairing & Sanding
Starting to laminate a fresh stack of quarter-inch strips into an arched roof support.
Houseboat update, Monday, January 7, 2019 -- Starting to laminate a fresh stack of quarter-inch strips into an arched roof support. Thinking a few steps ahead, it occurs to me that the inside curve of these arches will be a visible design element of the cabin ceiling, constantly on display as evidence of how much I care about aesthetic considerations. I think I care a lot, so that surface will be sanded and finished to a warm amber glow. So it occurs to me that it's easier to sand now, while it's flat, then later, when it's the inside curve of a glued-up laminate. The sanded surface will be stacked against the taped face of the jig with no glue, so it should be quite clean when I release the clamps after the lay-up hardens into its form. I should have thought of this before I produced the first four such arches, but I have nine to go, and "better late than never."
10 Jan 2019Deck & Coamings
It’s just too cold today to saw quarter-inch strips for Jersey Girl’s roof supports,...
Houseboat update, Thursday, January 10, 2019 – It’s just too cold today to saw quarter-inch strips for Jersey Girl’s roof supports, so I retreated indoors for a little art work. Here's my hot-off-the-easel watercolor, Bass Rocks 2 (14x20 inches), followed by my just-started, third in a series of Hubble-inspired spacescapes, also a 14x20 watercolor.
13 Jan 2019Glassing & Epoxy
Ten more-or-less identical roof supports for Jersey Girl, with one to go.
Houseboat update, Sunday, January 13, 2019 -- Ten more-or-less identical roof supports for Jersey Girl, with one to go. Next step after I laminate the last one will be to coat all their stacked edges with a slightly thickened epoxy mixture, to fill any voids between the glued-up strips of wood. That will be especially important where a loose knot may have caused deformation of the assembly, leaving a large opening. In such cases, I will apply a heavily thickened mixture of epoxy, using wood flour to closely match the color of the surrounding wood. Then, I will sand everything smooth and brush it all with at least two coats of unthickened epoxy, sanding between coats. Finally, I will varnish all but the top surfaces, leaving the epoxy on them exposed so as not to interfere with gluing the roofing planks down later.
Chapter 11
Paint & Finish
Primer, topcoat, bottom paint, boot stripe, lettering.
1 dayfrom January 2019
17 Jan 2019Paint & Finish
It's still a little too cold to venture out into the driveway to work on Jersey Girl,...
Houseboat update, Thursday, January 17, 2019... It's still a little too cold to venture out into the driveway to work on Jersey Girl, so I thought I'd go where it's a little hotter, or colder, or hotter, or... Hot off the easel: "In the Beginning," watercolor, 14 x 20 inches. No, it's not abstract. It's the third in my continuing series of paintings based on photographs sent back by Hubble. So, it's just another landscape. covering a little more ground, is all.
21 Feb 2019Glassing & Epoxy
With the temperature in the 50s and the snow and ice melting, I had a chance to do a...
Houseboat update, Thursday, February 21, 2019 -- With the temperature in the 50s and the snow and ice melting, I had a chance to do a little work on Jersey Girl in the driveway today. It felt good to be back at work, especially since I was knocked off the rails last week by a bit of thankfully minor man-part surgery. It wasn't enough to stop me, but it did serve as a reminder of mortality, and the undeniable fact that I really should not dawdle if I want to be able to finish this project and still have time left to enjoy the result! So, here's what I did. First, the roofbeam lamination layups were left with gobs of hardened epoxy, so I used a belt sander with 40-grit sandpaper to dress the flat faces of the arched beams. Then, I used a random orbital disk sander with 60-grit sandpaper to dress the tops and bottoms of the beams. The tops need to be free of any lumps so that the roofing planks will lay flat and even upon them. The curved inner surfaces of the bottoms will be visible from inside the cabin, so I want them to be free of any gobs of epoxy as well, and I also want to round over the edges, just because it'll look nicer. In addition, I want to significantly reduce the circular marks left by the saw blade when I cut the strips that went into these laminations. But I want to leave a subtle suggestion of these marks as a reminder of the honest work that went into them. Call it a craftsman aesthetic or whatever you want, but I think they will add to the visual interest when the job is finished and they are covered with the warm amber glow of marine varnish.
15 Mar 2019Glassing & Epoxy
71 degrees in Northern New Jersey today, so of course an old man's thoughts turn...
Houseboat update, Friday, March 15, 2019 -- 71 degrees in Northern New Jersey today, so of course an old man's thoughts turn to...his boat! I took a ride over the the local marina to see what was going on there, and it was a great big nothing. It's in a public park, the Palisades Interstate Park, but the parking lot was filled with coccooned boats, and no one seemed too interested in unwrapping them just yet. So I returned to my garage to do some more work on the arched, laminated roof beams that I will install on Jersey Girl, the 20-foot mini-houseboat I have been building for the last three and a half years. Six of these beams are already coated with three layers of epoxy, and today I sanded down five more to prepare them for the epoxy treatment. Soon, when I am sure there will be no more snow, I will bring Jersey Girl back to the driveway. As for tonight's weather, every couple of seconds there's a flash of typical summertime "heat lightning." Quite uncharacteristic for this time of the year.
20 Mar 2019
It’s officially Spring!
Houseboat update, Wednesday, March 20, 2019 – It’s officially Spring! And Jersey Girl is officially back in her own driveway, ready for another building season. More to follow; stay tuned.
25 Mar 2019Deck & Coamings
I spent the entire day plumbing Jersey Girl's forward deck drainage system.
Houseboat update, Monday, March 25, 2019 -- I spent the entire day plumbing Jersey Girl's forward deck drainage system. I started by cutting 2-inch PVC pipe and laying it out in the space under the deck, then putting the deck into place to make sure the drain holes corresponded with the plumbing as I cut it. Naturally, it did not, so it was cut and fit, add and fit, cut and fit, all day long. Finally, I got the pipes to go where they need to, to carry deck water under the seats and storage compartments and out out through scuppers in the port and starboard sides.By the way, that large hole amidships up in the bow is an inspection port, so I can check for any water and also to make sure the fastenings that hold the U-bolt for trailer winching stay good and tight. Now that Jersey Girl is officially named, I feel she deserves proper nautical nomenclature, So it's port and starboard now, not left and right. And it's forward and aft, or bow and stern, not front and back. Makes me feel properly salty. (Remind me to tell you the story of the old sea captain's life-long secret, told to me by the first mate aboard a Swedish freighter I worked on in my youth...)
26 Mar 2019Deck & Coamings
Jersey Girl is growing up!
Houseboat update, Tuesday, March 26, 2019 -- Jersey Girl is growing up! It's all for fit, measurement and marking, and has to come down until the weather warms up enough to allow me to glue with epoxy. But you can see that today I put up the stern roof posts, a temporary horizontal stringer, and the first of 11 arched roof beams. In its final form, the beam will be cut into three segments. The two outboard segments will form the port and starboard "shoulders" of the roof, and the center will be about four inches higher. That'll not only give a little more headroom on the aft deck (the back porch, to you landlubbers), but it will give the inside of the cabin a light and lofty feeling. With night-time temps still dipping below freezing around here, I may have to wait a bit for good 60-degree day that will allow me to glue things together.
28 Mar 2019Deck & Coamings
The cutting and fitting, nipping and tucking proceed.
Houseboat update, Thursday, March 28, 2019 -- The cutting and fitting, nipping and tucking proceed. Here, you can see the emerging shape of Jersey Girl's roof line. The raised center portion will give 6-foot-4 of headroom on the aft deck (enough to allow a stand-up solar-heated shower out there). Stepping down into the cabin, the headroom will be a generous 8 feet and then some. Jersey Girl will be a comfortable little cabin afloat!
4 Apr 2019Deck & Coamings
Jersey Girl's first roof post came out perfectly!
Houseboat update Part 2, Thursday, April 4, 2019 -- Jersey Girl's first roof post came out perfectly! Well measured and carefully marked, all the chamfers started and ended exactly as planned. Huge amounts of dust and noise, but I held onto my focus and paid scrupulous attention to what I was doing, and the result shows. (I emerged with all fingers intact, too.)
4 Apr 2019Deck & Coamings
Full disclosure: I made a dumb mistake.
Houseboat update, Part 3, Thursday, April 4, 2019 -- Full disclosure: I made a dumb mistake. Having measured and marked carefully, I cruised right past my markings and routed a chamfer where there absolutely must not be one in one of Jersey Girl's roof posts. I patched it up with a piece of scrap cedar, and tomorrow I will cut the patch to match the profile of the post. "But wait," some knowledgeable purist will say, "neither the color nor the grain come close to a match!" Well, I have heard there is a tradition among rug makers in Afghanistan, Pakistan and Iran to deliberately avoid weaving a perfect rug, making certain to include at least one imperfection. To make it perfect, the story goes, would be an affront to Allah, who alone is capable of perfection. I have no idea if the tale is true, but at times like this it's a comfort to a far-from-perfect boat builder. Onward.
4 Apr 2019Deck & Coamings
I am still working on the upright posts that will support Jersey Girl's roof and serve...
Houseboat update, Thursday, April 4, 2019 -- I am still working on the upright posts that will support Jersey Girl's roof and serve as some of the studs that the cabin walls will be fastened to. This morning, I'm cutting a long rabbet, which will be one of the support points for a 16-foot riser, running the length of the roof that will cover the cabin and the aft deck. The arched "shoulders" of the roof beams will run from the port and starboard sides to be glued and screwed to the lower part of the riser, and the beam supporting the raised central portion of the roof will span and connect the tops of the risers on both sides, creating eight feet of headroom in the central aisle of the cabin. I've used a circular saw with the the blade set at 3/4 inch to make a series of cuts across the width of the rabbet, then used a chisel to knock out the waste material. The other cutouts in this post are dadoes, made pretty much the same way as the rabbet. The dadoes will support the horizontal top and bottom of a railing that I will make later. I've decided to cut chamfers into the edges of these roof support posts. It will give them a lighter, more attractive look, and they will actually be a bit lighter in weight. I've carefully measured and marked where each chamfer will start and end, because I don't want a chamfer to be in the way of a joint where the railing will fit into the dadoes. I'll cut the 3/4-inch chamfers on a router table. I've included a picture of test cuts I made in a piece of scrap, so you can what a chamfer looks like. The bit I am using has a roller bearing, so theoretically I shouldn't need a fence to guide the post. But I will use a fence, secured to the correct position, just to help maintain accuracy. I've also put markings on the surface of the table, so I can line up the beginnings and ends of the cuts. I'll be using plastic finger boards to help me safely keep the post in firm contact with the router bit, so the depth of the cut stays uniform along its length. And I will be using full eye, ear and breathing protection.
7 Apr 2019
Mistake corrected.
Houseboat update, Sunday, April 7, 2019 -- Mistake corrected. The three photos show the mistake, the glued block that I used as a patch, and the final result, after milling on the router table.
9 Apr 2019Deck & Coamings
With temperatures in the 40s and thunderstorms promised later, it's not a good day to...
Houseboat update, Tuesday, April 9, 2019 -- With temperatures in the 40s and thunderstorms promised later, it's not a good day to start gluing things up. But I can still check parts for fit and make necessary adjustments and alignments. Here are the aft cabin door posts, looking out toward the aft deck. I can see that their alignment abeam is perfect, but I need to make an adjustment in the cutout at the top for the cabin roof riser, so it lines up with the aft deck roof post and other roof posts going forward. First, I lay the two posts on a pair of sawhorses, so the notches where they will rest on the hull’s “sheer clamps” – the timbers that the deck will fasten into – are even with each other. Then, I mark where the new notch at the top will start, lining it up with the notch that I need to match. Then, with the blade of a circular saw set at ¾-inch, I make a series of cuts across the area that I want to eliminate. Using a chisel and hammer, I clean it up – crudely, but well enough to glue in the riser that will support the center roof beams.
9 Apr 2019Deck & Coamings
The long-term nature of a project like this has its frustrations, to be sure, but it...
Houseboat update, Part 2, Tuesday, April 9, 2019 – The long-term nature of a project like this has its frustrations, to be sure, but it has benefits as well. For one thing, it affords me the opportunity to make a somewhat contemplative life for myself. As I’m plodding slowly forward I find I have time to think about things, things that may or may not have anything to do with the construction of Jersey Girl. Today, it does. See that void under the aft deck? It’s going to house a retractable stair system, two steps high, to be pulled out when necessary to allow easier access from the aft deck down into the cabin. But wait, there’s more, as the late night TV pitchmen like to say: Each of the two treads in the little stair system will be hinged, allowing storage inside. Today’s mind-wander has led to a neat innovation. By the way, the nautical term for a stair leading from one deck to another is a “companionway.” I rather like that word.
12 Apr 2019Deck & Coamings
So, what's this box have to do with Jersey girl?
Houseboat update, Friday, April 12, 2019 -- So, what's this box have to do with Jersey girl? It's a temporary framing jig. After my friend Steve helps me lift it up to Jersey Girl's sheer clamp (where the gunwales -- pronounced gunnels -- would be if this were an open boat), I will screw it down and I hope it will help me clamp, glue and screw the roof posts into square and plumb orientation with the hull. Just an idea I came up with when I couldn't sleep a couple of nights ago. It happens to people as a consequence of boat-brain. The second picture shows the framing jig in place. I find I need to make a few tweaks to make it serve as intended. Par for the course.Finally, Jersey Girl is all tucked in for the night. Tomorrow, if weather cooperates, I will install the first four -- possibly six -- of her roof support posts.
15 Apr 2019Deck & Coamings
The rain came to an end and the sun emerged later in the afternoon, so I took...
Houseboat update Part 2, Monday, April 15, 2019 -- The rain came to an end and the sun emerged later in the afternoon, so I took advantage of the break in the weather to clamp Jersey Girl's aft roof support posts into their final position. There's no such thing as having too many clamps for a job like this. I used 28! It suddenly occurred to me that she looks awfully tall on her trailer, and I wanted to keep her under 11 feet on the road to allow plenty of clearance for highway overpasses and the like. So, I measured, and she'll be 10-foot-2 tall on the trailer when the roof is on. What a relief! Exceptionally strong wind gusts made me a little nervous about spending so much time on the ladder, so I called a halt for the day. Tomorrow, I expect to make some progress gluing and screwing the posts into place.
15 Apr 2019Glassing & Epoxy
After a night of torrential rain, accompanied by lightning and long rolls of...
Houseboat update, Monday, April 15, 2019 -- After a night of torrential rain, accompanied by lightning and long rolls of house-shaking thunder (sounded like a freight train roaring through the living room one floor below), I awoke to beautiful blue skies. A scattering of high clouds served only to accentuate what great day it would be to work on Jersey Girl. In preparation for clamping, screwing and gluing her aft deck roof posts into place, the first thing I did was put some plastic package-sealing tape on the surface of the temporary squaring jig I had built. If a bit of squeezed-out epoxy were to get between a post and the plywood of the jig without the tape, the jig might wild up being not so temporary. But epoxy won't stick to the slick surface of the tape. Next, I started cutting a series of 3-inch holes around the previously marked places where the posts will go. I will use those holes to clamp the posts into position until they are secured in place. Then, within the space of five minutes, a dark curtain dropped through the blue sky and light, fluffy white clouds, and whaddya know, heavy rain. Again. I got soaked as I scrambled to pull Jersey Girl's raincoat on. Honestly, it seems our spring weather here in northern New Jersey, while always rainy, is getting to be more and more vulnerable to tropical-style rains. Maybe it'll clear up in the afternoon and I can take another crack at it
16 Apr 2019Glassing & Epoxy
Jersey Girl's aft deck roof supports are glued and screwed into place now.
Houseboat update, Tuesday, April 16, 2019 -- Jersey Girl's aft deck roof supports are glued and screwed into place now. As you can see, there are some gaps the could interfere with the kind of rock-solid bond I'd prefer to have. Luckily, it's possible to buy pre-thickened epoxy in a dual cartridge that mixes the resin and hardener in a special mixing nozzle as it squirts out. It doesn't run, it stays put on vertical surfaces and it fills the gap perfectly. It's much more expensive than epoxy that you have to mix to the proper consistency, and it requires a special dual cartridge caulking gun to apply (also expensive). But it's perfect for the job and well worth it.
17 Apr 2019Deck & Coamings
Free at last, the jig is gone, and Jersey Girl's aft deck roof posts are straight and...
Houseboat update, Wednesday, April 17, 2019 -- Free at last, the jig is gone, and Jersey Girl's aft deck roof posts are straight and strong! I have four more to make and install, the aft cabin posts, and then I will be able to start roofing the aft deck.
18 Apr 2019Fillets & Taping
I beat the anticipated rain today, completing the major part of the shaping of two of...
Houseboat update, Thursday, April 18, 2019 -- I beat the anticipated rain today, completing the major part of the shaping of two of the four additional support posts I will need to start work on Jersey Girl's aft deck roof and aft cabin wall. They are made of 4 x 4 cedar, which I ripped on a table saw to actual 3 x 3. Then I notched the posts to fit around the hull framing, employing my usual method of using a circular saw to make a series of cross cuts and a hammer and chisel to neatly knock out the waste. Because I need to make room to stay clear of epoxy fillets in the framing, I decided to bevel the posts in places where the fillets would interfere with a snug fit. As you can see, it worked perfectly.
21 Apr 2019Deck & Coamings
A most happy Easter/Passover to all who celebrate resurrection and/or freedom from...
Houseboat update, Sunday, April 21 -- A most happy Easter/Passover to all who celebrate resurrection and/or freedom from bondage. At our Seder, among the forms of intolerable oppression noted in the haggadah we were reading was the forced separation of families, a point I feel is especially worth noting in the present day. To the point of the topic at hand, Jersey Girl is about to get four more roof support posts. Sometime this week, weather permitting, the roof beams will be installed over the aft deck, then work can begin on the roof itself.
23 Apr 2019Deck & Coamings
Jersey Girl's aft deck forest sprouts four more new roof support posts, clamped in...
Houseboat update, Tuesday, April 23, 2019 -- Jersey Girl's aft deck forest sprouts four more new roof support posts, clamped in place and ready to be permanently fastened. That will be 10 in all, and then I will be able to start roofing that section and installing the aft cabin bulkhead (wall) and door. Things are really moving along now!
24 Apr 2019Deck & Coamings
Jersey Girl gets fitted for aft deck roof beams.
Houseboat update, Wednesday, April 24, 2019 -- Jersey Girl gets fitted for aft deck roof beams. This is just temporary, to see how things fit and mark parts up for final trimming. The horizontal planks are part of the longitudinal "riser" that will run the length of the aft deck roof and the cabin, defining the elevated central portion of the roof, above the arched "shoulders" on both sides. Now that this part of Jersey Girl has gone vertical, I am somewhat at the mercy of the weather until I get a roof over it.
25 Apr 2019Deck & Coamings
Another warm, sunny spring day means I get to make some progress on Jersey Girl.
Houseboat update, Thursday, April 25, 2019 -- Another warm, sunny spring day means I get to make some progress on Jersey Girl. Today, I permanently fastened risers and roof beams, tying the four central posts of the aft deck into a single, unified, solid structure. Next chance I get, I will be giving the same treatment to the six side posts, three on each side, to support the aft deck roof "shoulders." As I worked today, I became aware of a luscious, extravagantly sweet aroma. The lilacs have started to bloom. Tra-la. It's always been my favorite time of my favorite season of the year, for as long as I can remember.
29 Apr 2019Deck & Coamings
After a couple of rainy days, I caught a break with the weather and managed to add two...
Houseboat update, Monday, April 29, 2019 -- After a couple of rainy days, I caught a break with the weather and managed to add two support beams to the aft deck roof. These beams define the shape of the starboard "shoulder" that will continue forward over the enclosed cabin as well. Of course, there will be an identical shape over the port side as well. In addition, I started milling tongue-and-groove roofing boards today, first by ripping 10-inch common grade pine, knots and all, into three-inch planks. Then, I machined the tongue part into one edge of each plank and the groove into the other edge. Because of the arched shape of the roof, it's actually a little more complicated than what I've described. I will have to run each board over the router table a third time, to bevel the bottom side of the groove. That will allow a bit of relief to allow the boards to snug into each other as they bend around the arch. From the top, after the are all installed, they'll be sanded into a smooth, continuous curve. From inside the cabin, there will be a V-shaped groove at the joint between each plank, for an attractive "old cottage" look. In the old days, before routers, IO would have used a "combination plane" with a specially machined cutting iron to produce the shape I wanted.
30 Apr 2019Interior & Cockpit
First things first: after a night and morning of drenching rain, the lilacs are in...
Houseboat update, Tuesday, April 30, 2019 -- First things first: after a night and morning of drenching rain, the lilacs are in full bloom. Nothing signifies springtime so much as the sweet aroma of these sadly short-lived flowers. And, yes, the rain also gave me an opportunity to brush up on my bailing skills. But to the main point at hand -- I am starting to fit the aft cabin bulkhead in the starboard side! I will finish cutting it today, but before I install it I will have to sand it and give it a couple of protective coats of epoxy on both sides. That will take at least two more days, probably three. I’ll probably shop for a couple of used ship portholes for the aft and port sides to break up the solid expanse of wood separating the head and galley from the aft deck
4 May 2019Deck & Coamings
Dodging the raindrops that come and go, I am spending my 77th birthday adding more...
Houseboat update, Saturday, May 4, 2019 -- Dodging the raindrops that come and go, I am spending my 77th birthday adding more roof beams to Jersey Girl's aft deck. You might wonder why there are three spanning the center area, but only two on each side. I'm glad you asked. There will be a gate in the railing on each side, for easy boarding via the aft deck no matter which side is snugged up to a dock. But the 45-inch headroom from the sheer of the hull to the low-hanging eaves of the arched roof will present a problem to most adults, especially if they happen to be in my age category. So, I am designing a "gullwing" roof section to fill that empty space on each side that will lift up to allow boarding with a minimum of stooping down. I'm thinking of using gas-lift cartridges, similar to the ones you'd find on an automobile hatch, to support the roof section. It's all experimental; let's see if it works. A neighbor stopped by to wish me a happy birthday, and pronounced a traditional Yiddish blessing, "you should live to 120 years!" That'd be fine by me, but I would hope that by then I'd be enjoying an easy life on the water, and not still building this boat! Anyway, thanks to all who have wished me a happy birthday. You're all welcome to spend some time with me and Jersey Girl, when she's finished (but not all at the same time).
6 May 2019Glassing & Epoxy
I have sealed Jersey Girl's starboard aft cabin bulkhead with two coats of epoxy, on...
Houseboat update, Monday, May 6, 2019 -- I have sealed Jersey Girl's starboard aft cabin bulkhead with two coats of epoxy, on both sides and all the edges, to seal any moisture out. Now it's time to saw and shape more roof support posts, which will raise plenty of dust. Painful experience has taught me that I must not raise dust while epoxy is curing. I know it seems obvious, but sometimes when I am impatient to get on with the job, even the obvious is easy to overlook. So, before I start sawing, I will put on a pair of nitrile exam gloves to handle the sticky work piece, put it in the garage and close the door. (Again, obvious, I know, but if I don't think about the consequences of shortcuts, I spend even more time dealing with them.)
8 May 2019Interior & Cockpit
Yippee, a break!
Houseboat update, Part 2, Wednesday, May 8, 2019 -- Yippee, a break! FedEx just arrived with the two eyebrow windows I've decided to use in Jersey Girl's aft bulkhead, the ones overlooking the aft deck. So I get to do some challenging (but fun) work. First, I position the window where I think it should be, and trace a grease pencil line around it. Next, I use a circular saw to make a plunge cut along the line, leaving just a bit at each corner so the waste piece doesn't break loose in an uncontrolled way and splinter the surrounding wood. Plunge cuts require practice and concentration; plunge cuts on an arc, even more so. The trick to making a plunge cut on an arc is to set the depth of the saw blade just a tiny bit more than the thickness of the wood, to minimize the length of the chord of the circular blade that you are forcing around the arc. Finally, I use a Japanese pull saw to cut out the remaining corner bits, making sure to support the waste piece with a saw horse. Do all this right, and you achieve something like nirvana.
8 May 2019Interior & Cockpit
I have been spending the last several days machining four midship roof support posts,...
Houseboat update, Wednesday, May 8, 2019 -- I have been spending the last several days machining four midship roof support posts, a difficult, complicated job; arduous both physically and mentally. When I am working with expensive material like cedar, I greatly prefer not to make mistakes. So it's measure two or three times, check for fit, take break, come back, check again, then cut. Still, I make mistakes that need adjustments, but none I can't recover from. I still have to cut the decorative chamfers into the visible corners of these posts, then sand them and seal them with several coats of epoxy, before I can install them. Then, I have the four forward cabin posts still to be made. They will be the most complex of all, because they will have to be cut on angles matching the bay-window shape of the forward bulkhead and companionway of the cabin.
10 May 2019Interior & Cockpit
As I mentioned in a previous post, the design I'm using for Jersey Girl calls for a...
Houseboat update, Friday, May 10, 2019 -- As I mentioned in a previous post, the design I'm using for Jersey Girl calls for a forward cabin bulkhead sporting a sweet bay-window shape instead of being flat from one side to the other. I want to stick with that design. But that calls for some rather complicated shaping of the posts that form the framework as it transitions from the sides to the angled forward windows and meet at the door frame in the center of the forward bulkhead. As an example, the side posts need to be square to fasten into the hull and its below-deck framing, but twist abruptly to accommodate the topside shape of the forward bulkhead. That calls for some complex planning and slick execution on the table saw and finished up with a Japanese pull saw. Here is that transition, and I am happy with how it seems to have turned out. The outside posts are ready to be sanded and sealed with epoxy. I still have to shape the two door jamb posts, which will be different, but just as complicated.
19 May 2019Strongback & Molds
Suddenly, it's summer in northern New Jersey, the sun is shining, and I have a chance...
Houseboat update, Sunday, May 19, 2019 -- Suddenly, it's summer in northern New Jersey, the sun is shining, and I have a chance to get back to work on Jersey Girl. Today, I installed the four forward cabin bulkhead posts. The fore deck entry will go between the two center posts. On the left side of the picture, you're looking at where the helm will be, and on the right will be a seat for a passenger, facing forward or in toward the center, depending on his or her preference. More tomorrow, if weather permits.
20 May 2019Planning & Research
One of my design modifications for Jersey Girl was to recess the central portion of...
Houseboat update, Monday, May 20, 2019 -- One of my design modifications for Jersey Girl was to recess the central portion of the fore deck to provide comfortable outdoor seating space with a footwell, and a taller entry door into the cabin. That will require a railing, for safety. Today, I am starting to make two of the six posts I will need to wrap the railing around the deck and accommodate for convenient entry gates. These posts are going to require some creative saw work to make them fit around the frame of the hull and into the angle of the bow. I'll describe what I'm doing with each picture of the process..
21 May 2019
Here's why I use push sticks.
Houseboat update, Tuesday, May 21, 2019 -- Here's why I use push sticks. This could have been a finger!
21 May 2019Strongback & Molds
Just a little more fitting and below-deck prep work, and the floor of the recessed...
Houseboat update, Tuesday, May 21, 2019 -- just a little more fitting and below-deck prep work, and the floor of the recessed forward deck should be ready to be glued and screwed into place, maybe tomorrow. The other thing I did today was work on the two main longitudinal roof beams, which will run from the aft cabin bulkhead to the forward cabin bulkhead. I may be able to install them tomorrow as well. We'll see.
22 May 2019Deck & Coamings
A view from the bridge.
Houseboat update, Wednesday, May 22, 2019 -- A view from the bridge. Well, the helm, anyway. Or, in any event, where Jersey Girl's helm will be. The recessed central portion of the fore deck is permanently glued and screwed into place. I sure hope I can remember what I did with that hatch cover. I know it's around here somewhere.
23 May 2019Deck & Coamings
Raise high the roofbeams, boatbuilder!
Houseboat update,Thursday, May 23, 2019 -- Raise high the roofbeams, boatbuilder! (With apologies to J.D. Salinger.) Jersey Girl got her two main roofbeams today, but it was just for a trial fitting. It turns out I mismeasured by an inch and a half, but luckily it's no big deal. There's still plenty of wood to make a strong joint, and I'll fill in the gap later, as I go along. I made another discovery as well, as I hoisted each of these beams into place, one end at a time while I was precariously perched on 1 1/2 x 1 1/2 inch hull framing. A year ago, when I was a mere 76, this would have been easy. Now, at 77, it's still possible, but noticeably more difficult, with respect to both strength and balance. I'm glad I started this project at 73 and didn't put it off until it was too late! Some things require more strategizing than they used to. Tomorrow, I will pull the beams back down, taper their forward ends a bit so the roof slopes down a little at the forward end, then glue and screw them permanently in place.
26 May 2019Deck & Coamings
Jersey girl now has her two main roof beams and her two side roof beams installed.
Houseboat update, Sunday, May 26, 2019 -- Jersey girl now has her two main roof beams and her two side roof beams installed. When the epoxy cures, I will start fitting her arched transversal rafters, following the pattern I established at the stern. In the meantime, I checked to see if the starboard aft cabin bulkhead would fit on the port side as well, if I reversed it. I know it should, but one never knows, does one? As it turns out, it's a perfect fit! That means all I have to do is use it as a pattern, tracing it onto another piece of 3/8-inch panel of marine plywood, and cut it out.
27 May 2019Hull Panels
If nothing else, boatbuilding is an exercise in problem-solving.
Houseboat update Part 2, Monday, May 27, 2019 -- If nothing else, boatbuilding is an exercise in problem-solving. So here's my proposed fix for the problem of the wayward post. First, I run a long ratcheted tie-down strap from the top of the post to a U-bolt I had installed in the transom at the stern (never having considered the possibility I would need to use it for this). Next, crank the handle to put the strap and the post it's attached to under considerable tension. Then, knowing that it's possible to soften epoxy with heat, I carefully use an electric heat gun on the long epoxied joint between the base of the post and the hull. I keep the gun moving, trying to avoid unwanted damage, including blistering the epoxied and painted finish on the outside of the hull. After what seems like enough time, I climb down out of the hull, go around to the stern and give the ratchet handle a few more clicks. I eyeball the post again, and I see it has moved! Not enough, but better than it was. A little more heat, a few more clicks on the ratchet, and lo and behold, the post is right where I want it! But how to keep it there, that's the question. I decide to drive a cedar shim into the small gap that formed when the post moved, then cut off the excess of the shim, using a Japanese pull-saw. My hope is that ultimately the plywood panel that will form the cabin side will serve as a brace to lock the post into its correct position.
28 May 2019Deck & Coamings
The rain cleared out just before dusk this evening, so I had an opportunity to install...
Houseboat update, Tuesday, May 28, 2019 -- The rain cleared out just before dusk this evening, so I had an opportunity to install Jersey Girl's two aft cabin bulkheads. The openings are for "eyebrow" windows, but I won't put those into place until I'm sure there's no danger of crashing through them with errant construction materials. Tomorrow, if weather cooperates, I plan to work on more of the arched roof supports. That will bring me closer to a job I'll be happy to call done, but dread doing -- installing and finishing the roof. For that, I'm thinking of stabilizing the trailer and boat with jack stands, and buying or renting a scaffold system.
29 May 2019Interior & Cockpit
Jersey Girl now has her forward cabin framing complete.
Houseboat update, Wednesday, May 29, 2019 -- Jersey Girl now has her forward cabin framing complete. With thunderstorms in the forecast soon, it's time to wrap up for the day. Next, as soon as the weather gods smile upon me, is to go back aft and install the framing that will define the galley on the port side and the enclosed head on the starboard.
30 May 2019Glassing & Epoxy
I started my day with Jersey Girl by bailing out a couple of inches of water that had...
Houseboat update, Thursday, May 30, 2019 – I started my day with Jersey Girl by bailing out a couple of inches of water that had found its way past the two tarps covering her into several of her compartments, and I finished in a drenching downpour, scrambling to put away my tools and covering her up again. In between, I managed to fit four new framing posts – the ones that will define the areas set aside for the galley and the enclosed head. As soon as weather allows, I’ll complete the shaping of these posts and seal them with two coats of epoxy before installing them. Sadly, my humble Jersey Girl is just a shade over 13 cubits long and 5 cubits wide. In light of the almost-biblical weather we're having in North Jersey, I'm considering the possibility of expanding to biblical size -- Noah's craft was purportedly 300 cubits long, 50 cubits wide and 30 cubits high. By the way, did you see in the news over the last few days that the developers of the Kentucky replica of Noah's ark are suing their insurance company over its refusal to honor their claim for -- get this -- rain damage? It’s funny, I don’t recall anything in the bible about rain damage to Noah’s ark, notwithstanding a storm lasting 40 days and 40 nights. Gotta strike while the irony is hot, right? (Here's a picture of the four new posts. They're the light-colored ones that haven't been coated with epoxy yet.)
4 Jun 2019Interior & Cockpit
Yesterday, I permanently fastened the forward posts that will delineate the spaces to...
Houseboat update, Part 2, Tuesday, June 4, 2019 -- Yesterday, I permanently fastened the forward posts that will delineate the spaces to be occupied by Jersey Girl's head on the starboard side and the galley on the port. Today, I will concentrate on the arched roof supports over the posts I installed yesterday, as well as timbers that will form the framework for windows.
4 Jun 2019Interior & Cockpit
I have another set of three arched roof supports permanently fastened into place, and...
Houseboat update, Part 3, Tuesday, June 4, 2019 -- I have another set of three arched roof supports permanently fastened into place, and I have begun to make the first of six window framing spacers. It's the unfinished lighter-colored post in the foreground. Four of them will be the same 1 1/2 x 1 1/2 inch timber you see here, and two will be slightly wider. Together, they will allow me to mount four 24-inch-wide windows on each side of Jersey Girl. In addition, there will be three forward-facing windows, one of them in the forward cabin door. There will be a similar window in the aft cabin door, one aft-facing "eyebrow" window in the galley and one in the head, and two small inward-opening "hopper" windows in the sides of the galley and the head. Possibly two ventilating skylights as well. As you can guess, I want a wide-open feeling inside this little boat, since one of its uses will be as a floating art studio.
4 Jun 2019
As I uncovered Jersey Girl for what I hope will be great progress today, I could not...
Houseboat update, Tuesday, June 4, 2019 -- As I uncovered Jersey Girl for what I hope will be great progress today, I could not help but take a few minutes to appreciate the mountain laurel that has come into bloom, just as its cousin the rhododendron fade for the year. The closer one gets, the more beautiful the individual florets become. On to work. Construction notes to follow.
5 Jun 2019Strongback & Molds
Fitting Jersey Girl's first window frame.
Houseboat update, Wednesday, June 5, 2019 -- Fitting Jersey Girl's first window frame. Now is thee time to make small adjustments, to make certain that all will appear shipshape as Jersey Girl takes final form. I know the 24-inch windows will require 24 1/4 inches clearance between each two framing timbers, and the timbers have to be perfectly vertical to avoid problems later on. This sequence shows the steps I'm taking to fit the first one. Initially, I can see just by eyeballing, that the piece is not truly vertical. So I cut a notch in the sheer frame of the hull seat the bottom of the window frame a little to the outboard side. When I can see that it's vertical, I check the top and see that it's a little too long, so I take it to the miter saw and cut the top at the correct angle to the right length. Now, it fits perfectly. I'll take this frame down, and use it tomorrow as a template to mark and cut five more, so I can fit them without all the adjustments I'm making for the first one.
6 Jun 2019Interior & Cockpit
Notches, notches and more notches.
Houseboat update, Thursday, June 6, 2019 -- Notches, notches and more notches. Even some of the notches have notches of their own. Today was a day of fitting the three-dimensional jigsaw puzzle of framing together, mostly using a mallet and chisel. Here you can see Jersey's Girl's starboard side framing for the four windows that will stretch along the full length of the main cabin. Tomorrow, I'll make a few final adjustments and permanently glue and screw them into place. I already have the timbers cut and shaped for the port side, so I'll get them permanently fastened as well. After that, it's back to the the arched roof supports, so I can finally get started on covering Jersey Girl permanently. (I'm holding off installing the windows because there's still a lot of construction to be done, and tools to be dropped, and I don't want to risk breaking the glass.)
15 Jun 2019Interior & Cockpit
Windows! Jersey Girl has windows, seven of them so far. I need to shim a frame to fit the
Houseboat update, Saturday, June 15, 2019 -- Windows! Jersey Girl has windows, seven of them so far. I need to shim a frame to fit the last window on the port side. That should be done later today, then it is on to the roof. As an update to the update, I am thanking a crew of hearty volunteers from the Ethical Culture Society of Bergen County, who actually paid money (as part of a fund-raiser for the Society) to help me install these windows. I provided the lunch, we all had a great time, and the windows got where they needed to be in record time and in good order. And miracle of miracles, no one fell off any ladders.
17 Jun 2019Deck & Coamings
The rain it cometh.
Houseboat update, Monday, June 17, 2019. The rain it cometh. Again. Good for the flowers, good for the reservoirs, and the long run, I suppose, good for us all. Jersey Girl is pretty well cocooned, I think, but we'll have to wait and see. Because the most vulnerable section right now is the forward deck area, I have decided to take care of that before attacking the roof. Today, before the rain started, I shaped four forward-facing railing posts, which was pretty complicated because of how they have to be cut around hull framing and the rake of the bow panel. Tomorrow, weather permitting, I will cut decorative chamfers and dadoes for the rails, sand them, then seal them with two coats of epoxy. Perhaps I will install them on Wednesday, if I get a weather break.
23 Jun 2019Deck & Coamings
First of all, to anyone who ever was or is a mother, and anyone who ever had a mother,...
Houseboat update, Sunday, June 23, 2019 -- First of all, to anyone who ever was or is a mother, and anyone who ever had a mother, happy Mothers Day! Now back to Jersey Girl -- today she gets her forward deck rail posts. Here are two views, one from the outside looking in and one from the stern, looking forward. The extraneous lengths of scrap wood are temporary braces, to make certain they stay absolutely plumb relative to the hull as the glue hardens. Now, on to a few cleanup details before I start building the forward deck seating and hatch covers. There are two openings between forward bilge compartments that I'd like to fill before topside construction makes it difficult to get to them.
27 Jun 2019Deck & Coamings
It's about time to start closing up these six forward deck compartments, and if I do...
Houseboat update, Thursday, June 27, 2019 -- It's about time to start closing up these six forward deck compartments, and if I do it creatively and competently, they will provide water-resistant storage space for all manner of things, like a potable water tank, an anchor and line, ballast (if I need it), deck cushions and life jackets. The way I plan to do it, in three half-inch layers, the covering structure will add even more rigidity to an already exceptionally stiff hull. The middle layer will incorporate water-block and drainage channels to divert water away from the hatch openings and direct it overboard via a network of scuppers and piped drains. The top layer will be comprised of six separate hinged hatch covers, which will have nesting water dams on the underside, to surround the built-up dams around the hatch openings in the bottom layer. The exposed top surface of the hinged cover will serve as comfortable seating. If I need to, I will augment the seal on both sides with rubber weather stripping. Am I absolutely certain it will all work as intended? Hell, no! But like so many other things in this boat -- as in life -- It's worth a try.
2 Jul 2019Deck & Coamings
I'm still figuring out water management for Jersey Girl's forward deck.
Houseboat update, Tuesday, July 2, 2019 -- I'm still figuring out water management for Jersey Girl's forward deck. Here you can see how I hope to persuade water to stay out of the under-deck storage compartments. I've created a series if channels around each hatch opening, and scuppers to let water follow gravity to either the outside or into the footwell, where it will find its way out through drains connected by pipes to through-hulls. The raised curbs will be topped with rubber seals, and the hinged lid will rest on those, serving as seating when closed.
6 Jul 2019Deck & Coamings
Jersey Girl's front porch now has a nice place to sit on the starboard side.
Houseboat update, Saturday, July 6, 2019 -- Jersey Girl's front porch now has a nice place to sit on the starboard side. But wait, there's more! Under that hinged seating are three storage compartments. A similar arrangement on the port side will offer three more compartments. With the addition of one of the forward-looking windows affording a nice view over the deck, Jersey Girl is taking on a nice home-y feel.
1 Aug 2019Interior & Cockpit
After two weeks away from Jersey Girl for traipsing through Yosemite, I am back at work.
Houseboat update, Thursday, August 1, 2019 -- After two weeks away from Jersey Girl for traipsing through Yosemite, I am back at work. The forward deck area is pretty much complete, but for the railing and other details to come later. The hatch covers are installed, and they fit perfectly. The forward-facing cabin windows are screwed and sealed in place. Tomorrow, I will work on filling the spaces above and below the windows.
6 Aug 2019Interior & Cockpit
Jersey Girl is putting her best face forward.
Houseboat update, Tuesday, August 6, 2019 -- Jersey Girl is putting her best face forward. I've installed all the bead-board tongue-and-groove planks in her forward cabin bulkhead, leaving window trim and building the door for later. Tomorrow, weather permitting, I will get started on the roof. Good news: I've discovered that the same six-inch tongue-and-groove I used for the cabin will conform with the arc of the roof very nicely. This will save a lot of construction time, and it will look great from inside the cabin. Stay tuned.
11 Aug 2019Deck & Coamings
Please allow me a small moment of reflection.
Houseboat update, Sunday, August 11, 2019 – Please allow me a small moment of reflection. Patience is right up there, among the most critical requisites for boat-building. Case in point: I have no control over the weather or even the ability to know what it will be, so all I can do is cover Jersey Girl up with tarps when I finish working on her for the day. If I want to make it easy on myself, I take the extra time to “flake” the tarps as I remove them (the sailors among us will know what that means). For one person to flake a 20x12-foot light poly tarp in the mildest of breezes can be quite a do. So here’s a tip – with each fold of the flake, snap on a few small spring clamps, removing them and reclamping them with each successive fold. Then, when it’s time to put the tarps back on, just fasten a couple of lines to the grommets along the leading edge of the flaked tarp, toss them over the roof and pull on the lines to haul the tarp up an over. As I work on Jersey Girl, it occurs to me that patience is a learned attribute. When I was young and had all the time in the world, I was impetuous and impulsive, and patience was nowhere in evidence. Now that I am old and relatively little time left, I seem to have all the patience I need. It's kinda counterintuitive, but there it is...
13 Aug 2019Deck & Coamings
I’m beginning to get a bit of Jersey Girl’s roof in place, and I think it’s working...
Houseboat update, Tuesday, August 13, 2019 – I’m beginning to get a bit of Jersey Girl’s roof in place, and I think it’s working out quite nicely! I’m using ¾-inch tongue and groove pine, milled to show a beaded wainscoting pattern on one side, what some people call “bead board.” Before I install each plank, I seal it topside and inside with two coats of epoxy, then set it up temporarily for fitting, drilling and countersinking pilot holes. I put a pencil mark on the topside of each rafter to show the limit of where I’ll spread glue, then take the board down and cut it to the exact length. Finally, I spread thickened epoxy on the tops of the rafters, put the board down where it belongs, and screw it into place. Sometimes, I find I need to persuade the tongue of a board to fit into the groove of the full eight-foot length of an adjacent plank with a good deal of force. I choose not to whack away at it with a hammer! Instead, I temporarily screw down the plank at the end that fits, then, about two-thirds along the length of the board I protect both the tongue and the even-more-fragile groove with form-fitting scraps cut from similar stock and use a long bar clamp (the screw kind, not the ratchet kind) to apply gradual force until I get a snug fit. I leave the beaded side of the board showing on the inside of the cabin roof, knots and all, making for a nice rustic cottage look. I’m leaving overhangs at the forward and aft ends of the roof, just because I think it looks nice. At the aft end, rainwater will drain off the roof directly into whatever body of water Jersey Girl is floating in (or the road, if she’s on her trailer). At the forward end, the overhang will serve as a drip-cap, preventing water from running down the forward cabin bulkhead and finding its way inside, past window and door frames. From the forward deck, it should find its way to any of the four deck drains, and flow through the under-deck drainage piping to either of two scuppers on the port and starboard sides. More about patience: I find I don’t really have to make a choice between patience and impatience, or between instant and delayed gratification. Instead, I find a balance – immense satisfaction at each stage of the building process. It might not work for everyone, but it seems to keep me content.
14 Aug 2019Interior & Cockpit
Roofing on Jersey Girl progresses.
Houseboat update, Wednesday, August 14, 2019 -- Roofing on Jersey Girl progresses. Here's a series of photos to give an idea of what the inside will look like, from the motor well aft to the bow, and up to the roof. First is where the outboard motor will be, followed by the aft deck (which will also serve as an outdoor covered solar heated shower stall). Next, the door into the aft of the cabin. On the port (left) side will be the galley, equipped with small versions of stove, sink and refrigerator. Across the center aisle is space reserved for a head, with composting toilet. Forward of the two posts is the main cabin area, with setters along both sides. The seat sections will open two ways: out toward the center to create a queen-size bed, and up toward the side windows, for storage compartments and, on the port side, for a two-person dinette. Ahead of the forward cabin door will be the forward deck, with outside seating and more storage. There will be a few more refinements for creature comfort, which I will describe at a future time. This may have started out as a "shantyboat" in concept, but I must say it has evolved to at least "shanty chic," the waterborne version of "glamping." There's an additional picture showing where the helm will be, along with the salvage ship's wheel I was able to find.
26 Aug 2019Glassing & Epoxy
As the summer is drawing to an end and cooler weather is closing in on Jersey Girl and...
Houseboat update, Monday, August 26, 2019 -- As the summer is drawing to an end and cooler weather is closing in on Jersey Girl and me, I'm working hard to seal the cabin for the winter. As you can see, I have finished the roof planking on the port half and a little of the starboard half of the raised central portion of the roof. Before I finish the starboard side, I will use the openings for access to fill the topside grooves of the planking with thickened epoxy, then sand everything to a smooth surface in preparation for fiberglass. I'll finish the planking on the starboard side and smooth that as well. But before I start work on the two "shoulders," I will have to apply the fiberglass fabric, smooth that out and prime and paint the central section. Only then will I be able to treat the port and starboard shoulders the same way. I've included a photo of the neat little (1-inch) overhang along the port edge. I think it's a nice finishing touch.
27 Aug 2019Deck & Coamings
Today's project will be to fill all the topside grooves between Jersey Girl's roof planks.
Houseboat update, Tuesday, August 27, 2019 -- Today's project will be to fill all the topside grooves between Jersey Girl's roof planks. I will be using a mixture of epoxy and colloidal silica powder to create a thickened putty. Before I can do that, I must make sure the roof is free of all the morning dew that has condensed on the surface. I give the anticipated warmth of the day a head start by toweling off standing water drops and puddles. The obvious question is how I managed to get the picture of the top surface of the roof. I could say, "skyhooks," and let it go at that, but that would be wrong. Here's how: a tall ladder, balanced between the seats on the forward deck. I don't recommend this for anyone with more than a sensible fear of heights -- or less than a sensible fear of heights, either, for that matter. One of these days, I really should invest in a decent drone with photo capability.
28 Aug 2019Glassing & Epoxy
Today is shaping up as a day of scattered thunderstorms through the night, so no...
Houseboat update, Wednesday, August 28, 2019 -- Today is shaping up as a day of scattered thunderstorms through the night, so no actual work on Jersey Girl -- until tomorrow when a 10-day run of excellent building weather is forecast to start. In the meantime, I have been taking very seriously all the concerned comments from a number of observers that I am building failure into Jersey Girl's roof by fastening the planks down with epoxy and filling the topside grooves with more thickened epoxy, and planning to finish the top with fiberglass bedded in epoxy, followed by primer and paint on top of that. The concern is that because of the natural swelling and shrinkage of the wood over the course of the year, without the flexing ability of traditional caulk and a canvas cover, the grain of the wood itself would separate and split, leading to failure. So, after a night of sleepless worry, I called the gurus at Jamestown Distributors this morning and posed the problem to them. The short answer is that I will be fine doing just what I had planned. JD assures me that if the planks are all encapsulated by epoxy on both sides and all edges, and further sealed by epoxy and fiberglass on top, there will be no seasonal changes in moisture levels within the wood, and minimal expansion and contraction to worry about. Moreover, they said, the epoxy itself has a minimal ability to expand and contract with the wood. Finally, there is my own experience. More than 20 years ago, I built two cedar strip kayaks, sealed inside and out with fiberglass and epoxy applied directly to the wood. With regular maintenance, applying a fresh coat of varnish every couple of years, there has been absolutely no evidence of failure of the wood or delamination of the fiberglass, even though they are stored outside (under a roofed but open shelter) during the winter. With the patina of age and heavy use, they are even more beautiful now than they were when I built them. So, with thanks to all who have expressed concern, I have decided to complete Jersey Girl's roof as planned.
29 Aug 2019Deck & Coamings
Today I finished sealing up the topside grooves between the planks I had installed...
Houseboat update, Thursday, August 29, 2019 -- Today I finished sealing up the topside grooves between the planks I had installed earlier over the raised central portion of Jersey Girl's roof. Then, with a little daylight left, I got a jump on tomorrow's work, installing the remaining planks over this section. I should finish that job tomorrow, and if I have the time, seal up the grooves between the new planks.
30 Aug 2019Deck & Coamings
The raised central portion of Jersey Girl's roof is finished, at least from a...
Houseboat update, Friday, August 30, 2019 -- The raised central portion of Jersey Girl's roof is finished, at least from a construction standpoint. All the planks are glued and screwed into place. Tomorrow, I will finish filling the topside grooves between the planks with thickened epoxy, and add a small overhang along the starboard edge. Over the next few days, I will sand and fair the top surface of the roof to prepare it for fiberglassing, priming and painting. I want to get all that done before I start roofing the "shoulders," because I think the highest part of the roof will be more safely accessible for work without the rest of the roof in the way.
31 Aug 2019Fairing & Sanding
Today started with the correction of a mistake, and ended with getting Jersey Girl's...
Houseboat update, Saturday, August 31, 2019 -- Today started with the correction of a mistake, and ended with getting Jersey Girl's central roof ready for fiberglassing. Late yesterday, pushing past sensible physical limitations, I decided to get a jump on installing the starboard roof overhang. It's a good thing I got only a little done, because I discovered this morning that it was 3/16 inch wider than the overhang on the port side. I doubt anyone would have noticed, but I know it would be a source of continuing irritation to me! I could zip through this in a few seconds with a power saw, but with questionable balance and awkward position, that might result in disaster in the blink of an eye. So I used a Japanese pull saw and a little elbow grease, and it took about 20 minutes to correct the error. Next, I installed the rest of the overhang, and when that was done, filled the remaining grooves with a thickened mixture of epoxy and silica powder. Over the next few days, I will sand the entire area as smooth as I can reasonably get it, then use a fairing compound to eliminate any irregularities, sand again. God, I hate sanding.
4 Sep 2019Interior & Cockpit
This morning, I started to sand down the fairing compound I applied to Jersey Girl’s...
Houseboat update, Wednesday, September 4, 2019 – This morning, I started to sand down the fairing compound I applied to Jersey Girl’s roof yesterday. But I quickly learned that this stuff has to be bone dry to sand easily. The morning dew that collected on the roof overnight was enough to quickly turn sanding dust into a gummy mess. So I turned my attention to something else that’s been bugging me for some time, and worked on that until the sun dried out the roof. I started closing the open spaces between the sheer of the hull and the bottom window frames, using the same beaded tongue and groove that I used for the forward wall of the cabin and the roof. In the pictures, you’ll notice I left an open area of about 11 inches. Ultimately, that will be filled with a drop-down door. I could tell you that’ll be a gun port, but that would be wrong. No, the truth is that will be an oar port. I plan to install a pair of oarlocks, to accommodate long oars that will be stored along the inside of the roof risers. If I ever find myself without engine power for any reason, I’ll be able to row Jersey Girl by walking forward and backward in the cabin aisle. I finally did get back to sanding the roof, and now that it’s done I see I will have to do one more application of the fairing compound and sand again. In today’s update, I’ve also included a couple of pictures to show Jersey Girl’s latest overall appearance. You may notice an unfilled space above the vertical gunwale boards and below the window frames. This space will accommodate a sill that will run the fill length of the cabin, canted slightly down toward the outside to allow water to run off instead of back into the cabin.
7 Sep 2019Glassing & Epoxy
I’m rocking my man glitter today, just having finished three sandings of Jersey Girl’s...
Houseboat update, Saturday. September 7, 2019 – I’m rocking my man glitter today, just having finished three sandings of Jersey Girl’s roof – the central portion of it, anyway. I’ve gone from 60 grit (very coarse), to 150 grit to 220 grit, and not it’s just about ready for epoxying and covering with fiberglass woven fabric. Except for a few small lacunae, which I will fill later today. Details, details…
7 Sep 2019Planning & Research
The adventure so far in a nutshell.
Houseboat update, Saturday, September 7, 2019 – The adventure so far in a nutshell. A friend who is building from the same design I am using for Jersey Girl asked how long we all had been building. I thought it would be worthwhile to share my answer more widely. First, however, major credit goes to the originator of the plans I am working from, even though I have made modifications: Roy Schreyer, at RoyDesignedThat.com. I started work on the long frames and bulkheads of what would become Jersey Girl on June 6, 2015, and then decided to extend the length to 20 feet, so backtracked a bit to saw the frames and add 3 feet in the middle. I ended construction for the year on August 15, 2015. I did no building at all in 2016, because I felt the need to clear space out of the garage by building a bike shed. I resumed construction on May 28, 2017, and by the time I packed her off to winter storage on November 29, 2017, she was a promising but ugly upside-down hull. I resumed work April 9, 2018, and by the time I sent her back to winter storage, she was a somewhat prettier right-side-up hull. On March 20 of this year, I resumed work again, and here she is today, September 7, 2019.
10 Sep 2019Glassing & Epoxy
I'm a local celebrity, thanks to a couple who are neighborhood real estate brokers.
Houseboat update, Tuesday, September 10, 2019 -- I'm a local celebrity, thanks to a couple who are neighborhood real estate brokers. Jon and Lee Long publish a monthly newsletter to help promote their business, and hot-off-the-presses September edition features Jersey Girl and yours truly. Meanwhile, the central portion of Jersey Girl's roof is covered in epoxy-bedded fiberglass fabric, and tomorrow, I'll start priming it.
17 Sep 2019Deck & Coamings
I spent the day making a few adjustments and improvements to the central portion of...
Houseboat update, Tuesday, September 17, 2019 – I spent the day making a few adjustments and improvements to the central portion of Jersey Girl’s roof, so I did not get to start priming it as I had wanted. First, it seemed to me that I needed to make some sort of drip edge on the roof overhangs in the forward and aft parts of the roof. Otherwise, surface tension of any water would allow it to run off the roof, over the edge and back along the underside of the overhang, and possibly intrude through the joint where it meets the cabin wall. It was a simple matter to cut thin strips of wood, angled from a quarter inch to 3/8 inch, then glue them along the underside of the arched roof. It’ll be harder for water to defy gravity and flow up, so it’ll just drip down form the leading edge of the overhang – or so I hope. Next, because I could not start sanding and priming until the glue on the drip edges cures, I spent some time laminating two more of the arched roof rafters that I used in Jersey Girl. These new laminations will be used as frames for gullwing-style roof panels, which I will install in the roof over the aft deck, to make it easier for people to board without stooping down too much. I’ll use gas-lift cartridges, similar to what you’d find in the rear hatch of an SUV, to raise and lower the gullwing panels. By the way, in making these new laminations, I used exactly the same jigs, methods and materials as I did for the roof supports. They are made of quarter-inch strips sawn from the edges of common 2 x 4 framing lumber from the big box store (in this case, Lowe’s). I am not worried about knots, because I make sure they are encapsulated between two adjacent glued strips, and I even use a strip that has broken on a knot. Trust me on this, it works really well, and the final result suffers no noticeable strength loss. Nor is there any spring-back from the curve when the lamination is unclamped from the jig. I know I’m probably going to offend the same purist “experts” who told me the last time I wrote about this that I would wind up with a “crap boat” because I was using “crap wood,” but – sorry to disappoint them – the results prove otherwise. I’m more than satisfied with the strength and the rich textured appearance of my choice of “crap wood.”
21 Sep 2019
I'm about to get back to work on Jersey Girl for the day under a cloudless blue sky,...
Houseboat update, Saturday, September 21, 2019 -- I'm about to get back to work on Jersey Girl for the day under a cloudless blue sky, and I notice a perfect half moon above, in the southwest. Life is good.
22 Sep 2019Interior & Cockpit
Now that the final finish coat has been applies to the central portion of Jersey...
Houseboat update, Sunday, September 22, 2019 – Now that the final finish coat has been applies to the central portion of Jersey Girl’s arched roof, I can turn my attention to the more easily reached “shoulders” – the two outboard sides of the roof. In preparation for that, though, I’ve decided to close in the sides of the cabin that will accommodate the head on the starboard side and the galley on the port. That’s because each of these beadboard outer walls will have windows, and I’ll need to install the dripcaps over those windows before the roofing overhangs make it difficult to do that. So, I’ve included a few pictures of how the starboard side is beginning to look with the planks temporarily put in place for fit, before gluing and screwing. The window that will go into that opening is a fixed transom-style window, but I've built a wooden frame around it, and the entire assembly will be hinged at the top so that it can open, like an awning, outward. There will be an identical wndow on the port side, where the galley will be. By the way, I’ve made a design decision: The decoration on the door to the head will be a crescent moon and a plaque that says “Ship’s Library.” At least, that’s my inclination du jour.
24 Sep 2019Interior & Cockpit
Jersey Girl is really stylin' now.
Houseboat update, Tuesday, September 24, 2019 -- Jersey Girl is really stylin' now. Here's the aft starboard corner of her cabin. Just forward of the beadboard bulkhead separating the cabin from the aft deck is the space for what I will call euphemistically the "Ship's Library." Or, possibly, the "Throne Chamber." Or, maybe both. Tomorrow, I will begin work on the roof over the starboard side.
2 Oct 2019Deck & Coamings
Jersey Girl is two boards shy of a roof.
Houseboat update, Wednesday, October 2, 2019 -- Jersey Girl is two boards shy of a roof. The forecast called for a brief downpour at 6 p.m., and I thought I could beat it with the last two boards. But reality and forecast diverged at about 4:45, and I got caught with a line of freshly applied epoxy adhesive, in the groove of the third to last plank. What could I do? I decided to go ahead and glue and screw the board down in the middle of the soaker. I suspect it will be OK, but I'll have to wait and see. Just as I pulled my last tool in out of the rain and prepared to haul the tarps over the roof, the rain stopped as quickly as it had started, and the sun broke through and shone splendidly. But I will still have to cover up; the forecast is for stormy weather to start again at about 10 p.m. and go all the way through tomorrow night.
2 Oct 2019Glassing & Epoxy
Aaaand, Jersey Girl has her raincoat on.
Houseboat update, Wednesday, October 2, 2029 (Part 2) -- Aaaand, Jersey Girl has her raincoat on. She'll be comfortable enough to see her through tomorrow's stormy weather, I think. Even after I get those two final roof planks on, I won't be quite finished the roof, and I'll have to use the tarps until I am finished. First, I will have to screw and glue two-inch wide tongue-and-groove strips all along the side edges, to serve as overhangs to direct water away from the sides of the boat. Next, I'll sand both side "shoulders" to get ride of any epoxy lumps. Then I will need to apply at least two coats of fairing compound to fill the grooves and cover the screw heads, sanding after each application. After that, there will be an epoxy-bedded layer of fiberglass cloth, followed by an additional coat of epoxy. Then, sanding, two coats of primer an finally, two coats of finish paint. Only then will I be free of the tarps!
5 Oct 2019Deck & Coamings
Jersey Girl's roof is structurally complete.
Houseboat update, Saturday, October 5, 2019 -- Jersey Girl's roof is structurally complete. The next step is to fashion inch-and-a-half overhangs along both sides, like the one shown here on the port aft section. For this, I mill my own tongue-and-groove planks, fit them into position, measure 1 1/2 inches out from the longitudinal side roof beam, mark and cut. Because of slight variations in construction, there will be variations in the width of the overhang plank, but when it's done it will all look quite uniform. How did I settle on 1 1/2 inches? I want to keep the total width of the boat within 8 feet, and overhang boards any wider than that would have exceeded that critical dimension. Why 8 feet? That's the maximum allowable width of a towed trailer without an escort.
7 Oct 2019Glassing & Epoxy
All the side overhangs on Jersey Girl's roof are complete.
Houseboat update, Monday, October 7, 2019 -- All the side overhangs on Jersey Girl's roof are complete. But I still have to use tarps to protect her from rain, because the roof is not yet sealed with epoxy, fiberglass, primer and paint. I need six or seven rain-free days with warm temperatures to do that.There's more to making and installing these simple overhangs than meets the eye, so I'll post a separate description and photos of that process later tonight. But first, because a storm is forecast until 10 tomorrow morning, I must get Jersey Girl's raincoat on her.
7 Oct 2019Deck & Coamings
Here’s how I measure and make the side edge overhangs for Jersey Girl’s roof.
Houseboat update, Monday, October 7, 2019 (Part 2) -- Here’s how I measure and make the side edge overhangs for Jersey Girl’s roof. First, because of construction variations involving how individual roof planks fit together at their tongue-and-groove joints, I observe that the final side edges are not uniform. That means that the overhang planks will have to be tapered in one direction or the other, and possibly wider at the fore and aft ends and narrower in the middle. To check the variations, I start by using a scrap piece of tongue-and-groove as a measuring block. Having settled on a 1½-inch overhang, I press the tongue of the scrap block up against the tongue of the last installed roof plank at the aft end of the cabin and use a ruler to measure out 1 ½ inch from the side roof beam. I mark that measurement on the block with a pencil. Next, I hold the block up against the appropriate end of a t&g board and transfer the measurement from the block to the board. I do the same thing at the other end of the 6-foot board, which in this instance will be the midpoint of the 12-foot cabin roof. The boards I am using are 6 feet long, longer than the 4-foot builder’s level I will use as a straight edge, so I’ll have to make another mark in the middle. I do that by extrapolating a mid-point mark on the measuring block halfway between the two end marks, and transfer that to the midpoint of the plank. Then, I know that when I connect the three marks, I’ll have a straight line. Then, I mark the position on the face of the board for proper orientation during installation (It's easy to forget which side is up or which end is forward.) WARNING: the next step, cutting along the tapered line the way I do it is inherently stupid and dangerous, and I recommend you find a safer way to do it. I do it on a contractor’s table saw, freehand, without a fence, a taper jig or an anti-kickback kerf splitter. Please don’t do it this way. Instead, take a little more time and use a Japanese pull saw, an exquisite hand tool that lets you make long rip cuts without the risk of imminent maiming! With all 10 fingers having survived my impetuous method, I then edge-glue and screw the overhang strips to the roof planks, and I have a uniform 1 ½-inch overhang all the way along the length of Jersey Girl’s roof.
13 Oct 2019Glassing & Epoxy
It took a grand total of an hour and 15 minutes to sand all the green fairing glop...
Houseboat update, Sunday, October 13, 2019 -- it took a grand total of an hour and 15 minutes to sand all the green fairing glop smooth on the starboard side of Jersey Girl's roof. There are a few random slightly low spots where the epoxy-based compound did not quite fill to the surface of the grooves between some of the roofing planks. I know that if I leave it the way it is, the low spots will telegraph through the epoxy-bedded fiberglass that will cover the roof, but I also know that they will be largely concealed (in all but the strongest dawn and sunset sidelight), once the primer and paint are applied. Even then, they will be visible only to birds soaring overhead. And what's visible to any humans who happen to be standing on the walls of canal locks as Jersey Girl passes through will serve as a visual cue to her humble and honest roots. As you may be able to discern, I've convinced myself -- I'm going no further. Jersey Girl is shanty boat chic, not the royal yacht Britannia.
19 Oct 2019Interior & Cockpit
I have some progress to report in my drive to close Jersey Girl’s cabin before the...
Houseboat update, Saturday, October 19, 2019 – I have some progress to report in my drive to close Jersey Girl’s cabin before the cold winter weather sets in. Over the past few days, I have found time to work on the port side, closing up the spaces under the windows on the port side, and completing the outer walls at the aft quarter on the port side, the space where the galley will be, sometimes, a special challenge will pop up, requiring a little thought before a solution is reached. In this case, it just so happened that the tongue-and-groove beadboard I am using for siding [presented a groove exactly at the trailing edge of the aft-most cabin window on the port side, just where I really wanted it to be a solid edge. The solution: carefully cut the tongue from a scrap of beadboard left over from an earlier solution to another problem, and glue it into the unwanted groove. Let the glue set, and voila! just the solid edge I was hoping for. Tomorrow, rain is in the forecast, so I will not be able to ‘glass the roof. But Monday is supposed to be rain-free, with a high in the upper 60s, perfect for epoxy and fiberglass work. We shall see.
21 Oct 2019Glassing & Epoxy
The port side of Jersey Girl's roof is fiberglassed.
Houseboat update, Monday, October 21, 2019 -- The port side of Jersey Girl's roof is fiberglassed. While the epoxy it's bedded in cures, I'll move over to the starboard side. Remaining to do on the roof: trim the edges of the fiberglass fabric, give it a light sanding, followed by an additional application of epoxy, two coats of primer and two coats of topside paint. Also, I will have to build, fiberglass and finish the two "gullwing" sections of the roof and install them with hinges and gas-lift struts. The uncharacteristically warm autumn has treated me (and Jersey Girl) very well.
23 Oct 2019Deck & Coamings
As the epoxy-bedded fiberglass cures on both sides of Jersey Girl's roof, it's time to...
Houseboat update, Wednesday, October 23, 2019 -- As the epoxy-bedded fiberglass cures on both sides of Jersey Girl's roof, it's time to start on the gull wing sections, which will be hinged and lift up to allow easier access to the aft deck when boarding from a dock. Earlier, I laminated curved pieces patterned after the roof beams. Now, I temporarily screw them into the aft bulkhead of the cabin and the forward beam of the aft-most section of fixed roof. Before I do that, however, I protect any wood I don't want to become a permanent part of the assembly from any stray epoxy. I also use thick washers as temporary spacers to establish a 3/16-inch gap to assure the gull wing won't bind as it is raised and lowered. The first piece of tongue-and-groove installed against the center longitudinal beam must be ripped on the table saw to eliminate the groove, and it must be cut on an angle to accommodate the angle of the roof at that point. I will be using continuous hinges on this assembly, so I use a scrap of such a hinge as a temporary spacer to tell me how much of a gap I have to leave. As night fell and I had to stop work, I was one board and an overhang away from finishing the gull wing on the starboard side. I will take advantage of fine weather to finish this side and perhaps do the other side tomorrow.
24 Oct 2019Deck & Coamings
Jersey Girl's starboard gull wing is complete, but for the face board under the...
Houseboat update, Thursday, October 24, 2019 -- Jersey Girl's starboard gull wing is complete, but for the face board under the overhang, which will tie it in visually to the surrounding stationary roof. When the epoxy cures, I will remove the six temporary screws holding it in place, install the hinges and finish it up with fiberglass and paint, matching the rest of the roof. I am considering using gas lift struts, like the ones on the rear hatch of an SUV, to raise and lower the gull wings. Now, on to trimming the fiberglass fabric hanging down from the roof, giving everything a light sanding, and applying one more coat of epoxy.
24 Oct 2019Glassing & Epoxy
Now that the epoxy on the starboard aft gull wing has cured enough, I can remove the...
Houseboat update, Thursday, October 24, 2019 (part 2) -- Now that the epoxy on the starboard aft gull wing has cured enough, I can remove the six temporary retaining screws and lift it enough to give an idea of what it will look like in use. Pretty nifty, eh what? I'll bring it into the house for a full cure overnight, and tomorrow I will start finishing it with a layer of fiberglass. I expect it will be next week before I can permanently install it with a piano hinge.
25 Oct 2019Fairing & Sanding
The starboard gull wing has its face board installed and its green fairing glop applied.
Houseboat update, Friday, October 25, 2019 -- the starboard gull wing has its face board installed and its green fairing glop applied. When this cures, I'll sand it down, then fiberglass it. Now, on to the same treatment for the port side, and a whole bunch of long- deferred little details that have to be attended to.
26 Oct 2019Deck & Coamings
Jersey Girl's roof has its first coat of primer.
Houseboat update, Saturday, October 26, 2019 -- Jersey Girl's roof has its first coat of primer. That, plus attending to some pesky leaks that were diverting rain water from the decks into the cabin, is how I spent my Saturday. Rain is forecast for tomorrow, so I'll learn how successful my efforts were.
28 Oct 2019Deck & Coamings
Yesterday's downpour provided good information on Jersey Girl's leaky places, so I...
Houseboat update, Monday, October 28, 2019 -- Yesterday's downpour provided good information on Jersey Girl's leaky places, so I spent today attacking as many of the points of vulnerability as I could get to in one day. First, I fiberglassed the starboard gull wing roof section, knowing it would take the rest of the day for the epoxy to cure sufficiently for me to put it in place. Next, I applied a second coat of epoxy to the two tongue-and-groove boards I would need to finish building the port gull wing roof section, and set them aside to cure. After that, I edge-cut thin strips from an inch-thick board, for use as drip-edges on the forward and aft ends of the roof shoulders, to prevent water from curling around the end-overhangs of the roof and flowing into the joint between the cabin walls and the undersides of the roof planks. Then, I cut filler strips of plywood to start closing gaps between the aft deck and the roof posts, and to serve as a bulwark against seepage at the joint between deck and the base of the cabin wall. The last things I did in a busy day was to position the newly fiberglassed starboard gull wing in hopes it would help prevent rainwater from entering the still-uncovered deck hatches under it, and built the port gull wing in place. An all-day rain is forecast to start Tuesday mid-morning, so we'll see if I am on the right track.
3 Nov 2019Glassing & Epoxy
With night-time temperatures dropping into the 30s, it's far too cold for epoxy to...
Houseboat update, Sunday, November 3, 2019 (Catching up on recently completed work...) With night-time temperatures dropping into the 30s, it's far too cold for epoxy to cure properly outdoors. But I can bring discrete Jersey Girl components into the garage, heated to a nice, toasty 65. Here's the port side gull wing roof panel, already faired and given a sealing coat of epoxy. Tomorrow, when it's cured, I will see if any areas have absorbed so much epoxy that it will need a second sealing coat. When I am confident that it is properly sealed, I will lay a section of fiberglass fabric over it and work epoxy through the weave until it is saturated. In the meantime, I will work on organizing this incredibly messy garage; I'll be spending a lot of time in it this winter.
4 Nov 2019Glassing & Epoxy
I know that many people reading this are already knowledgable in how to lay down a...
Houseboat update, Monday, November 4, 2019 (catching up on recently completed work) -- I know that many people reading this are already knowledgable in how to lay down a smooth application of woven fiberglass fabric and bond it to a wood surface with epoxy, and some others do not know and really don't care. This is for the few in the middle. After giving a quick, light sanding to the cured epoxy I applied yesterday to the port side gull wing panel of Jersey Girl's roof, I cut a slightly oversized piece of the fabric, using ordinary dollar-store scissors, and smoothly draped it over the surface. As you can see, it's an opaque, reflective white, completely obscuring the wood underneath. Then, I mix up a batch of epoxy resin and hardener. (Not too much, because as soon as the two parts contact each other, the catalyzing chemical reaction begins, and in 20 minutes or so, the mix begins to gel to a point where it's increasingly difficult to work.) I drizzle a line of the mixed epoxy along the center of the area that I want to saturate, and using a plastic auto body putty spreader, I start to gently squeegee it out to the edges. I make subsequent passes with increasing pressure, working the mixture into the weave of the fabric. As you can see, the opacity disappears and the cloth becomes transparent as saturation takes place. I want to saturate the weave on this first application, not fill it to the point where the texture disappears. The danger of slapping on too much epoxy is two-fold. First, it will almost certainly cure with ugly drips and curtain-like runs, and second, it can actually cause the fabric to float above the surface of the wood, interfering with a good bond. I gently work the epoxy out from the center to the edges, avoiding any strokes that could pull the fabric into bunched-up ridges. When I think I'm done, I inspect the surface carefully to see if there are any patches that are still somewhat opaque, and if there are, I work a little more epoxy into those areas. Then, I look at the surface from different angles to spot any drips or ridges in reflected light. Finally, I use a disposable foam brush to gently tip out any imperfections. That it. After it's cured, I'll use a utility knife to trim the excess fabric from the edges, and sand the edges smooth. Now, while it's curing, I will move on to the task of plugging up some remaining leaks from the decks into the cabin.
5 Nov 2019Deck & Coamings
The storage compartments under Jersey Girls forward decks seem to attract rainwater!
Houseboat update, Tuesday, November 5, 2019 (catching up with recently completed work) – The storage compartments under Jersey Girls forward decks seem to attract rainwater! This wasn’t supposed to happen, thanks to a system of channels and scuppers I devised to gently persuade water to flow overboard by a clever path of least resistance. Or so I thought, and maybe I was right for most of the water, some of the wet stuff apparently was able to find a path of even leaster resistance. A prime suspect were the unfinished deck edges outboard of the six rail posts that will eventually support a railing and gates around the forward deck. Some of these leaky spots were more obvious than others. Obvious or not, now is a good time to take care of this detail. I do this by cutting three thicknesses of half-inch plywood, stacking them up, and gluing and screwing them into the voids where the posts were installed much earlier in the year. Eventually, probably in the spring when I have warmer weather, I’ll grind these flush and finish off the edge by squirting thickened epoxy under the deck along the sheer line, and cover the joint with a nice (and tough) white oak rub rail.
8 Nov 2019Deck & Coamings
Moving back to Jersey Girl’s aft deck, I decide to make some improvements to channel...
Houseboat update, Friday, November 8, 2019 (Catching up on recently completed work) – Moving back to Jersey Girl’s aft deck, I decide to make some improvements to channel and scupper system I designed for the forward deck. I think that some of my leakage problem may stem from the half-inch height of the channel that allows water to flow overboard – it may not be big enough for the volume of water that needs to pass through it in an all-day soaker. So for the aft deck, I have decided to make the thickness of the dams around the hatch openings (and under the deck surface as well) 3/4 inch. I’m getting that thickness by using two layers of 3/8-inch plywood for the channel walls, epoxied together. It’s too cold outside today to build them up on the deck itself, so I’m prefabbing them in the heated garage, then, on the fist reasonably temperate and dry day outside, I’ll glue and screw them into their appropriate places.
9 Nov 2019Deck & Coamings
While I’m waiting for a warmer day to install the channel and scupper system on Jersey...
Houseboat update, Saturday, November 9, 2019 (Catching up on recently completed work) – While I’m waiting for a warmer day to install the channel and scupper system on Jersey Girl’s aft deck, it’s a good time to put the fiberglassed and primed gull wings into their places on the port and starboard sides of the roof over the aft deck. Not only do they make the whole boat look a lot better, they also help to keep rain on the outside, where it belongs.
19 Nov 2019Deck & Coamings
I’ve now installed all those scupper system pieces I made last week on Jersey Girl’s...
Houseboat update, Tuesday, November 19, 2019 – I’ve now installed all those scupper system pieces I made last week on Jersey Girl’s aft deck. Here, you can see how they are arranged on the port side, with the intent they will direct water to any of three places: either overboard toward the side, or into the depressed foot well area, or into the motor well. If the water goes into the foot well, it’ll flow from there through two previously installed scuppers into the motor well, and from the motor well it’ll go overboard through a scupper through the transom. Also, you can see how the hatch openings are surrounded by dams, to stop water from going down into the storage compartments below. And you can see how this system of channels will be topped by plywood panels, leaving room for hinged, flush-mounted hatch covers that will be strong enough to sit, stand or walk on. Finally, you can see how one of the under-deck scuppers leads from the channel system to the port side, along the sheer. Eventually, I’ll install a white oak rub rail along the sheer line, with openings cut into it to allow the free flow of water overboard.
26 Nov 2019Deck & Coamings
The hatch and drainage system for Jersey Girl’s aft deck has been installed (finally),...
Houseboat update, Tuesday, November 26, 2019 – The hatch and drainage system for Jersey Girl’s aft deck has been installed (finally), and I’ve cut pieces of half-inch plywood to serve as hatch covers on the port and starboard sides. Over the next few days, I’ll finish them up with sealing coats of epoxy and face strips to make them look good. The hatch covers will be solid enough to sit on and to walk across while entering and exiting. I hope the under-deck drainage system will be effective in excluding water from the storage compartments below and sending it overboard where it belongs.
27 Nov 2019Hull Panels
It's time clean up Jersey Girl's homeport in preparation for the winter.
Houseboat update, Wednesday, November 27, 2001 -- It's time clean up Jersey Girl's homeport in preparation for the winter. That means getting rid of old, tattered tarps that have been folded up and stowed under her hull, converting pieces of scrap wood offcuts that have littered the driveway into firewood, and disassembling the scaffold. Now that the roof is completed and protected for now with primer, I won't be needing the scaffold until spring. But JG will be staying right where she is over the winter, and work will continue. Bit by bit I will be closing in the cabin against the weather, and then I'll start fitting out her interior accommodations. So please keep checking for further developments!
30 Nov 2019Deck & Coamings
Jersey Girl’s aft deck hatch covers are functionally complete, which is to say they...
Houseboat update, Saturday, November 30, 2019 – Jersey Girl’s aft deck hatch covers are functionally complete, which is to say they fit and they are well sealed with several coats of epoxy – and they cover the hatches, which is what they are supposed to do. Finishing touches, like fascia boards and hinges will await the arrival of warmer weather. In the meantime, I think they’ll keep the weather away from the bilges, and that’s good enough for now. Today, I’ll start to pay attention to the window openings in the head area on the starboard side and the galley area on the port side. As I work on Jersey Girl, my mind wanders to that time in the foreseeable future when we’ll be on the water, and I conjure up thoughts of what that will actually mean to me. In part, at least, it will represent – more than a conveyance, or a mode of transportation – a portal into a different time, place, world, way of seeing and way of being. Constantly surrounded by the hard artifacts of modern life, we tend to lose the sense of wonder that is of core importance to our existence as human beings. I believe that Jersey Girl, at speeds from zero to six miles an hour, will be a source of restoration.
2 Dec 2019Interior & Cockpit
Today, I got a start making the tilt-up awning-style windows to fit the openings in...
Houseboat update, Monday, December 2, 2019 – Today, I got a start making the tilt-up awning-style windows to fit the openings in Jersey Girl’s port-side Galley and Starboard-side head. I started with inexpensive flush-mount transom windows that manufactured to non-opening fixed windows. But because I want these to open, I’m first making a wooden frame to mount them in, and then I’ll hinge the framed windows into the cabin wall openings. So far, I’ve managed to complete one of these windows, including the outer flange that I hope will keep the weather from intruding past the frame into the cabin. Weather permitting, later this week I will complete the second one and mount them both.
5 Dec 2019Interior & Cockpit
I finished building Jersey Girl’s second aft side window today, the one that will be...
Houseboat update, Thursday, December 5, 2019 – I finished building Jersey Girl’s second aft side window today, the one that will be installed in the galley, on the port side. First, I temporarily screwed the manufactured transom window into the frame I had built earlier, so I could accurately cut and fit the four pieces that would comprise the flanges. Then I cut the flanges on the table saw, setting the blade angle at 15 degrees for the ends of the side pieces and using the dame angle to rip the top and bottom pieces, to create a natural run-off for any water that might want to find its way into the cabin. After I temporarily installed the flange pieces, I disassembled everything, and used a sealant to set the window back in place, screwed it down, and finally used a thickened epoxy to glue the flange pieces back into the place. Tomorrow, weather permitting, I'll begin to hinge them into place. You’ll notice I’m using my new favorite screw head style, square drive Robertson head screws. I had been using Frearson head screws, which look a bit like the more familiar Phillips heads but with the cross-slot cut more sharply to help prevent the spinning drill bit from “camming out,” destroying the head and making it impossible to fully drive the screw into its place. But even the Frearson head screws are vulnerable to that, and it’s a pain when it happens. Recently, my supplier (Jamestown Distributors) inadvertently sent me a bag of the square-drive screws, and after getting past my initial irritation, I thought I’d give them a try. It’s like I died and went to heaven! I’ll never go back to the screws I had been using. After a little research, I discovered that this style of screw has been in common use in Canada for over 100 years, but it only recently has made its way south of the border, beginning to replace the common Phillips head screw for many applications. Thanks, Canadian friends!
7 Dec 2019Interior & Cockpit
Today, I installed the clerestory awning window in the head area of Jersey Girl’s...
Houseboat update, Saturday, December 7, 2019 – Today, I installed the clerestory awning window in the head area of Jersey Girl’s starboard side, and I declare it a total success! But it took many steps and a minor re-do to get there. First, I realized that the stainless steel piano hinges I am using have a thickness of 3/16-inch, determined by the centerline of the hinge, where the pin connects the two halves along the 24-inch length. So I had to shave a bit of wood off the top of the window frame to accommodate the hinge. Next, I centered the hinge along the top of the window opening, using the open hinge itself as a positioning jig. I had to find a way to support the window in the open position to attach the hinge to its upper surface, and I hit on the idea of using a couple of ratchet-operated bar clamps attached to the frame of the opening, resting the window on the extended bars as they stuck out from the side of the boat. When I was fairly confident – gauging by eye – that I had the window in the right place, started to attach it, using a sharp awl to establish a screw position, then drove a single screw in near the center of the long hinge. Then I did the same thing at both ends. I didn’t want to commit myself at this point to all 12 screw holes along the length of the hinge, because if it needed adjustment it would be by so little that the existing screw holes would make it difficult to establish new ones. It’s a good thing I was cautious, because when I removed the supporting clamps and closed the window, I discovered it was binding at the lower aft corner! So I started over, using different hinge holes, and moved the window forward by about a 16th of an inch, and when I saw that it was a perfect fit, I drove in the rest of the screws. I see that water can still make its way past the hinged top edge of the window, but I’ll deal with that later by bridging the gap with a strip of heavy canvas, and by installing a continuous drip cap over all the windows along each side of the cabin, including this clerestory window. The one thing I haven’t figured out yet is where to get an appropriate piece of hardware that I can use to lock the window into an open position, as in the photo showing it propped open with a scrap of wood. It needs to be adjustable, so the window can be opened a little or a lot. Suggestions, anyone?
24 Dec 2019Interior & Cockpit
First of all, Jersey Girl and I wish you a most joyous Christmas!
Houseboat update, Wednesday, December 24, 2019 -- First of all, Jersey Girl and I wish you a most joyous Christmas! It's fairly warm for a Christmas Eve in Northern New Jersey, so I'm squeezing in a little work and taking a bit of a chance squeezing out a little epoxy. Here, I've started preparing for the aft cabin door frame, gluing and screwing a few short tongue-and-groove pieces into place over the door opening. Even though epoxy needs a 60-degree minimum temperature to cure properly, I'm not terribly concerned. All the pieces, being screwed tight, aren't moving anywhere. Eventually, I trust, Jersey Girl and I will see warmer weather, and the glue will take up the job of curing, more or less, at that time. I'm also posting a picture of one of the recently installed awning windows at the aft end of the cabin, seen from the inside.
27 Dec 2019Strongback & Molds
I took advantage of another warm December day to do a little more work on Jersey...
Houseboat update, Friday, December 27, 2019 -- I took advantage of another warm December day to do a little more work on Jersey Girl's aft door frame, installing short pieces of epoxy-finished tongue-and-groove pine at the top on the inside. Eventually, I will seal the gap at the roof, and cover it with a neat-looking moulding strip. Tomorrow, I will install a cedar head jamb and possibly the side jambs as well. (If you don't know what jambs are, check back over the next few days and all will become clear.)
28 Dec 2019Interior & Cockpit
Still blessed with warm end-of-December weather, I was able to install the head jamb...
Houseboat update, Saturday, December 28, 2019 -- Still blessed with warm end-of-December weather, I was able to install the head jamb and two side jambs of Jersey Girl's aft door frame today. The starboard jamb was the perfect 90-degree angle from the head jamb, but -- oh, no! -- the post forming the framing foundation for the port side jamb was simply not plumb. From top to bottom, it was off by a full 3/4 inch. I am not the perfectionist some people accuse me of being, and normally I might have been tempted to say, "screw it, function is more important than form, so let it be." But in this case, a door will be hinged to that jamb. Form and function must be one and the same here, or the door won't open or close properly. So I decided to use four pairs of tapered cedar shims and some scrap plywood to make the jamb stand away from the cedar post, gradually increasing the distance from zero at the top to 3/4 inch at the bottom. By sliding each pair of tapered shims in and out, I was able to precisely adjust the gap at each point along the length of the crooked post. Could Handel have been thinking of Jersey Girl nearly 300 years ago, when he wrote in Messiah, "Ev'ry valley shall be exalted, and ev'ry mountain and hill made low, the crooked straight and the rough places plain?" Maybe not, but I entertained myself with that fantasy as I struggled through the day to make my crooked straight and my rough places plain. When the glue sets, I will cut off the waste end of the shims, and I'll have a port side jamb close enough to straight for a shanty boat. Then, I will cover the gap with trim, called "casing," making sure to glue and screw the casing to both the edge of the jamb and underlying cedar post, so it serves a structural function in addition to its usual decorative purpose. Then, I will move on, keeping the refrain from Leonard Cohen in mind: "Ring the bells that still can ring, forget your perfect offering. There is a crack, there is a crack in everything. That's how the light gets in."
1 Jan 2020Interior & Cockpit
First of all, Jersey Girl and I wish everyone a most happy New Year, with the sincere...
Houseboat update, Wednesday, January 1, 2020 – First of all, Jersey Girl and I wish everyone a most happy New Year, with the sincere hope that we all may find happiness and health and deeply meaningful change during the year to come. The run of decent weather continues, so I spent a few hours today continuing to prepare a properly framed door opening in JG’s aft cabin bulkhead. You can see that the jambs are in place, and I’ve used a piece of 2-by cedar as a riser that will be under the sill, or saddle. The top of the riser is sloped downward toward the outside, so that any water running down off the door will be deflected toward the aft deck instead of in toward the cabin. Just inboard of the sloped top of the riser is a 1 x 3 ¼-inch cedar plank, installed at the same angle as the top of the riser. The actual saddle will be made of white oak, and will cap the top of the riser and the substrate behind it, overhanging the aft edge by a half-inch to make a proper saddle. White oak will also be used on the inboard side, but level instead of sloped, and with its top surface set a half-inch lower than the top of the outer saddle. This will make a lip, serving as a bottom stop for the inward-opening door to close against, in addition to the usual head and side jamb stops that will be installed. Why white oak? It’s a wonderfully dense, tight grained hardwood that holds up well in a maritime environment, and is quite rot resistant – unlike red oak, which is commonly used for interior saddles in homes. These details take time, which can be a little frustrating, but I’m convinced that in the long run they will be well worth it.
2 Jan 2020Interior & Cockpit
Today’s the day to cut a saddle from a 1 x 6-inch piece of white oak for Jersey Girl’s...
Houseboat update, Thursday, January 2, 2020 – Today’s the day to cut a saddle from a 1 x 6-inch piece of white oak for Jersey Girl’s aft cabin door. It’s a little tricky, because the inside and outside edges must be cut on an angle so that they are vertical when the saddle is installed over the 11-degree slope of the framing underneath. Not only that, but the inside edge of the “ears” that wrap around the door jambs have to be cut at the same angle so they form a close fit. The major edges are no problem; I simply set the angle of the table saw blade and cut. And cutting the inside edge of one of the ears is not too much of a problem, although I do have to cut carefully, taking into account that the undercut of the spinning blade is always considerably longer than what I can see from above as I guide the board through. I do this in two steps: first from the top, then I turn the board over, reset the fence and do it again from the bottom. If I am careful (and I am), that leaves me with a small, wedge-shaped section of uncut wood in the middle. I finish that off with a hand-held Japanese pull saw, and get a perfect result. But the ear at the other end of the saddle is a real problem, calling for a creative solution. I can set the saw blade on an angle in only one direction, and it’s the wrong direction for the inside cut of the second ear. So, after thinking about this for a few minutes while figuratively sitting in my imaginary “groaning chair” (my shop’s too crowded to have an actual one), I come up with a solution. I decide to set the blade at the normal vertical position and tilt the work piece as I run it over the blade. First, I clamp a piece of scrap wood against the fence, trying a length of ¾ x ¾-inch in a test run. I discover that’s just a bit low to give me the angle that I want, so I pick out another piece that has a 7/8 x 7/8-inch cross section and clamp that against the fence. I try running a piece of scrap wood the same width as the saddle over it, and the result is satisfactory. Finally, I try it with the white oak, and it works perfectly. Lesson learned: if you can’t tilt the blade, tilt the workpiece! After cleaning up the cuts with the handsaw, the saddle is a perfect fit. All I have to do now is sand it smooth, seal all surfaces with epoxy and glue and screw it into place.
7 Jan 2020Interior & Cockpit
I started working on the construction of Jersey Girl’s aft cabin door today.
Houseboat update, Tuesday, January 7, 2020 – I started working on the construction of Jersey Girl’s aft cabin door today. I’ve decided to make a sandwich assembly, using a piece of half-inch marine plywood as a core, faced on both sides with the same pine beadboard I’ve used elsewhere in the cabin, but thickness-planed down to a half inch. That will give me a door 1 ½ inches thick, allowing plenty of wood for hinges and other necessary hardware. Ultimately, the door will have a somewhat smaller version of the same windows I’ve used elsewhere in the cabin, for a uniform look. One interesting problem is that I happen to have a 24-inch wide sheet of plywood, but the door opening is 27 ¼ inches wide. I’ve decided to use it anyway, by including strips of pine planed down to an equal thickness as the plywood, along each side, included as part of the sandwich core. I’m pretty confident that this will work and produce a solid door that’s dimensionally stable. So, onward! The first step is to lay the window on the plywood and trace along its perimeter to mark where I will have to make a plunge cut for the opening. Then, after cutting the plywood down to size, I take the plunge. I leave a little wood at each corner, so the cutout is supported and doesn’t fall away uncontrollably and taker large splinters of the veneer with it. After I make the plunge cuts, I use a handheld Japanese pull saw to carefully complete the cuts. As expected, the window is a perfect fit. As darkness falls, I check the door for length in the opening, expecting it to be a perfect tight fit, and it is. That means I have to cut 3/8 inch from the bottom, to allow a 3/16-inch clearance between the door and the head jamb at the top and the saddle at the bottom. Tomorrow, weather permitting, I will run the ¾-inch beadboards through the thickness planer to produce the inside and outside surfaces of the door.
10 Jan 2020Interior & Cockpit
Yesterday, I temporarily installed faux rails, deliberately cut a bit too long, on the...
Houseboat update, Friday, January 10, 2020 – Yesterday, I temporarily installed faux rails, deliberately cut a bit too long, on the plywood door shape that will ultimately be the inner core of Jersey Girl’s aft cabin door. Today, I temporarily position the door. First, I loosely place a quarter-inch strip of wood on the inner saddle, to serve as a spacer to make sure the door is positioned at the correct height and allow clearance at the bottom. Then, after measuring gaps on both sides of the door to make sure it is centered between the jambs, I temporarily screw the ends of the rails into the edges of the jambs from inside the cabin. Next, I go back outside to double check that the measurements are correct from the other side of the door as well, and then I trace a pencil marking to show me where to cut the ends of the rails. Then, I remove the door and unscrew the temporary rails, making sure to mark them so they will be in the correct orientation when I reinstall them with glue. After cutting the rails on the miter saw to the correct length, I run them through a thickness planner to reduce them from ¾-inch to a half-inch. Remember, this door will ultimately be 1 ½ inches thick, so the rails, stiles and veneer boards on both front and back need to be milled to a half-inch. After sanding the rails, I glue and screw them into their proper places on the plywood core, leaving two-inch “ears” sticking out from the sides. When I flip the door onto its back, those ears will serve as supports for the half-inch pine core extensions that will become the center of the sandwich that will make up the two stiles, the hinge stile and the lock stile. Tomorrow, I’ll mill enough ¾-inch beadboard to a half-inch thickness and finish up the outside of the door.
11 Jan 2020Interior & Cockpit
Today, Jersey Girl’s aft cabin door starts to look more like a real door.
Houseboat update, Saturday, January 11, 2020 – Today, Jersey Girl’s aft cabin door starts to look more like a real door. I mill enough beadboard a half-inch, then cut everything to fit, screwing it all in place temporarily to make sure I’ve measured and cut correctly, Then, I remove all the pieces, making sure to mark them before reinstall them with thickened epoxy. I feel a little guilty about the pleasure I take in a 68-degree day on the eleventh day of January, but I’ll take it! Finally, as I close up shop for the day, I have finished the outside face of the door. I have to say, I’m pretty pleased with it. It’s strong, flat, and I like its appearance quite well.
14 Jan 2020Interior & Cockpit
Jersey Girl's aft cabin door is almost a perfect fit, and it looks good too, I think.
Houseboat update, Tuesday, January 14, 2020 -- Jersey Girl's aft cabin door is almost a perfect fit, and it looks good too, I think. Just a tiny bit of planing on the hinge side, which will be the port (left) side, and I will be ready to install the hinges and the locking hardware. Then, I will finish the door with a couple of sealing coats of epoxy, which will give it an amber color like the surrounding cabin bulkhead. Eventually, all this epoxied woodwork will be protected from UV of sunlight by multiple coats of marine varnish. On the inside, I elected to leave the plywood core showing, as an inset panel, rather than face it with pine tongue-and-groove beadboard as I did on the outside. The door is strong and rigid enough without it, the extra weight would be a detriment, and I think it looks good enough.
16 Jan 2020Interior & Cockpit
Jersey Girl's aft cabin door is, if I may use the expression without intending any...
Houseboat update, Thursday, January 16 -- Jersey Girl's aft cabin door is, if I may use the expression without intending any offense, well hung. It opens and closes freely, and with its opening, screened window in place, I think it looks pretty good. I still have a few details to attend to, which I will do tomorrow: I need to install the latch and deadbolt striker plates for the locks, then the door stop mouldings with weather seals, and finally the outside casings for a nice, finished appearance. Then, I'll go around to the forward end and do the same thing all over again.
Chapter 12
Maintenance & Changes
Life after launch: fixes, improvements, and what you would do differently.
4 daysfrom December 2023
14 Dec 2023Maintenance & Changes
With the painting of the fender washer striker plates, the finishing touches are in...
Houseboat update, Thursday, December 14, 2023 -- With the painting of the fender washer striker plates, the finishing touches are in place in Jersey Girl's combination rolling aft cabin step and storage box.
I'm just so pleased with how it all came together -- it locks solidly in any position when needed, yet rolls smoothly in and out from its recessed spot under the aft deck.
The storage box is commodious enough to hold a two-burner propane camping stove, up to eight one-pound conyainers of propane (although I don't think it's a good idea to carry that much bottled gas), and a zipper bag full of assorted tools, wiring connectors, etc.
Over the winter, I'll be sewing seven roll-up privacy curtains, with sewn-in clear vinyl windows, to surround the aft deck -- in preparation for the heated shower I plan to install back there in the spring before I re-launch for the season.
17 Jun 2024Maintenance & Changes
Jersey Girl the Houseboat, it turns out, is quite a hit with the ladies!
Houseboat Update, Monday, June 17, 2024 -- Jersey Girl the Houseboat, it turns out, is quite a hit with the ladies! JG and I had a great time on Saturday, participating in the 49th annual Lake Hopatcong Antique and Classic Boat Society's show at the elegant Lake Hopatcong Yacht Club.
Lemme tell ya, JG and I have never before seen so much high-gloss mahogany in one place at the same time!
But among all the women who voted, the clear favorite was none other than Jersey Girl! My well-built little babe came home with three awards, including the coveted "Ladies' Choice" plaque. She also won the award for "Best Restoration by an Amateur," even though she was relatively newly built (not restored), and launched in 2021 after six years of construction. Finally, JG won one of several gag awards, the Lake Hopatcong Realty Board's prize for "Most Portable Lakefront Home."
My personal favorite (after Jersey Girl, of course) was "Mr. Frank," a sweet little 20-foot Larson Cabin Outboard Special, built in 1955 by the Larson Boat works of Little Falls, Minnesota, originally designed to be a mailboat on the Border Waters between the U.S. and Canada.
Among the other boats was "Thayer IV" -- one of four mahogany Chris-Craft runabouts used in the filming of "On Golden Pond" starring Henry Fonda and Katherine Hepburn. As you may recall, Fonda, playing the part of Norman "You old poop" Thayer, ran this lovely runabout right up onto the rocks on Squam Lake in New Hampshire, the movie stand-in for the fictional Golden Pond. Needless to say, the restored "Thayer IV" showed no sign of rock damage.
(Here's a bit of trivia for you: Did you know that Chris-Craft boats were built to such exacting standards that only slotted screws were permitted -- no Phillips heads, and don't even THINK of Robbies, you Canadian builders! Not only that, the screws had to be driven in such a way that all the slots reached their final position pointed in exactly the same direction.
I'm attaching some photos of some of the boats in the show.
Next up: The "I Built I Myself" section of the Wooden Boat Show, in Mystic, Connecticut, June 18-30.
14 Jul 2024Maintenance & Changes
Ginger and I had a wonderful day with our dear friend Jim G.
Houseboat update, Sunday, July 14, 2024 (posting a day later) -- Ginger and I had a wonderful day with our dear friend Jim G. and his family aboard Jersey Girl on Lake Hopatcong on Sunday. Jim was accompanied by his daughter Audrey, son-in-law Nate, and granddaughter Morgan. Here we all are at the dock, about to explore the lake after a fine lunch at The Windlass, a lakeside restaurant. Morgan took JG's helm for a while and did a fine job piloting her through the wake of many boats speeding across the lake.
28 Aug 2025Maintenance & Changes
Jersey Girl in her new coat.
Houseboat update, Thursday, August 28, 2025 -- Jersey Girl in her new coat. I think she's looking pretty slick these days. I still haven't decided what to do with the railings. I'm leaning toward Cetol for the rub rail. Maybe for the railings as well. Whadd'yall think?
boatbuildlog.com
Jersey Girl
191 entries,
568 photographs,
written down as the work was done.
The words and photographs in this log belong to Jim Norman.