Jersey Girl · step
Deck & Coamings
Decking, hatches, coamings, cockpit rim.
Deck & Coamings on every boat, not just the Jersey Girl →
July 7, 2015. Off the drawing board and back to the sawdust. The first thing I have to do is cut the stern section off each of the longitudinal frames and splice 36 inches of new length into them. I've decided to put this spliced section in toward the aft part of the boat, between the outside portion of the rear deck area where the motor well will be and aft part of the enclosed cabin. By doing that, I can distribute the extra length between the aft deck and the head area, where I want to install an inside shower. Then, I have to cut away eight inches from the height of the deck supports forwa...
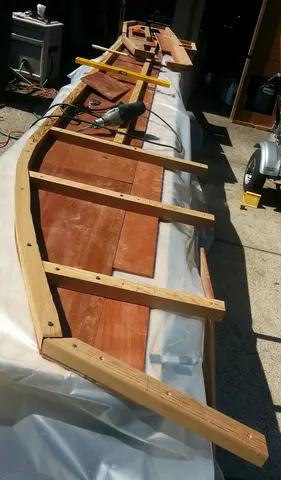
June 29, 2017. Here's the aft bulkhead, the structural wall that will separate the motor well from the rest of the aft outside deck area. The original design had below-deck access ports, which I cut in accordance with the plans. But I have since modified the design to lower the deck and lengthen the outside aft area by 18 inches, so the below deck ports will be quite difficult to get to if I have to for any reason. Instead, I will provide access to the motor well via hinged covers from the topside. So I am filling in the holes with patches cut to size, and covering the seams with a mitered fra...
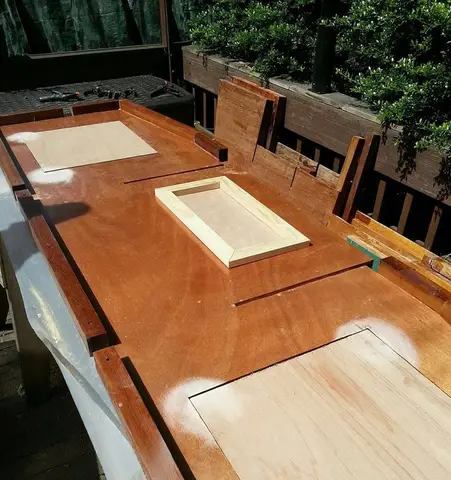
July 10, 2017. The last two of the six full-beam bulkheads, all sealed up with epoxy. No rain expected, but under shelter just the same. The one on the right will be closest to the bow; the one on the left will be the next one in, under the fore deck. The long, skinny cutouts are to accommodate the recessed deck; the others are for below-deck access and storage. I'm expecting a big delivery of more marine plywood tomorrow, then I will make the bow and stern outer panels before starting hull assembly. By the way, for those who shared my distress over the rain-pocked bulkheads a few days ago, no...
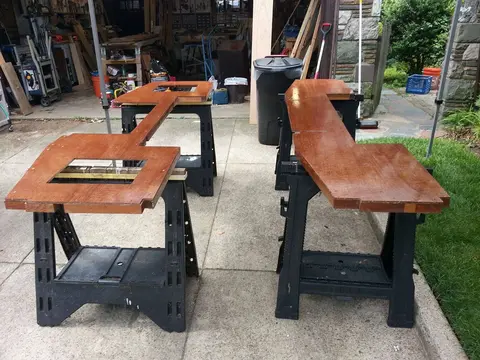
Houseboat update, Saturday, July 21, 2018 -- The motor well area is complete, with a raised and angled false bottom to allow rain water to drain through a scupper. The scupper, Jersey Girl's first thru-hull, is made from a short length of PVC pipe set in epoxy in the center of the transom. Because I did not want the true bottom to be unavailable for occasional inspection and maintenance, I cut a rectangular opening, surrounded it with wooden dam, and made a cover to fit over the opening. All the wooden parts are well sealed with epoxy, so any rain will be diverted away from the inspection op...
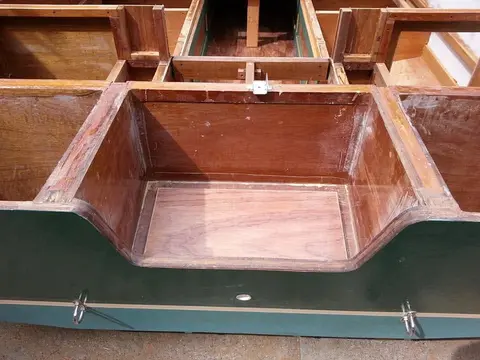
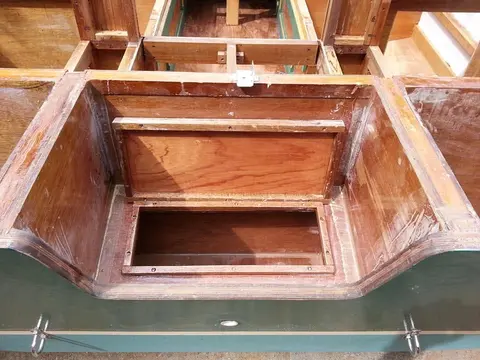
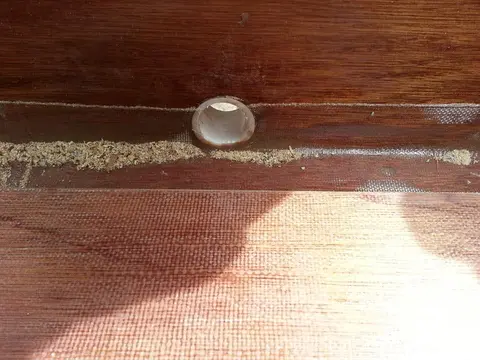
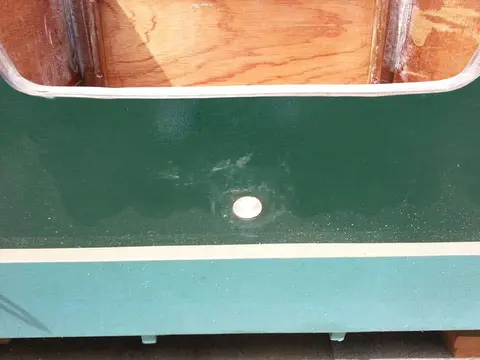
Houseboat update, Saturday, July 21, 2018 (Part 2) -- The framing for the aft deck is complete. When the deck is installed, it will be 47 inches wide by 27 inches long. The forward part of the aft deck will have a door to enter the cabin. The deck will be flanked by two seats, hinged for access to storage compartments below. One compartment will contain a tank for waste water and the other will be for fresh water. Drainage from the recessed deck will be a two-way system. The default will be passive, allowing rainwater to pass through a PVC pipe scupper into the motor well, then out the transom...
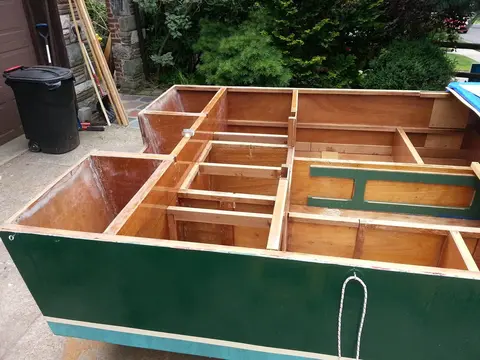
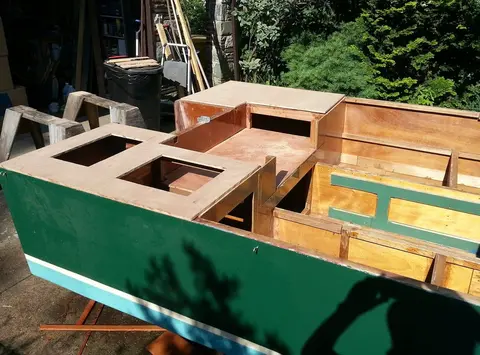
Houseboat update, Thursday, August 9, 2018 -- I'm back to work on Jersey Girl. Here you can see I have started construction on the aft deck seats and stowage areas. The hatches that I have plunge-cut with a circular saw allow access to below-decks, where I will keep water and fuel tanks. I will cut similar openings in the deck on the port side. The openings will be surrounded by wooden dams to divert water away from the openings, and the decks will be covered by hinged seats that will also serve as hatch covers. When these panels are fiberglassed and glued and screwed into place, they will hel...
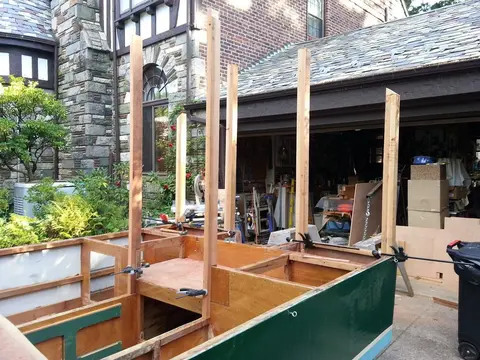
Houseboat update, Thursday, August 30, 2018 -- I am dry-fitting the support posts for Jersey Girl's aft deck roof. It was quite complicated to cut the below-deck portions of these posts to accommodate for framing, and it will require some bit of nipping and tucking before everything is shipshape. Ultimately, these posts will be chamfered along the corners, to make them lighter in both appearance and weight.
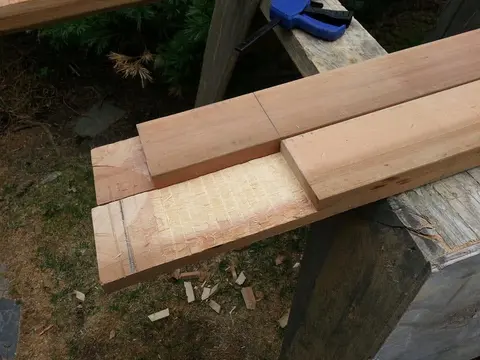
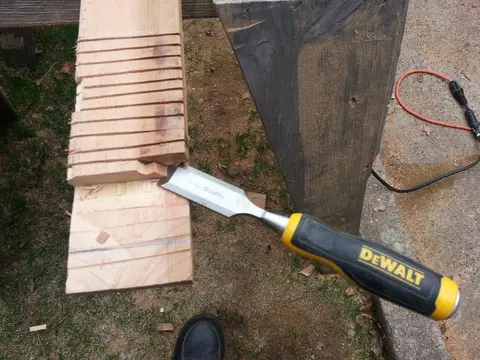
Houseboat update, Saturday, September 1, 2018 -- When I said I had to do a little nipping and tucking to make the aft deck roof posts fit properly, I wasn't kidding -- except for the "little" part. As you can see, there are quite a few irregularly sized and shaped notches that have to be cut to make sure this post fits perfectly around the below-deck framing and still stand plumb in relation to the hull. A circular saw is good to start with, but to really make it fit, I had to fall back to more traditional tools -- a hammer and chisel, a hand plane and a Japanese pull saw. The fit is now perfe...
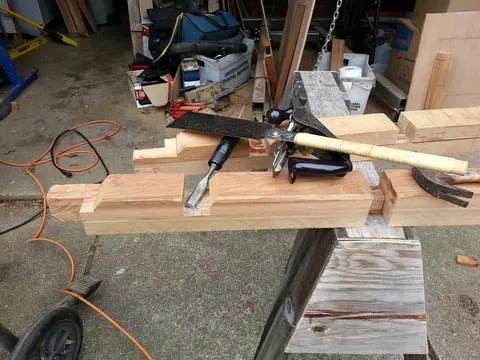
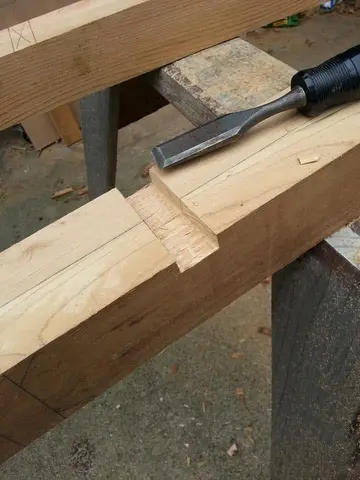
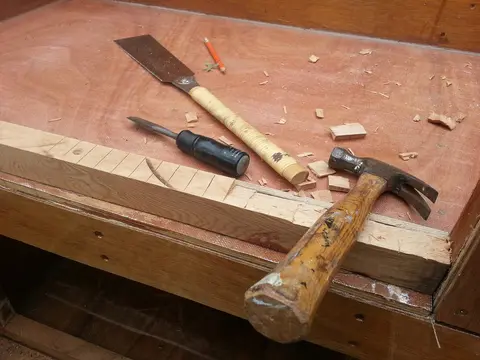
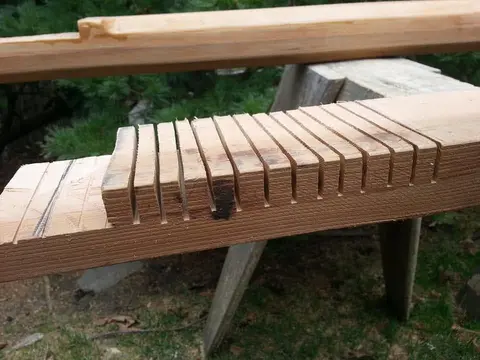
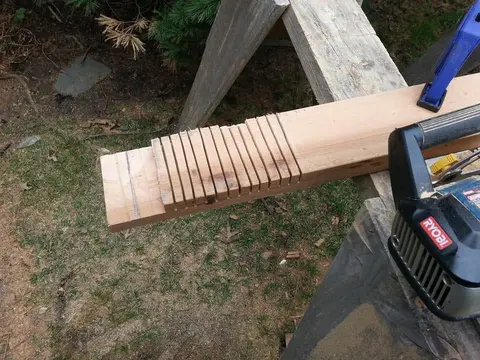
Houseboat update, Saturday, September 1, 2018 (Part 2) -- Here's how I cut the dadoes in the roof support posts for the railing tops and bottoms: First, I scribe where I want them with a pencil. Then, I use a circular saw with the blade set to a half-inch and make cuts within the scribed lines. In this case, for a one inch wide dado, three cuts are enough. Next, I use a hammer and chisel to knock the waste blocks down almost to the depth of the initial cuts. Finally, I use the sharp chisel blade, by hand and without the hammer, in the manner of an ultra-low angle block plane, to smooth the bot...
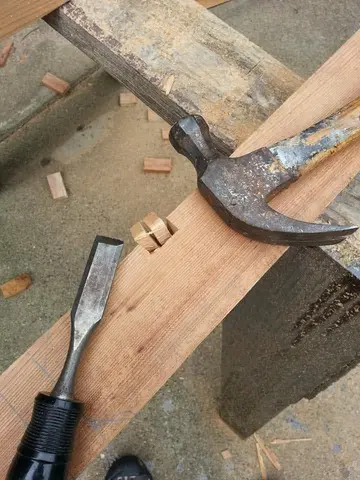
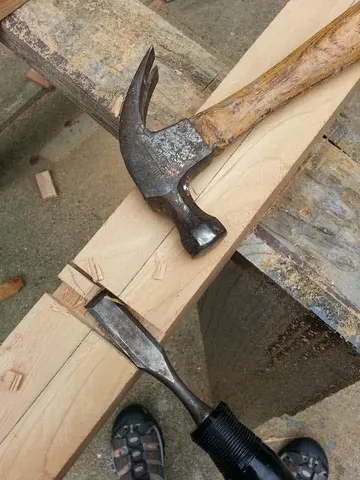
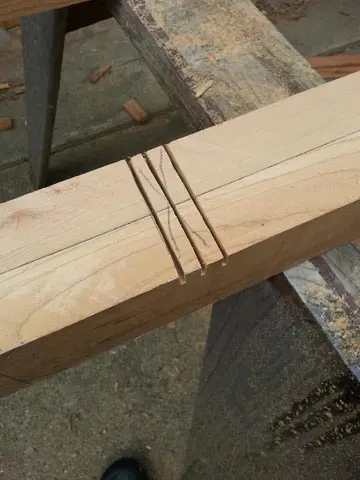
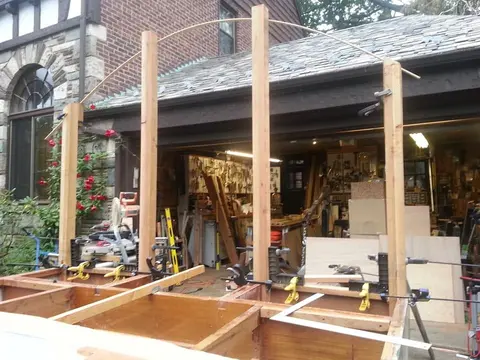
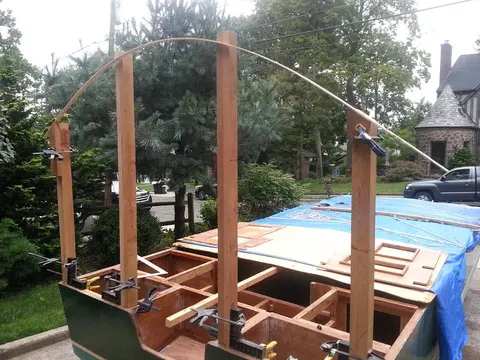
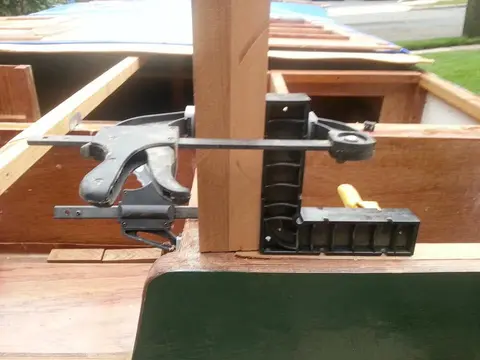
Houseboat update, Friday, September 7, 2018 -- Today was an important day. I laid out the basic shape of Jersey Girl's roof line, using a flexible batten bowed between the two aft-most outer roof posts. First, I used clamps and plastic squaring forms to make sure the posts were absolutely plumb, relative to the hull. Next, I did the same for the two inner posts, which will be fastened to the transom. Then, I fastened the batten to the 35-degree sloped top of one of the outer posts and and bent it in pleasing curved shape to the top of the other outer post. Where the batten crossed the faces of...
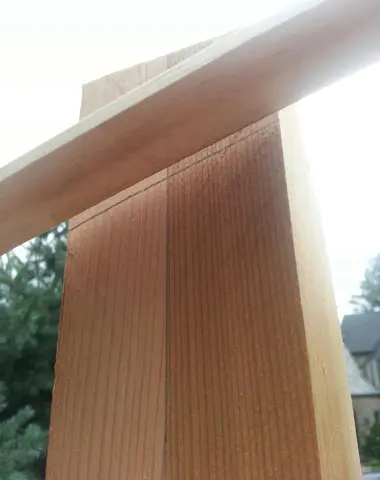
Houseboat update, Thursday, September 20, 2018 -- Back to work on Jersey Girl. Over the past week, I have almost finished the poop deck. I'm as scatologically inclined as anyone (OK, call it arrested development) and I get a kick out of writing "poop deck," but it's not what you think. It means the highest, aft-most deck on a vessel. It comes from an old French word for exactly that, "poupe." On Jersey Girl, it'll be a nice place to sit and enjoy the fresh air with a sunset cocktail, perhaps, or a place to set up my easel to do some plein air harbor painting. It'll be covered by an extension o...
Houseboat update, Monday, October 1, 2018 -- I'm starting to frame the support timbers for Jersey Girl's recessed fore deck. Like the aft deck, the "front porch" will provide space for comfortable seating for two, and a place to watch the world go by. It'll be a little tricky, because this area lacks the obvious opportunity to build in drainage. But I have a few ideas to explore, and I'm sure I'll figure it out. It'll probably involve a "thru-hull" or two. The framing that I am working on now will probably be the last thing I can do before I tuck Jersey Girl in for a long winter's sleep. I'm g...
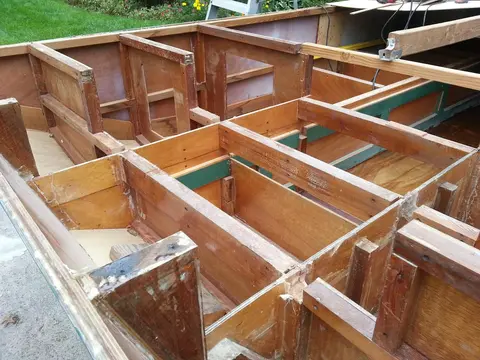
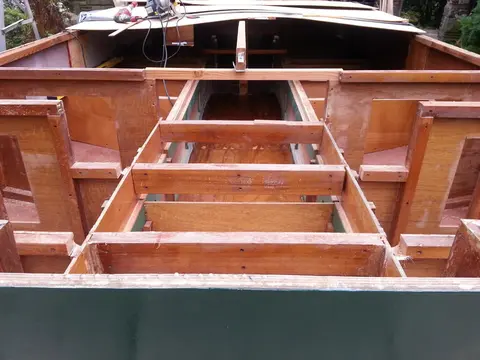
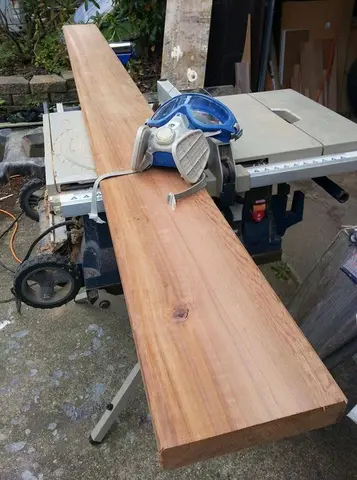
Houseboat update, Part 2, Monday, October 1, 2018 -- I'm getting ready to cut some red cedar 2 x 2s to use in framing Jersey Girl's fore deck. Cedar is wonderful wood for boats. It's lightweight and very rot resistant. I'm no "woodologist" but I suspect the same properties that make it unattractive to the critters that play a starring role in the cycle of rot also make its dust play havoc on the lungs of boat builders. Thus, the full-face respirator. I'm just making note of this in case anyone cares to engage in my obsession. Gotta protect the ol' blowholes if you want to live long enough to p...
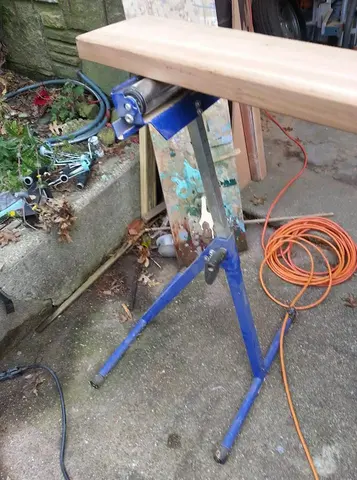
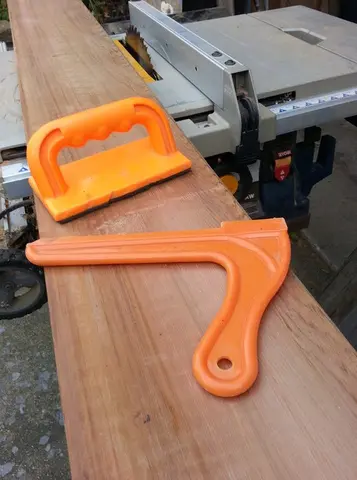
Houseboat update, Monday, October 8, 2019 – Jersey Girl gets her fore deck fitted today. After measuring carefully and cutting out notches to accommodate the framing, I am glad to report that we have a perfect fit. If it were not such a drizzly day, I’d fiberglass this piece and start working on the drainage system. But the threatening weather gives me the opportunity to restore order in my incredibly messy garage. If I can tidy up a bit, there’s a good chance I can make space to fiberglass the deck inside, then get to work on installation and drainage tomorrow. In the meantime, it felt good t...
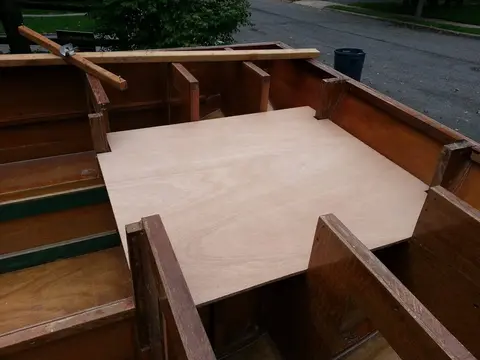
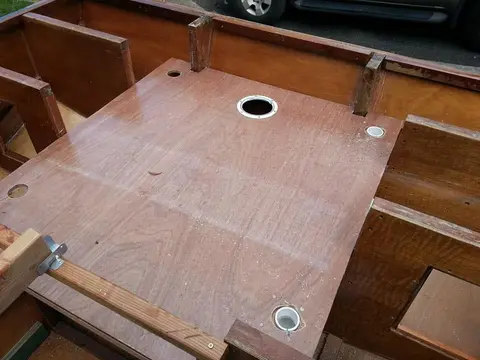
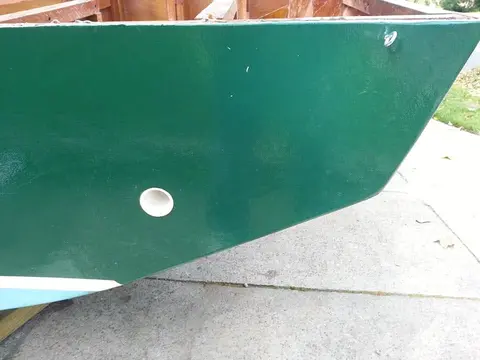
Houseboat update, Thursday, October 25, 2018 -- It's been a while since I've posted new developments in Jersey Girl's construction. Things are slowing down a bit as the temperature drops and stops the epoxy I use from curing properly. But a few last-minute details before I wrap her up and tuck her in for a long winter's sleep. As you can see, her recessed fore deck is in place, but not yet glued and screwed down. I'm in the middle of designing and installing a drainage system, so any rain or spray that might fill the recessed area will flow easily through a scupper in the side of the hull to t...
Houseboat update, Saturday, December 22, 2018 -- Jersey Girl is in hibernation for the winter, but while she sleeps her faithful builder is starting work on her Spring bonnet -- an arched roof that begins with symmetrically arched beams made of laminated cedar strips. The first step is to make a jig, a mold to set the strips against as I glue them up, the idea being to make all of them identical. The beams will be 1 1/2 inches thick, so I'm making the jig out of two layers of 3/4-inch plywood. The first step to get a nice fair arc was to establish a center line and decide the ultimate maximum...
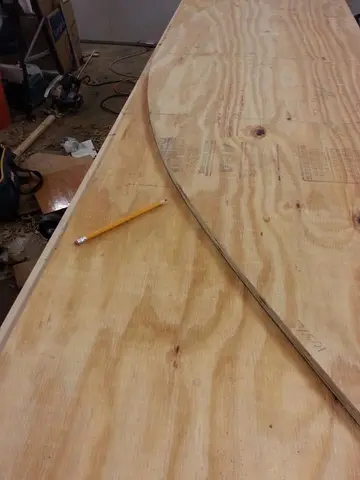
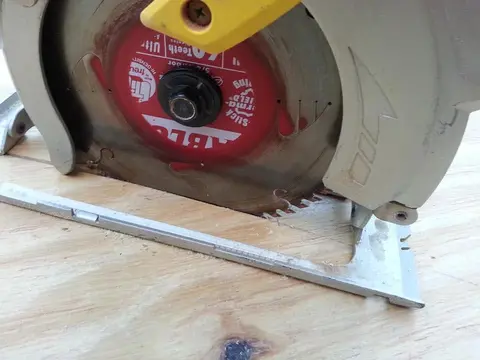
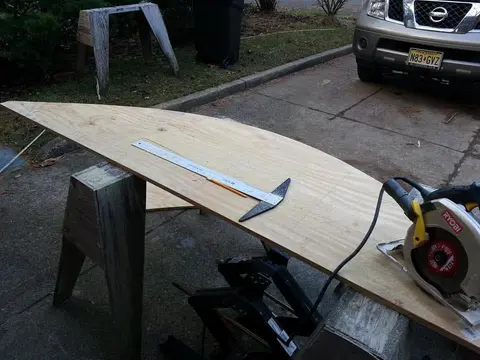
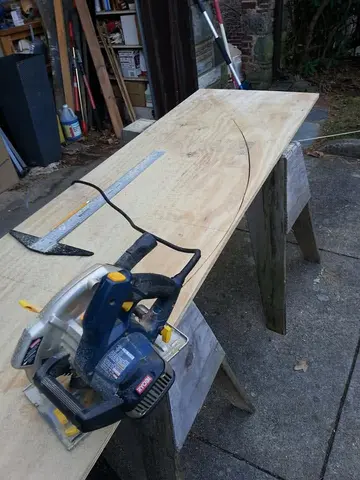
Houseboat update, Sunday, December 23, 2018 -- Still working on the jig for Jersey Girl's laminated cedar roof beams. Yesterday, I used the first arc, cut from a piece of 3/4-inch plywood to scribe the pattern onto a second piece of ply, to give me a 1 1/2-inch jig to build the laminate on. Today, I checked for symmetry by reversing the first cut arc and flopping it down on the second drawn arc, and discovered they were not quite symmetrical. So I drew a new line at the asymmetrical places, and cut along that line, then matched the new pattern up with the old and trimmed the edge of the old to...
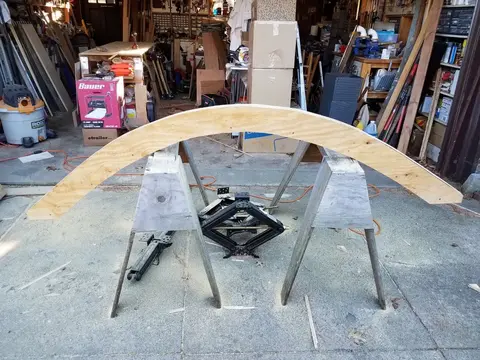
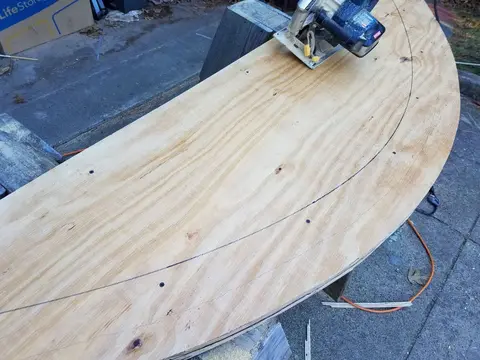
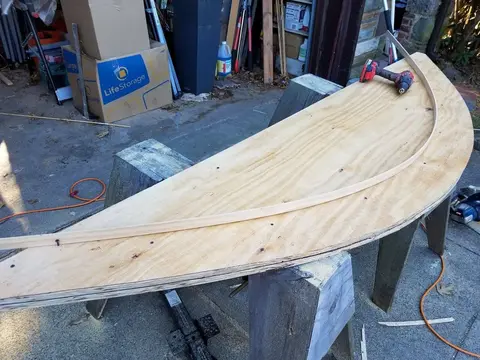
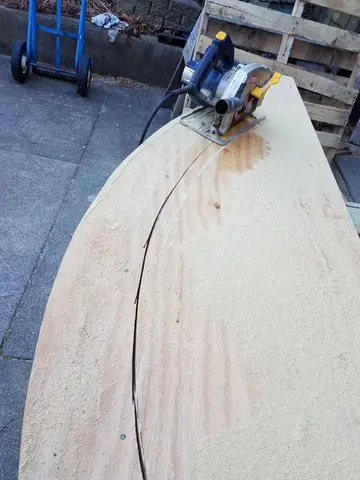
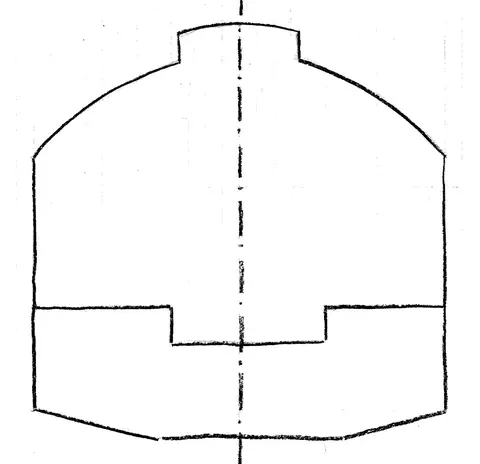
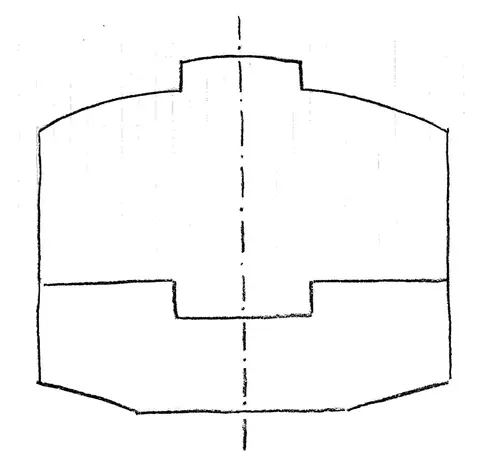
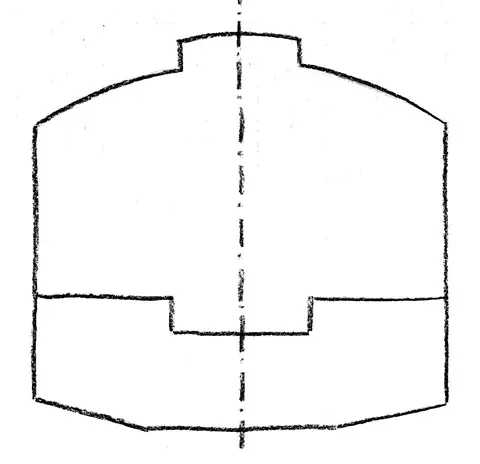
Houseboat update, Sunday, December 30, 2018 -- It's back to the drawing board for Jersey Girl's roof. My first attempt at design change, resulting in the dramatic, high-crown arch I published yesterday, does not do justice to Roy Schreyer's original design, I've concluded. My aim was to raise the headroom by about a foot, to allow more comfortable standing space on the aft deck, for entrance into the cabin and for showering. I still want to do that, but there's an aesthetically better way, I think. In the original design, the cabin sides are about 35 inches from the deck to the start of the ro...
Houseboat update, Thursday, January 10, 2019 – It’s just too cold today to saw quarter-inch strips for Jersey Girl’s roof supports, so I retreated indoors for a little art work. Here's my hot-off-the-easel watercolor, Bass Rocks 2 (14x20 inches), followed by my just-started, third in a series of Hubble-inspired spacescapes, also a 14x20 watercolor.


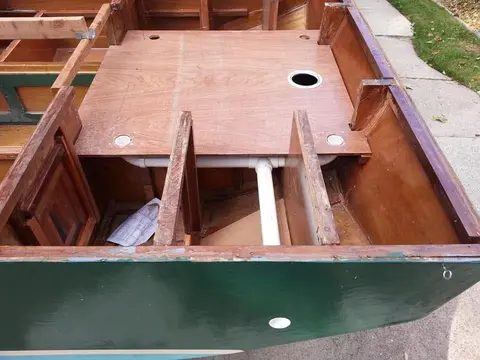
Houseboat update, Monday, March 25, 2019 -- I spent the entire day plumbing Jersey Girl's forward deck drainage system. I started by cutting 2-inch PVC pipe and laying it out in the space under the deck, then putting the deck into place to make sure the drain holes corresponded with the plumbing as I cut it. Naturally, it did not, so it was cut and fit, add and fit, cut and fit, all day long. Finally, I got the pipes to go where they need to, to carry deck water under the seats and storage compartments and out out through scuppers in the port and starboard sides.By the way, that large hole ami...
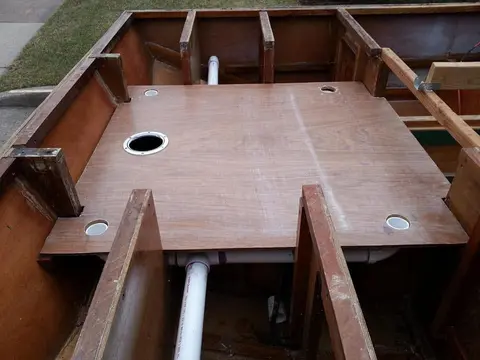
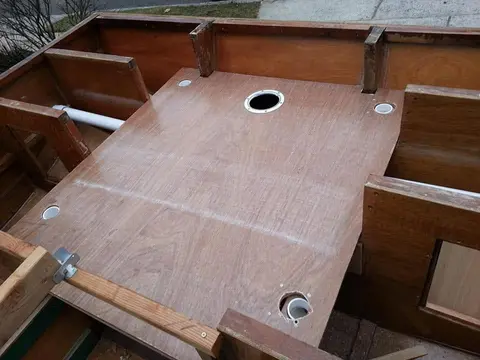
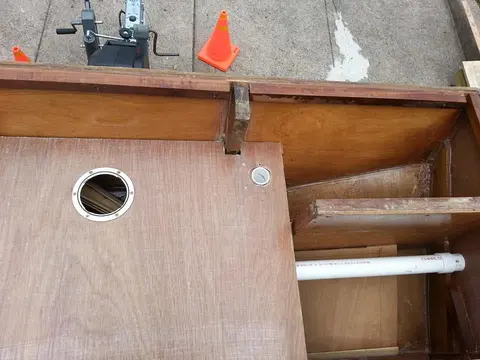
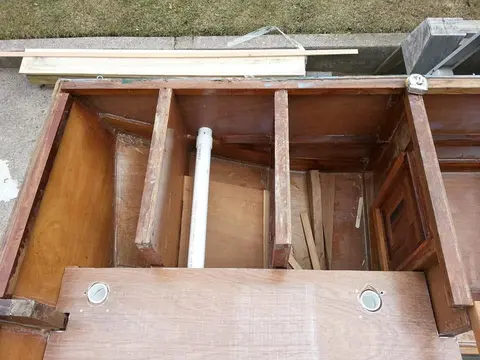
Houseboat update, Tuesday, March 26, 2019 -- Jersey Girl is growing up! It's all for fit, measurement and marking, and has to come down until the weather warms up enough to allow me to glue with epoxy. But you can see that today I put up the stern roof posts, a temporary horizontal stringer, and the first of 11 arched roof beams. In its final form, the beam will be cut into three segments. The two outboard segments will form the port and starboard "shoulders" of the roof, and the center will be about four inches higher. That'll not only give a little more headroom on the aft deck (the back por...
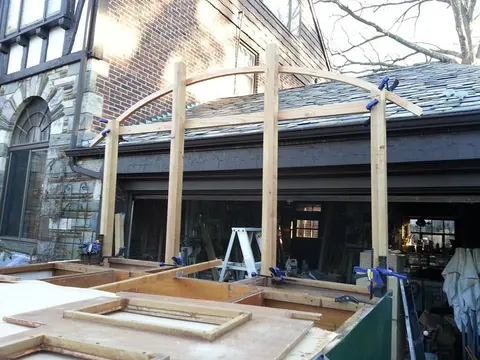
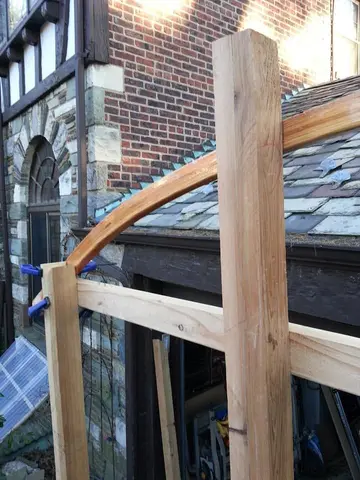
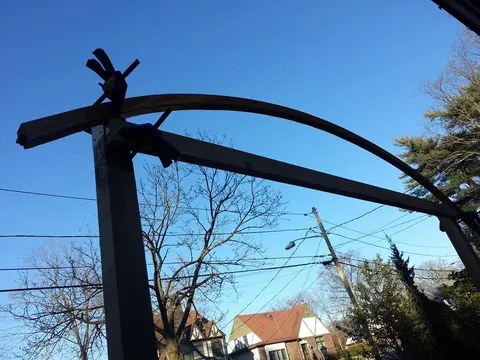
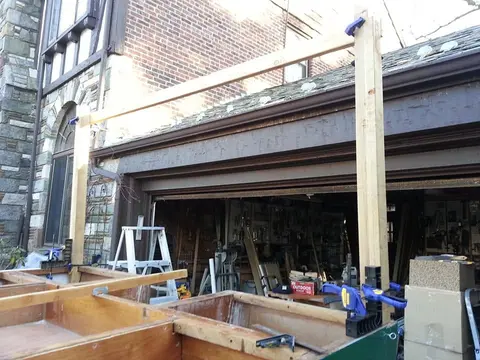
Houseboat update, Thursday, March 28, 2019 -- The cutting and fitting, nipping and tucking proceed. Here, you can see the emerging shape of Jersey Girl's roof line. The raised center portion will give 6-foot-4 of headroom on the aft deck (enough to allow a stand-up solar-heated shower out there). Stepping down into the cabin, the headroom will be a generous 8 feet and then some. Jersey Girl will be a comfortable little cabin afloat!
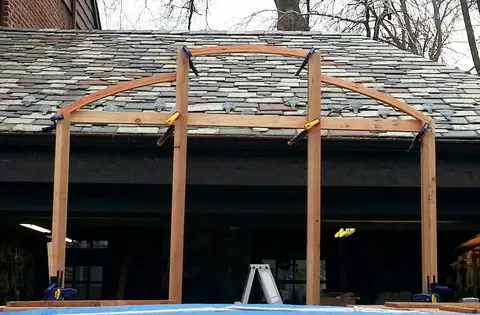
Houseboat update, Thursday, April 4, 2019 -- I am still working on the upright posts that will support Jersey Girl's roof and serve as some of the studs that the cabin walls will be fastened to. This morning, I'm cutting a long rabbet, which will be one of the support points for a 16-foot riser, running the length of the roof that will cover the cabin and the aft deck. The arched "shoulders" of the roof beams will run from the port and starboard sides to be glued and screwed to the lower part of the riser, and the beam supporting the raised central portion of the roof will span and connect the...
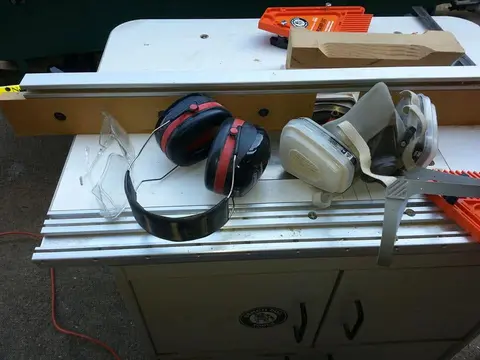
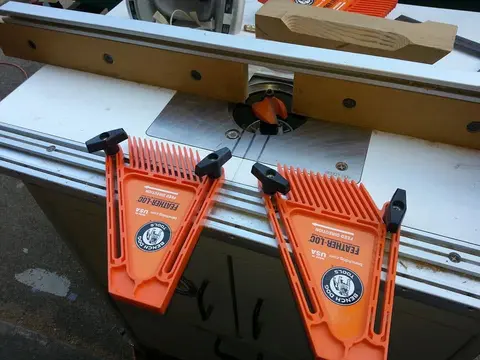
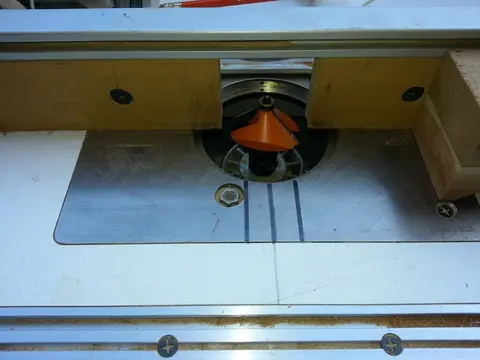
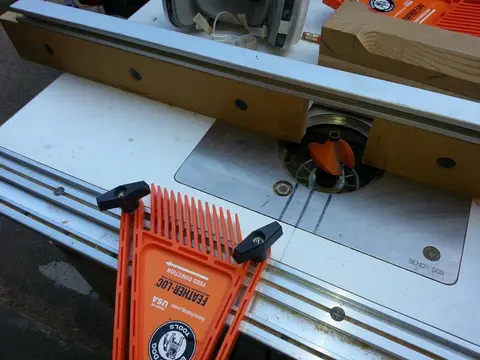
Houseboat update Part 2, Thursday, April 4, 2019 -- Jersey Girl's first roof post came out perfectly! Well measured and carefully marked, all the chamfers started and ended exactly as planned. Huge amounts of dust and noise, but I held onto my focus and paid scrupulous attention to what I was doing, and the result shows. (I emerged with all fingers intact, too.)
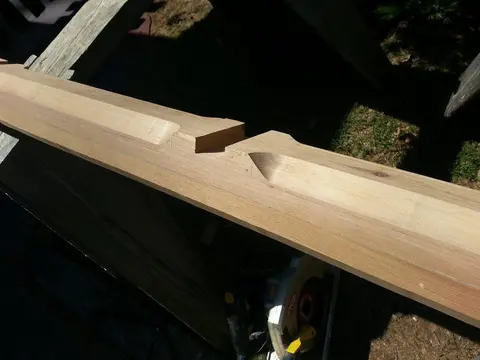
Houseboat update, Part 3, Thursday, April 4, 2019 -- Full disclosure: I made a dumb mistake. Having measured and marked carefully, I cruised right past my markings and routed a chamfer where there absolutely must not be one in one of Jersey Girl's roof posts. I patched it up with a piece of scrap cedar, and tomorrow I will cut the patch to match the profile of the post. "But wait," some knowledgeable purist will say, "neither the color nor the grain come close to a match!" Well, I have heard there is a tradition among rug makers in Afghanistan, Pakistan and Iran to deliberately avoid weaving a...
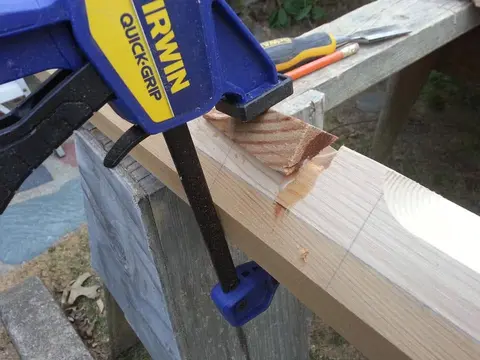
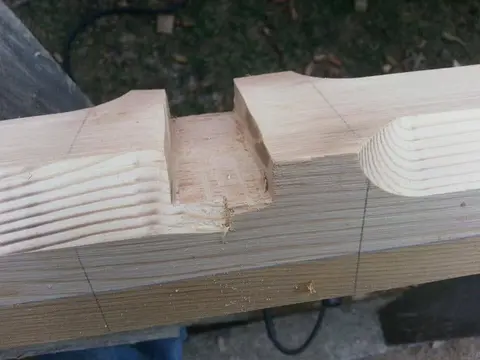
Houseboat update, Tuesday, April 9, 2019 -- With temperatures in the 40s and thunderstorms promised later, it's not a good day to start gluing things up. But I can still check parts for fit and make necessary adjustments and alignments. Here are the aft cabin door posts, looking out toward the aft deck. I can see that their alignment abeam is perfect, but I need to make an adjustment in the cutout at the top for the cabin roof riser, so it lines up with the aft deck roof post and other roof posts going forward. First, I lay the two posts on a pair of sawhorses, so the notches where they will r...
Houseboat update, Part 2, Tuesday, April 9, 2019 – The long-term nature of a project like this has its frustrations, to be sure, but it has benefits as well. For one thing, it affords me the opportunity to make a somewhat contemplative life for myself. As I’m plodding slowly forward I find I have time to think about things, things that may or may not have anything to do with the construction of Jersey Girl. Today, it does. See that void under the aft deck? It’s going to house a retractable stair system, two steps high, to be pulled out when necessary to allow easier access from the aft deck do...
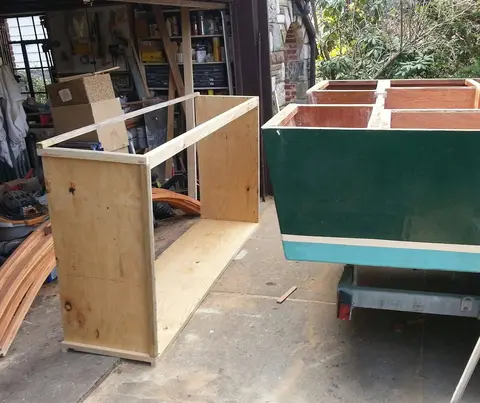
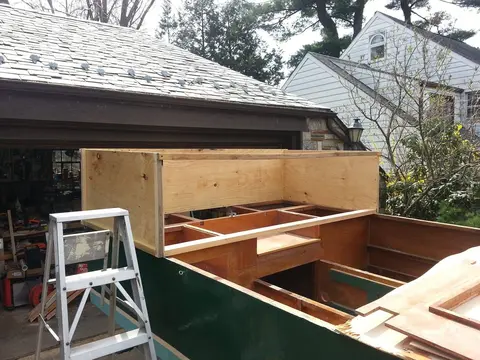
Houseboat update, Friday, April 12, 2019 -- So, what's this box have to do with Jersey girl? It's a temporary framing jig. After my friend Steve helps me lift it up to Jersey Girl's sheer clamp (where the gunwales -- pronounced gunnels -- would be if this were an open boat), I will screw it down and I hope it will help me clamp, glue and screw the roof posts into square and plumb orientation with the hull. Just an idea I came up with when I couldn't sleep a couple of nights ago. It happens to people as a consequence of boat-brain. The second picture shows the framing jig in place. I find I nee...
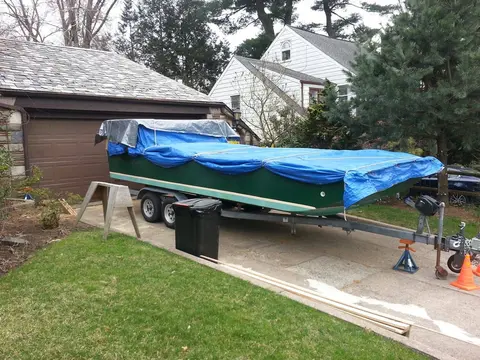
Houseboat update Part 2, Monday, April 15, 2019 -- The rain came to an end and the sun emerged later in the afternoon, so I took advantage of the break in the weather to clamp Jersey Girl's aft roof support posts into their final position. There's no such thing as having too many clamps for a job like this. I used 28! It suddenly occurred to me that she looks awfully tall on her trailer, and I wanted to keep her under 11 feet on the road to allow plenty of clearance for highway overpasses and the like. So, I measured, and she'll be 10-foot-2 tall on the trailer when the roof is on. What a reli...
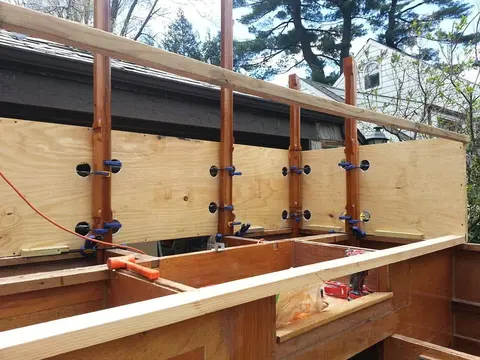
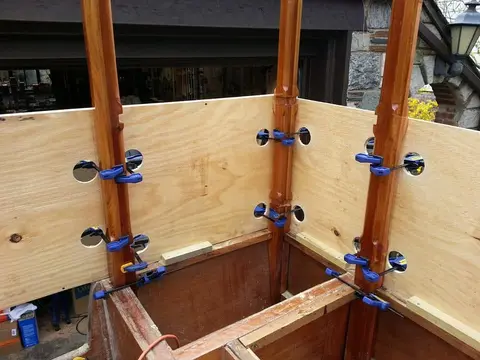
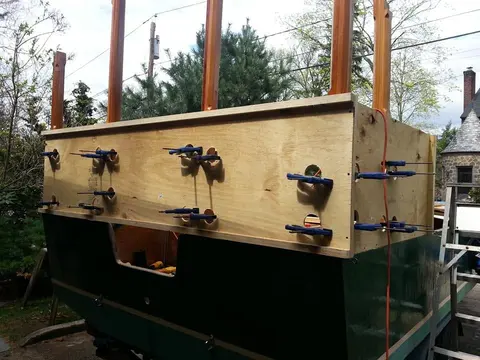
Houseboat update, Wednesday, April 17, 2019 -- Free at last, the jig is gone, and Jersey Girl's aft deck roof posts are straight and strong! I have four more to make and install, the aft cabin posts, and then I will be able to start roofing the aft deck.
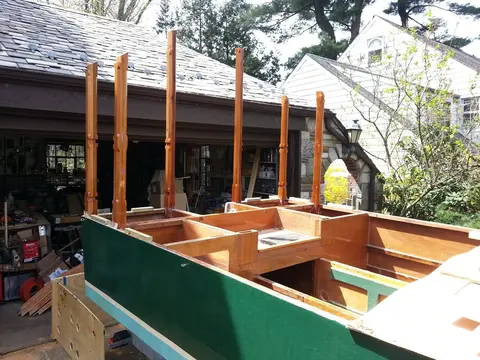
Houseboat update, Sunday, April 21 -- A most happy Easter/Passover to all who celebrate resurrection and/or freedom from bondage. At our Seder, among the forms of intolerable oppression noted in the haggadah we were reading was the forced separation of families, a point I feel is especially worth noting in the present day. To the point of the topic at hand, Jersey Girl is about to get four more roof support posts. Sometime this week, weather permitting, the roof beams will be installed over the aft deck, then work can begin on the roof itself.

Houseboat update, Tuesday, April 23, 2019 -- Jersey Girl's aft deck forest sprouts four more new roof support posts, clamped in place and ready to be permanently fastened. That will be 10 in all, and then I will be able to start roofing that section and installing the aft cabin bulkhead (wall) and door. Things are really moving along now!
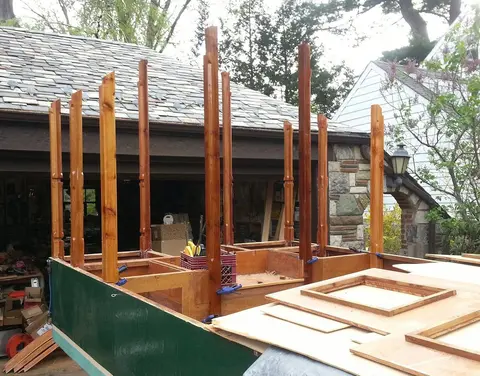
Houseboat update, Wednesday, April 24, 2019 -- Jersey Girl gets fitted for aft deck roof beams. This is just temporary, to see how things fit and mark parts up for final trimming. The horizontal planks are part of the longitudinal "riser" that will run the length of the aft deck roof and the cabin, defining the elevated central portion of the roof, above the arched "shoulders" on both sides. Now that this part of Jersey Girl has gone vertical, I am somewhat at the mercy of the weather until I get a roof over it.
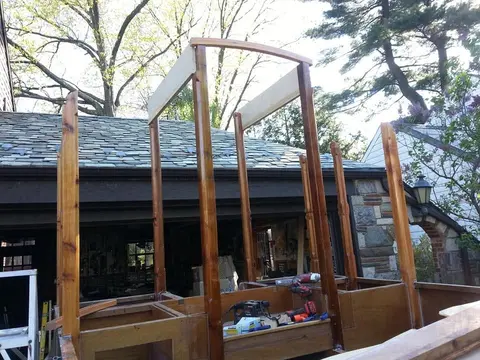
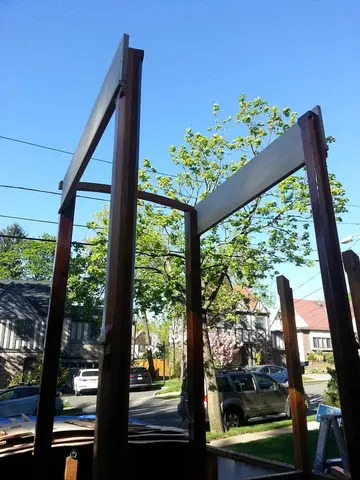
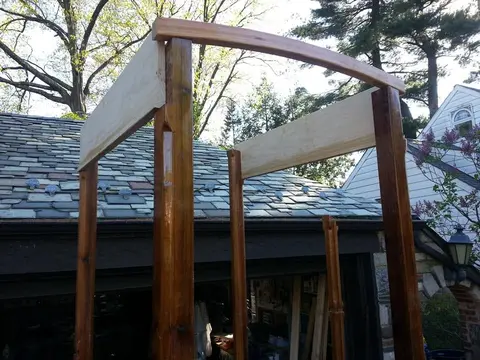
Houseboat update, Thursday, April 25, 2019 -- Another warm, sunny spring day means I get to make some progress on Jersey Girl. Today, I permanently fastened risers and roof beams, tying the four central posts of the aft deck into a single, unified, solid structure. Next chance I get, I will be giving the same treatment to the six side posts, three on each side, to support the aft deck roof "shoulders." As I worked today, I became aware of a luscious, extravagantly sweet aroma. The lilacs have started to bloom. Tra-la. It's always been my favorite time of my favorite season of the year, for as...
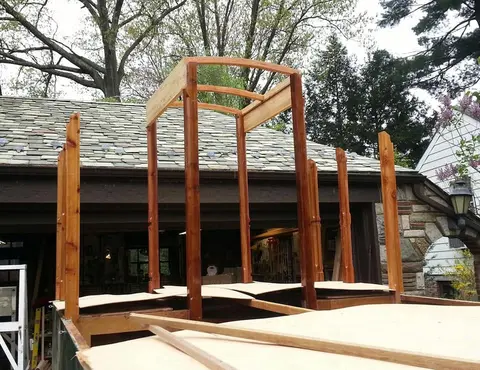

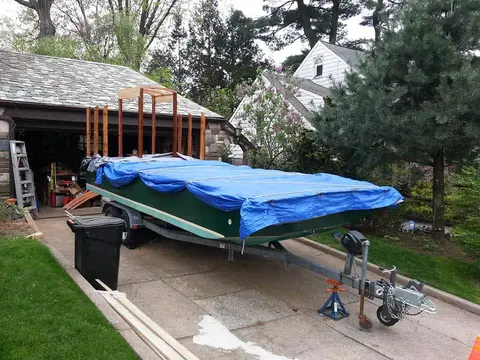
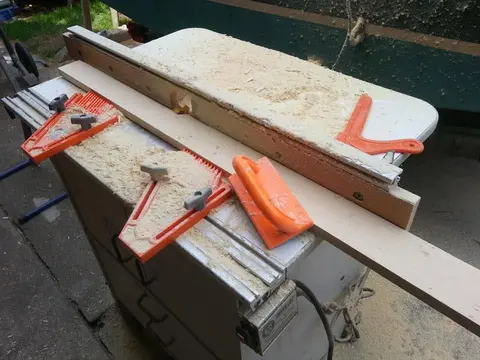
Houseboat update, Monday, April 29, 2019 -- After a couple of rainy days, I caught a break with the weather and managed to add two support beams to the aft deck roof. These beams define the shape of the starboard "shoulder" that will continue forward over the enclosed cabin as well. Of course, there will be an identical shape over the port side as well. In addition, I started milling tongue-and-groove roofing boards today, first by ripping 10-inch common grade pine, knots and all, into three-inch planks. Then, I machined the tongue part into one edge of each plank and the groove into the other...
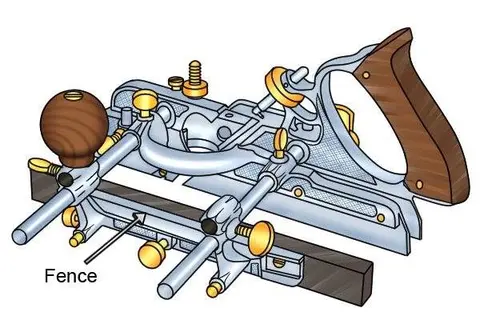
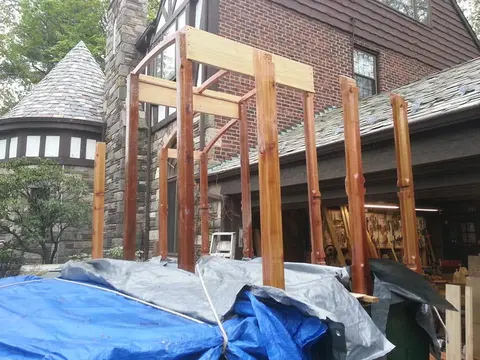
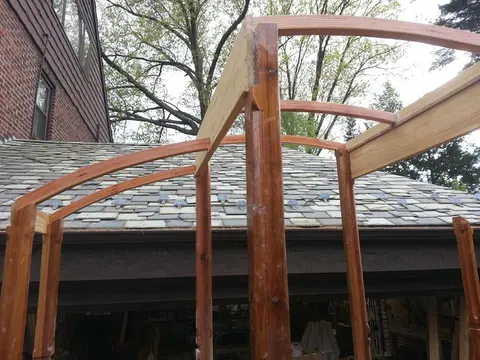
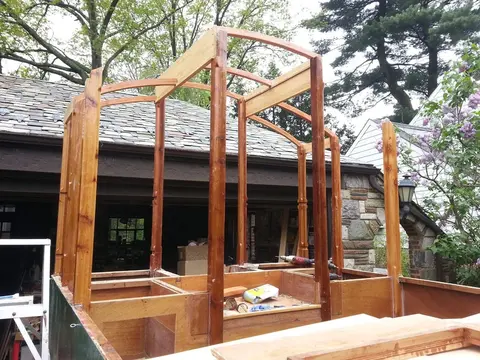
Houseboat update, Saturday, May 4, 2019 -- Dodging the raindrops that come and go, I am spending my 77th birthday adding more roof beams to Jersey Girl's aft deck. You might wonder why there are three spanning the center area, but only two on each side. I'm glad you asked. There will be a gate in the railing on each side, for easy boarding via the aft deck no matter which side is snugged up to a dock. But the 45-inch headroom from the sheer of the hull to the low-hanging eaves of the arched roof will present a problem to most adults, especially if they happen to be in my age category. So, I am...
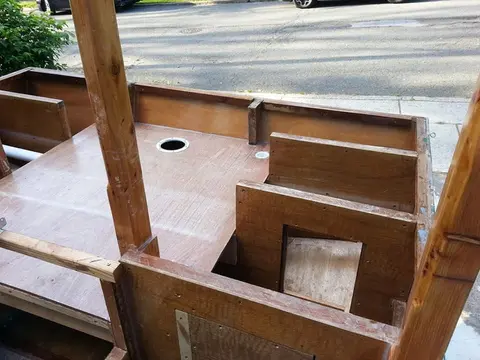
Houseboat update, Wednesday, May 22, 2019 -- A view from the bridge. Well, the helm, anyway. Or, in any event, where Jersey Girl's helm will be. The recessed central portion of the fore deck is permanently glued and screwed into place. I sure hope I can remember what I did with that hatch cover. I know it's around here somewhere.
Houseboat update,Thursday, May 23, 2019 -- Raise high the roofbeams, boatbuilder! (With apologies to J.D. Salinger.) Jersey Girl got her two main roofbeams today, but it was just for a trial fitting. It turns out I mismeasured by an inch and a half, but luckily it's no big deal. There's still plenty of wood to make a strong joint, and I'll fill in the gap later, as I go along. I made another discovery as well, as I hoisted each of these beams into place, one end at a time while I was precariously perched on 1 1/2 x 1 1/2 inch hull framing. A year ago, when I was a mere 76, this would have been...
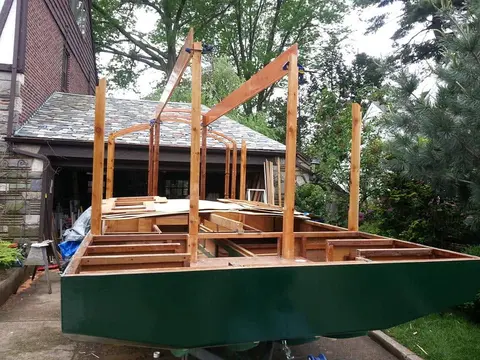
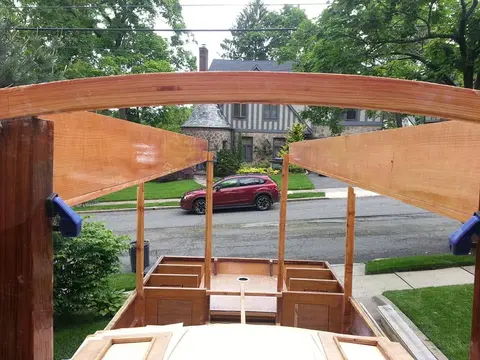
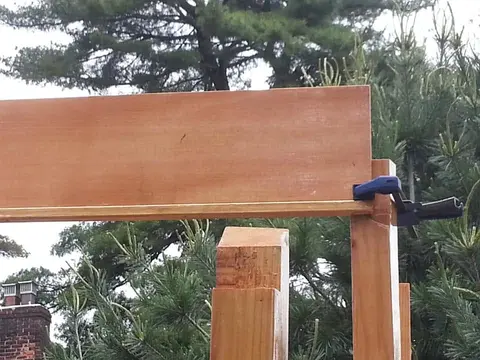
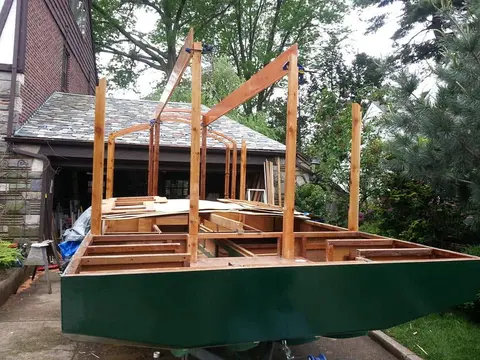
Houseboat update, Sunday, May 26, 2019 -- Jersey girl now has her two main roof beams and her two side roof beams installed. When the epoxy cures, I will start fitting her arched transversal rafters, following the pattern I established at the stern. In the meantime, I checked to see if the starboard aft cabin bulkhead would fit on the port side as well, if I reversed it. I know it should, but one never knows, does one? As it turns out, it's a perfect fit! That means all I have to do is use it as a pattern, tracing it onto another piece of 3/8-inch panel of marine plywood, and cut it out.
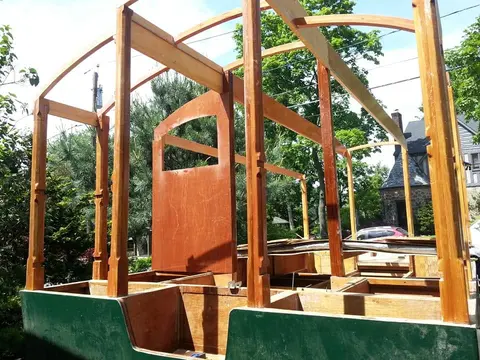
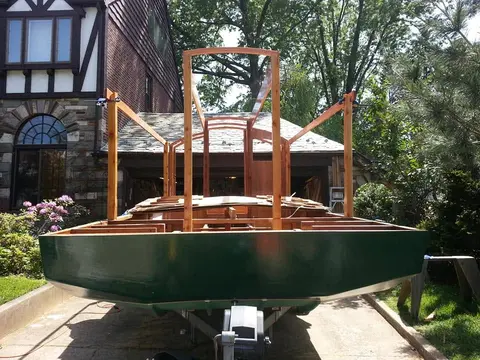
Houseboat update, Tuesday, May 28, 2019 -- The rain cleared out just before dusk this evening, so I had an opportunity to install Jersey Girl's two aft cabin bulkheads. The openings are for "eyebrow" windows, but I won't put those into place until I'm sure there's no danger of crashing through them with errant construction materials. Tomorrow, if weather cooperates, I plan to work on more of the arched roof supports. That will bring me closer to a job I'll be happy to call done, but dread doing -- installing and finishing the roof. For that, I'm thinking of stabilizing the trailer and boat wit...
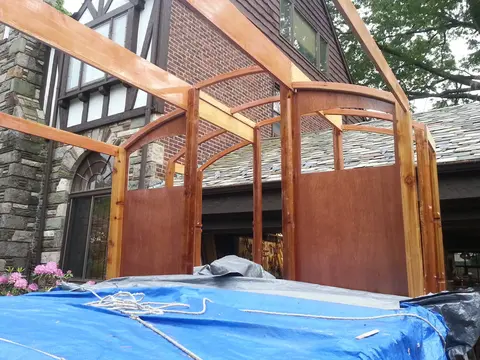
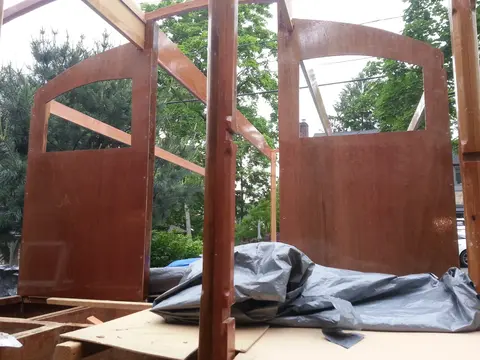
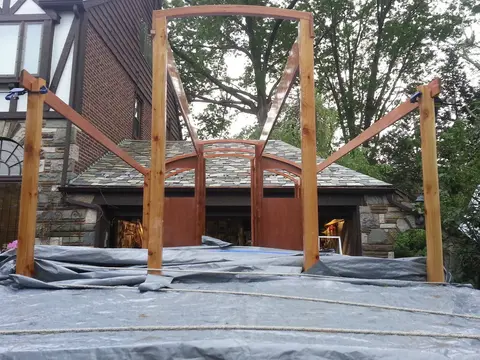
Houseboat update, Monday, June 17, 2019. The rain it cometh. Again. Good for the flowers, good for the reservoirs, and the long run, I suppose, good for us all. Jersey Girl is pretty well cocooned, I think, but we'll have to wait and see. Because the most vulnerable section right now is the forward deck area, I have decided to take care of that before attacking the roof. Today, before the rain started, I shaped four forward-facing railing posts, which was pretty complicated because of how they have to be cut around hull framing and the rake of the bow panel. Tomorrow, weather permitting, I wil...
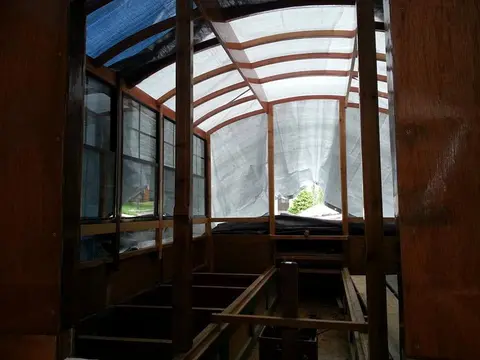
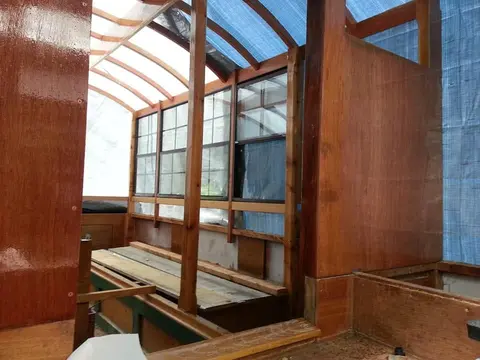
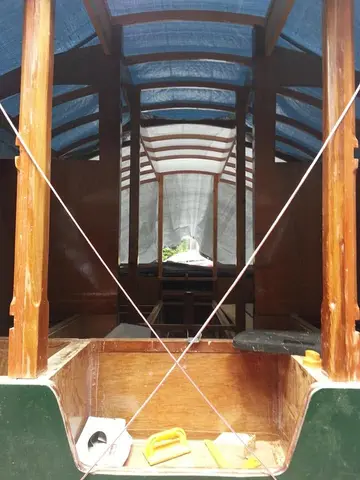
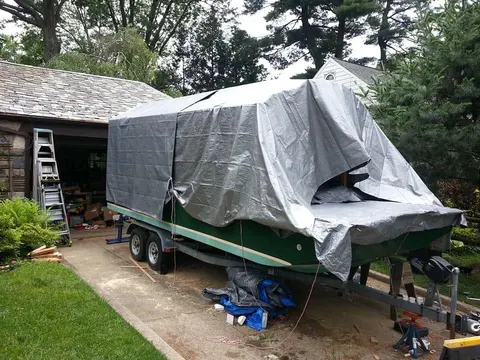
Houseboat update, Sunday, June 23, 2019 -- First of all, to anyone who ever was or is a mother, and anyone who ever had a mother, happy Mothers Day! Now back to Jersey Girl -- today she gets her forward deck rail posts. Here are two views, one from the outside looking in and one from the stern, looking forward. The extraneous lengths of scrap wood are temporary braces, to make certain they stay absolutely plumb relative to the hull as the glue hardens. Now, on to a few cleanup details before I start building the forward deck seating and hatch covers. There are two openings between forward bilg...
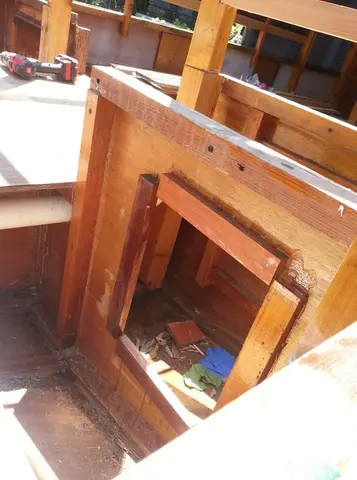
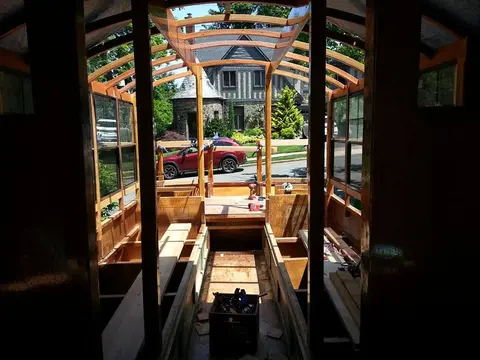
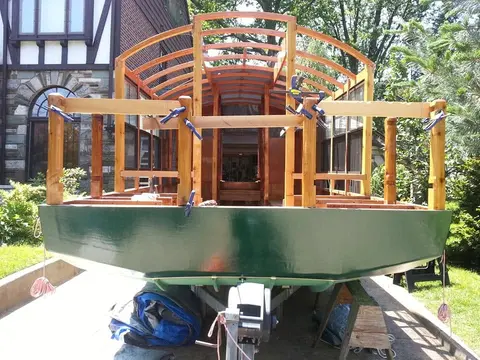
Houseboat update, Thursday, June 27, 2019 -- It's about time to start closing up these six forward deck compartments, and if I do it creatively and competently, they will provide water-resistant storage space for all manner of things, like a potable water tank, an anchor and line, ballast (if I need it), deck cushions and life jackets. The way I plan to do it, in three half-inch layers, the covering structure will add even more rigidity to an already exceptionally stiff hull. The middle layer will incorporate water-block and drainage channels to divert water away from the hatch openings and di...
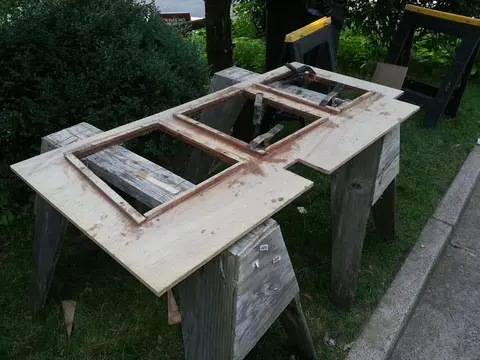
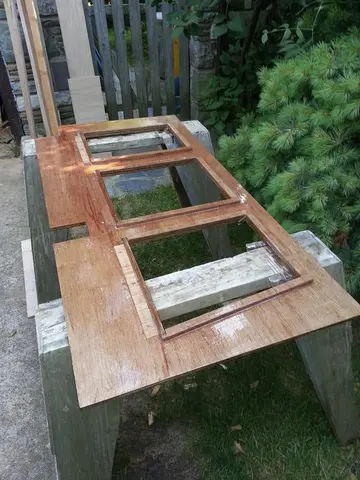
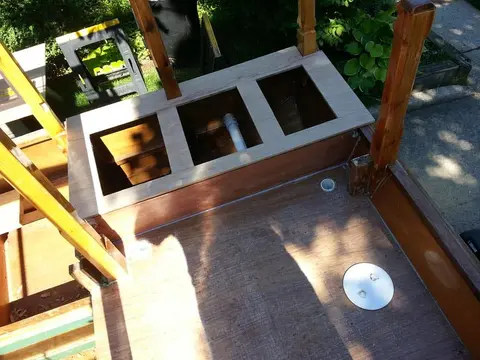
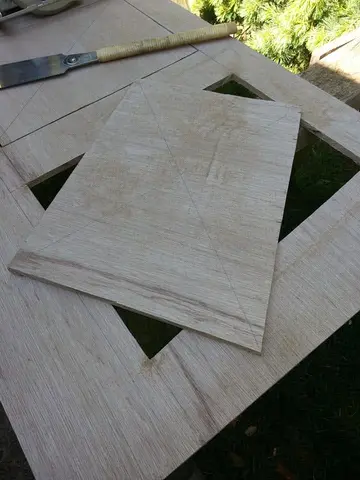
Houseboat update, Tuesday, July 2, 2019 -- I'm still figuring out water management for Jersey Girl's forward deck. Here you can see how I hope to persuade water to stay out of the under-deck storage compartments. I've created a series if channels around each hatch opening, and scuppers to let water follow gravity to either the outside or into the footwell, where it will find its way out through drains connected by pipes to through-hulls. The raised curbs will be topped with rubber seals, and the hinged lid will rest on those, serving as seating when closed.
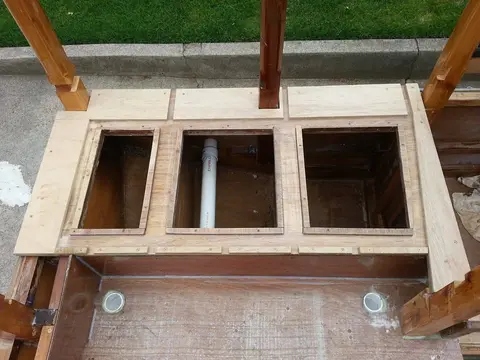
Houseboat update, Saturday, July 6, 2019 -- Jersey Girl's front porch now has a nice place to sit on the starboard side. But wait, there's more! Under that hinged seating are three storage compartments. A similar arrangement on the port side will offer three more compartments. With the addition of one of the forward-looking windows affording a nice view over the deck, Jersey Girl is taking on a nice home-y feel.
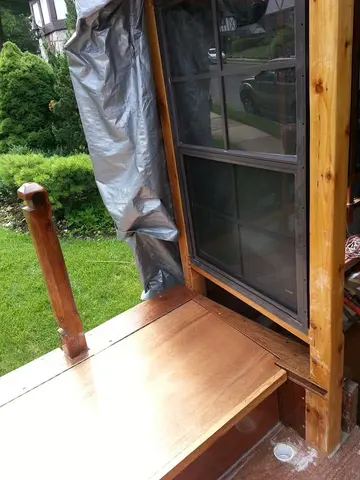
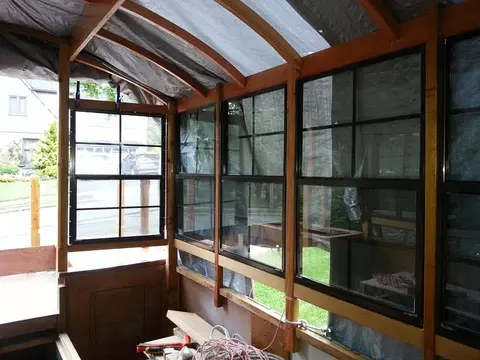
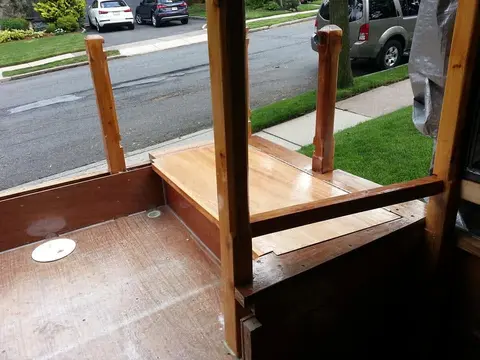
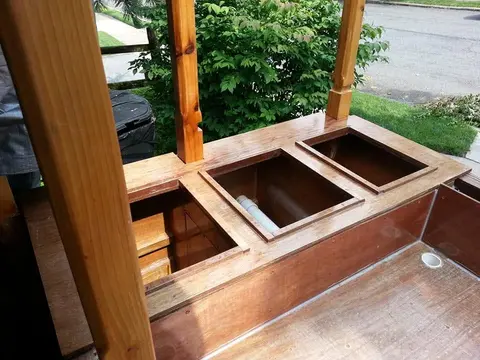
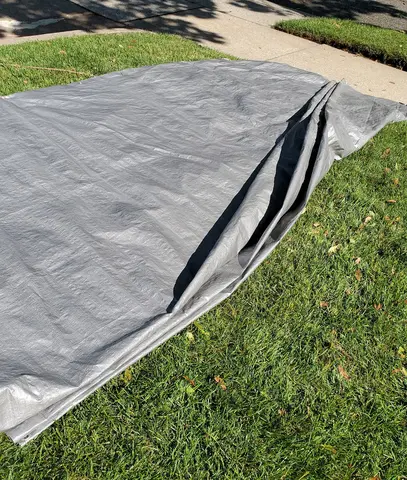
Houseboat update, Sunday, August 11, 2019 – Please allow me a small moment of reflection. Patience is right up there, among the most critical requisites for boat-building. Case in point: I have no control over the weather or even the ability to know what it will be, so all I can do is cover Jersey Girl up with tarps when I finish working on her for the day. If I want to make it easy on myself, I take the extra time to “flake” the tarps as I remove them (the sailors among us will know what that means). For one person to flake a 20x12-foot light poly tarp in the mildest of breezes can be quite a...
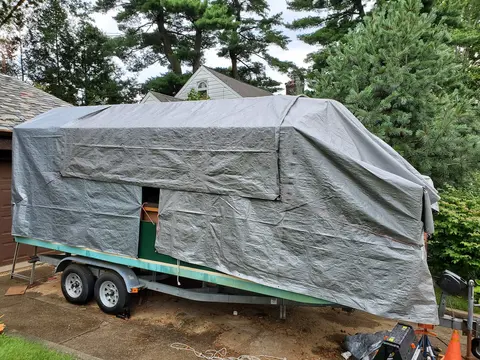
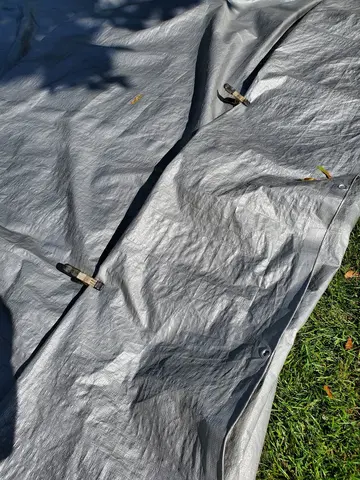
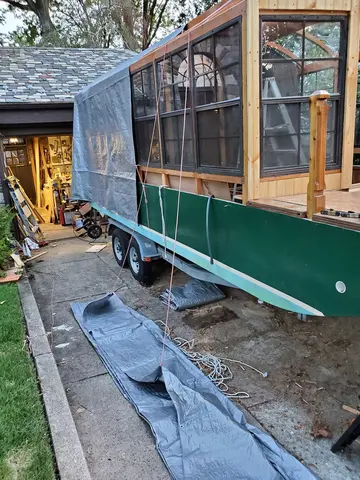
Houseboat update, Tuesday, August 13, 2019 – I’m beginning to get a bit of Jersey Girl’s roof in place, and I think it’s working out quite nicely! I’m using ¾-inch tongue and groove pine, milled to show a beaded wainscoting pattern on one side, what some people call “bead board.” Before I install each plank, I seal it topside and inside with two coats of epoxy, then set it up temporarily for fitting, drilling and countersinking pilot holes. I put a pencil mark on the topside of each rafter to show the limit of where I’ll spread glue, then take the board down and cut it to the exact length. Fin...
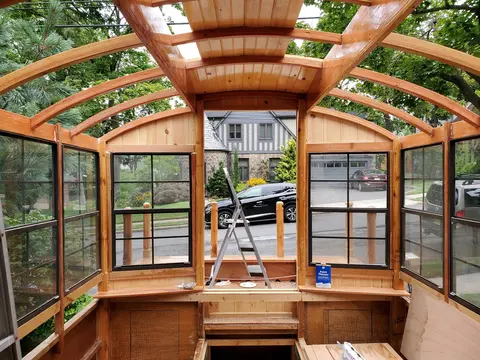
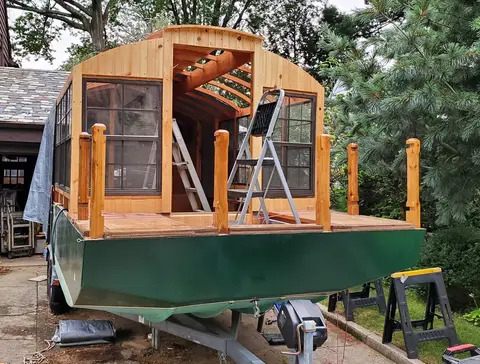
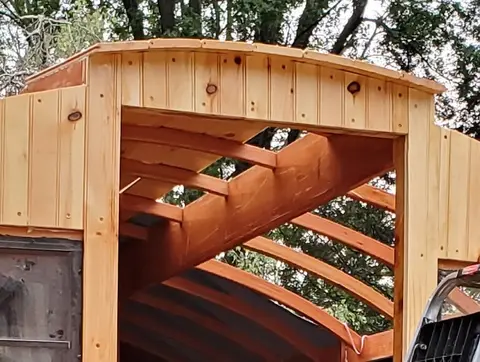
Houseboat update, Tuesday, August 27, 2019 -- Today's project will be to fill all the topside grooves between Jersey Girl's roof planks. I will be using a mixture of epoxy and colloidal silica powder to create a thickened putty. Before I can do that, I must make sure the roof is free of all the morning dew that has condensed on the surface. I give the anticipated warmth of the day a head start by toweling off standing water drops and puddles. The obvious question is how I managed to get the picture of the top surface of the roof. I could say, "skyhooks," and let it go at that, but that would b...
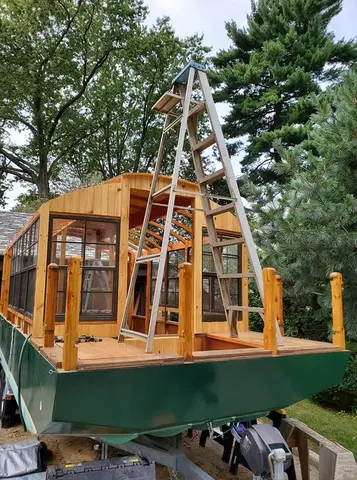
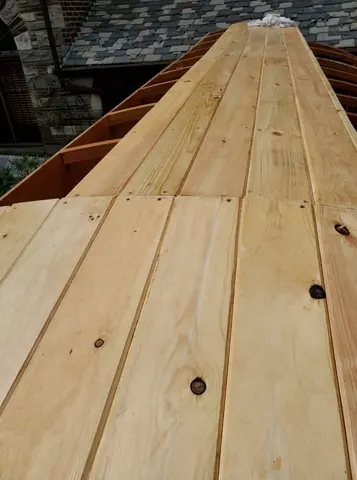
Houseboat update, Thursday, August 29, 2019 -- Today I finished sealing up the topside grooves between the planks I had installed earlier over the raised central portion of Jersey Girl's roof. Then, with a little daylight left, I got a jump on tomorrow's work, installing the remaining planks over this section. I should finish that job tomorrow, and if I have the time, seal up the grooves between the new planks.
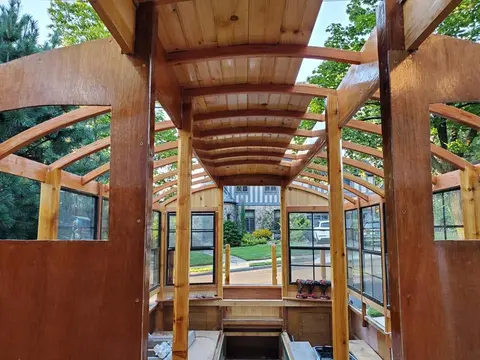
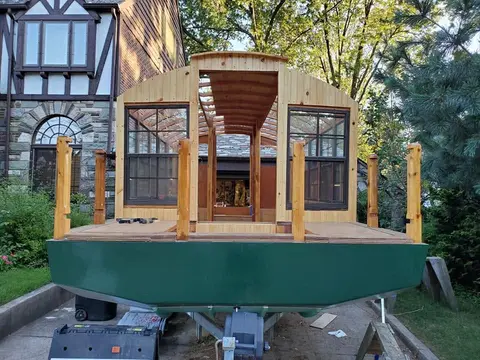
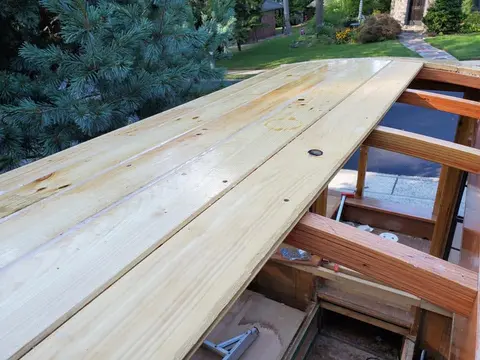
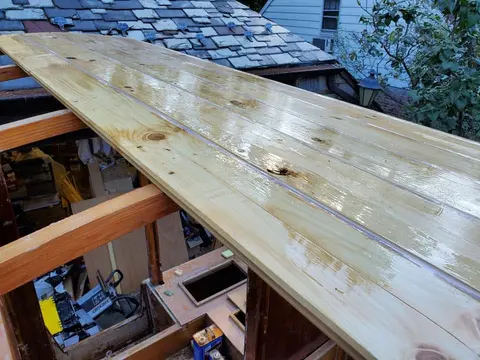
Houseboat update, Friday, August 30, 2019 -- The raised central portion of Jersey Girl's roof is finished, at least from a construction standpoint. All the planks are glued and screwed into place. Tomorrow, I will finish filling the topside grooves between the planks with thickened epoxy, and add a small overhang along the starboard edge. Over the next few days, I will sand and fair the top surface of the roof to prepare it for fiberglassing, priming and painting. I want to get all that done before I start roofing the "shoulders," because I think the highest part of the roof will be more safel...
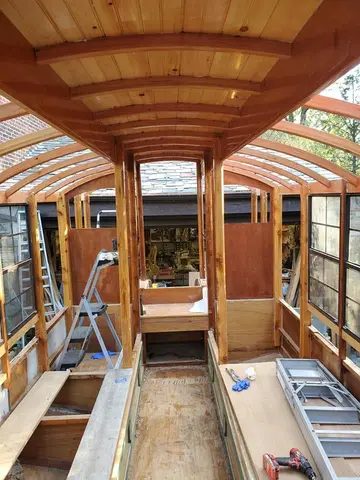
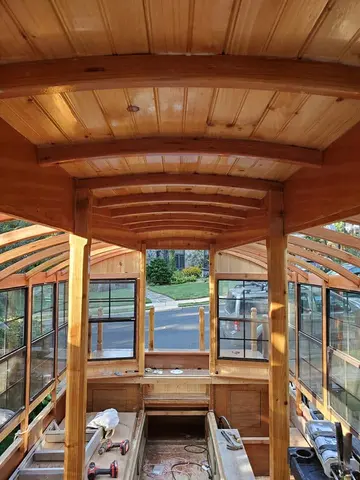
Houseboat update, Tuesday, September 17, 2019 – I spent the day making a few adjustments and improvements to the central portion of Jersey Girl’s roof, so I did not get to start priming it as I had wanted. First, it seemed to me that I needed to make some sort of drip edge on the roof overhangs in the forward and aft parts of the roof. Otherwise, surface tension of any water would allow it to run off the roof, over the edge and back along the underside of the overhang, and possibly intrude through the joint where it meets the cabin wall. It was a simple matter to cut thin strips of wood, angle...
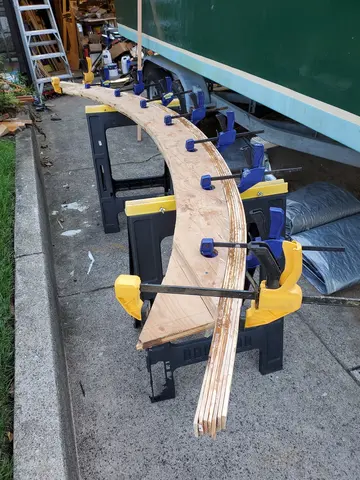
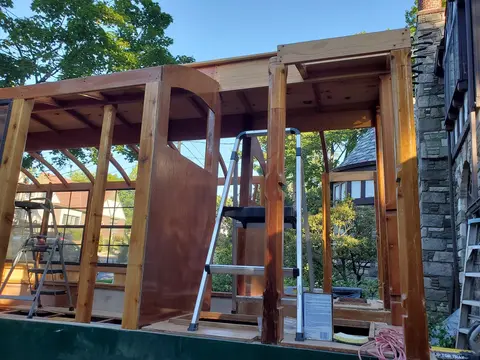
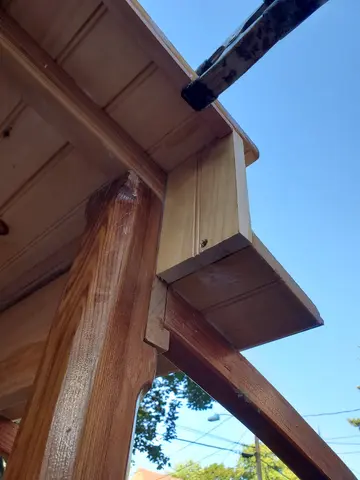
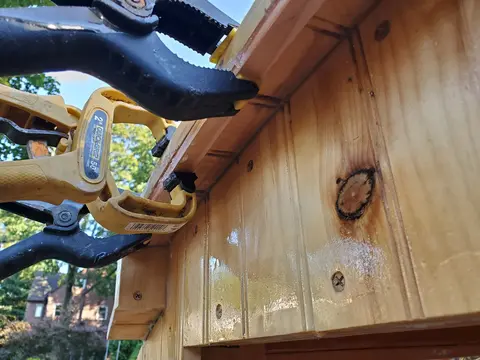
Houseboat update, Wednesday, October 2, 2019 -- Jersey Girl is two boards shy of a roof. The forecast called for a brief downpour at 6 p.m., and I thought I could beat it with the last two boards. But reality and forecast diverged at about 4:45, and I got caught with a line of freshly applied epoxy adhesive, in the groove of the third to last plank. What could I do? I decided to go ahead and glue and screw the board down in the middle of the soaker. I suspect it will be OK, but I'll have to wait and see. Just as I pulled my last tool in out of the rain and prepared to haul the tarps over the r...
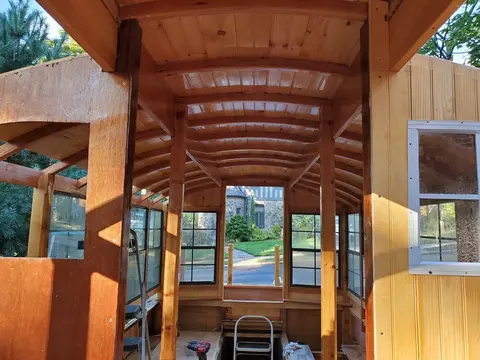
Houseboat update, Saturday, October 5, 2019 -- Jersey Girl's roof is structurally complete. The next step is to fashion inch-and-a-half overhangs along both sides, like the one shown here on the port aft section. For this, I mill my own tongue-and-groove planks, fit them into position, measure 1 1/2 inches out from the longitudinal side roof beam, mark and cut. Because of slight variations in construction, there will be variations in the width of the overhang plank, but when it's done it will all look quite uniform. How did I settle on 1 1/2 inches? I want to keep the total width of the boat w...
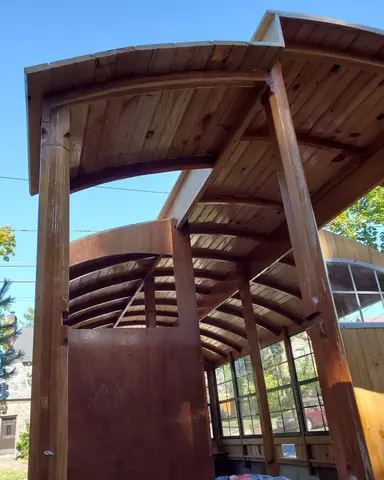
Houseboat update, Monday, October 7, 2019 (Part 2) -- Here’s how I measure and make the side edge overhangs for Jersey Girl’s roof. First, because of construction variations involving how individual roof planks fit together at their tongue-and-groove joints, I observe that the final side edges are not uniform. That means that the overhang planks will have to be tapered in one direction or the other, and possibly wider at the fore and aft ends and narrower in the middle. To check the variations, I start by using a scrap piece of tongue-and-groove as a measuring block. Having settled on a 1½-inc...
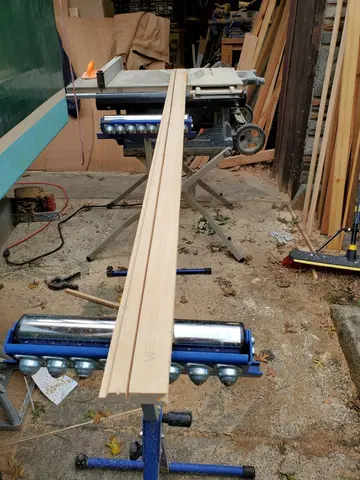
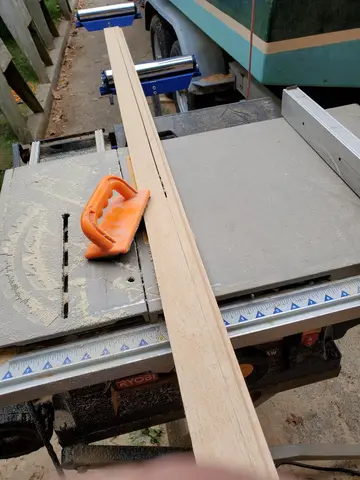
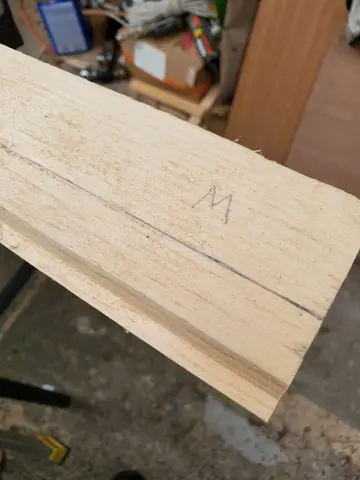
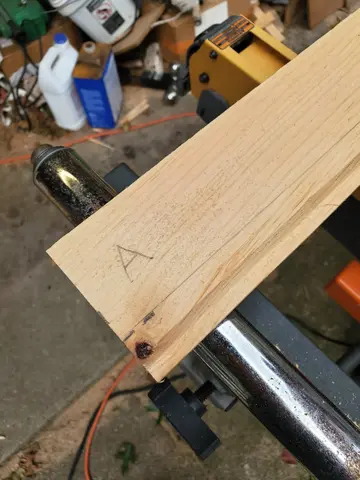
Houseboat update, Wednesday, October 23, 2019 -- As the epoxy-bedded fiberglass cures on both sides of Jersey Girl's roof, it's time to start on the gull wing sections, which will be hinged and lift up to allow easier access to the aft deck when boarding from a dock. Earlier, I laminated curved pieces patterned after the roof beams. Now, I temporarily screw them into the aft bulkhead of the cabin and the forward beam of the aft-most section of fixed roof. Before I do that, however, I protect any wood I don't want to become a permanent part of the assembly from any stray epoxy. I also use thick...
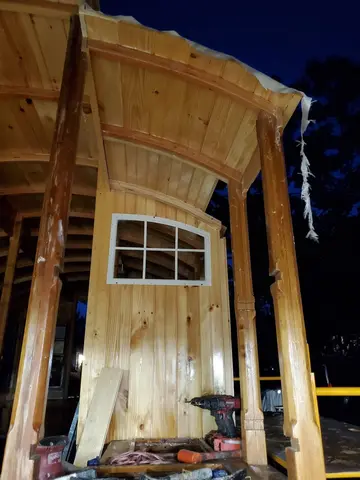
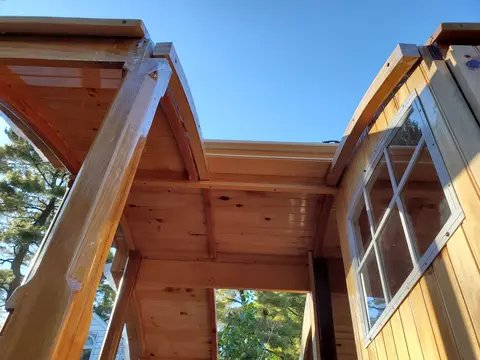
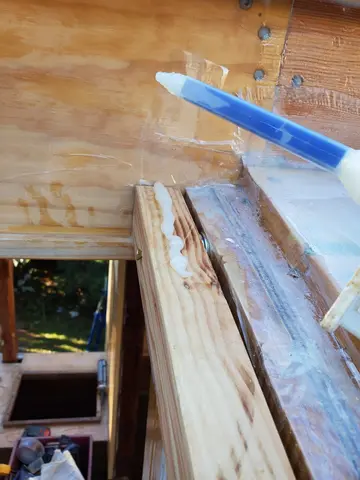
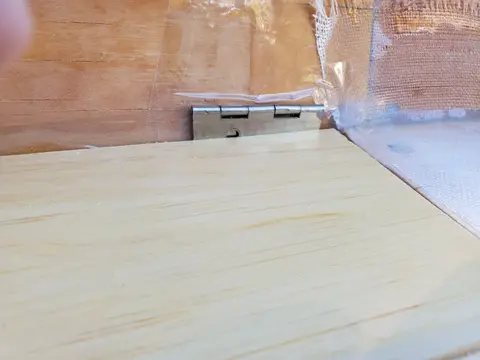
Houseboat update, Thursday, October 24, 2019 -- Jersey Girl's starboard gull wing is complete, but for the face board under the overhang, which will tie it in visually to the surrounding stationary roof. When the epoxy cures, I will remove the six temporary screws holding it in place, install the hinges and finish it up with fiberglass and paint, matching the rest of the roof. I am considering using gas lift struts, like the ones on the rear hatch of an SUV, to raise and lower the gull wings. Now, on to trimming the fiberglass fabric hanging down from the roof, giving everything a light sandin...
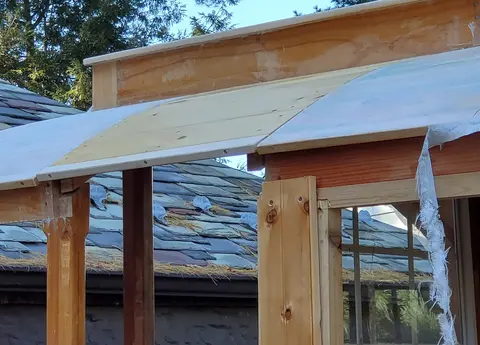
Houseboat update, Saturday, October 26, 2019 -- Jersey Girl's roof has its first coat of primer. That, plus attending to some pesky leaks that were diverting rain water from the decks into the cabin, is how I spent my Saturday. Rain is forecast for tomorrow, so I'll learn how successful my efforts were.
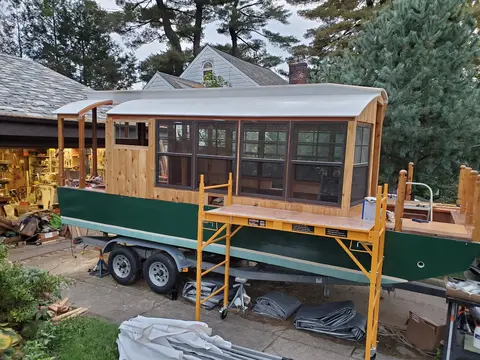
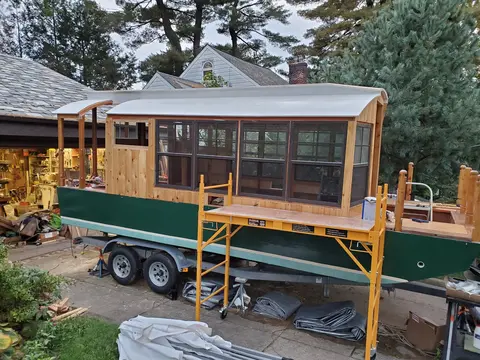
Houseboat update, Monday, October 28, 2019 -- Yesterday's downpour provided good information on Jersey Girl's leaky places, so I spent today attacking as many of the points of vulnerability as I could get to in one day. First, I fiberglassed the starboard gull wing roof section, knowing it would take the rest of the day for the epoxy to cure sufficiently for me to put it in place. Next, I applied a second coat of epoxy to the two tongue-and-groove boards I would need to finish building the port gull wing roof section, and set them aside to cure. After that, I edge-cut thin strips from an inch-...
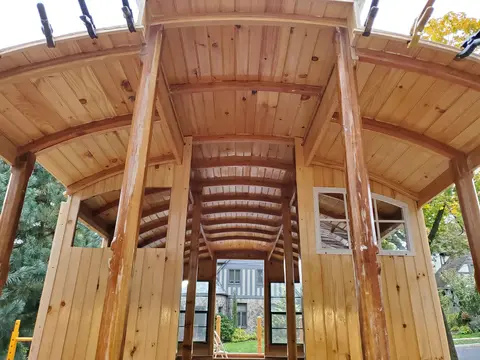
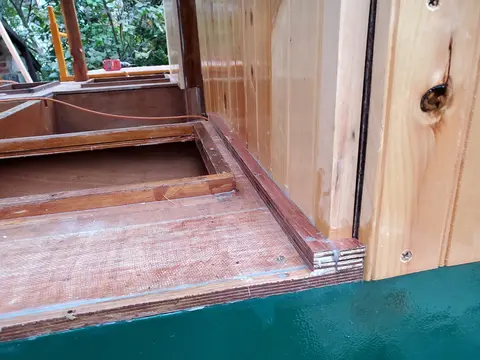
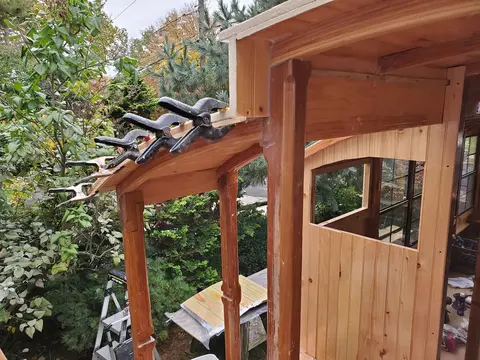
Houseboat update, Tuesday, November 5, 2019 (catching up with recently completed work) – The storage compartments under Jersey Girls forward decks seem to attract rainwater! This wasn’t supposed to happen, thanks to a system of channels and scuppers I devised to gently persuade water to flow overboard by a clever path of least resistance. Or so I thought, and maybe I was right for most of the water, some of the wet stuff apparently was able to find a path of even leaster resistance. A prime suspect were the unfinished deck edges outboard of the six rail posts that will eventually support a rai...
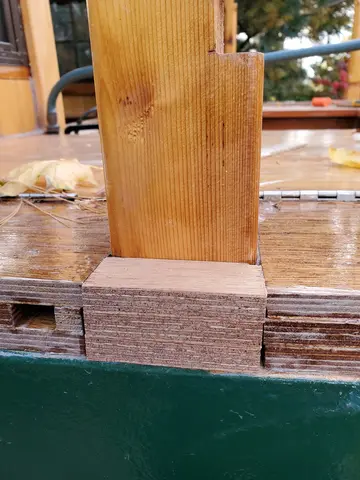
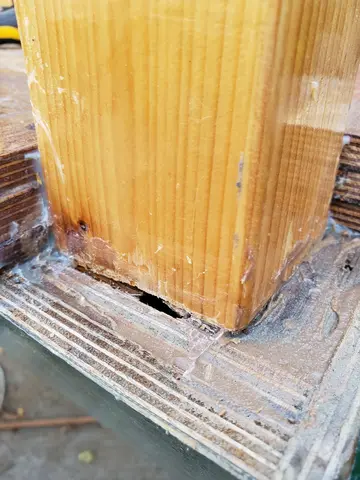
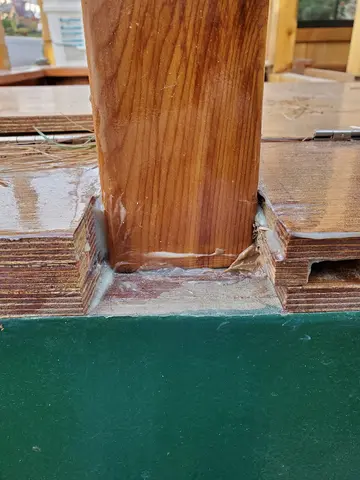
Houseboat update, Friday, November 8, 2019 (Catching up on recently completed work) – Moving back to Jersey Girl’s aft deck, I decide to make some improvements to channel and scupper system I designed for the forward deck. I think that some of my leakage problem may stem from the half-inch height of the channel that allows water to flow overboard – it may not be big enough for the volume of water that needs to pass through it in an all-day soaker. So for the aft deck, I have decided to make the thickness of the dams around the hatch openings (and under the deck surface as well) 3/4 inch. I’m g...
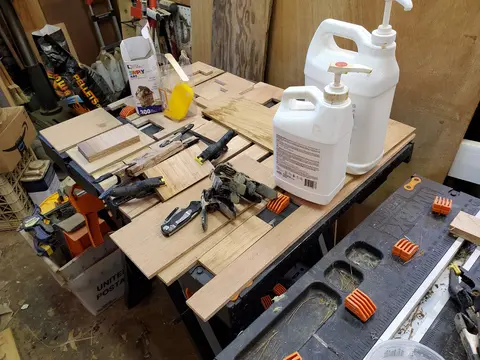
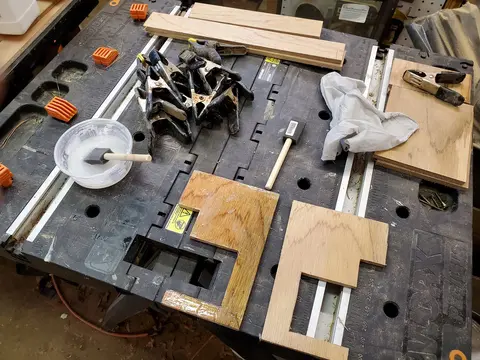
Houseboat update, Saturday, November 9, 2019 (Catching up on recently completed work) – While I’m waiting for a warmer day to install the channel and scupper system on Jersey Girl’s aft deck, it’s a good time to put the fiberglassed and primed gull wings into their places on the port and starboard sides of the roof over the aft deck. Not only do they make the whole boat look a lot better, they also help to keep rain on the outside, where it belongs.
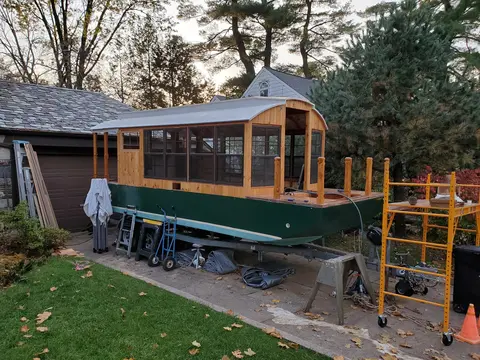
Houseboat update, Tuesday, November 19, 2019 – I’ve now installed all those scupper system pieces I made last week on Jersey Girl’s aft deck. Here, you can see how they are arranged on the port side, with the intent they will direct water to any of three places: either overboard toward the side, or into the depressed foot well area, or into the motor well. If the water goes into the foot well, it’ll flow from there through two previously installed scuppers into the motor well, and from the motor well it’ll go overboard through a scupper through the transom. Also, you can see how the hatch ope...
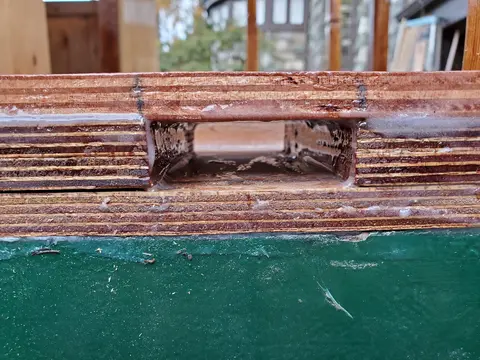
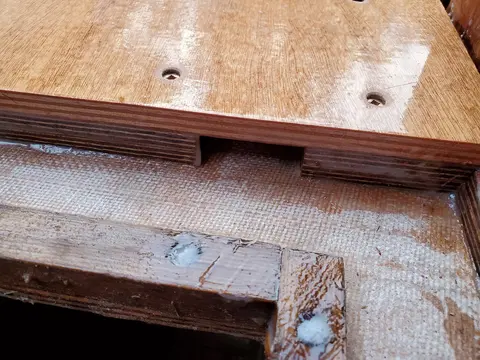
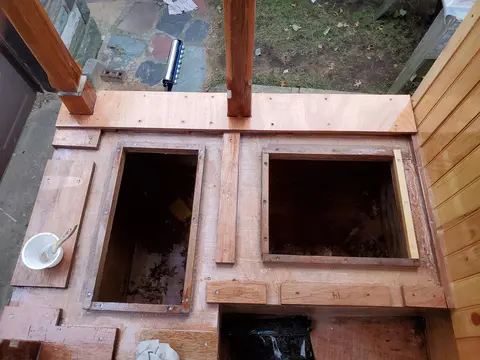
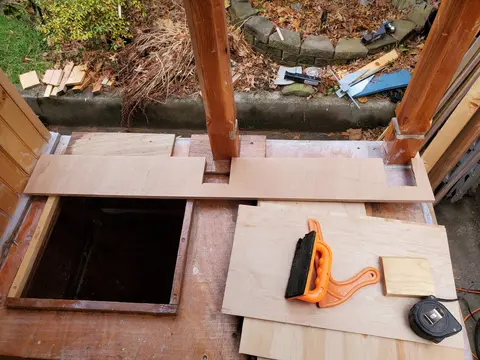
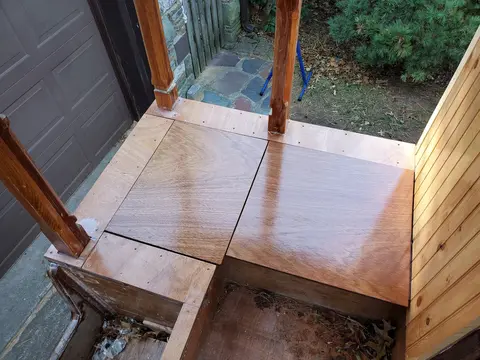
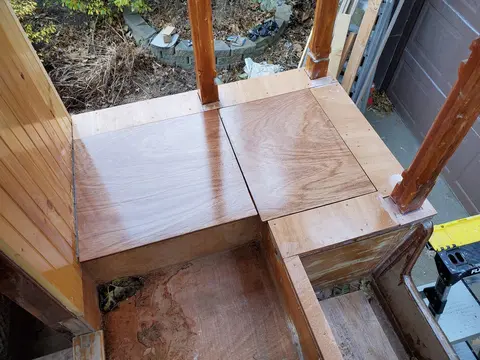
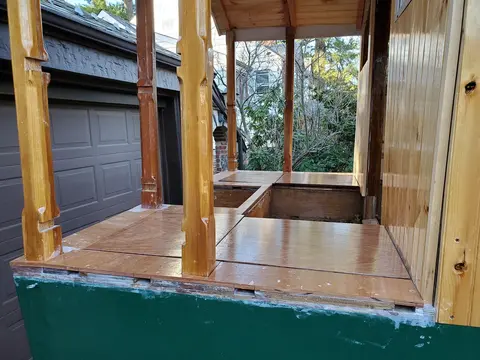
Houseboat update, Tuesday, November 26, 2019 – The hatch and drainage system for Jersey Girl’s aft deck has been installed (finally), and I’ve cut pieces of half-inch plywood to serve as hatch covers on the port and starboard sides. Over the next few days, I’ll finish them up with sealing coats of epoxy and face strips to make them look good. The hatch covers will be solid enough to sit on and to walk across while entering and exiting. I hope the under-deck drainage system will be effective in excluding water from the storage compartments below and sending it overboard where it belongs.
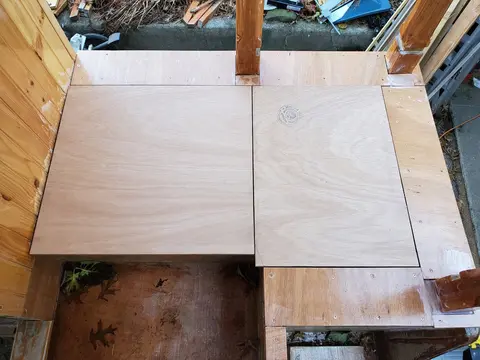
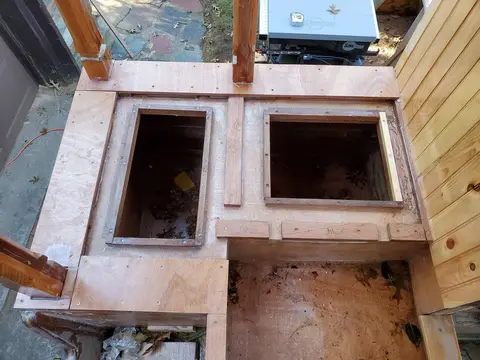
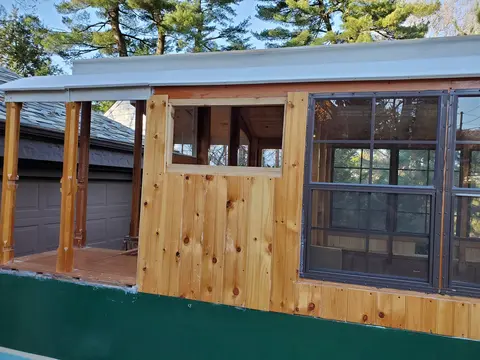
Houseboat update, Saturday, November 30, 2019 – Jersey Girl’s aft deck hatch covers are functionally complete, which is to say they fit and they are well sealed with several coats of epoxy – and they cover the hatches, which is what they are supposed to do. Finishing touches, like fascia boards and hinges will await the arrival of warmer weather. In the meantime, I think they’ll keep the weather away from the bilges, and that’s good enough for now. Today, I’ll start to pay attention to the window openings in the head area on the starboard side and the galley area on the port side. As I work on...