Jersey Girl · step
Glassing & Epoxy
Sheathing in cloth, wetting out, fill coats.
Glassing & Epoxy on every boat, not just the Jersey Girl →
July 8, 2017. A setback! I took a chance with the weather and finished the faces of two of the bulkheads with a coating of epoxy. The epoxy cured hard despite the rainstorm that inevitably came, but the rain caused it to be lumpy, ugly and clouded. I'll have to sand it down to the bare wood and start over again. Ugh.
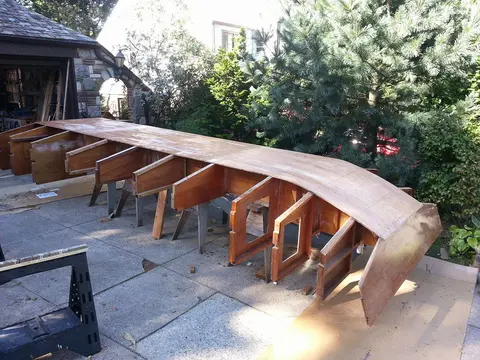
Aug. 15, 2017: A view from the bridge. Actually, from an upstairs window. All the framing is in place. Before I can start sheathing the hull with marine plywood, I will reinforce all the frame joints with fiberglass tape and epoxy, and plane down any high spots and shim any low spots. I will also go over all my work carefully to make sure I have not left behind any steel sheet rock screws that I used as temporary clamps. They all need to be replaced with non-rusting silicon bronze screws. Each will be dipped in epoxy before being driven home, to make sure they stay in place over the life of th...
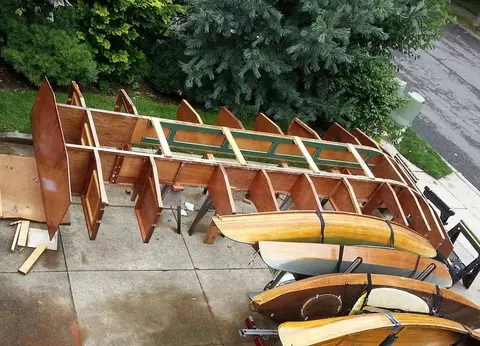
Sept. 29, 2017: Happiness is an unclamped bottom. Its all glued and screwed, and nothing has sprung loose. I've cut away most of the overhang at the bow and will plane and sand what remains until it's flush. I've sealed the entire bottom with a coat of epoxy, so it's protected from the rain that's forecast for tomorrow. She's starting to look a little more like a boat, and less like the fossilized skeleton of a prehistoric creature.
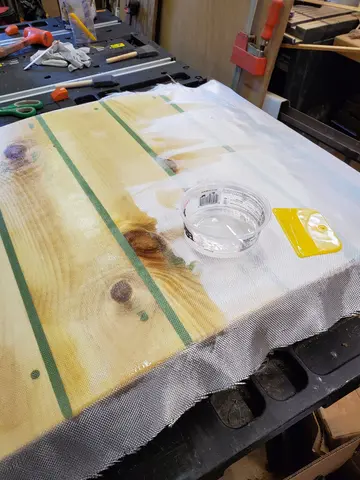
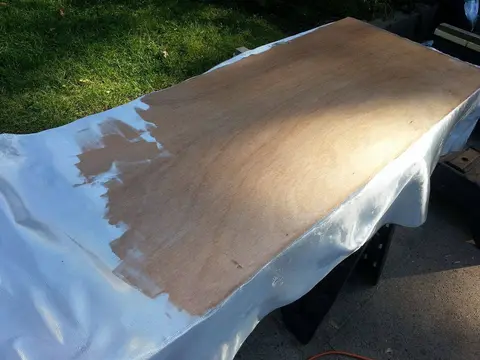
Oct. 3, 2017: Starting to fiberglass the backs of the side panels -- the sheer strakes. I will want to be somewhat neat about this, because some of these surfaces will be visible from inside the cabin. When I lay out the fiberglass fabric, it is opaque white. As I permeate the fiberglass weave with the two-part epoxy mixture, the fabric turns from opaque to transparent, allowing the grain of the wood to show.
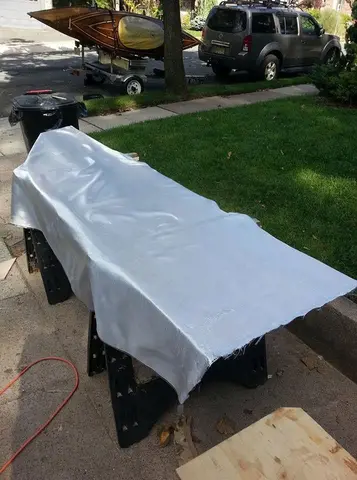
Houseboat update, Thursday July 26, 2018 -- Jersey Girl's aft deck, sealed in fiberglass fabric and epoxy on both sides, is dry fit in place. Before I can glue it and screw it permanently, I'll have to pay attention to all the bottom and bulkhead joints that will be difficult to reach once the deck is installed. I'll have to run a bead of thickened epoxy along each such joint and work it into a running cove-shaped "fillet," then cover each length treated that way with a strip of fiberglass tape set in epoxy. That will greatly strengthen the joints and contribute to the hull's resistance to und...
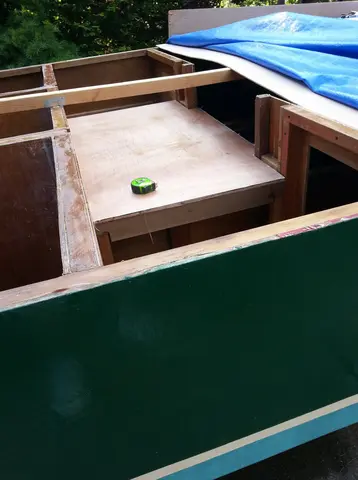
Houseboat update, Saturday, August 11, 2018 -- It's getting to the time when Jersey Girl starts growing up, and I need to start by defining her superstructure with eight clear red cedar vertical posts that will support the roof over her aft deck and serve as the jambs for the door from there into the cabin -- or, as I like to think of it, the salon. I have not been able to find a local source for clear eight-foot 3 x 3 cedar posts that I need. ("Clear," in woodish, means almost completely free of knots, straight-grained and having no twist or warp.) I could order them, but they'd take weeks to...
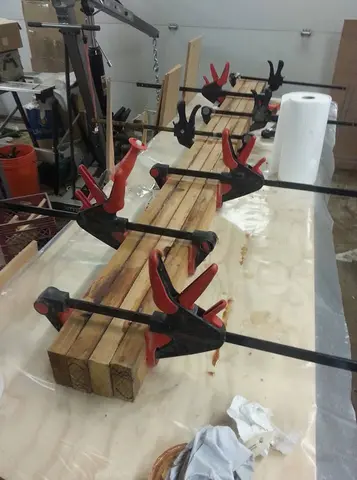
Houseboat update, Friday, December 28, 2018 – I’ve started laying up the first of Jersey Girl’s arched roof beams against the jig I made earlier. Each beam will be made of seven quarter-inch-thick by 1 ½ inches wide Douglas fir. I had planned to make these of clear cedar, but I simply could not justify the cost of turning that much high-priced cedar into saw dust, losing an eighth of an inch to the kerf with each pass of the table saw blade. So, I decided to go with plain old Doug 2-by-6 framing lumber. I looked for the straightest, most knot-free ones I could find in the stack of generally ho...
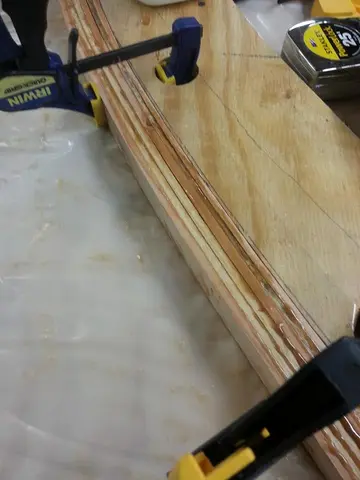
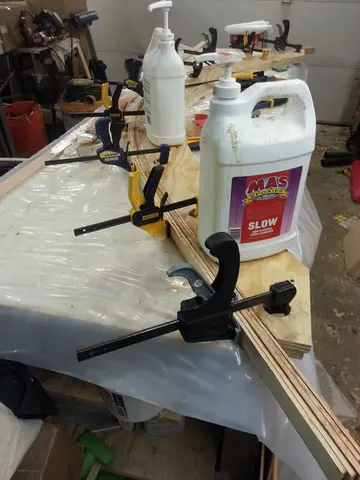
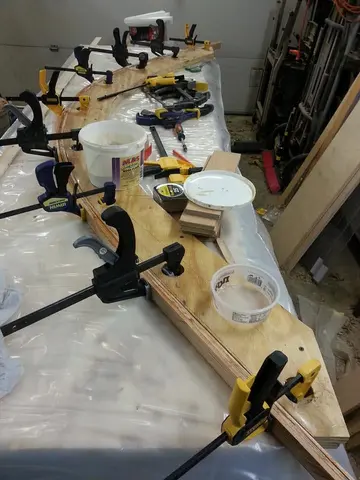
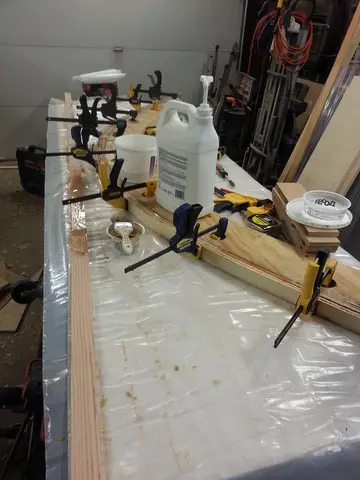
Houseboat update, Saturday, December 29, 2018 -- Here's Jersey Girl's first roof beam, released from its jig. It's made of seven quarter-inch thick strips of Douglas fir, sawn from ordinary 2 x 6 framing lumber from the local big box home center. In all, there's less than three dollars worth of wood in this, and about the same amount in epoxy. I didn't know what to expect in spring-back when I released it from the jig, and I was pleasantly surprised to see it flatten out by less than a half inch over its full eight-foot span. Not only that, it's very light and very strong. This will work!
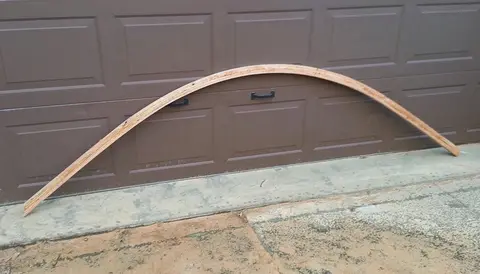
Houseboat update, Friday, January 4, 2019 – Amping up production here, with two roof beams glued up at the same time. I’ve discovered that if I work quickly I can spread glue on all six of the seven strips that comprise one beam, then clamp them all at once before the epoxy begins to catalyze. It’s a great time saver, but I have to work efficiently to do it. If something interrupts me, it’s best to clamp up however many strips I’ve spread glue on, then let that assembly cure before going back to the remaining strips. If I return to the job and release the strips to add more before a full cure...
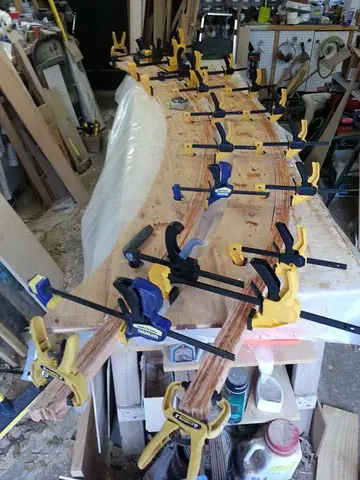
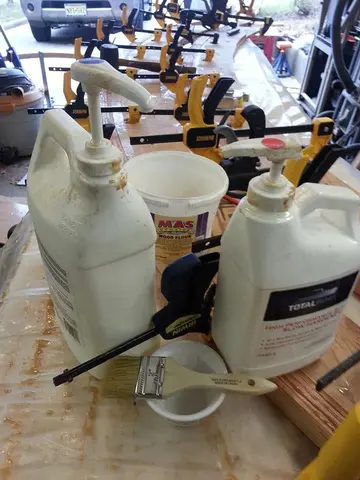
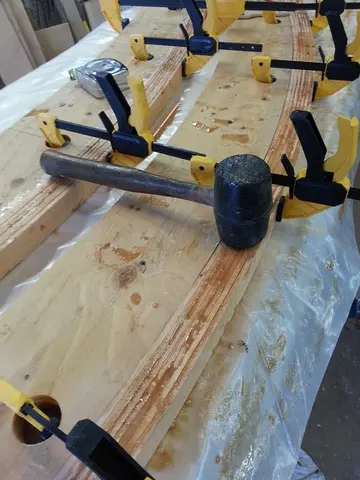
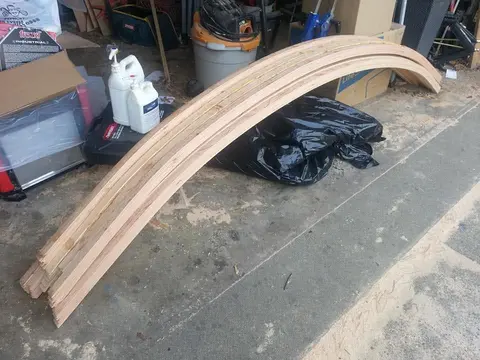
Houseboat update, Sunday, January 13, 2019 -- Ten more-or-less identical roof supports for Jersey Girl, with one to go. Next step after I laminate the last one will be to coat all their stacked edges with a slightly thickened epoxy mixture, to fill any voids between the glued-up strips of wood. That will be especially important where a loose knot may have caused deformation of the assembly, leaving a large opening. In such cases, I will apply a heavily thickened mixture of epoxy, using wood flour to closely match the color of the surrounding wood. Then, I will sand everything smooth and brush...
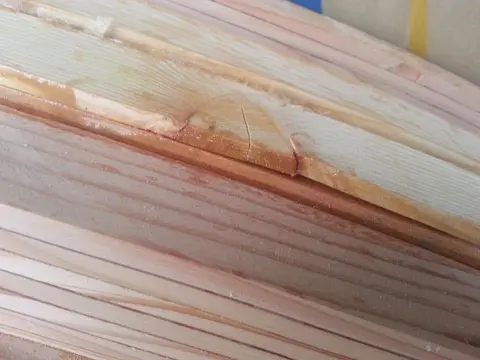
Houseboat update, Thursday, February 21, 2019 -- With the temperature in the 50s and the snow and ice melting, I had a chance to do a little work on Jersey Girl in the driveway today. It felt good to be back at work, especially since I was knocked off the rails last week by a bit of thankfully minor man-part surgery. It wasn't enough to stop me, but it did serve as a reminder of mortality, and the undeniable fact that I really should not dawdle if I want to be able to finish this project and still have time left to enjoy the result! So, here's what I did. First, the roofbeam lamination layups...
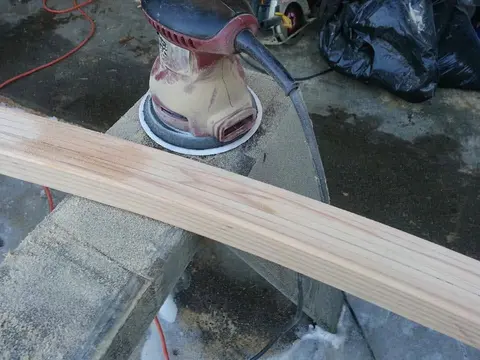
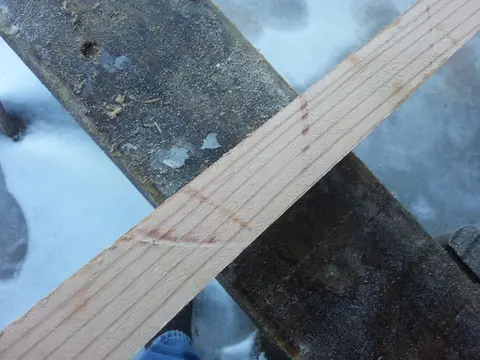
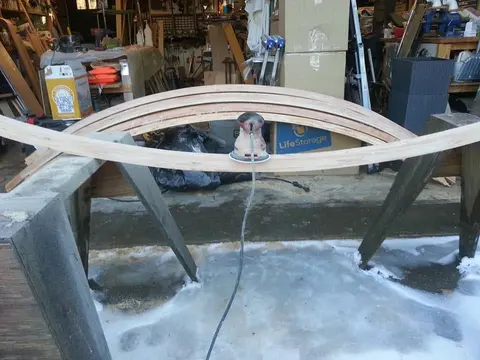
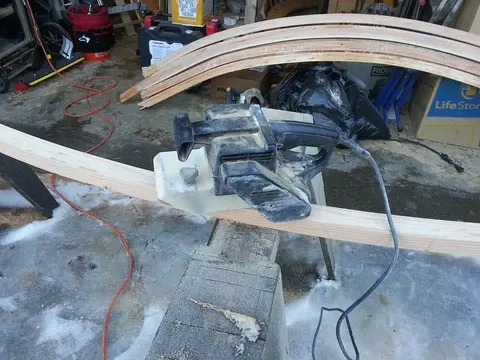
Houseboat update, Friday, March 15, 2019 -- 71 degrees in Northern New Jersey today, so of course an old man's thoughts turn to...his boat! I took a ride over the the local marina to see what was going on there, and it was a great big nothing. It's in a public park, the Palisades Interstate Park, but the parking lot was filled with coccooned boats, and no one seemed too interested in unwrapping them just yet. So I returned to my garage to do some more work on the arched, laminated roof beams that I will install on Jersey Girl, the 20-foot mini-houseboat I have been building for the last three...

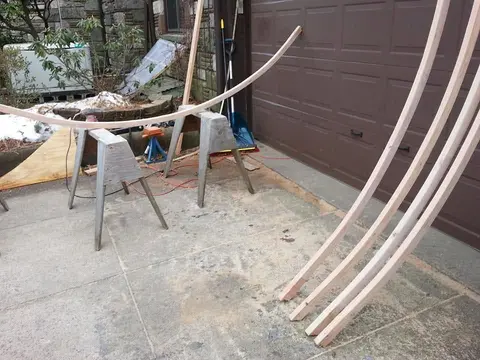
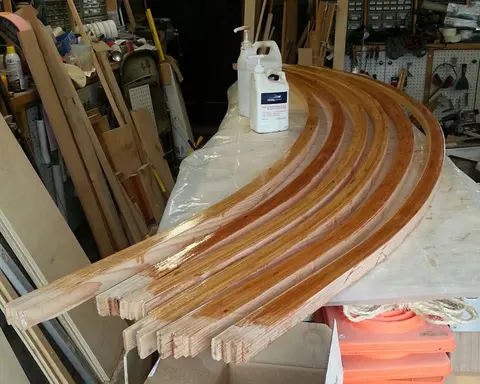

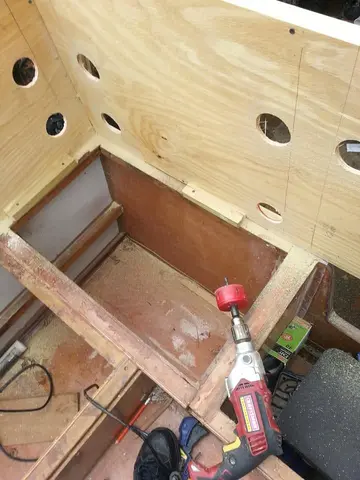
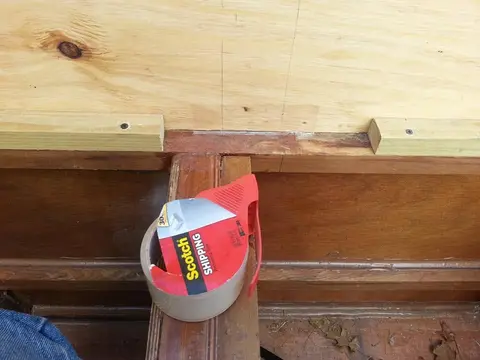
Houseboat update, Monday, April 15, 2019 -- After a night of torrential rain, accompanied by lightning and long rolls of house-shaking thunder (sounded like a freight train roaring through the living room one floor below), I awoke to beautiful blue skies. A scattering of high clouds served only to accentuate what great day it would be to work on Jersey Girl. In preparation for clamping, screwing and gluing her aft deck roof posts into place, the first thing I did was put some plastic package-sealing tape on the surface of the temporary squaring jig I had built. If a bit of squeezed-out epoxy w...
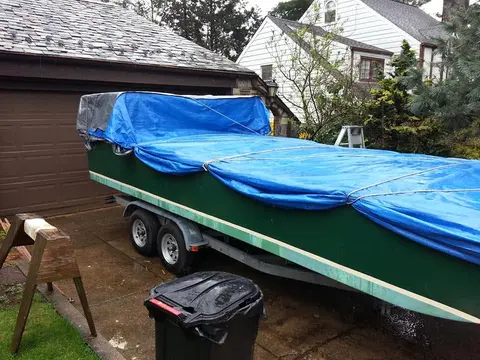
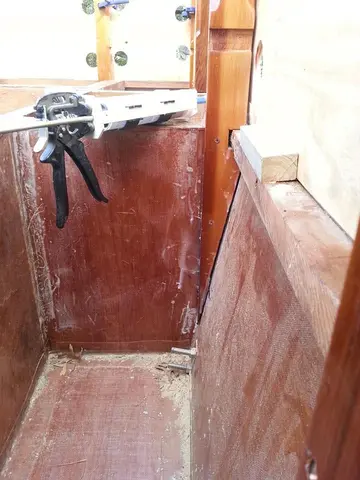
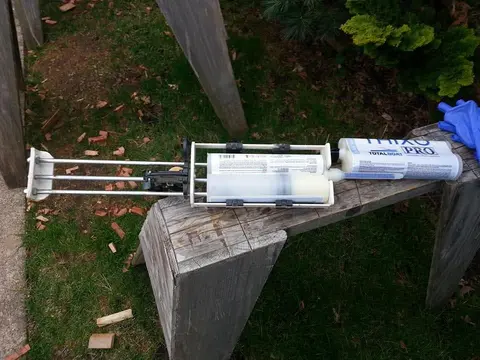
Houseboat update, Tuesday, April 16, 2019 -- Jersey Girl's aft deck roof supports are glued and screwed into place now. As you can see, there are some gaps the could interfere with the kind of rock-solid bond I'd prefer to have. Luckily, it's possible to buy pre-thickened epoxy in a dual cartridge that mixes the resin and hardener in a special mixing nozzle as it squirts out. It doesn't run, it stays put on vertical surfaces and it fills the gap perfectly. It's much more expensive than epoxy that you have to mix to the proper consistency, and it requires a special dual cartridge caulking gun t...
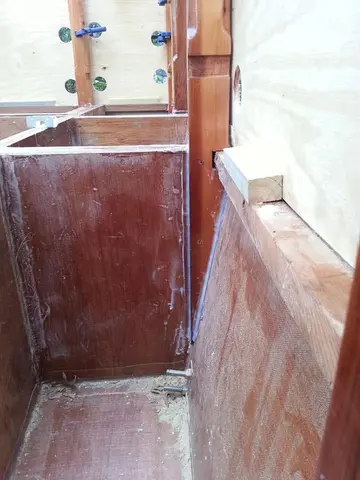
Houseboat update, Monday, May 6, 2019 -- I have sealed Jersey Girl's starboard aft cabin bulkhead with two coats of epoxy, on both sides and all the edges, to seal any moisture out. Now it's time to saw and shape more roof support posts, which will raise plenty of dust. Painful experience has taught me that I must not raise dust while epoxy is curing. I know it seems obvious, but sometimes when I am impatient to get on with the job, even the obvious is easy to overlook. So, before I start sawing, I will put on a pair of nitrile exam gloves to handle the sticky work piece, put it in the garage...
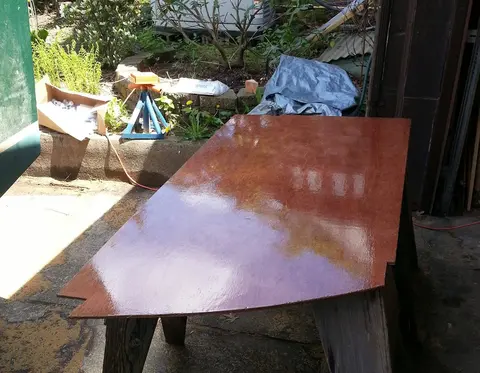
Houseboat update, Thursday, May 30, 2019 – I started my day with Jersey Girl by bailing out a couple of inches of water that had found its way past the two tarps covering her into several of her compartments, and I finished in a drenching downpour, scrambling to put away my tools and covering her up again. In between, I managed to fit four new framing posts – the ones that will define the areas set aside for the galley and the enclosed head. As soon as weather allows, I’ll complete the shaping of these posts and seal them with two coats of epoxy before installing them. Sadly, my humble Jersey...
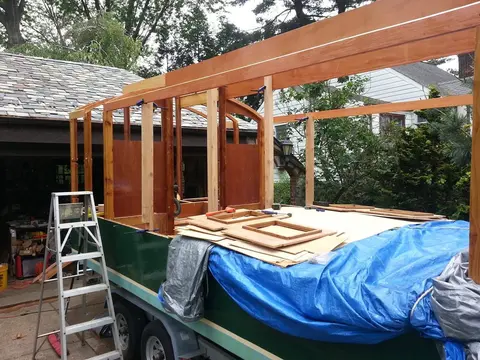
Houseboat update, Monday, August 26, 2019 -- As the summer is drawing to an end and cooler weather is closing in on Jersey Girl and me, I'm working hard to seal the cabin for the winter. As you can see, I have finished the roof planking on the port half and a little of the starboard half of the raised central portion of the roof. Before I finish the starboard side, I will use the openings for access to fill the topside grooves of the planking with thickened epoxy, then sand everything to a smooth surface in preparation for fiberglass. I'll finish the planking on the starboard side and smooth t...
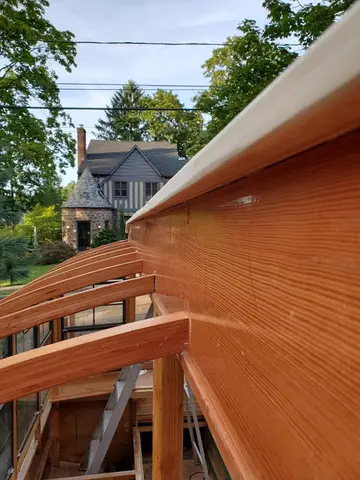
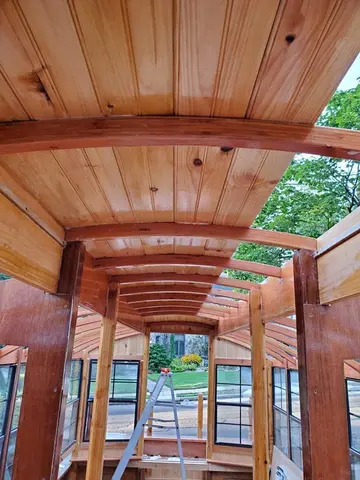
Houseboat update, Wednesday, August 28, 2019 -- Today is shaping up as a day of scattered thunderstorms through the night, so no actual work on Jersey Girl -- until tomorrow when a 10-day run of excellent building weather is forecast to start. In the meantime, I have been taking very seriously all the concerned comments from a number of observers that I am building failure into Jersey Girl's roof by fastening the planks down with epoxy and filling the topside grooves with more thickened epoxy, and planning to finish the top with fiberglass bedded in epoxy, followed by primer and paint on top o...

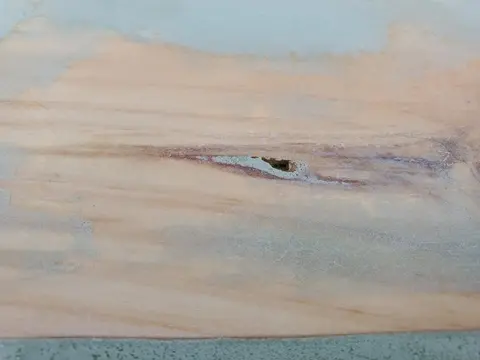
Houseboat update, Saturday. September 7, 2019 – I’m rocking my man glitter today, just having finished three sandings of Jersey Girl’s roof – the central portion of it, anyway. I’ve gone from 60 grit (very coarse), to 150 grit to 220 grit, and not it’s just about ready for epoxying and covering with fiberglass woven fabric. Except for a few small lacunae, which I will fill later today. Details, details…
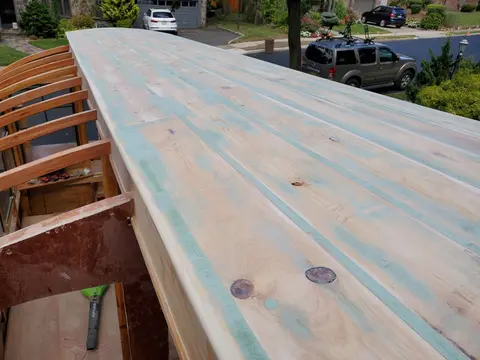
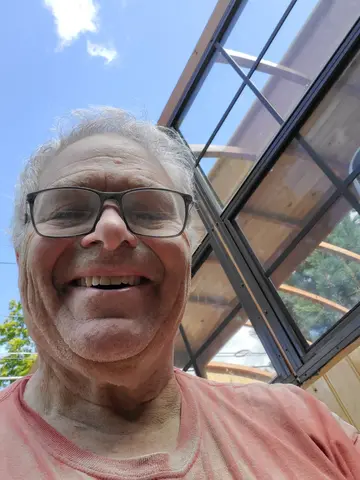
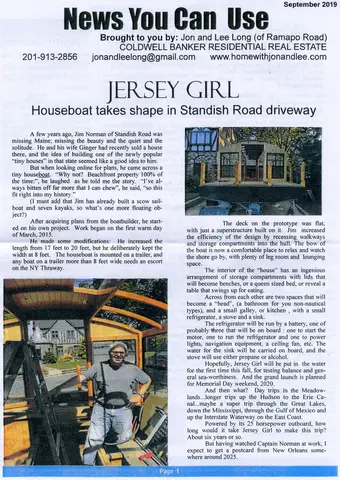
Houseboat update, Tuesday, September 10, 2019 -- I'm a local celebrity, thanks to a couple who are neighborhood real estate brokers. Jon and Lee Long publish a monthly newsletter to help promote their business, and hot-off-the-presses September edition features Jersey Girl and yours truly. Meanwhile, the central portion of Jersey Girl's roof is covered in epoxy-bedded fiberglass fabric, and tomorrow, I'll start priming it.
Houseboat update, Wednesday, October 2, 2029 (Part 2) -- Aaaand, Jersey Girl has her raincoat on. She'll be comfortable enough to see her through tomorrow's stormy weather, I think. Even after I get those two final roof planks on, I won't be quite finished the roof, and I'll have to use the tarps until I am finished. First, I will have to screw and glue two-inch wide tongue-and-groove strips all along the side edges, to serve as overhangs to direct water away from the sides of the boat. Next, I'll sand both side "shoulders" to get ride of any epoxy lumps. Then I will need to apply at least two...
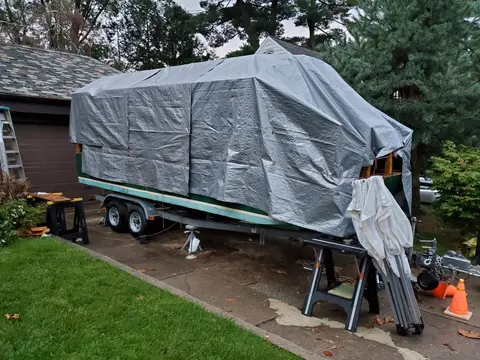
Houseboat update, Monday, October 7, 2019 -- All the side overhangs on Jersey Girl's roof are complete. But I still have to use tarps to protect her from rain, because the roof is not yet sealed with epoxy, fiberglass, primer and paint. I need six or seven rain-free days with warm temperatures to do that.There's more to making and installing these simple overhangs than meets the eye, so I'll post a separate description and photos of that process later tonight. But first, because a storm is forecast until 10 tomorrow morning, I must get Jersey Girl's raincoat on her.
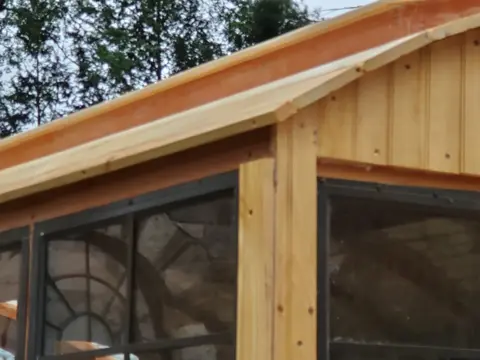
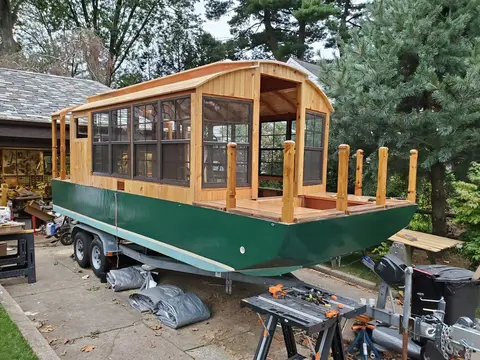
Houseboat update, Sunday, October 13, 2019 -- it took a grand total of an hour and 15 minutes to sand all the green fairing glop smooth on the starboard side of Jersey Girl's roof. There are a few random slightly low spots where the epoxy-based compound did not quite fill to the surface of the grooves between some of the roofing planks. I know that if I leave it the way it is, the low spots will telegraph through the epoxy-bedded fiberglass that will cover the roof, but I also know that they will be largely concealed (in all but the strongest dawn and sunset sidelight), once the primer and pai...
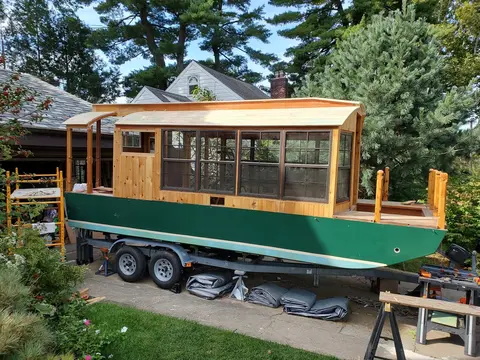
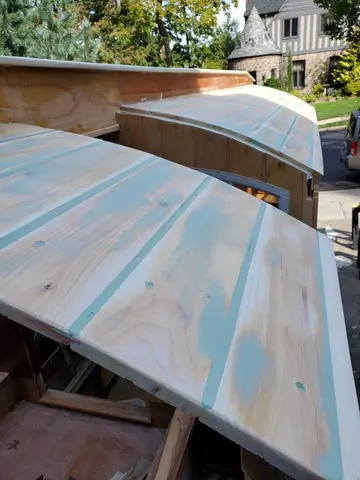
Houseboat update, Monday, October 21, 2019 -- The port side of Jersey Girl's roof is fiberglassed. While the epoxy it's bedded in cures, I'll move over to the starboard side. Remaining to do on the roof: trim the edges of the fiberglass fabric, give it a light sanding, followed by an additional application of epoxy, two coats of primer and two coats of topside paint. Also, I will have to build, fiberglass and finish the two "gullwing" sections of the roof and install them with hinges and gas-lift struts. The uncharacteristically warm autumn has treated me (and Jersey Girl) very well.
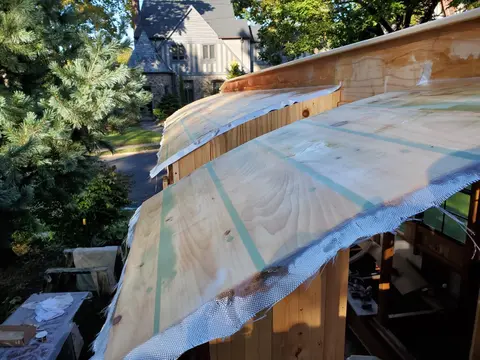
Houseboat update, Thursday, October 24, 2019 (part 2) -- Now that the epoxy on the starboard aft gull wing has cured enough, I can remove the six temporary retaining screws and lift it enough to give an idea of what it will look like in use. Pretty nifty, eh what? I'll bring it into the house for a full cure overnight, and tomorrow I will start finishing it with a layer of fiberglass. I expect it will be next week before I can permanently install it with a piano hinge.
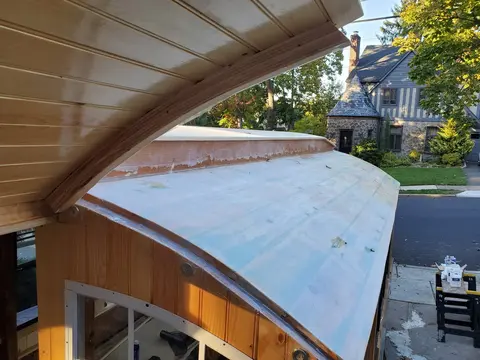
Houseboat update, Sunday, November 3, 2019 (Catching up on recently completed work...) With night-time temperatures dropping into the 30s, it's far too cold for epoxy to cure properly outdoors. But I can bring discrete Jersey Girl components into the garage, heated to a nice, toasty 65. Here's the port side gull wing roof panel, already faired and given a sealing coat of epoxy. Tomorrow, when it's cured, I will see if any areas have absorbed so much epoxy that it will need a second sealing coat. When I am confident that it is properly sealed, I will lay a section of fiberglass fabric over it a...
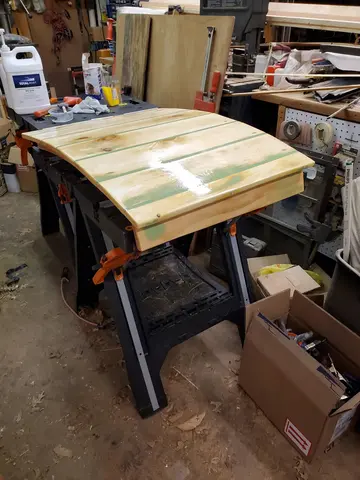
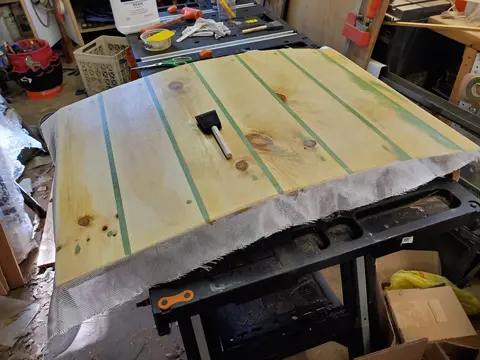
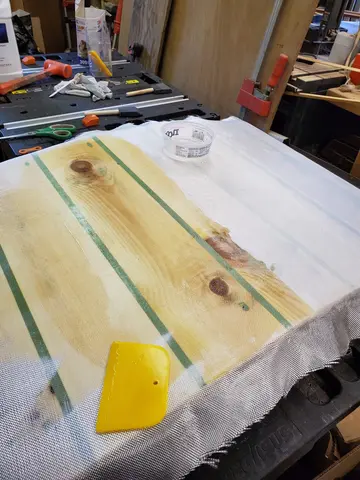
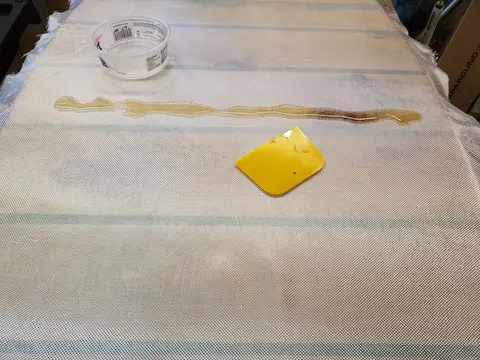
Houseboat update, Monday, November 4, 2019 (catching up on recently completed work) -- I know that many people reading this are already knowledgable in how to lay down a smooth application of woven fiberglass fabric and bond it to a wood surface with epoxy, and some others do not know and really don't care. This is for the few in the middle. After giving a quick, light sanding to the cured epoxy I applied yesterday to the port side gull wing panel of Jersey Girl's roof, I cut a slightly oversized piece of the fabric, using ordinary dollar-store scissors, and smoothly draped it over the surface...