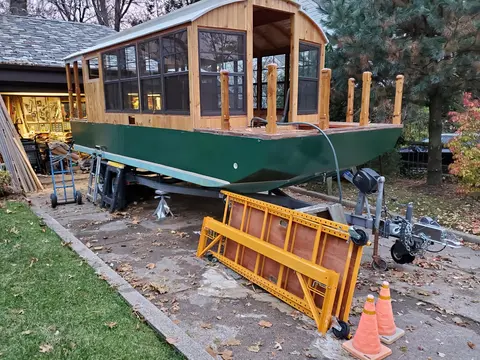
Jersey Girl · step
Hull Panels
Scarfing plywood, cutting panels, milling strips or planking stock.
Hull Panels on every boat, not just the Jersey Girl →
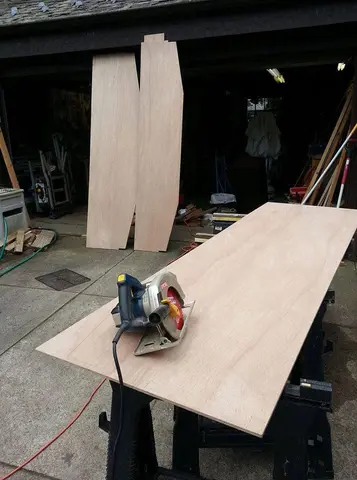
June 17, 2017. At long last, more than a year after I put the houseboat parts into storage, I have resumed work. Here, I am rough-cutting the transverse bulkheads. There will six of them. The original plan calls for two, but that's for a 17-foot boat. I'm stretching it out to 20 feet, so I feel I need extra stiffening in the stern and bow. My Facebook friend, Penny Barr, an artist who lives and works on a houseboat in Toronto, noted: "We ALL need extra stiffening now and then. .." Another friend from my Journalism days at the New York Post, who calls himself Thomas Wolfe, observed: Thomas Wolf...
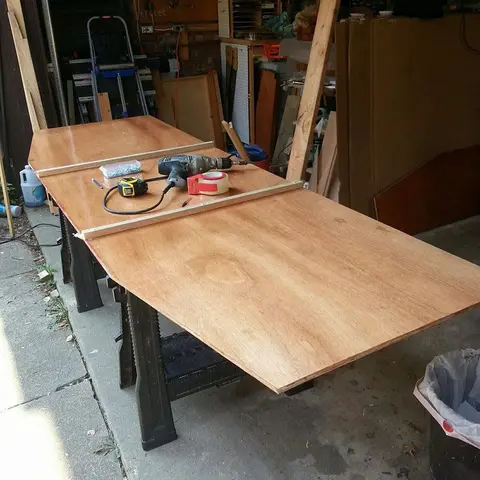
July 19, 2017. I'm preparing the transom to be installed on the stern. I've screwed down two temporary spacer strips making sure to use screws long enough to hold the half-inch plywood securely but short enough not to break the surface on the opposite side, which will show. Also, I've wrapped the strips in package-sealing tape, so any squeeze-out of epoxy will not stick to them and I will be able to remove them easily. Yes, I measured three times, three different ways. Outside edge to outside edge of the spacing strips, 28 1/2 inches. Centerline of the transom to outside edge of each strip, 14...
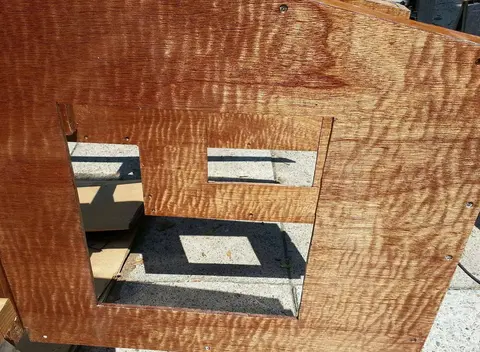
August 9, 2017. Houseboat footnote. Take a gander at the figure of this grain! So here's a brief peregrination on the relative merits of okoume and lauan marine plywood for boatbuilding. "You don't build boats with lauan," more than one boat-building professional has sniffed at me. "You use okoume. Only if you want the boat to stay on top of the water." So of course I started out with okoume, made in Holland from an African hardwood that -- as I understand it, and I could be wrong -- is related to mahogany. And it carries a certification from Lloyd's of London saying it is waterproof even if...
Sept. 7, 2017: I have decided to solve a few problems at one time. The problems: my dissatisfaction over the ugly dark stains from water intrusion under the epoxy finish in the transom, together with the expensive okoume's totally boring grain pattern, and my feeling that I wanted to thicken and stiffen the transom to be able to support a much larger motor than the design calls for. Solution: face the transom with half-inch laminates, inside and out, of much less expensive lauan marine plywood. I believe it's better quality plywood, it has a much more interesting grain, and when I finish, the...
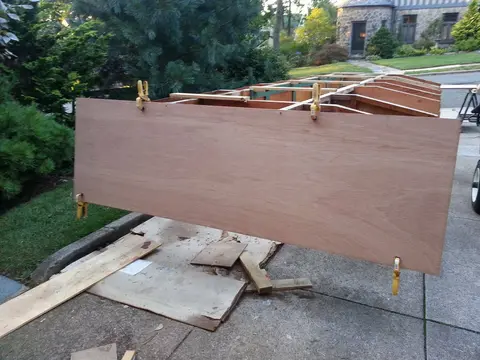
Sept. 11, 2017: On all days, but especially on this day, I feel fortunate to be alive and doing things I love to do. I do not take that lightly or for granted. Here's the the new face of the transom, laminated over the old one. Much better, in my opinion. You can see a bit of the old one where I have not yet cut it away for the motor mount.
September 24, 2017. It's time to close in the hull, starting with bottom panels. I've decided to use the services of Chesapeake Light Craft, in Annapolis, Md., to deliver plywood panels that are pre-cut with finger joints, formed on their huge computer numerically controlled routing table. Traditionally, multiple sheets of plywood were joined to increase length by using "scarf" joints -- gradual tapers planed into the the edges of the plywood with an 8-to-1 ratio of length to thickness, then glued and clamped. But I think using CLC's finger joints will save me a lot of time and give me a more...
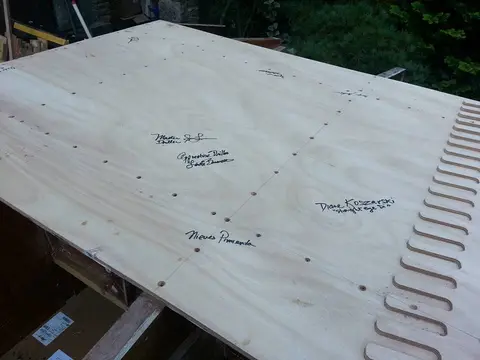
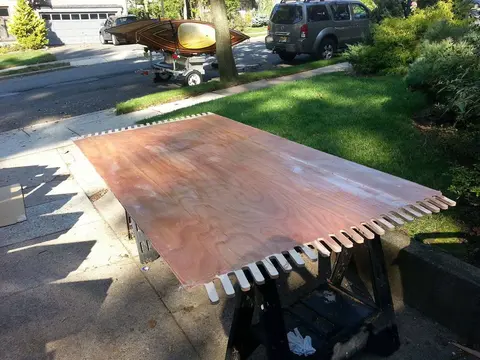
Sept. 25, 2017: Here's the inside surface of the second bottom panel, prepared for installation. Each of these hull panels will be sealed with epoxy and fiberglass fabric before being installed, because it's easier to do it on saw horses than working upside-down while lying on my back under the growing hull. It's still a little tacky so I'll wait until tomorrow to install that and then I'll get back to other fiberglassing jobs in the stern compartments. So that's it for today. Tomorrow is another day.
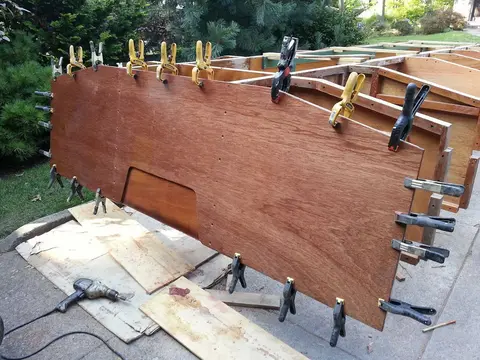
Sept. 28, 2017. Some say that with a long enough lever and a well placed fulcrum, you can move the world. That may be on my bucket list, but for now, I am satisfied with bending half-inch marine plywood around the curve of the bow of the hull of the houseboat-to-be. It might be easier with run-of-mill construction-grade plywood from the big box home center, but with this high quality seven-layer cake that's certified by Lloyd's of London to have no internal voids, bending seems not to be in its nature. "How can you possibly bend it?" asked an architect friend. "I'll bend it with my mind," I sa...
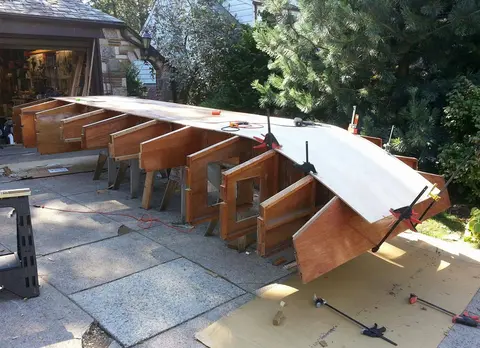
Oct. 1, 2017: I have started work on the side panels of the hull. The thin batten tacked temporarily to the curve of the bow is to tell me how to cut the panel and its supporting framework in that area. I will fasten a cedar plank to the bulkhead ends and trace the curve of the batten onto the plank. Then, I will cut the plank on the traced line, and use it as a template for the side panel at the bow.
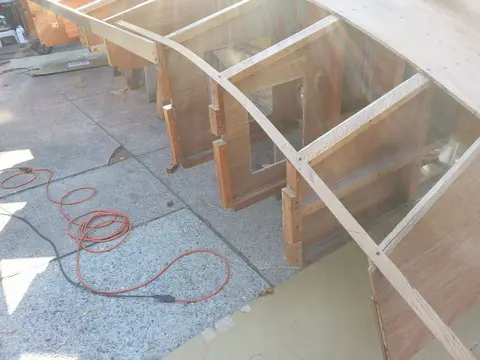
Oct. 1, 2017 (part 2): The curve of the side panel frame is pretty good for a first pass. Now, I have to plane it into a sweet curve with no lumps and bumps, and work in the bevel to make sure all the panels in this area lie down as they are intended. Then, when I'm sure I have it just right, I will unscrew the parts and check them for approximate fit on the other side, even though I know the bevel will be reversed. Then, I'll use the parts as templates for the other side. My goal for tomorrow is to get at least one full-length side panel glued up and installed. We'll see....
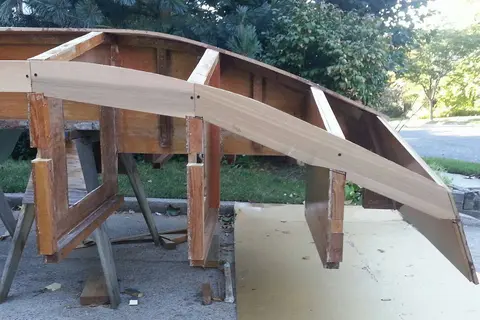
Oct. 2, 2017. Hanging the side panels temporarily, to check for fit. By the way, the topmost edge of the side of a boat is called the "sheer." A plank is called a "strake." These three pieces, when joined, will be the "sheerstrake." In the second picture, you can see the bow section from the inside. I'll use a pencil to trace the outline of the curve of the bow, then cut that section of the sheerstrake on the line I scribe.
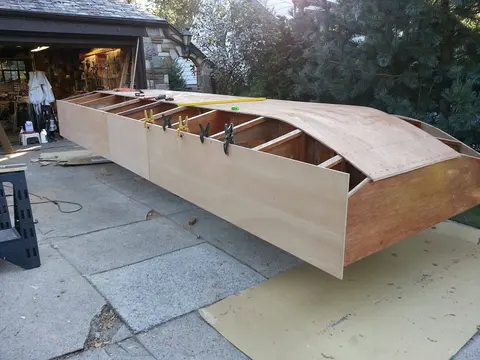
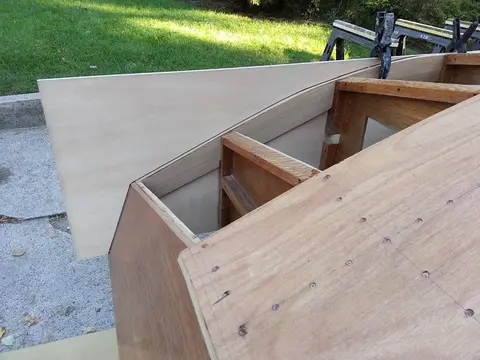
Oct. 10, 2017: Jersey Girl's port side panels fit perfectly. (Port is left; starboard is right. In this picture, Jersey Girl is upside-down. When she's turned right-side up, this will be the port side.) Later today, I'll drill and countersink a couple hundred pilot holes, then screw and glue everything together permanently.
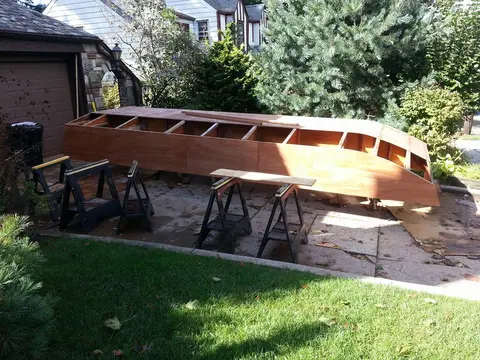
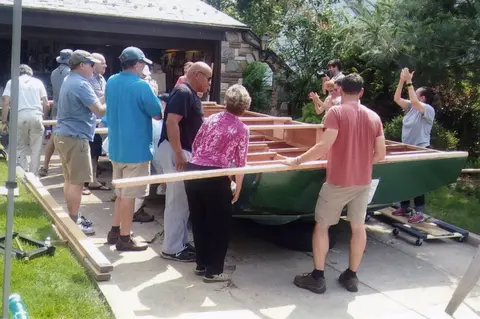
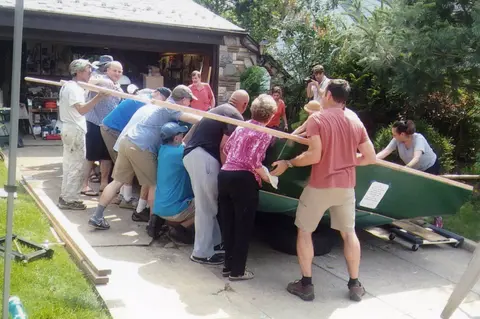
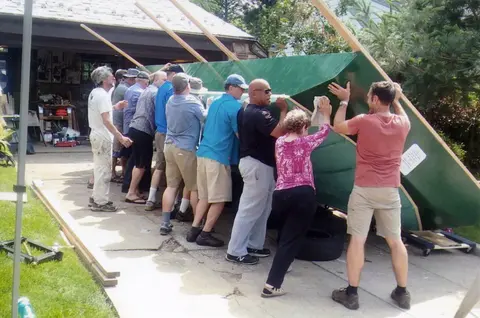
Houseboat look-back to Sunday, July 1, 2018 – There came a time over the summer when friends and neighbors showed up to help me flip over Jersey Girl. A few days ago, my friend Jerry handed me a packet of photos he made of the occasion, a sequence of 13 pictures. Here they all are, from the hull upside down to right-side up. Before the festivities started, I used a heavy-duty motor hoist to lift the bow first and then the stern, so I could remove the four sawhorses on which I had built the hull. Then, we raised one side so I could slide six movers’ dollies under that edge. Next, we rolled the...
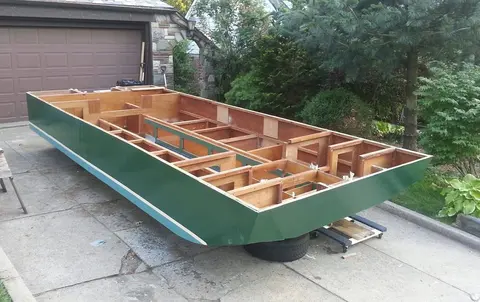
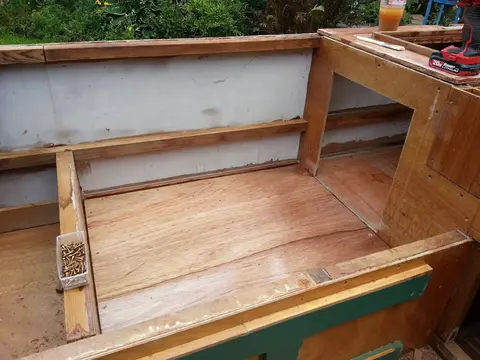
Houseboat update, Monday, September 24, 2018 -- The floor of Jersey Girl's future head was glued and screwed into place today. I love the grain pattern in this plywood, and I may decide to leave it exposed rather than go to the trouble of fastening individual floorboards to the top of it. It's luan, sometimes inaccurately called Philippine mahogany, produced from the same tree we can thank for the crap quarter-inch underlayment available at big-box home centers. For years, the word among professionals was, "boat builders do not use luan." Now, thanks to new cutting and production methods, luan...
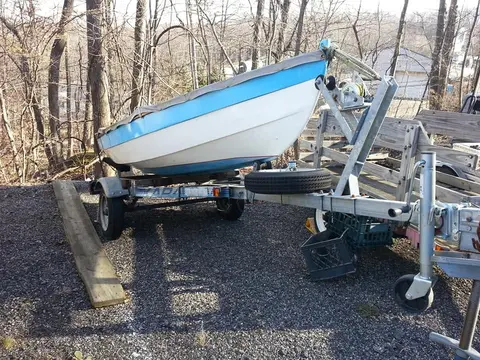
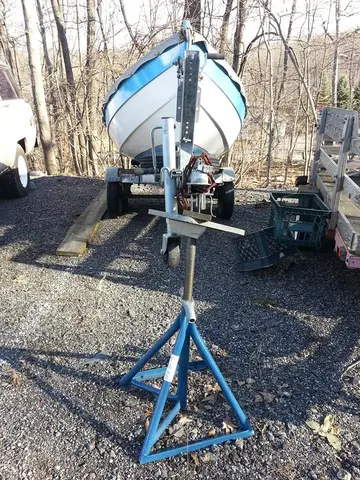
Houseboat update (with a slight course correction), Thursday, December 6, 2018 -- As I tuck Jersey Girl in for winter hibernation, I must not forget Thistledew, the sailing dinghy I built more than 25 years ago. She's still in great shape, but if I don't tilt her up to let any water run out her transom scupper, freeze/thaw cycles will quickly take their toll. I haven't had a chance to sail her for at least four years, and I have to decide whether to make use of her or let her go to a new owner.
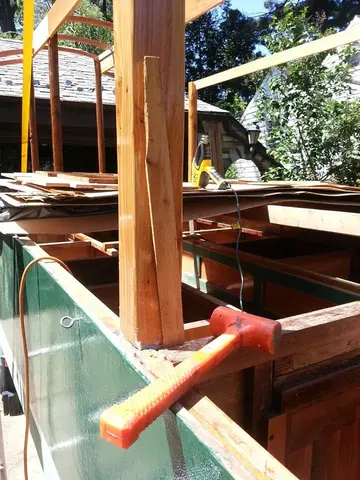
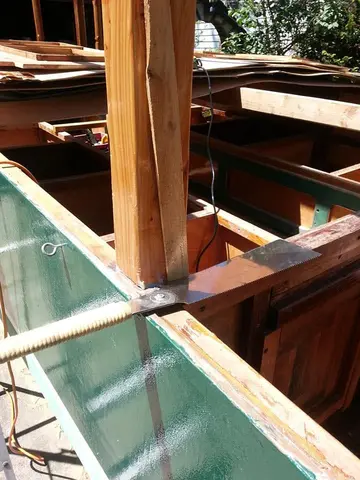
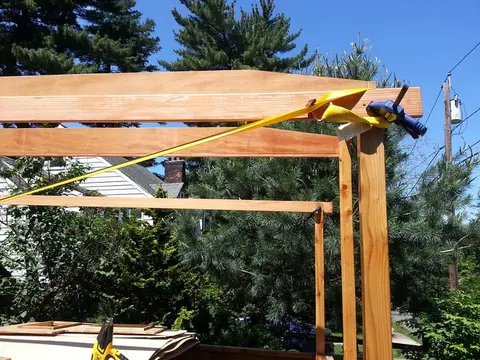
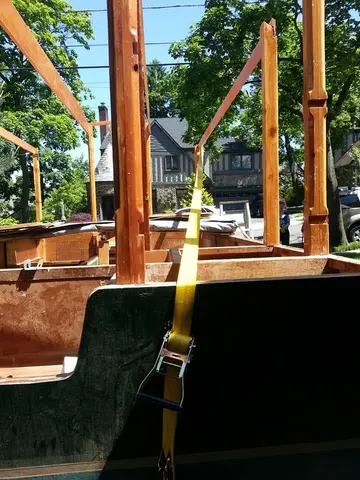
Houseboat update Part 2, Monday, May 27, 2019 -- If nothing else, boatbuilding is an exercise in problem-solving. So here's my proposed fix for the problem of the wayward post. First, I run a long ratcheted tie-down strap from the top of the post to a U-bolt I had installed in the transom at the stern (never having considered the possibility I would need to use it for this). Next, crank the handle to put the strap and the post it's attached to under considerable tension. Then, knowing that it's possible to soften epoxy with heat, I carefully use an electric heat gun on the long epoxied joint b...
Houseboat update, Wednesday, November 27, 2001 -- It's time clean up Jersey Girl's homeport in preparation for the winter. That means getting rid of old, tattered tarps that have been folded up and stowed under her hull, converting pieces of scrap wood offcuts that have littered the driveway into firewood, and disassembling the scaffold. Now that the roof is completed and protected for now with primer, I won't be needing the scaffold until spring. But JG will be staying right where she is over the winter, and work will continue. Bit by bit I will be closing in the cabin against the weather, an...