Jersey Girl · step
Strongback & Molds
Building the strongback or ladder frame and setting up station molds.
Strongback & Molds on every boat, not just the Jersey Girl →
May 5, 2015. I buy enough okoume marine plywood to get started. This stuff is expensive, about $100 for a 4 x 8 sheet of 3/8-inch ply and $125 for the half-inch. But you can't expect to do a project like this with the kind of material you can get at the big-box home centers. The material I am buying has many more plies for a given thickness, and they are bonded with glues that are certified to be waterproof and boilproof. It is made of selected hardwood throughout, and it contains no inner voids or outer patches, which I have learned are called "dutchmen." I'll be learning a lot of new vocabul...
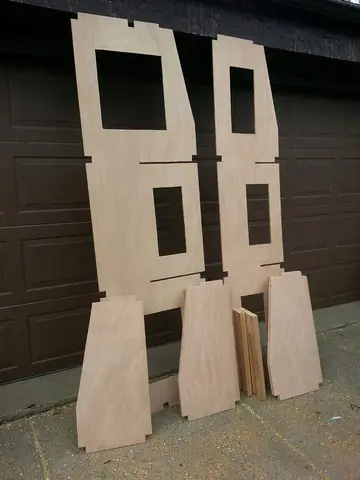
June 6, 2015. It's time to get to work on the longitudinal frames. These are the pieces that will interlock in slotted joints with the full-width bulkheads to create the basic backbone of the hull. The longitudinal frames will also support the partial bulkheads off to the port and starboard (left and right) sides. Reflecting the design length of the boat, they are 17 feet long. Because they are so long, each one has to be made of several smaller pieces of plywood, and they are supported at the joints by 2 x 2-inch timbers of clear red cedar. Red cedar is an exceptionally light-weight wood, and...
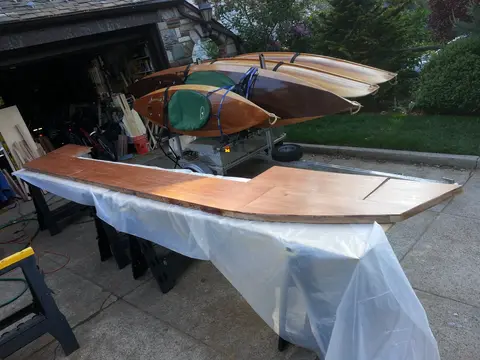
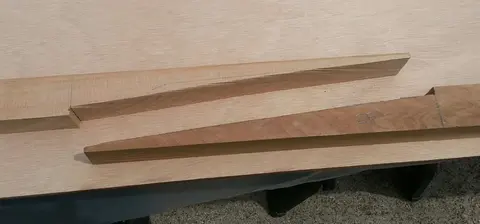
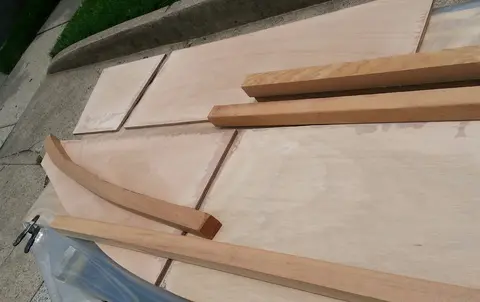
June 29, 2015. The joints in the longitudinal frame are reinforced on the side that will be seen from inside the boat by a decorative wainscoting system, made of pine. Once it's glued and screwed into place, I'll ease the edges in the decorative way and paint it to make it look good.
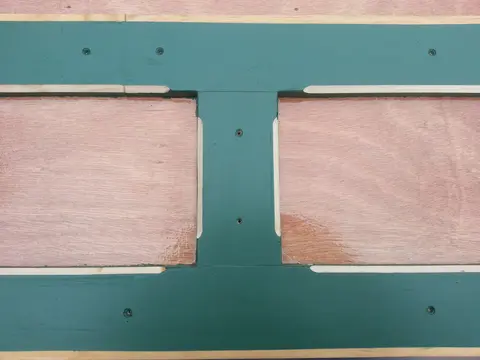
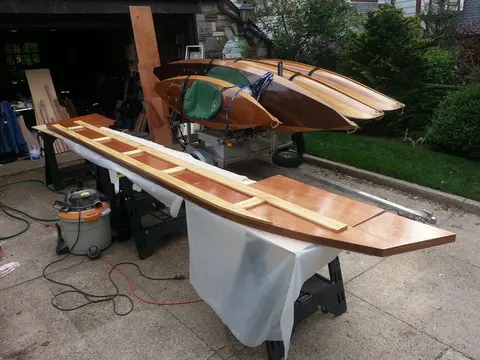
July 10, 2015. I've reduced the height of the forward deck support in the long frames, and installed additional bracing to make up for the loss of girder effect. I've also beefed up the the bow, anticipating the shape of the forward deck structure. By now, there's enough wood in each of these long frame components that they are heavy and require quite an effort to move. At the same time, each of them is quite floppy without the support of surrounding framework. If I'm not careful, a misstep now will easily snap one of them in two. That would not be a good thing. Another problem: by now, these...
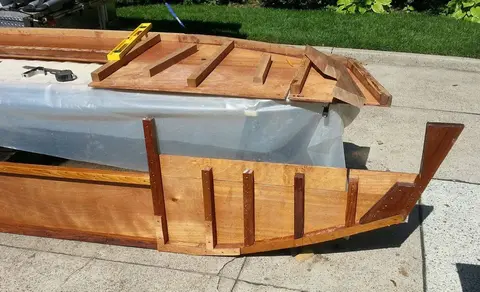
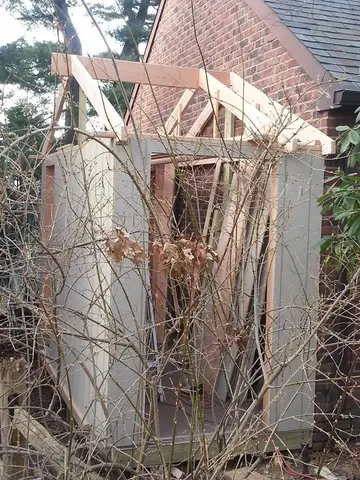
December 31, 2016. Here it is, the very last day of 2016, and I still have not completed the "short-term" construction of a shed that was supposed to help me clear out the garage and get back to boat-building. The long frames, wrapped in plastic on the deck, have gone through more than a year and a half, serving no purpose other than to reprimand me every time I look at them, for abandoning ship. It is perfectly clear that I will still be building the shed well into 2017, when the weather is warm enough that I should be building the boat instead.
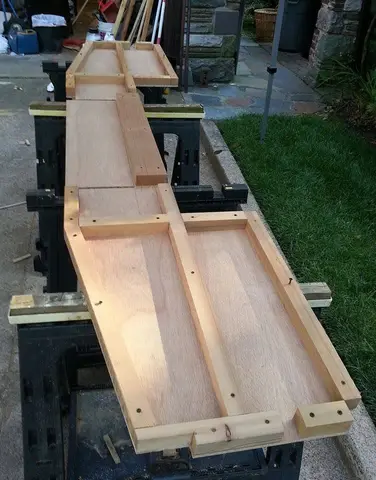
June 28, 2017. One day closer to the big splash! Today's progress on the houseboat project -- the layout and dry fit of the parts that go into the bulkhead closest to the bow. I screw everything together temporarily with sheetrock screws, drilling pilot holes as I go. (Try screwing into cedar without pilot holes and you wind up with expensive kindling.) This bulkhead is representative of the cross section of the outside deck areas of the boat. The recessed area in the center at the right of the picture will support the deck; hence all the extra cedar bits. The two "ears" at the ends show the h...
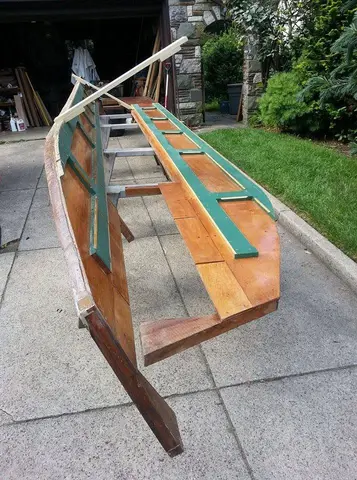
July 18, 2017. The hull frame setup begins, with the long frames being taken out of storage (finally), and placed on sawhorses that will be the temporary support of the entire hull as it grows, piece by piece. One temporary spacer is screwed into place on one side. Next, I will do a second, then raise both sides into approximate position and make adjustments for equal length.
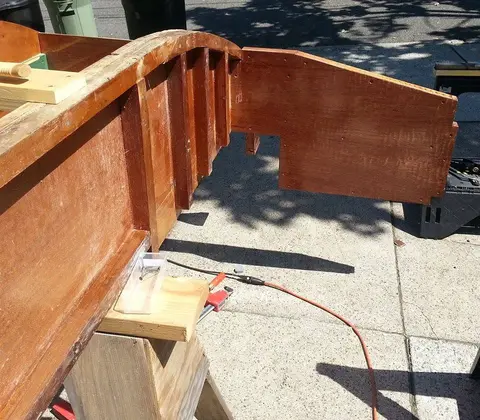
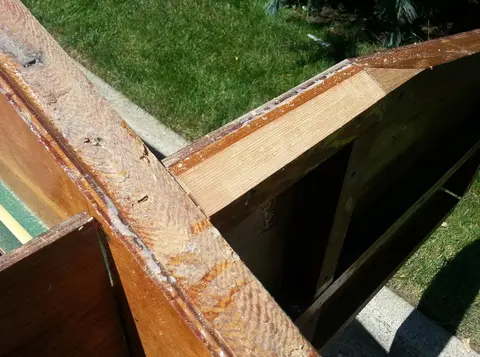
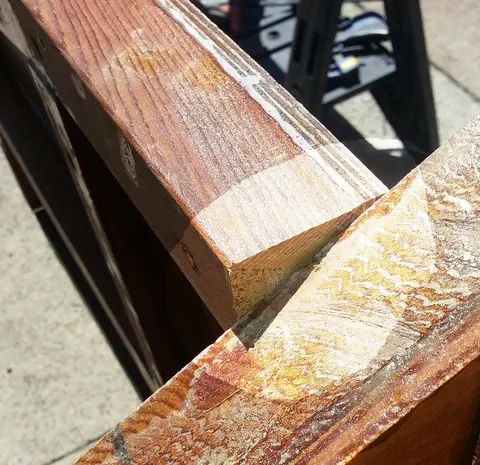
July 21, 2017. Now, moving forward to the bow, I'm fitting foremost full width bulkhead. This begins the creation of the slotted "egg crate" construction method used for this boat.You can see that when the bulkhead is in place along the curve of the bow, it will need some planing to make its bottom timber conform so that the plywood bottom panel can be bent to the proper shape, when it's time to do that. The third picture shows what it looks like after I have planed an angle matching the curve of the bow. And the fourth picture gives you and idea of the placement of the bulkhead joining the tw...
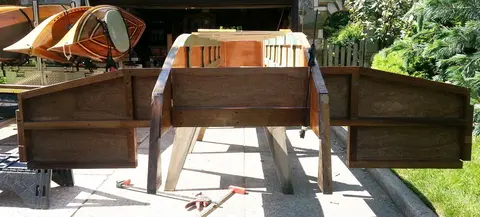
July 25, 2017. The mid-bow bulkhead went in today. Tomorrow, I will make some adjustments and put in the forward cabin bulkhead. I find I have to keep checking for square as I go along, and I have devised a great way to do that reliably and easily. The sheet of cheap quarter-inch plywood sitting on top of the work (actually, the bottom, but it's upside-down) is my squaring tool. I just line it up parallel with both of the longitudinal side frames and put the short edge where I want to install a lateral bulkhead. I mark on both sides and enjoy the confidence that it will be square.
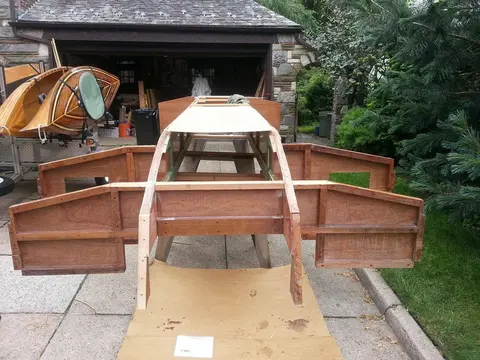
July 26, 2017. I am preparing for the dry fit of the stern bulkhead, the one just forward of the transom. Actually, it's the second dry fit for this component. The first time around I found I had to trim a bit here and there to make it fit. I think I cut and ground and chiseled away all the offending bits, but am I certain? No, it doesn't fit until I see it fits. Can you imagine spreading epoxy with a working life of about a half-hour, and then discovering the piece doesn't fit? What a mess. So, I have to dry fit every piece, screw it together, and if any adjustments are necessary dry fit it a...
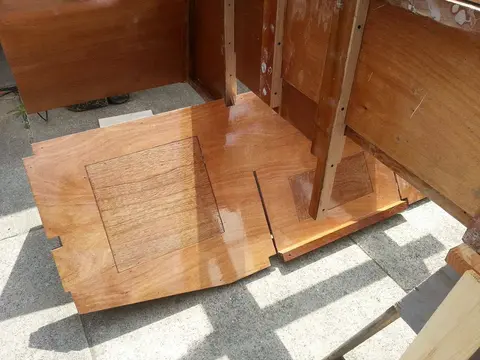
Aug. 10, 2017. It's time to start adding the partial bulkheads, four on each side. Unlike the full-beam (beam is the nautical term for width) bulkheads installed earlier, these shorties do not transect the central space between the two longitudinal frames in the area where the cabin will be. That's because we are keeping that space unobstructed to serve as an aisle so we can move about inside. But before I glue and screw these partial bulkheads in place I have to make sure they are square. In this case, I have decided to make the first partial bulkhead toward the aft end of the cabin 35 inches...
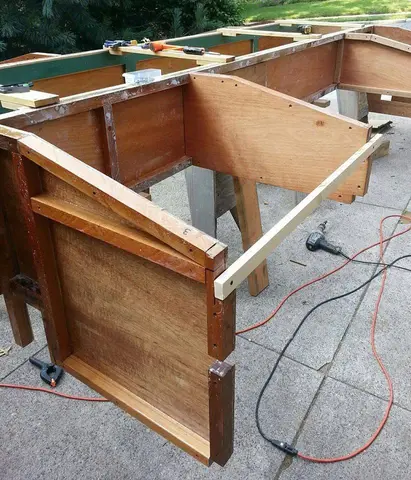
Quitting time, Aug. 10, 2017 -- That's it for today. The mosquitoes are having a feast, and I'm about due for a transfusion. I am four partial bulkheads away from a complete frame for the hull. I'll have to do a little planing to bevel around the bow and stern. At the joints where the pieces of wood intersect, I will have to lay in a "fillet" of thickened epoxy, and reinforce each joint with a strip of fiberglass tape. I hope to be ready to start sheathing the hull next week.
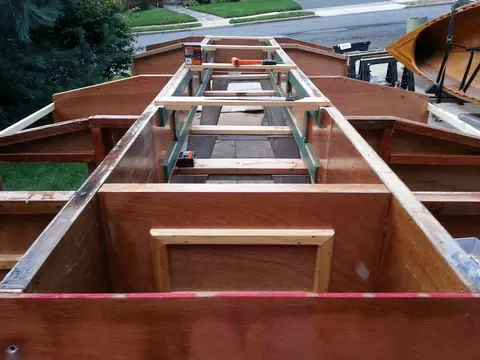
Houseboat update, Sunday, May 19, 2019 -- Suddenly, it's summer in northern New Jersey, the sun is shining, and I have a chance to get back to work on Jersey Girl. Today, I installed the four forward cabin bulkhead posts. The fore deck entry will go between the two center posts. On the left side of the picture, you're looking at where the helm will be, and on the right will be a seat for a passenger, facing forward or in toward the center, depending on his or her preference. More tomorrow, if weather permits.
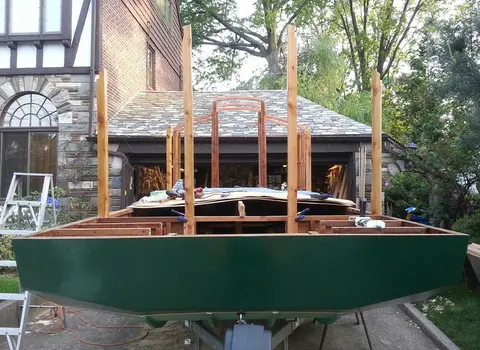
Houseboat update, Tuesday, May 21, 2019 -- just a little more fitting and below-deck prep work, and the floor of the recessed forward deck should be ready to be glued and screwed into place, maybe tomorrow. The other thing I did today was work on the two main longitudinal roof beams, which will run from the aft cabin bulkhead to the forward cabin bulkhead. I may be able to install them tomorrow as well. We'll see.
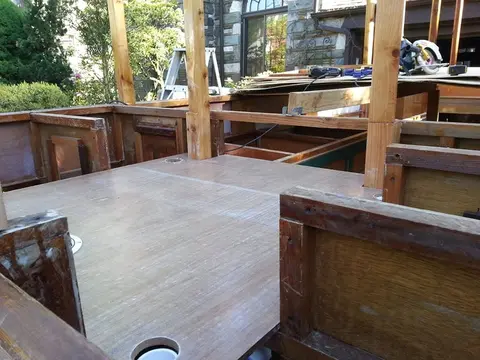
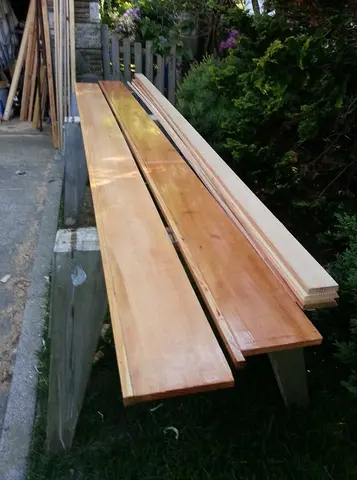
Houseboat update, Wednesday, June 5, 2019 -- Fitting Jersey Girl's first window frame. Now is thee time to make small adjustments, to make certain that all will appear shipshape as Jersey Girl takes final form. I know the 24-inch windows will require 24 1/4 inches clearance between each two framing timbers, and the timbers have to be perfectly vertical to avoid problems later on. This sequence shows the steps I'm taking to fit the first one. Initially, I can see just by eyeballing, that the piece is not truly vertical. So I cut a notch in the sheer frame of the hull seat the bottom of the wind...
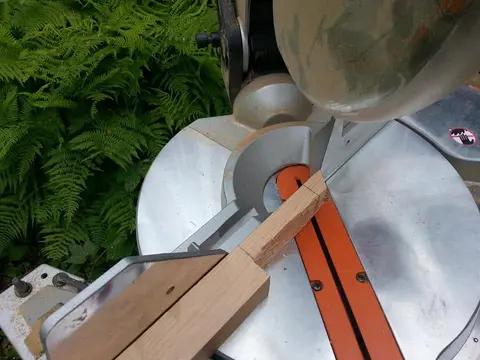
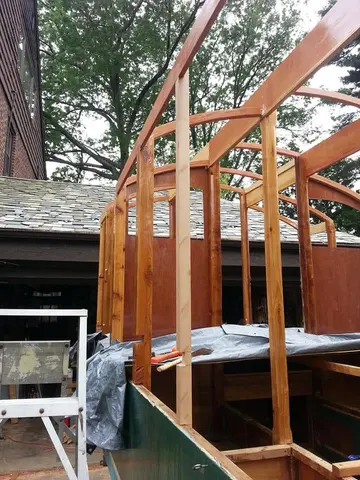
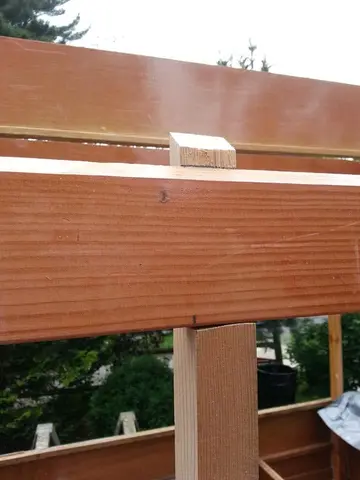
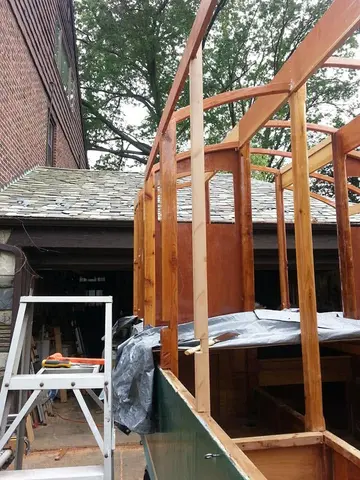
Houseboat update, Friday, December 27, 2019 -- I took advantage of another warm December day to do a little more work on Jersey Girl's aft door frame, installing short pieces of epoxy-finished tongue-and-groove pine at the top on the inside. Eventually, I will seal the gap at the roof, and cover it with a neat-looking moulding strip. Tomorrow, I will install a cedar head jamb and possibly the side jambs as well. (If you don't know what jambs are, check back over the next few days and all will become clear.)