Framing a hard-chine plywood hull, step by step
How the frames, chines, sheer clamps and battens go together before the first sheet of plywood
There is a stage in every frame-built plywood boat between setting up the frames and hanging the first sheet of plywood. It does not look like much progress. You end up with a skeleton of sticks that still does not look like a boat. But it is where the shape of the hull actually gets decided, and anything that goes wrong here stays hidden until the plywood will not lie down.
This post walks through that stage for a hard-chine hull, using two real logs from this site: one boat finished and on the water, and one being framed in a city garage right now.
What a hard-chine frame is
A hard-chine hull is one where the bottom and the sides meet at a distinct corner, called the chine, rather than curving smoothly into each other. It is the natural shape for sheet plywood, because each panel only has to bend in one direction. Glen-L describe both the Flying Saucer and the Hot Rod as vee-bottom hard-chine hulls developed for sheet plywood.
The skeleton is made of two kinds of part. Transverse frames run across the boat at intervals, with the stem at the bow and the transom at the stern. Longitudinals run the length of the boat: the keel along the centreline, a chine log along each chine, a sheer clamp along each top edge, and battens between them on the bottom.
The part that surprises most first-time builders is which of those the plywood actually fastens to. Glen-L are clear about it in their note on whether the planking is attached to the frames: the planking is fastened to the chine and sheer, not to the frames. The frames give the hull its shape. The longitudinals carry the load and give you something to screw into. Fastening plywood hard to a frame sets up a stress point that can crack the panel later, which is why so much of this stage is about making sure the frames sit just clear of the skin.
Setting up the frames
The frames go up on a building form, usually upside down, so the bottom faces you when it is time to plank it. Each one has to sit at its station, level, square to the centreline and plumb, because every longitudinal after this is going to be bent around them.
Paul Kane's Glen-L Hot Rod log has two small decisions from this stage worth copying. The hull is only 28 inches deep, so he raised his setup jig until the tops of the frames sat 16 inches off the floor, which gave him a comfortable working height and room to cut notches and fair the sheer. He also added a third leg between two of the middle frames, because the chines and sheer clamps put real load on the structure when they are sprung in, and he did not want anything shifting.
Before you move on, run a long, thin batten over the frames from stem to transom in a few places. If it touches every frame with an even curve, the setup is good. If one frame stands proud or sits low, fix it now. It is a five minute job with nothing attached and a very long one later.
Chines and sheer clamps
This is where the boat first starts to look like a boat, and where you find out how stiff wood really is.
Glen-L's guide to fitting the chines sets out the method. Every frame and the transom is notched and bevelled so the chine sits tight against it, and the chine should bend naturally around the frames in a clean line, without dips or humps. Fit the joint at the stem first, leaving extra length at the transom. Glue it, put a single screw in at the stem, then spring it around the boat and fasten into each frame as you go. Near the bow the chine has to twist as well as bend, and where it lands on the stem can move a little to let it lie flat.
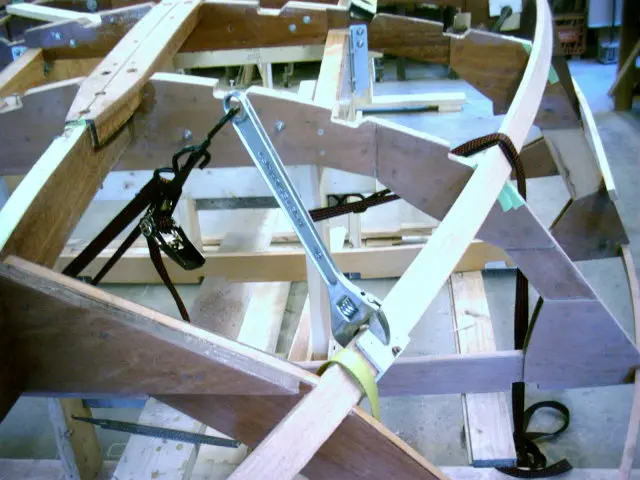
That twist is the hard part. Paul used a large crescent wrench and a ratchet strap to twist the top of the chine inward towards the keel, checking with a straightedge from sheer to chine to see when there was enough. Glen-L's own suggestion for wood that will not cooperate is to wrap it in old towels, pour boiling water over them and bend it straight away.
Sheer clamps are often laminated in layers rather than bent as one thick piece, because two or three thin strips take the curve far more easily. Paul used two strips of mahogany per side to start and added more laminations later. For one glue-up he used no screws at all, and it took 29 clamps. Finishing nails through the dry-fitted strips kept them from sliding once the clamping pressure went on.
Battens and fairing
With the chines and sheer on, the battens go in along the bottom. Depending on the design they are either notched into the frames or rest on top of them. Glen-L say the bottom battens should run as far forward as possible and should never end on a frame.
Then comes fairing, which is the real work of this stage. Fairing means planing and sanding every surface the plywood will touch, keel, chines, stem, sheer, battens and frame edges, until a sheet laid across them meets all of them in one continuous smooth plane. Glen-L publish a method named after Rabl for fairing the stem and chine, and Paul followed it.
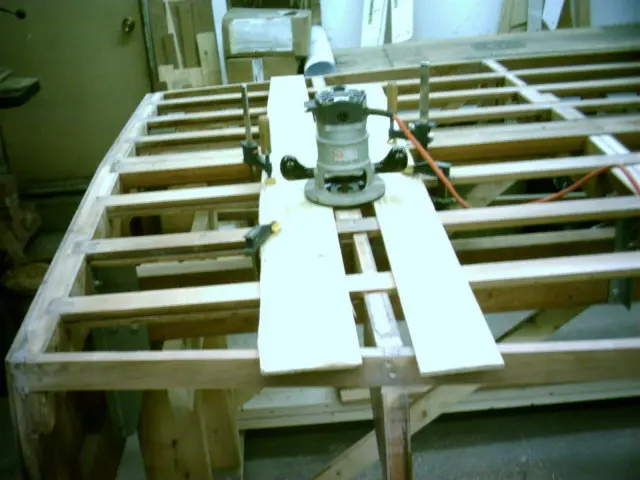
His best trick is one to steal. To get the frames sitting exactly 1/8 inch below the battens, he clamped two strips of 1/4 inch plywood along the battens and ran a router across them, so the bit could only cut the frame and never the batten. That is precisely the gap that stops a frame from making a hard spot in the bottom planking. He used the same router jig on the sides of the frames, and for fairing the long run from chine to sheer he welded two 30 inch steel bars to an old jack plane so it would span the gap.
The order, start to finish
- Set up the building form level and mark the centreline.
- Stand the frames, stem and transom at their stations, then brace them square and plumb.
- Check them all with a long batten and fix any that are proud or low.
- Notch and bevel the frames for the chines, keel and sheer.
- Fit each chine at the stem first, then glue, spring and fasten it aft, frame by frame.
- Fit the sheer clamps, laminating them in strips if the bend is tight.
- Fit the battens, running them as far forward as you can.
- Fair everything until a batten or sheet meets every surface without a gap or a hard spot.
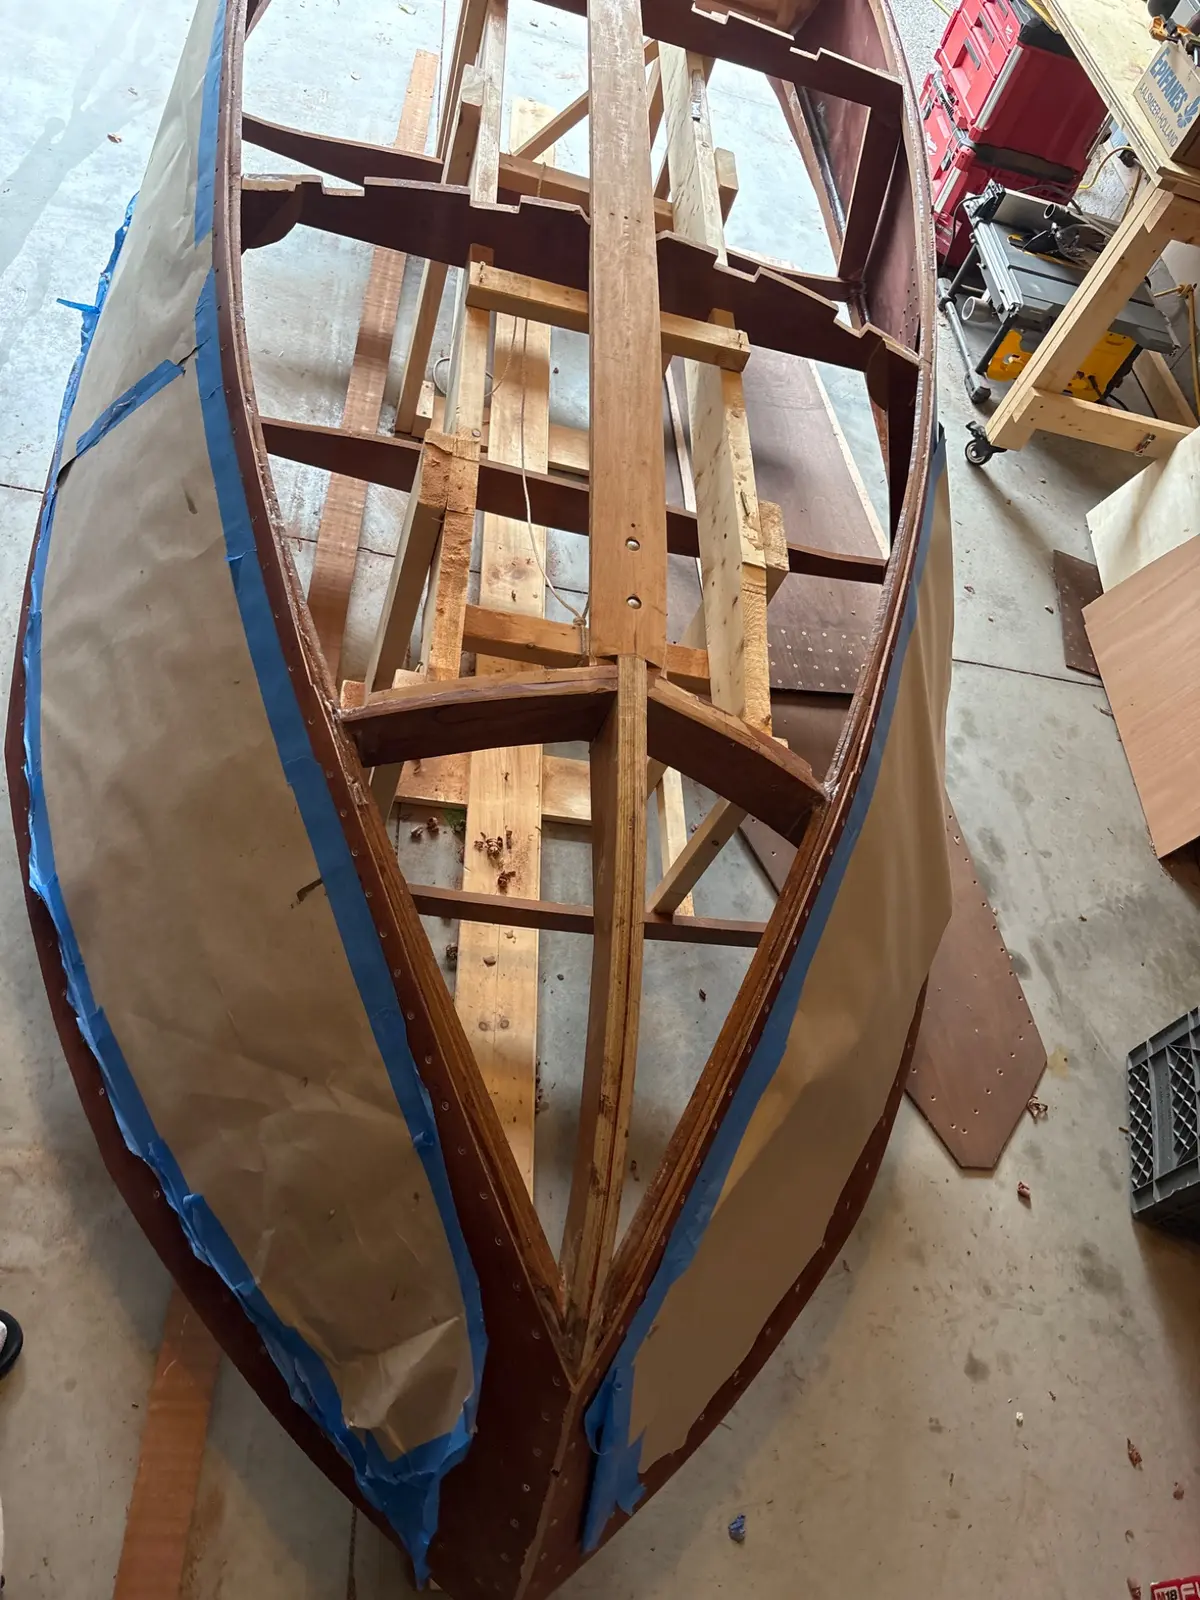
Michael, who is building the Flying Saucer on this post's showcase card, is at exactly this point. His sides are on and he is adding wood at the bow so the bottom screws get good purchase along the chine, while he decides how to butt block the bottom panels. It is his first boat.
Very few builders log their hours for this stage. On the numbers page, strongback and molds work has entries from five builders and, at the time of writing, no hours logged against it at all. That is a shame, because it is the stage everyone underestimates. If you are about to start framing, start a build log and write down the hours. The next person to frame a hard-chine hull will thank you for it.