Scarf, butt block or puzzle joint: joining plywood sheets
Three ways to make a plank longer than a sheet, and how to glue any of them flat.
A sheet of plywood is 8 feet long. Most boats worth building are not. Pick a design longer than a sheet and you have to make long panels out of short ones, often before a single hull part exists.
There are three ways to do it: a scarf joint, a butt block, or a puzzle joint. They differ in strength, in the skill they ask of you, in how they look, and in how easy they are to glue up straight. This post explains how each works, which designers use which, and how to glue a joint flat.
Why a hull needs joined panels at all
A plywood joint, in boatbuilding, is an end-to-end glue joint that turns two sheets into one panel longer than either. On a stitch and glue boat every hull plank, or strake, runs the full length of the hull. On a framed plywood boat the bottom and side skins do the same. Anything over 8 feet needs at least one joint in every panel.
Builders who keep the whole boat inside one sheet skip the problem. Dave's Micro-Wherry is 93 inches long, and every panel fit in a single sheet with no scarf. Everyone else joins plywood, and the plans will say how.
The scarf joint
A scarf is a long, shallow bevel planed on the end of each sheet so the two tapers overlap and glue face to face. The glue area is large and the finished joint is almost invisible, which is why bright-finished boats use it.
The number that matters is the ratio of bevel length to plywood thickness. Glen-L shows 1:12 as the standard, and says some builders use 1:10 on plywood up to 1/2 inch and 1:8 on thicker stock. The arithmetic is simple: multiply the thickness by the ratio. At 1:12, a 1/4 inch sheet needs a 3 inch bevel. WoodenBoat published bending tests of epoxied scarfs in oak, and found the 4:1 and 8:1 samples weaker than solid timber while the 12:1 and longer joints were at least as stiff. That was solid wood, not plywood, but the direction is clear: 8:1 is the minimum you will see in print, not the target.
Glen-L's method for cutting one:
- Lay the two panels on a flat bench, edges parallel, with the upper panel set back from the lower one by the length of the scarf.
- Clamp a block through both panels to the bench so nothing moves.
- Plane both tapers at once with a hand plane or a power plane, working down until the glue lines of the plywood show as straight, evenly spaced bands.
- Finish with a long smoothing plane so the bevel is flat, not hollow.
Gluing is where scarfs bite. The feathered edges slide on wet epoxy, so the joint can creep out of line while you clamp it. Line the panel up against a straightedge and fasten a block over the joint with temporary screws to spread the pressure. Glen-L warns against pressure that forces the epoxy out, because a starved scarf is a weak one.
Andrew Donald scarfed every sheet in the decks of his Grey Seal, lapping the joints from bow to stern, and wrote that in the end each scarf takes little more than some noise and dust. He had considered butt joints and was talked out of it.
The butt block
A butt block is the plain method. The two sheets meet square, end to end, and a strip of plywood at least as thick as the planking is glued and fastened across the back of the seam. Glen-L specifies a block that extends at least 4 inches past each side of the joint, with fasteners about 2 inches apart and an inch in from the edges, driven right through planking and block. With epoxy, the fasteners can be left out, but then Glen-L suggests rough-cutting the panels and joining them flat on a bench first, where you can get real clamping pressure.
The catch is shape. A butt block is stiff and will not bend with the plank, so the hull goes flat over the joint. Put the joint in the flattest part of the hull you can find, usually amidships on the bottom. The block is fitted between the longitudinals, the battens, chine and keel, so it goes in after one panel is fastened and before the next.
Butt blocks are honest, fast and strong enough on a framed runabout or skiff where the inside of the hull is hidden under a sole anyway. They are a poor choice where the plywood is bent hard, or where you want a clean interior. On thin, double-glassed stitch and glue hulls, John C. Harris of CLC has pointed out that even a plain glassed butt joint works, because the fiberglass on both faces carries the load.
The puzzle joint
A puzzle joint is what you get when the designer owns a CNC router. The ends of the panels are cut into interlocking tabs, like a jigsaw, and simply push together. Chesapeake Light Craft moved its kits from machine-cut scarfs to puzzle joints around 2005, and John Harris has explained why on the CLC forum. Feather-edged scarfs were fragile in shipping, and scarfs and butts both slide when glued, so the misalignment showed up later as bulkheads that would not fit. Puzzle joints cannot slide lengthwise.
Harris is candid that a scarf is stronger in absolute terms: roughly six times the strength the joint needs against roughly four for a puzzle joint, which in practice never lets go at the puzzle because the wood fails first. Some builders dislike the look of the tabs under varnish, and CLC still cuts scarfs for a couple of its traditional kits.
Jeffrey Marso's Guider came as a 1,200 pound pallet of okoume cut from about nine full sheets, every long plank in pieces with puzzle ends. His log puts it plainly: the puzzle joint is there to align the pieces lengthwise and hold them while the epoxy cures.
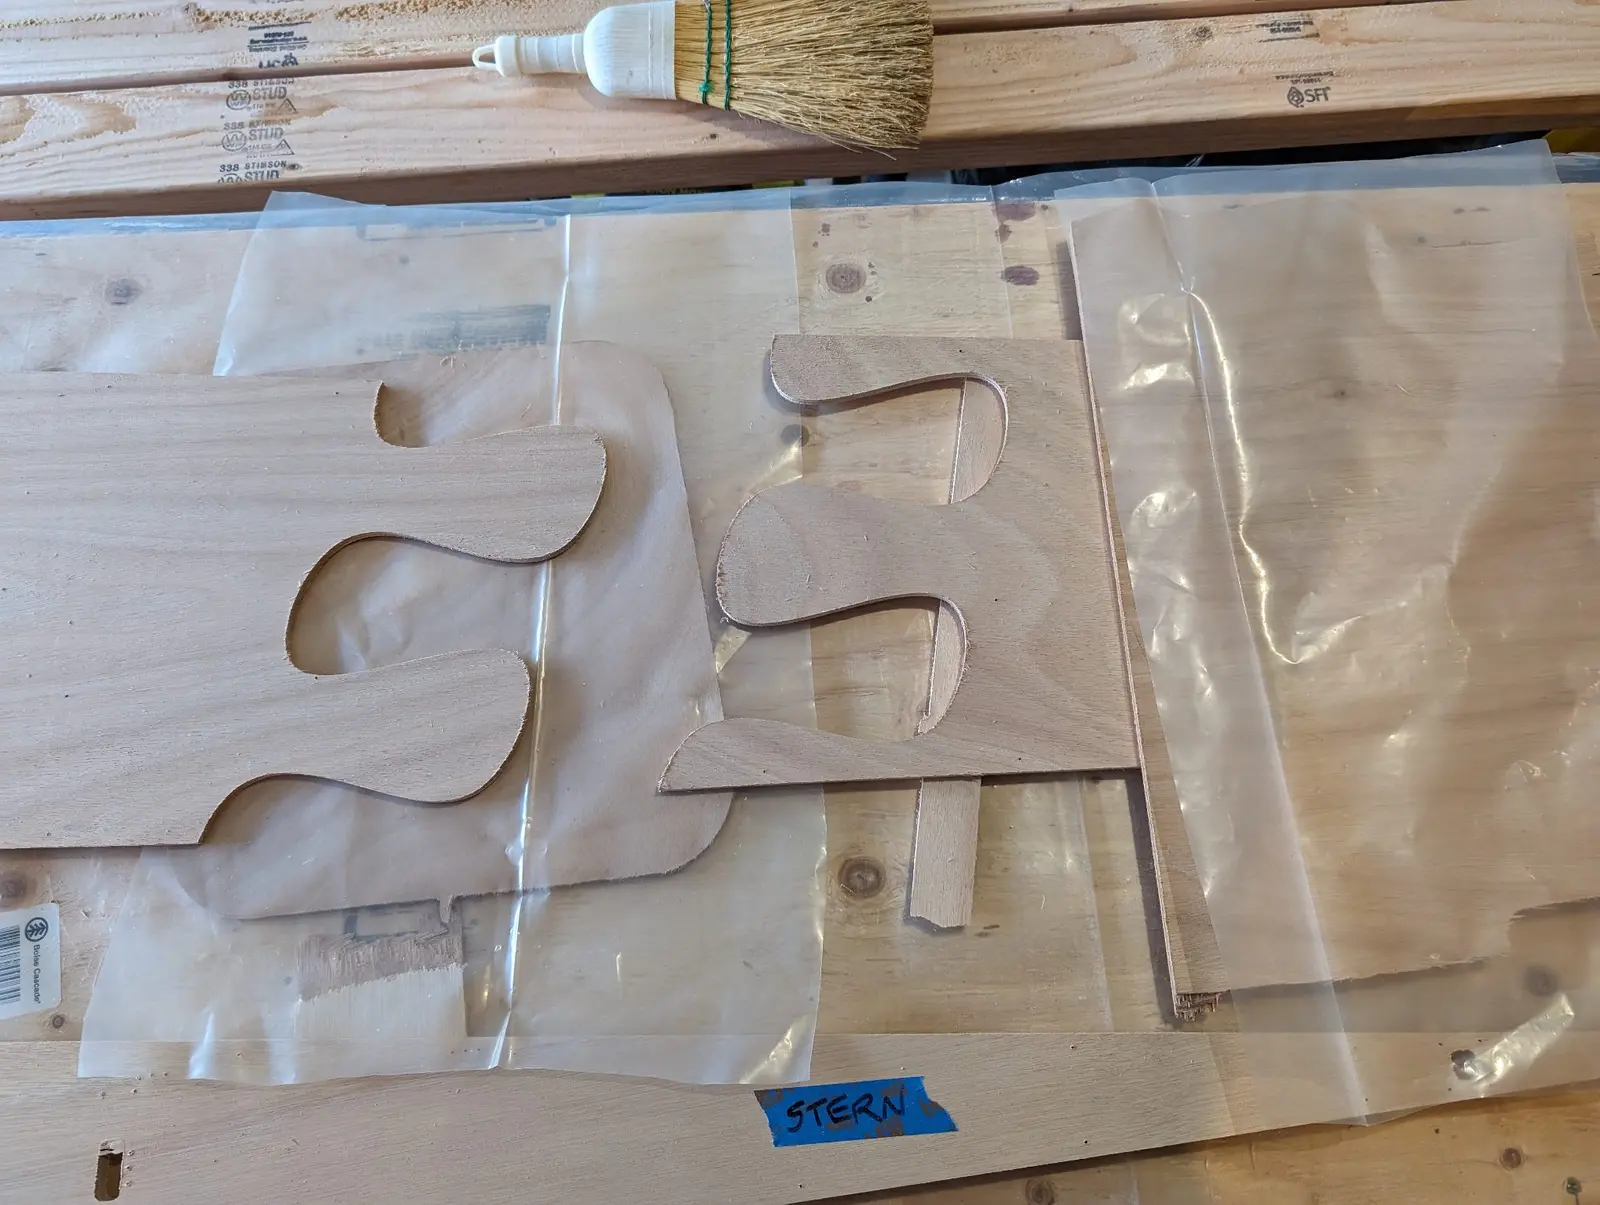
What a puzzle joint does not do is level itself. One sheet can still sit a hair higher than the other, and a step is hard to sand out of thin plywood. Jeffrey's note on the number one plank is the one that matters: careful attention must be paid to leveling the joint so there is no vertical misalignment.
How to glue any of them flat
Whichever joint the plans call for, the glue-up is the same job: hold two pieces of plywood dead flat and in line while epoxy cures.
- Work on a surface you trust. Two sawhorse tables with a straight plank across them is enough, if you sight along it first.
- Put plastic sheet under the joint, and a second piece over it. Epoxy will not stick to polyethylene, and it will stick to your bench.
- Dry-fit and mark the alignment: a straightedge along one edge for a scarf or butt, tabs pushed home for a puzzle.
- Wet both faces with unthickened epoxy first, then a slightly thickened coat on one face. Puzzle tabs are end grain on every edge and drink more than you expect.
- Weight it, do not clamp it. A flat board and a few cinder blocks give even pressure and cannot pull the joint out of plane the way a single clamp can.
- Leave it alone overnight. Then sand the squeeze-out flush before the plank goes anywhere near the boat.
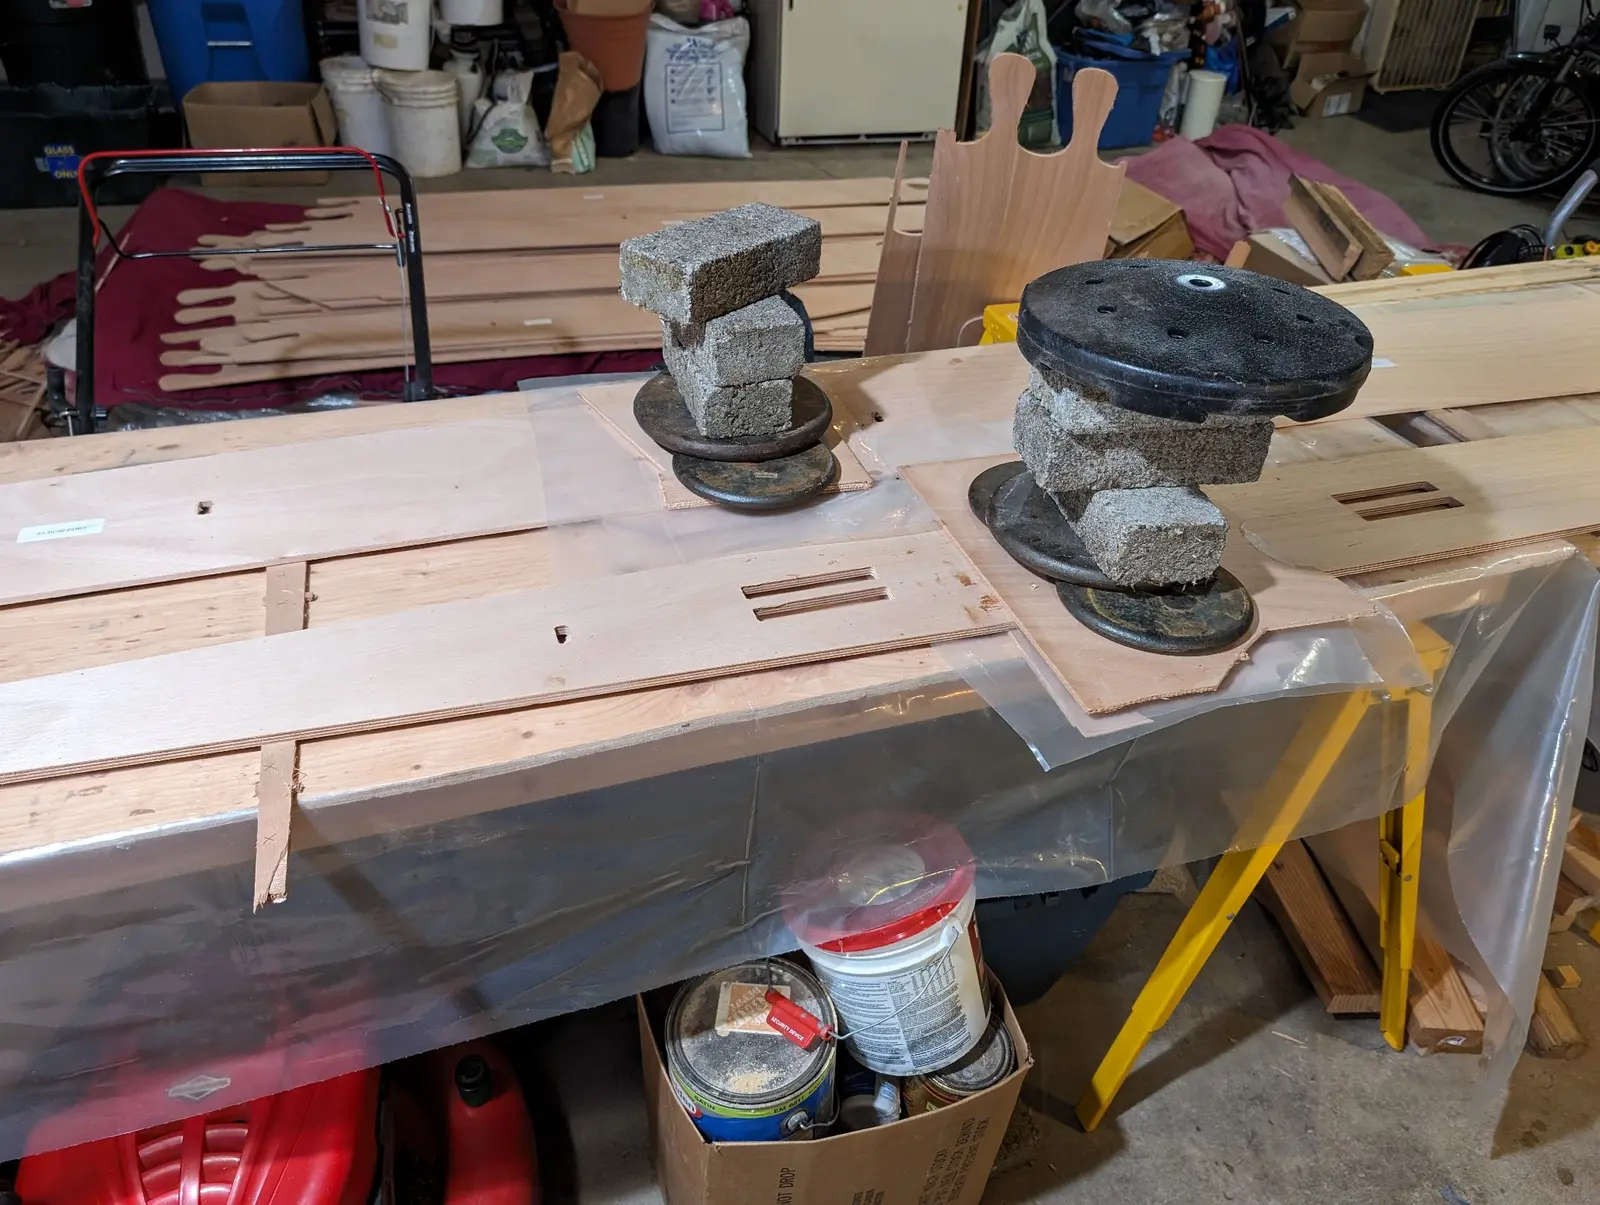
That photo is Jeffrey's, and it is the whole method in one picture: plastic, a flat caul, masonry for weight. Nothing in it cost money.
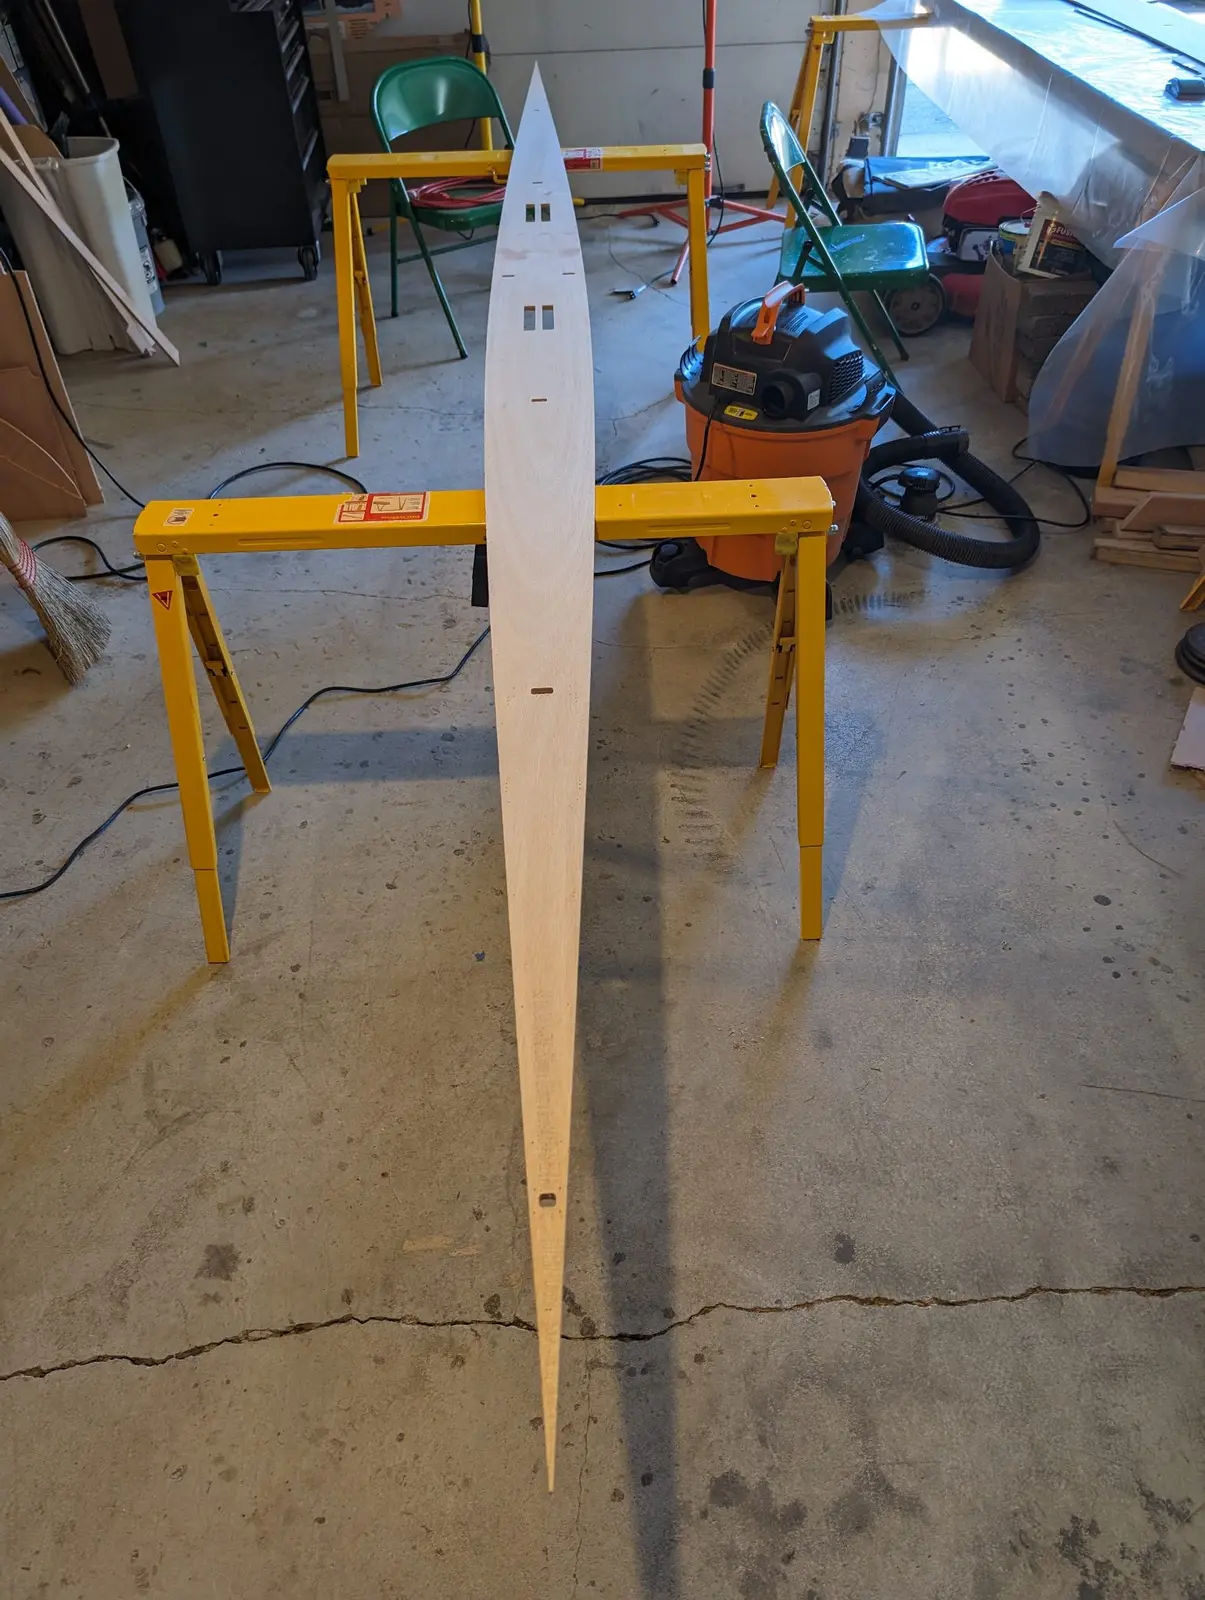
A plank that comes off the table straight will stitch up straight. One with a step at the joint will fight you at every frame, and the hours spent fairing it out never show in the finished boat. The stats page carries real hours from real logs, and a fair share of them are sanding.
Which one should you use?
Use the joint your plans specify. The designer chose it with the plywood thickness, the bend and the fiberglass schedule in mind. Beyond that:
- A kit with puzzle joints: push them together, level them, weight them. Do not try to improve on them.
- A framed plywood boat from plans, bottom hidden under a sole: butt blocks are fine, placed in the flattest run of the hull.
- A bright-finished hull, a hard bend, or a stitch and glue boat from plans with no CNC parts: cut scarfs, at 1:8 as a floor and 1:12 if the plans or your nerves allow.
Whichever you choose, write it down: which joint, what ratio, where along the plank it fell, and what it looked like the next morning. A build log that lasts is the place for that note, because the next builder of the same design will have the same sheet of plywood in front of them and the same question.